Learn how to change settings on your iPhone or iPad so that the built-in Mail app sends you notifications for new emails for quicker communication.
The delayed email problem and the solutions to fix it
Being a long-time Apple user, I’ve noticed that the built-in Mail app on iPhone and iPad doesn’t always notify you of new emails as they arrive.
- The Mail app significantly stalls new email notifications and sends them after a while. In several situations, new mail notifications may arrive on the subsequent days!
- You may not get new email notifications until you plug your iPhone into charging.
- The Mail app doesn’t get new emails until you open it and pull down the screen to refresh it.
- New email notifications in the Mail app make no sound alerts or don’t show the notification banner. They may come quietly and stack up in the Notification Center.
The troubleshooting solutions below will fix all these and similar problems.
1. Turn off Low Power Mode
When your iPhone is in Low Power Mode, many features are temporarily disabled or limited to save battery. One of the affected activities is mail fetch. New mail notifications will be delayed if your iPhone is in Low Power Mode (the yellow battery icon).
To address this, turn off Low Power Mode by going into Settings > Battery. If getting new email notifications is essential to you, force your iPhone to never enter Low Power Mode.
2. Set email push notifications
The Mail app has three settings for getting new emails:
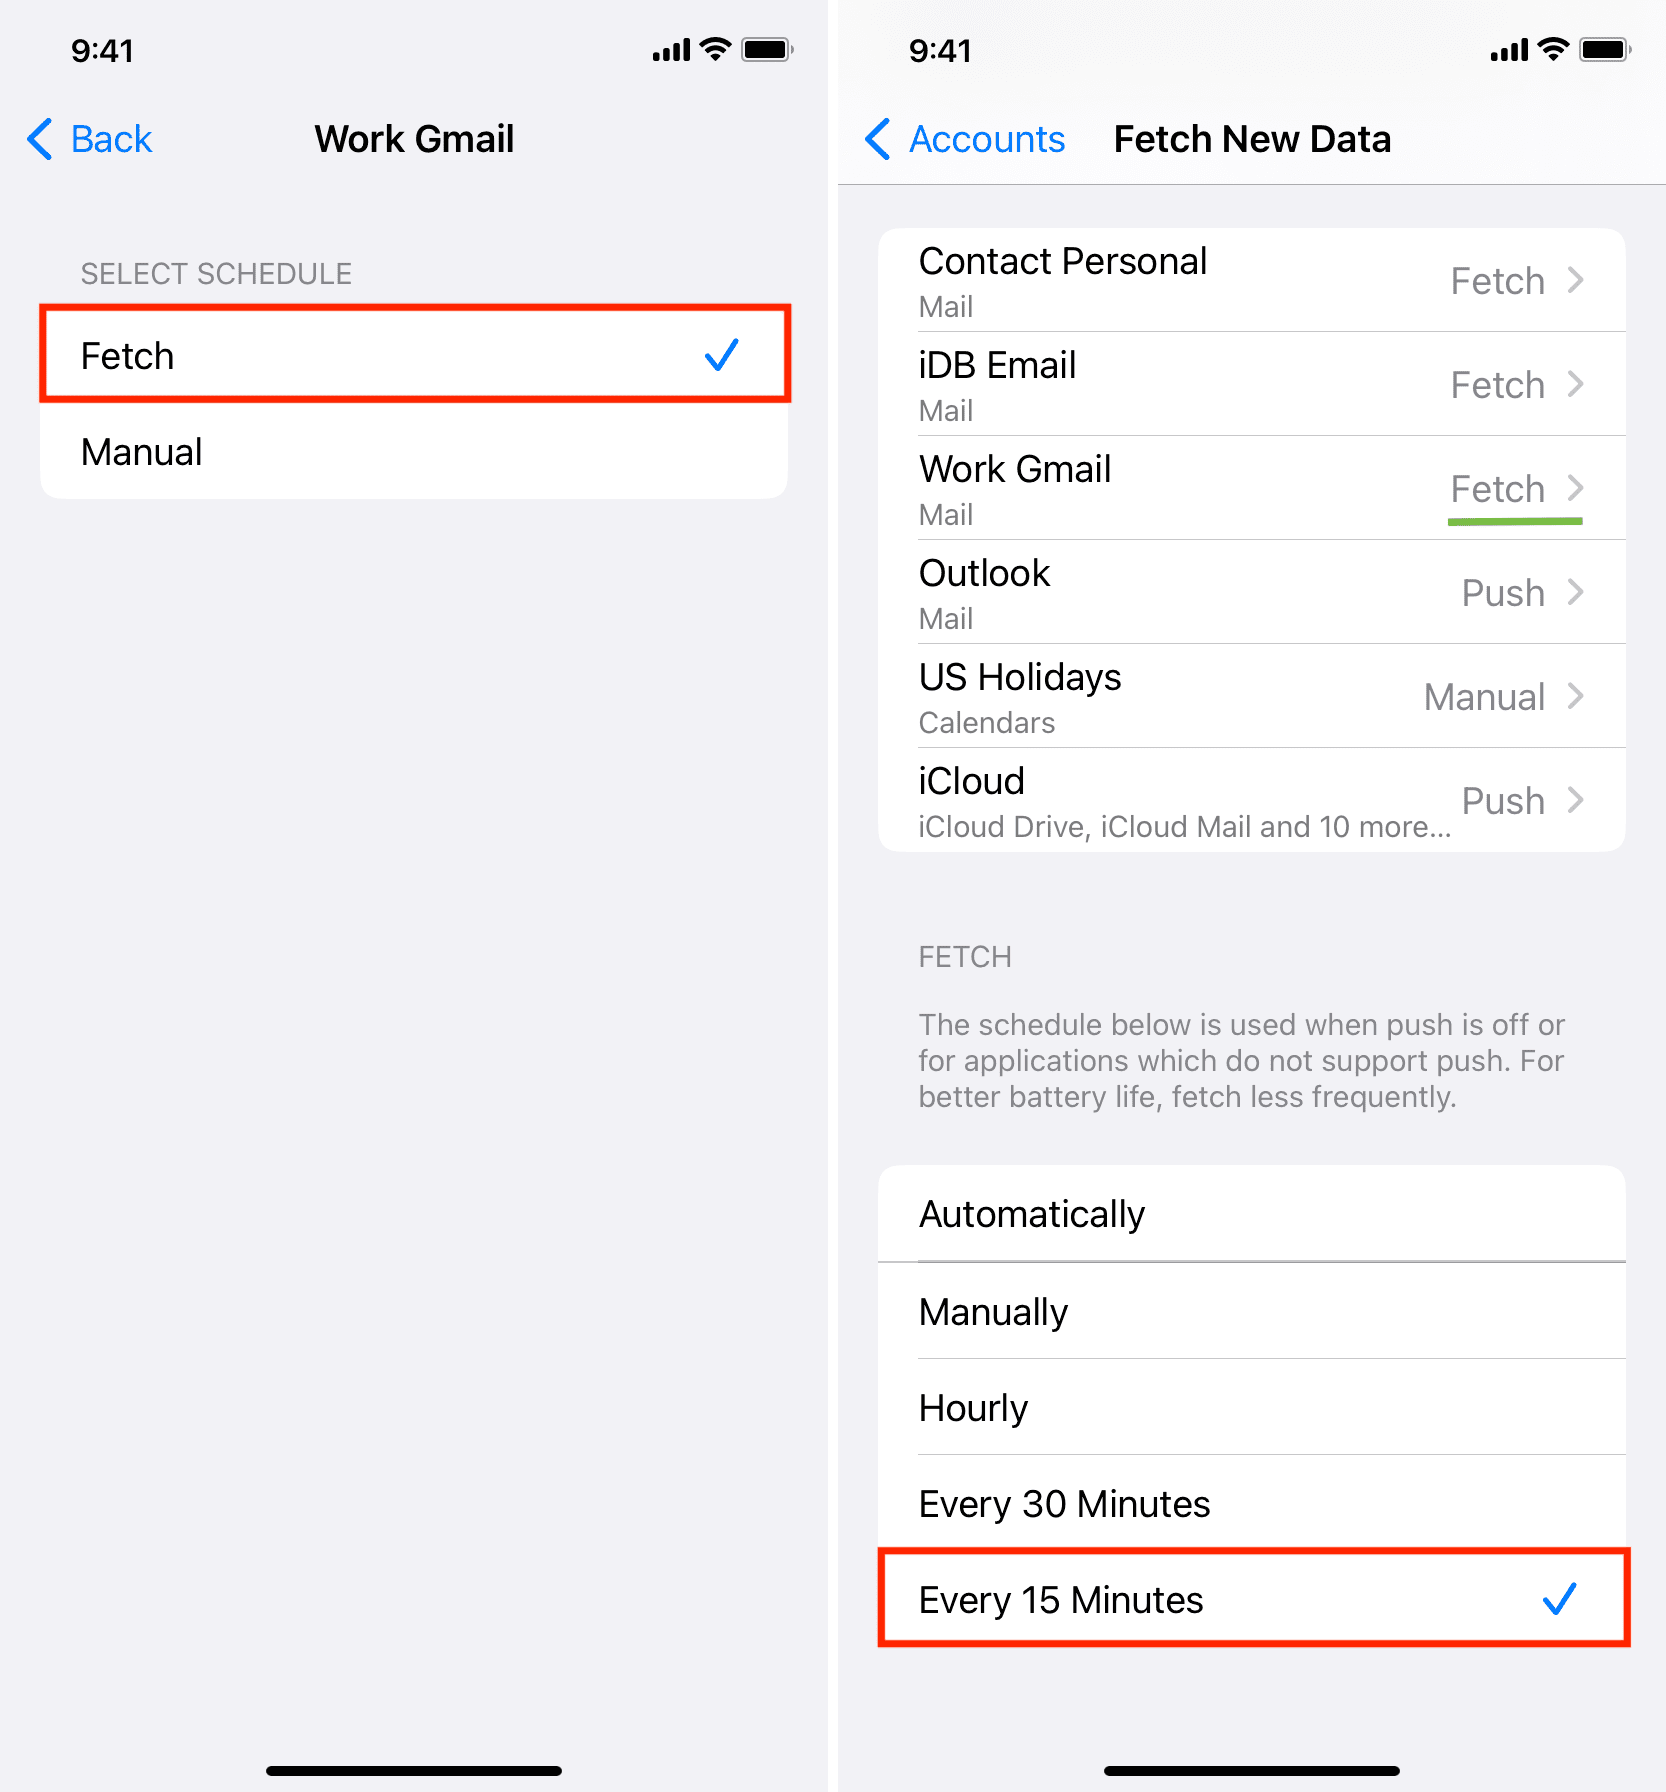
- Push: Instantly ‘push’ new email notifications (as long as Low Power Mode is off and other notification settings are in place).
- Fetch: Get new emails automatically when your iPhone is charging and connected to Wi-Fi, or you can set it to fetch new emails every 15, 30, or 60 minutes.
- Manual: New emails are loaded only when you open the Mail app.
You’ll also need to take into account these:
- The Mail app cannot push new mail notifications from Gmail accounts or most other email services. Push is only supported by iCloud, Outlook, and a few other services.
- Push consumes the most battery compared to the Fetch and Manual settings.
The steps below will set the Mail app to push new email notifications:
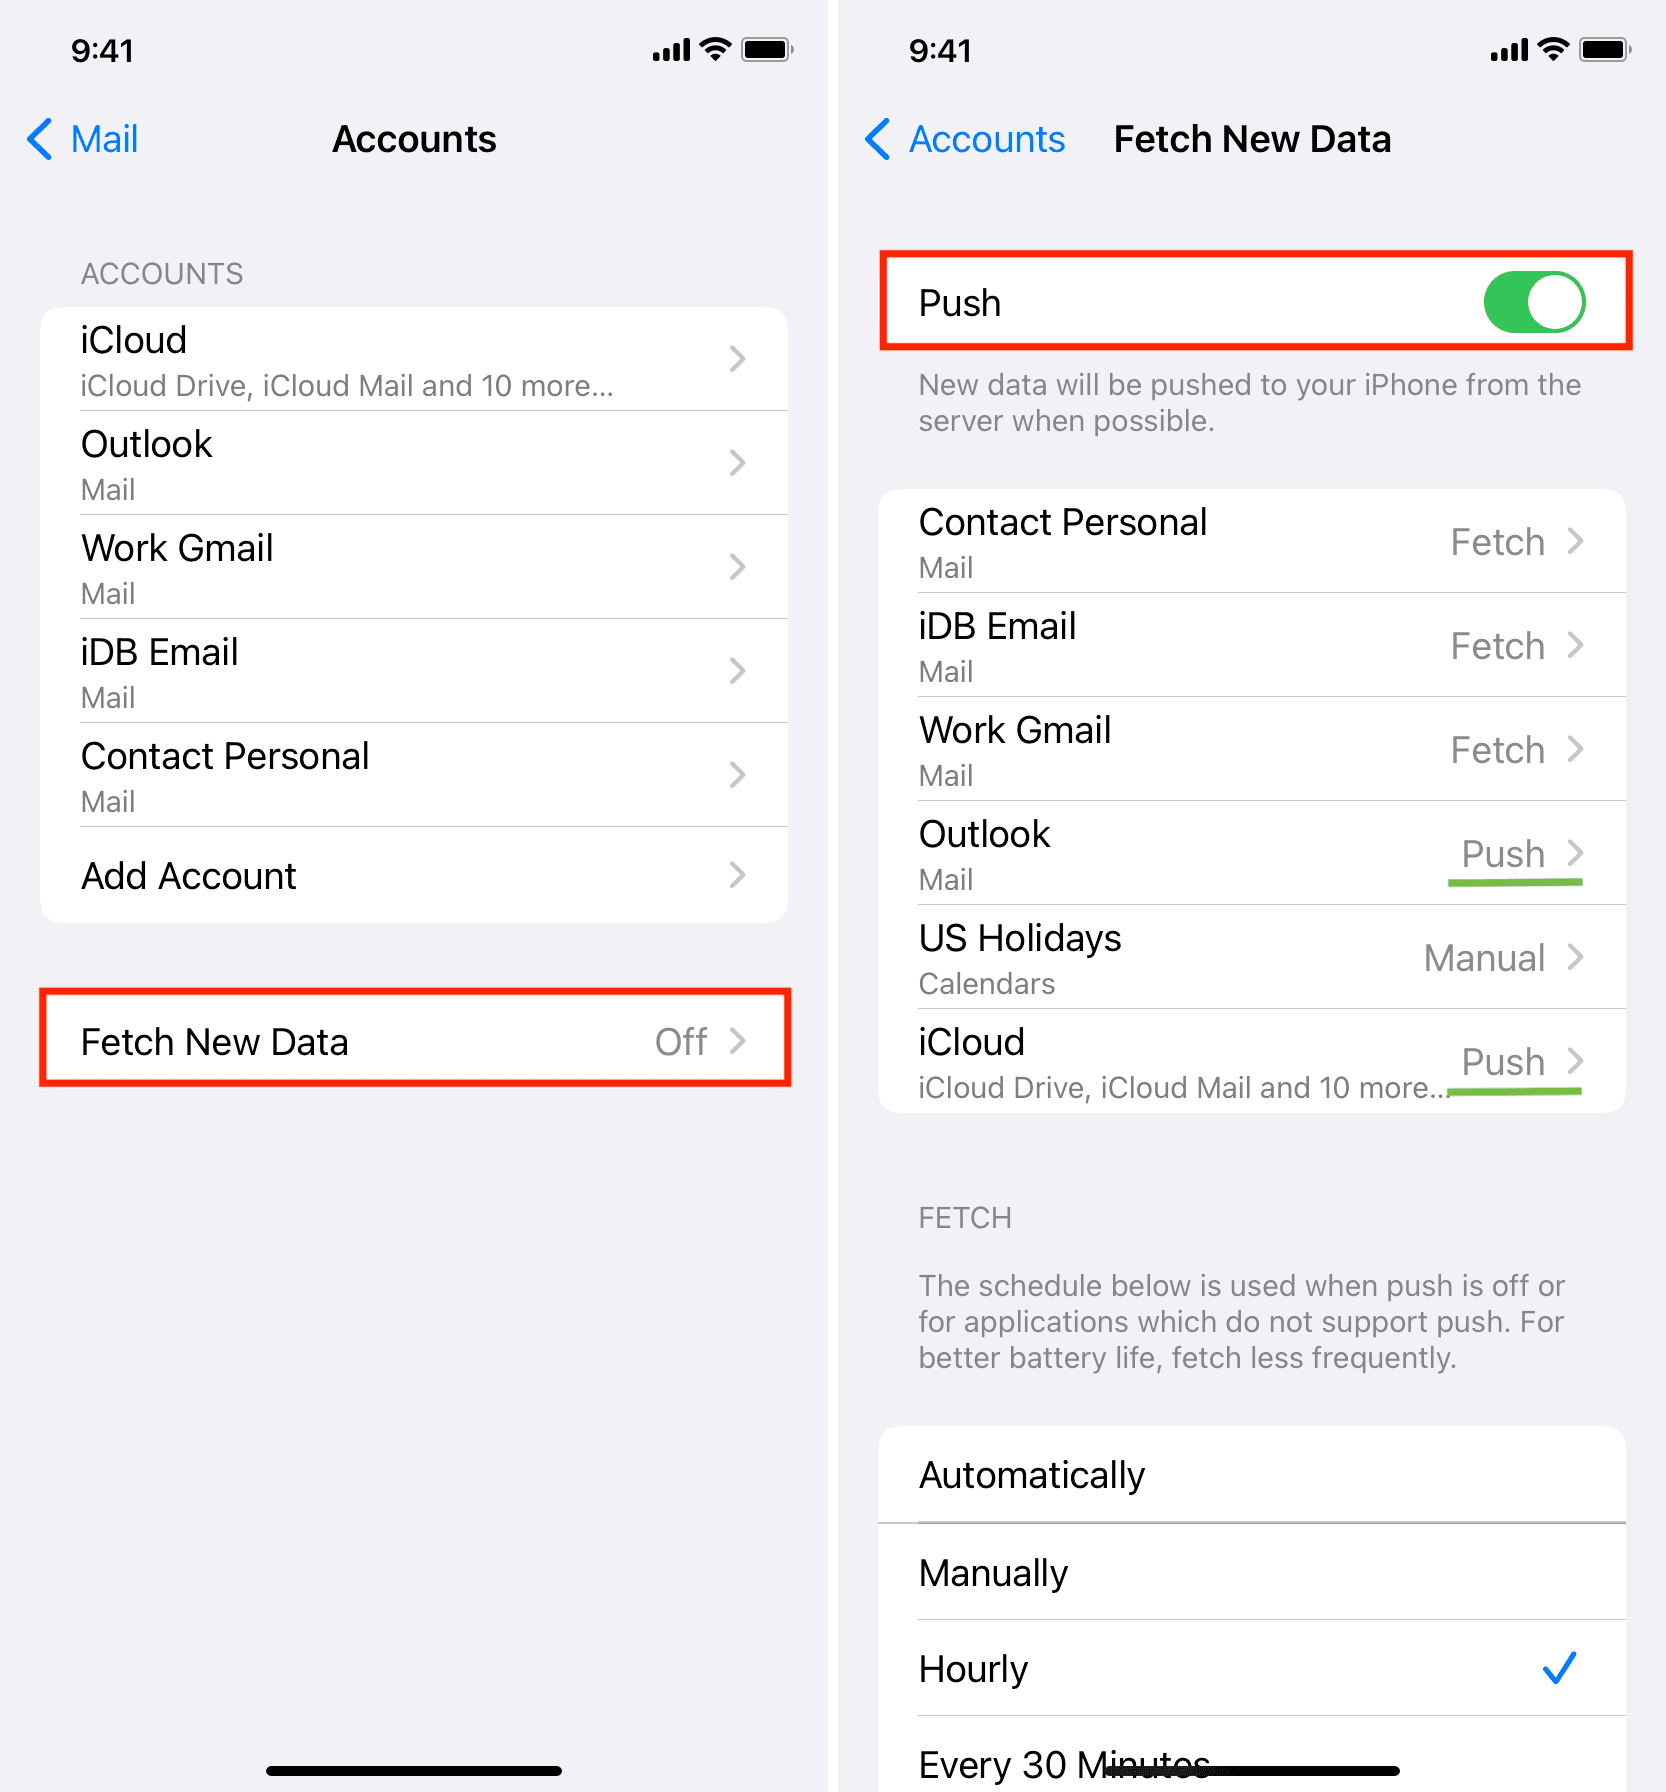
- Open the Settings app and tap Apps from the bottom.
- Select Mail from the list of apps.
- Tap Mail Accounts.
- Tap Fetch New Data.
- Turn on Push.
- Ensure it says Push next to your iCloud account or other supported services. Otherwise, tap it and pick Push under the Select Schedule heading.
About delayed Gmail notifications in the iPhone Mail app
As mentioned, if you use Gmail or another email service in Mail, your best option is to select Fetch with a schedule set to Every 15 Minutes. But even in the best-case scenario, that option will delay new email notifications by about 15 minutes. If Gmail is your primary email service, check out our last tip.
3. Correct your Mail app notification settings
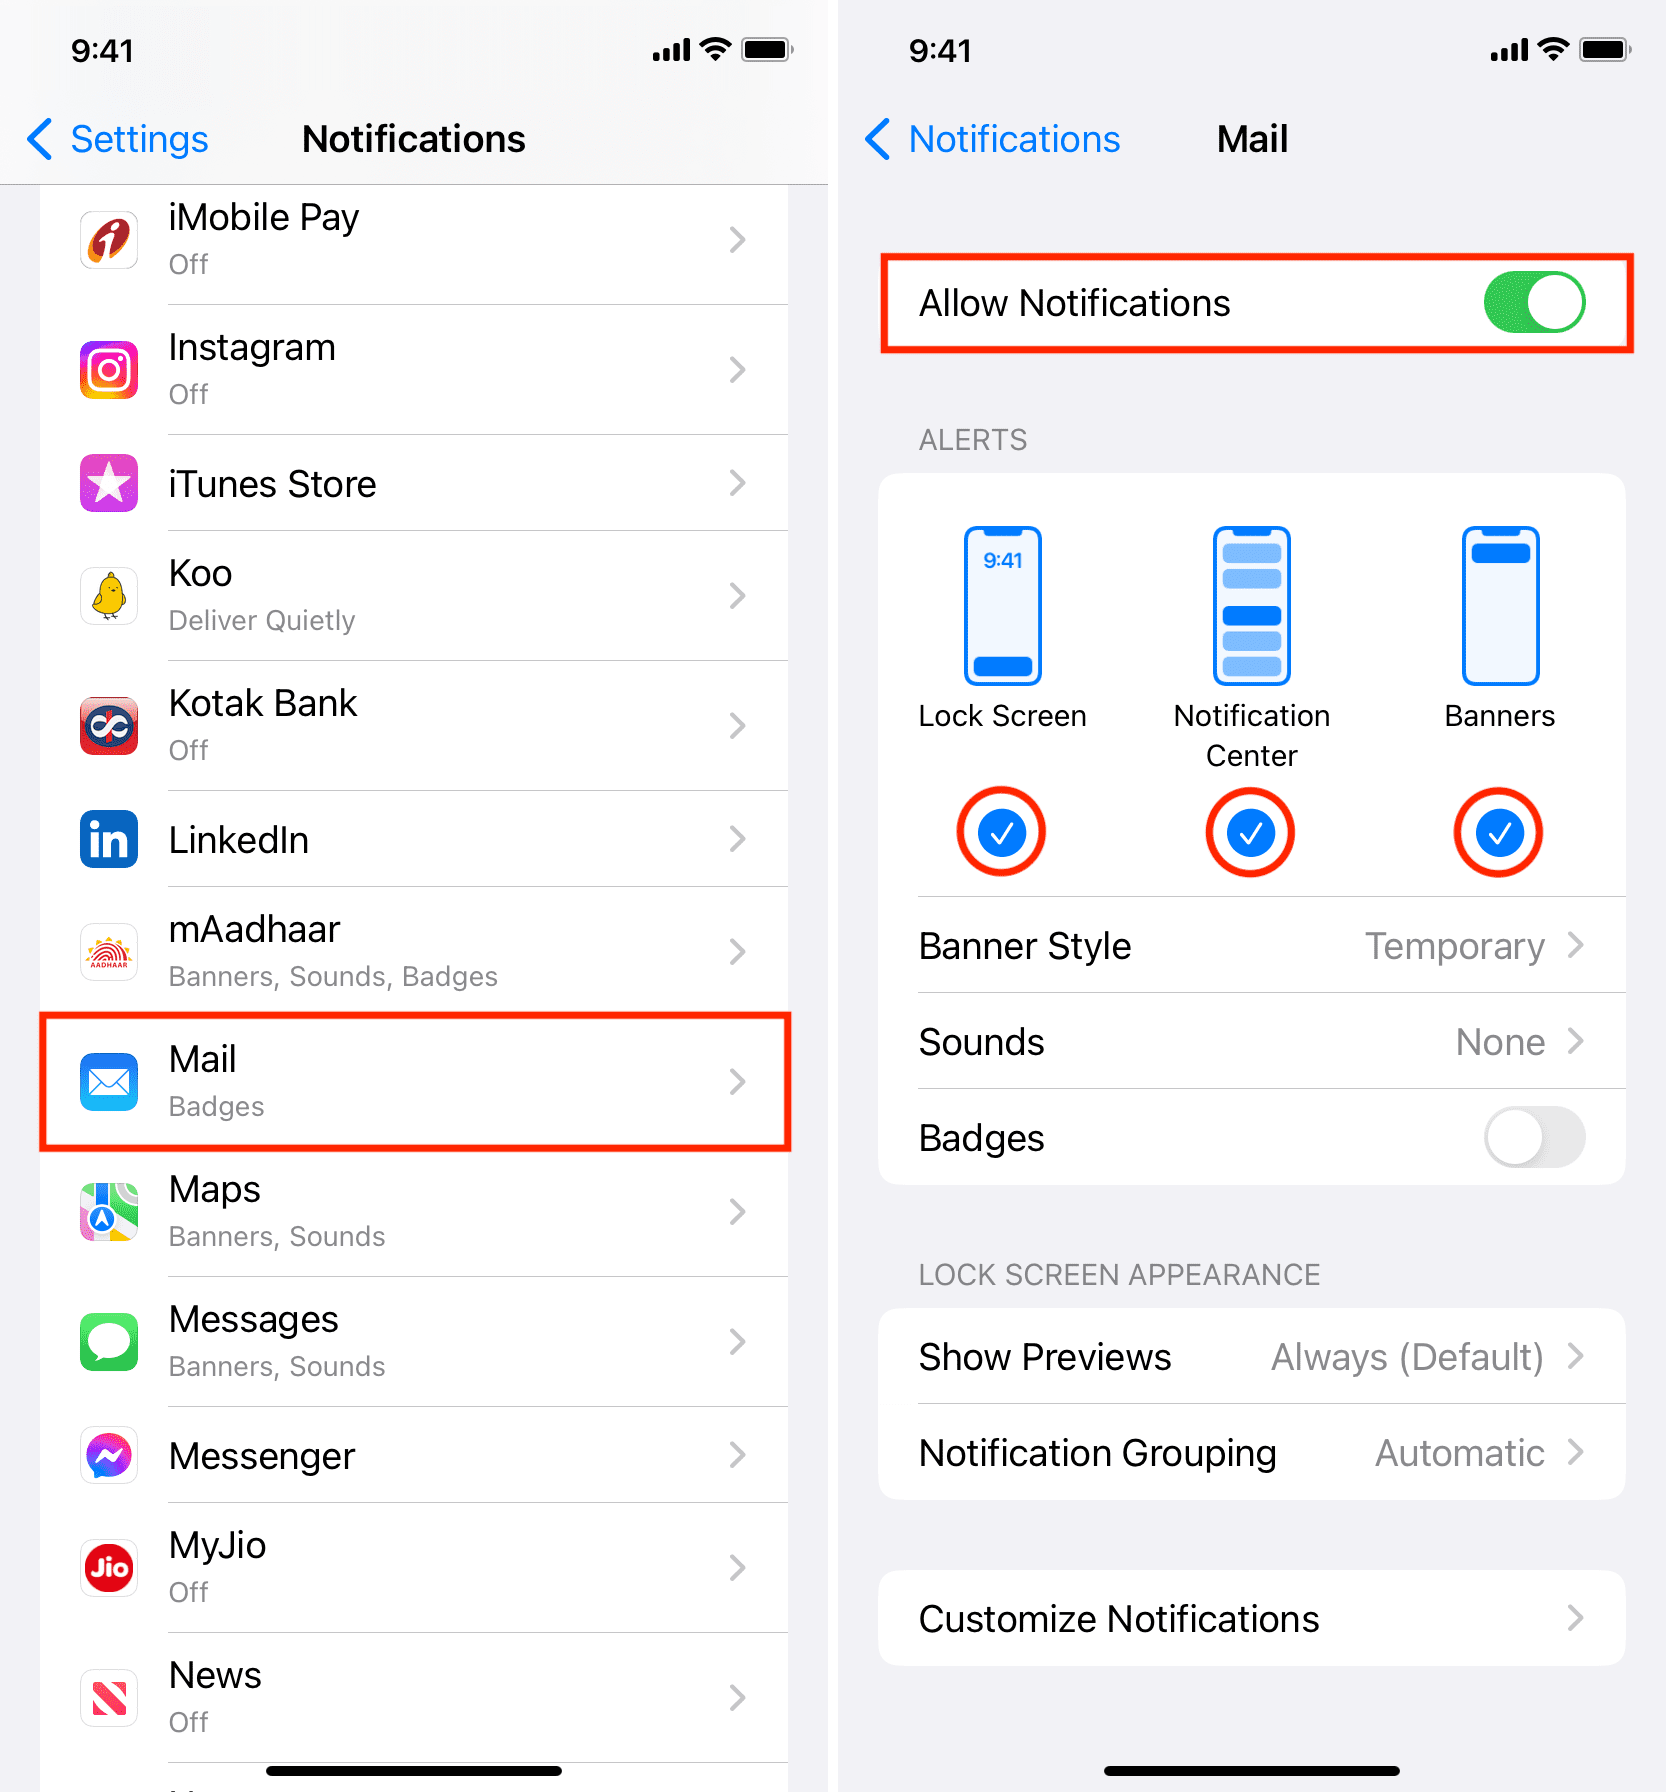
Configure alert settings for the Mail app if you don’t see notification banners or new emails don’t appear on the lock screen.
- Open the Settings app and tap Notifications.
- Select Mail from the list of apps.
- Make sure Allow Notifications is green.
- Check the boxes for Lock Screen, Notification Center, and Banners.
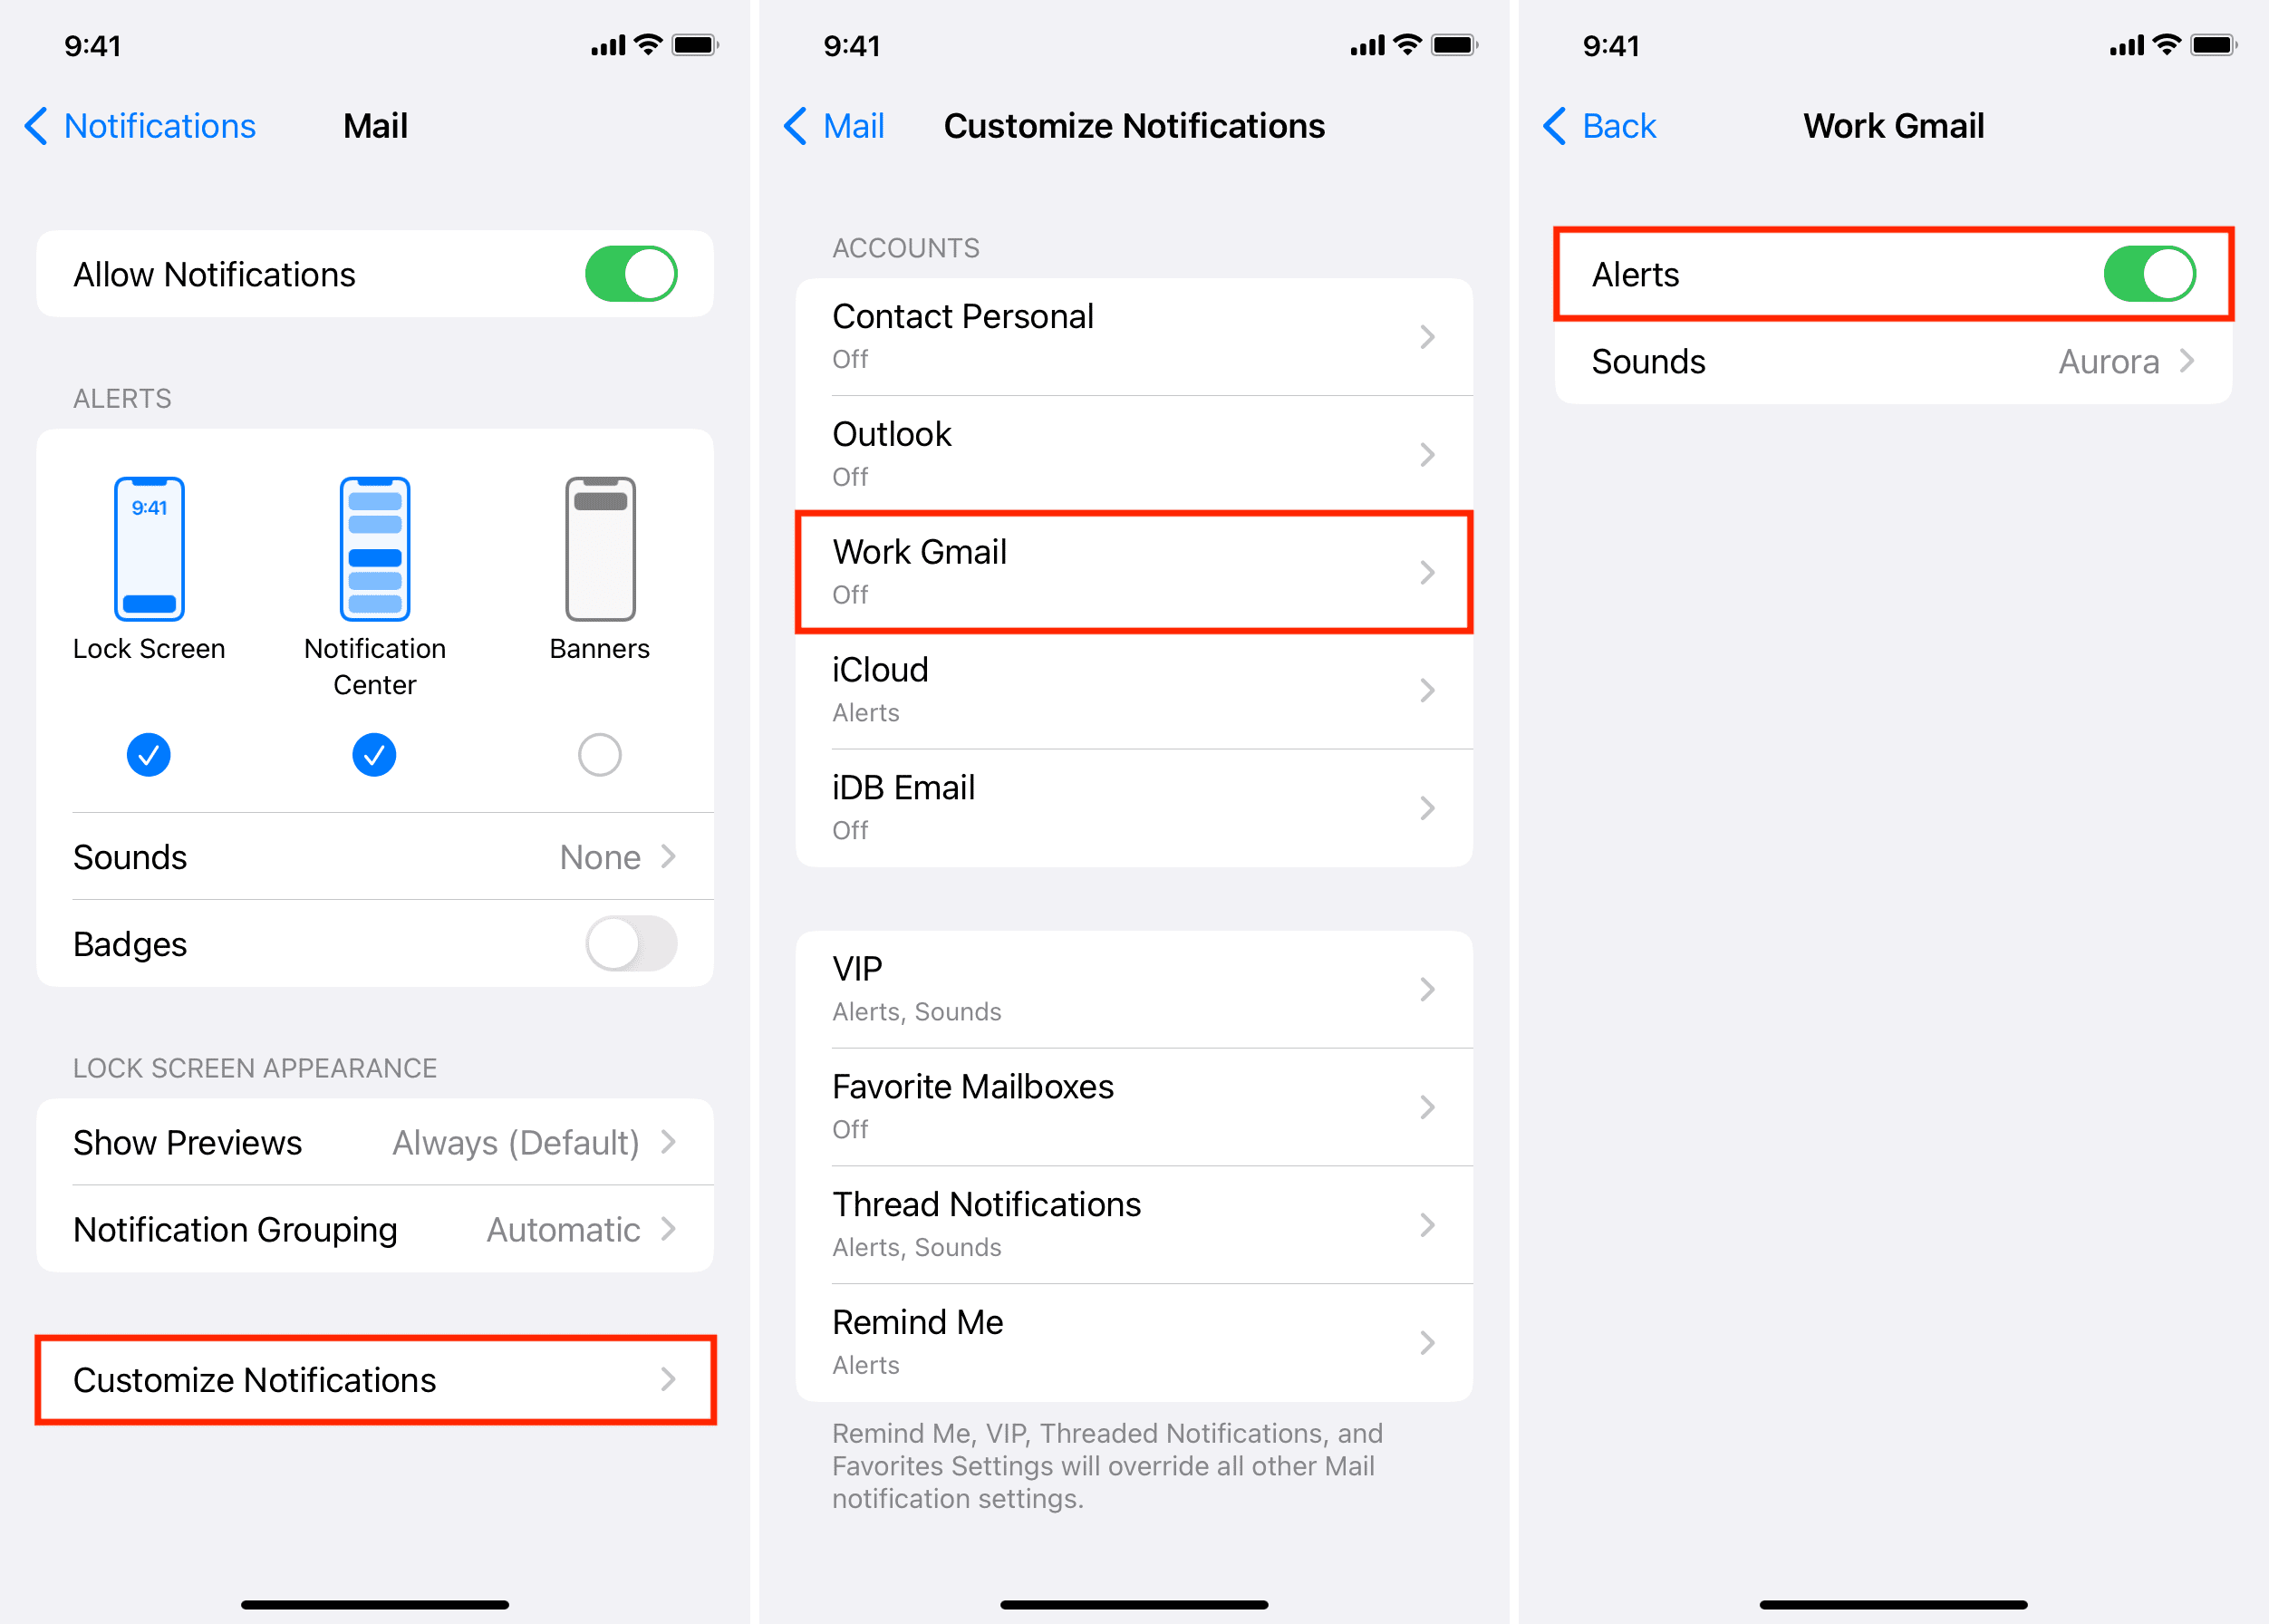
4. Enable other email account notifications
- Tap Customize Notifications from the notification settings for Mail.
- Select one of your previously added email accounts, then turn on the Alerts switch to get notifications whenever an email hits that account.
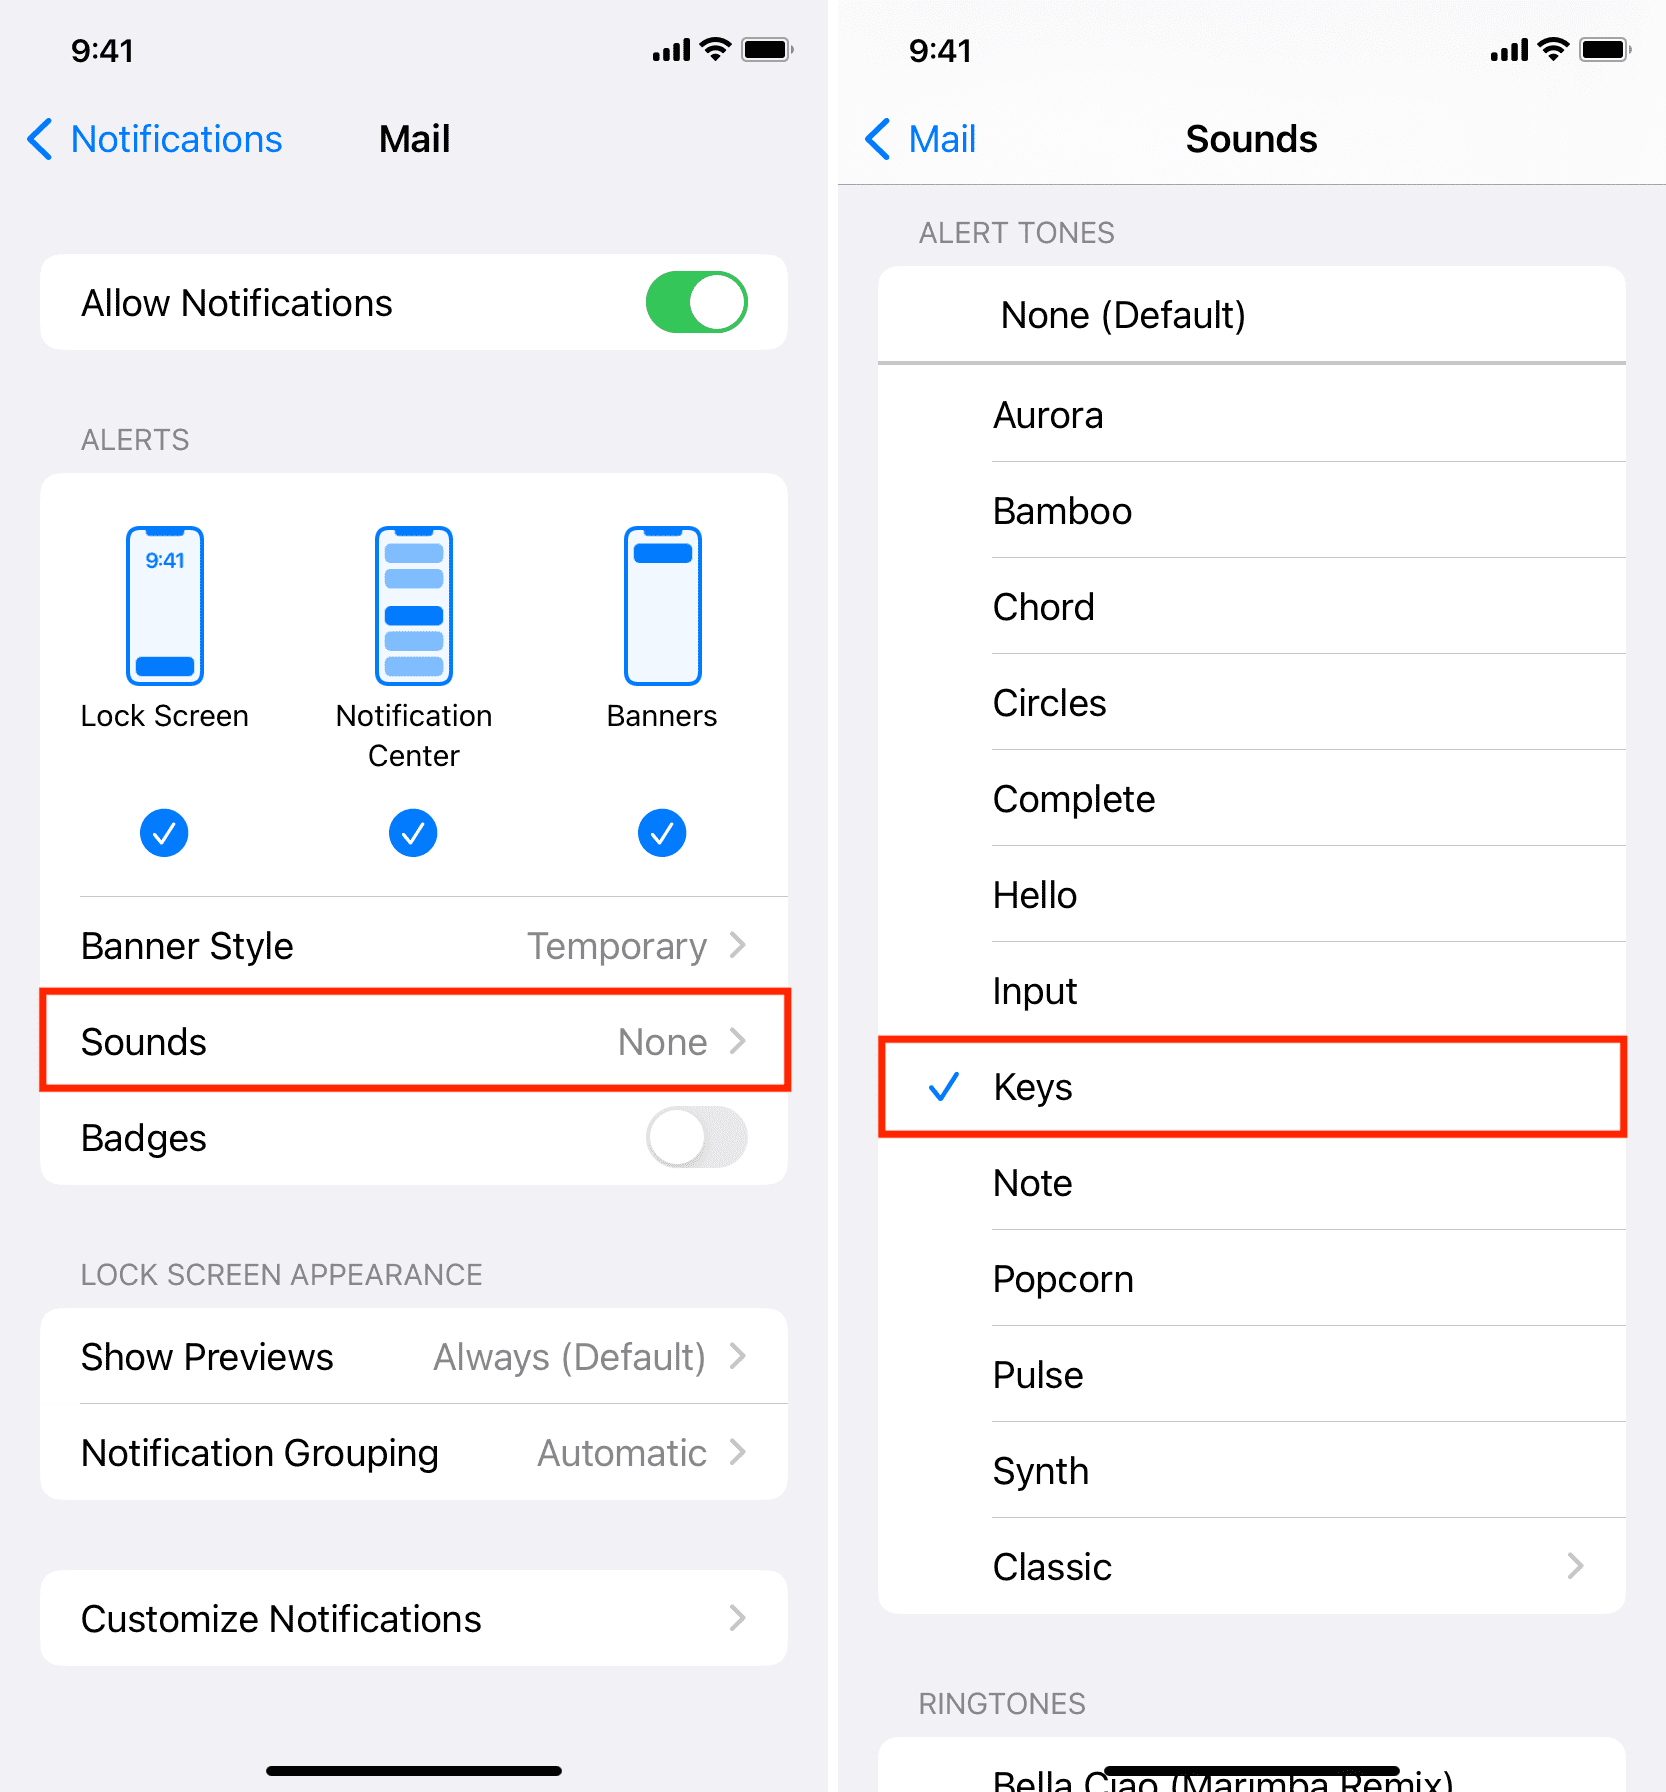
5. Set up notification sound for new emails
Apple is aware that people are getting a lot of emails daily, the majority being spam, promotions, and newsletters). That’s why all new email alerts (except VIPs) by default don’t make a sound, but you can change this.
- Follow the above steps to get to the Mail notification settings.
- Tap Sounds.
- Choose an alert tone other than None (Default).
6. Use the VIP feature
The Mail app lets you add important people as VIPs. Emails from VIPs override the notification settings. Notifications for emails from VIPs should arrive on time and with sound (Settings > Notifications > Mail > Customize Notifications > VIP).
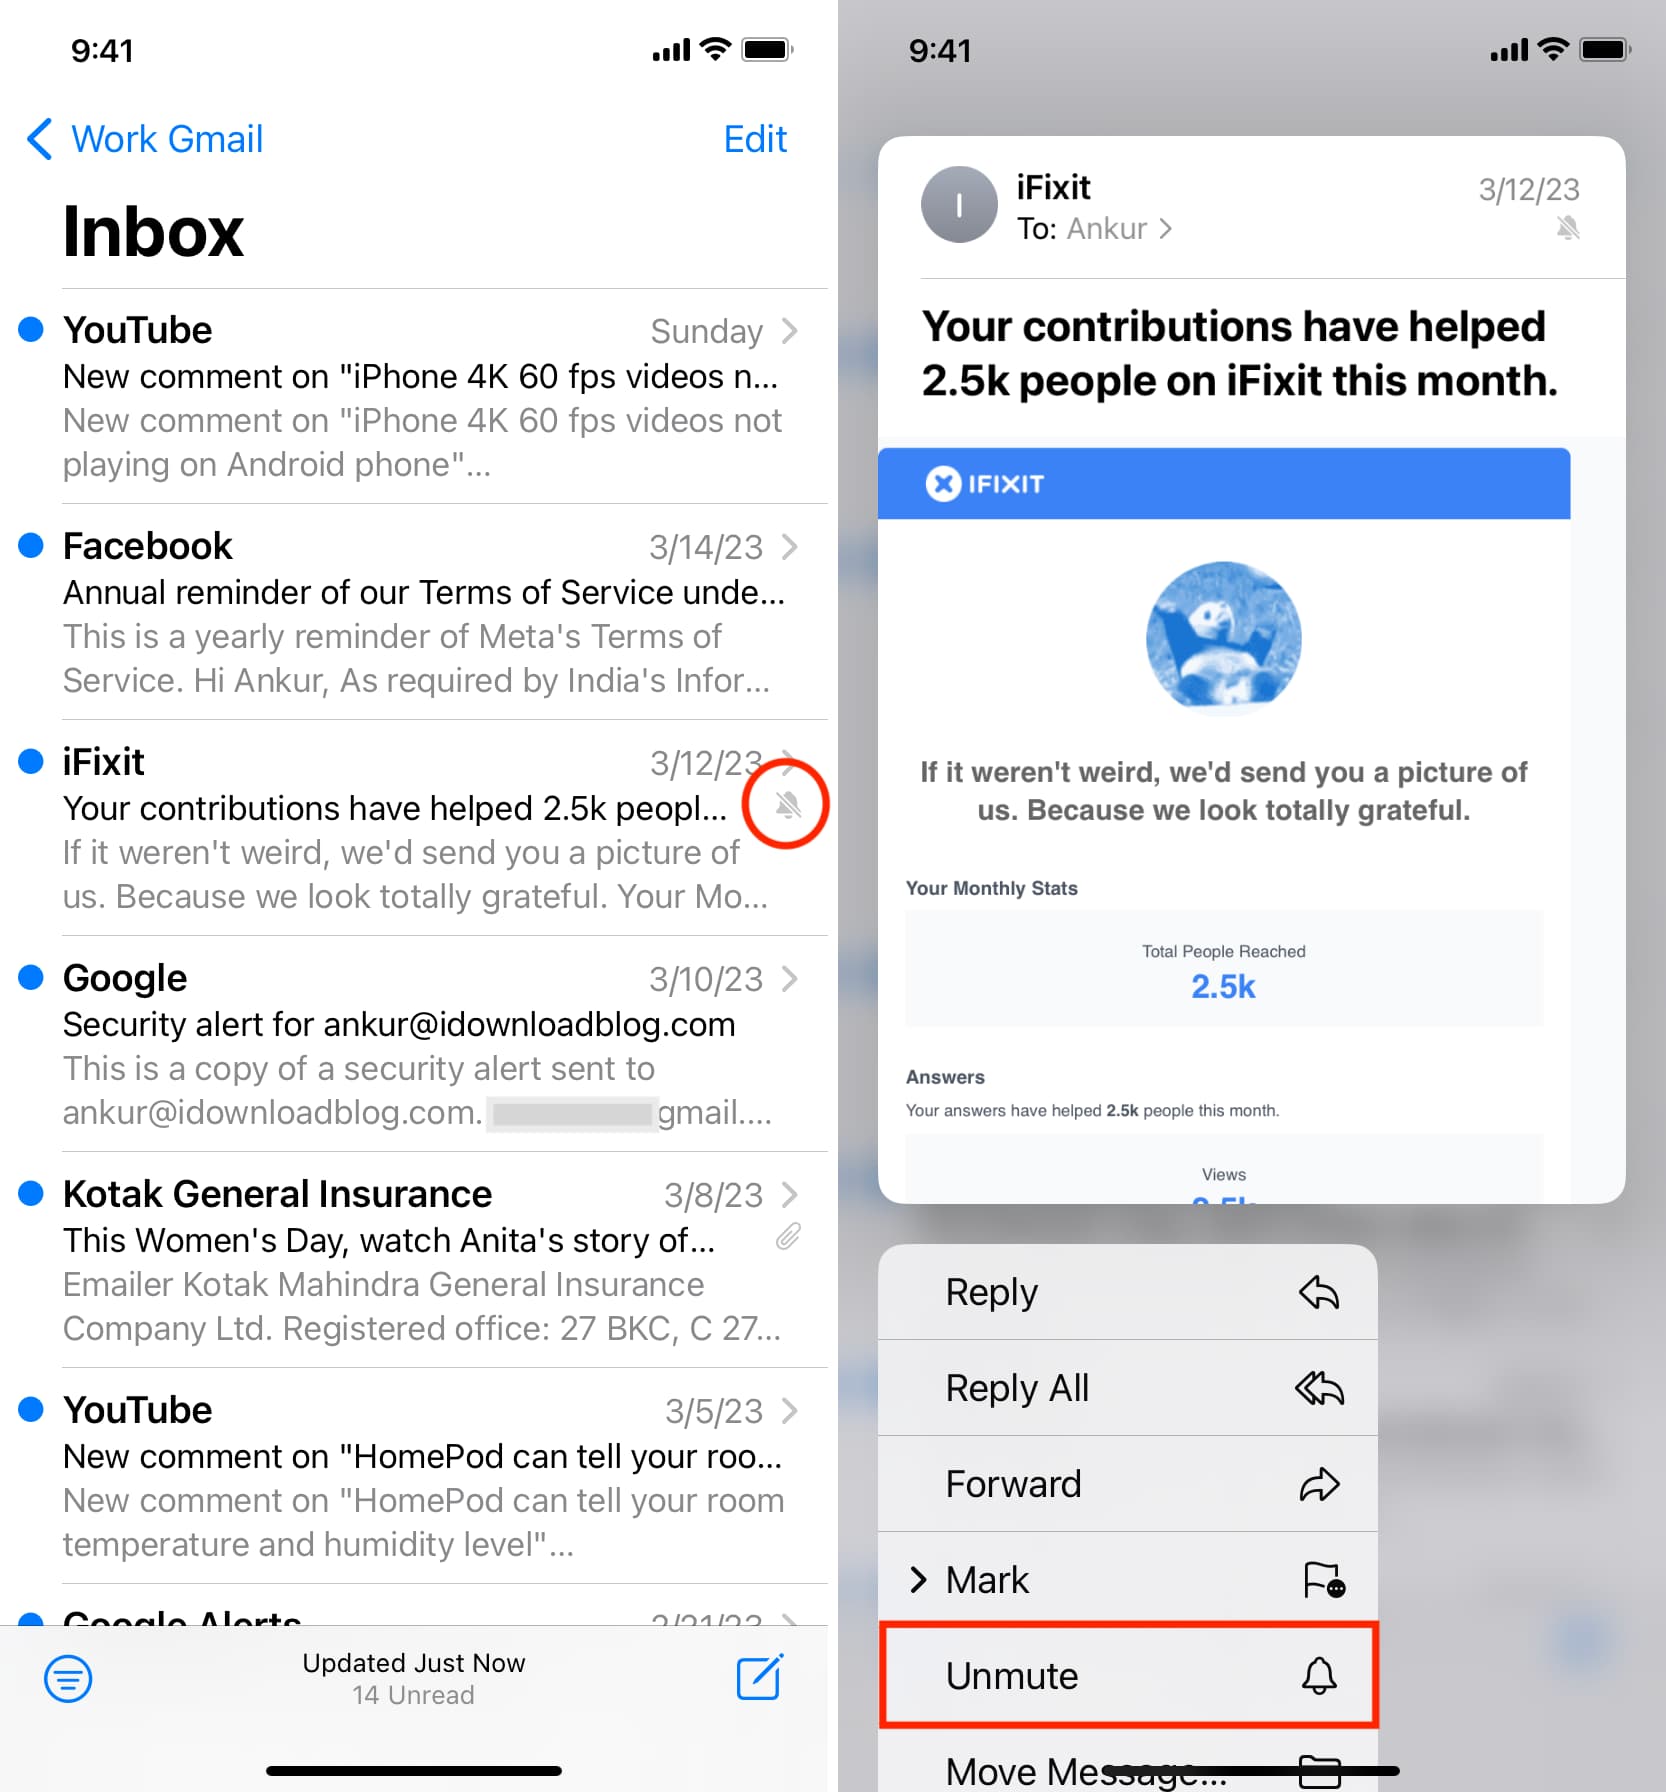
7. Unmute an email thread
Muting email replies in a thread stops all notifications for new messages in the thread. Here’s how to unmute it.
- Open the Mail app and stay on the inbox screen.
- Find the email that has a tiny silent bell icon.
- Touch and hold the message and choose Unmute or swipe left and tap More > Unmute.
8. Turn on Background App Refresh for Mail
When Background App Refresh is on, apps can fetch new content in the background to stay up-to-date, which also helps deliver new notifications on time.
To switch on Background App Refresh, go to Settings > General > Background App Refresh. Make sure it’s on. If not, tap it and select Wi-Fi & Cellular Data.
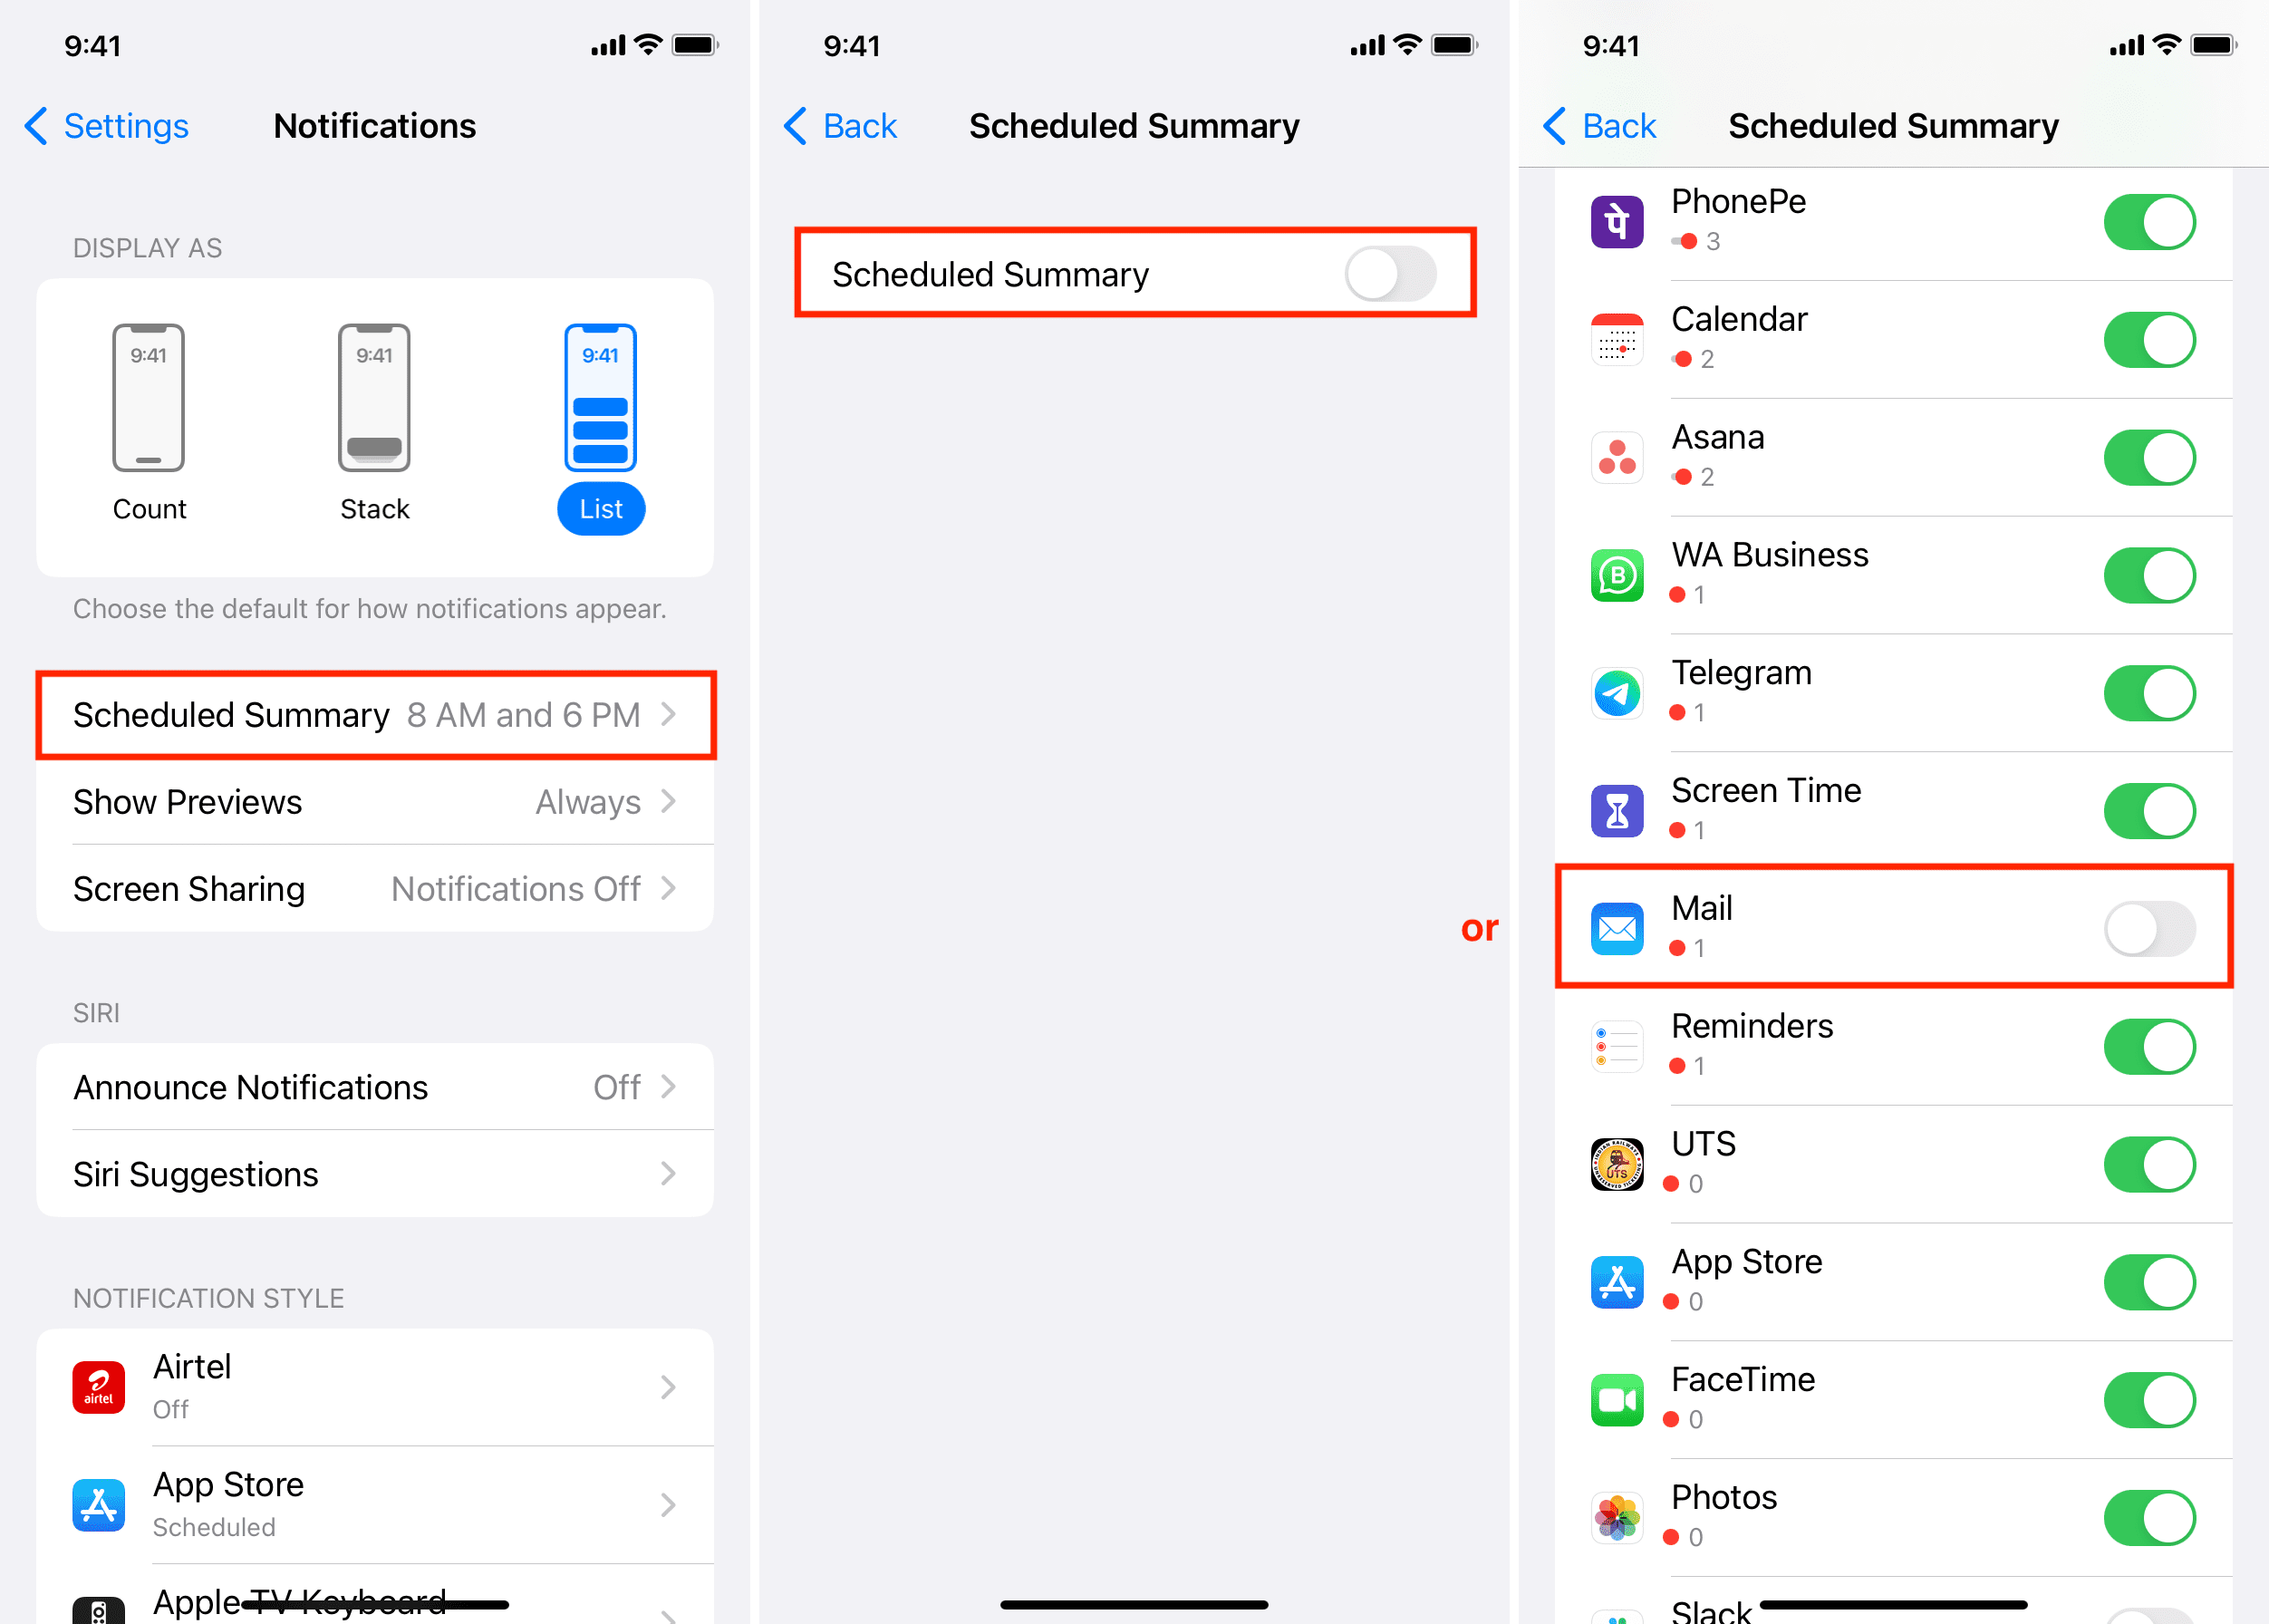
9. Exclude the Mail app from Notification Summary
- Open the Settings app and tap Notifications.
- Tap Scheduled Summary.
- From the next screen, you can turn off Scheduled Summary.
- If you like this feature, you can also turn off the switch next to Mail to exclude it from being a part of Scheduled Summary. Other app notifications will be held off and included in Scheduled Summary, but those from the Mail app should reach you instantly.
10. Turn off Low Data Mode
When your iPhone is in Low Data Mode, it uses cellular data or Wi-Fi sparingly. This may cause apps to get new content and notifications in a restricted manner. So, consider turning off this data-saving mode if it’s activated.
11. Turn off Do Not Disturb or Focus
It goes without saying that you won’t be alerted of the new app and email notifications if your iPhone is in Do Not Disturb mode or a specific Focus is active. Head to the Control Center, and if the Focus icon is colored, tap the icon to turn it off. You can also tap the Focus name and tap it again on the next screen to disable it.

12. Regularly restart your iPhone
Delayed app notifications may be caused by glitches iOS picks up during regular use. The best way to address this is by turning off and on your iPhone periodically. I personally do it every two or three days.
13. Make sure your iPhone stays connected to the internet
If you keep your iPhone’s cellular data off and your home or office Wi-Fi stops working or you step out, the phone won’t have internet connectivity, meaning no new email notifications. Leave mobile data turned on so that your iPhone can automatically use that it when disconnected from Wi-Fi.
14. Update your iPhone or iPad
If your iPhone is on an older version of iOS, update it from Settings > General > Software Update.
15. Set correct Apple Watch Mail notifications
- Open the Watch app on your iPhone and tap Notifications > Mail.
- If Custom is selected, make sure Allow Notifications is also checked.
- Tap an email account like iCloud or Gmail and enable the switch for Show Alerts from iCloud or Gmail.

Note: Aside from Custom settings, you can also pick Mirror my iPhone. To turn off Mail notification on your Apple Watch, choose Custom followed by Notifications Off.
16. Remove and re-add the email account
In some cases, new notifications may refuse to come or be delayed due to unknown reasons. You can try fixing it by removing said account from the Mail app and adding it again.
17. Reset the Mail app on iPhone
Still having problems? Go ahead and reset the Mail app, which involves removing all email accounts and performing a fresh installation of the app after deleting it.
18. Reset iPhone network settings
If Mail notifications still aren’t arriving on time, try resetting all network settings.
19. Switch to another email app
Because the Mail app delays new email notifications from Gmail and many other email services, you may want to try a third-party email app unless you don’t need to read and respond to every new message instantly.
I use the official Gmail app and Edison Mail on my iPhone. Both apps send new email notifications instantly, and I couldn’t be happier. You can also try Microsoft Outlook, Spark, Zoho Mail, or one of the other apps.
Important: If you get too many email notifications from Gmail, fix it by following the steps in our tutorial explaining how to better manage Gmail app notifications on iPhone.
Also, be sure to check out: