In this guide, we list several ways to keep your browser history, bookmarks, reading lists, passwords, and other sensitive data private by locking Google Chrome, Safari, Edge, Firefox, Opera, or other web browsers on your computer.
A web browser stores your private web browsing history, bookmarks, open tabs, and account usernames and passwords, so it’s natural to want to protect them from people who use your computer, like family members or work colleagues.
Unfortunately, no popular desktop browser on macOS or Windows offers a full-fledged built-in app lock to prevent unauthorized access. However, there are some easy ways to keep your browser data secure. Here are eight such handy options.
1. Use a strong system password
This is the most important and basic step you can take to keep everything safe on your Mac or PC. You’re likely already using a master password that locks your computer when it goes to sleep, starts a screen saver, or after a period of inactivity. If not, head to your computer’s settings, create a strong password, and adjust the settings to ensure utmost security.
2. Use private browsing
If you’re worried that someone may see your browser history, use private browsing or incognito browsing, which doesn’t keep a log of the sites you visit. Moreover, if you’re running macOS Sonoma or later, your Safari private browsing is secured behind your Mac’s password and Touch ID by default.
3. Auto-delete browser history
You can set your Mac or Windows PC browser to automatically clear all your web history when you exit the app. This ensures that your history is no longer available for other people to access.
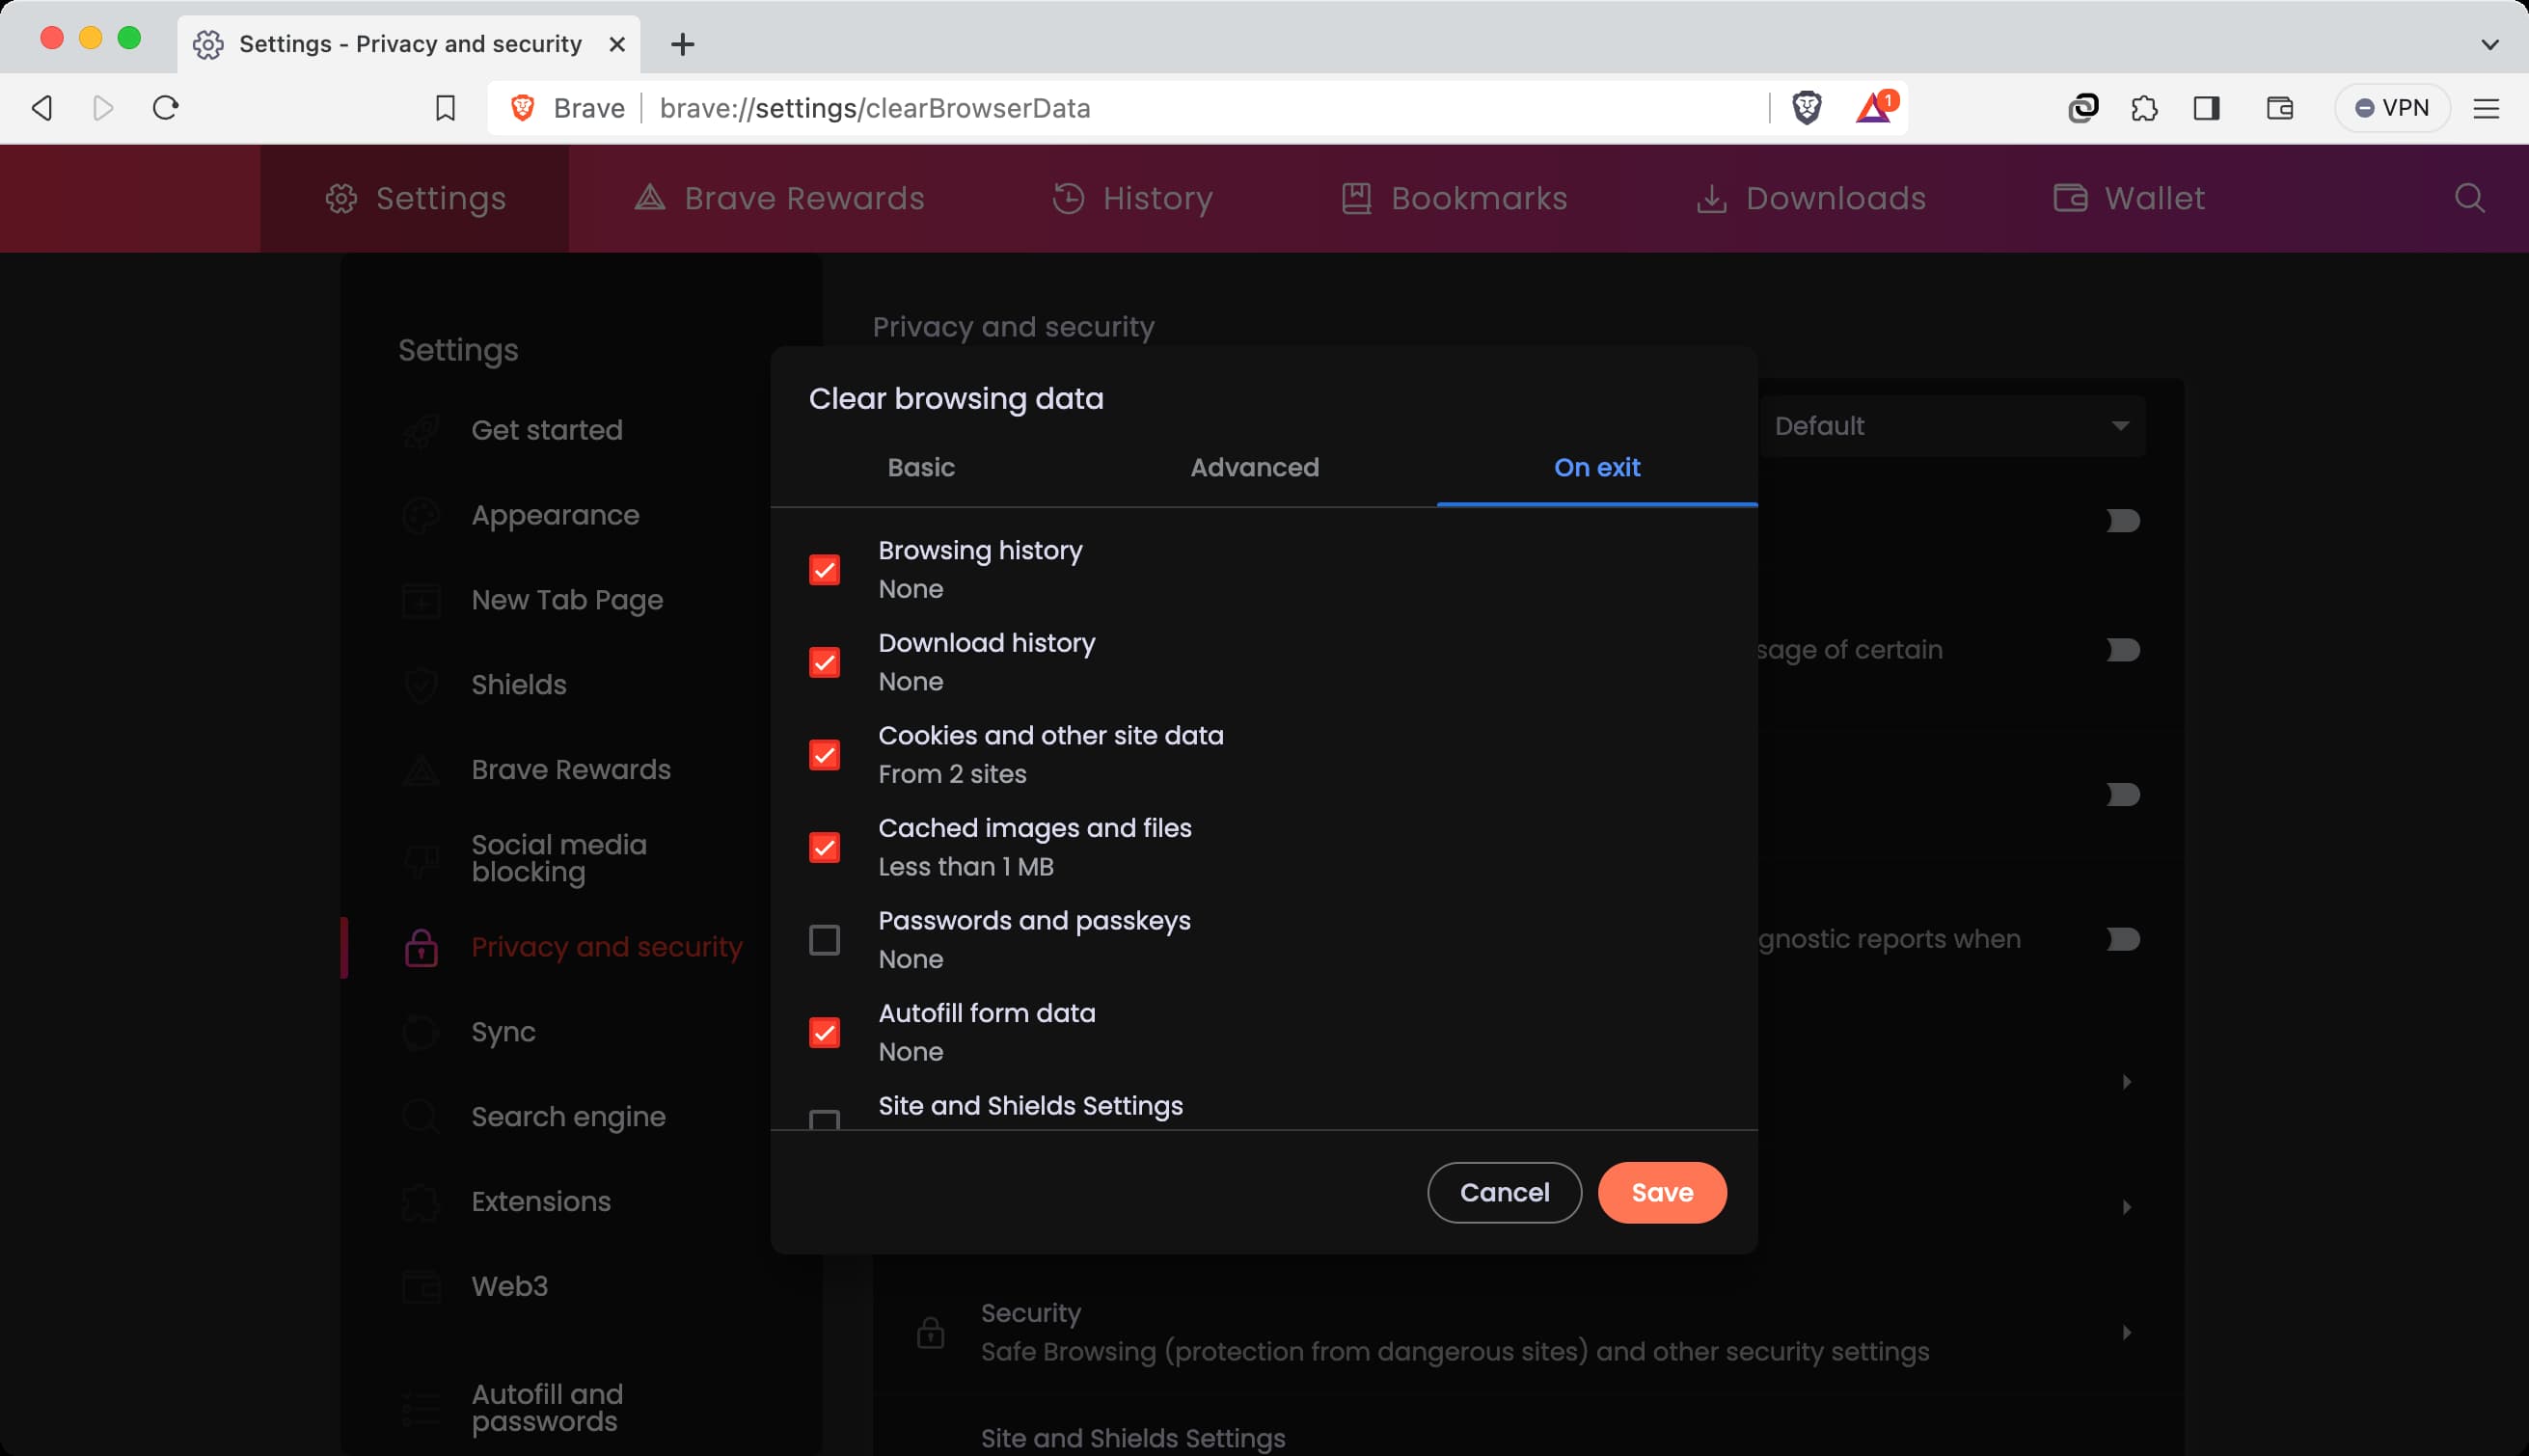
Tip: You can set Safari to automatically close open tabs after a day, week, or month.
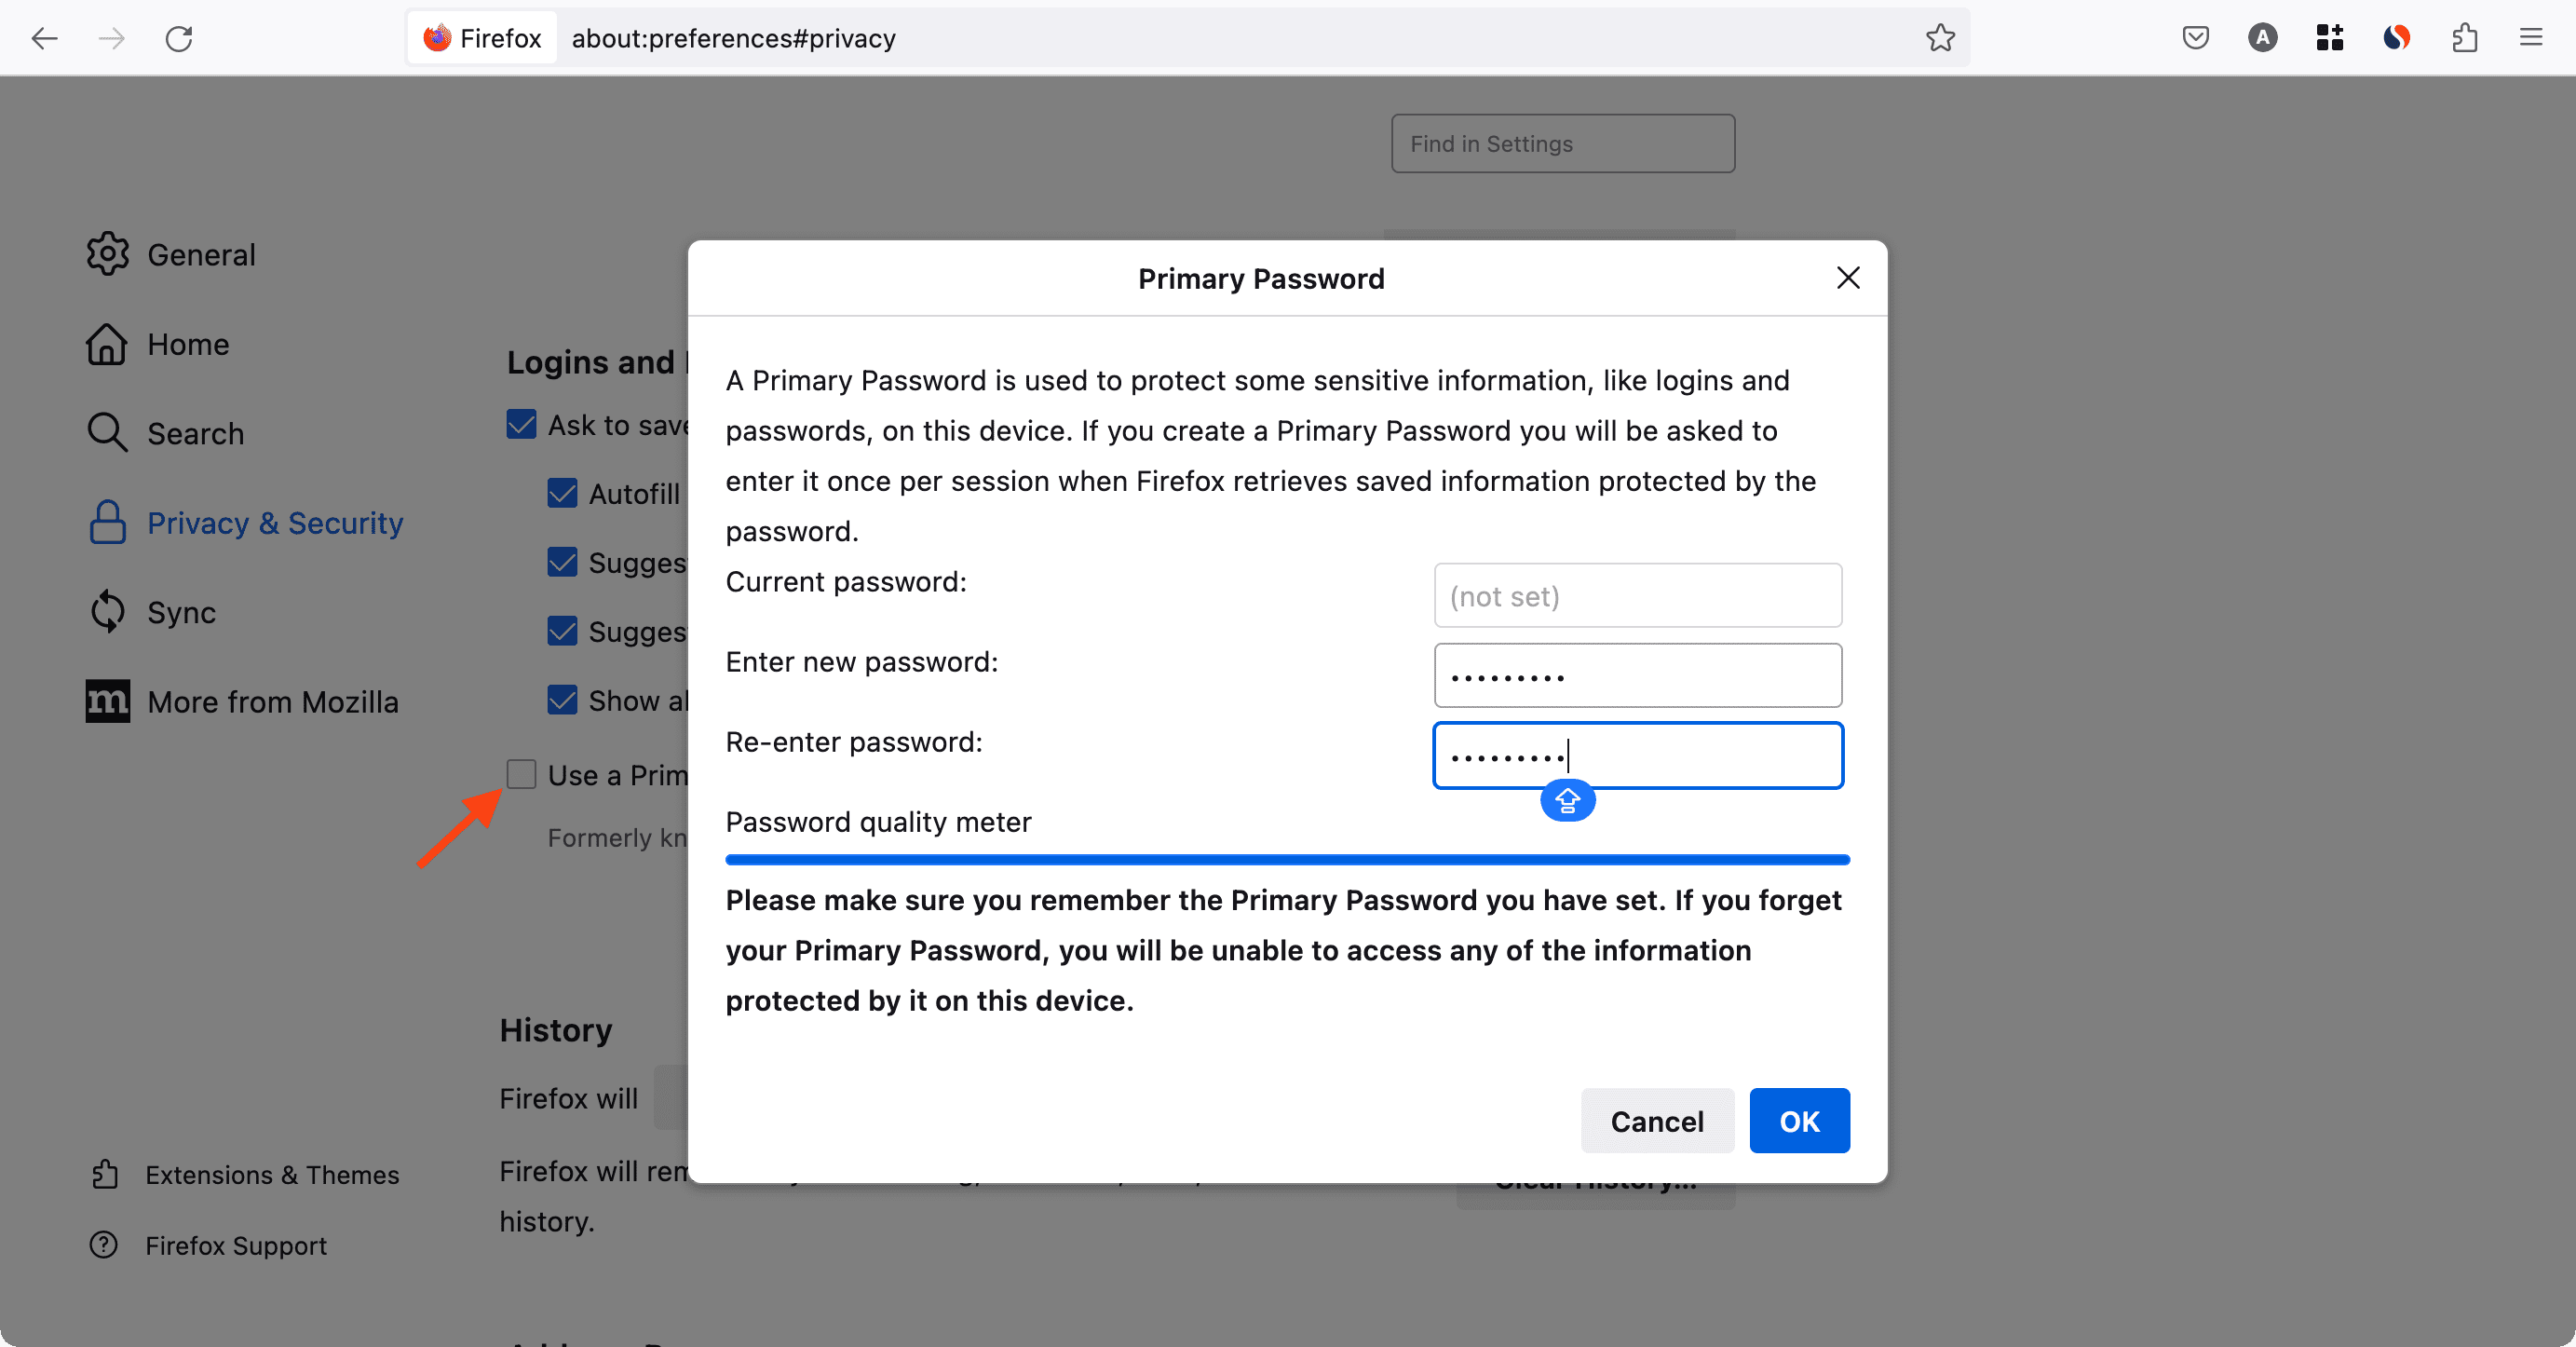
4. Protect your passwords saved in web browsers
When you access website passwords saved in Safari (iCloud Keychain) or Google Chrome, you’ll be asked to enter your Mac’s password. Without it, you can’t view the saved account passwords. However, if you’re using Firefox, follow these steps to set up a master password, which must be entered before anyone can see the saved passwords.
- Open Firefox, click the three-line hamburger icon in the top right, and choose Settings.
- Select Privacy & Security.
- Scroll to the “Passwords” section, check the box for “Use a Primary Password,” and set it.
- From now on, when you try to access the passwords saved inside Firefox, it will ask you for this master password.
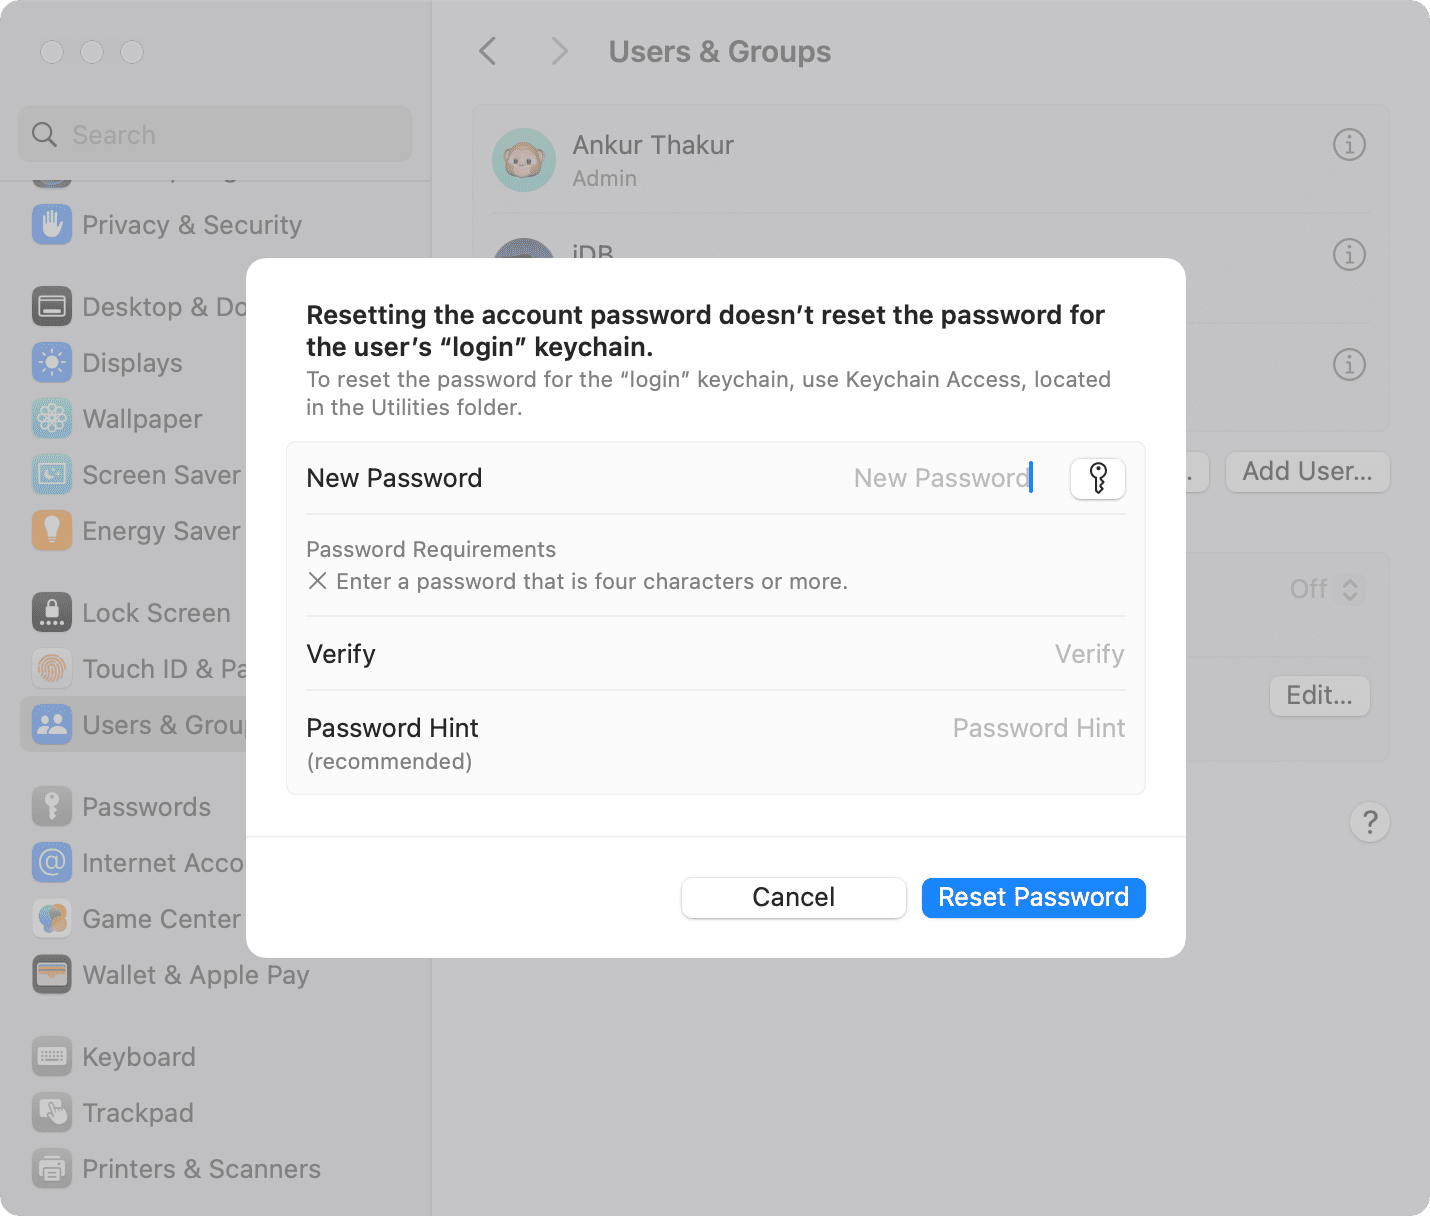
5. Use multiple user accounts
Occasionally, you may have to hand your computer over to a family member or colleague for work. To address this, create a separate user account for each family member or user. This way, their browsing and everything can stay separated from yours. You can also enable Guest mode or simply create a second user account and log in to it before allowing others to use your Mac.
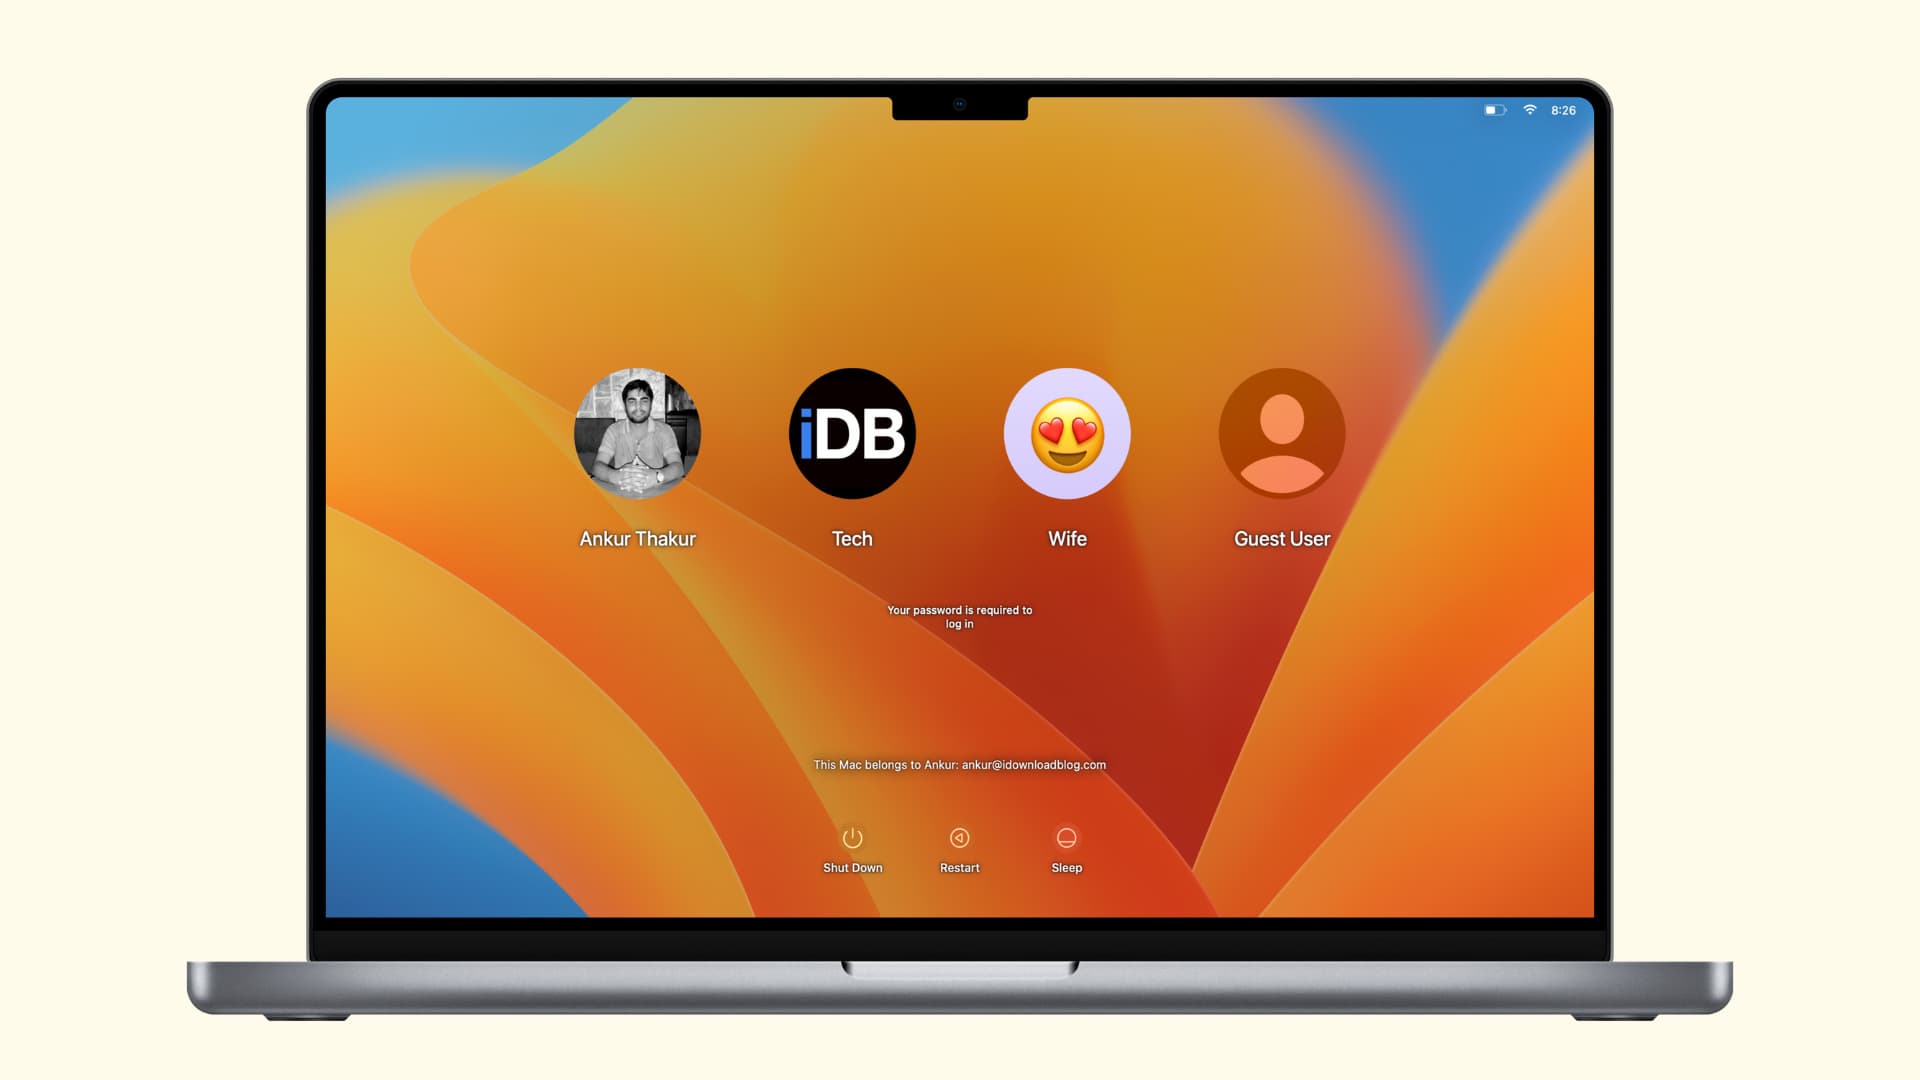
Switching between various macOS accounts is very easy, and you don’t need to shut down and restart your computer. Just click the Apple icon , log out of the current user, and log in to another. It’s a breeze. And if you check the “Reopen windows when logging back in,” you can easily pick up from where you left off.
You can set up more than one user account on your Windows machine by going to Settings > Accounts > Other users > Add account.

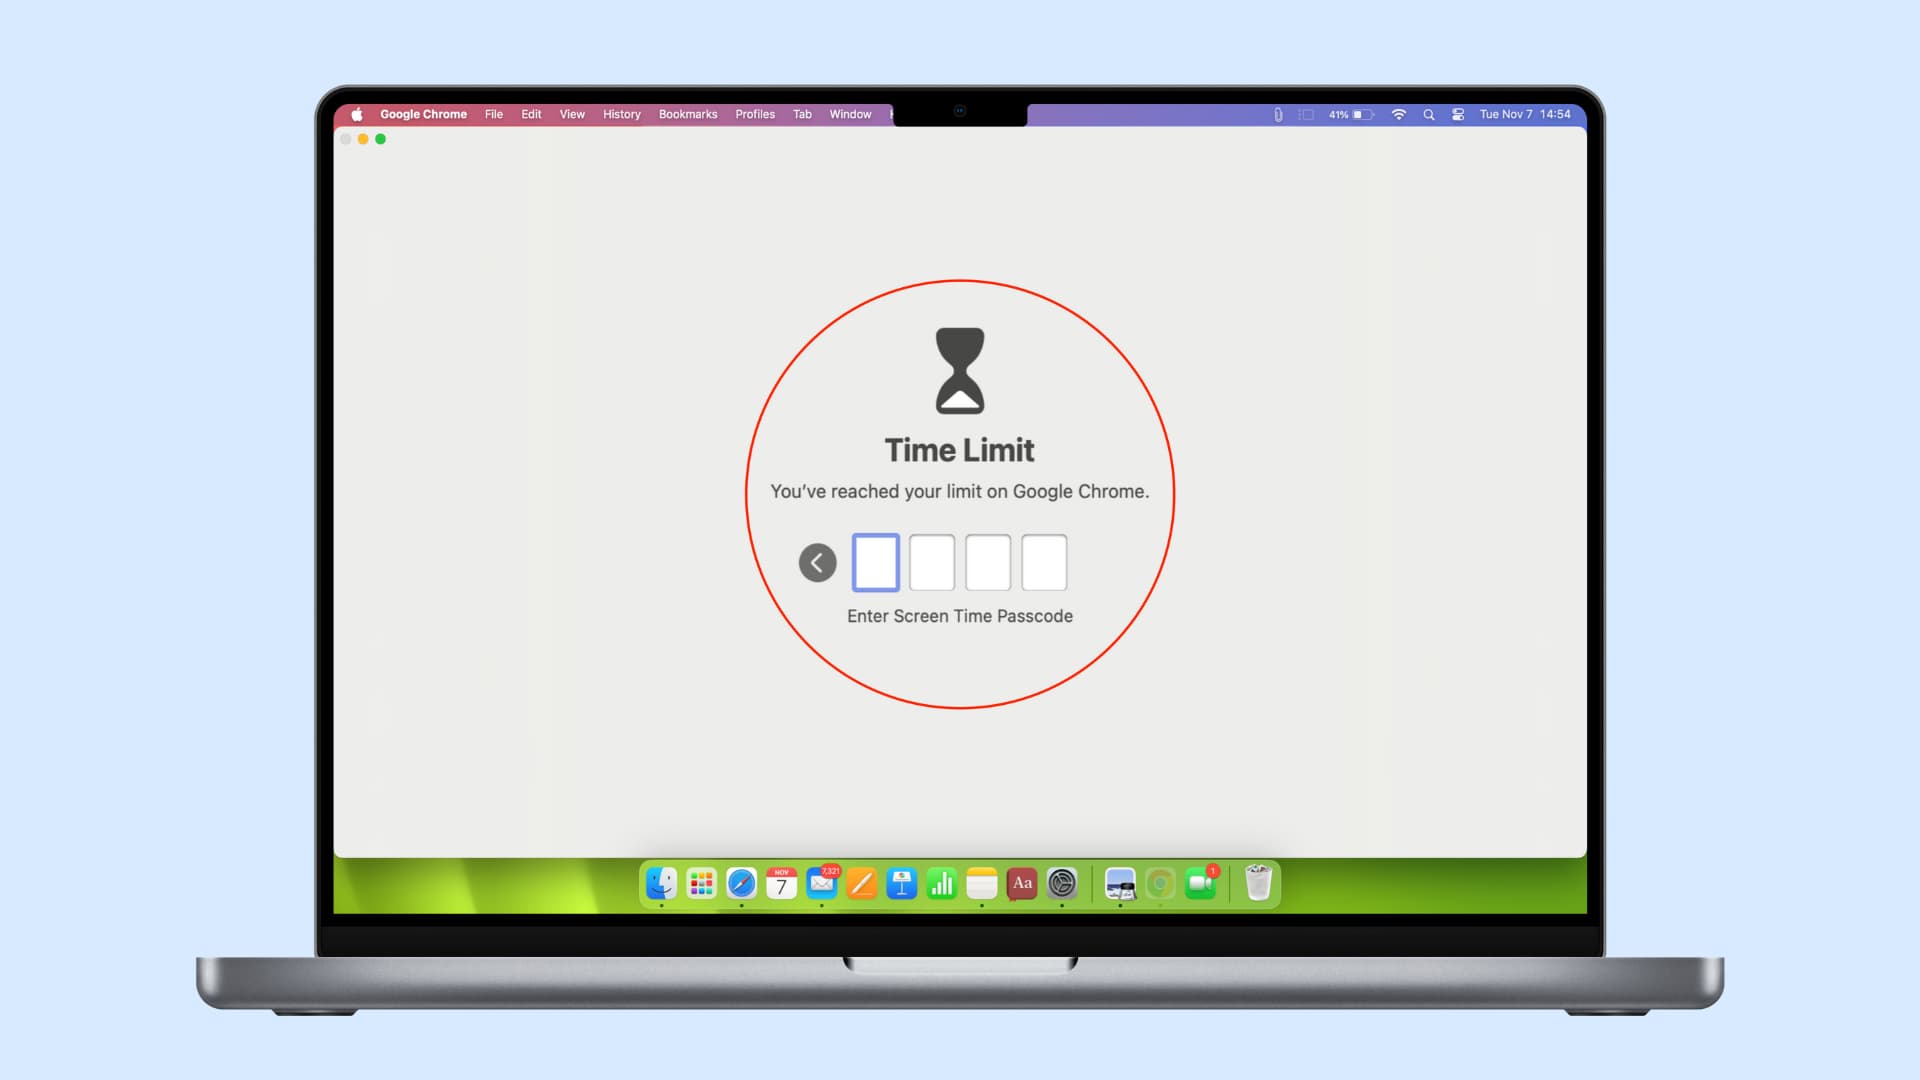
6. Set Screen Time limit for the browser app on Mac
Imagine you want to allow someone to use your computer for a presentation in Keynote or to play games, but you need to lock apps like Chrome, Firefox, or Safari. You can set a short time limit for the browser, such as one minute, to lock it after the time is up.
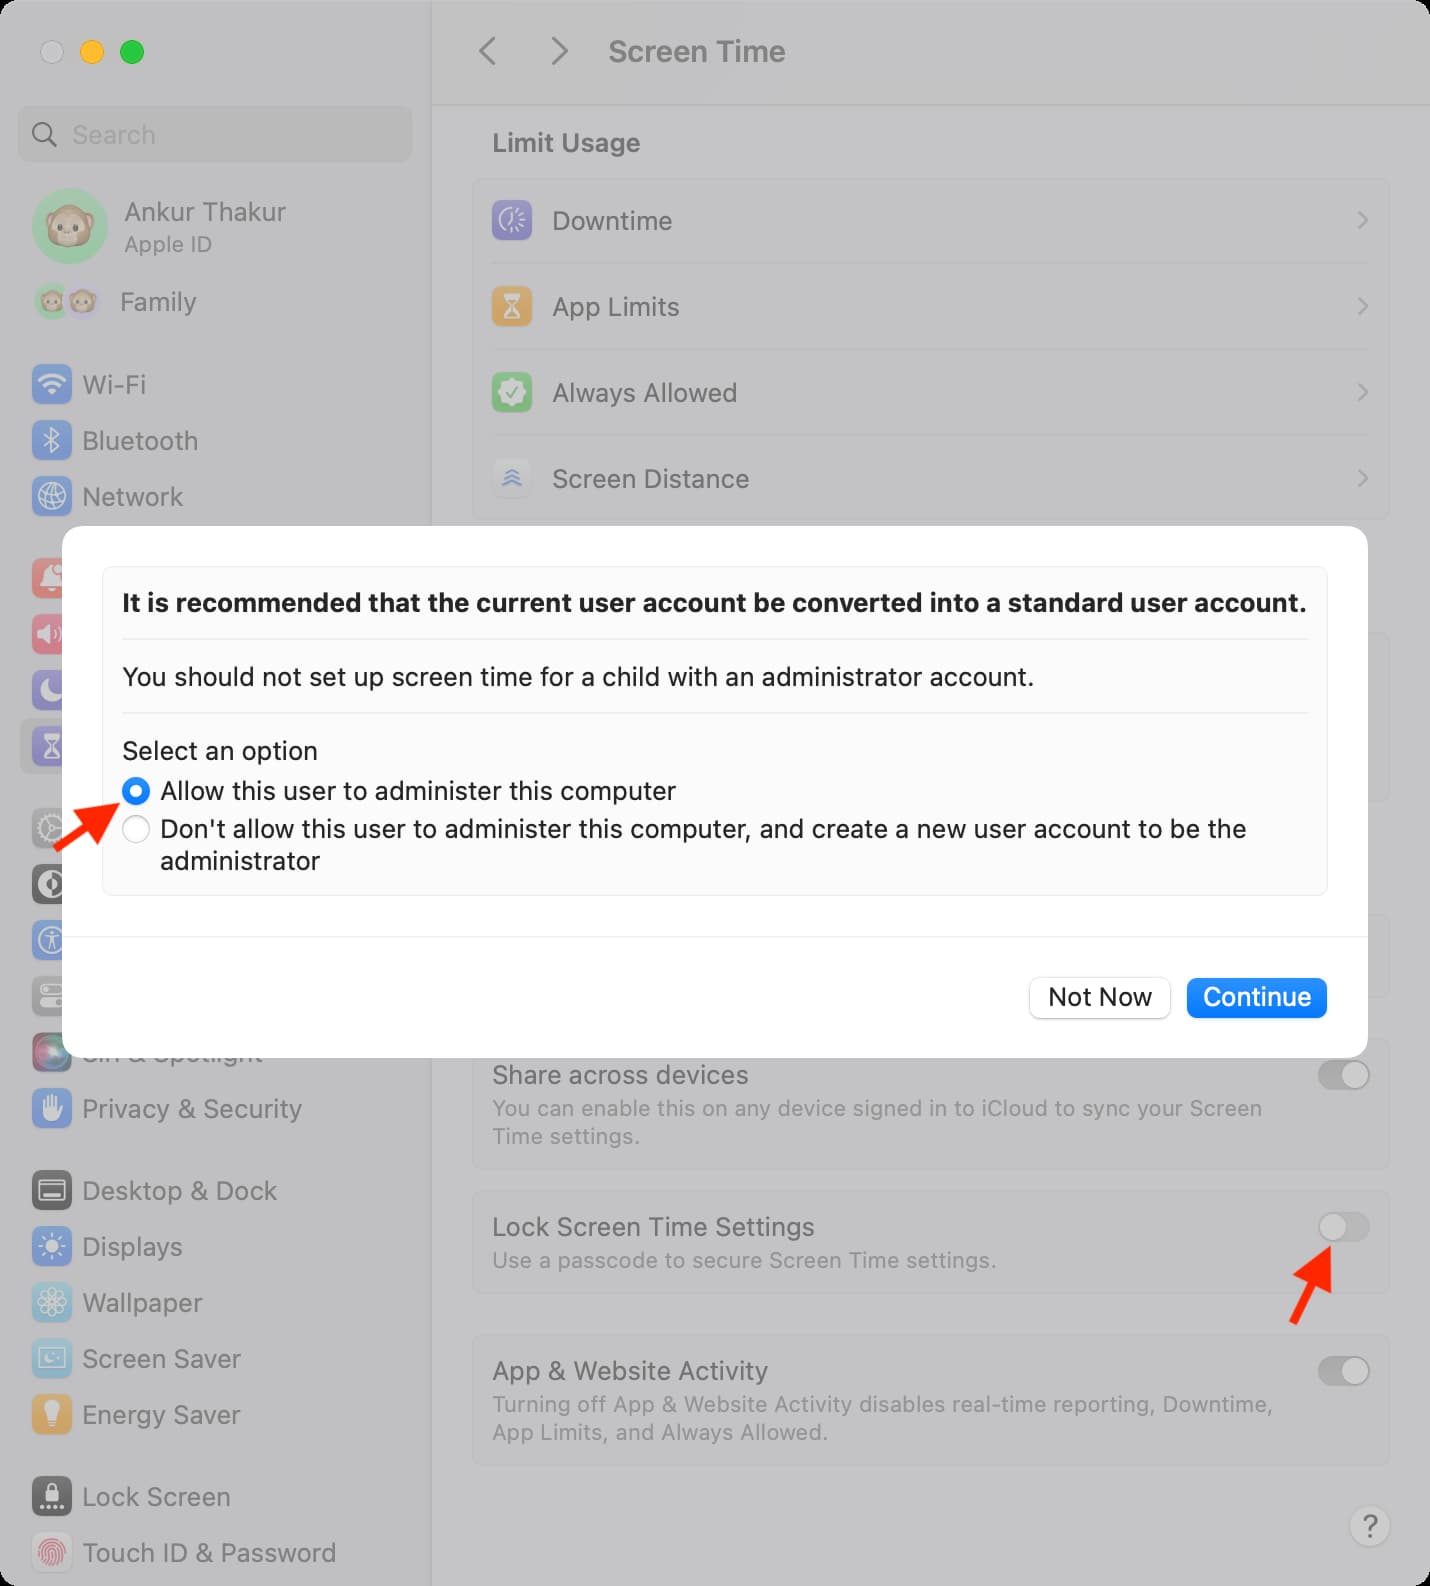
Before proceeding, avoid sharing your computer’s administrator password with the person.
Additionally, you should turn on the Screen Time lock. Apple rightly advises against using a Screen Time passcode with an admin account, but if you think you can remember the passcode, you can choose “Allow this user to administer this computer” while setting the Screen Time passcode. Once you regain your computer from the guest user, disable the Screen Time passcode for the admin account.
Here’s how to lock a browser app on your Mac using the time limit feature:
1) Open System Settings, select Screen Time, and turn it on if it isn’t already.
2) Click App Limits, followed by Add Limit.
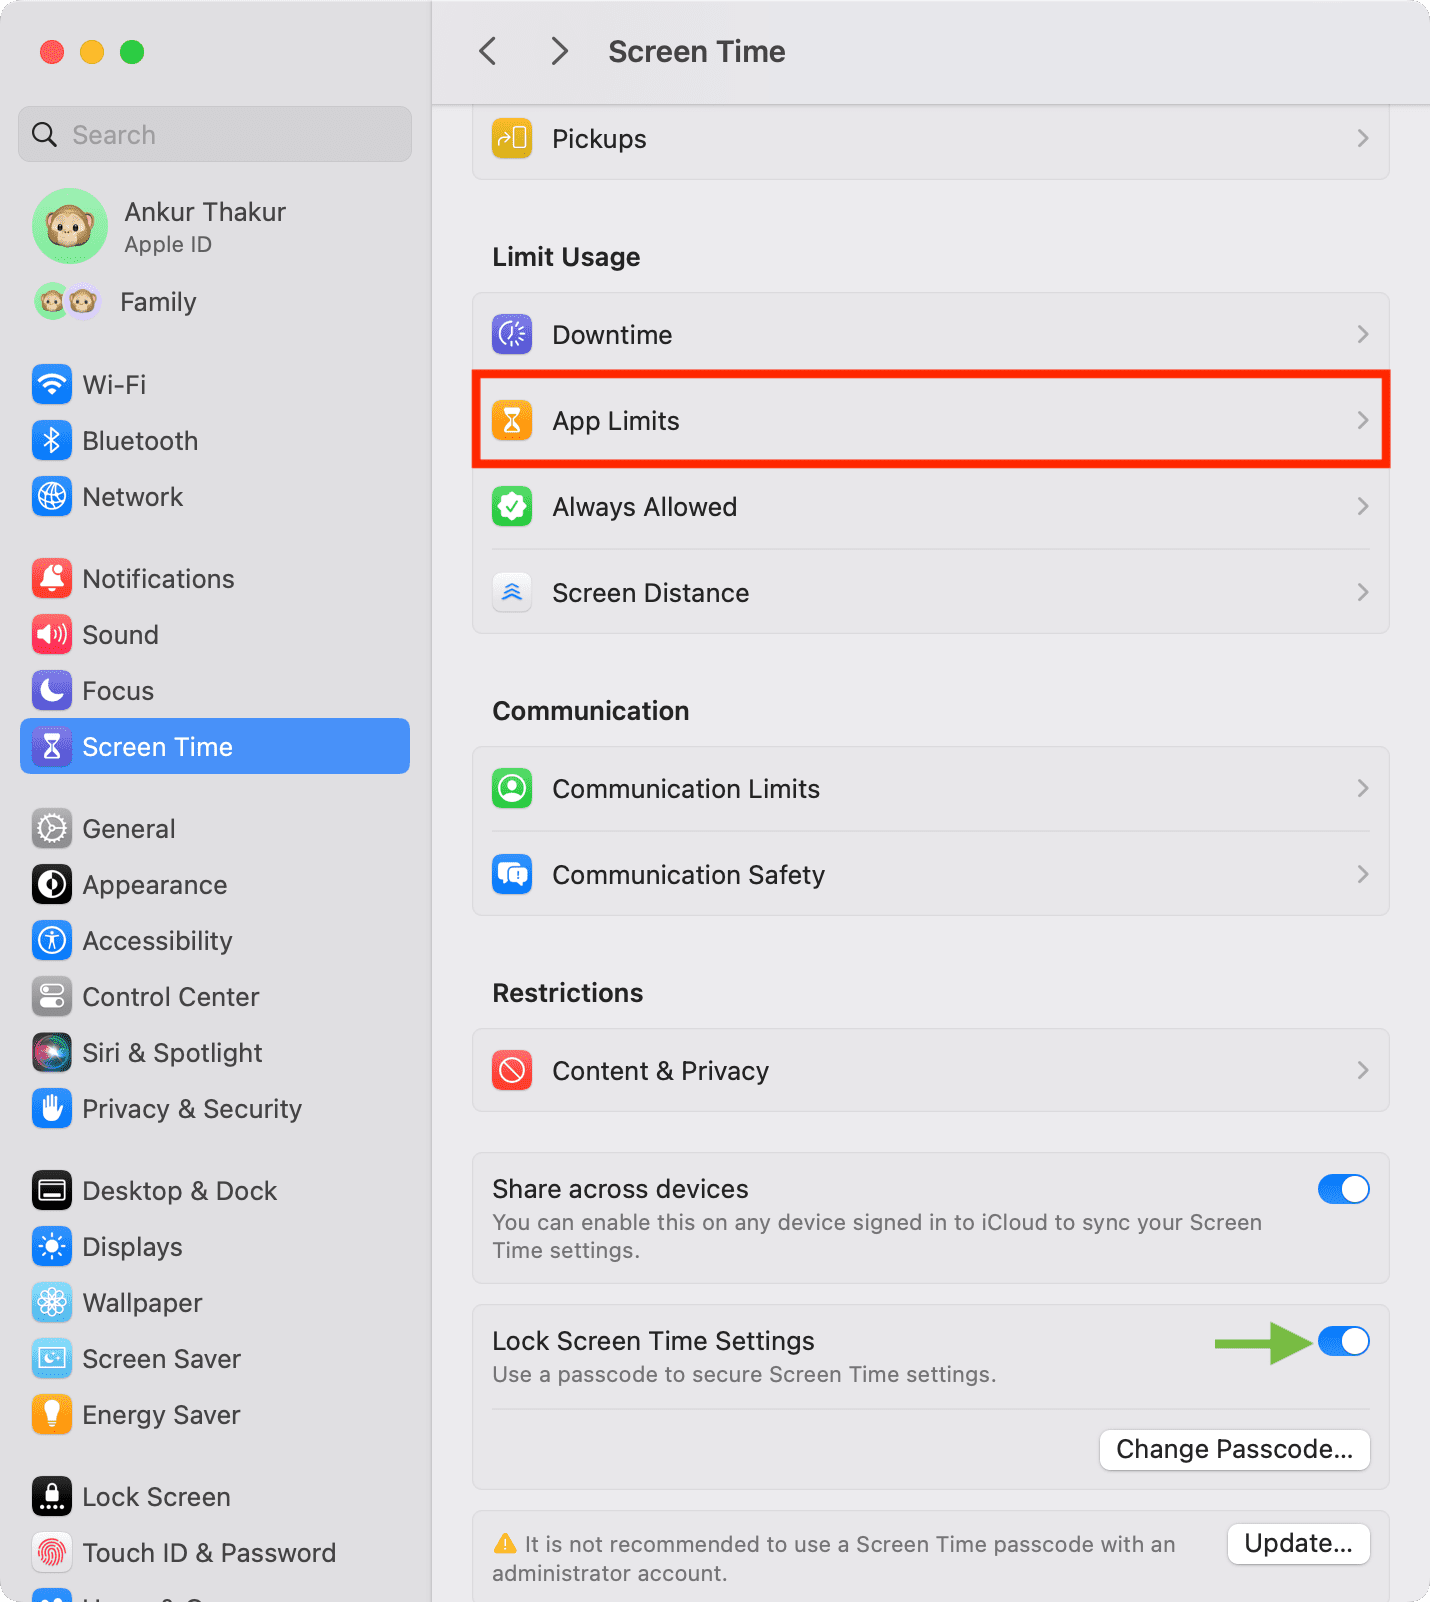
If you don’t see App Limits, click App & Website Activity and turn it on.
3) Use the search bar to find the browser or app you want to lock and select it.
4) Set a short time limit, such as 1 or 2 minutes.
5) Make sure “Block at end of limit” is checked and click Done. You may not see this option if you haven’t set up a Screen Time passcode.
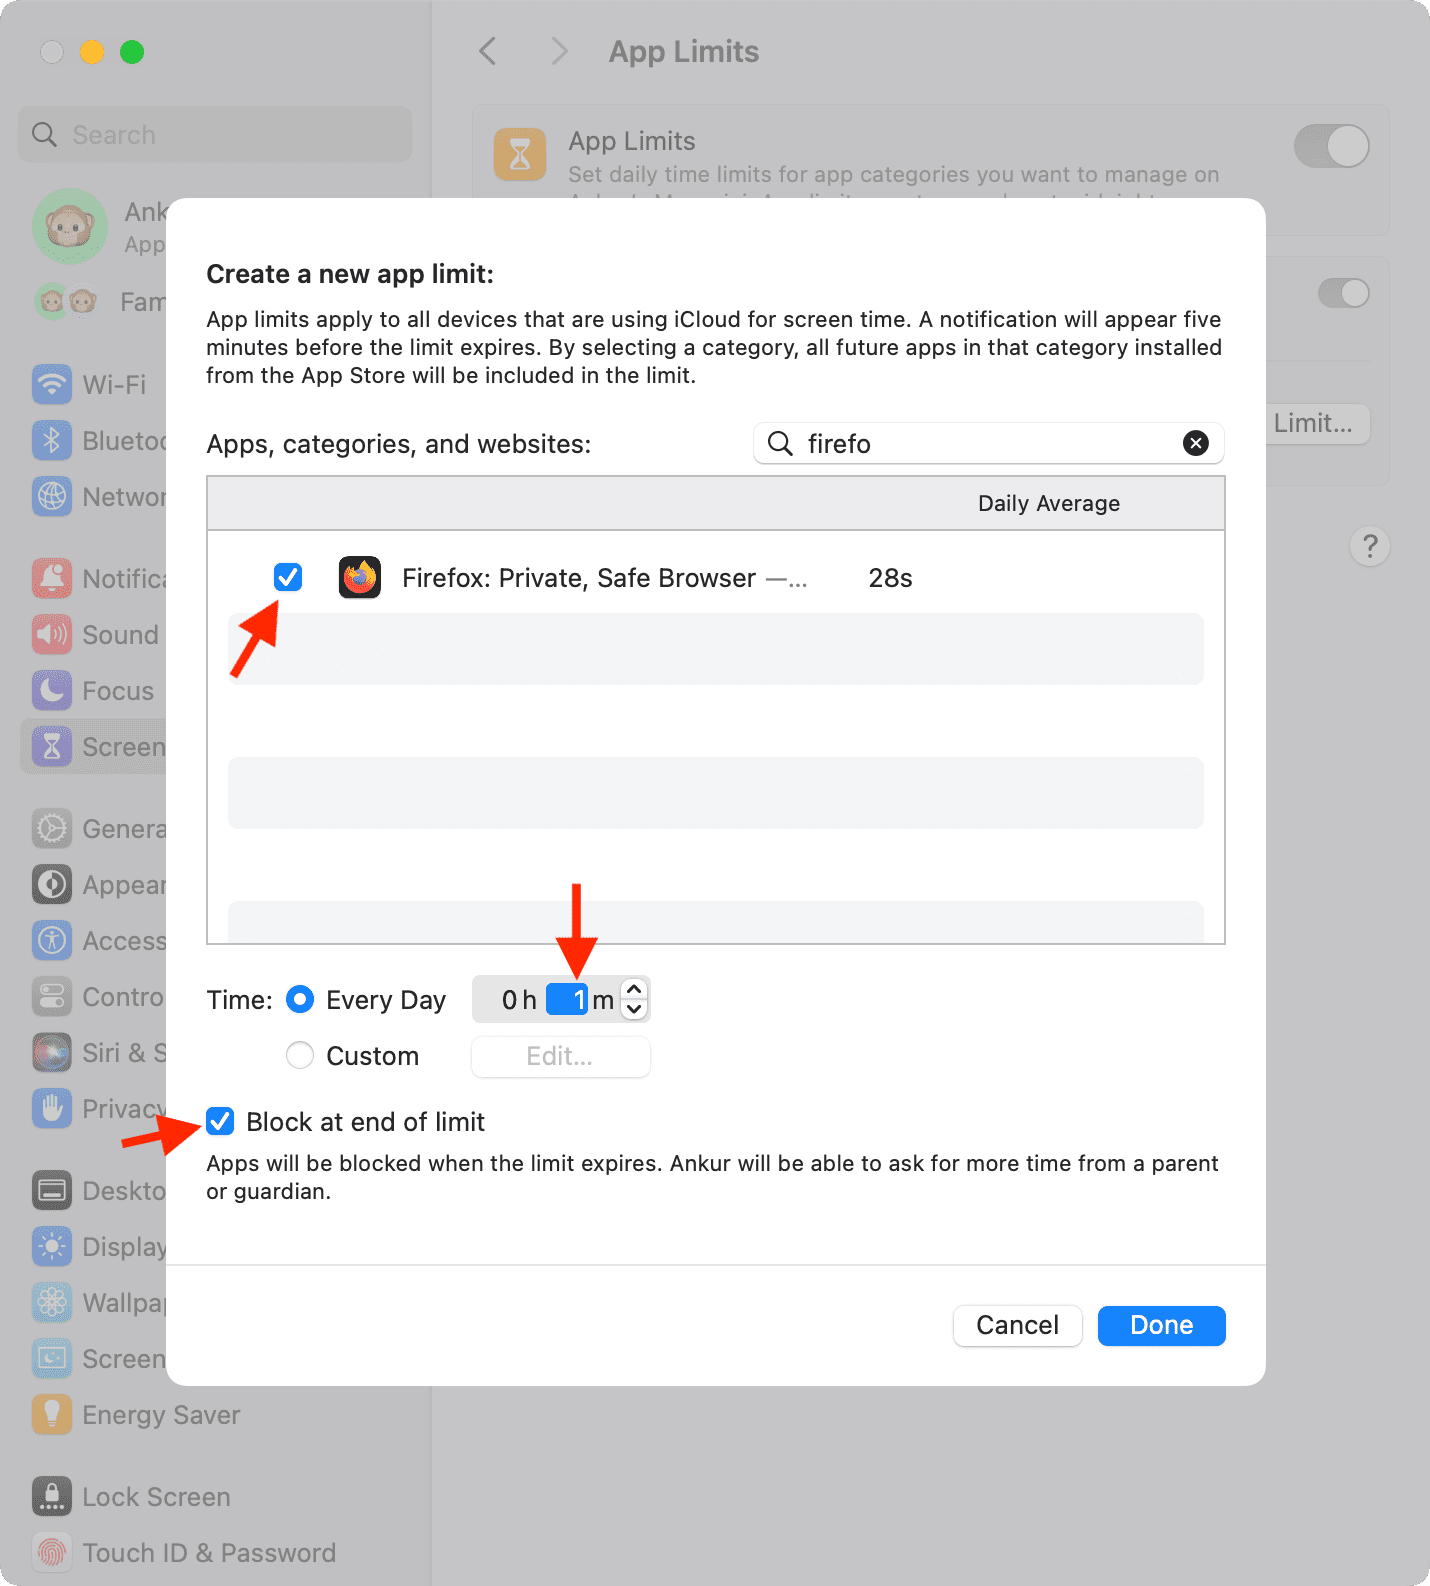
6) Now, use the browser or app for 1 or 2 minutes (the duration you set in step 5). Once this time is up, the app will lock automatically. During the first minute after locking, the app can be accessed without the Screen Time passcode. After that, however, you or the user will need to enter the Screen Time passcode to disable the limit.

Note: If media is playing in a browser, it may continue to play even after the time limit is reached!
7. Use extensions to lock your web browser
While this method directly addresses the topic of our post, we’ve placed it at the end because it requires using third-party extensions and giving them access to your browser. However, if you’re aware of the implications of using such extensions, you can lock Google Chrome or other Chromium-based browsers like Edge, Brave, and Opera on your Mac or Windows PC using these browser-lock extensions.
After you install and set them up, you’ll need to enter the configured password to access the browser.
- Set a password for your browser (Chrome lock)
- Browser Lock | Lock Your Browser: For Chrome, Edge, and Opera
8. Try a system-wide app lock
Lastly, you can explore Mac and PC apps like AppCrypt, which can help you set a password for your browser and other apps. But in my opinion, going this route and granting extensive system permissions to an app for locking a web browser is a bit extreme. Instead, I recommend using one of the simpler tips mentioned above.
On a related note: How to protect any iPhone or iPad app with a passcode and Face ID [no jailbreak required]