Learn how to set up Touch ID on a MacBook or Magic Keyboard, enroll your fingerprints in the system, and use it to quickly unlock your computer, make purchases on websites with Apple Pay, and much more.

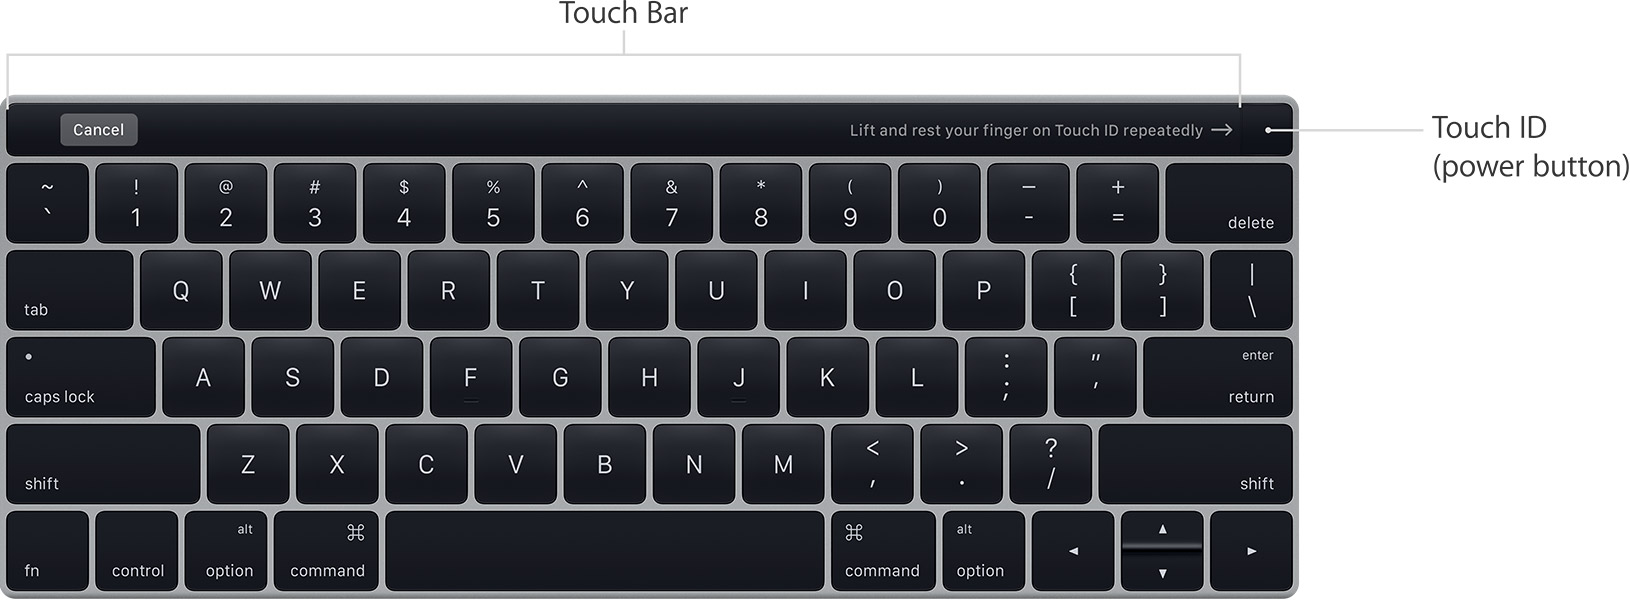
Since October 2016, Touch ID has been available on MacBook Pro and MacBook Air. The Touch ID doubles as the Power button, too. Besides that, you can get the Magic Keyboard with Touch ID and use it on any Apple silicon Mac like Mac mini, Mac Studio, iMac, etc.
What you can do with Touch ID on your Mac
- Unlock your Mac
- Authorize Apple Pay purchases on the web
- Make purchases in App and iTunes stores
- Unlock certain System Preferences panes that require a password
- Open password-protected notes in the Notes app
- Access the Passwords section in Safari preferences
- Use fast user switching
- Authenticate compatible third-party apps, like 1Password
Note: While you can press and hold down the Touch ID button for a few seconds to put the Mac to sleep, Apple recommends choosing Sleep from the Apple menu.
macOS may ask you to enter your account password instead of using Touch ID:
- If you’ve just restarted your Mac
- If you’ve logged out of your user account
- If your fingerprint isn’t recognized five times in a row
- If you haven’t unlocked your Mac in more than 48 hours
- If you’ve just enrolled or deleted fingerprints
So, just how secure is Touch ID on the Mac?
Touch ID and your security
Touch ID on the Mac provides the same strong security and privacy that iOS users have grown accustomed to. That’s because your Mac comes with a special chip that has the so-called Secure Enclave, which keeps mathematical representations of your saved prints, as well as Apple Pay tokens, safely encrypted. All communications between the Touch ID sensor and the rest of the system go through that chip.
The main processor, the operating system, and any first or third-party apps cannot access the Touch ID sensor directly. All they get from the Touch ID subsystem is a simple confirmation upon a successful match. Apple does not save your fingerprints into the cloud, nor does it synchronize saved prints between devices via iCloud.
How to set up Touch ID on Mac
While setting up your new or erased Mac, you’re asked if you would like to use Touch ID. This is true even when you set up your Mac mini, Mac Studio, or iMac using the Magic Keyboard with Touch ID.
However, if you didn’t set up Touch ID then or want to add more fingerprints, follow these easy instructions:
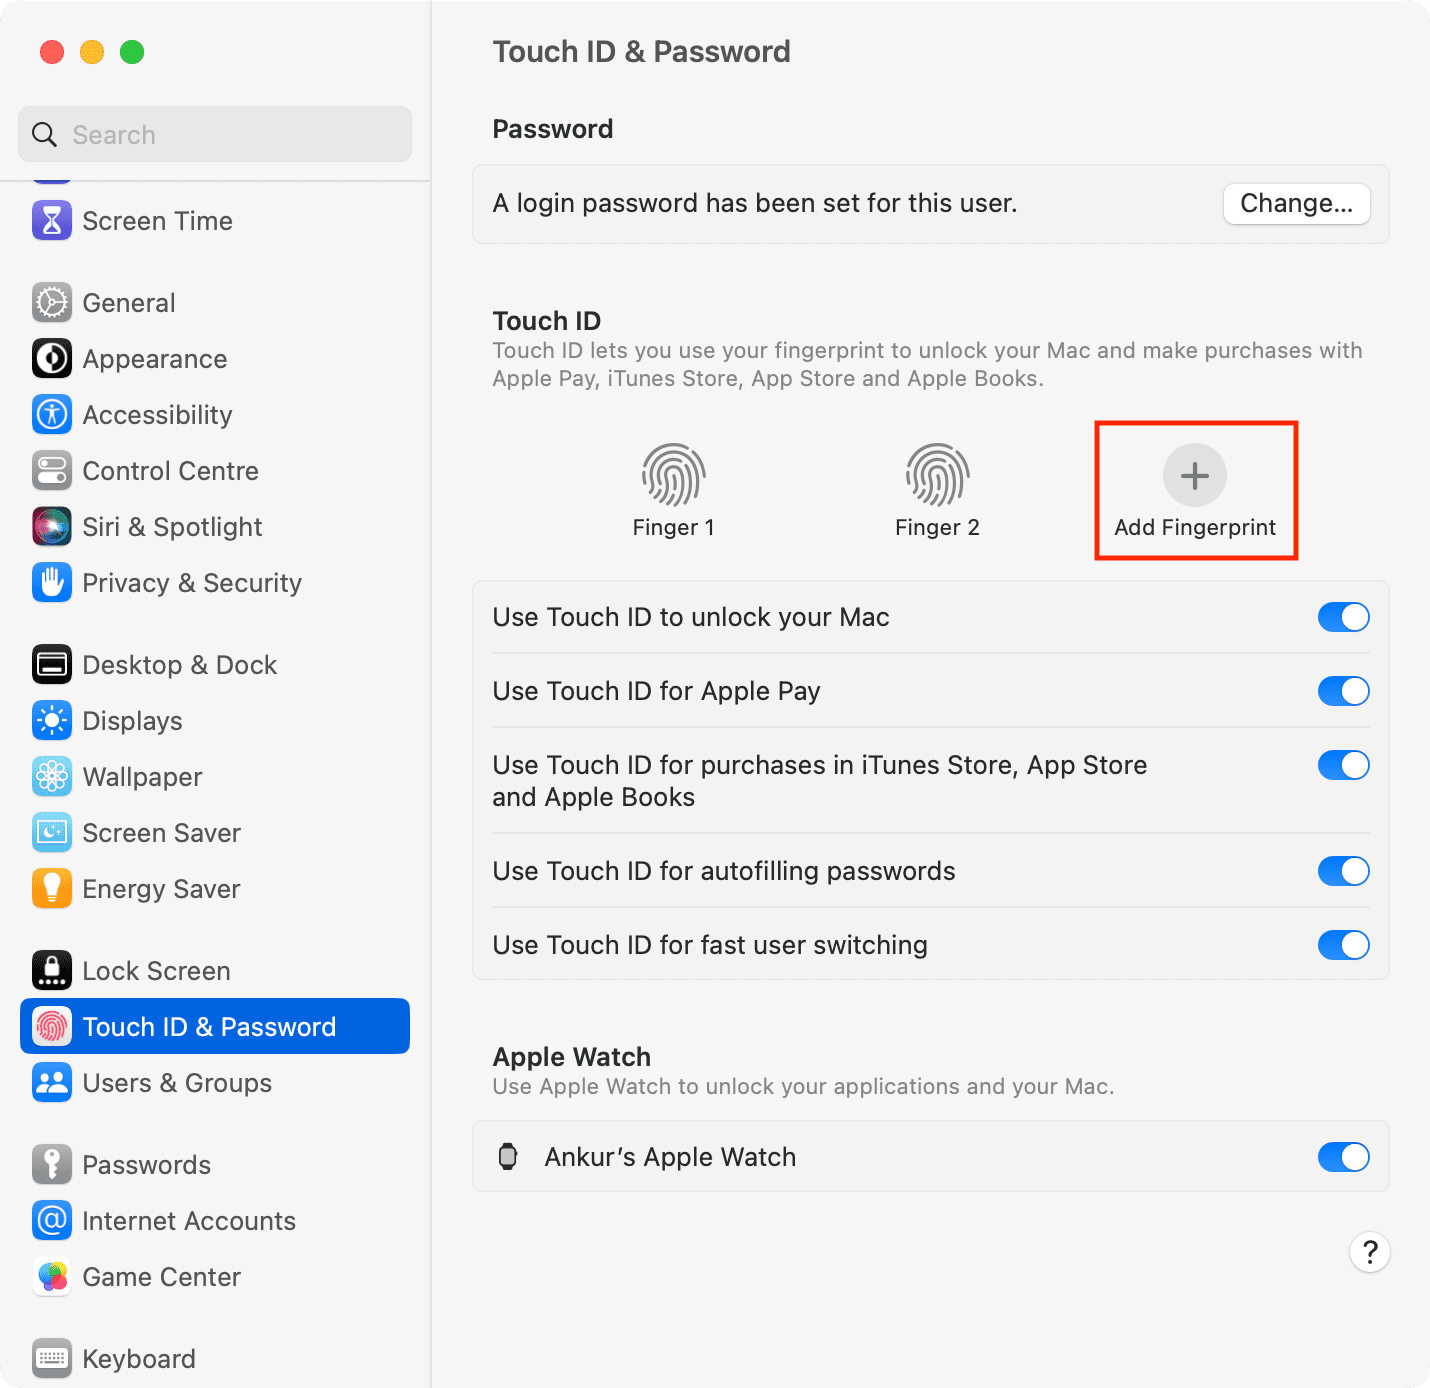
- Launch System Settings on your Mac.
- Select Touch ID & Password from the left side.
- Click Add Fingerprint.
- Enter your Mac’s password and hit Unlock.
- Now, repeatedly place (not press) and lift your finger on the Touch ID sensor of your MacBook or Magic Keyboard until all the patterns are filled with red-pink lines. Make small adjustments to the position of your finger each time so that the system captures the edges of your print.
- Touch ID is Ready message appears after the fingerprint has been enrolled in Touch ID. Finally, click Done.
You can now unlock your Mac using your fingerprint and do everything else that Touch ID supports.
You can register up to three fingerprints with Touch ID on your Mac versus five on your iPhone or iPad.
What to do after setting up Touch ID
After you save at least one fingerprint, you will see that the various buttons below the fingerprint icons are enabled letting. But if they are not, simply click the switches to turn them on so that you can use Touch ID to perform the said actions on your Mac.
You can select to use Touch ID for:
- Unlocking your Mac: Bypass typing your Mac account’s password on the login screen and unlock the computer with your fingerprint.
- Apple Pay: Use your fingerprint to make purchases with Apple Pay.
- iTunes, App Store, and Apple Books: Use Touch ID to authorize purchases made on the Mac App Store, iTunes Store, and Books Store.
- Autofill passwords: Confirm using Touch ID to fill saved passwords from iCloud Keychain.
- User switching: If you have created multiple users for your Mac, you can switch between them using Touch ID.
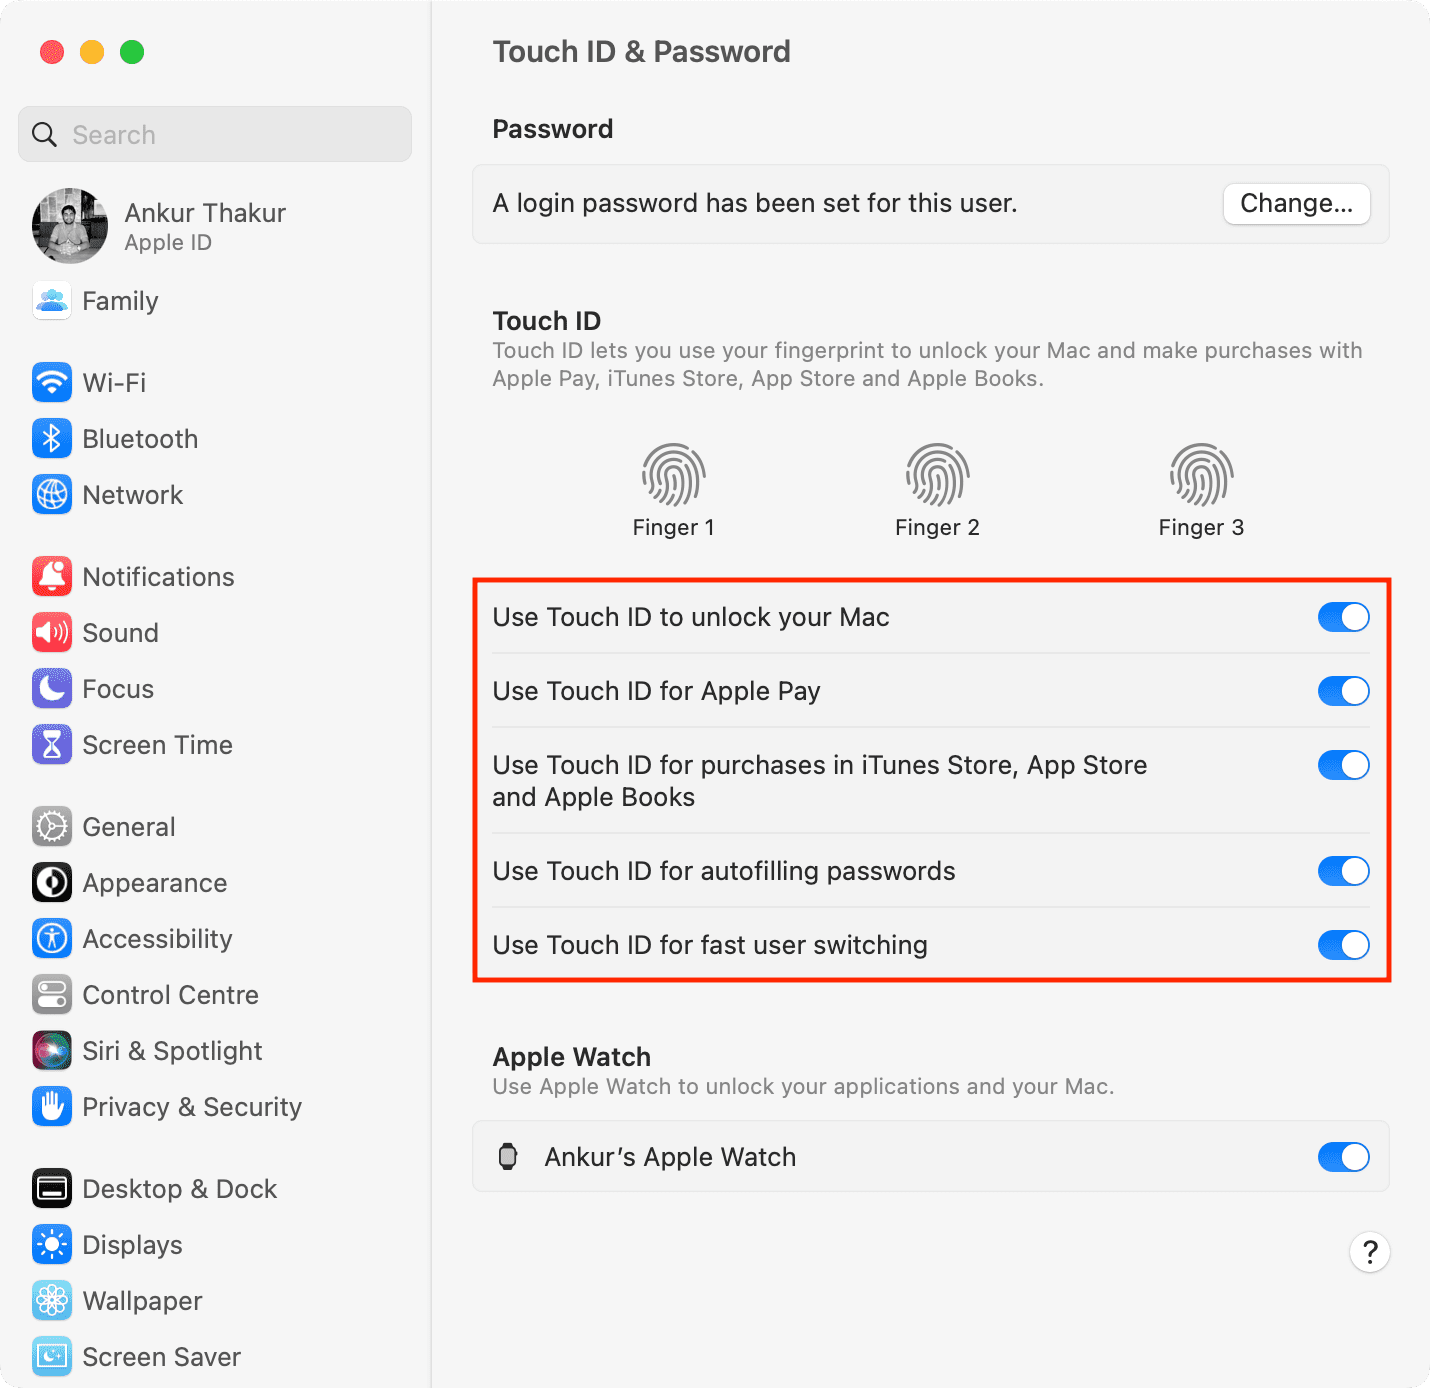
Like with your iPhone and iPad, macOS lets you name any saved fingerprint (i.e., Middle Finger, Right Thumb, and so forth) so that it’s easier to identify in the list. However, you cannot place your finger on the Touch ID sensor to have System Settings highlight a matched print in the list, as you can on iOS.
Keep in mind that you may be asked to enter your administrative password if you’ve made changes to the fingerprints that you’ve enrolled in Touch ID.
Using Touch ID on Mac
For unlocking and user switching
Touch ID can save you from typing your account password on the Login screen.
After the initial password-based login, you can authenticate with Touch ID instead of your password. As mentioned in the opening section of this article, Touch ID can be used to open locked System Settings features, the Passwords section in Safari preferences, and any password-protected notes in the Notes app.
And if your computer is set up for multiple users and each user account has Touch ID set up, you can use the fingerprint sensor to quickly switch to any logged-in user accounts via the Fast User Switching feature.
On the App Store and iTunes Store
When you’re about to download or purchase an app, media, or book, click the Buy or Get icon. After that, on the Touch ID prompt, place the finger on the Touch ID sensor to complete the purchase.
For security reasons, your Mac may ask you to enter your password on your first store purchase or if you’ve made changes to the fingerprints that you’ve enrolled in Touch ID.
Related: How to download apps on iPhone without Apple ID password, Face ID, or Touch ID authentication
For Apple Pay on websites in Safari
- In Safari, navigate to a website that accepts Apple Pay payments. Add products you wish to buy to the cart, then click the Buy with Apple Pay or Apple Pay button at checkout.
- A sheet pops up with your billing, shipping, and contact information. If you didn’t provide this information during the Apple Pay setup process, simply enter your billing, shipping, and contact details on the form, and Apple Pay will automatically store this information so you won’t need to enter it again. Tip: To pay with a different card, click the arrows next to your default card in to select the card you wish to use for this particular purchase.
- Authorize your purchase by placing one of the registered fingers on the Touch ID sensor when a prompt appears on the Touch Bar. A check mark followed by “Done” appears when the purchase is completed.
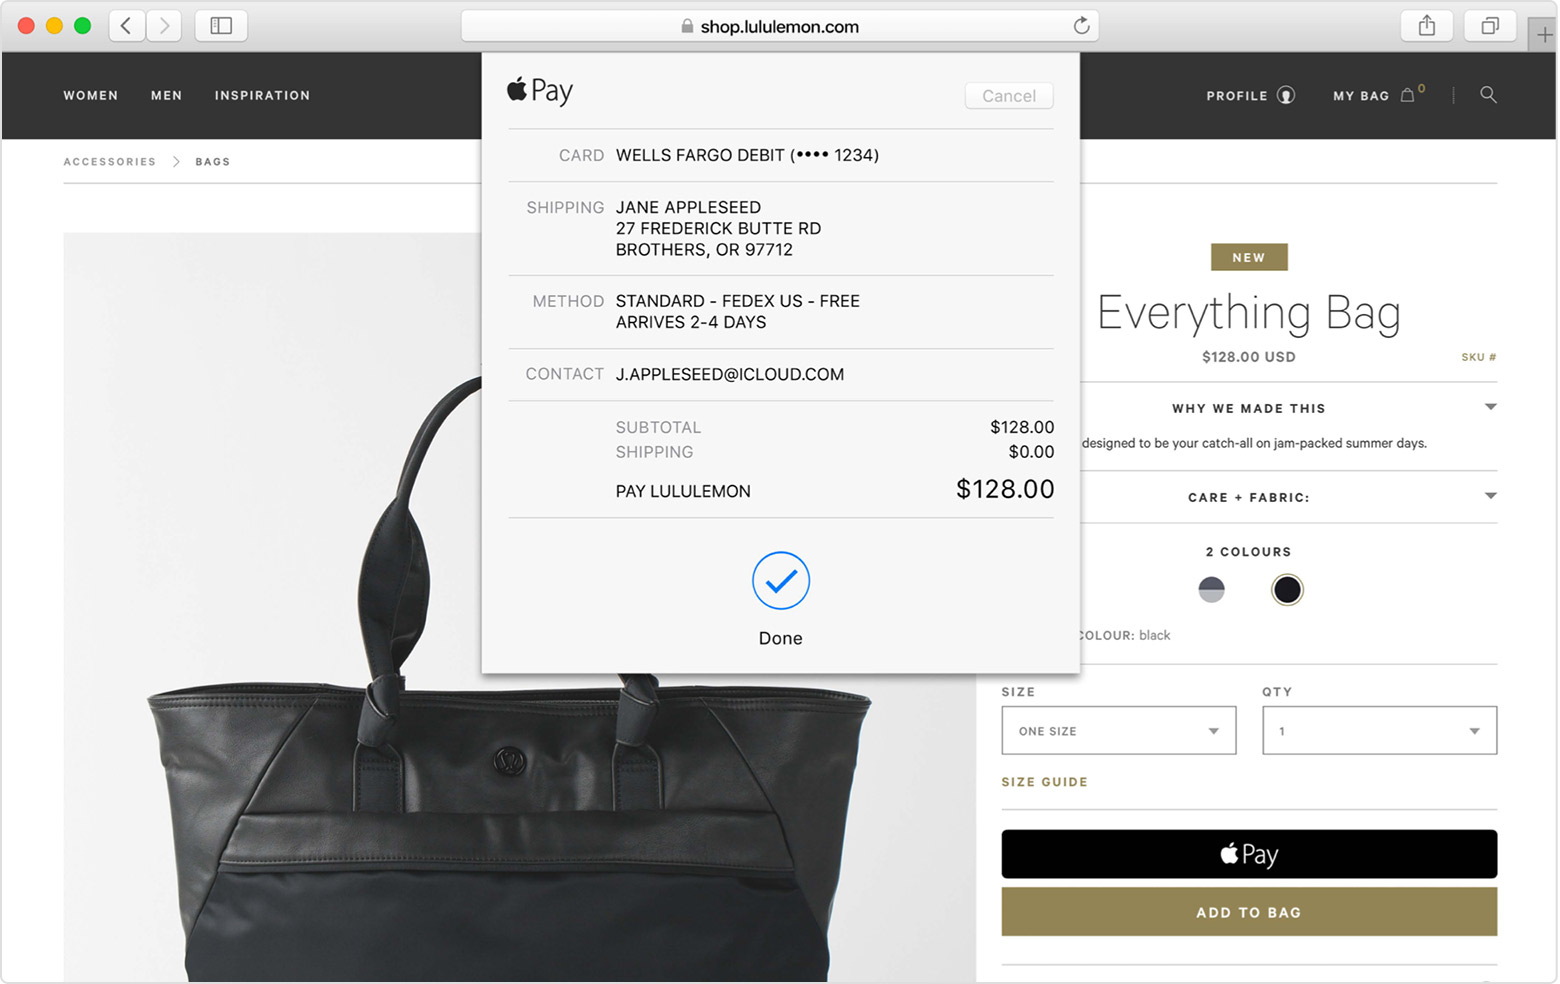
Tip: If Touch ID is disabled on your Mac, click the Apple Pay icon on the Touch Bar and follow the prompts on the screen.
Your bank may only display the transactions made from your computer, or you might see all transactions made from your credit or debit card account, including those made from all Apple Pay devices and your plastic cards.
Keep in mind that you might see different transaction amounts from locations such as restaurants, gas service stations, hotels, and car rental companies because some banks provide only initial authorization amounts to Wallet.
Touch ID troubleshooting tips
Your Mac’s fingerprint sensor does not work well with wet or oily fingers because moisture, lotions, sweat, oils, cuts, or dry skin might affect fingerprint recognition. Due to these technological restrictions, you’re likely to experience temporary hiccups with Touch ID after activities like exercising, showering, swimming, or cooking, including any other conditions or changes that affect your fingerprint.
You can clean your Mac’s Touch ID sensor the same way you would clean the display: either use a microfiber cloth to remove finger oils and residue or dampen a soft, lint-free cloth with water only, then use it to clean the Touch ID sensor.
Shut down your Mac and unplug the power adaptor before cleaning the sensor.
Related: How to fix Touch ID not working on iPhone, iPad, and Mac
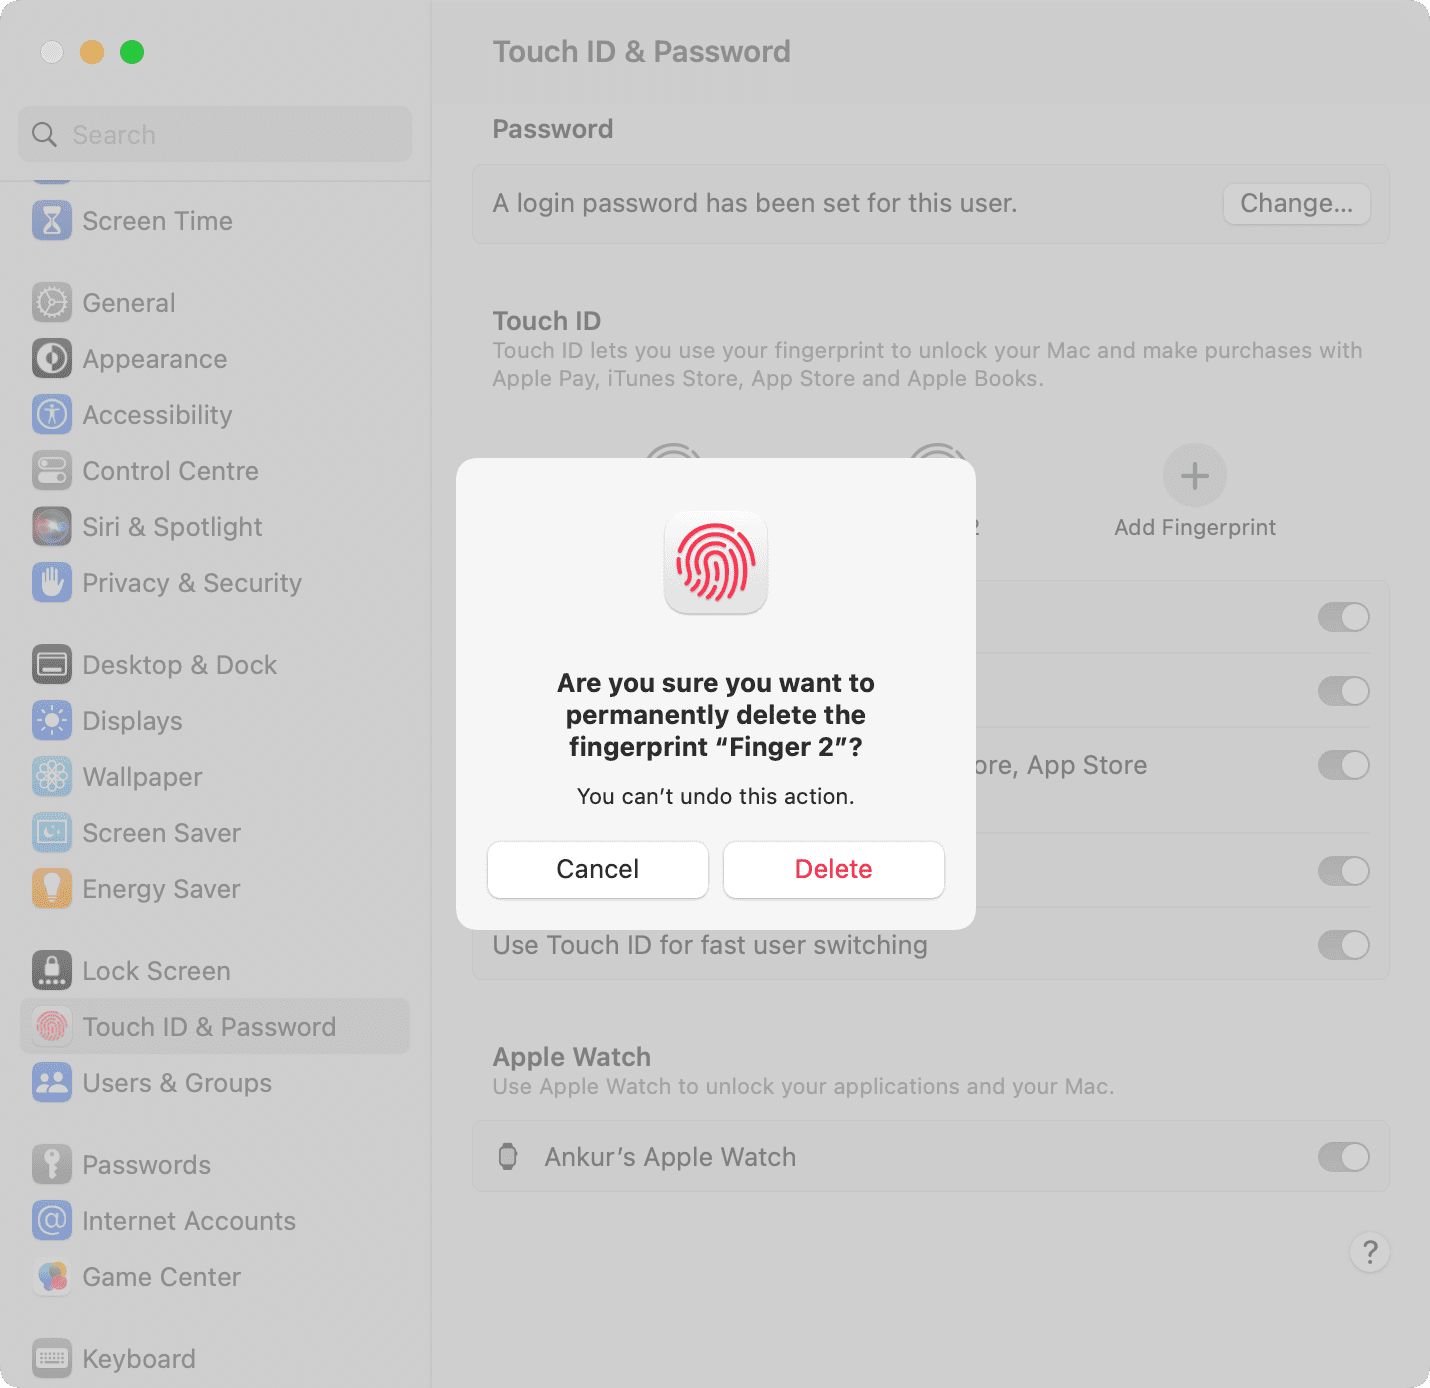
Delete enrolled fingerprints on Mac
As mentioned, your Mac can remember up to three different fingerprints. You can easily remove one of the enrolled fingerprints via these steps:
- Go to System Settings > Touch ID & Password.
- Take the pointer over an added fingerprint and click the X button.
- Enter Mac’s password and hit Unlock.
- Finally, click Delete.
To use this fingerprint later, you’ll need to add it again there.