Learn how to set up Assistive Access on an iPhone or iPad to simplify the device for individuals with cognitive disabilities.
What is Assistive Access?
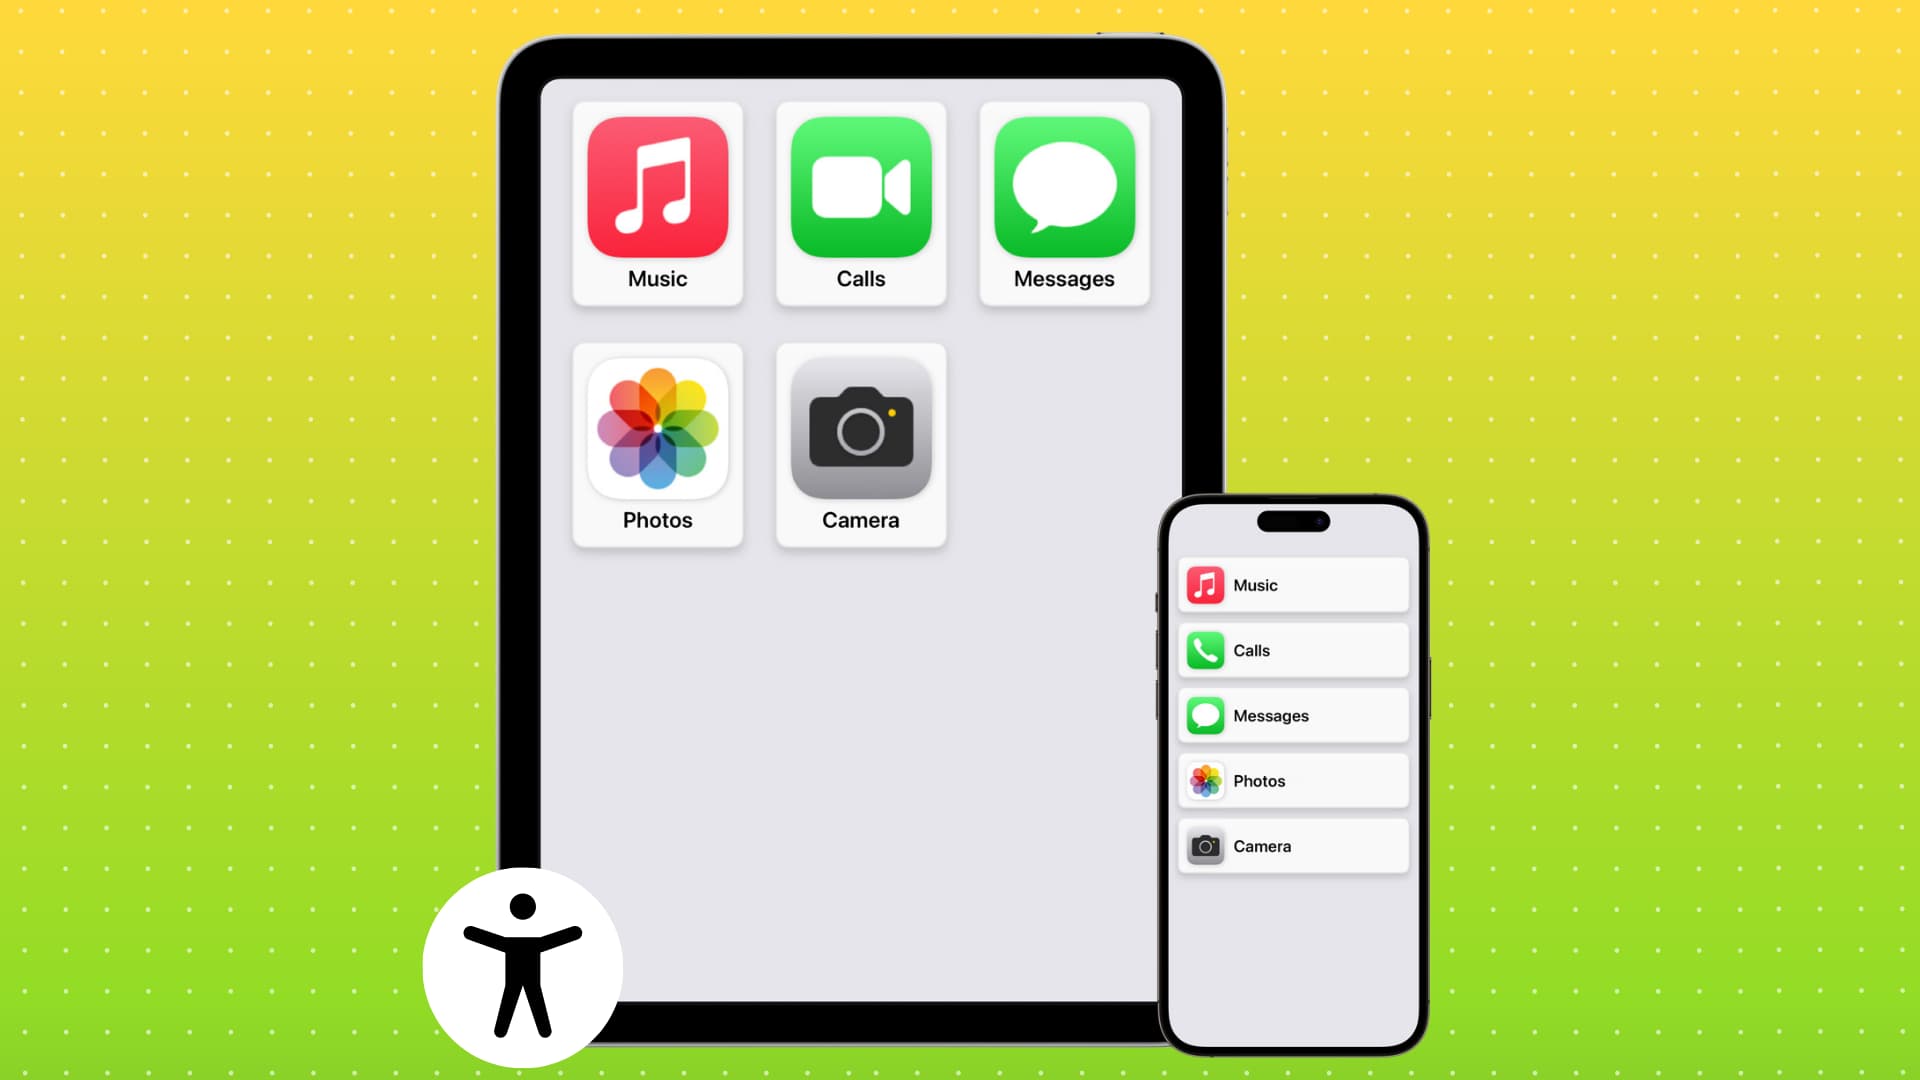
Assistive Access is an accessibility feature that changes the look and user interface of your device by showing only essential apps and very few operating system experiences. Furthermore, the added app can be distilled to only do specific things.
In other words, you (the person/caregiver who is setting up the iPhone or iPad for someone with a cognitive disability) can choose which apps to show during Assistive Access. You can also choose to enable only certain elements of an app. For instance, you can set the Camera to only take selfies and not record videos or set the Music app to show just a chosen playlist.

The apps are redesigned to include fewer features and a larger interface, making it easier for people with cognitive disabilities to see and interact with their iPhone or iPad for essential activities like making phone calls, listening to music, and capturing memories through photos and videos.
Why use Assistive Access
With countless features and apps, your iPhone or iPad is like a supercomputer in your palm. But not everyone needs all those features!
For some, navigating numerous app icons, Home Screen pages, settings, menus, notifications, and more can be overwhelming. Assistive Access simplifies this by removing most of these elements and providing a streamlined interface for essential apps.
Per the FCC,
“Cognitive disabilities” is a term that refers to a broad range of conditions that include intellectual disability, autism spectrum disorders, severe, persistent mental illness, brain injury, stroke, Alzheimer’s disease, and other dementias.
Some individuals may find it challenging to use iOS and iPadOS in their original form, as the abundance of options can confuse them and make interacting with their iPhone or iPad difficult.
To address this, Apple’s Assistive Access transforms the standard iOS interface into a simplified package with only a few selected apps.
Additionally, I can also see this mode being helpful for older people like grandparents who may not have the above health conditions but can still benefit from a simple-to-use phone interface.
Before you turn on Assistive Access
Please follow these steps to ensure a smoother setup for Assistive Access, so you won’t need to interrupt the process to adjust its required settings. These recommendations will also make it easier for the person using Assistive Access on the iPhone or iPad.
- Add Face ID for the person who will use Assistive Access.
- Install the useful apps that the person will need during Assistive Access. This way, you can add them while following steps 7, 8, and 9 below.
- Save the phone number or/and FaceTime/iMessage email addresses of important people the person will communicate with.
- Set up Hey Siri using the person’s voice if they plan on using hands-free Siri during Assistive Access.
- Connect the iPhone or iPad to the appropriate Wi-Fi or cellular network.
- Turn off SIM PIN, as it blocks you from activating Assistive Access.
- Make sure the device uses a four or six-digit numeric passcode (like 3476 or 126789). You can do it from Settings > Face ID & Passcode > Change Passcode > Passcode Options > 4-Digit Numeric Code or 6-Digit Numeric Code. Assistive Access can’t be set up if your device uses a Custom Numeric Code or Custom Alphanumeric Code password.
Note: You can also turn the passcode off to make it even easier for the person to unlock their iPhone or iPad. However, this obviously comes with security drawbacks, as it would mean anyone could access the device.
Turn on and set up Assistive Access
1) Open the Settings app on an iPhone or iPad.
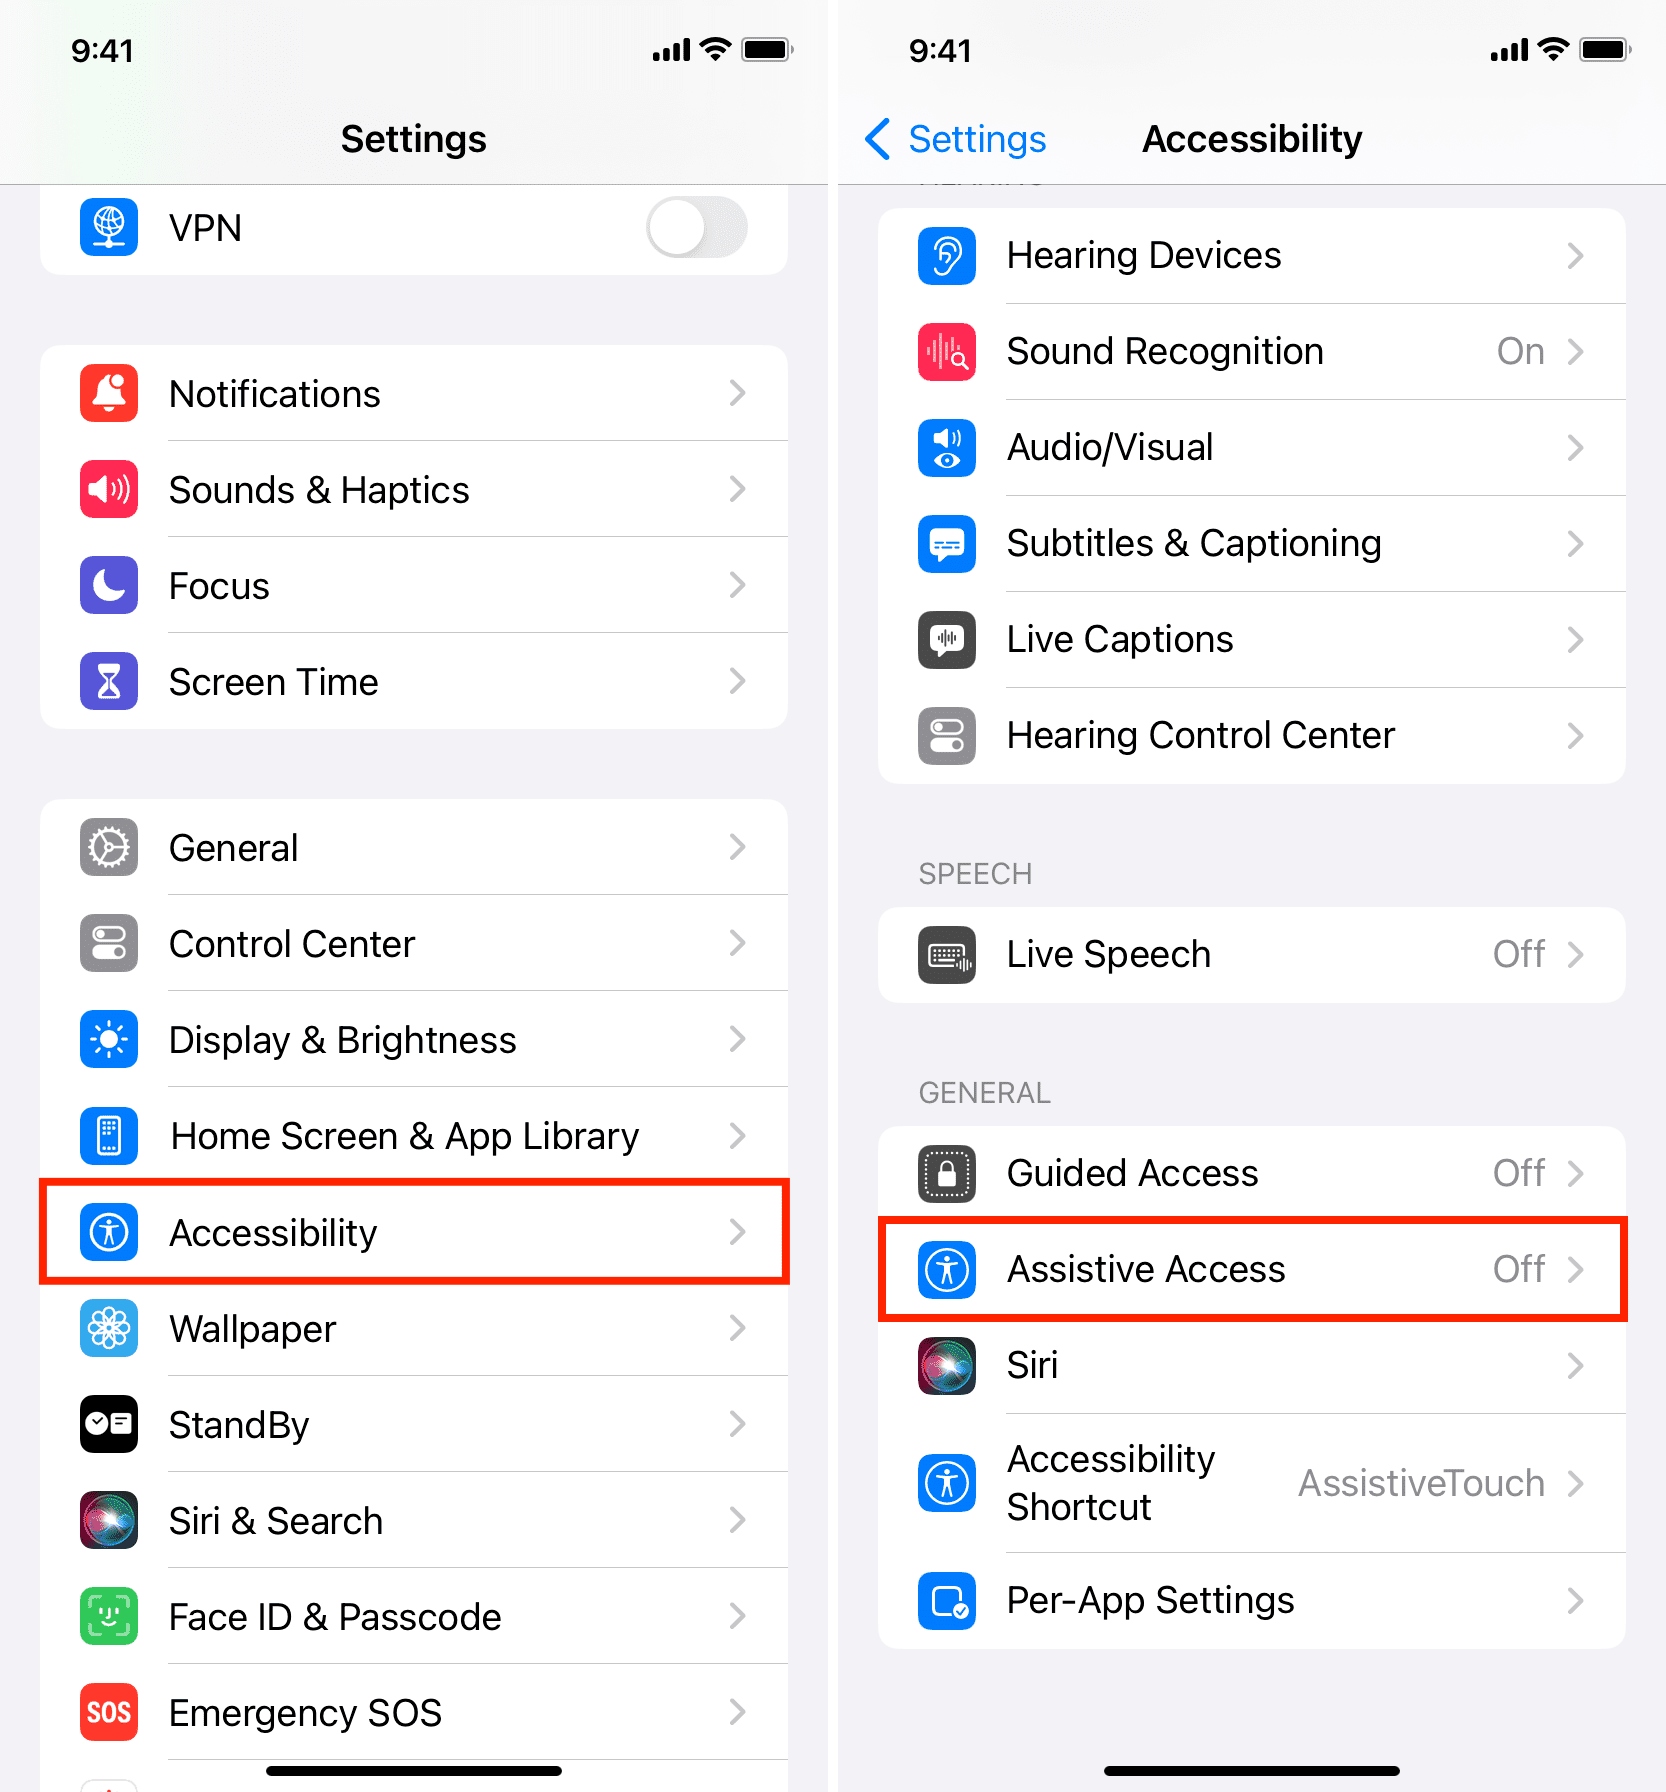
2) Select Accessibility.
3) Scroll down and tap Assistive Access.
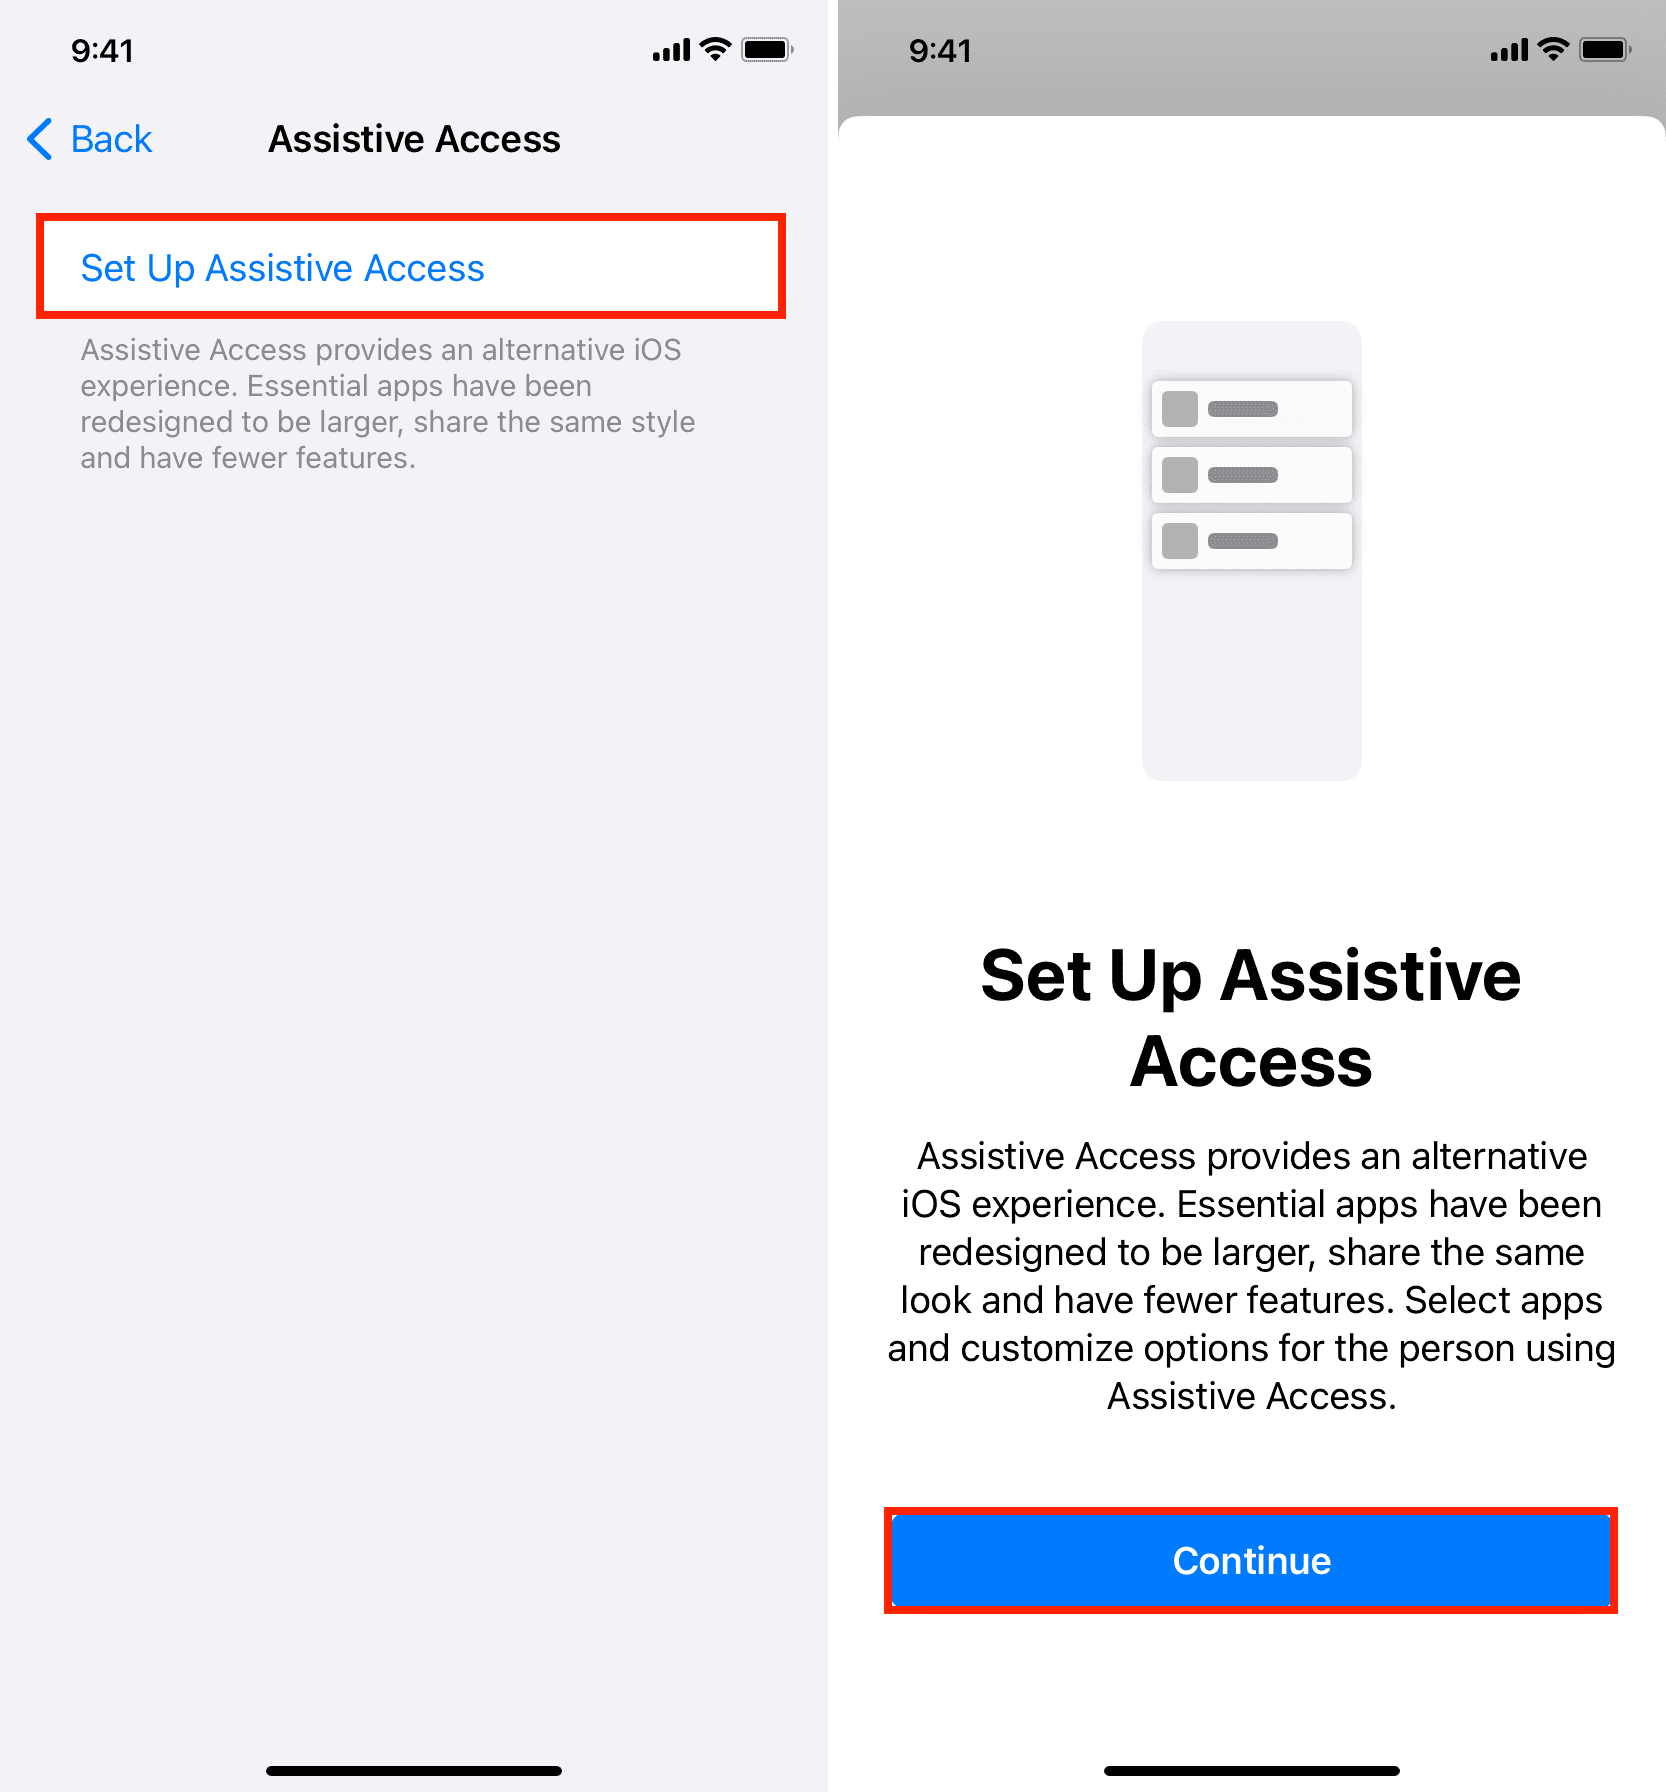
4) Tap Set Up Assistive Access and hit Continue.
5) Apple recommends having the Apple Account of the person who will be using this iPhone or iPad in Assistive Access mode. If another Apple ID is added, you can tap Change Apple Account and use their Apple ID on this device. Get help from this tutorial if needed: How to sign out of iCloud or Apple ID and sign in again
6) Next, choose the appearance for the Assistive Access Home Screen and its app layout by selecting Grids or Rows view, then hit Continue.

7) Now, here. is the screen where you will select the apps that will be available during Assistive Access. At the top, you’ll see apps that are optimized to work well during Assistive Access. You may find just Apple apps here, but third-party developers can support this experience in their apps. Under optimized apps, you’ll see all other apps that are not optimized for Assistive Access but can still be added and used during Assistive Access.
To start, tap the green plus button (+) for the first app you want to add to Assistive Access. For the purpose of this tutorial, I’m selecting Messages.
8) After tapping the green plus button, you see the screen to configure settings for this app. As for Messages, you can decide if you want to allow texts only from favorites, contacts, selected people, or everyone. Similarly, you can choose to turn on the ability to hear messages and conversation details.

9) Follow steps 7 and 8 to add more apps—you should be able to tweak most of their settings.
Tip: The whole point of using Assistive Access is to simplify things and make it easier to use the iPhone or iPad, so try not to add too many apps or enable a bunch of features. Stick to adding just things that the user will really need.
10) Once you have added the necessary apps for Assistive Access, tap Continue.

11) Go through the “Using Assistive Access” facts and convey them to the person who will use this iPhone or iPad with Assistive Access. For instance, tell them they can triple-click the iPhone side button to access emergency calling. After that, tap Continue.
12) Next, make sure the person who will use this device knows its passcode (if set) and that their Face ID is added. After that, hit Continue again.
13) Navigate to set the Assistive Access passcode. It can be different from the main iPhone or iPad passcode. On the next screen, you can also enter the Apple Account and its password so that it becomes easier to reset your Assistive Access passcode in case you forget it.

14) Finally, tap Start Using Assistive Access and type the Assistive Access passcode you set in step 13.

Your iPhone or iPad will show a black screen with the text “Entering Assistive Access.” In a few seconds, you’ll see your iPhone or iPad in Assistive Access mode.
Using Assistive Access
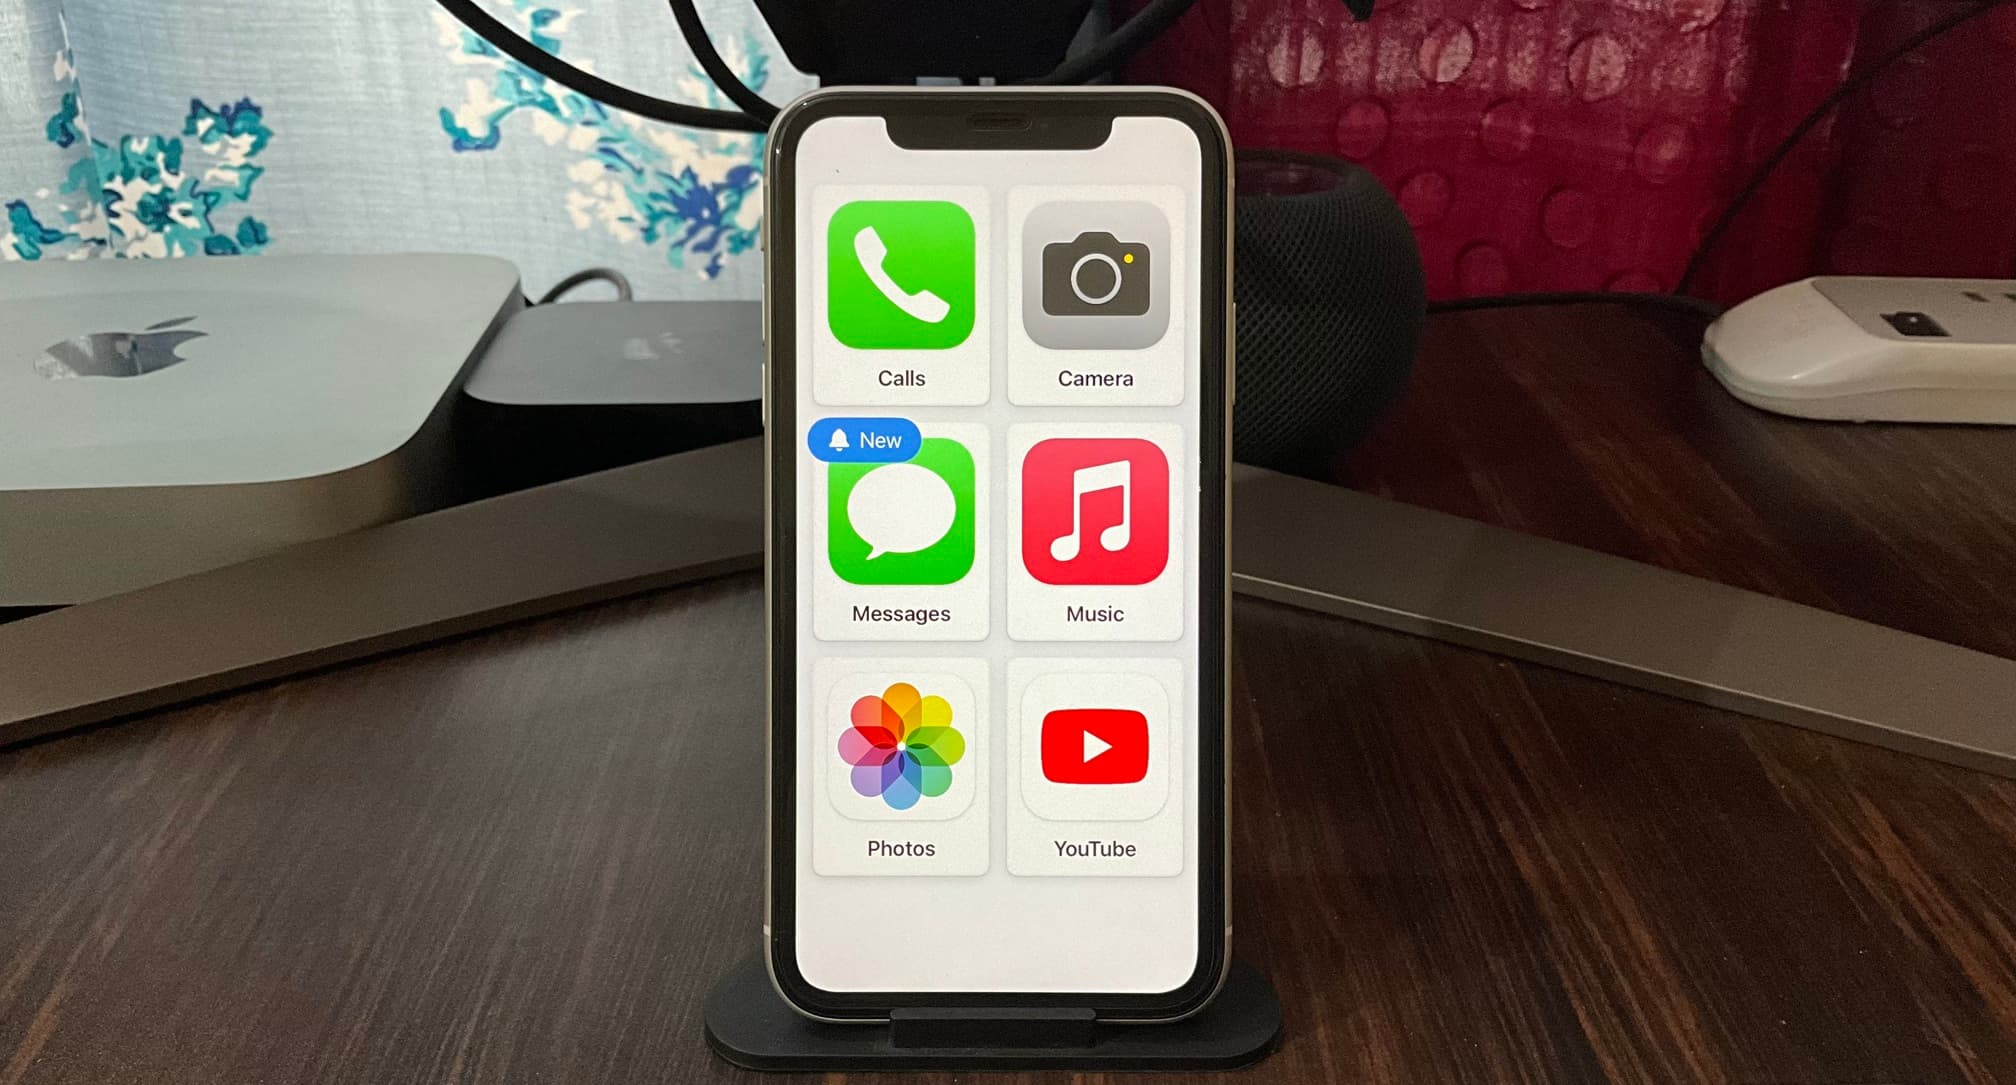
Once you enter Assistive Access, you’ll notice that the entire operating system (iOS or iPadOS) has been simplified into a basic, easy-to-use interface. It will have only those apps that you added while setting up Assistive Access.
To use an app, simply tap its icon.
You’ll notice straightforward action buttons and a large, prominent Back button.
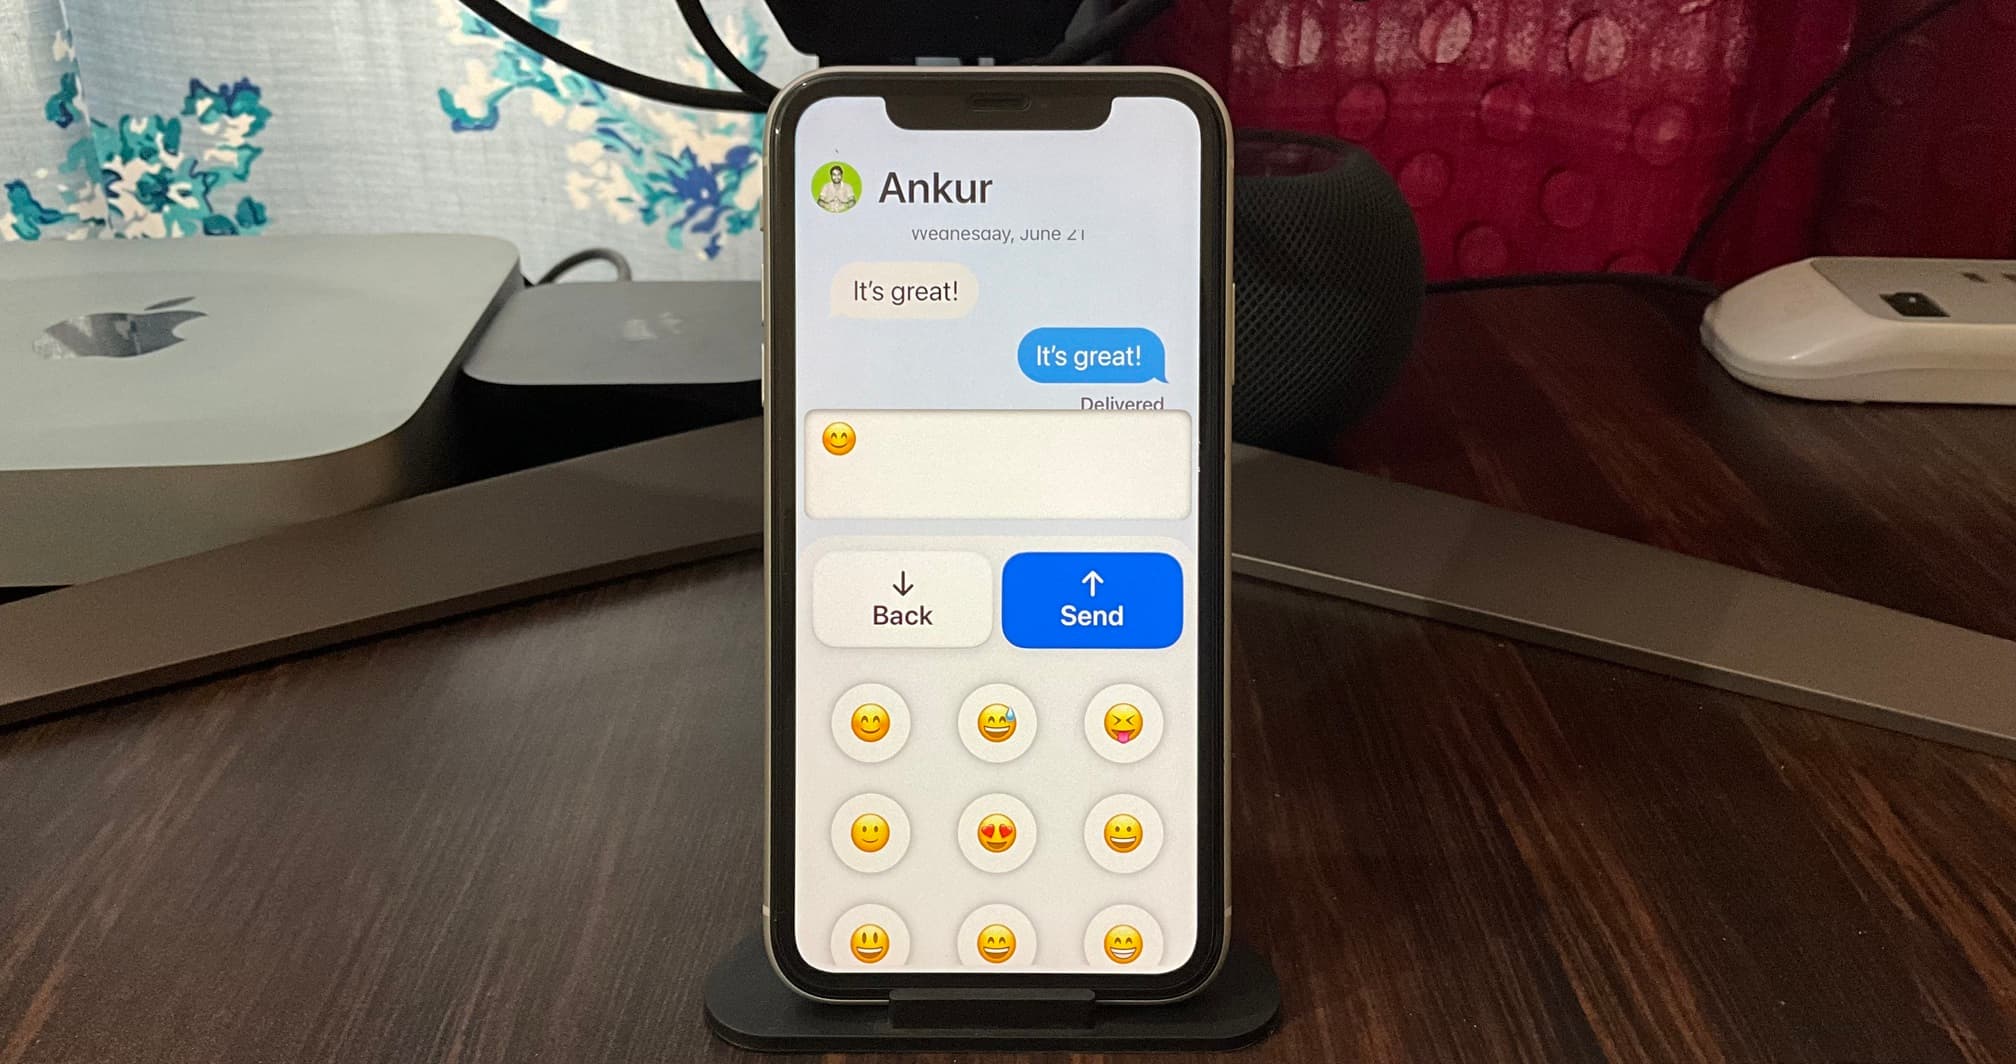
If you open Messages and go inside a conversation, you’ll see a big box to enter text. Once you tap it, there are enlarged buttons to enter an emoji, record a video selfie, or use the standard keyboard. Once the message is composed, simply tap the huge Send button.
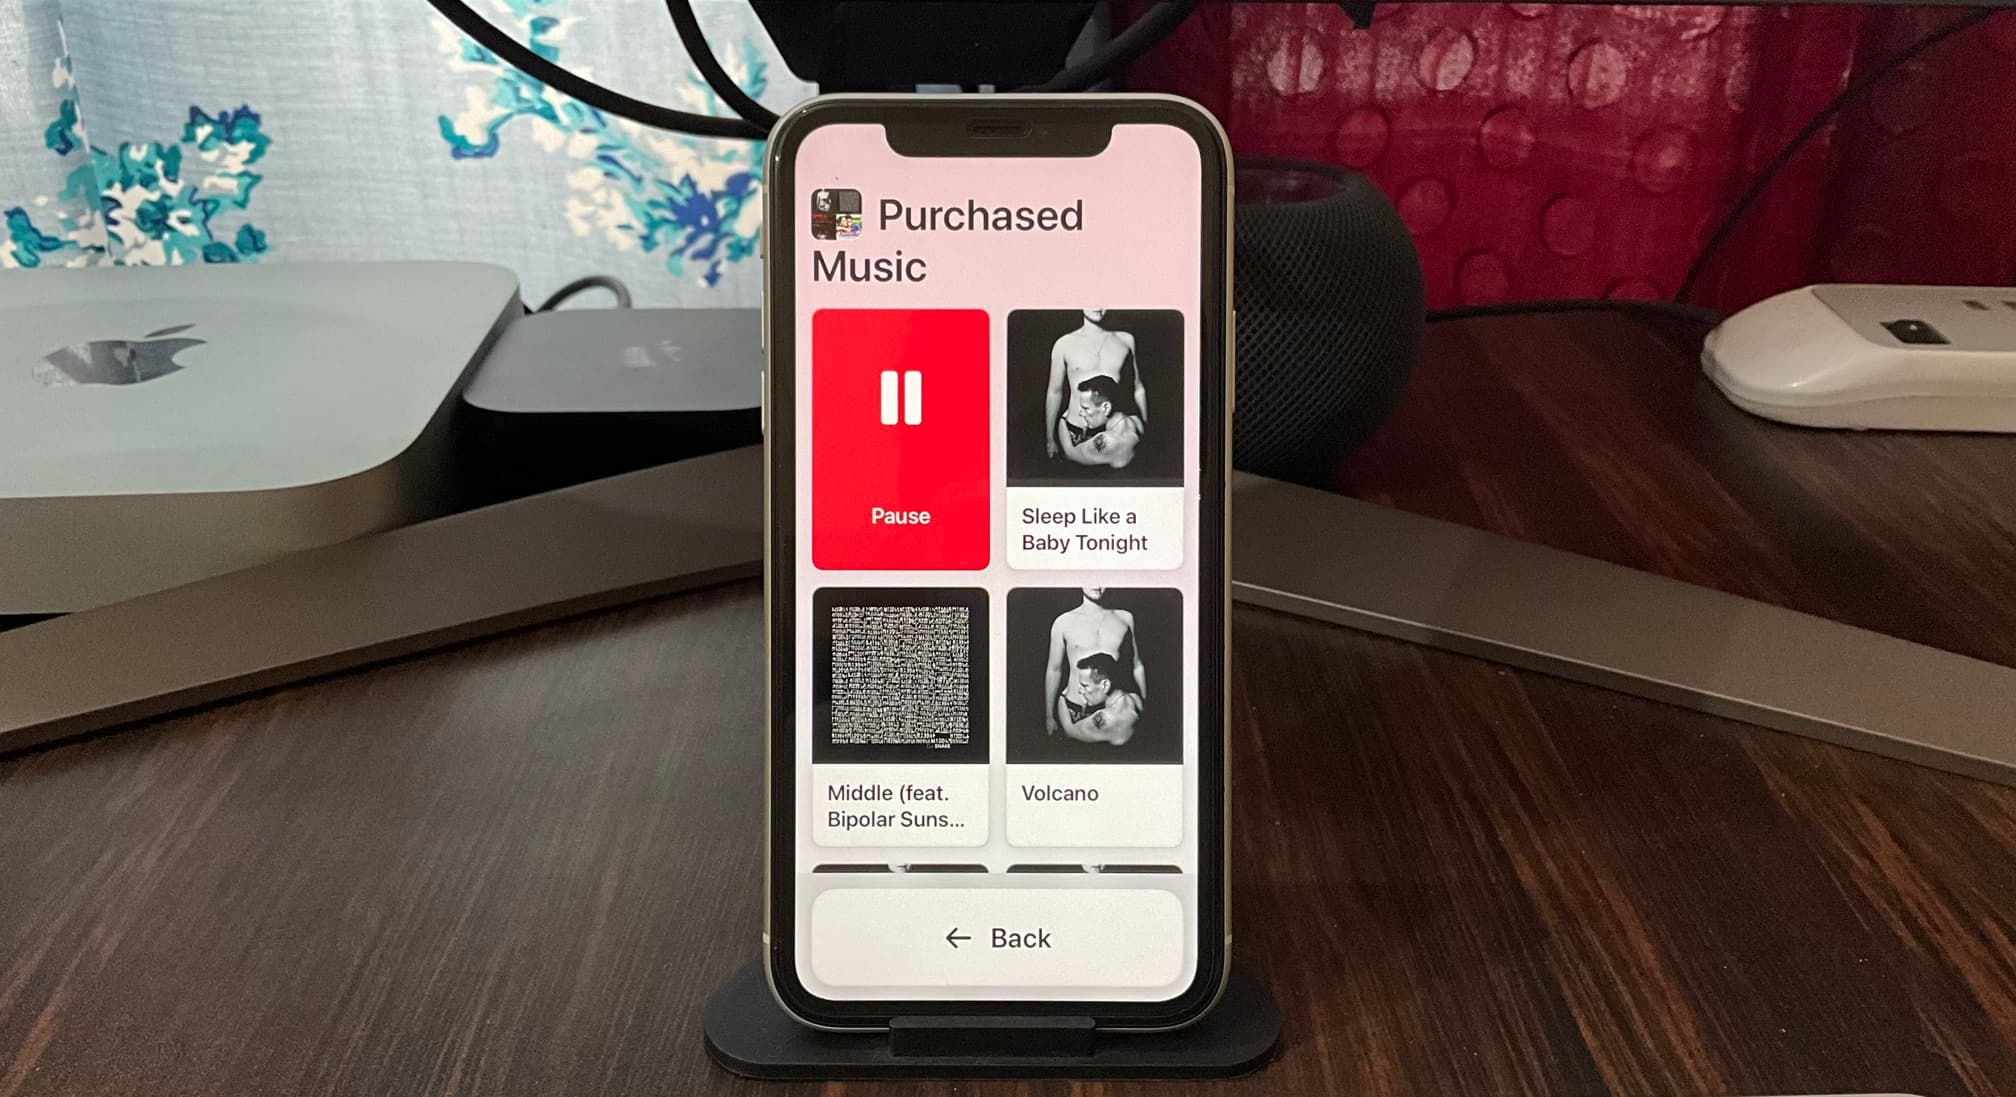
Similarly, the Music app displays songs with a large album cover, and tapping one starts playing it. There isn’t a now-playing screen, but you have a huge Play/Pause button.
Using non-optimized apps
If an app is not optimized for Assistive Access, it will still work and appear as it normally would, but in a smaller window to accommodate the Back button. Here’s how the YouTube app looks: the Back button will remain visible even in full-screen mode.

New texts
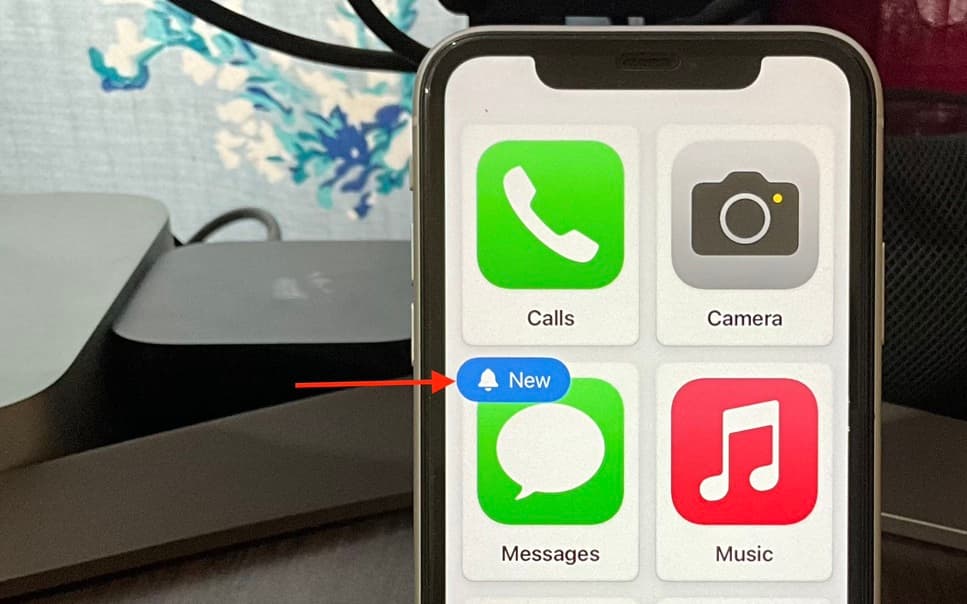
When there is a new or unread message, the word New with a bell icon appears on the Messages app icon as well as on the Lock Screen.
Lock your iPhone or iPad
During Assistive Access, you can press the iPhone right side button or the iPad top button to lock it.
Unlock your iPhone or iPad
Simply tap the screen once or press the iPhone side button or iPad top button, and your device should unlock by Face ID. Next, tap the big Open button.
If for some reason Face ID doesn’t work, hit Tap > Tap > Open and enter the iPhone or iPad’s numeric passcode (not the Assistive Access passcode).

See the current time
The familiar top status bar is absent when your iPhone or iPad is in Assistive Access mode. To check the time, first lock the device. Then, wake it with a tap, and the current time will appear on the Lock Screen.
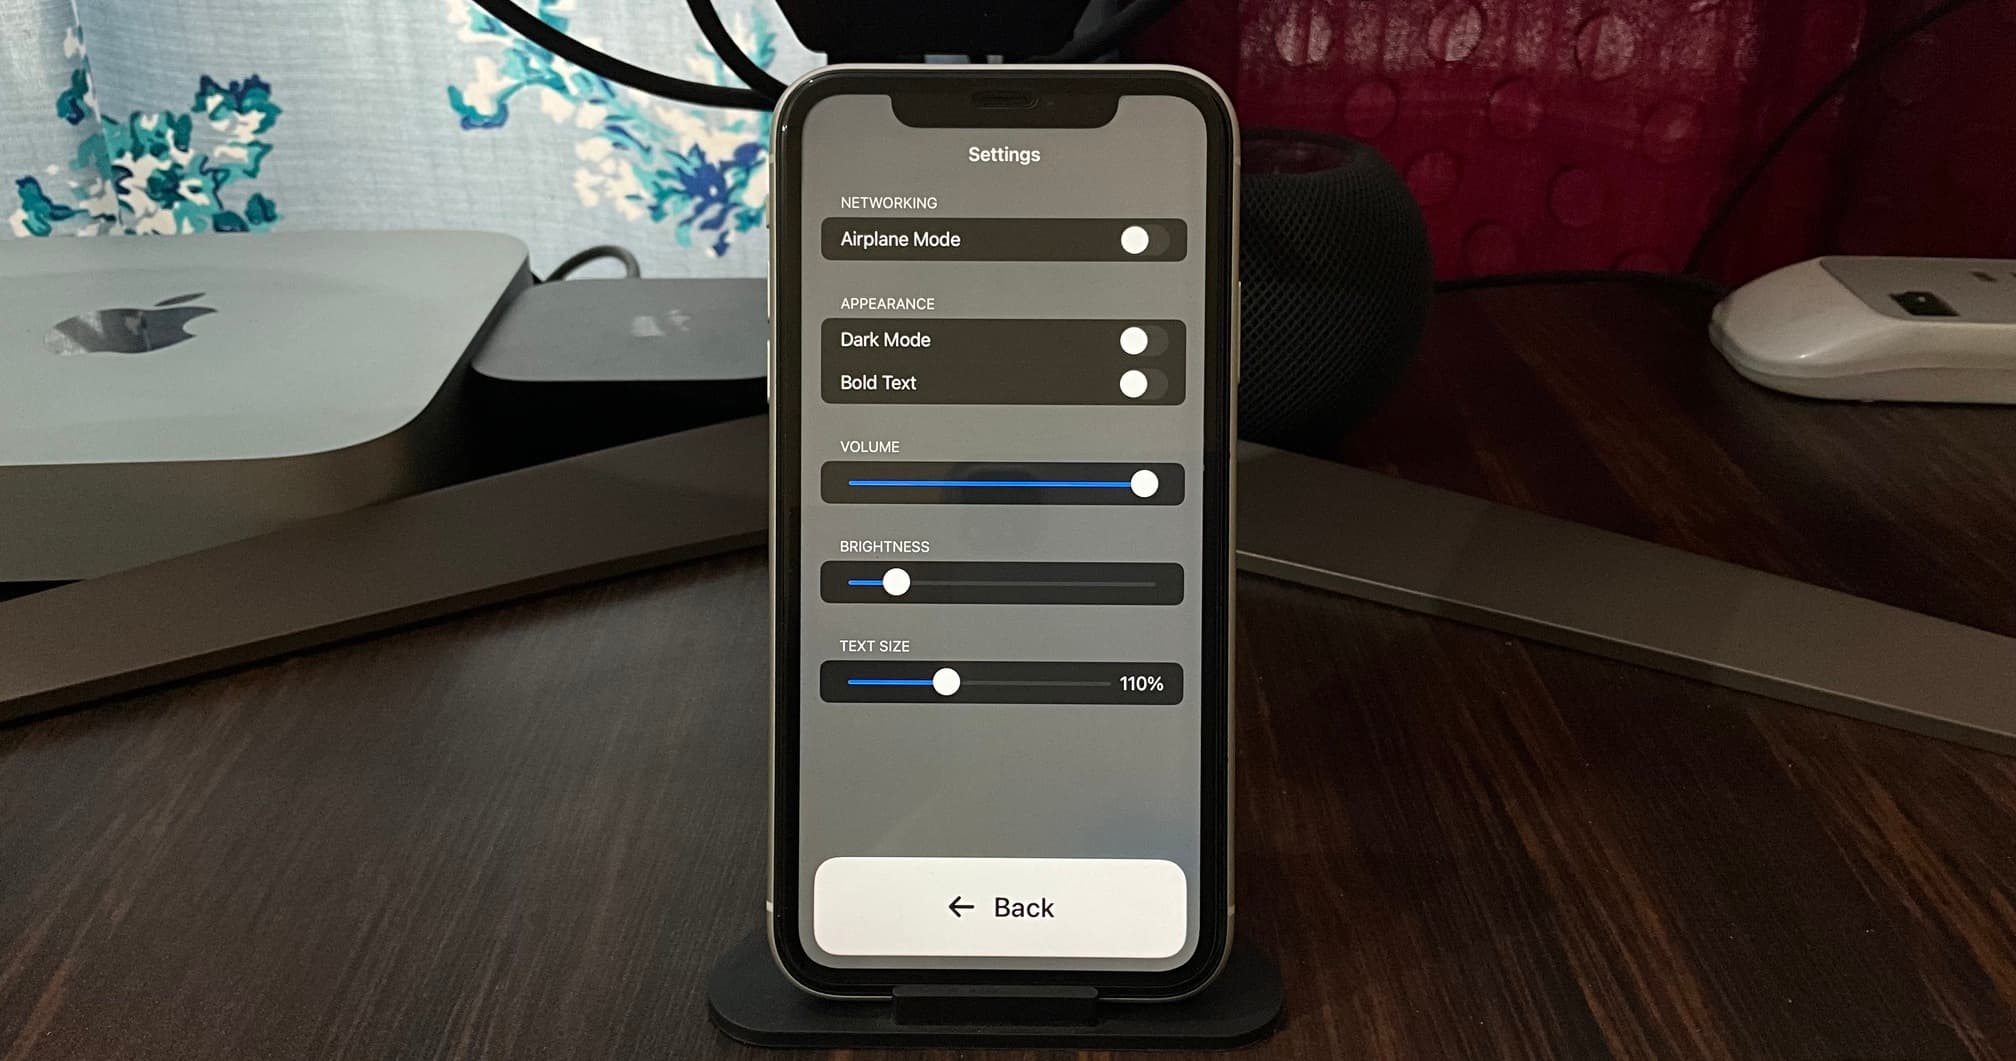
Change basic Assistive Access settings
A few quick settings can be changed without exiting Assistive Access mode.
1) Triple-press the iPhone side button or iPad’s top button.
2) Tap Settings from the menu and enter your Assistive Access passcode.
3) From here, you can:
- Change the text size
- Toggle Airplane mode on or off
- Switch to Dark Mode
- Change volume
- Adjust brightness
- And turn off your iPhone
After making the adjustments, tap the Back button to return to the Assistive Access Home Screen.
Access emergency options during Assistive Access
Triple-press the iPhone side button or iPad top button and tap Emergency. From here, you can use the keypad and the call button or tap Medical ID to access the health information of that user.

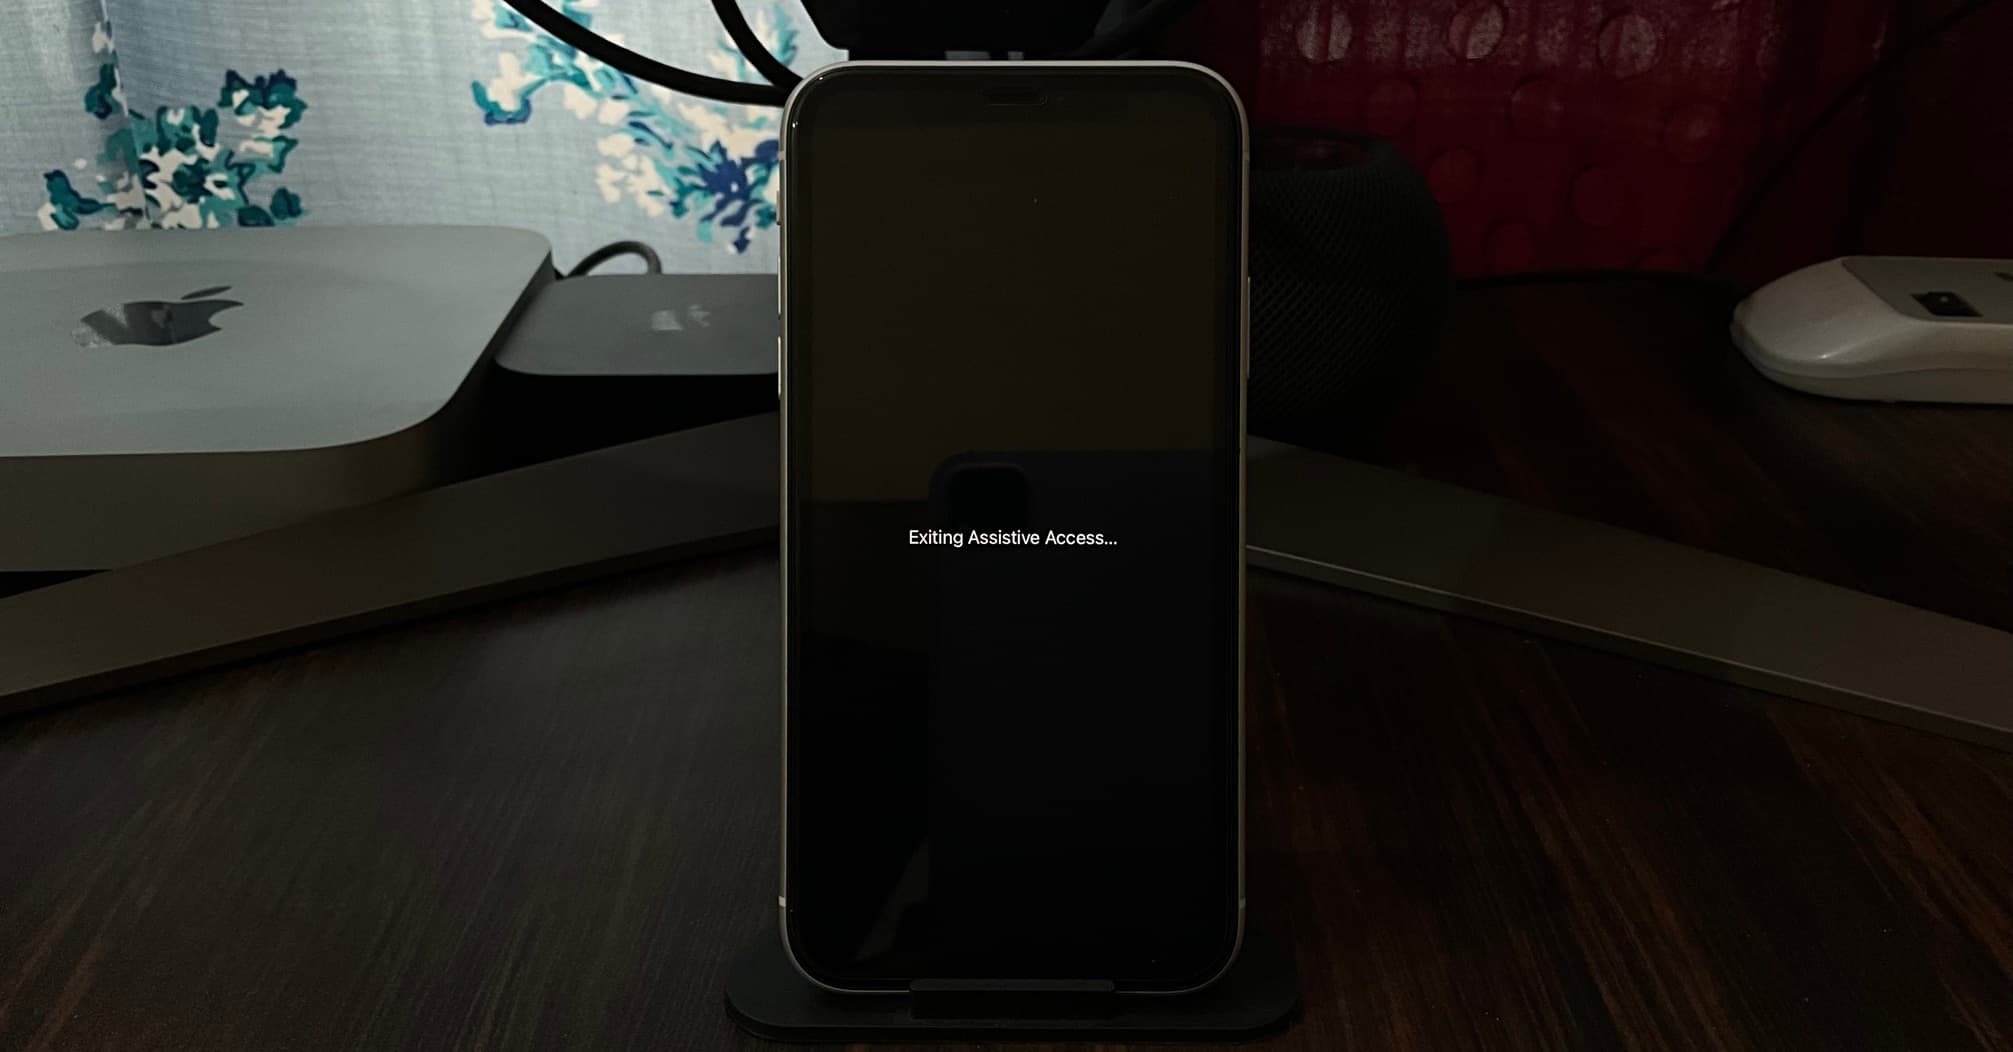
Exit Assistive Access mode
You’ll have to exit Assistive Access mode to see the battery percentage (until you add it – explained below), update the software, add more apps to Assistive Access, tweak options for existing apps added to Assistive Access, or simply use your iPhone or iPad in its original form.
To exit Assistive Access:
1) Triple-press the iPhone side button or iPad top button.
2) Tap Exit Assistive Access.
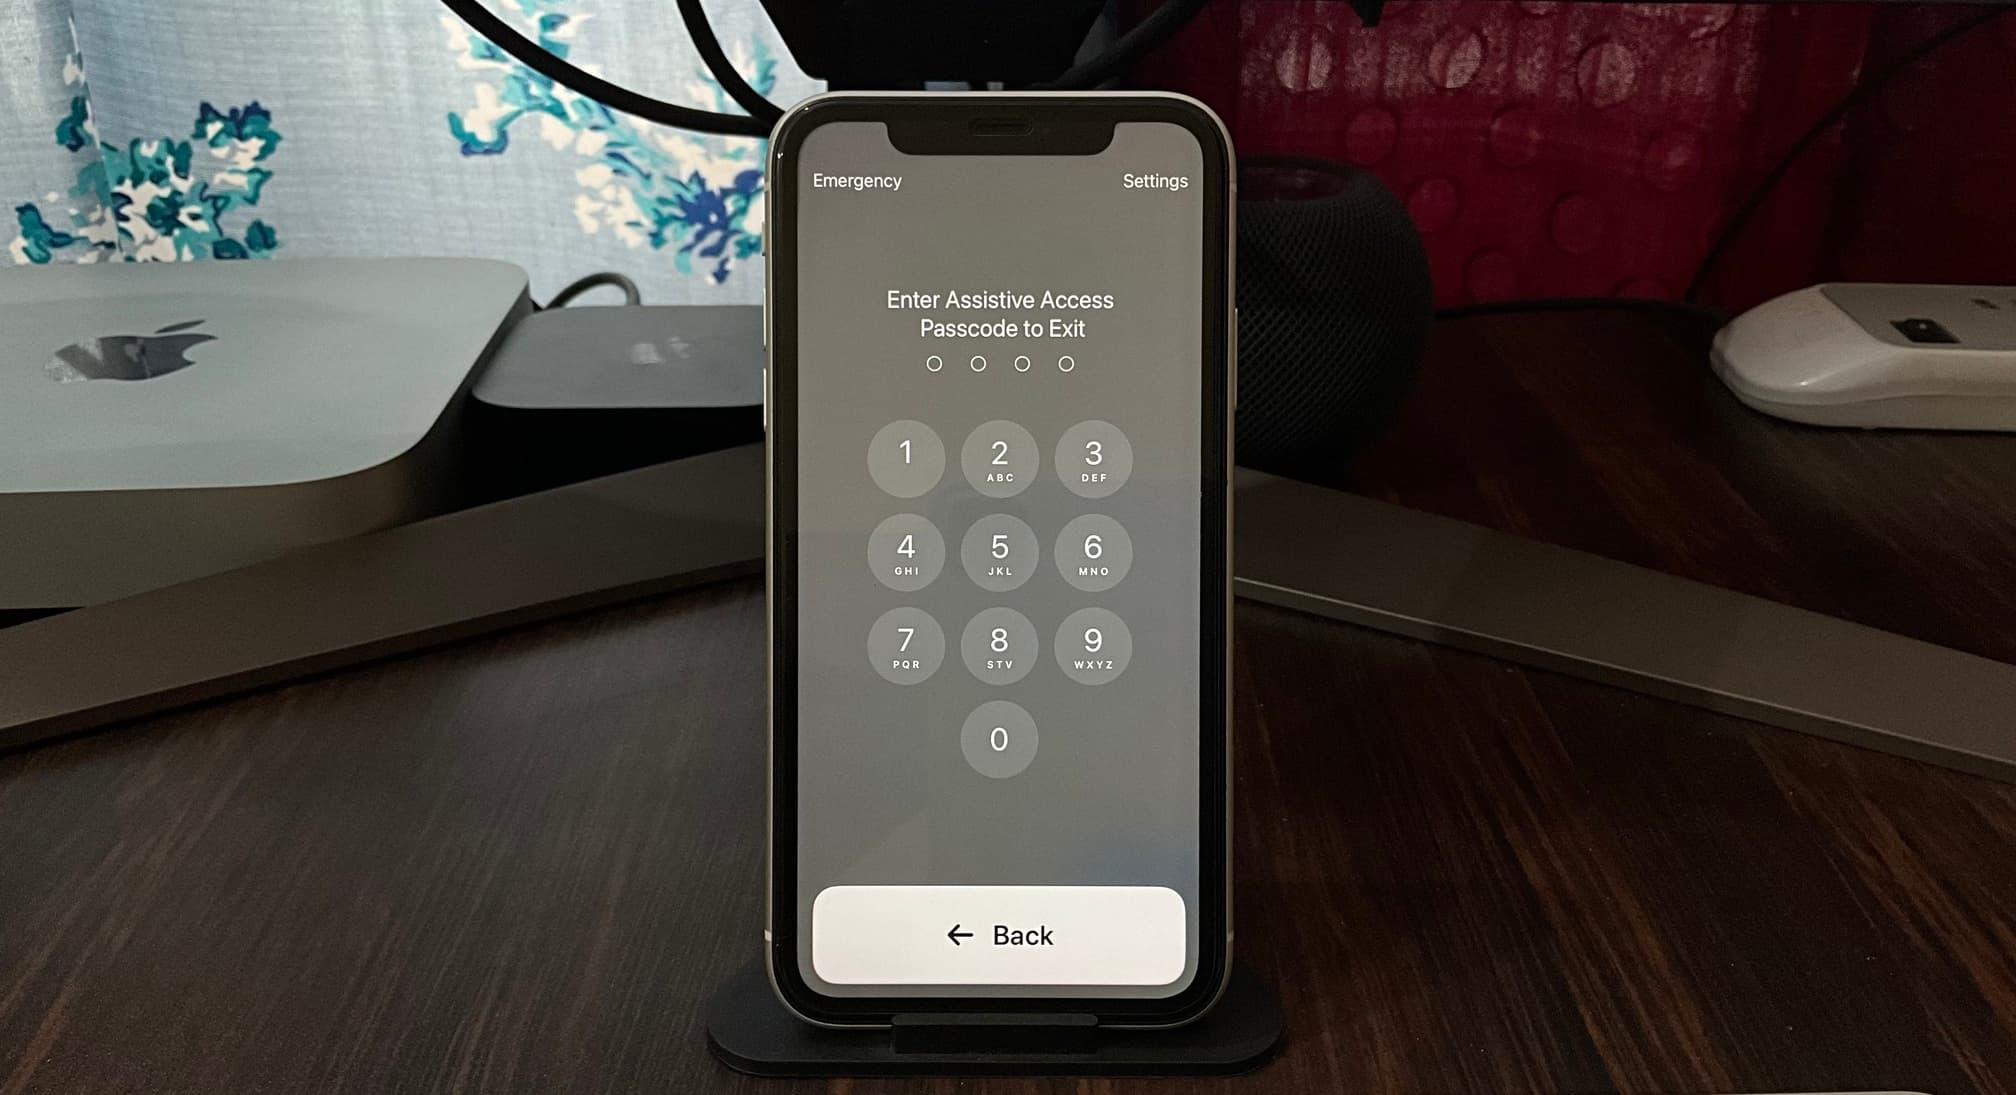
3) Enter the four-digit Assistive Access passcode (not the iPhone or iPad device passcode). In a few seconds, your device will exit Assistive Access and show the standard Lock Screen.
Add or remove apps and change settings
After you exit Assistive Access mode, open the Settings app on your iPhone or iPad and go to Accessibility > Assistive Access.

From here, you can:
- Start Assistive Access once again.
- Customize options for added apps.
- Tap Manage Apps to add more apps to Assistive Access or remove existing ones.
- Change the Home Screen and app options style (Rows or Grids).
- Add Lock Screen wallpaper.
- Block volume buttons.
- Allow enabling silent mode.
- Choose to show or hide time on the Lock Screen.
- Show the iPhone or iPad battery icon on the Assistive Access Home Screen.
- Allow notification badges.
- Allow Siri during Assistive Access.
- Tap Passcode Settings to change the Assistive Access passcode.
- Finally, you can tap Reset Assistive Access to start over with this accessibility feature.
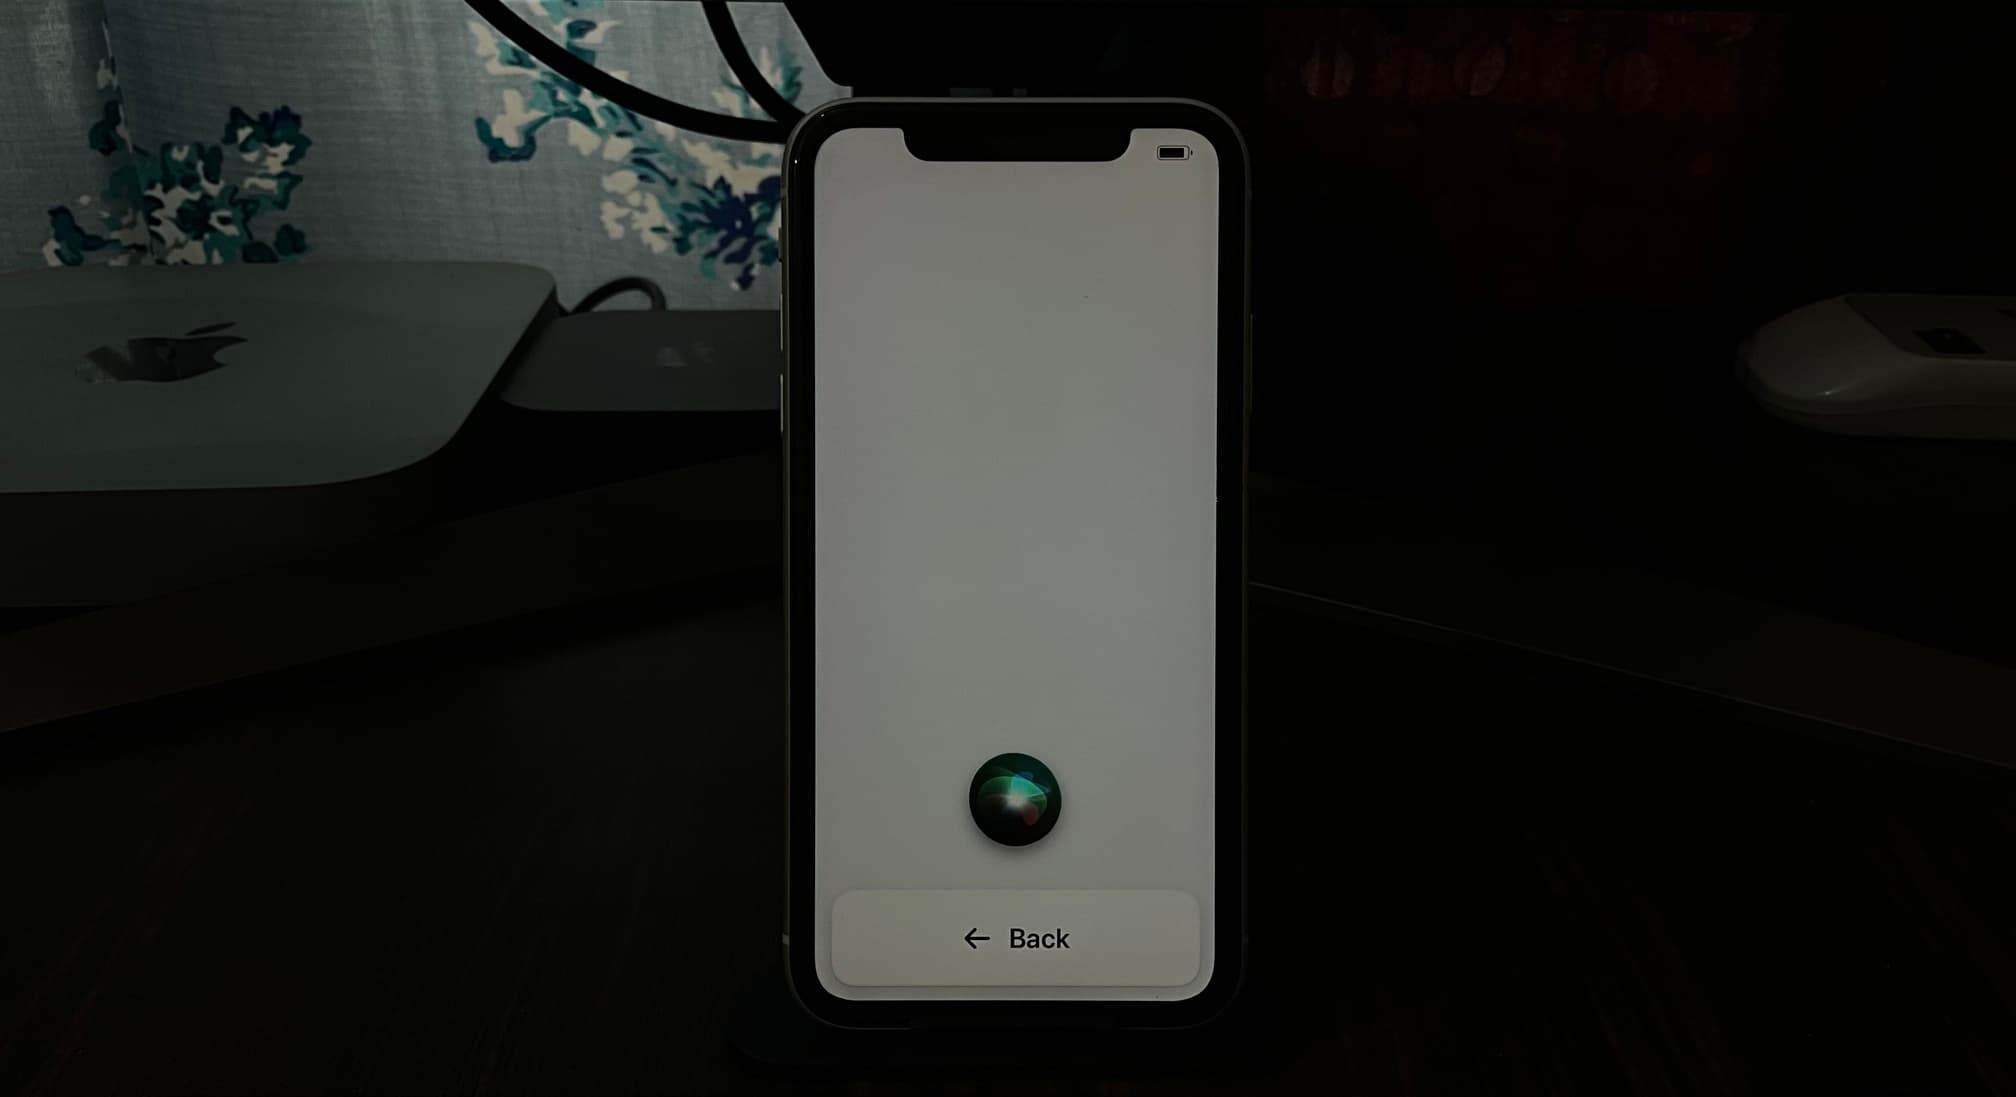
Using Siri during Assistive Access
First, turn on Siri by going to Settings > Accessibility > Assistive Access > Set Up Siri or Allow Siri.
When your device is in Assistive Access mode, Siri can be activated by pressing the side/top button and/or saying Hey Siri.
Seeing an empty white screen during Assistive Access?
You may see an empty white Home Screen in Assistive Access after adjusting its settings or going in and out of it multiple times.
To fix this, exit Assistive Access and restart your iPhone or iPad. After that, re-enter Assistive Access, and it should no longer show the empty Home Screen.
If this behavior continues, exit Assistive Access back to your normal iPhone or iPad Home Screen. From here, navigate to Settings > General > Software Update and get the latest version of iOS or iPadOS for your device.

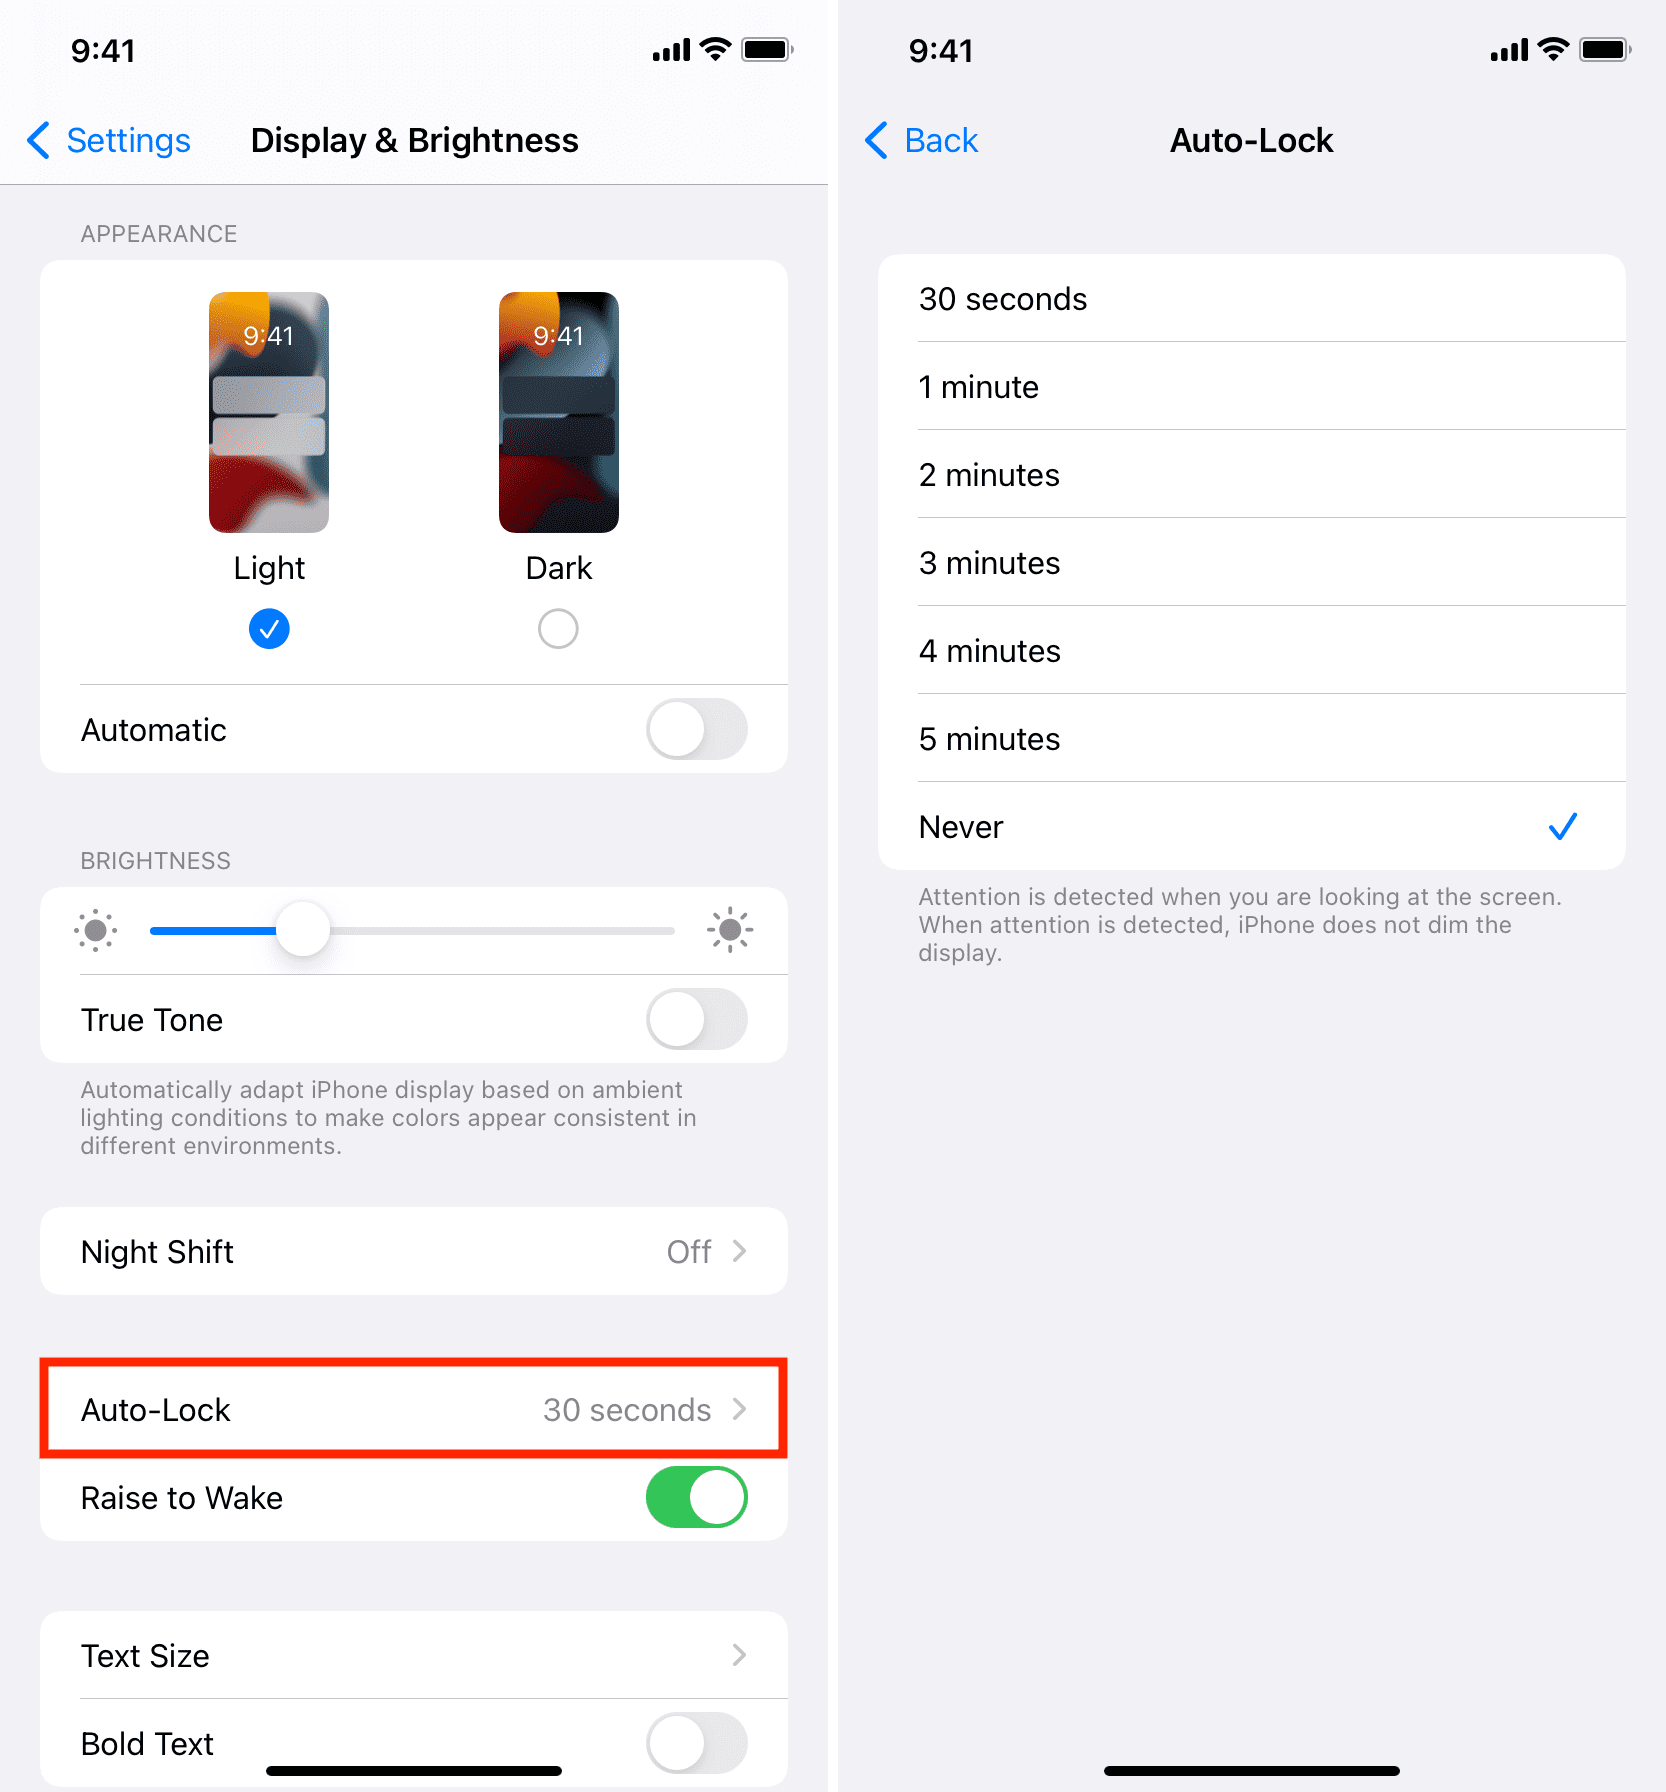
Stop Assistive Access from auto-locking or locking too soon
Assistive Access will lock after inactivity. I also noticed it getting auto-locked when I was watching YouTube in Assistive Access mode.
The period after which Assistive Access locks automatically is the same as the Auto-Lock setting on that iPhone or iPad when it’s not in Assistive Access mode. If you don’t want the Assistive Access screen to lock automatically or want to extend its auto-lock time, here’s how to do that:
1) Exit Assistive Access.
2) Go inside your iPhone or iPad and tap Settings > Display & Brightness.
3) Tap Auto-Lock.
4) Set it to Never or choose a longer duration. The maximum you can go on an iPhone is 5 minutes, and on an iPad, it’s 15 minutes.
More accessibility tips: