Learn how to install macOS Sequoia on a different volume (disk partition) and have two macOS versions simultaneously on your Mac.

If you want to use macOS Sequoia without compromising your current setup, you can do so by creating a separate volume (commonly referred to as a partition) on your Mac’s internal disk and then installing macOS Sequoia on that second volume.
This will allow you to explore its features while keeping your existing system intact. You’ll have macOS Sequoia on the new partition and the current macOS version (be it the predecessor macOS Sonoma or the successor macOS Tahoe) on the main volume. In fact, you can even use this tip to have two copies of macOS Sequoia on the same Mac.
However, note that you can only do this if your Mac is compatible with macOS Sequoia.
Also see: How to install macOS Tahoe 26 on a different partition of your Mac
Breakdown of steps
Installing macOS Sequoia on a different partition of your Mac involves these steps:
- Creating a new volume (partition) on your Mac
- Getting the macOS Sequoia installer and installing it on the new volume
- Learning how to boot into either macOS Sequoia or your current macOS
Note: You’ll see the macOS Sonoma installer image in the screenshots below because we created this tutorial right on the day macOS Sequoia was released as a developer beta, and Apple had not yet updated the installer image. But apart from this minor difference, all screenshots and steps are correct.
Create a partition in your Mac’s internal drive for macOS Sequoia
We have a detailed tutorial explaining what a disk volume is and how to add, erase, or delete it. So, I will keep things brief and to the point here.
1) Open Disk Utility and select the internal disk from the left side.
2) Click the plus button for Volume from the top of the Disk Utility window or click Edit > Add APFS Volume from the menu bar.
3) Give this new volume a desired name. I’m going with Sequoia.
4) Set Format to APFS if it isn’t already.
Note: You can define the volume size by clicking Size Options, but that’s not necessary.
5) Finally, click Add > Done on the Operation Successful screen.

Install macOS Sequoia on a separate volume
1) To install macOS Sequoia, you obviously need to get its installer file (approximately 16 GB). There are a few easy ways to do that.
Method 1. From the App Store: Since this macOS version is already publicly available, search for it in the App Store and then click the “Get” button.

System Settings will open automatically, where you have to click Download.

macOS Sequoia will start downloading on your Mac. Wait for it to finish. In case the download disappears from System Settings, click “Get” again in App Store, followed by “Download” in System Settings, and your previous download should resume.

Method 2: Use Terminal to download the macOS Sequoia installer on your Mac. We have explained this in our post on creating a macOS Sequoia bootable USB installer and 3 ways to download macOS installer on your Mac.
Important: You’re ready to proceed once you have the macOS 15 installer in your Mac’s Launchpad (screenshot below) and the Applications folder. If you don’t see it here, you can’t proceed further.

2) Click the macOS Sequoia installer file from the Launchpad or the Applications folder.

3) Click Continue > Agree (if you do).

4) You’ll see all the available disks of your Mac. If not, click Show All Disks.

Now, select the volume you just created earlier and hit Continue. Don’t select the volume that already has your existing macOS installation.

5) Select a user as the owner/admin of the new macOS installation and hit Install. Note that you can only select an admin account here. Optionally, you can also choose to copy account settings.

6) Enter your admin password and hit Unlock if asked.

7) macOS will start the installation process. For the moment, you can use the computer, but I suggest not doing that so the installer can use all the processing power it needs.

After a while, your Mac will restart automatically, but if you’re working on the computer, it may not restart automatically. In that case, click Restart.

Now, your computer will close all applications and prepare itself to restart. You’ll see the black screen with an Apple logo . Your Mac will restart more than once in the process.
8) Once the installation is complete, your computer will boot up normally like a new, freshly out-of-the-box Mac. Select your country and complete the standard setup.

Must see: 40+ things I do after setting up my new Mac
How to boot into macOS Sequoia or the other macOS version on your Mac
You have now successfully installed macOS Sequoia on a separate volume of your Mac. And your existing macOS installation is already on your original volume. So, how do you boot into either one of them?
On Mac with Apple silicon
1) Click the Apple icon and choose Shut down if your Mac is powered on. Wait for about 30 seconds for it to shut down properly.
2) Press and hold the power button until you see the Loading startup options on the screen.
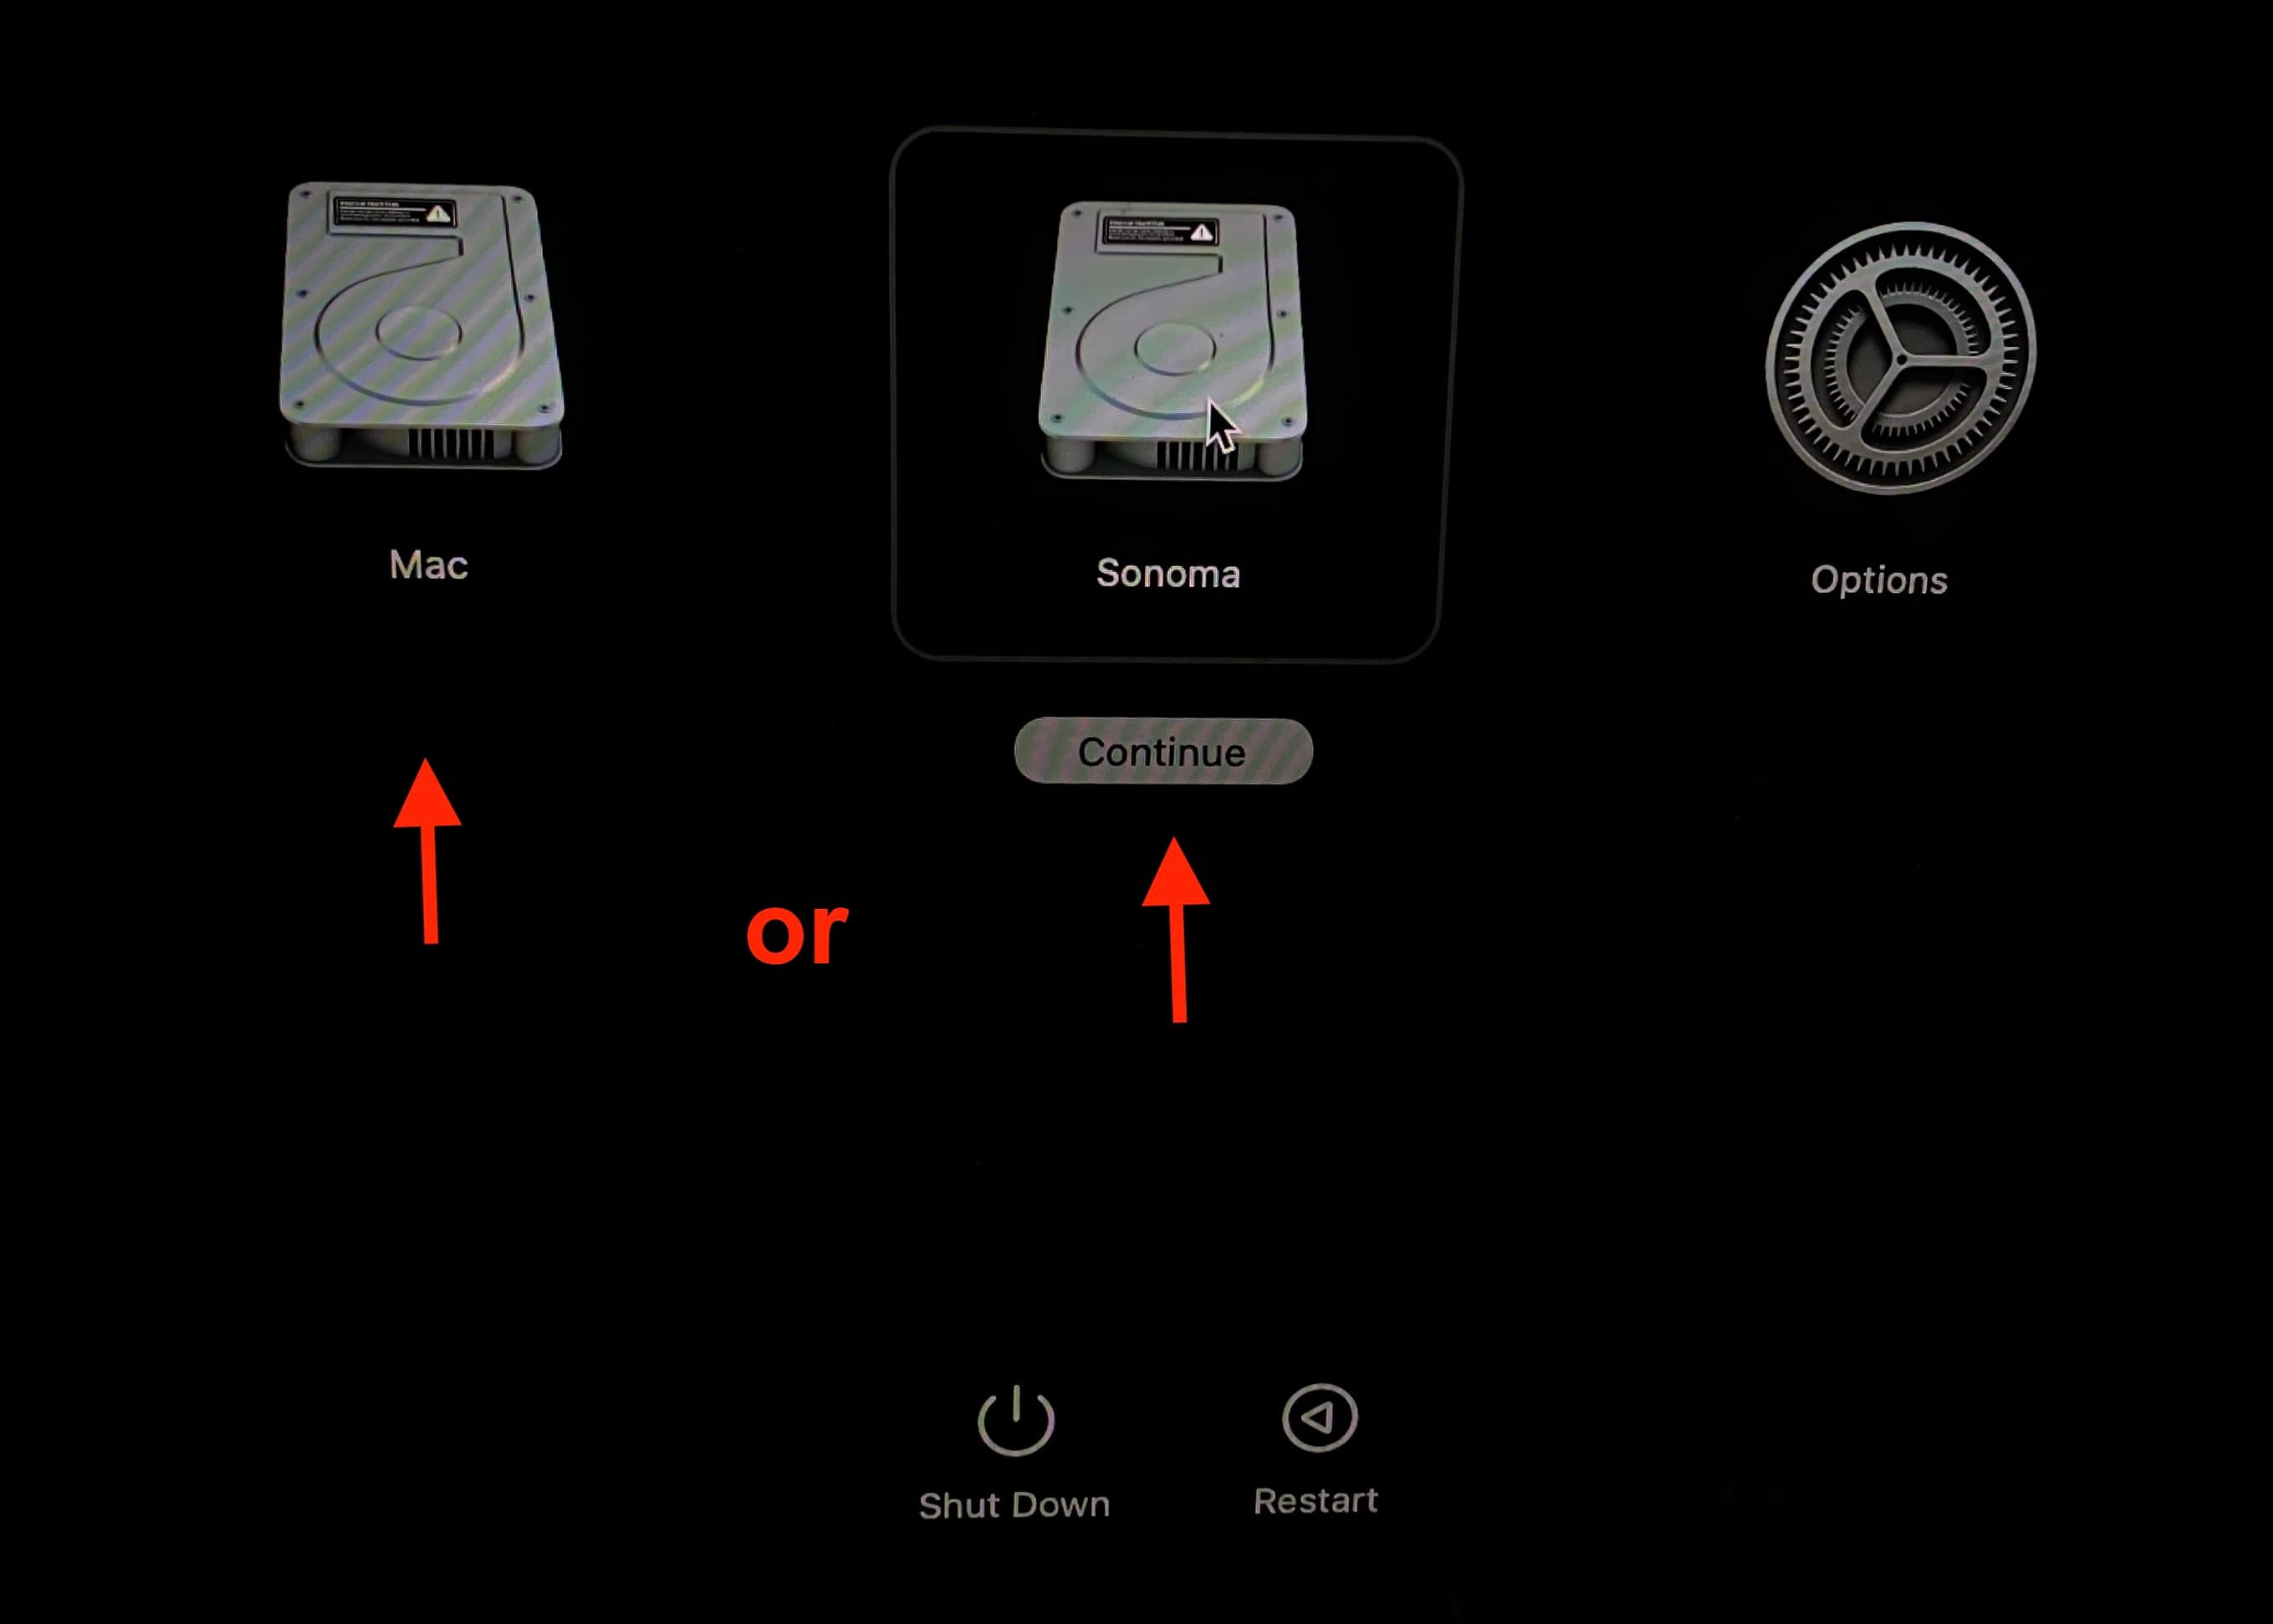
3) Select either your volume with the macOS Sequoia installation or the other macOS installation and hit Continue. Your Mac will boot into the operating system you choose.
On Mac with an Intel processor
Follow these steps to select the startup disk for your Intel Mac during boot. It requires you to turn off your Mac, press the power button, and immediately hold the Option key until you see the Startup Manager. From here, you can pick the startup disk.
Set a default startup disk
By selecting the desired startup disk, you can tell your Mac to always boot up automatically to either macOS Sequoia or the other macOS installation.
1) Open System Settings and go to General > Startup Disk.
2) Select a volume, use that disk’s admin password to unlock it, and click Restart.

From now on, when you press the power button once (and not press & hold it to see Startup Options), your Mac will automatically boot up into the selected startup disk.
If you see the macOS Recovery screen when you power on your Mac
Your Mac may show the macOS Recovery screen if it can’t decide which volume to boot into. You don’t have to follow it and reinstall macOS. Simply click the Apple icon in the top left corner and choose Restart. This time, your Mac should boot up into one of the volumes.
If it doesn’t and shows the macOS Recovery screen again, click the Apple icon once more and hit Startup Disk. Now, select a volume and boot into it.
And in the rare situation you repeatedly keep seeing the macOS Recovery screen, that means there is some issue with the installation. Go ahead and follow the on-screen prompts to reinstall macOS.
Also, check out: How to create a bootable USB installer for macOS Tahoe 26