In this Mac tutorial, we show you how to create a new volume using Disk Utility and, if required, erase or delete it.
The entire process is quick and happens without complications. Feel free to create volumes or get rid of them when no longer needed.
What’s a volume on Mac
The internal drive on your Mac running macOS High Sierra (10.13) or newer is in Apple File System (APFS) format. The drive can have more than one container or partition. And every container can have several volumes. The terms partition and volume appear the same, but they are different.
A drive partition is rigid (when creating a partition on your SSD or hard disk drive (HDD), you have to define the size of that partition, say 80 GB, and it can’t exceed that). Meanwhile, a volume is flexible and can use the free space of the APFS container as required.
Because of the above-mentioned size flexibility, for most work, including running different macOS versions, Apple recommends creating a new volume instead of creating a new partition.
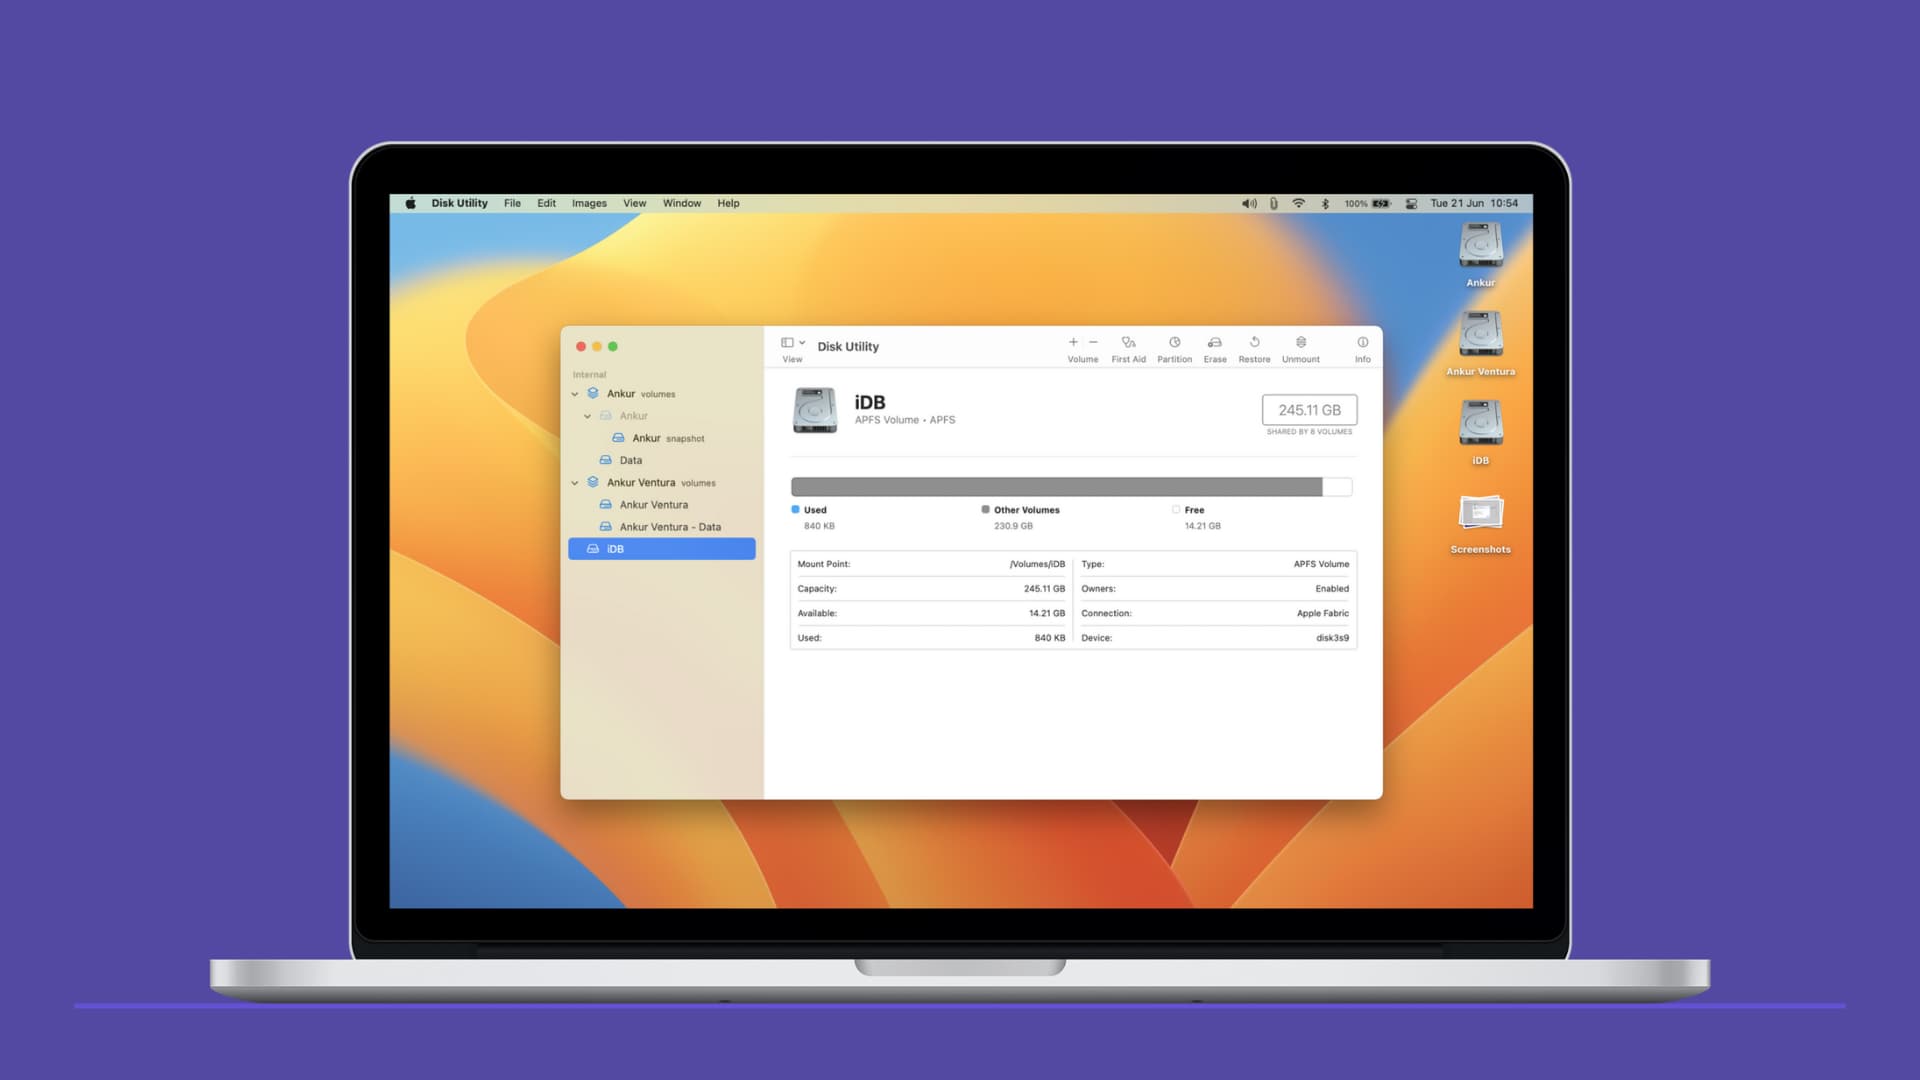
Existing volumes on your Mac
- Open the Disk Utility app on your Mac.
- In the left sidebar, you’ll see the volume group with the word volumes next to it. If you click the tiny arrow to expand it, you will see multiple volumes of that group. These will have your name or, by default, be called Macintosh HD (stores the system files) and Macintosh HD – Data (stores your data).
New volumes you create will be listed in this left sidebar of Disk Utility.
Use cases of a volume on Mac
Recently, we explained how to get macOS Tahoe on a different volume on Mac. In this, we showed how to create a volume on Mac’s internal drive and install macOS Tahoe on that second volume. As a result, you can use two macOS versions on the same Mac!
Similarly, if you want to run a developer or public beta of a macOS version or just want a different volume to store files, you have the flexibility to do so.
Prerequisite for creating a volume
To create a volume, your drive should be formatted as APFS. This file system is used by macOS 10.13 (released in 2017) and later. So, it shouldn’t be an issue on a recently purchased or updated Mac. Jump straight to the next heading.
However, macOS 10.12 (released in 2016) or earlier used Mac OS Extended. If your drive is formatted to Mac OS Extended or something else, you’ll have to reformat it to APFS.
Note: Formatting an external drive to APFS isn’t a big undertaking, and you can do that in Disk Utility. However, if your internal drive (Mac’s main drive) is Mac OS Extended, simply update to macOS High Sierra (10.13) or later. You don’t have the option to opt out of using APFS in regular (non-beta) versions of macOS High Sierra or later.
Must read: What you need to know about transitioning to APFS in macOS High Sierra
How to add a volume on Mac
Follow these steps to add a new APFS volume using Disk Utility on your Mac:
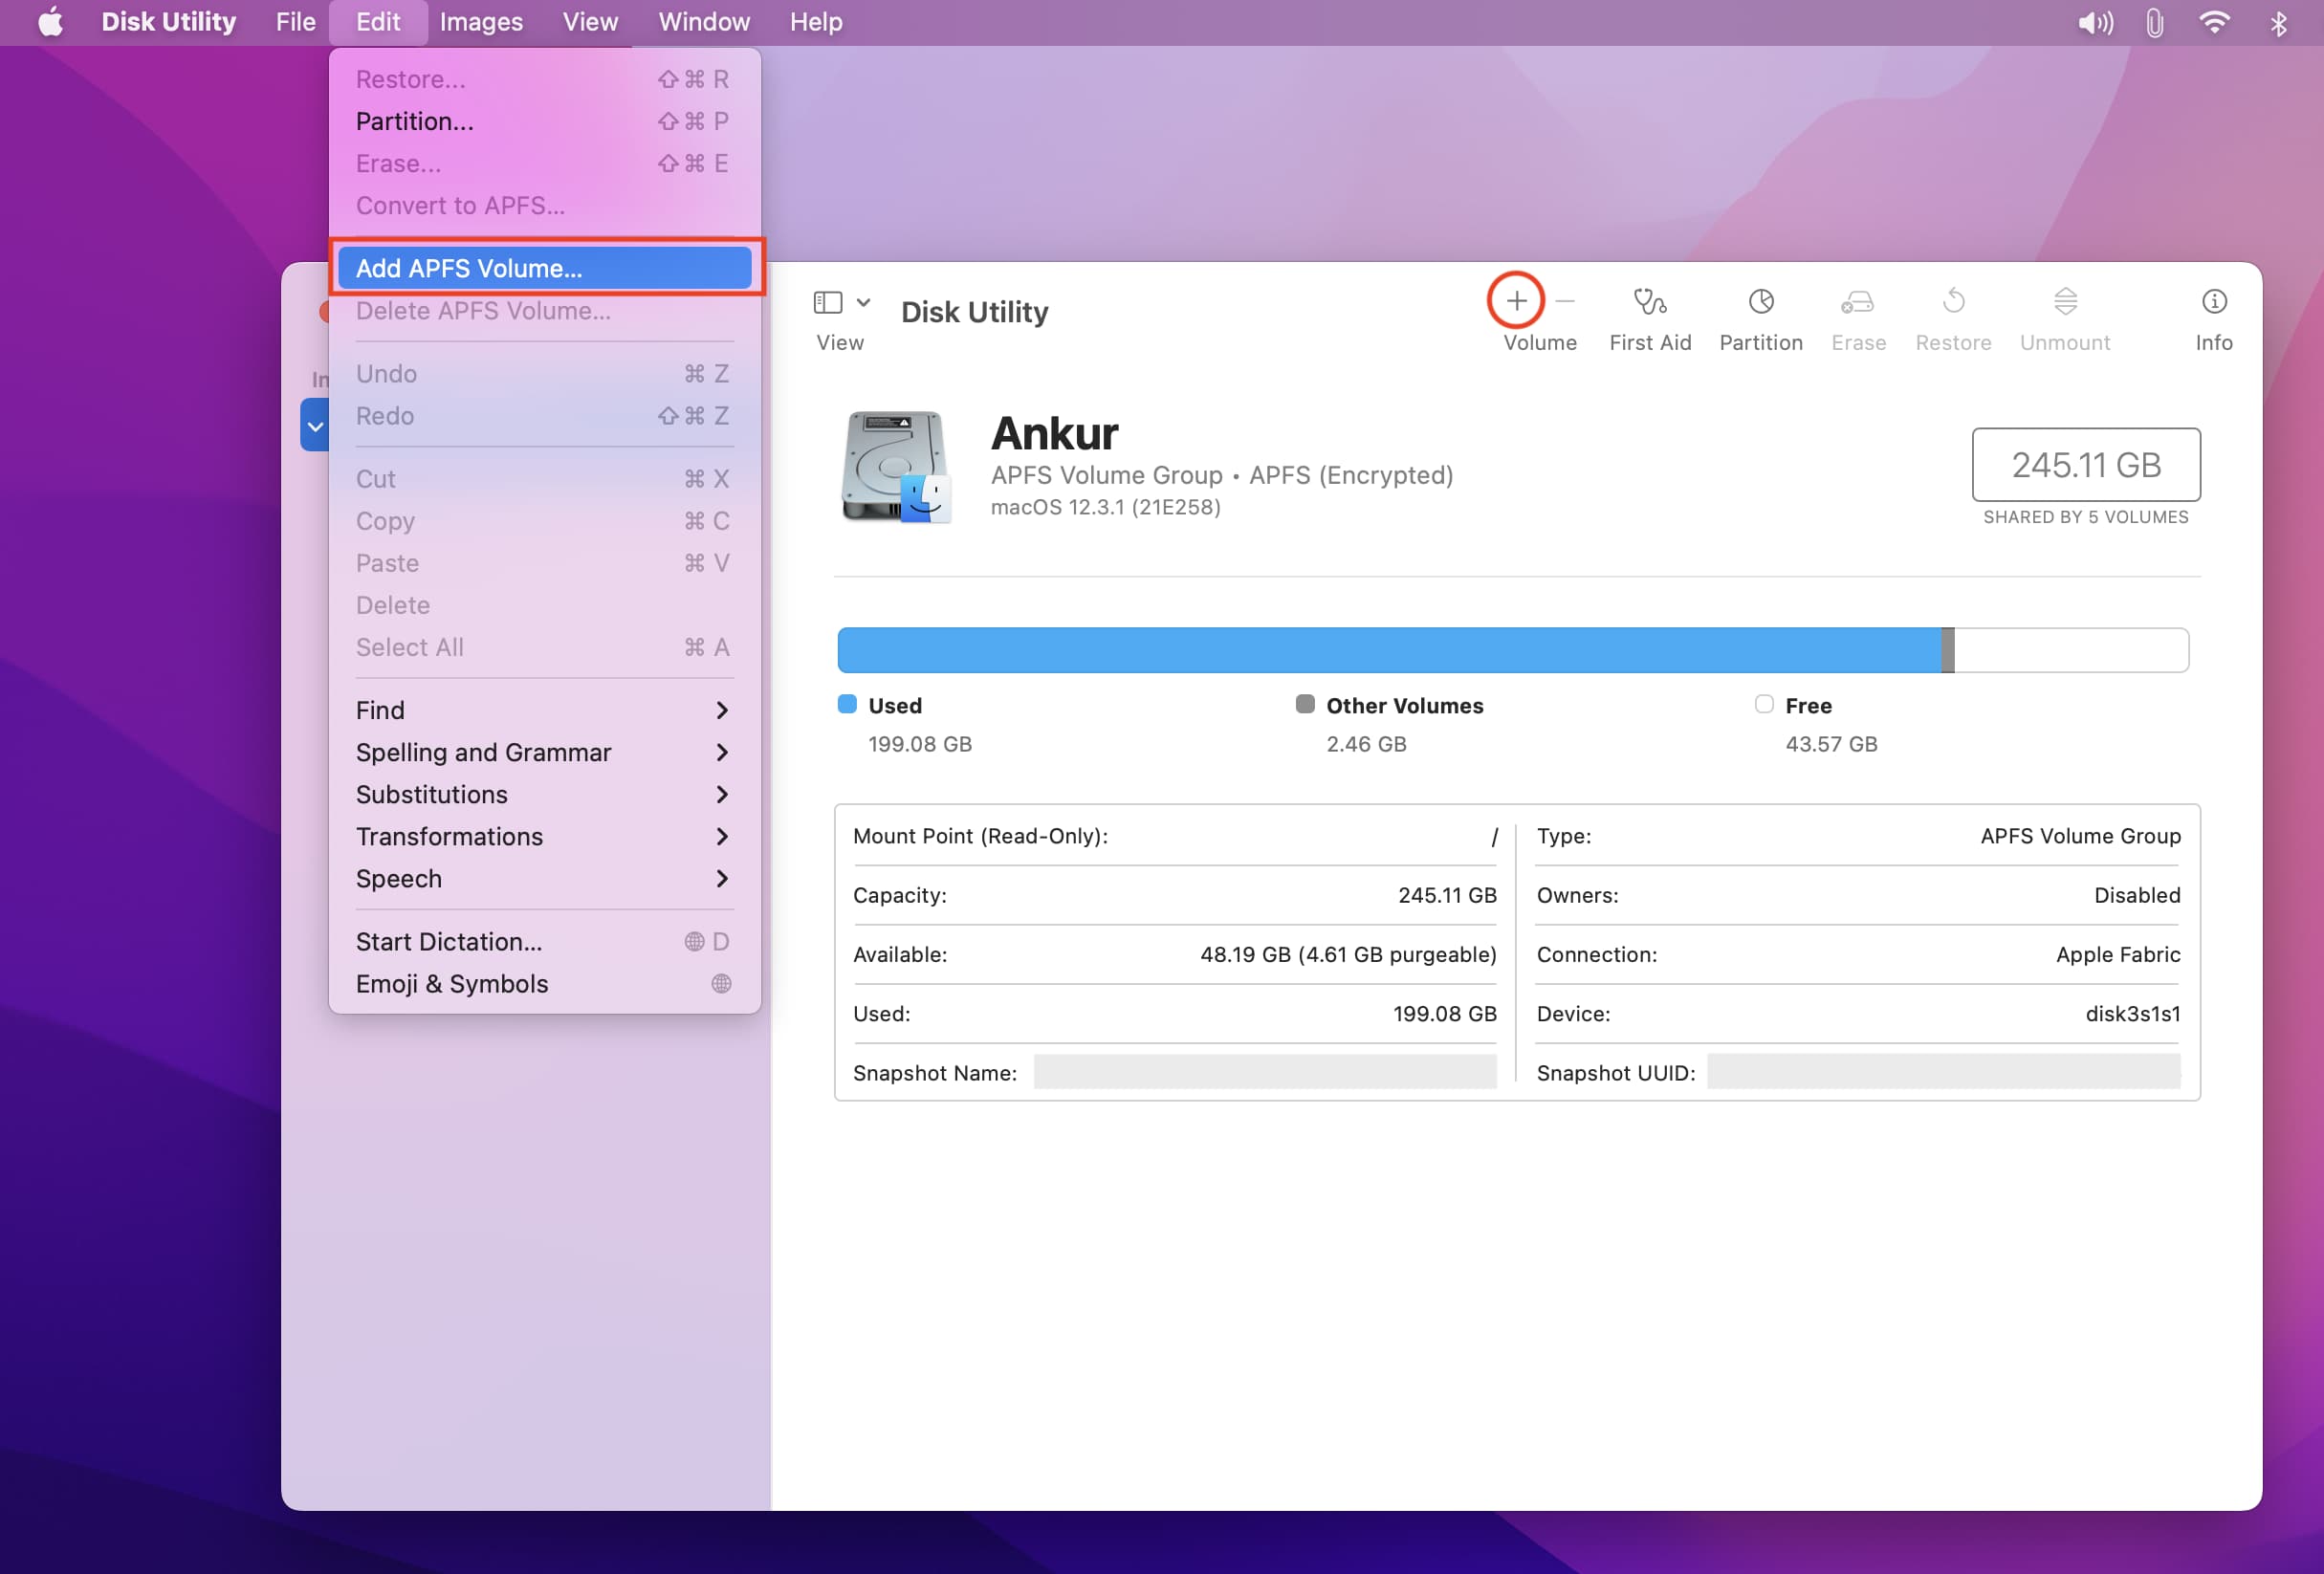
1) Open the built-in Apple Disk Utility app.
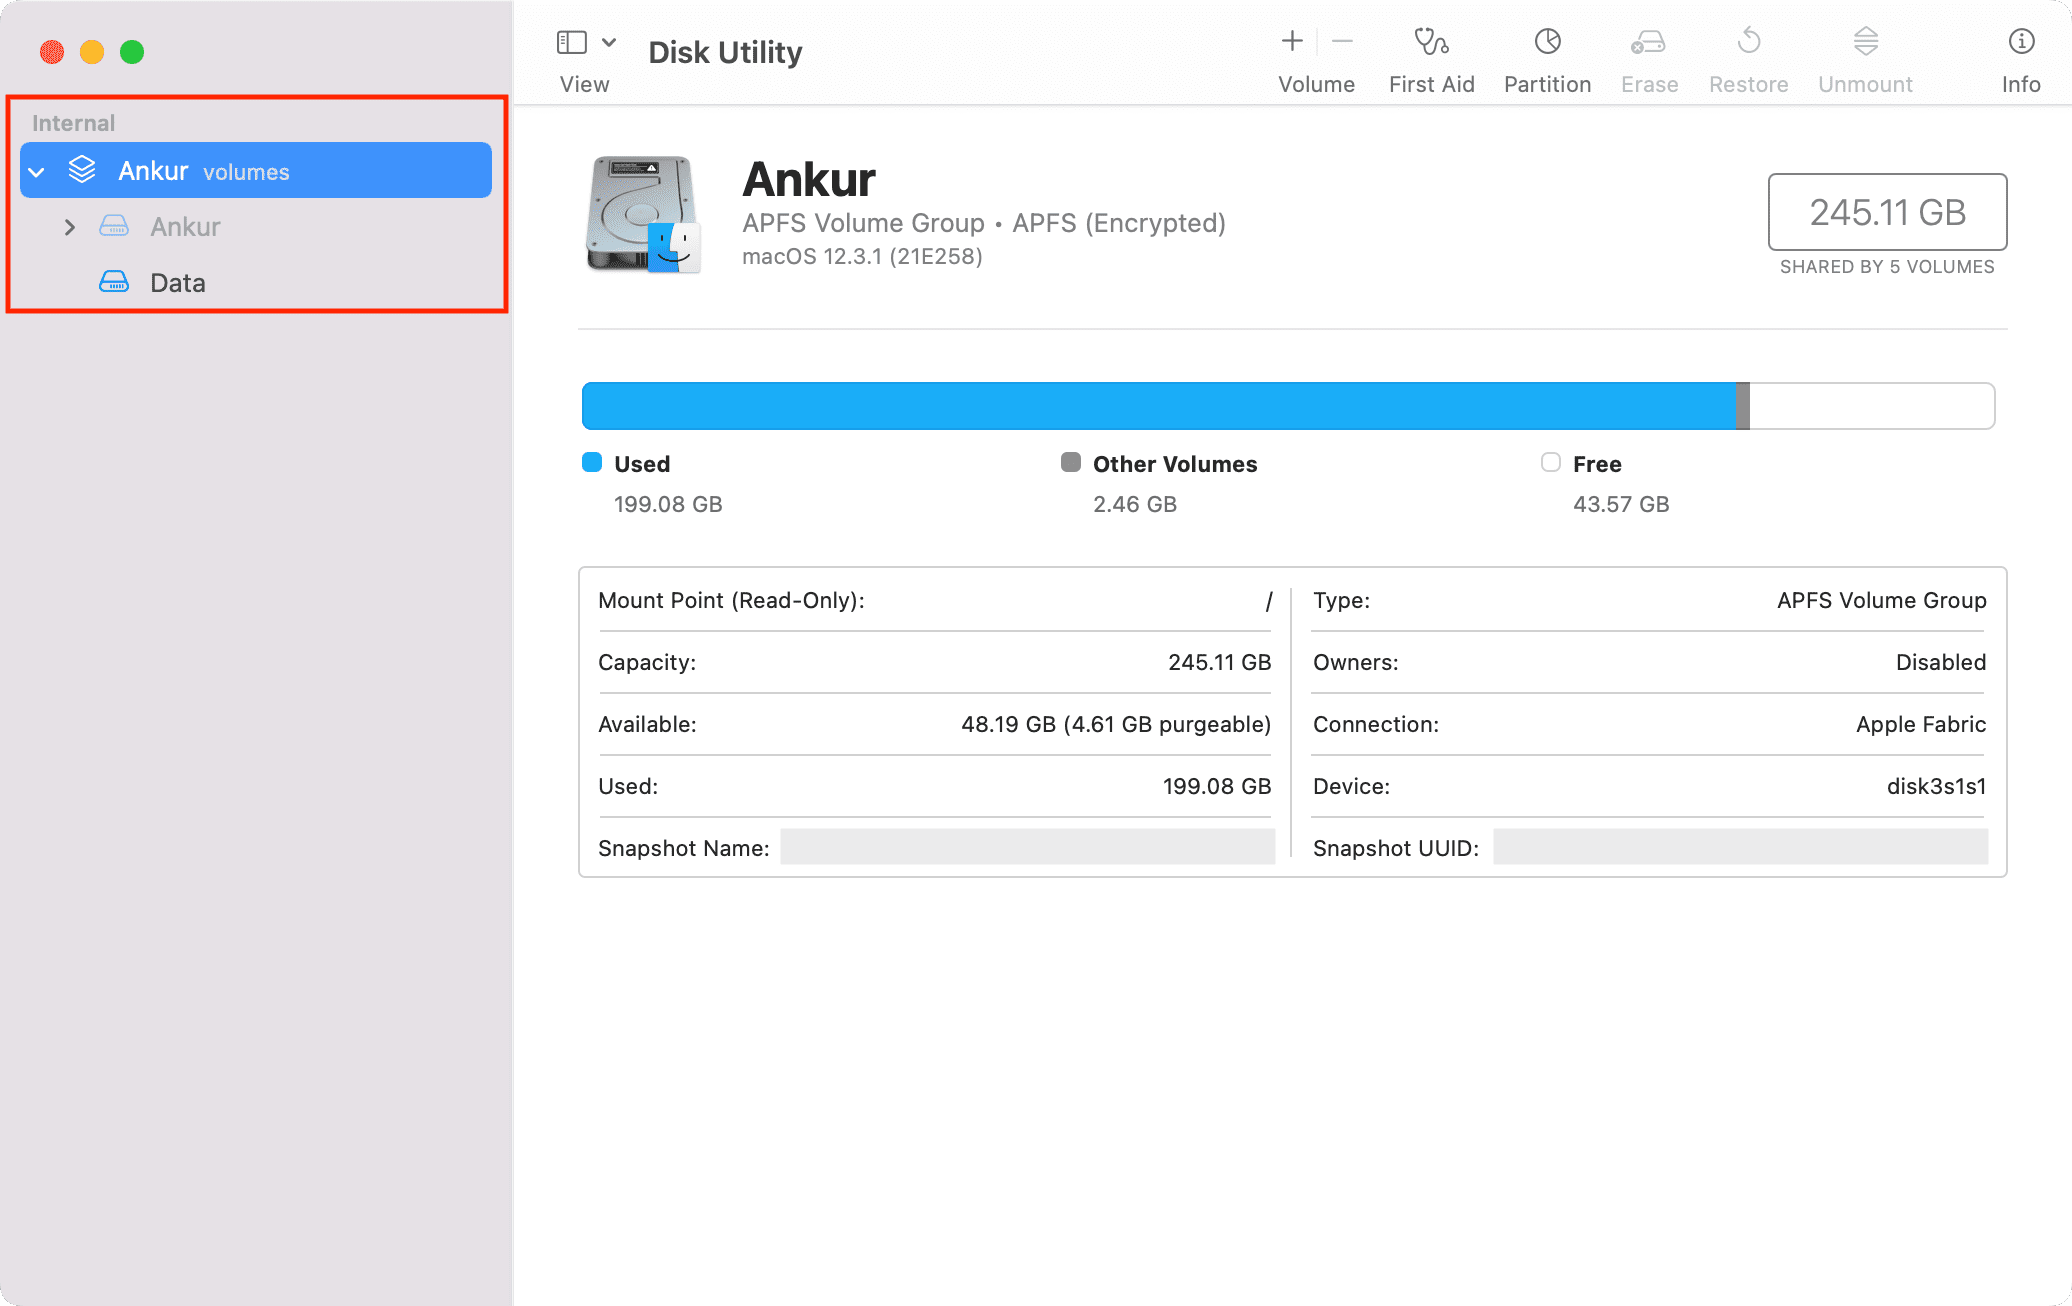
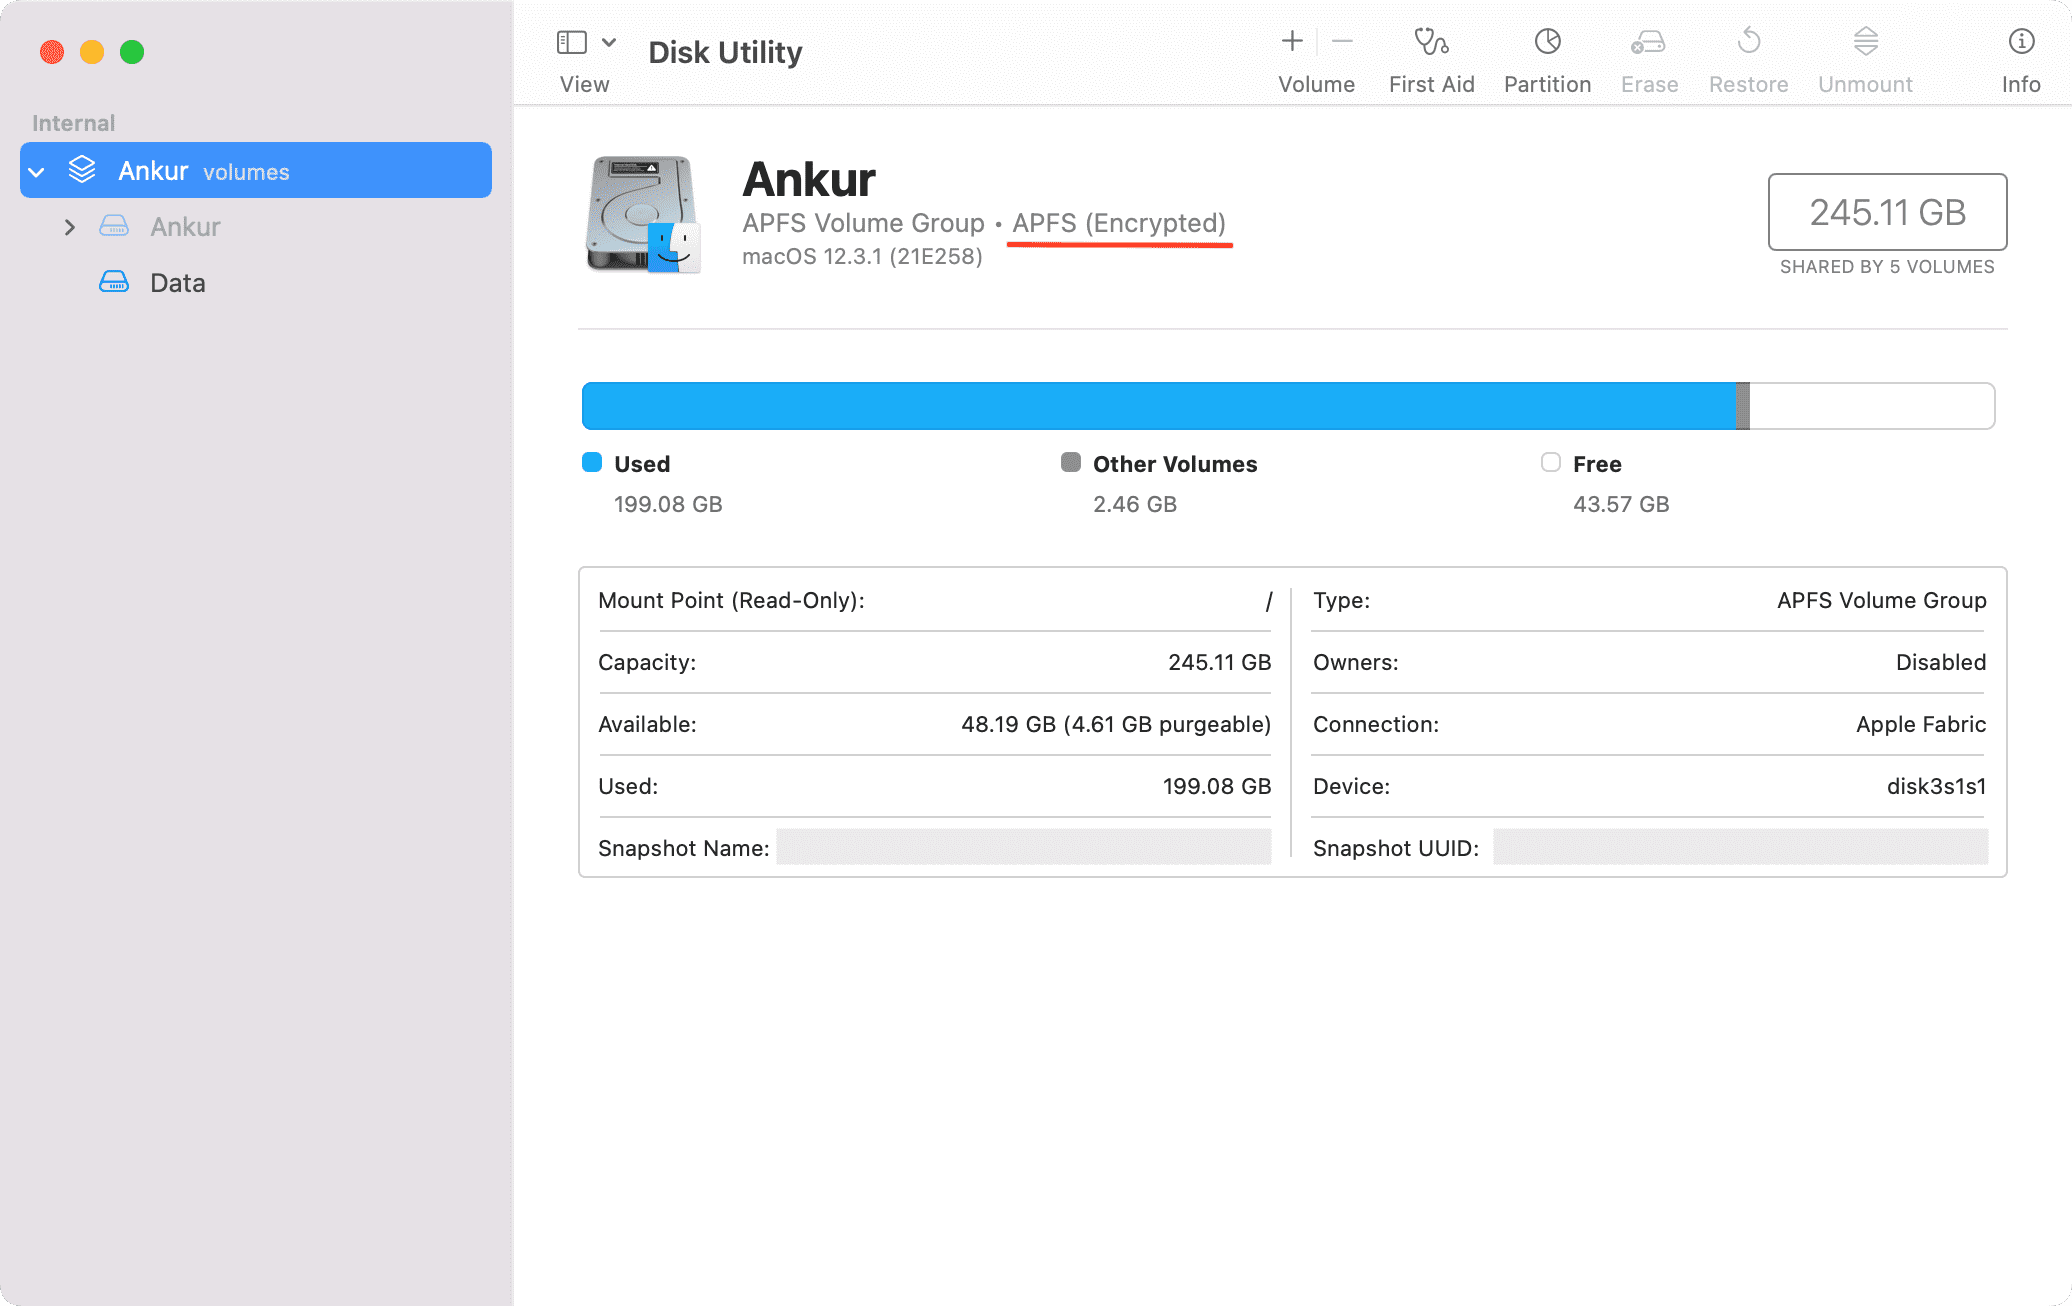
2) Select an existing APFS volume in the left sidebar.
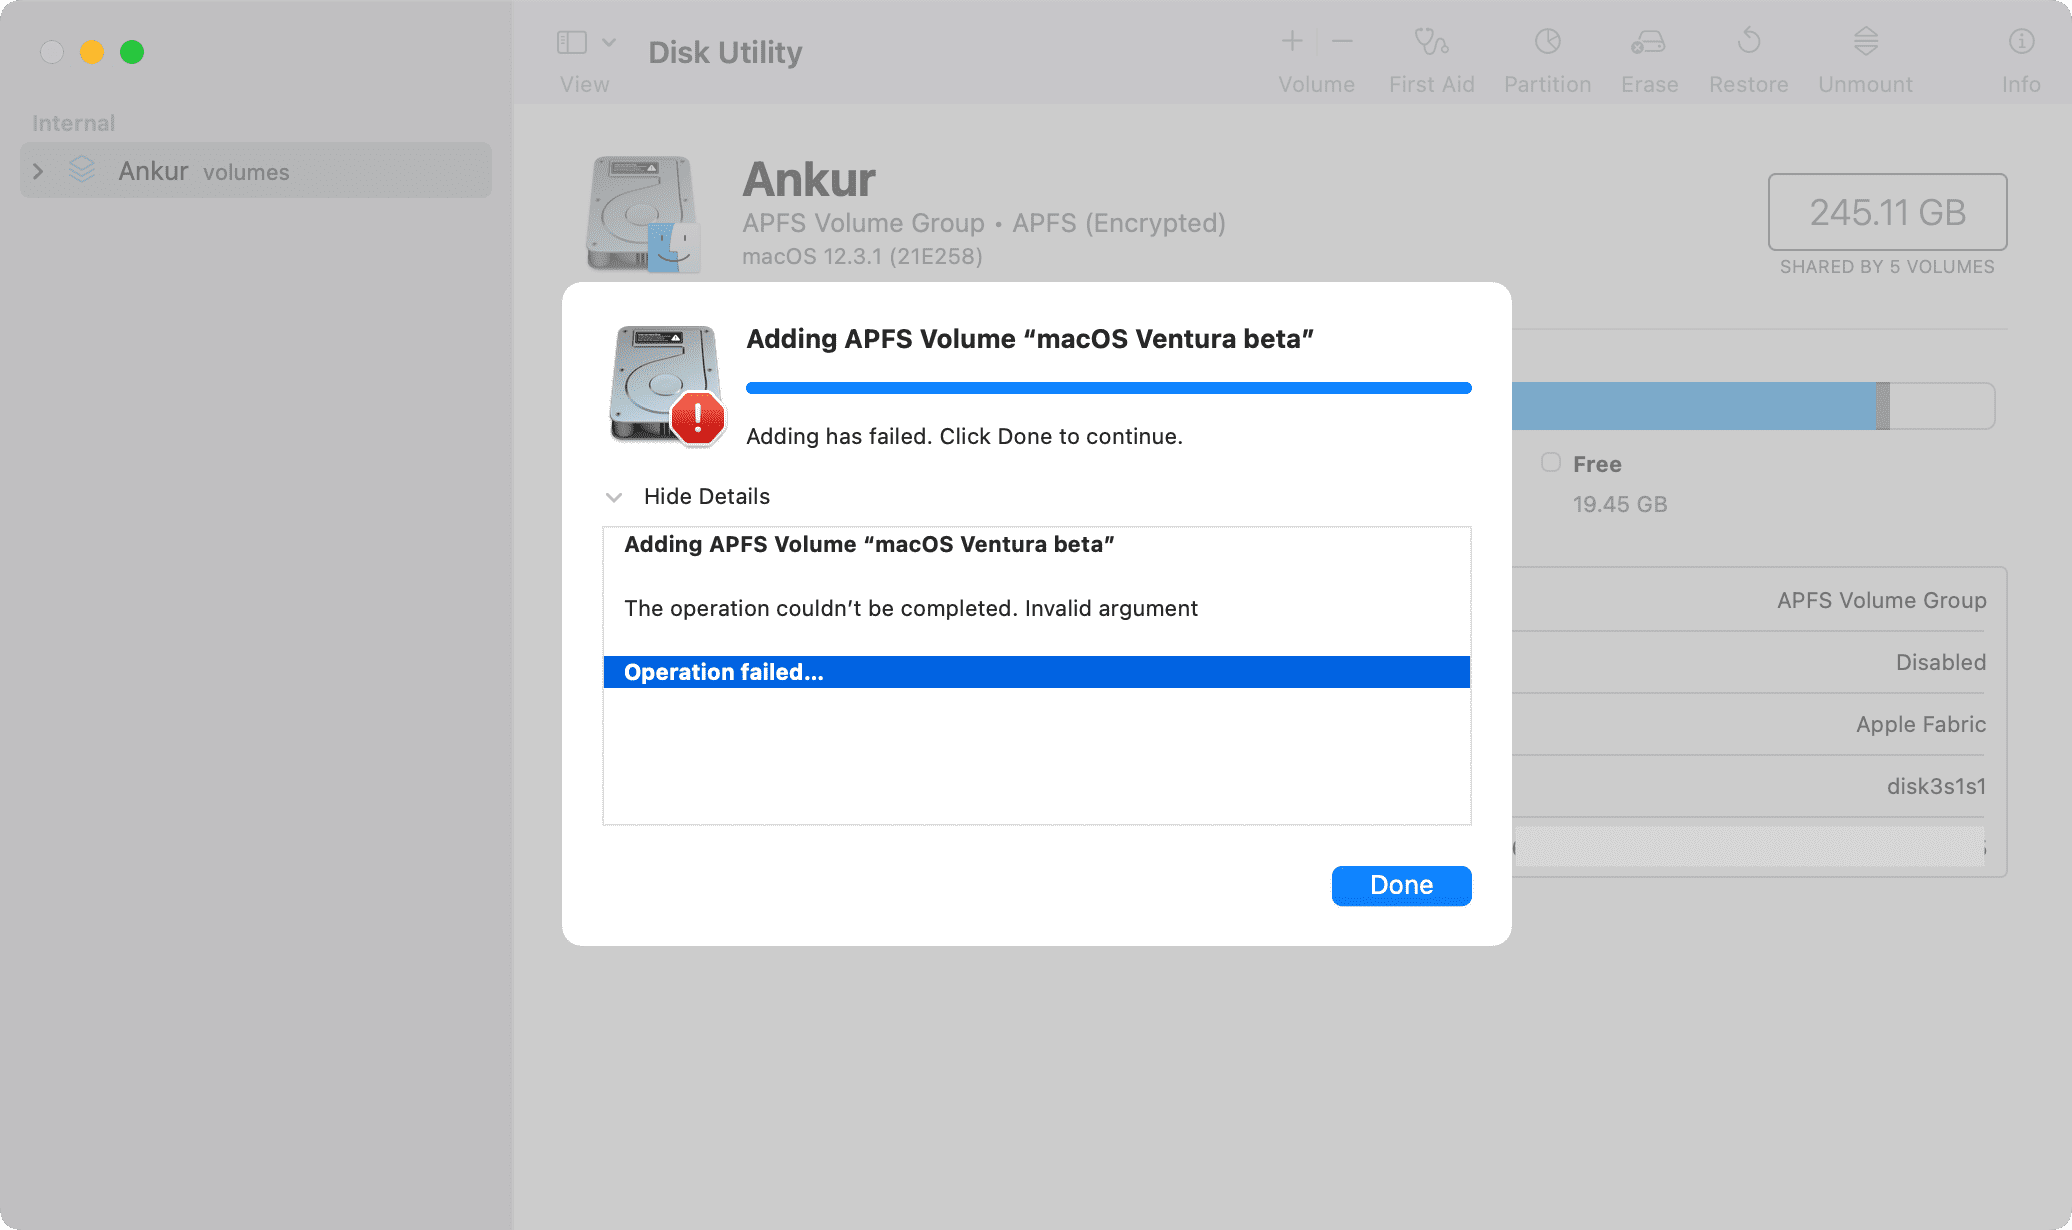
3) Click the plus button above Volume. Alternatively, click Edit > Add APFS Volume from the top menu bar.
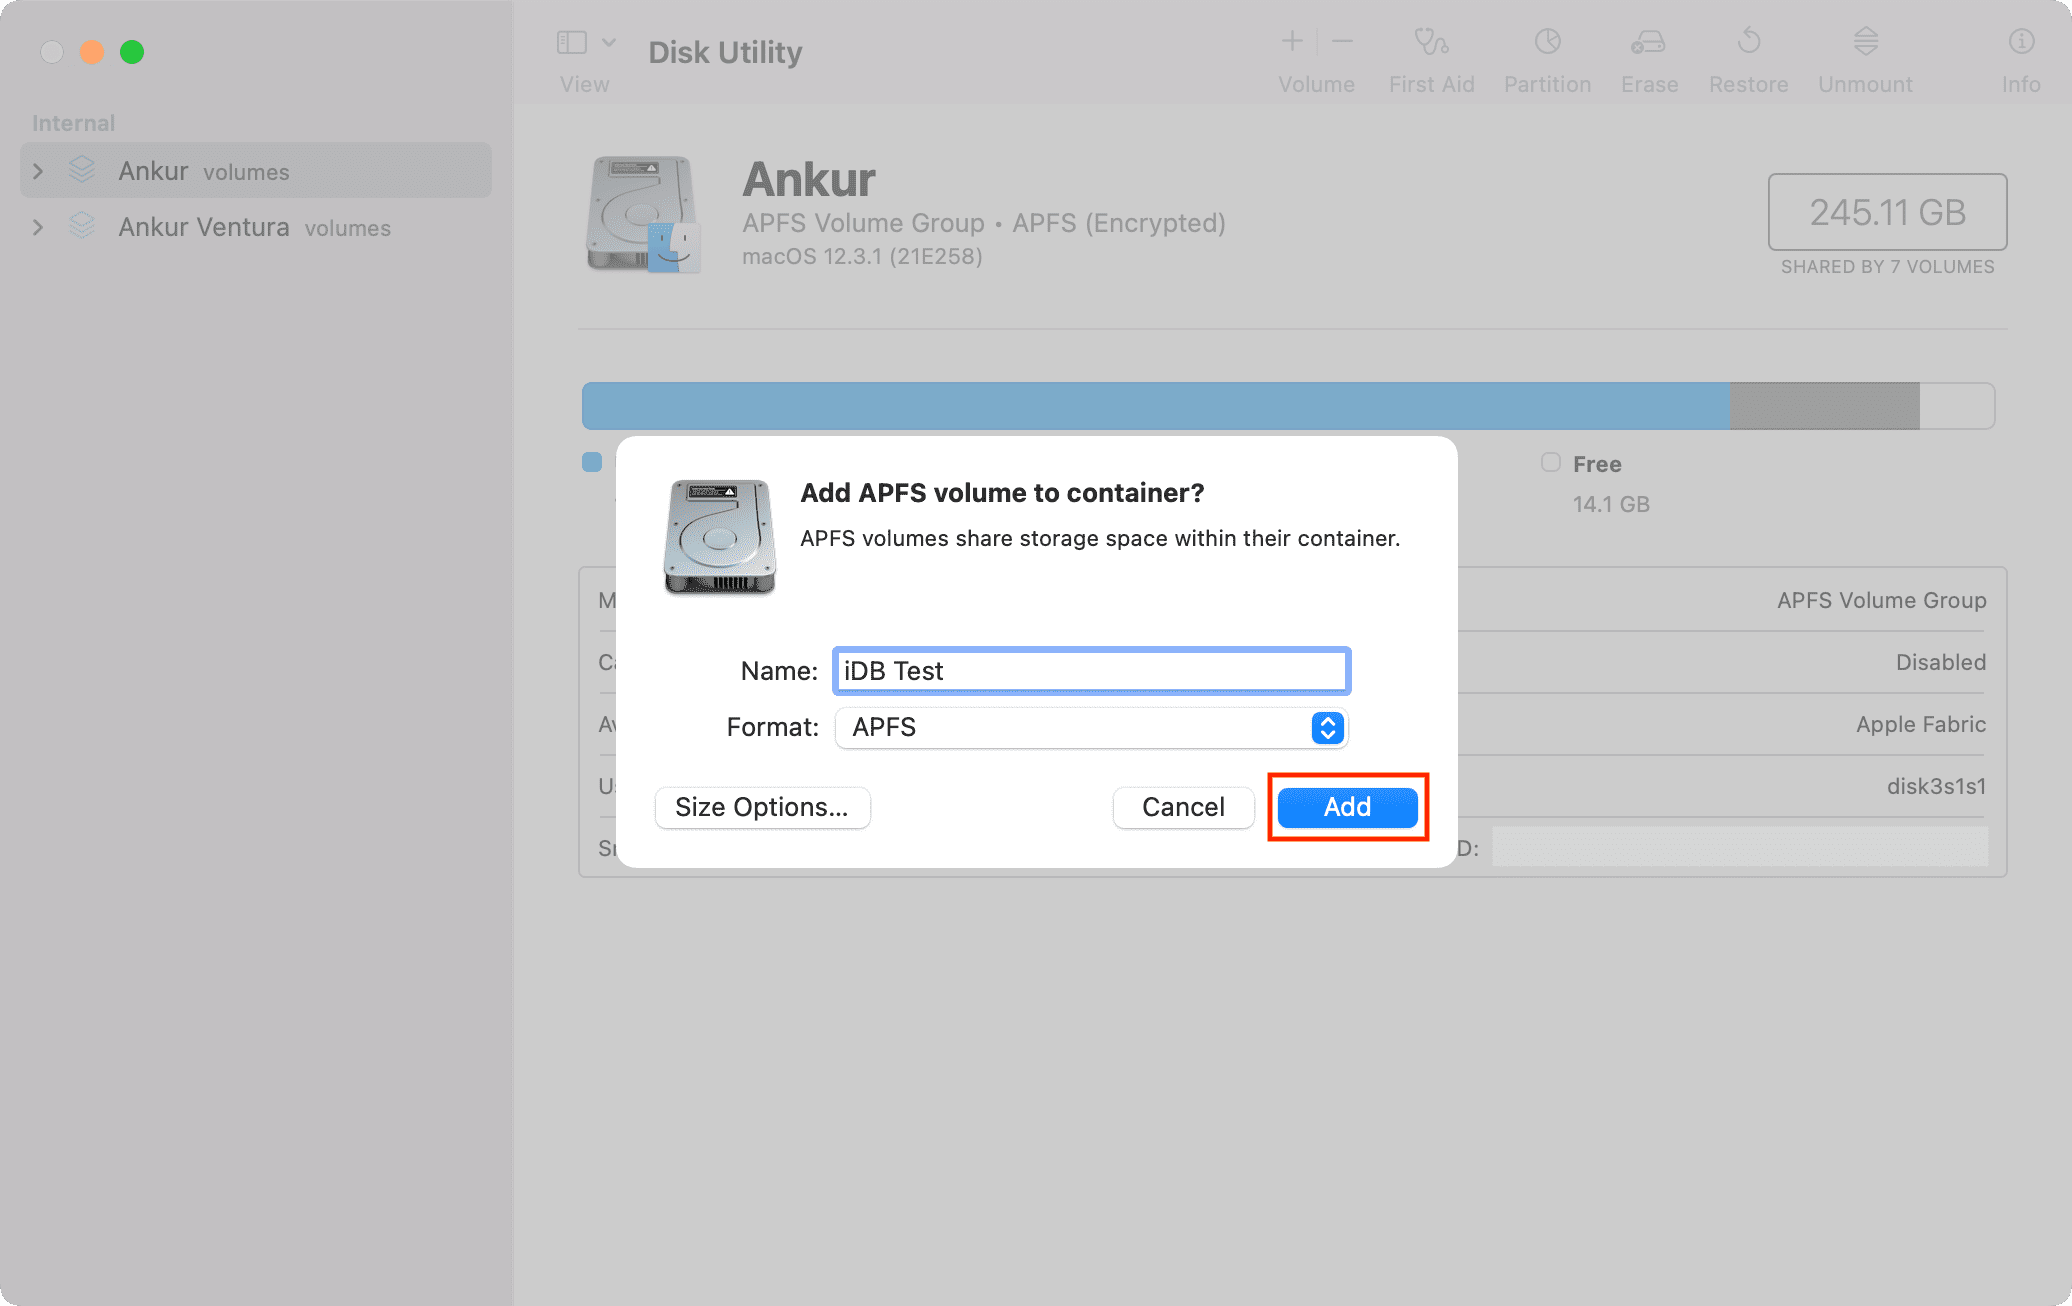
4) Give the volume a name you like.
5) For Format, you can use one of the following:
- APFS: If you don’t need an encrypted or case-sensitive format (very commonly used).
- APFS (Encrypted): This encrypts the volume.
- APFS (Case-sensitive): It’s case-sensitive to file and folder names. For instance, folders named Apple and APPLE are two different folders. Or files named iDB.jpeg and IDB.jpeg are two different files.
- APFS (Case-sensitive, Encrypted): It’s case-sensitive to file and folder names (like above) and also encrypts the volume.
6) Optional: As mentioned, an APFS volume has the flexibility to use the available space of the main container as needed. But if you like, you can click Size Options and enter a Reserve Size and Quota Size.
- Reserve Size is the size that is put aside for this volume.
- Quota Size is the limit for how much storage the volume can allocate.
Note: Say only 40 GB of free space is available on your Mac’s drive. Now, if you set a quota size of 50 GB, it will show an error. In that case, take note of how much space you have on your Mac and set the size options appropriately.
You should skip setting the reserve and quota sizes for most use cases.
7) Click Add.
8) Finally, click Done.
You’ll see this new volume in Disk Utility’s left sidebar. Plus, this volume appears as a mountable drive on your Mac’s desktop. If you don’t see it, enable a simple option to show the disks on the desktop.
You can now copy files to this volume or install a different version of macOS on it.
Unmount and mount a volume on Mac
If you don’t want to use a volume temporarily, you can unmount it by following these steps:
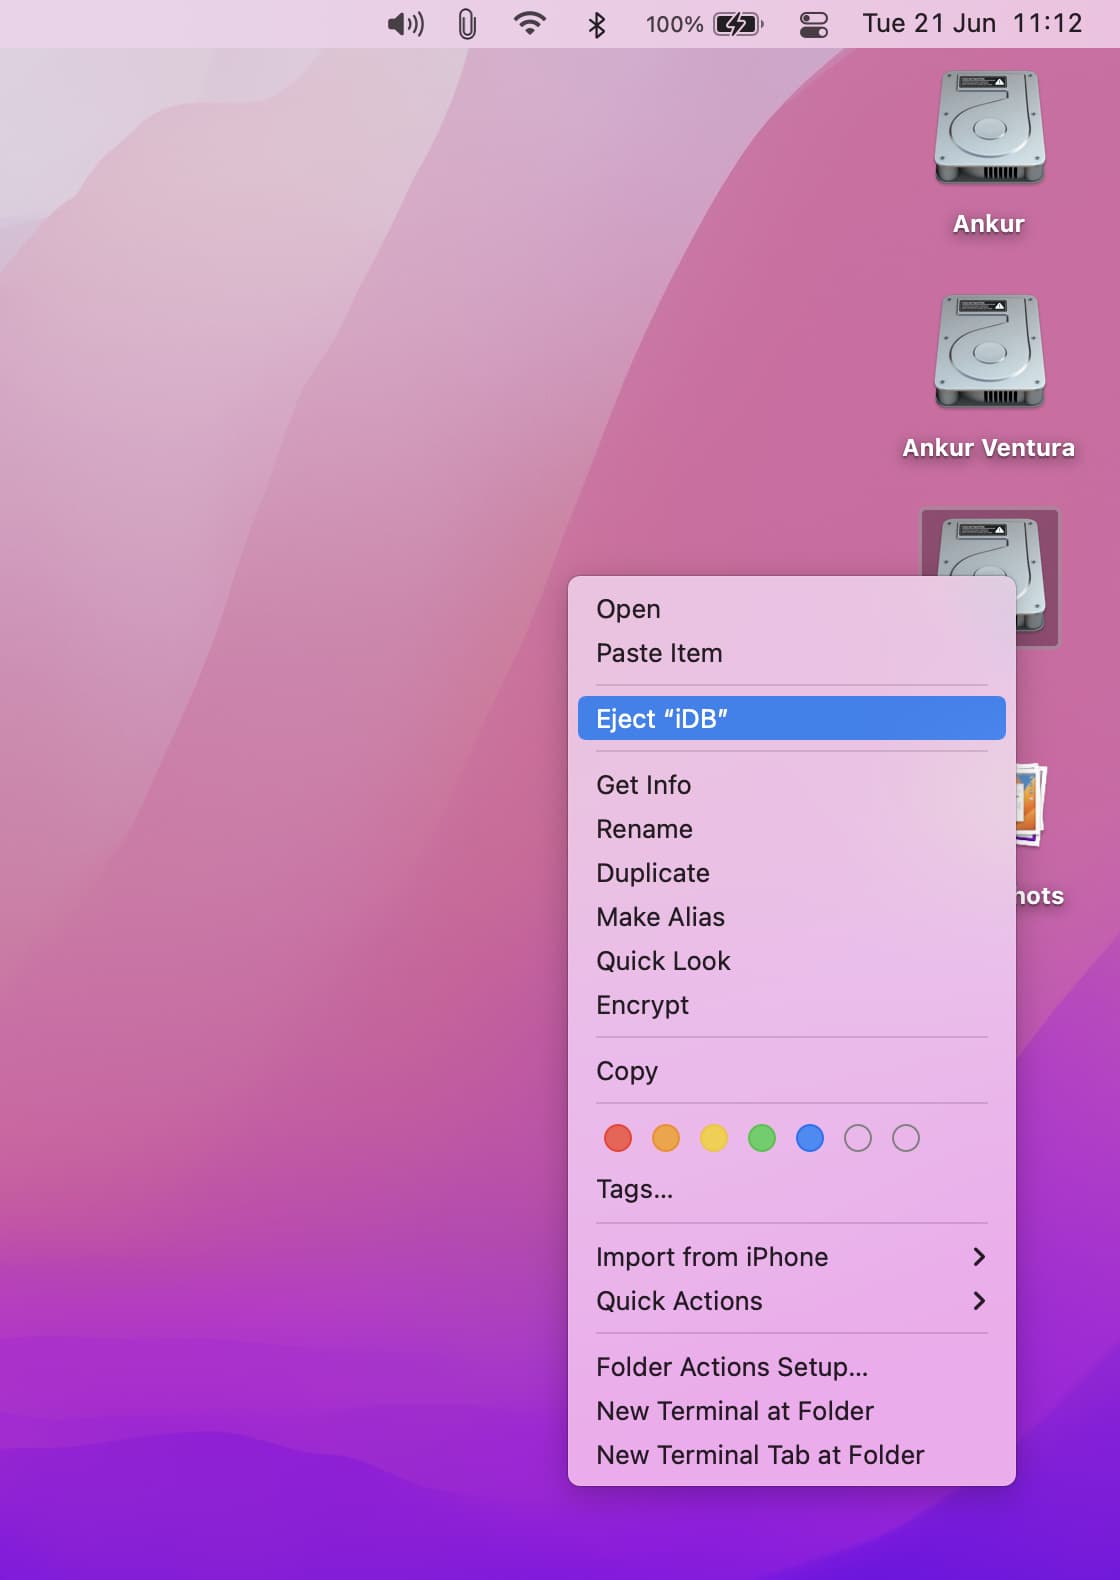
1) Control-click or right-click on its icon on your Mac’s desktop.
2) Click Eject “volume name.”
You can also do this from the Finder sidebar or Disk Utility.
To see the volume again, follow these steps to mount it:
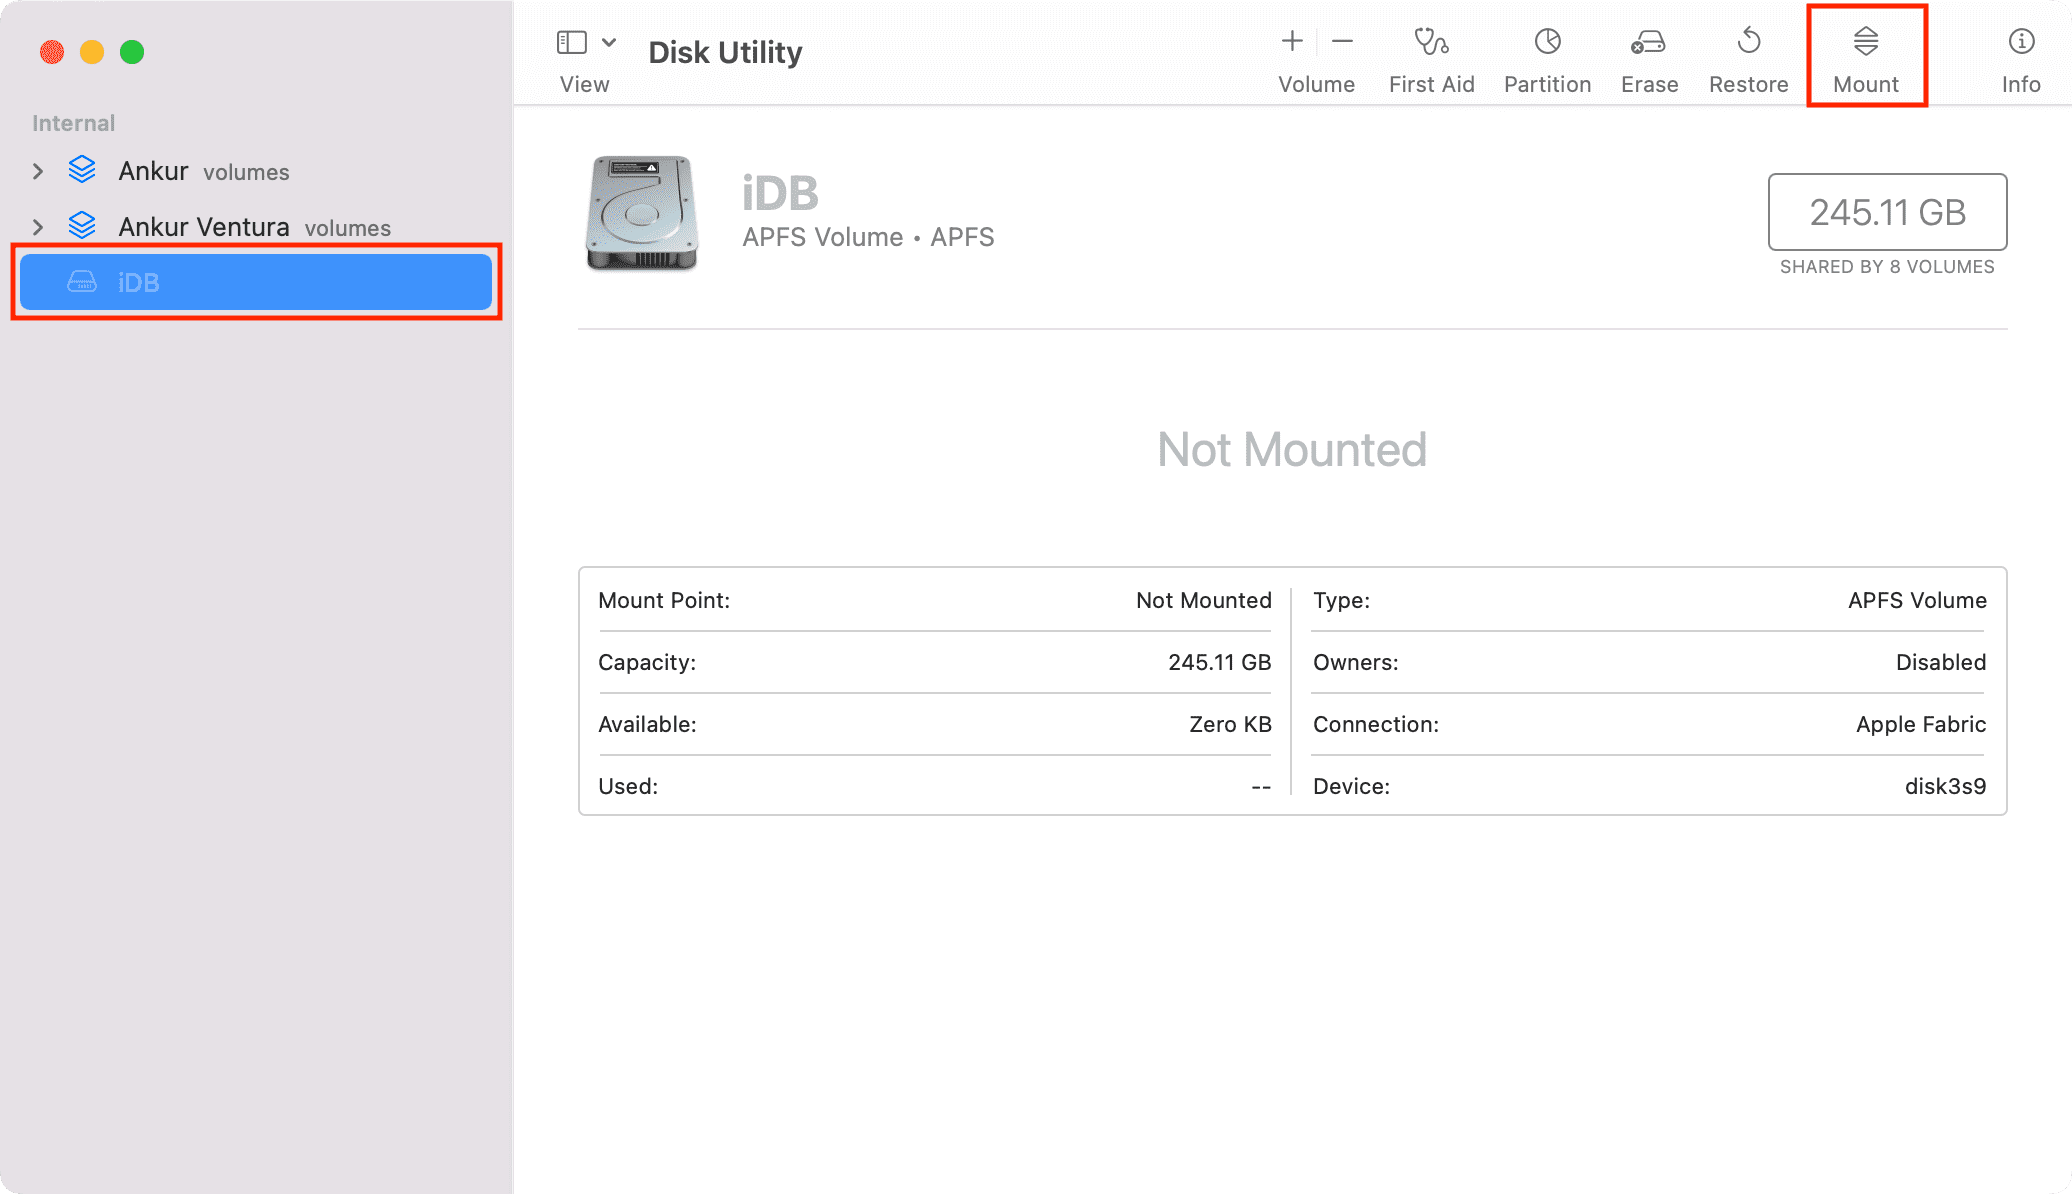
1) Open Disk Utility.
2) Click the grayed volume name from the left sidebar.
3) Click Mount. This volume will again start showing on your Mac’s desktop and Finder sidebar.
How to erase a volume on Mac
If you need to free space or get rid of all the files on a volume, erasing it is a viable option. Erasing a volume permanently removes all the data on that volume, leaving only that empty volume in the container. You can reuse this volume in the future.
Follow these steps to erase an APFS volume using Disk Utility on Mac:
1) Open Disk Utility and select the volume or volume group from the sidebar.
2) Click Erase.
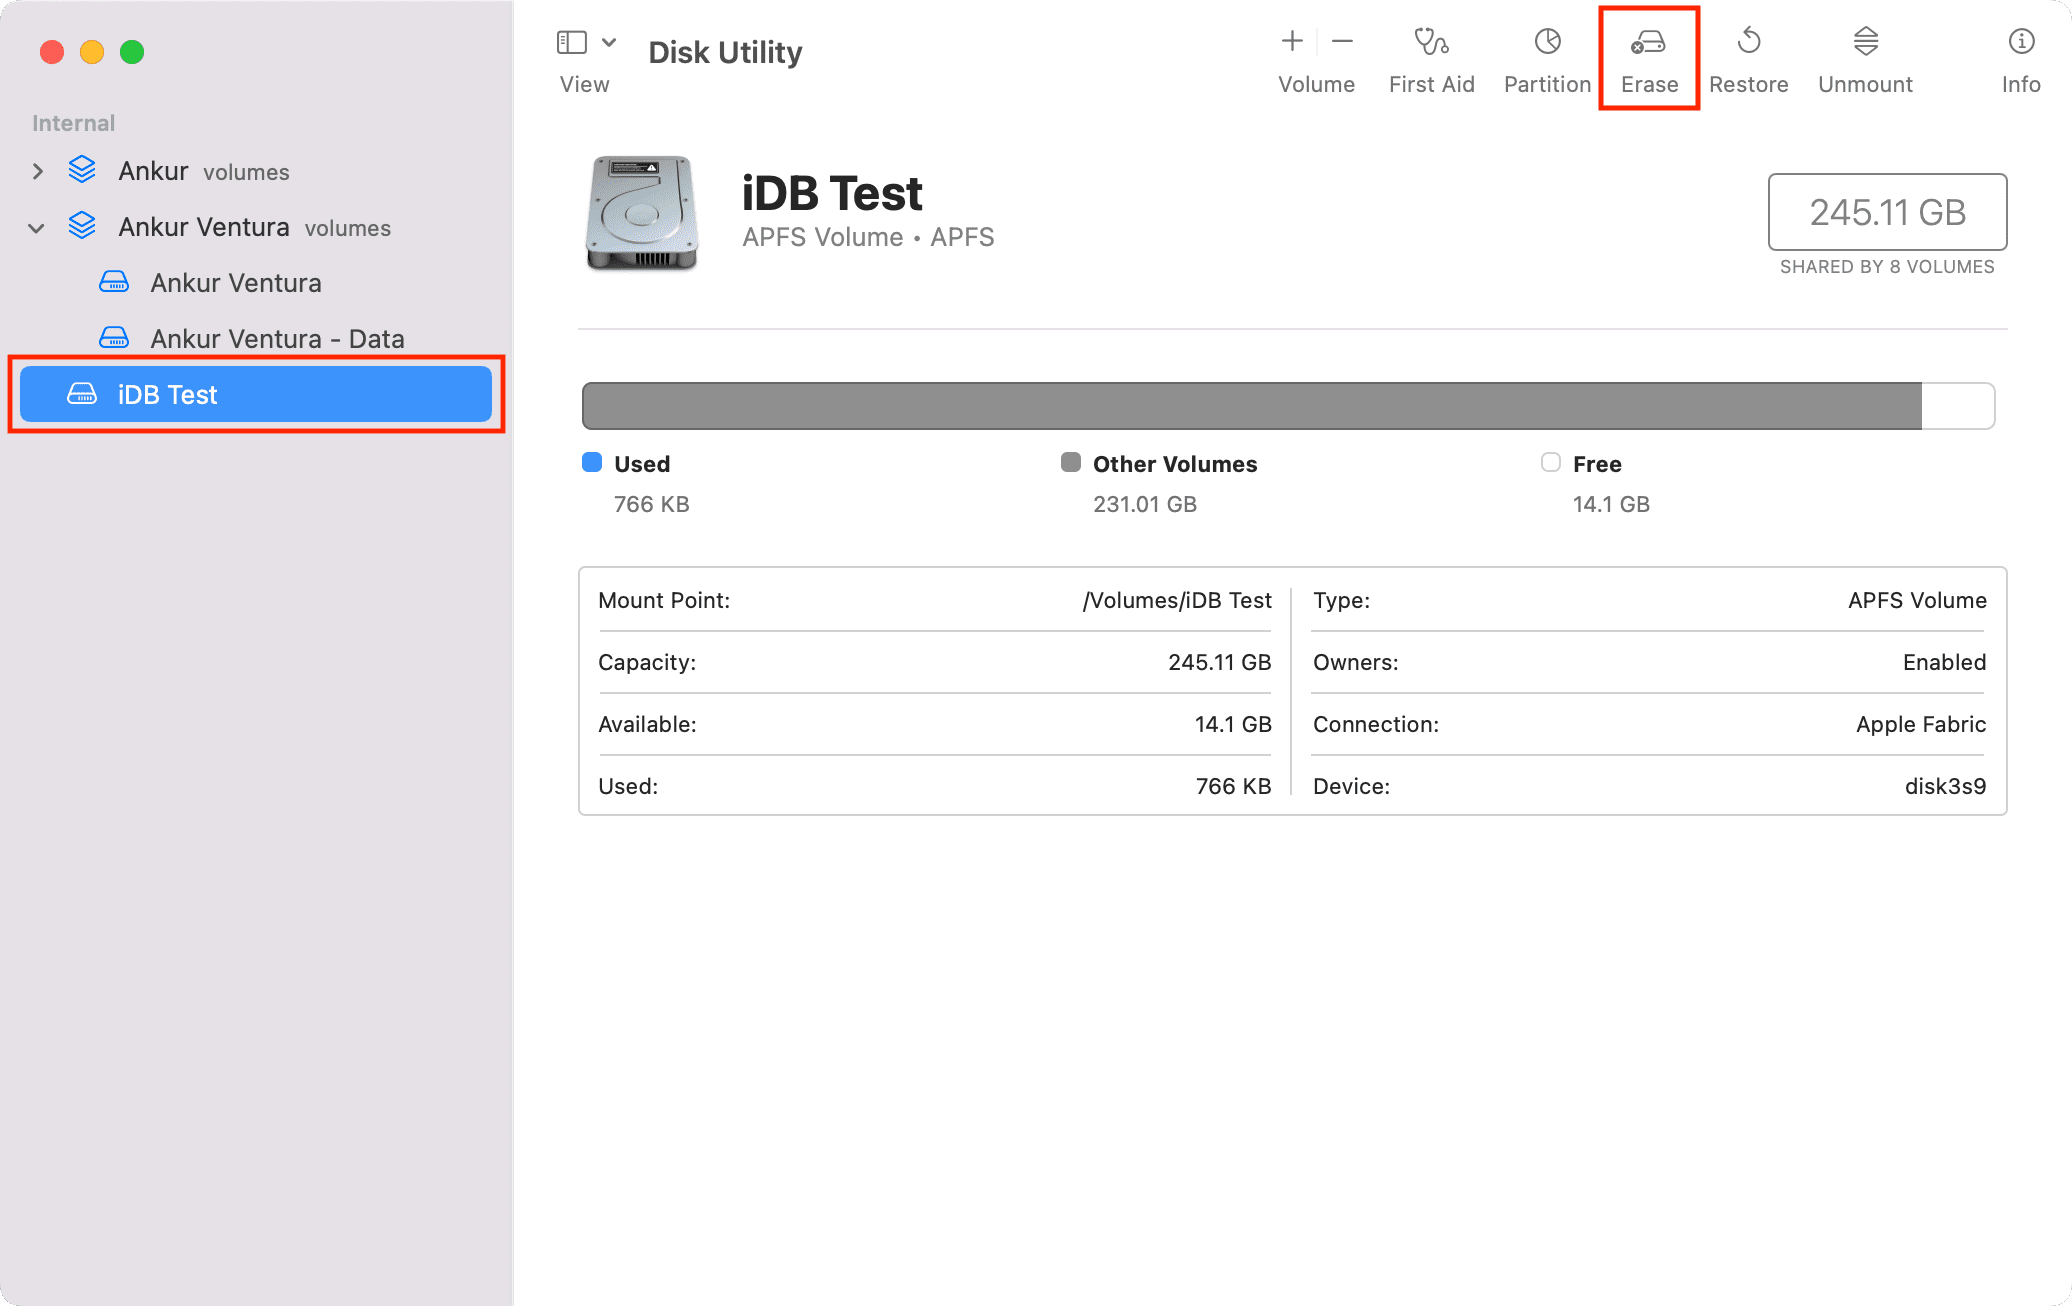
3) Optionally, you can set a new name and format or keep the same.
4) Click Erase or Erase Volume Group.
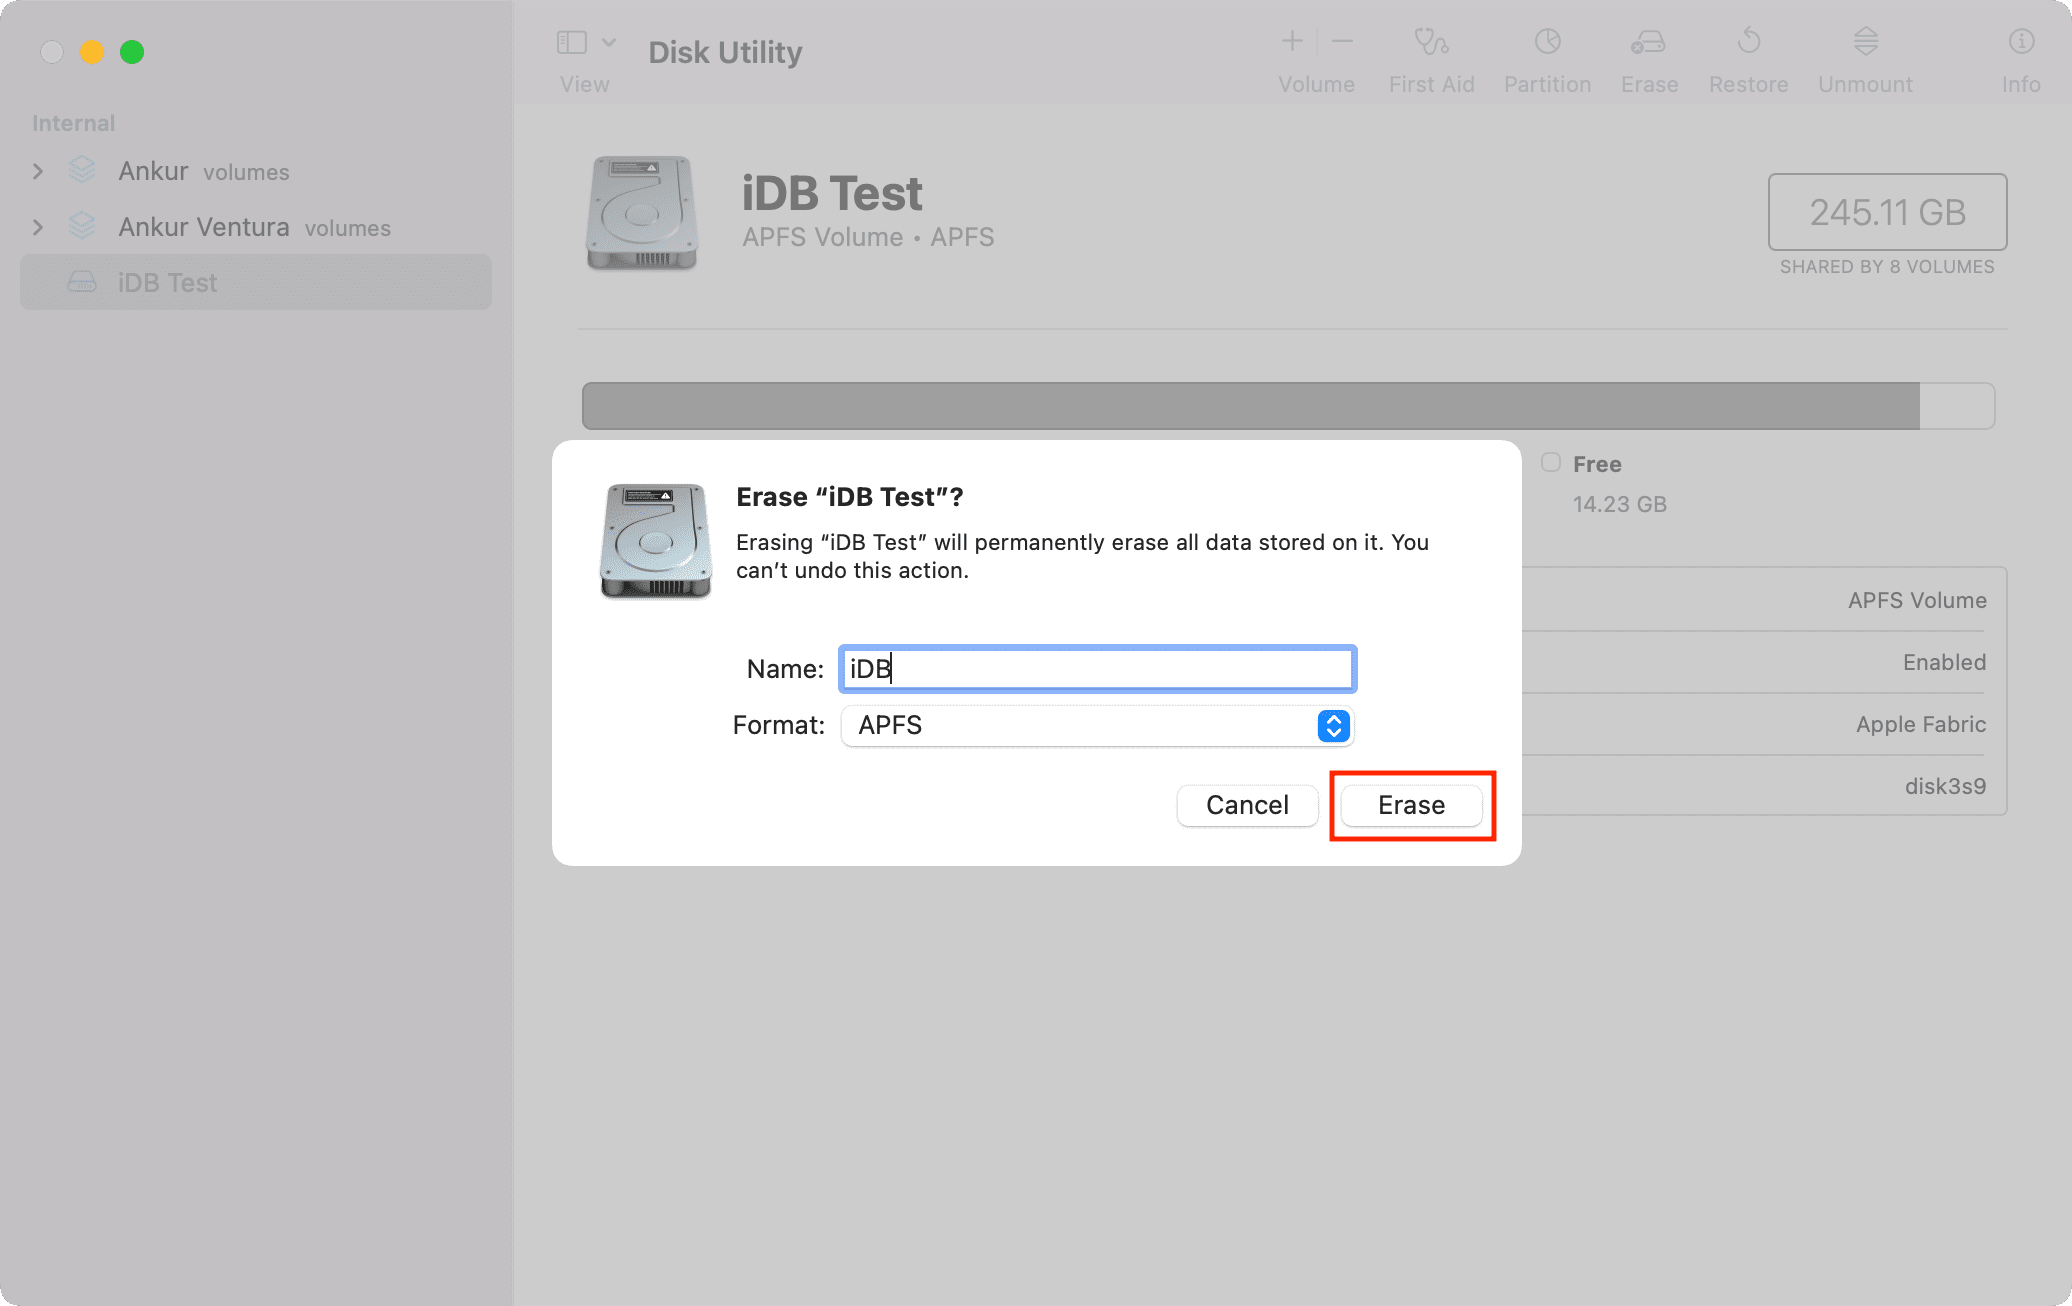
5) Finally, click Done on the “operation successful” screen.
How to delete a volume on Mac
Deleting a volume permanently removes all the data on that volume and removes that volume from the container. In short, nothing is left behind. You’ll have to create a new volume if you want to use one.
Follow these steps to delete a volume on Mac’s SSD:
1) Open Disk Utility and select the volume or volume group you want to delete.
2) Click the minus button above Volume or click Edit from the menu bar and choose Delete APFS Volume.
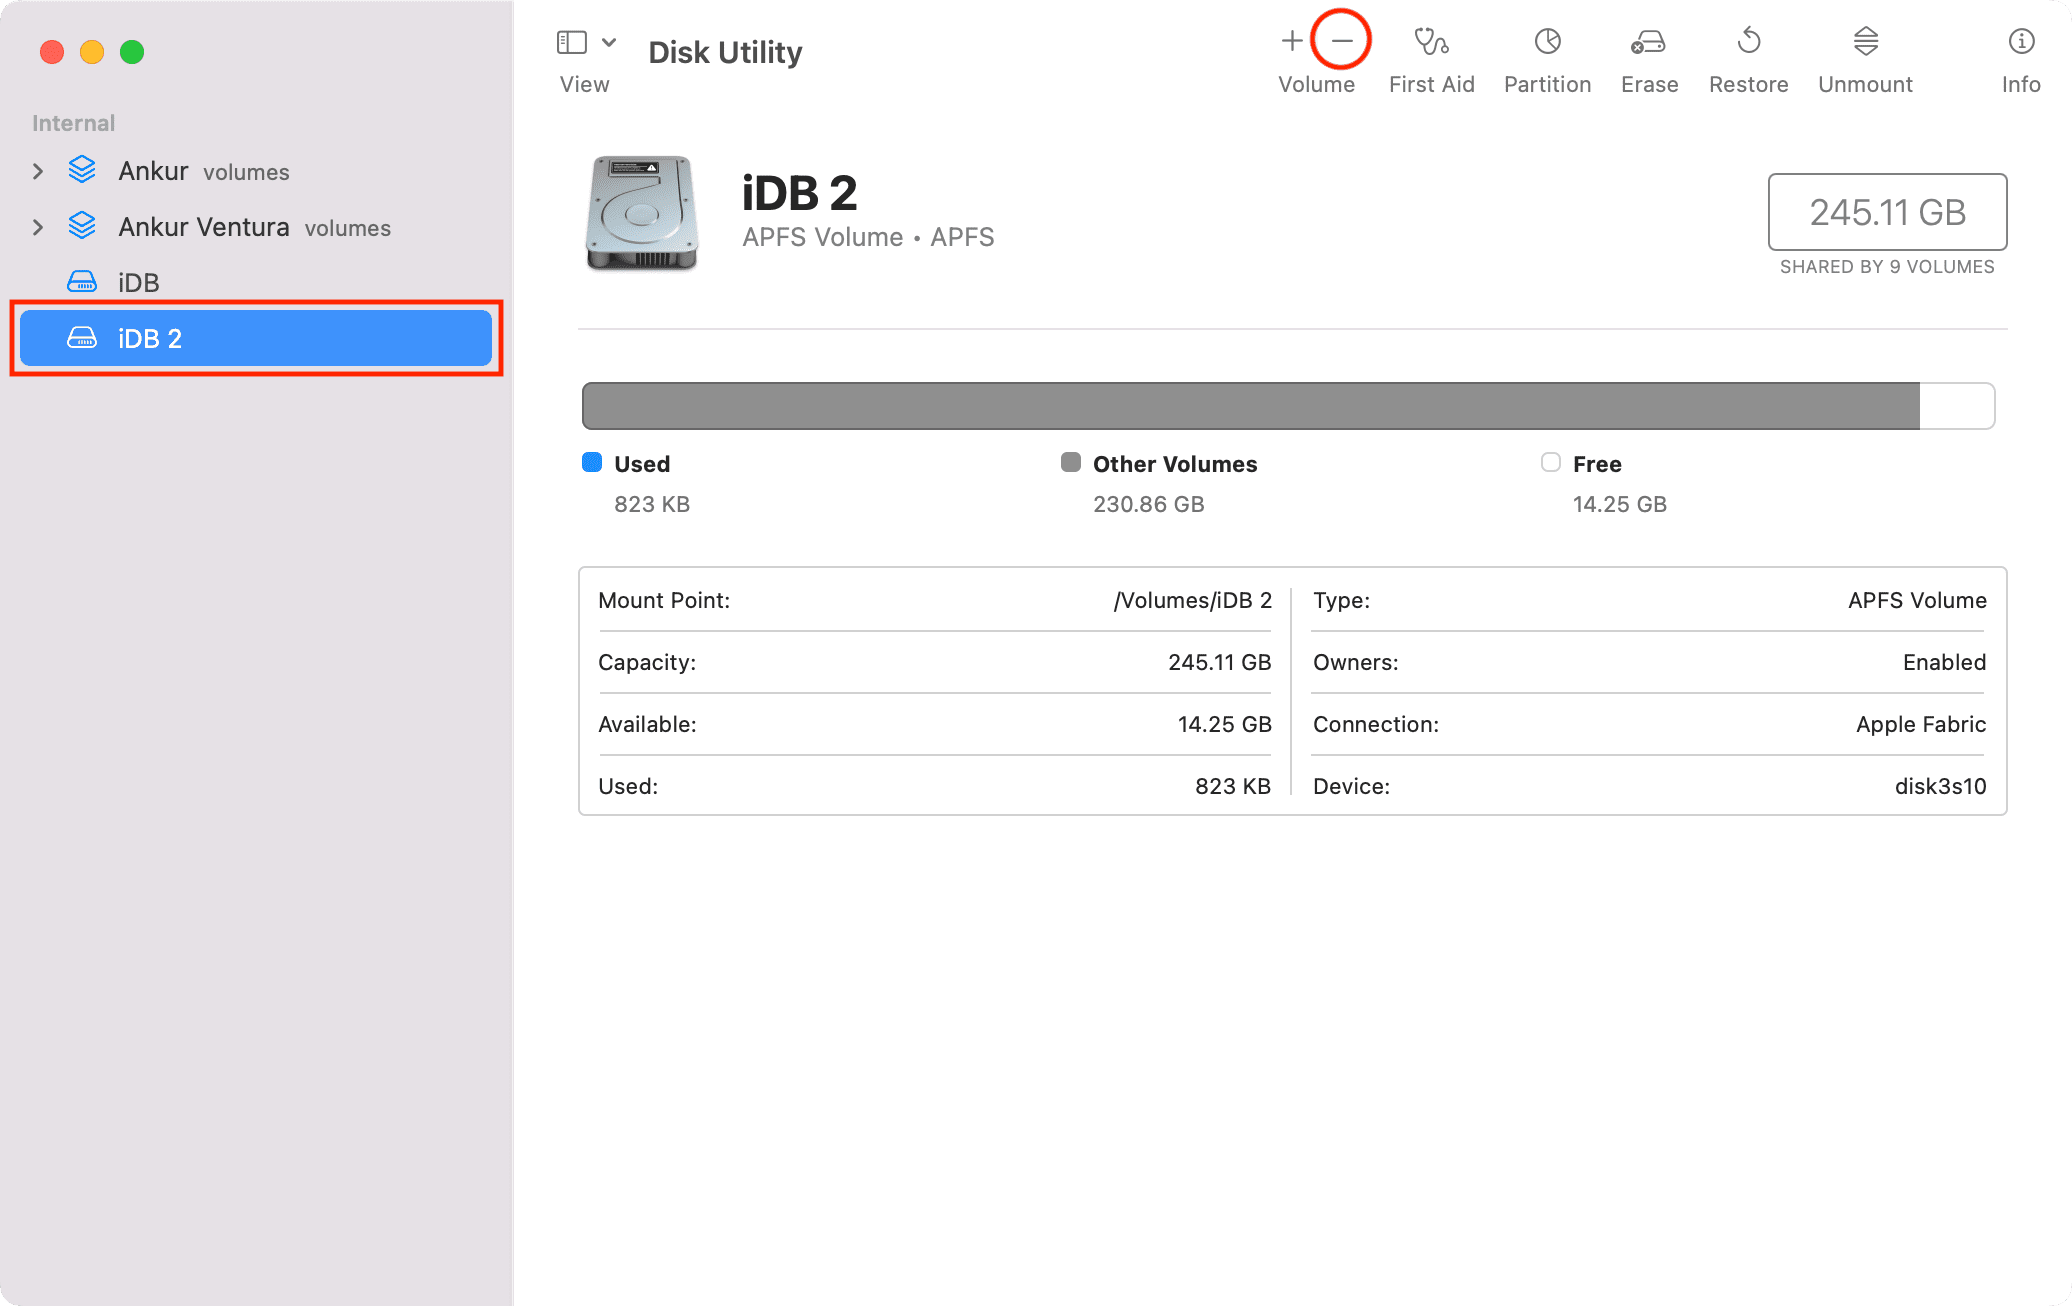
3) Click Delete.
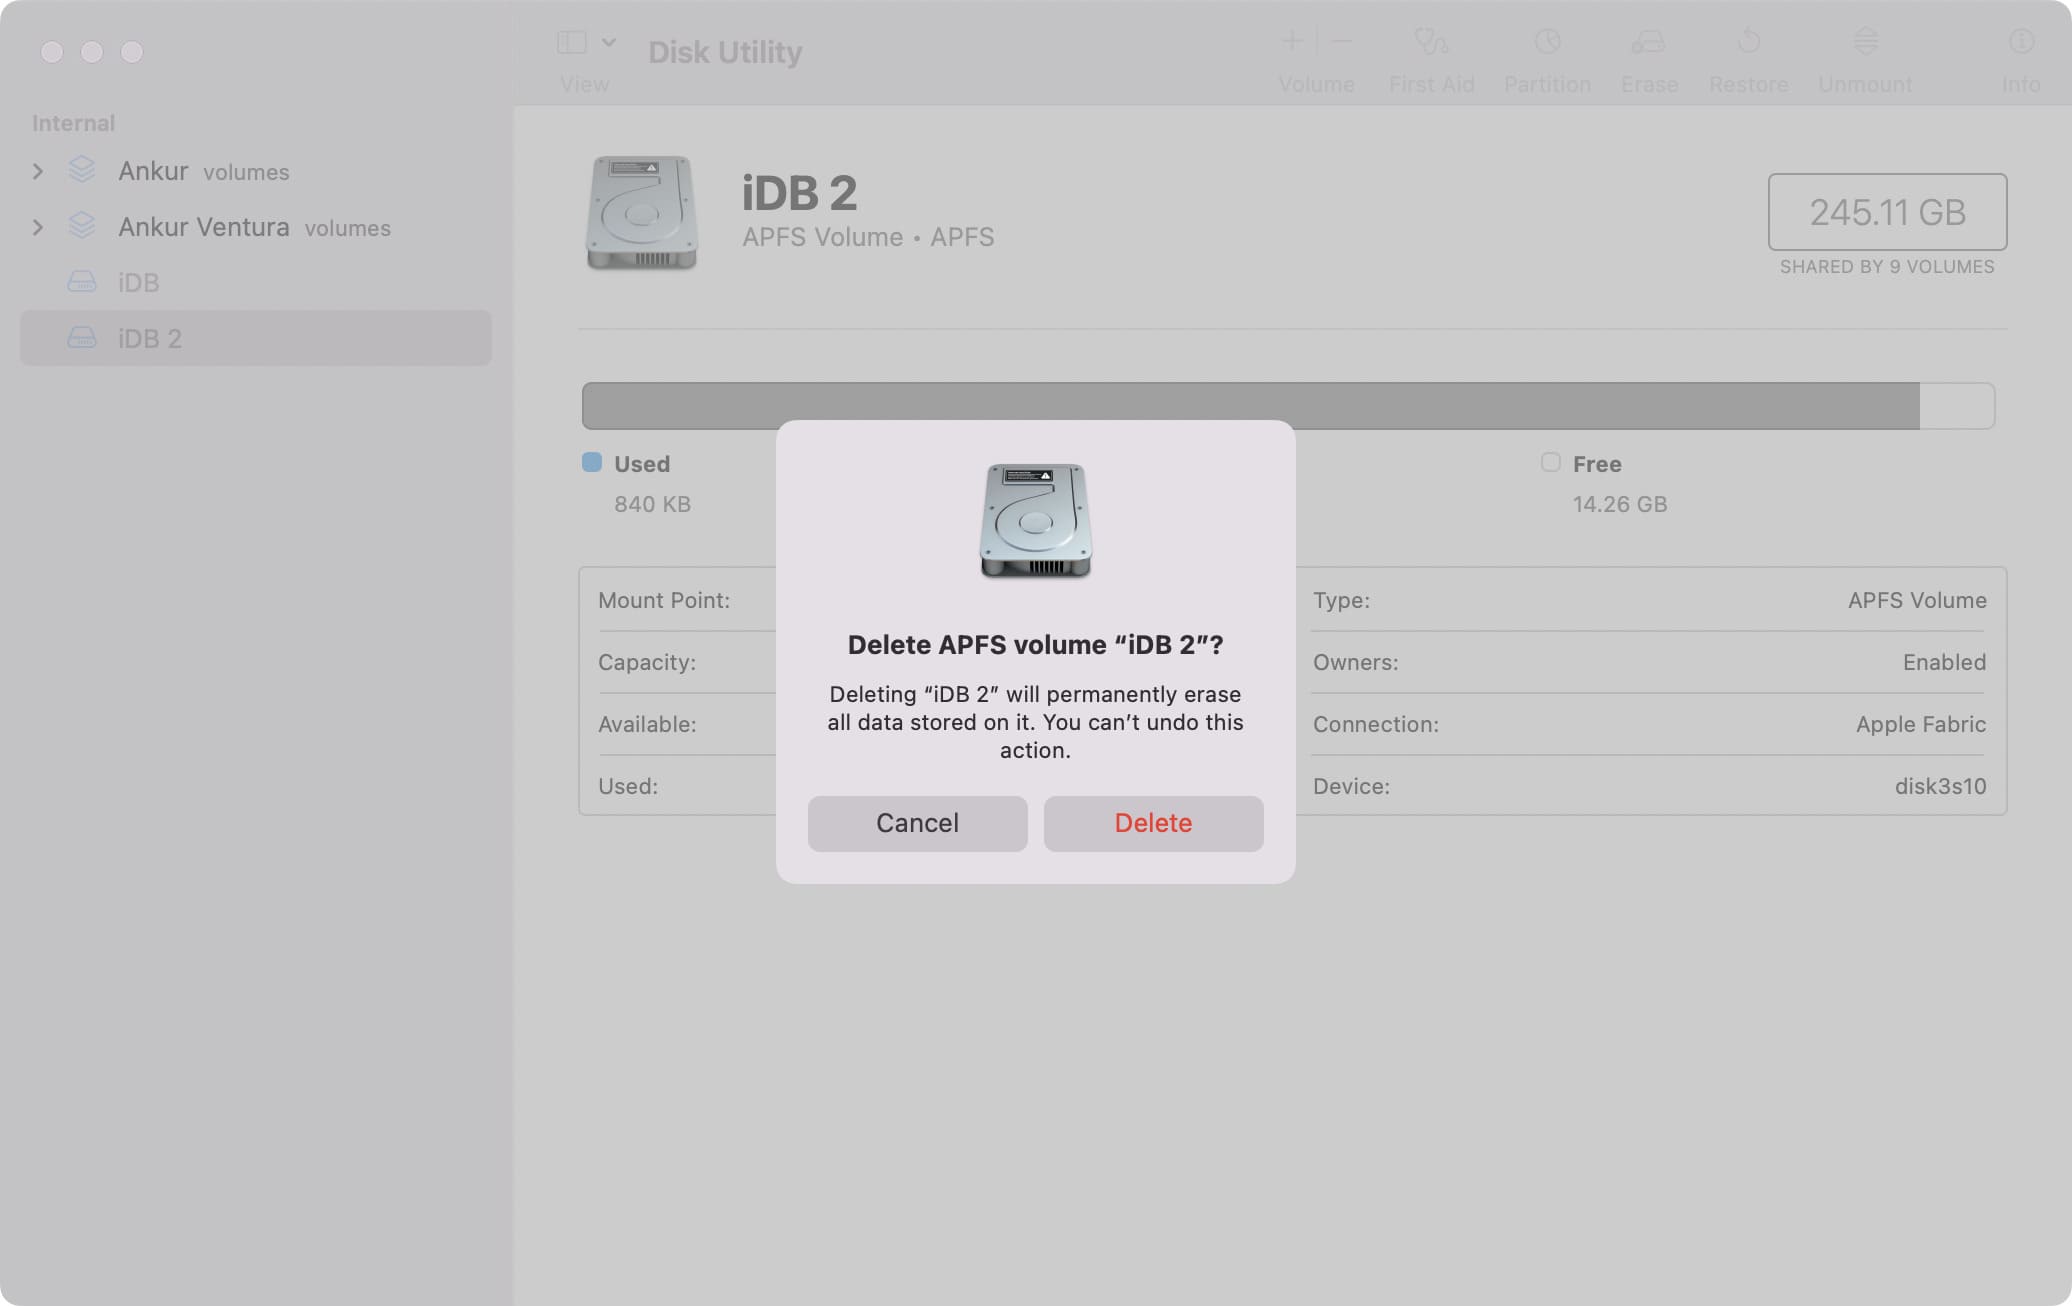
4) When deletion is complete, click Done.
You’ll no longer see this volume in your Disk Utility. Plus, the number of volumes will show one fewer count.
Can’t erase or delete a volume on Mac?
The Erase button or the Delete option in Disk Utility will be dimmed if the selected volume is in use. In that case, start your Mac in Recovery Mode and use the Disk Utility there to erase or delete the volume or volume groups.
Check out next: