You can create a bootable installer for macOS Ventura on a USB flash drive or secondary volume. This is useful if you want to install macOS Ventura on multiple Macs and don’t want to download the huge 12 GB file every time on each computer.
In this tutorial, we show you how to create a bootable installer for macOS Ventura on an external drive.
Things you need
Here’s what you need to create a bootable installer for macOS Ventura:
- A 16 GB or more USB flash drive formatted as Mac OS Extended
- Reliable internet connection
- At least an hour of free time
Breakdown of steps
These are the primary steps to create a macOS Ventura bootable installer:
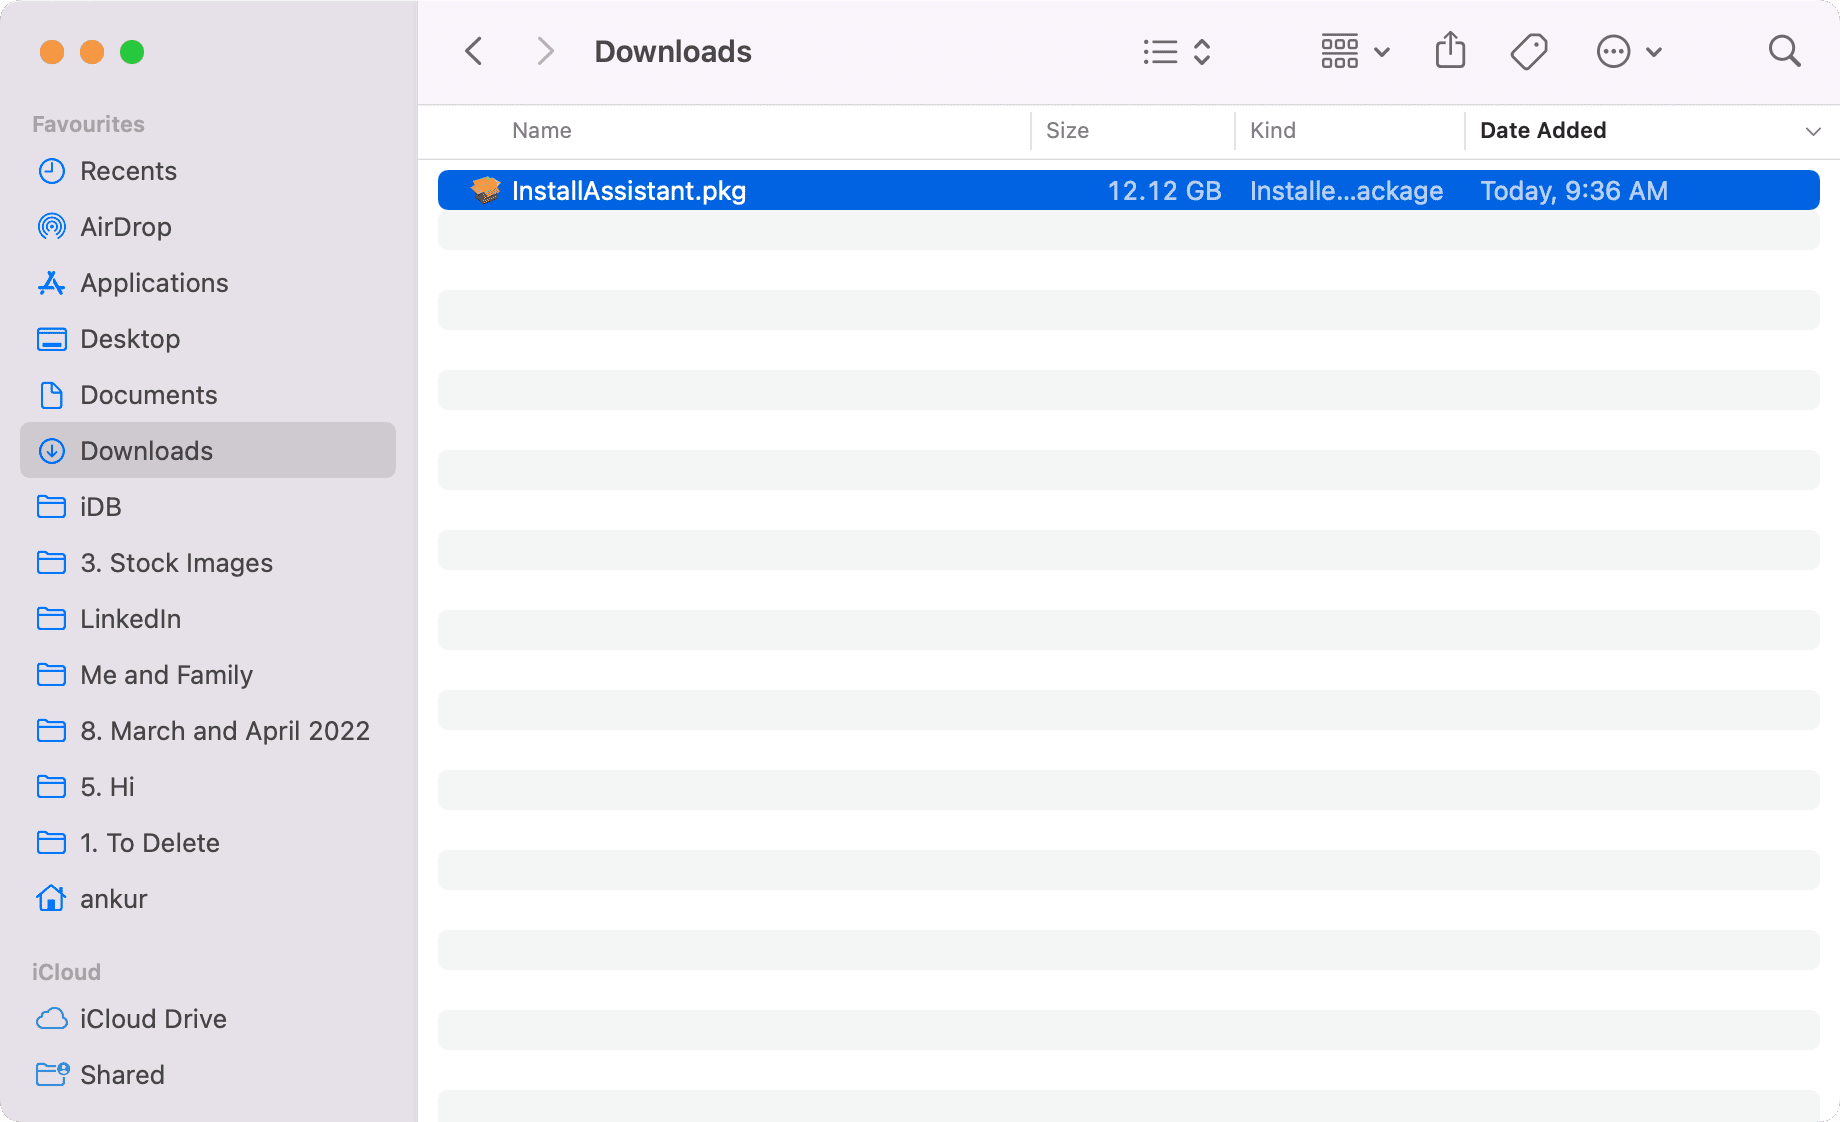
- Download the macOS Ventura installer.
- Erase and correctly format your USB flash drive.
- Use the createinstallmedia command in Terminal.
All three are explained below, along with the steps to use the bootable installer.
1) Download the macOS Ventura installer
Currently, macOS Ventura is in the developer beta phase. It’s limited only to developers who have joined the Apple Developer Program and pay $99 per year to Apple. If you have that, simply head to developer.apple.com and sign in with your developer Apple ID to download the developer beta profile for macOS Ventura. iDB author Christian has explained the process in detail here for an earlier version of macOS. If you don’t have a developer account, you may be able to download the macOS 13 developer beta profile from third-party websites that are not affiliated with Apple. We do not condone this.
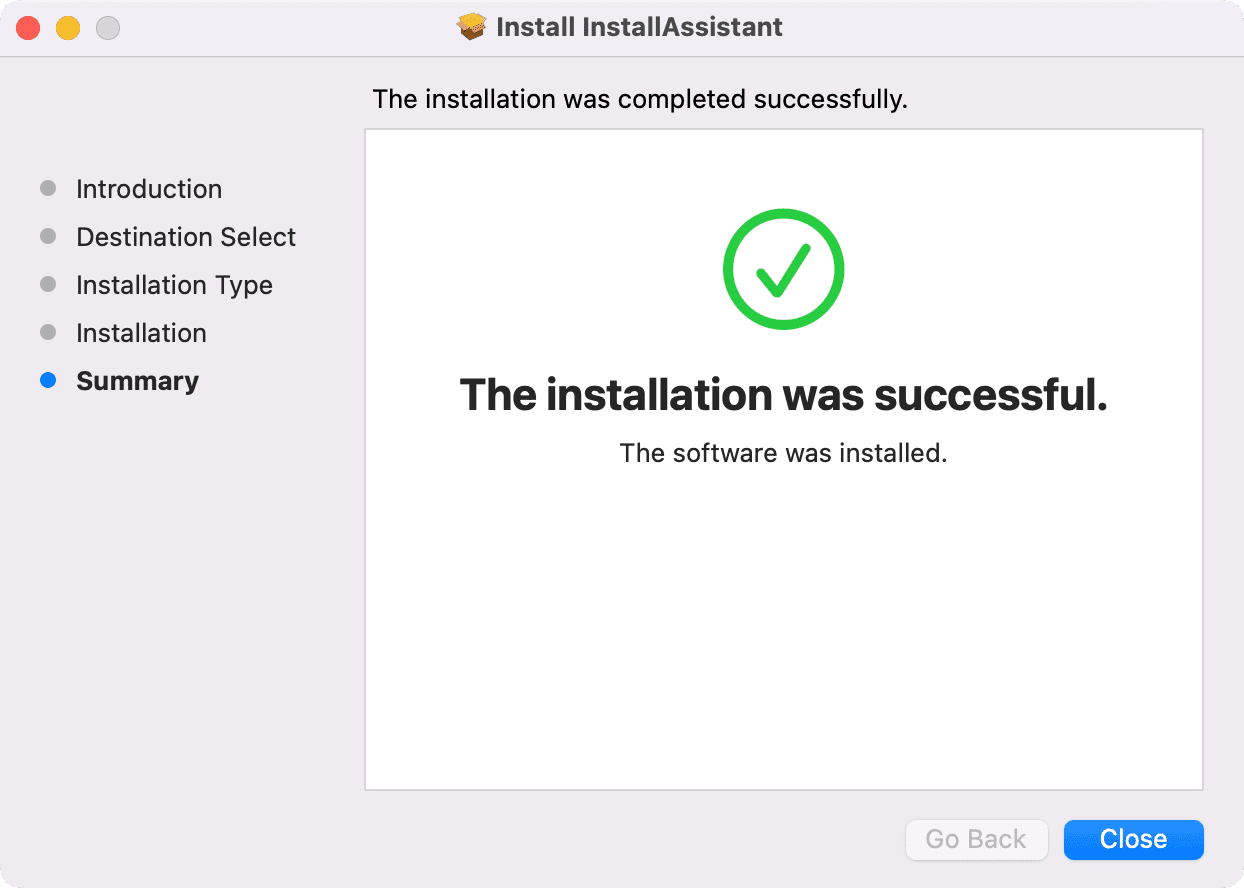
Proceed to the next steps only when you see Install macOS 13 beta in your Mac’s Launchpad and Applications folder.
2) Erase and format your USB flash drive
You’ll be erasing the drive. So, if there are some valuable documents on it, make sure you transfer them to your Mac first.
Here’s how to format your drive as Mac OS Extended to create a bootable installer for macOS:
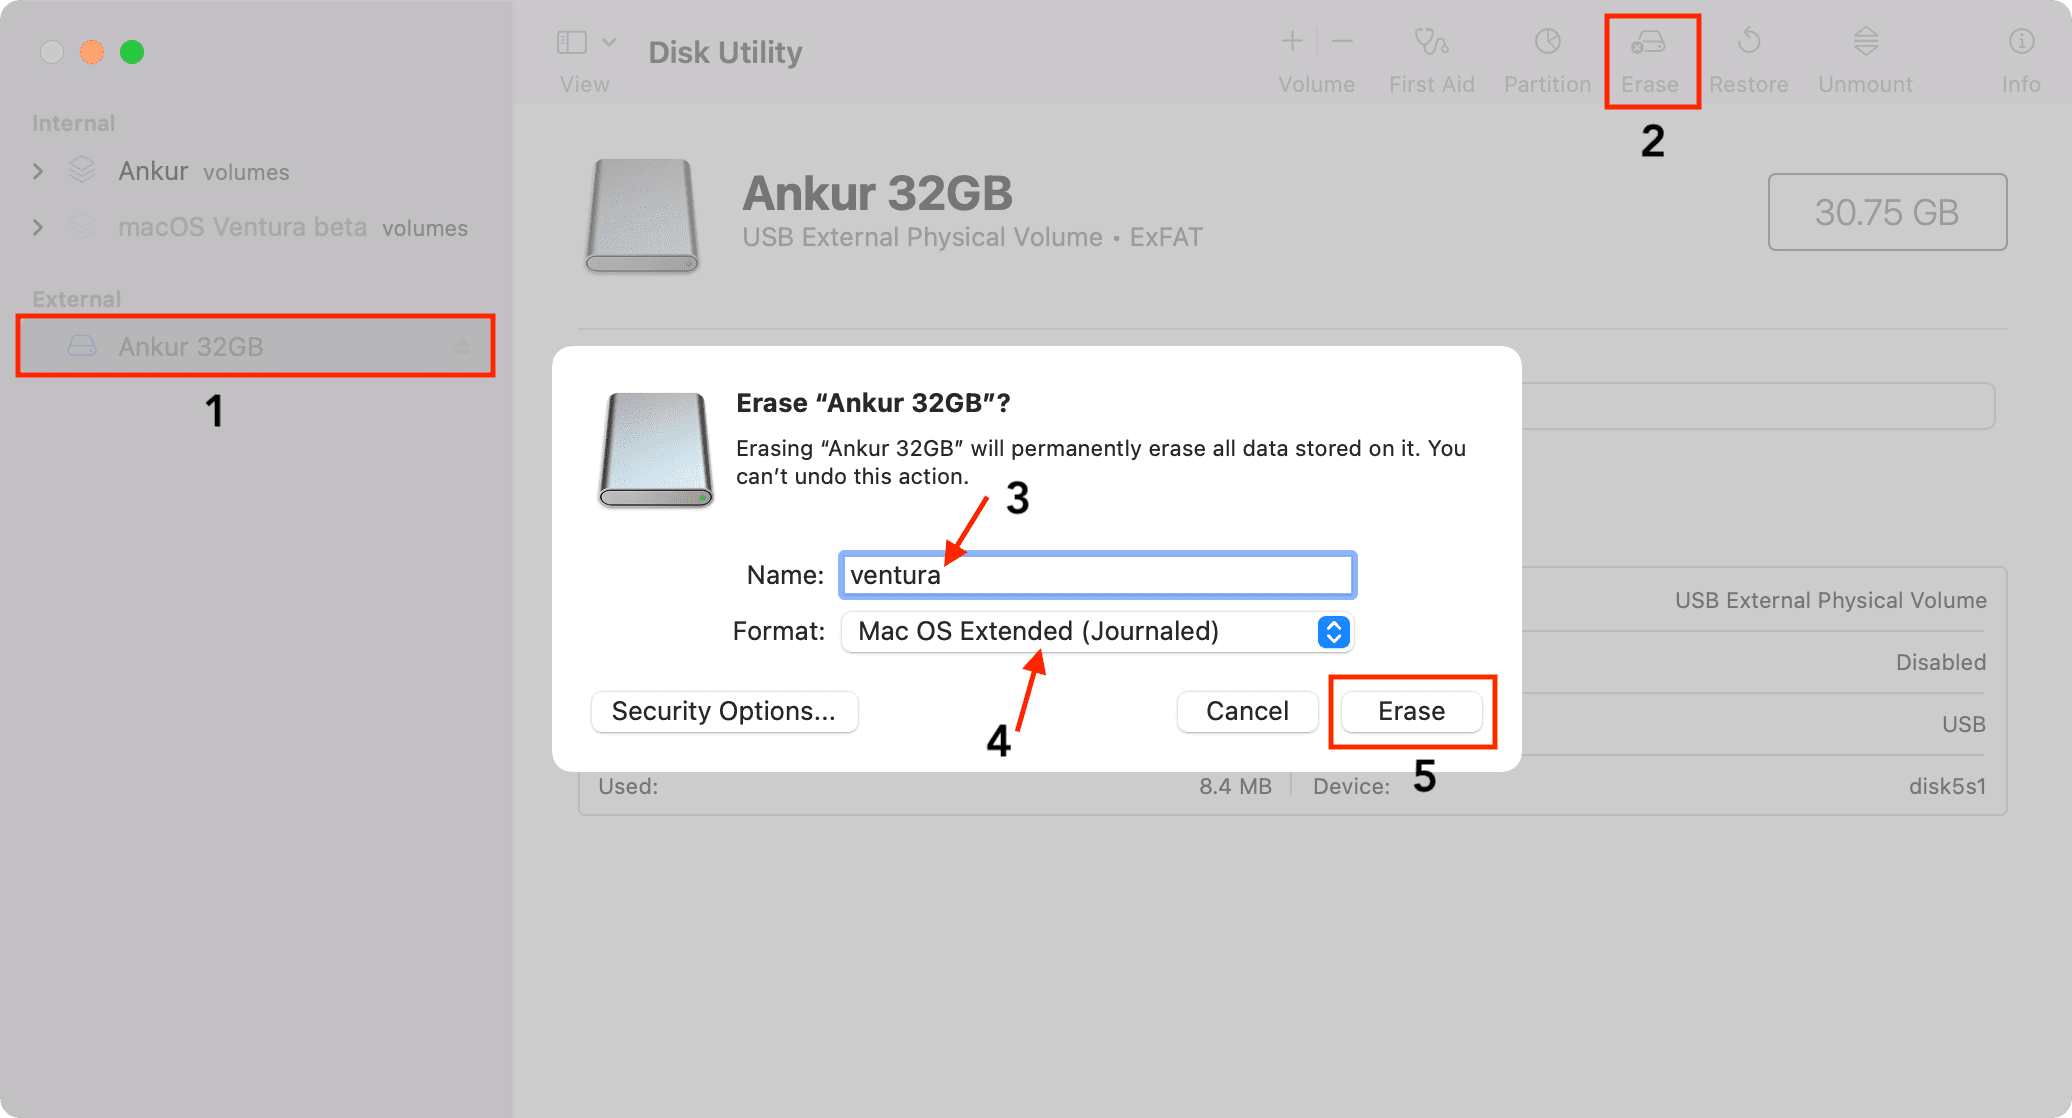
1) Connect your flash drive to your Mac.
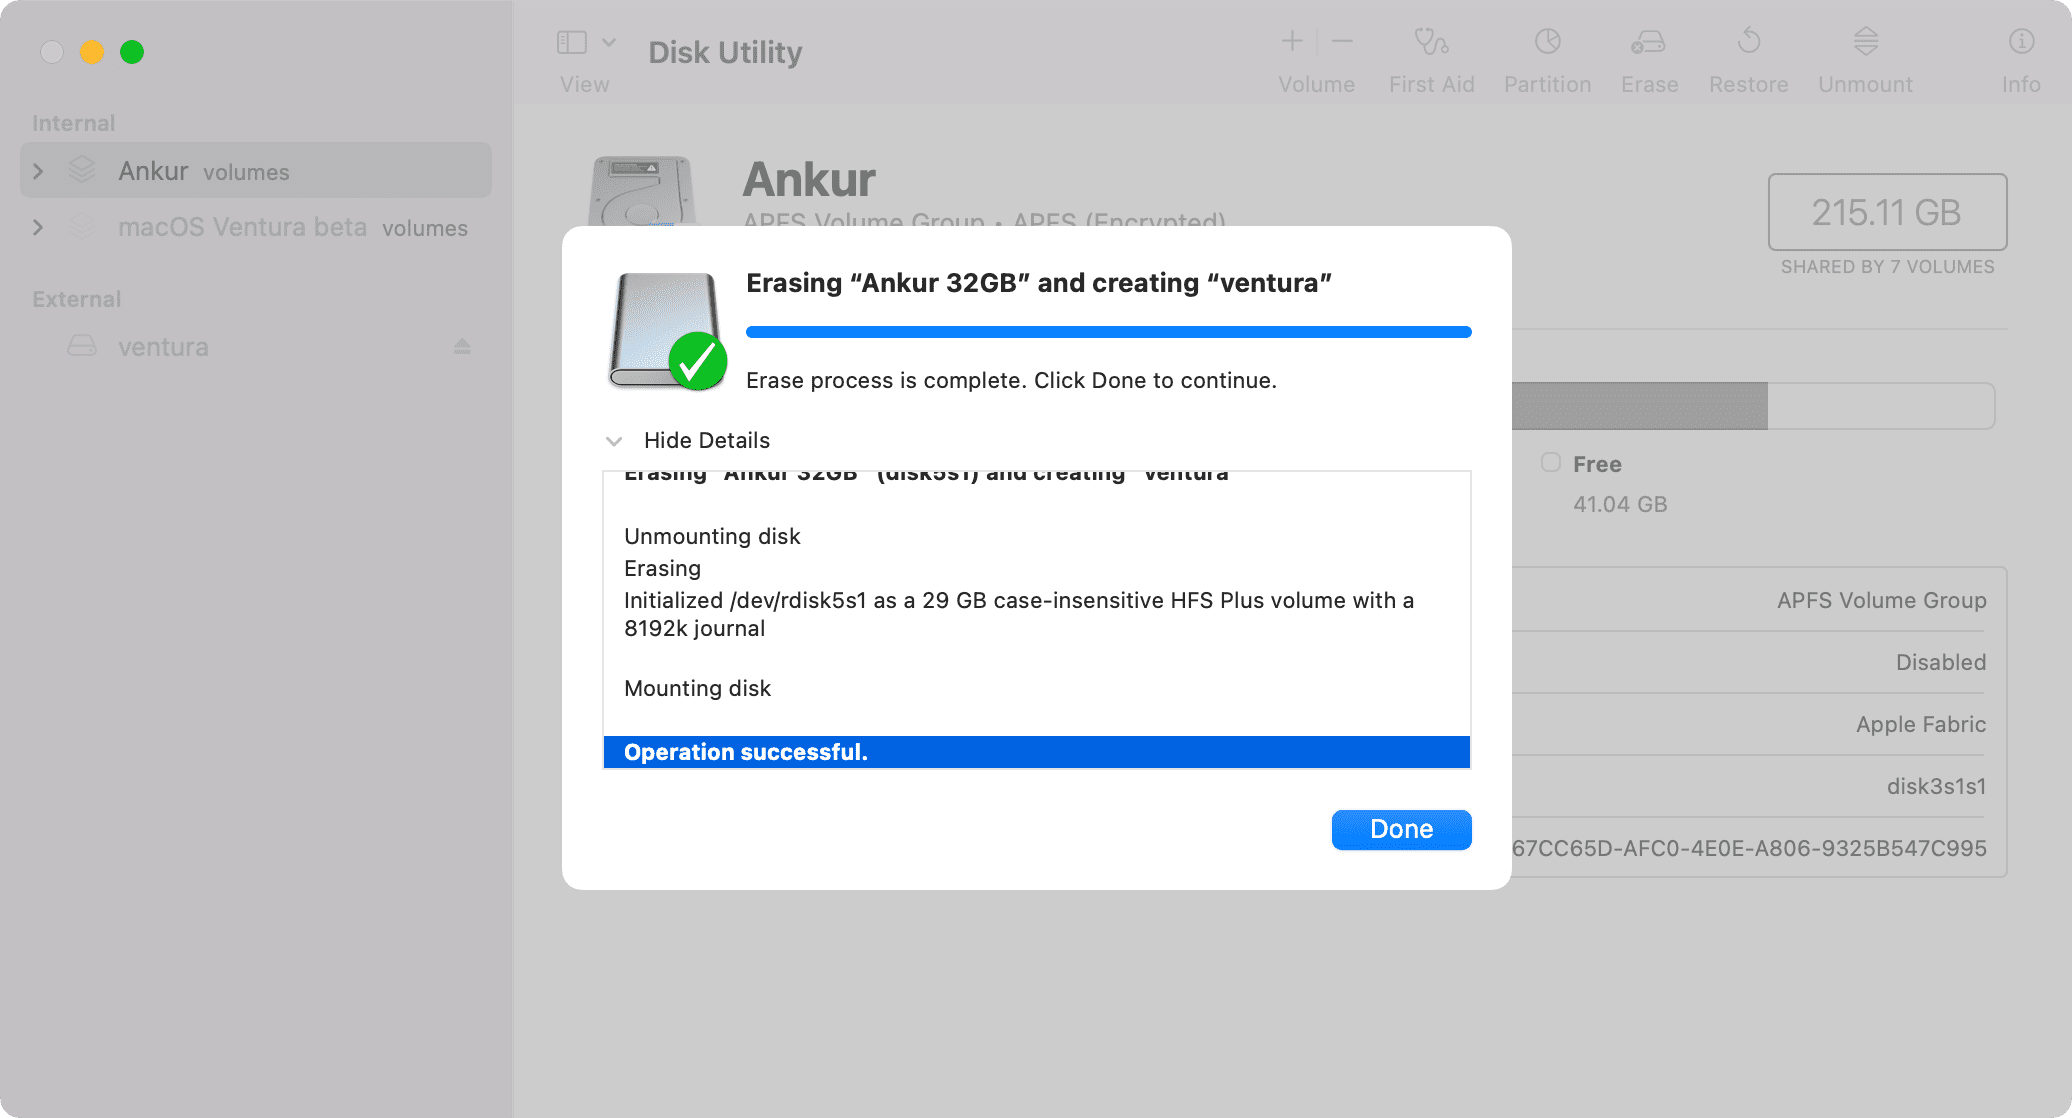
2) Open Disk Utility.
3) Select your drive from the left sidebar of Disk Utility.
4) Click Erase.
5) In name, put ventura with small v.
6) In Format, select Mac OS Extended (Journaled). If you see Scheme, select GUID Partition Map.
7) Finally, click Erase.
Once the process completes, click Done.
You have successfully prepared your USB flash drive to become a bootable installer for macOS.
Note: In step 5 above, you can use any name you want, but I hope you stick with using ventura as this is the name in the command line in step 2 below. This way, you don’t have to edit anything. Also, the name you set here is irrelevant for the long run, as Terminal will rename the drive with the name of the macOS version (Install macOS 13 beta). So, just stick with ventura, and you won’t have to change the Terminal command below. In case you enter a different name, make sure to use that in the Terminal command in step 2.
3) Use createinstallmedia command in Terminal to create a bootable installer for macOS Ventura
Tip: The process below will take some time. So, before you begin, I recommend you remove your MacBook from your lap or an uneven surface and keep it on a flat, non-shaky table away from kids and pets. This is to ensure that your Mac isn’t moved, shaken, or fidgeted during the process. If it’s moved, the externally connected drive or the USB-C dongle may disconnect, which will cancel the operation.
With the macOS Ventura installer file downloaded and a USB flash drive prepared, follow these final steps to create a bootable installer for macOS Ventura:
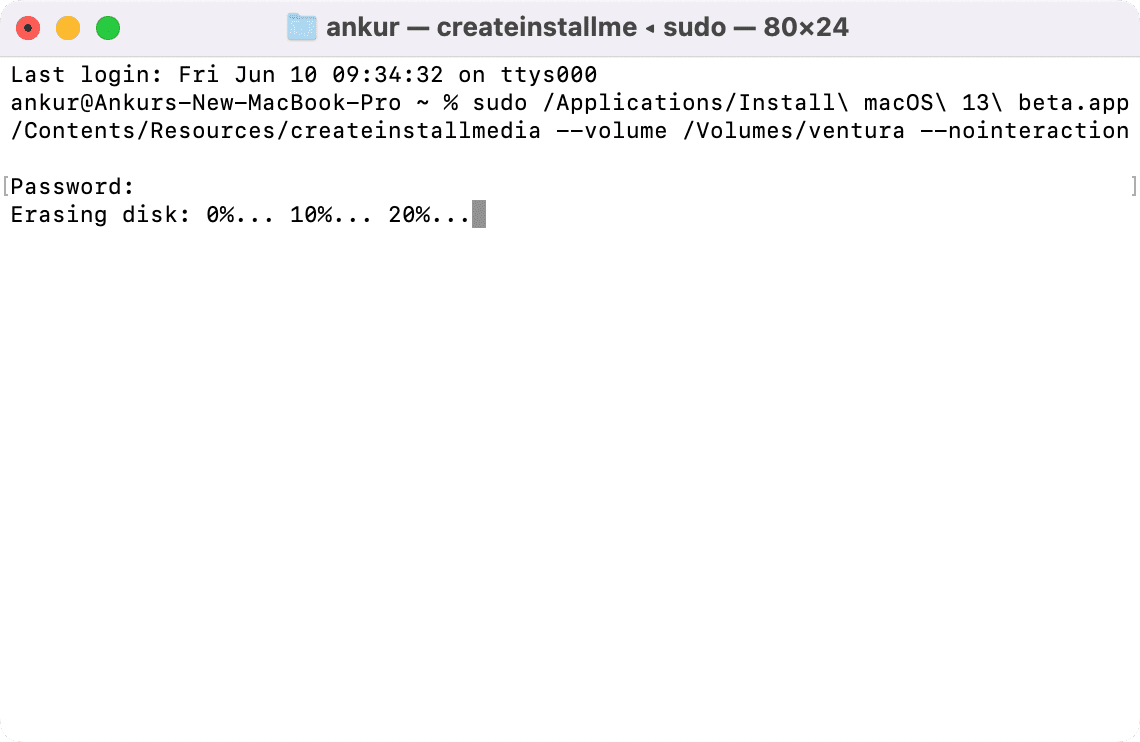
1) Open Terminal on your Mac.
2) Copy this command, paste it into the Terminal, and press the return/enter key.
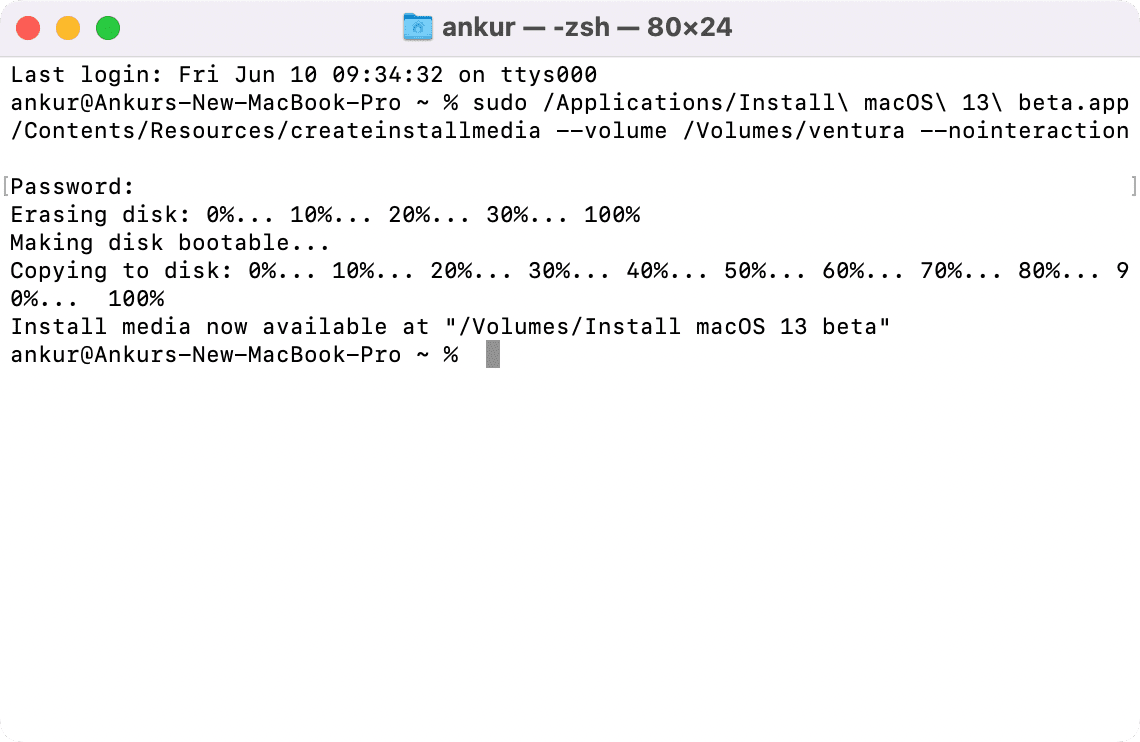
sudo /Applications/Install\ macOS\ 13\ beta.app/Contents/Resources/createinstallmedia --volume /Volumes/ventura --nointeraction
3) Enter your Mac’s password and hit the return key. Note that when you type the password in Terminal, it won’t show anything on the screen.
That’s it! Sit back and relax. I recommend you don’t run any intensive tasks on your Mac for now and let the process complete peacefully.
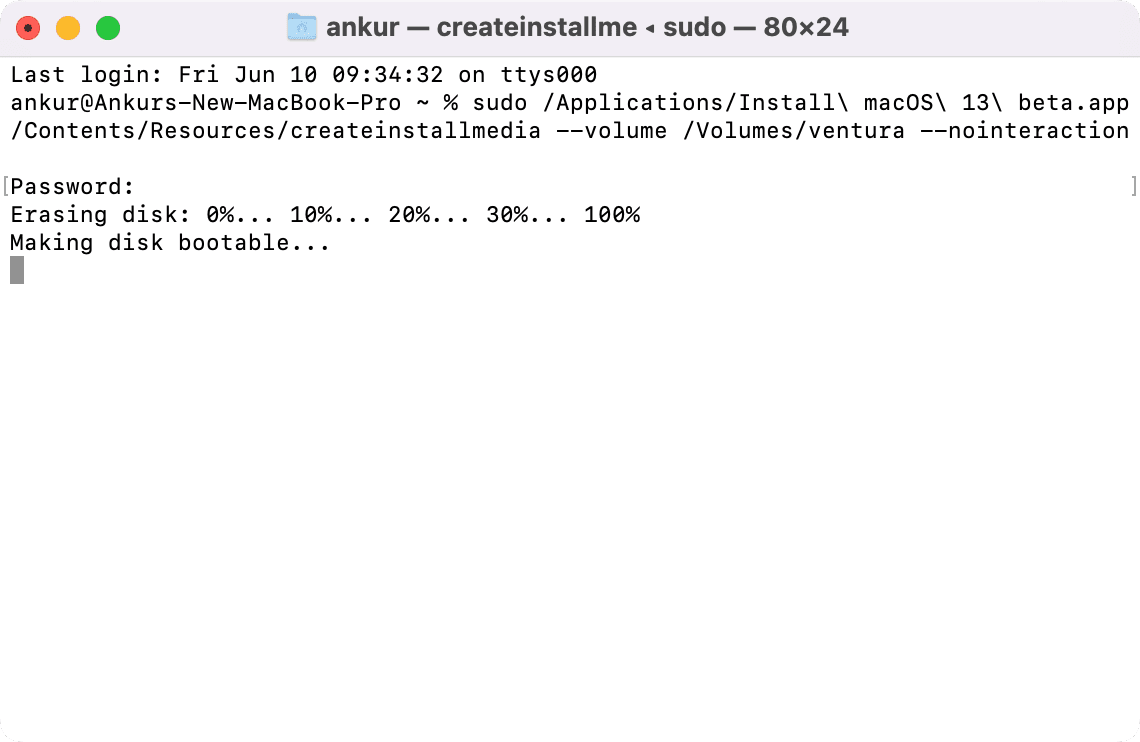
Terminal will erase the disk. You will see 0%… 10%… 20%… up to 100%.
In between, you might see a popup saying, “Terminal would like to access files on a removable volume.” Click OK.

Now, Terminal will show making disk bootable.
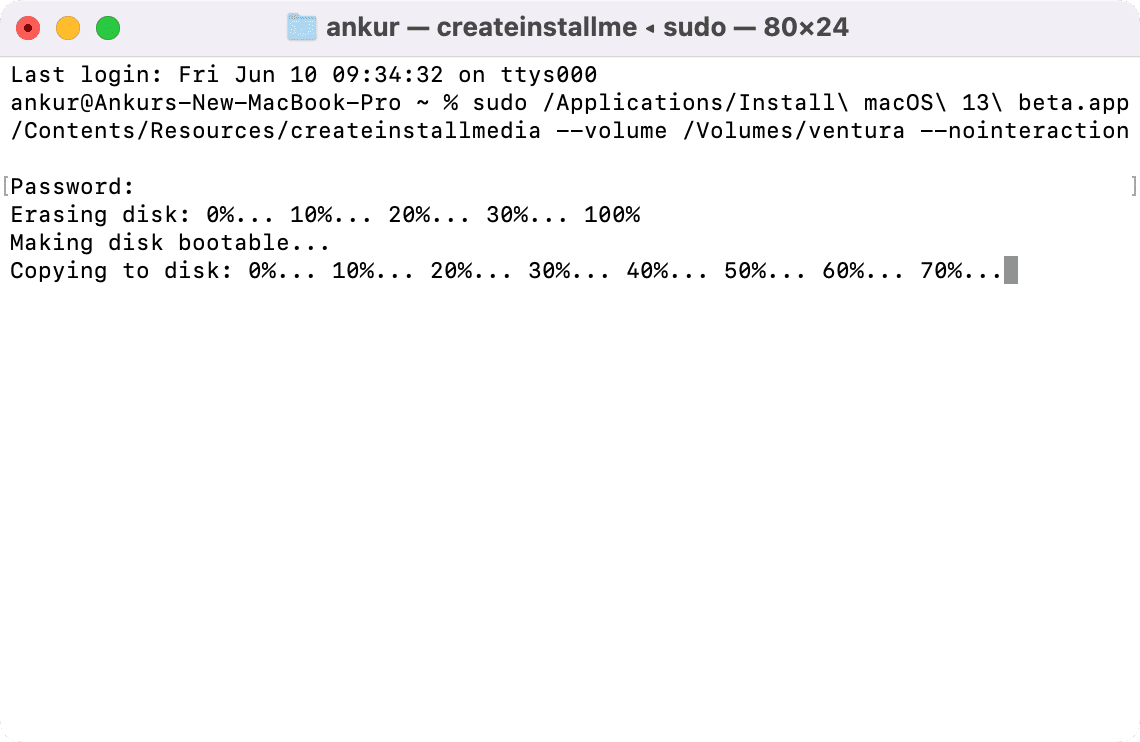
After this, it will show copying to disk: 0%… 10%… 20%… 30%… up to 100%. Depending on your Mac and the external drive, it will take significant time. I have an M1 MacBook Pro and a SanDisk USB 3.0 drive. It took me about 30 minutes. It’s important to note that the process is incomplete even after it shows 100%. So, please keep waiting.
Once you see, Install media now available at “/Volumes/Install macOS 13 beta” Your Username@Your Mac’s Name ~ % the process is truly finished.
You have now successfully created a bootable installer for macOS Ventura. Finally, here’s how to use it to get macOS Ventura developer beta.
How to use macOS Ventura bootable installer
Before you begin:
- You should know whether your Mac has Apple silicon (M1, M1 Pro, M1 Max, M1 Ultra, or M2) or an Intel processor. After that, follow the appropriate corresponding steps mentioned under the headings below.
- Make sure your Mac supports macOS Ventura.
- While installing macOS from a USB drive, the huge 12 GB macOS isn’t downloaded from the internet. But still, your Mac must be connected to the internet to get firmware and other essential information.
- Open this iDB post on your phone or another computer and shut down your Mac where you want to install macOS Ventura. Next, follow the steps below.
Apple silicon
Here’s how to use a bootable macOS Ventura Installer if your Mac has Apple silicon:
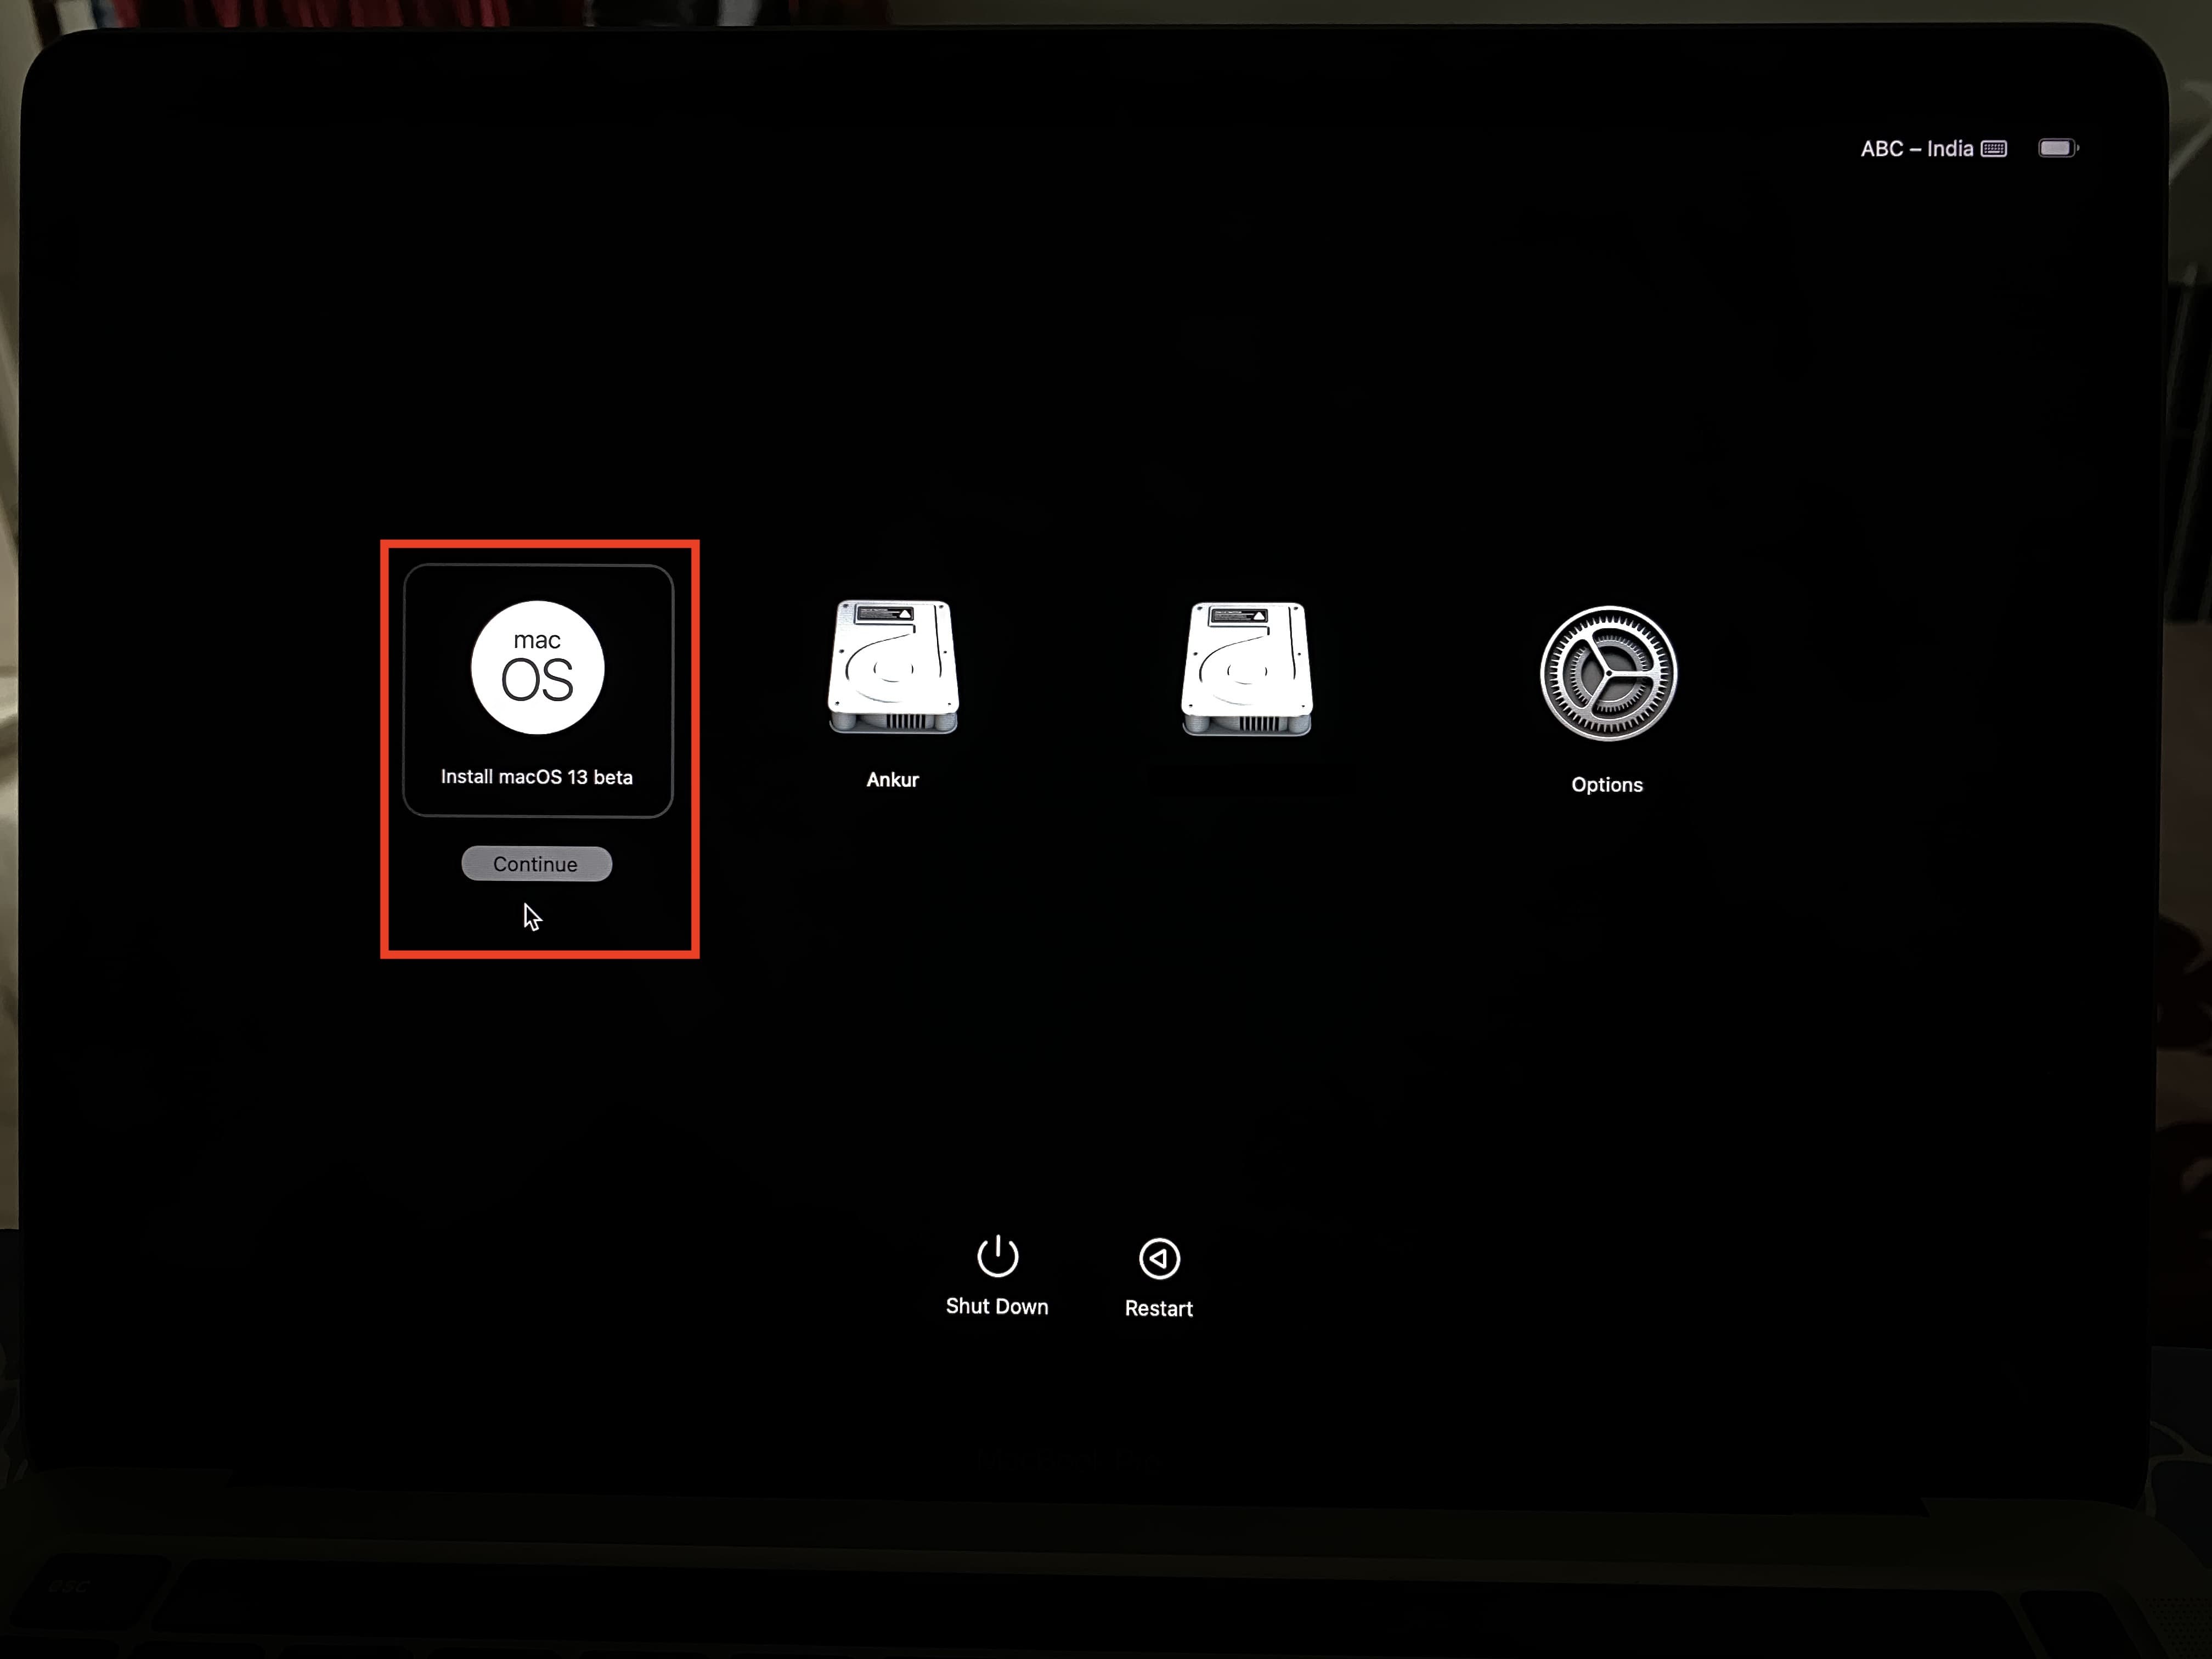
1) Plug in the bootable USB drive installer to your Mac.
2) Press the power button once and then immediately continue pressing it until you see Loading startup options on the screen.
3) You will now see the available bootable volumes. Select the drive with the bootable installer and click Continue. Follow the instructions in the macOS installer window to install macOS Ventura on your Mac.
Intel processor
Here’s how to use a bootable macOS Ventura Installer if your Mac has an Intel processor:
1) Plug in the bootable USB drive installer to your Mac.
2) Turn on your Mac and immediately press and hold the Option key. Stop pressing the Option key when you see the black screen with your Mac’s available bootable volumes.
3) Select the bootable installer drive and press the return key or click the up arrow.
4) After choosing the language, select Install macOS from the Utilities window and click Continue. Now, follow along with the onscreen instructions.
This is how you can create and use macOS Ventura USB installer to get the exciting new macOS 13 on your Mac.
Must see: