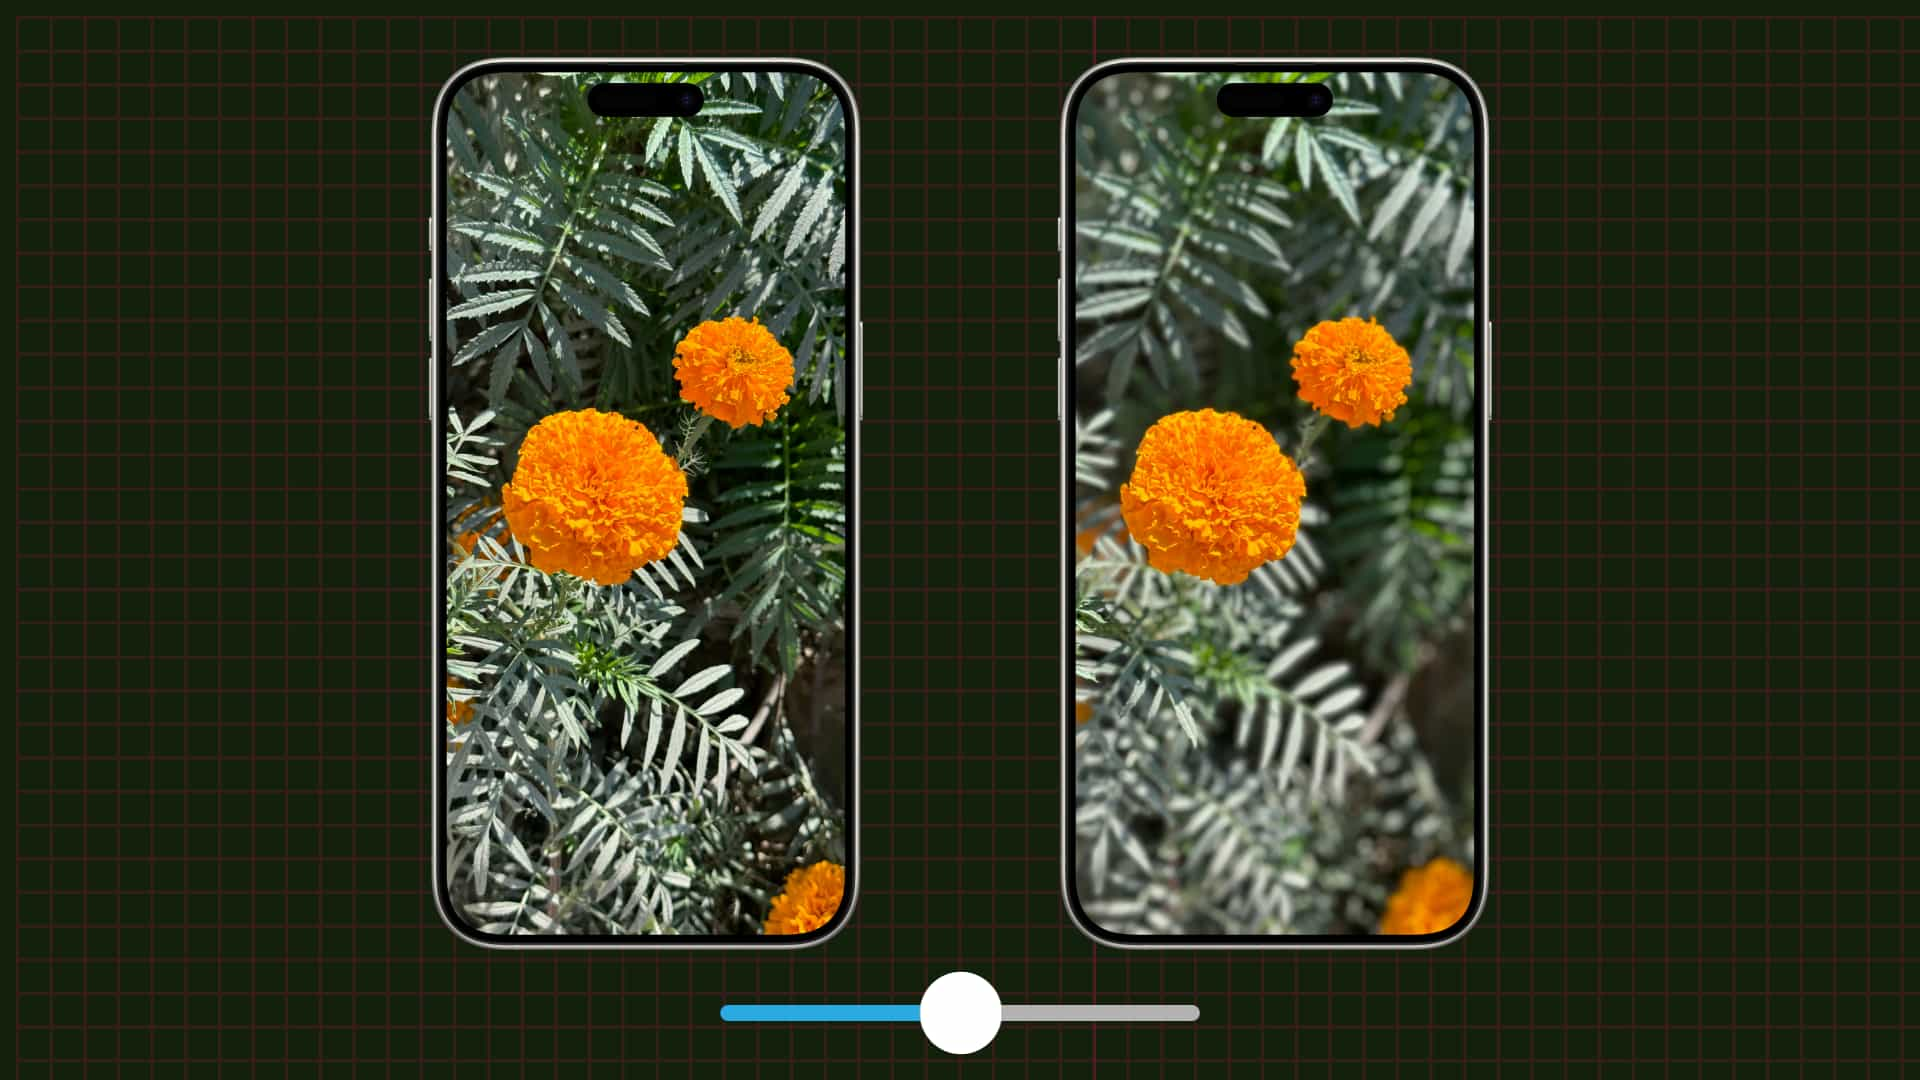
Learn how to adjust a photo’s depth of field and focus point on your iPhone to change the amount of background blur, also known as bokeh.
iPhone photographers are familiar with the bokeh effect. Any standard image taken with an iPhone will have subtle background blur. In contras, photos snapped in the Camera app’s portrait mode have a much more pronounced depth-of-field effect. You can adjust the amount of background blur non-destructively for portrait shots taken with the iPhone XR or later in the built-in Photos app.
With the iPhone 15 or later, you can also turn a regular photo into a portrait image after the shot has been taken. And, you can do all this without any third-party apps or AI tools.
Adjust background blur in the built-in Camera app
Follow these steps to increase or decrease the intensity of the depth-of-field effect right in the viewfinder of the Camera app, before snapping the image.
- Open the built-in Camera app on your iPhone.
- Swipe to switch to Portrait mode.
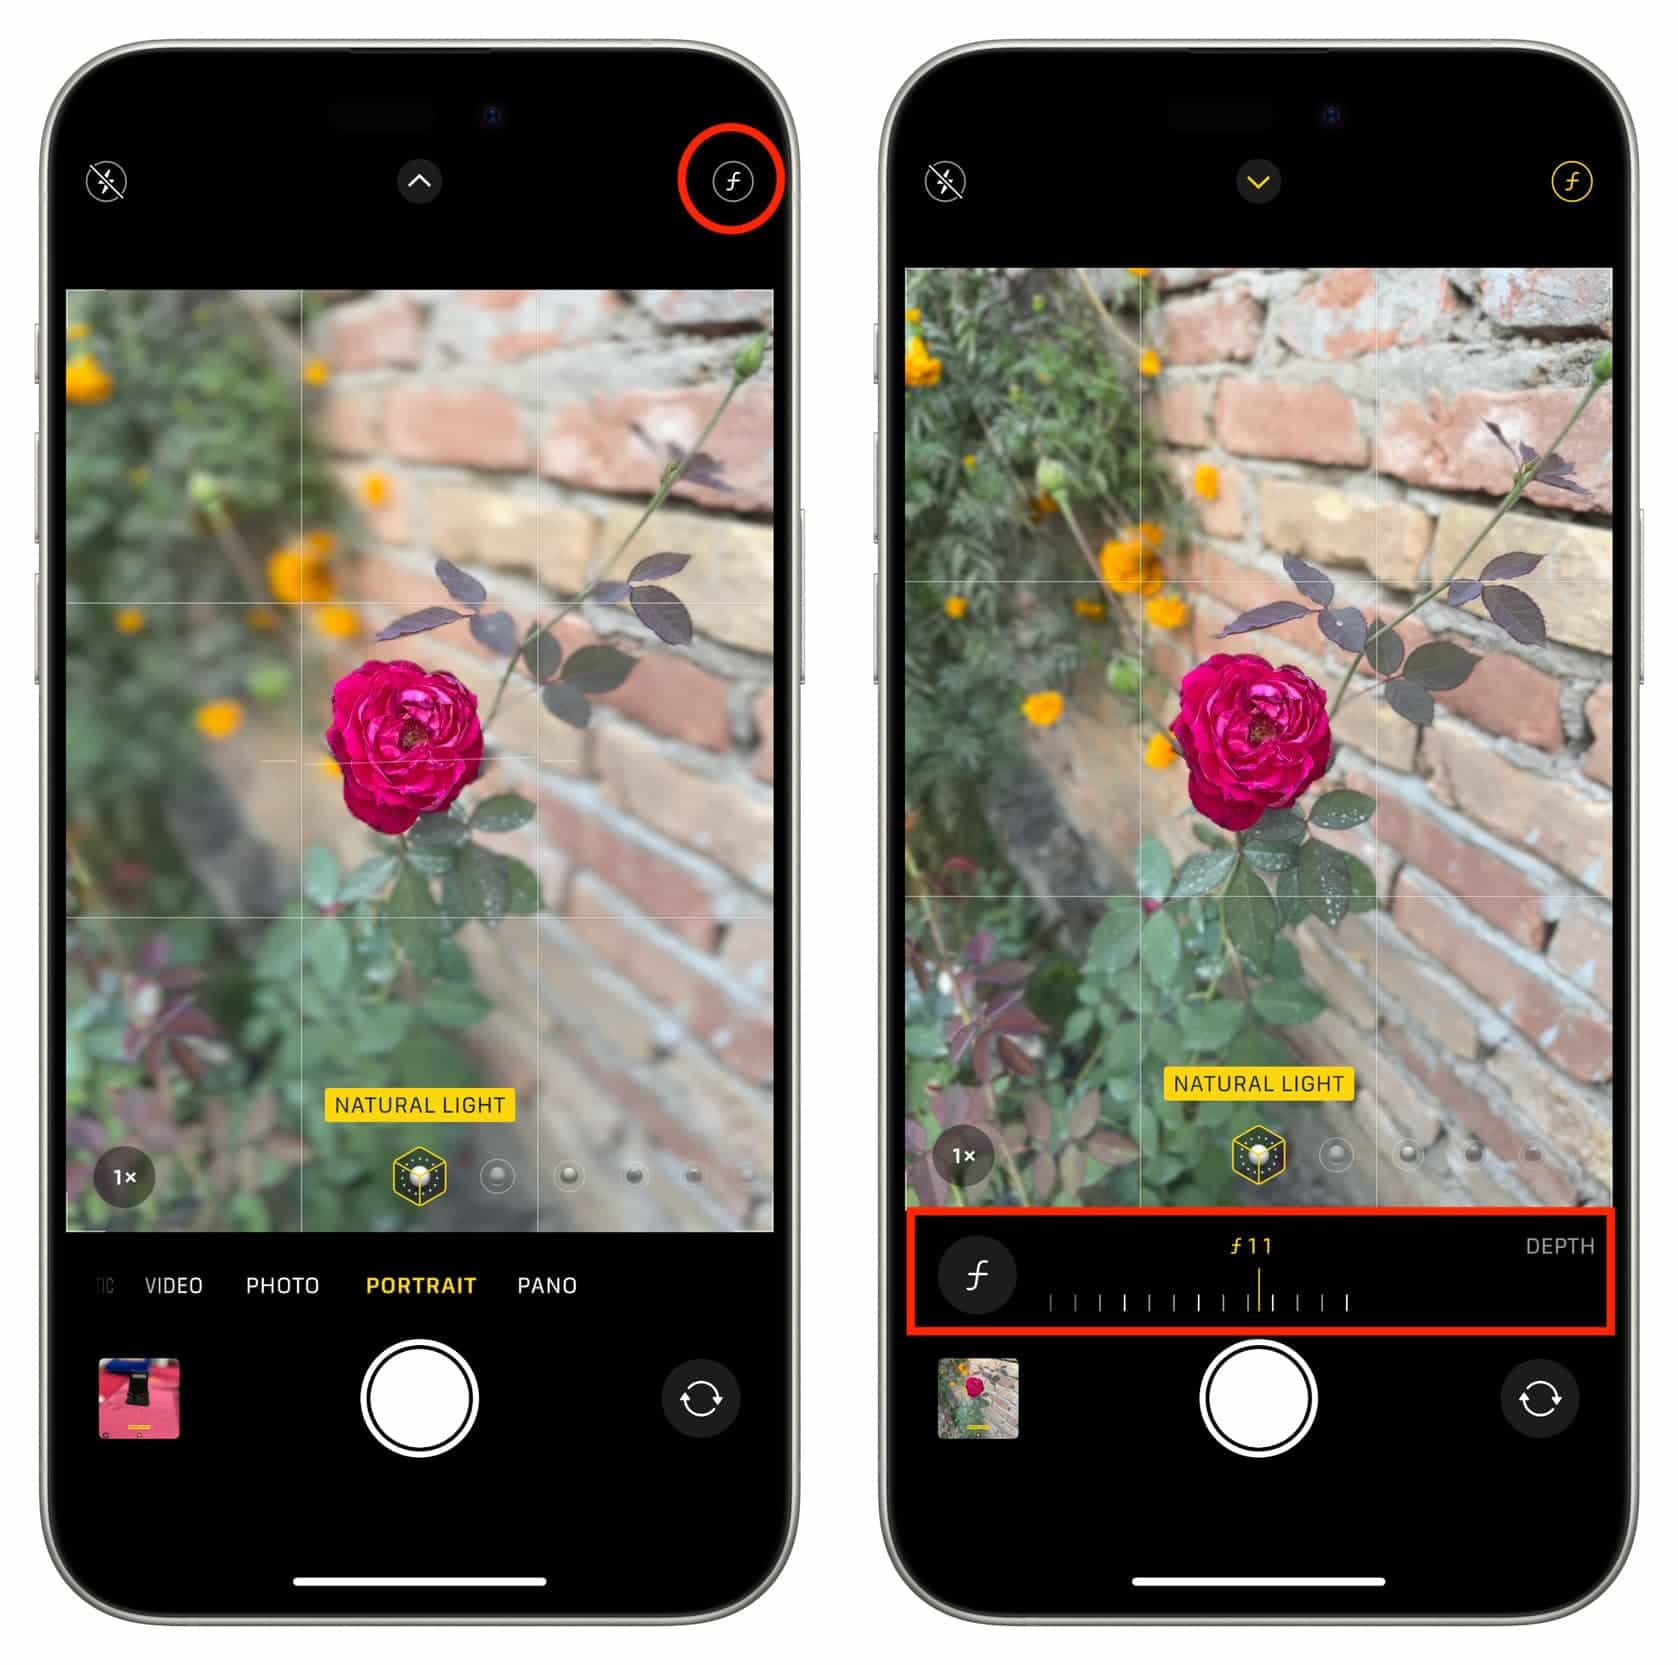
- Tap the depth icon (f) in the top-right corner. Move the phone a bit closer or farther from the subject until a Natural Light or a similar label turns yellow, indicating portrait mode is active.
- Drag the depth control slider anywhere between f 1.4 and f 16.
- When happy with background blur, tap the shutter button to take the photo.
Adjust a photo’s background blur
Don’t worry if you don’t have the time to adjust a photo’s background blur in-camera as you can do it later in Apple’s built-in Photos app.
- Launch the Photos app on your iPhone and open any portrait photo. To browse all your depth-of-field images, choose the Portrait option under the Media Types heading.
- Hit the edit icon.
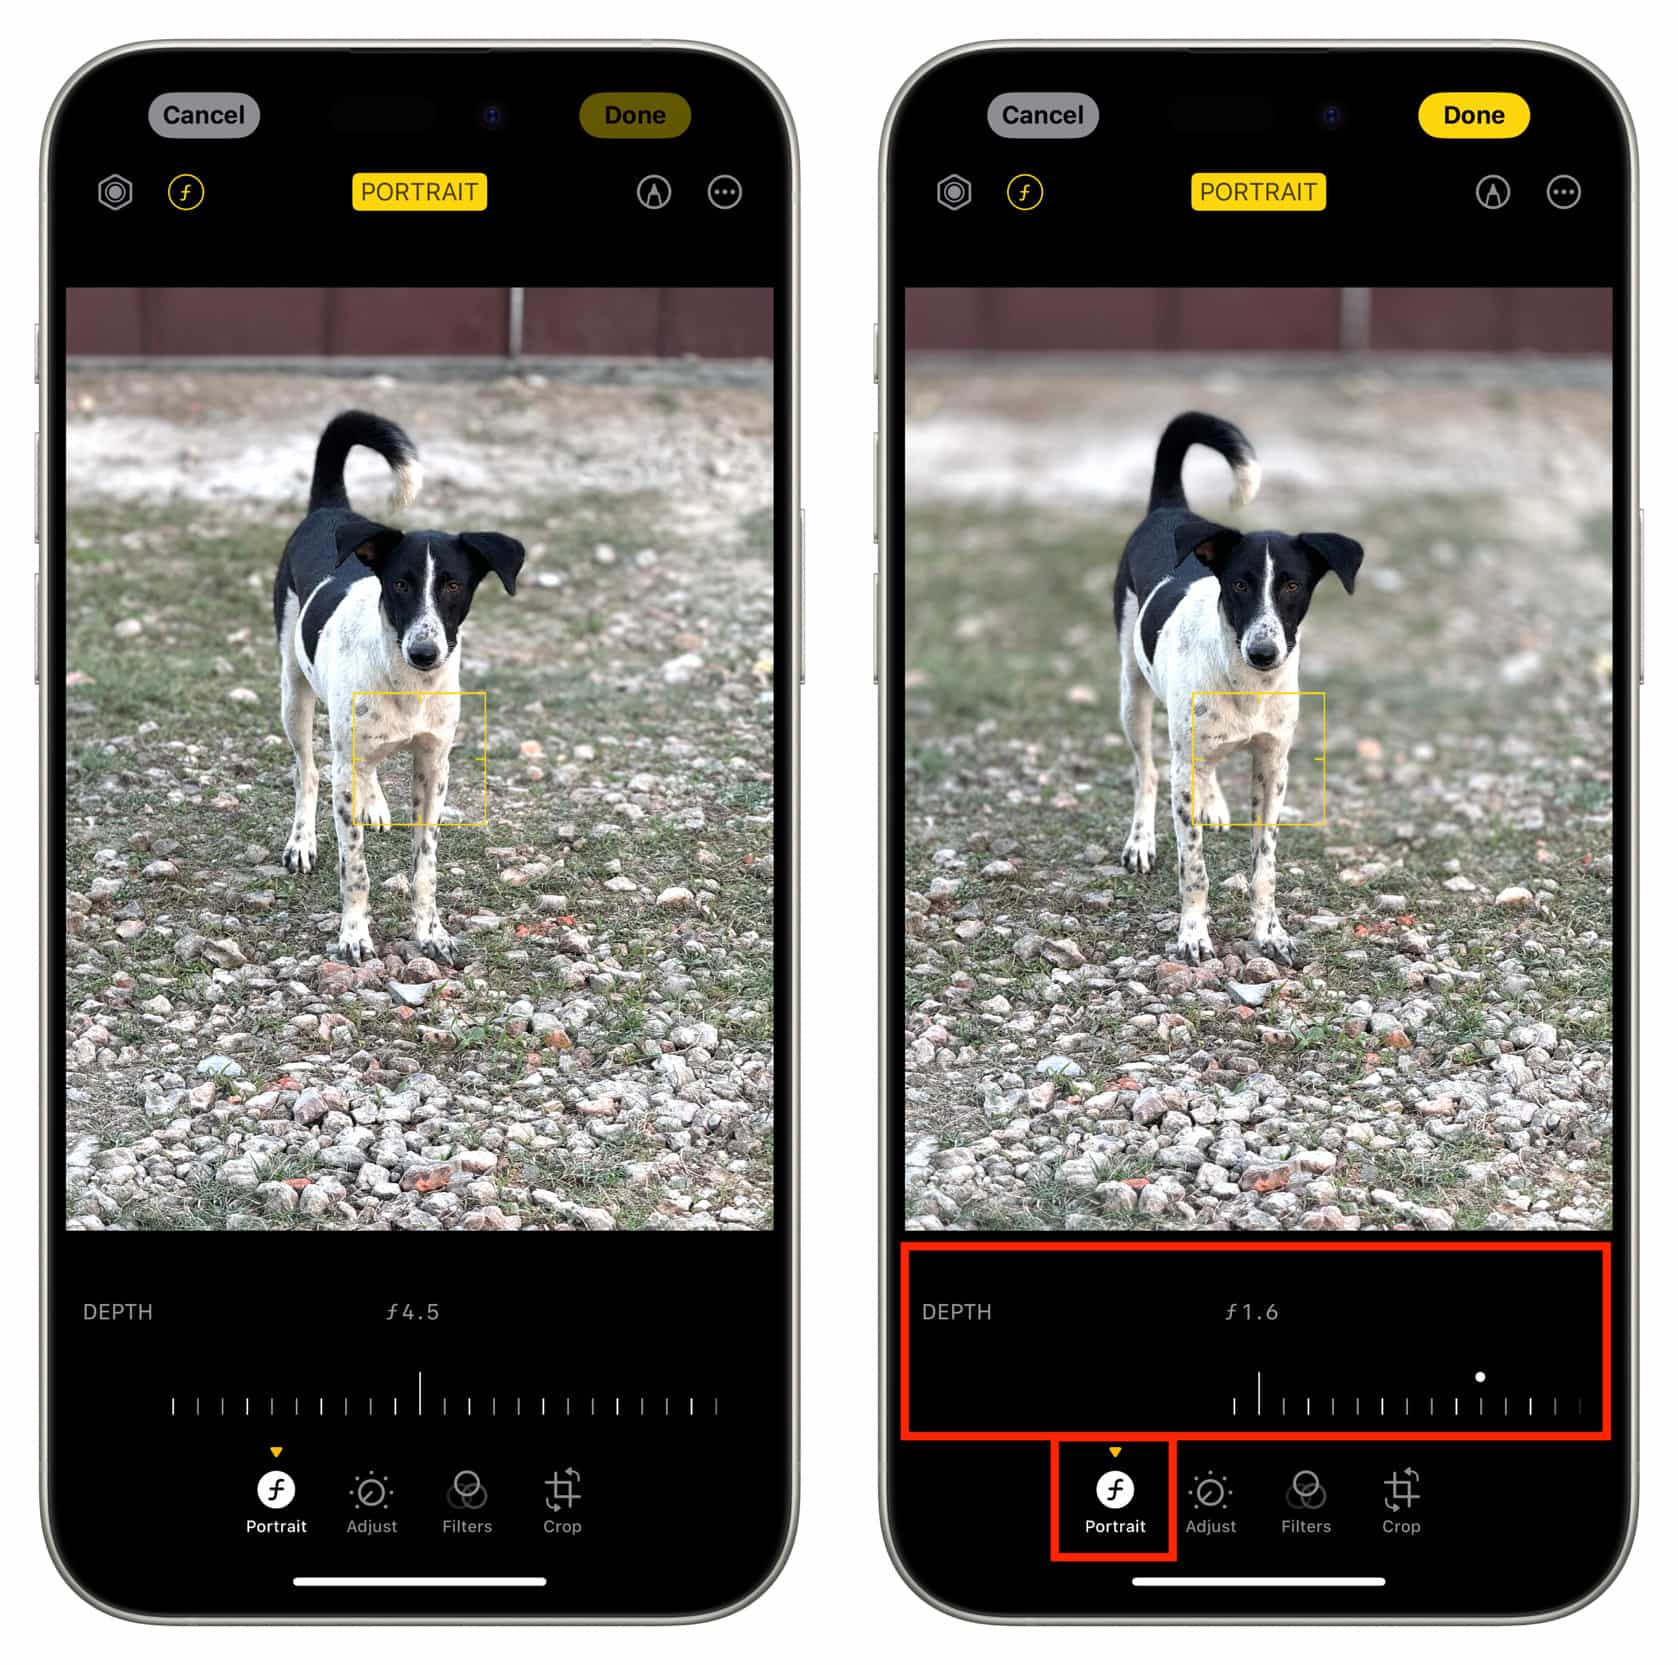
- The Depth slider should appear at the bottom. If it’s missing, hit the (f) Portrait button at the bottom and make sure the (f) option is selected in the top-left corner. Drag the depth of field slider to adjust the background blur. The white dot on the slider marks the original depth value when the shot was taken.
- Tap Done to save the changes.

Note: This feature is available on the second-generation or later iPhone SE and the iPhone XR and later.
Turn a regular photo into a portrait one
If you have any iPhone 15, iPhone 16 or later model, the Camera app will detect people and pets in the viewfinder and automatically save depth data even if you’re in Photo mode, letting you convert regular images into portrait mode photos after the fact.
- Open the Camera app on your iPhone 15 or later, swipe to the Photo mode and snap up a photo of a person, a dog, or a cat.
- Open the photo you just took, hit the Portrait or Live label at the top, and select Portrait to use saved depth data to background blur. Alternatively, hit the edit icon, select the (f) Portrait button at the bottom, and drag the depth control slider to adjust background blur.
- Hit Done to save your changes.
If there’s no (f) portrait button or the depth slider, the image cannot be turned into a portrait, which can happen for several reasons:
- Photo subject isn’t a human or an animal.
- You’ve turned off “Portraits in Photo Mode” in Settings > Camera.
- The algorithm couldn’t recognize the subject; in that case, take another photo with subtle changes to the background, subject placement, or lighting.
I was able to convert almost all regular photos of people and pets taken with the 1x, 2x and 5x lenses on my iPhone 15 Pro Max into portraits, the only exception being the ultra-wide 0.5 lens. Keep in mind that applying Live Photo effects such as Loop, Bounce, and Long Exposure to a portrait image will automatically disable background blur.
Re-focus a photo with Focus Control
If you take a photo of, say, a flower in sharp focus with the leaves in the background blurred out, you can reverse it later so that the flower in the foreground is blurred and the leaves are sharp.
- Launch the Photos app and open a portrait taken with an iPhone 15 or later, then hit the edit icon.
- If the depth slider is at the OFF position, drag it a little to turn on background blur.
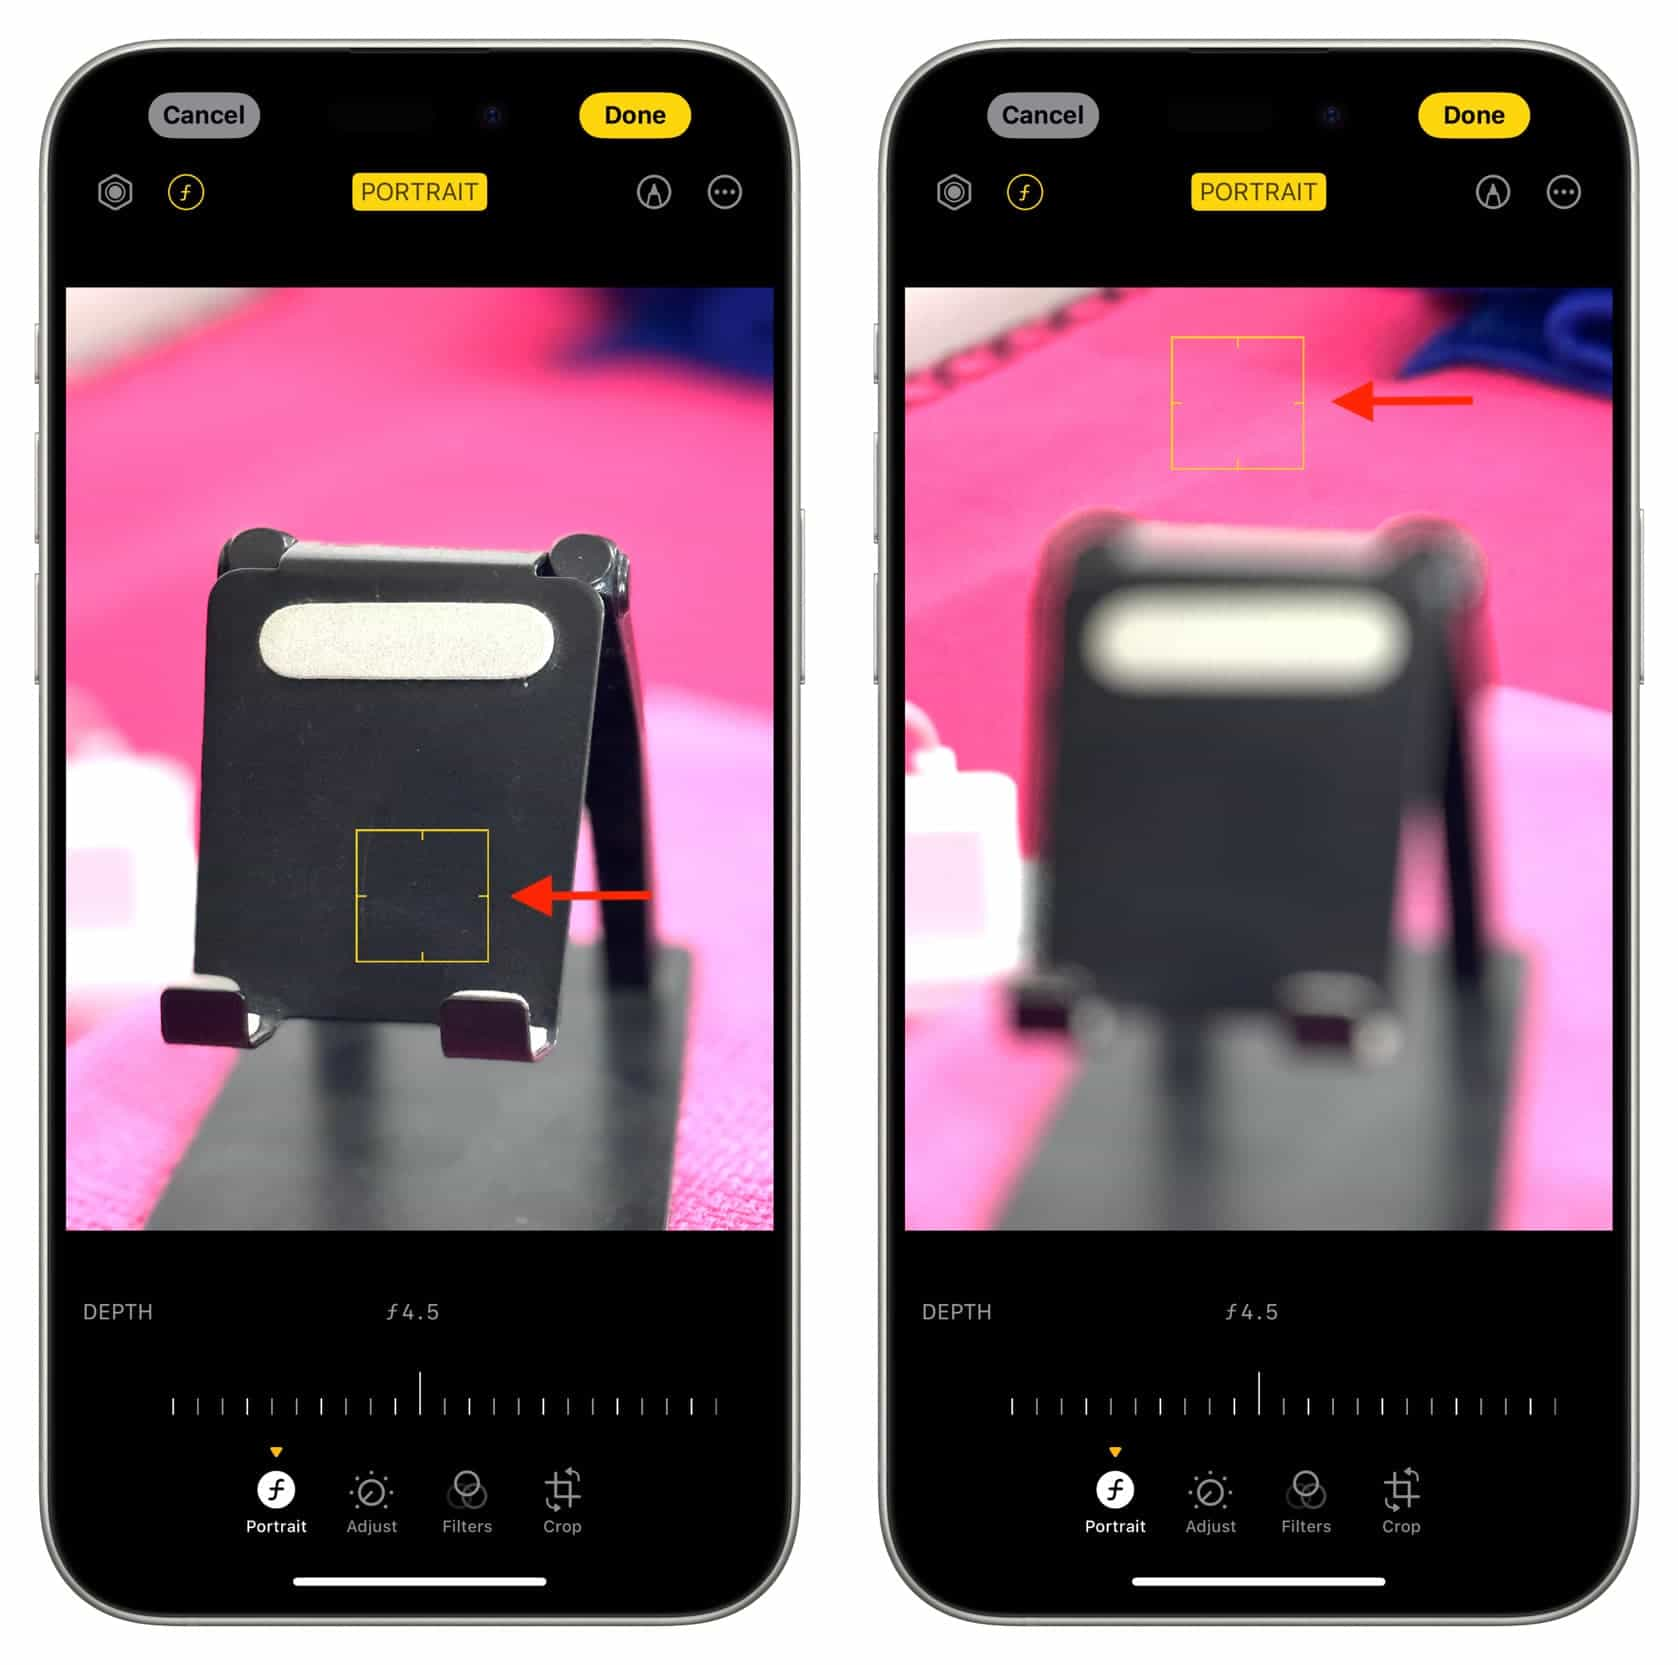
- Tap the background to refocus the image on the background object while blurring the main subject in the foreground. If you change your mind, simply tap the foreground subject to bring it back into focus while blurring out the background.
- Drag the depth slider to refine the shallow depth of field of your blurred subject.
- Hit Done to save your changes.
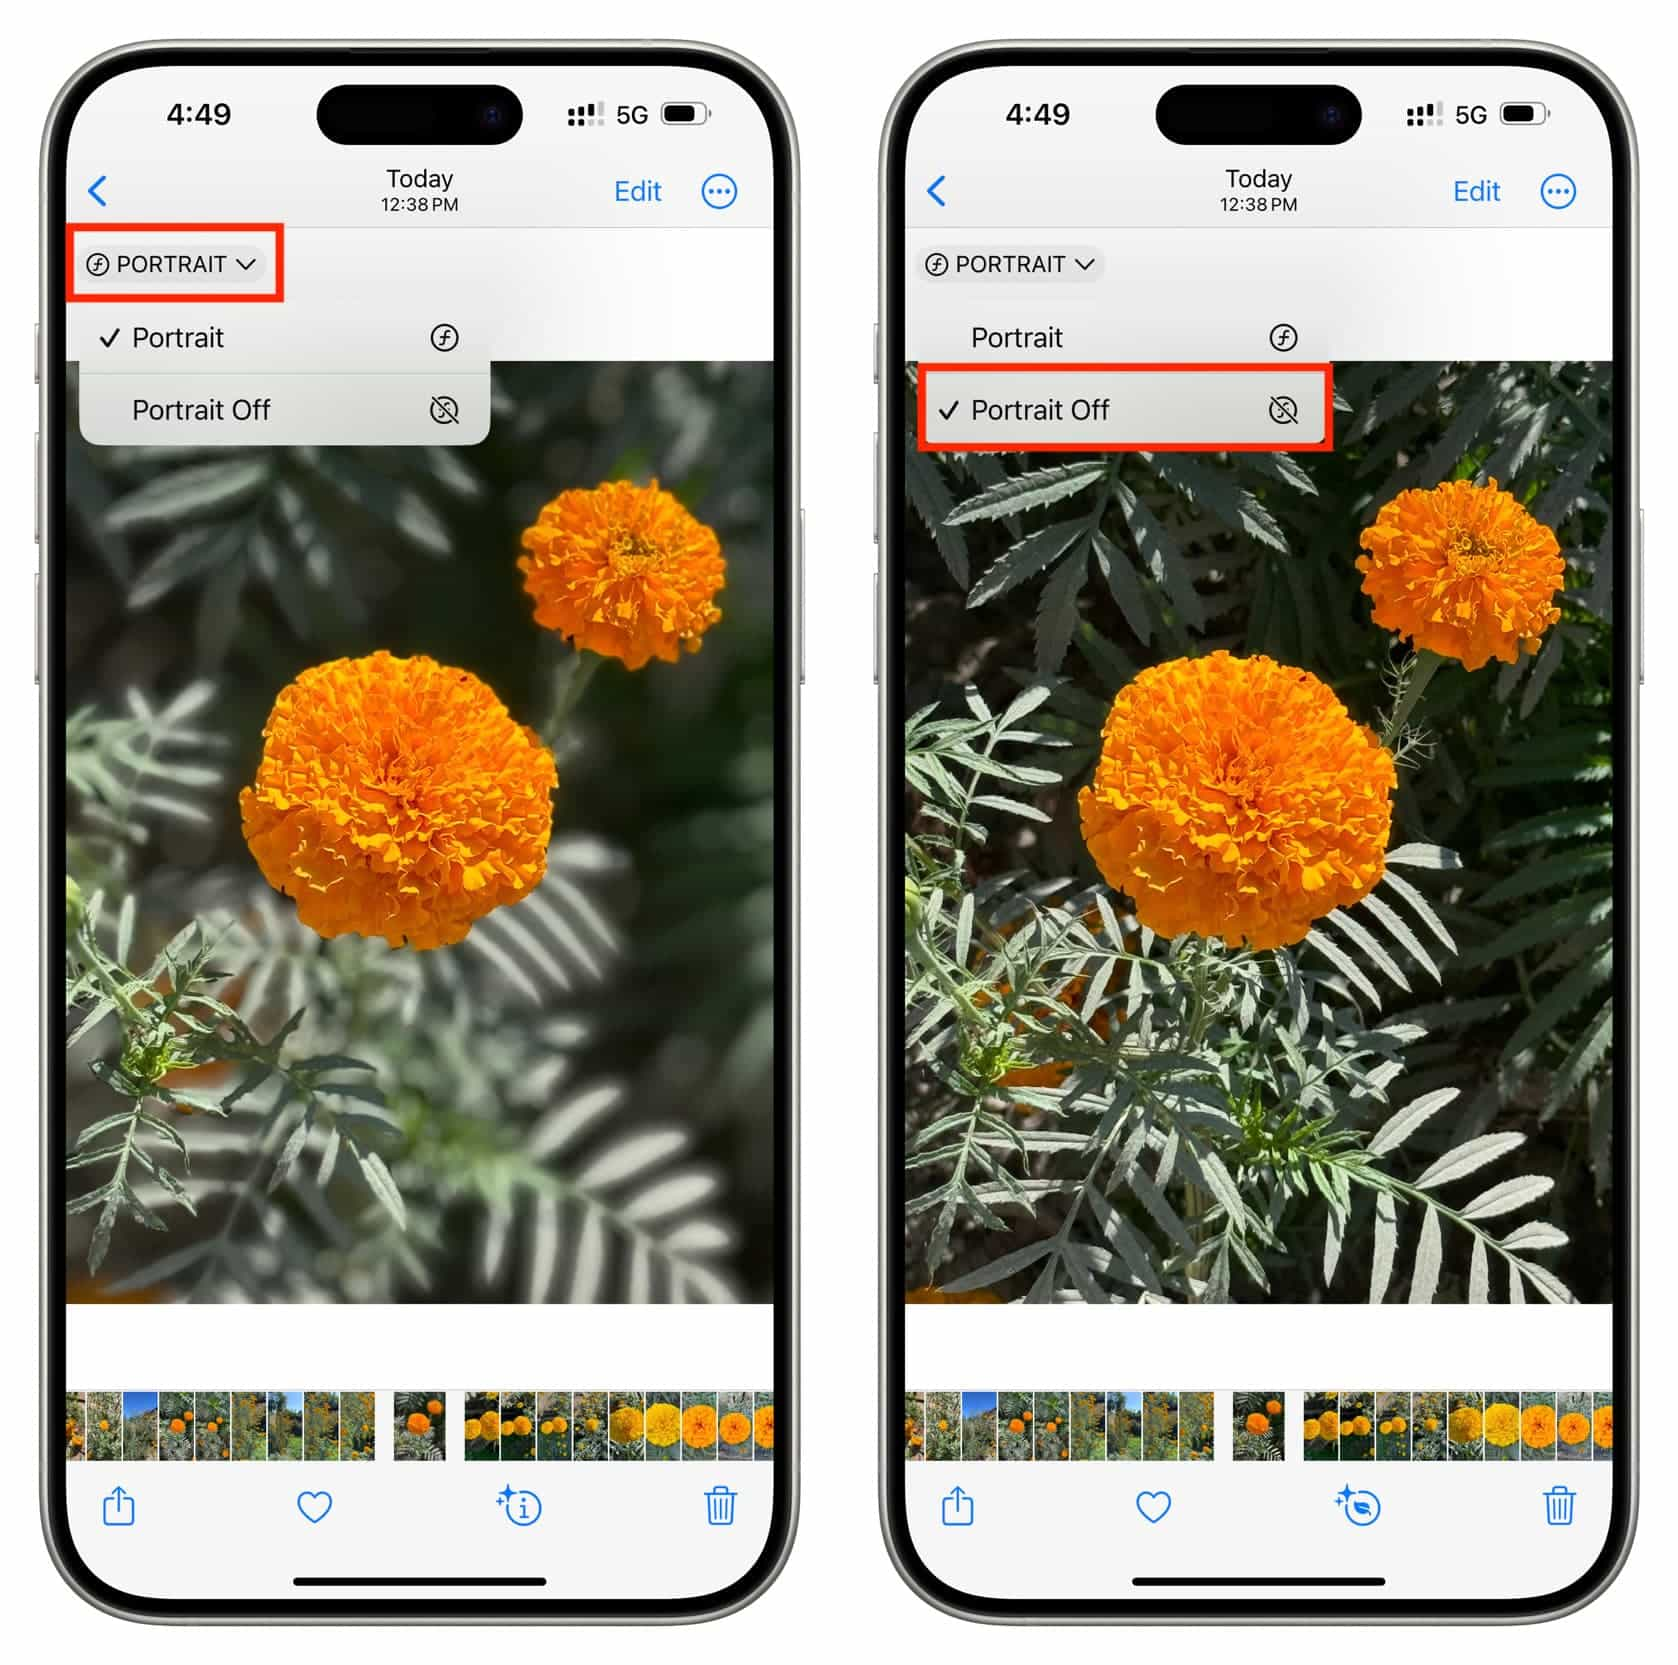
Switch off background blur
To remove backgroun blur from a photo, open the image in the Photos app and tap Portrait > Portrait Off in the top-left corner. Or, enter edit mode and drag the depth slider to the OFF position.
More on background blur: