Live Photos are nifty little moving clips in the form of photos. When you see one, just press and hold to watch it move and hear its sound. And since Live Photos are like tiny videos, you can do some cool things with them, like add effects.
If you want to make your Live Photo loop or bounce, you can easily do so on iPhone, iPad, and Mac. Here, we’ll show you how.
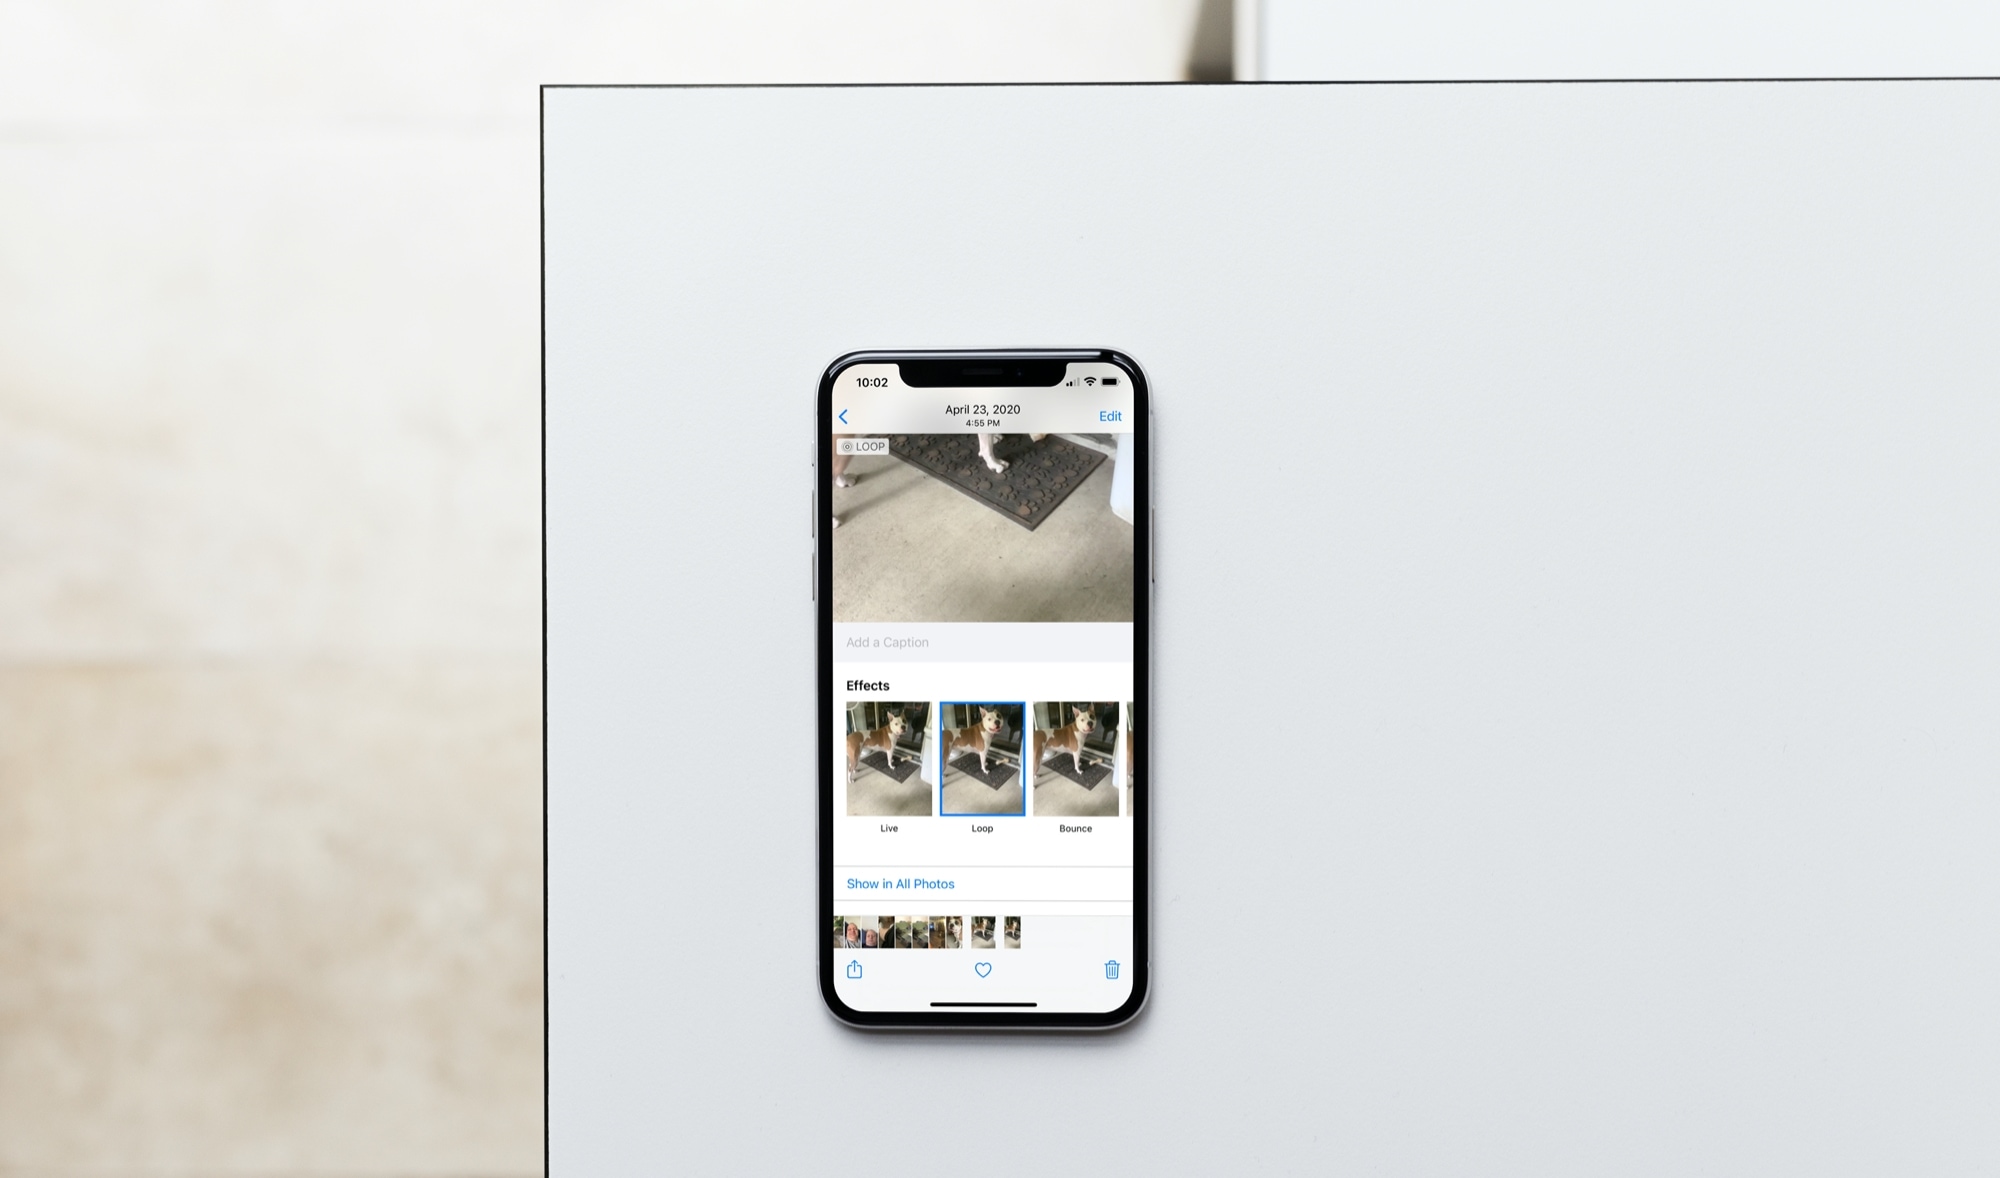
Add a loop or bounce effect on iPhone and iPad
Open the Live Photo that you want to edit. You can select it from Live Photos on iPhone near the bottom of the Albums tab or under Media Types in the sidebar on iPad. Then follow these steps to add an effect.
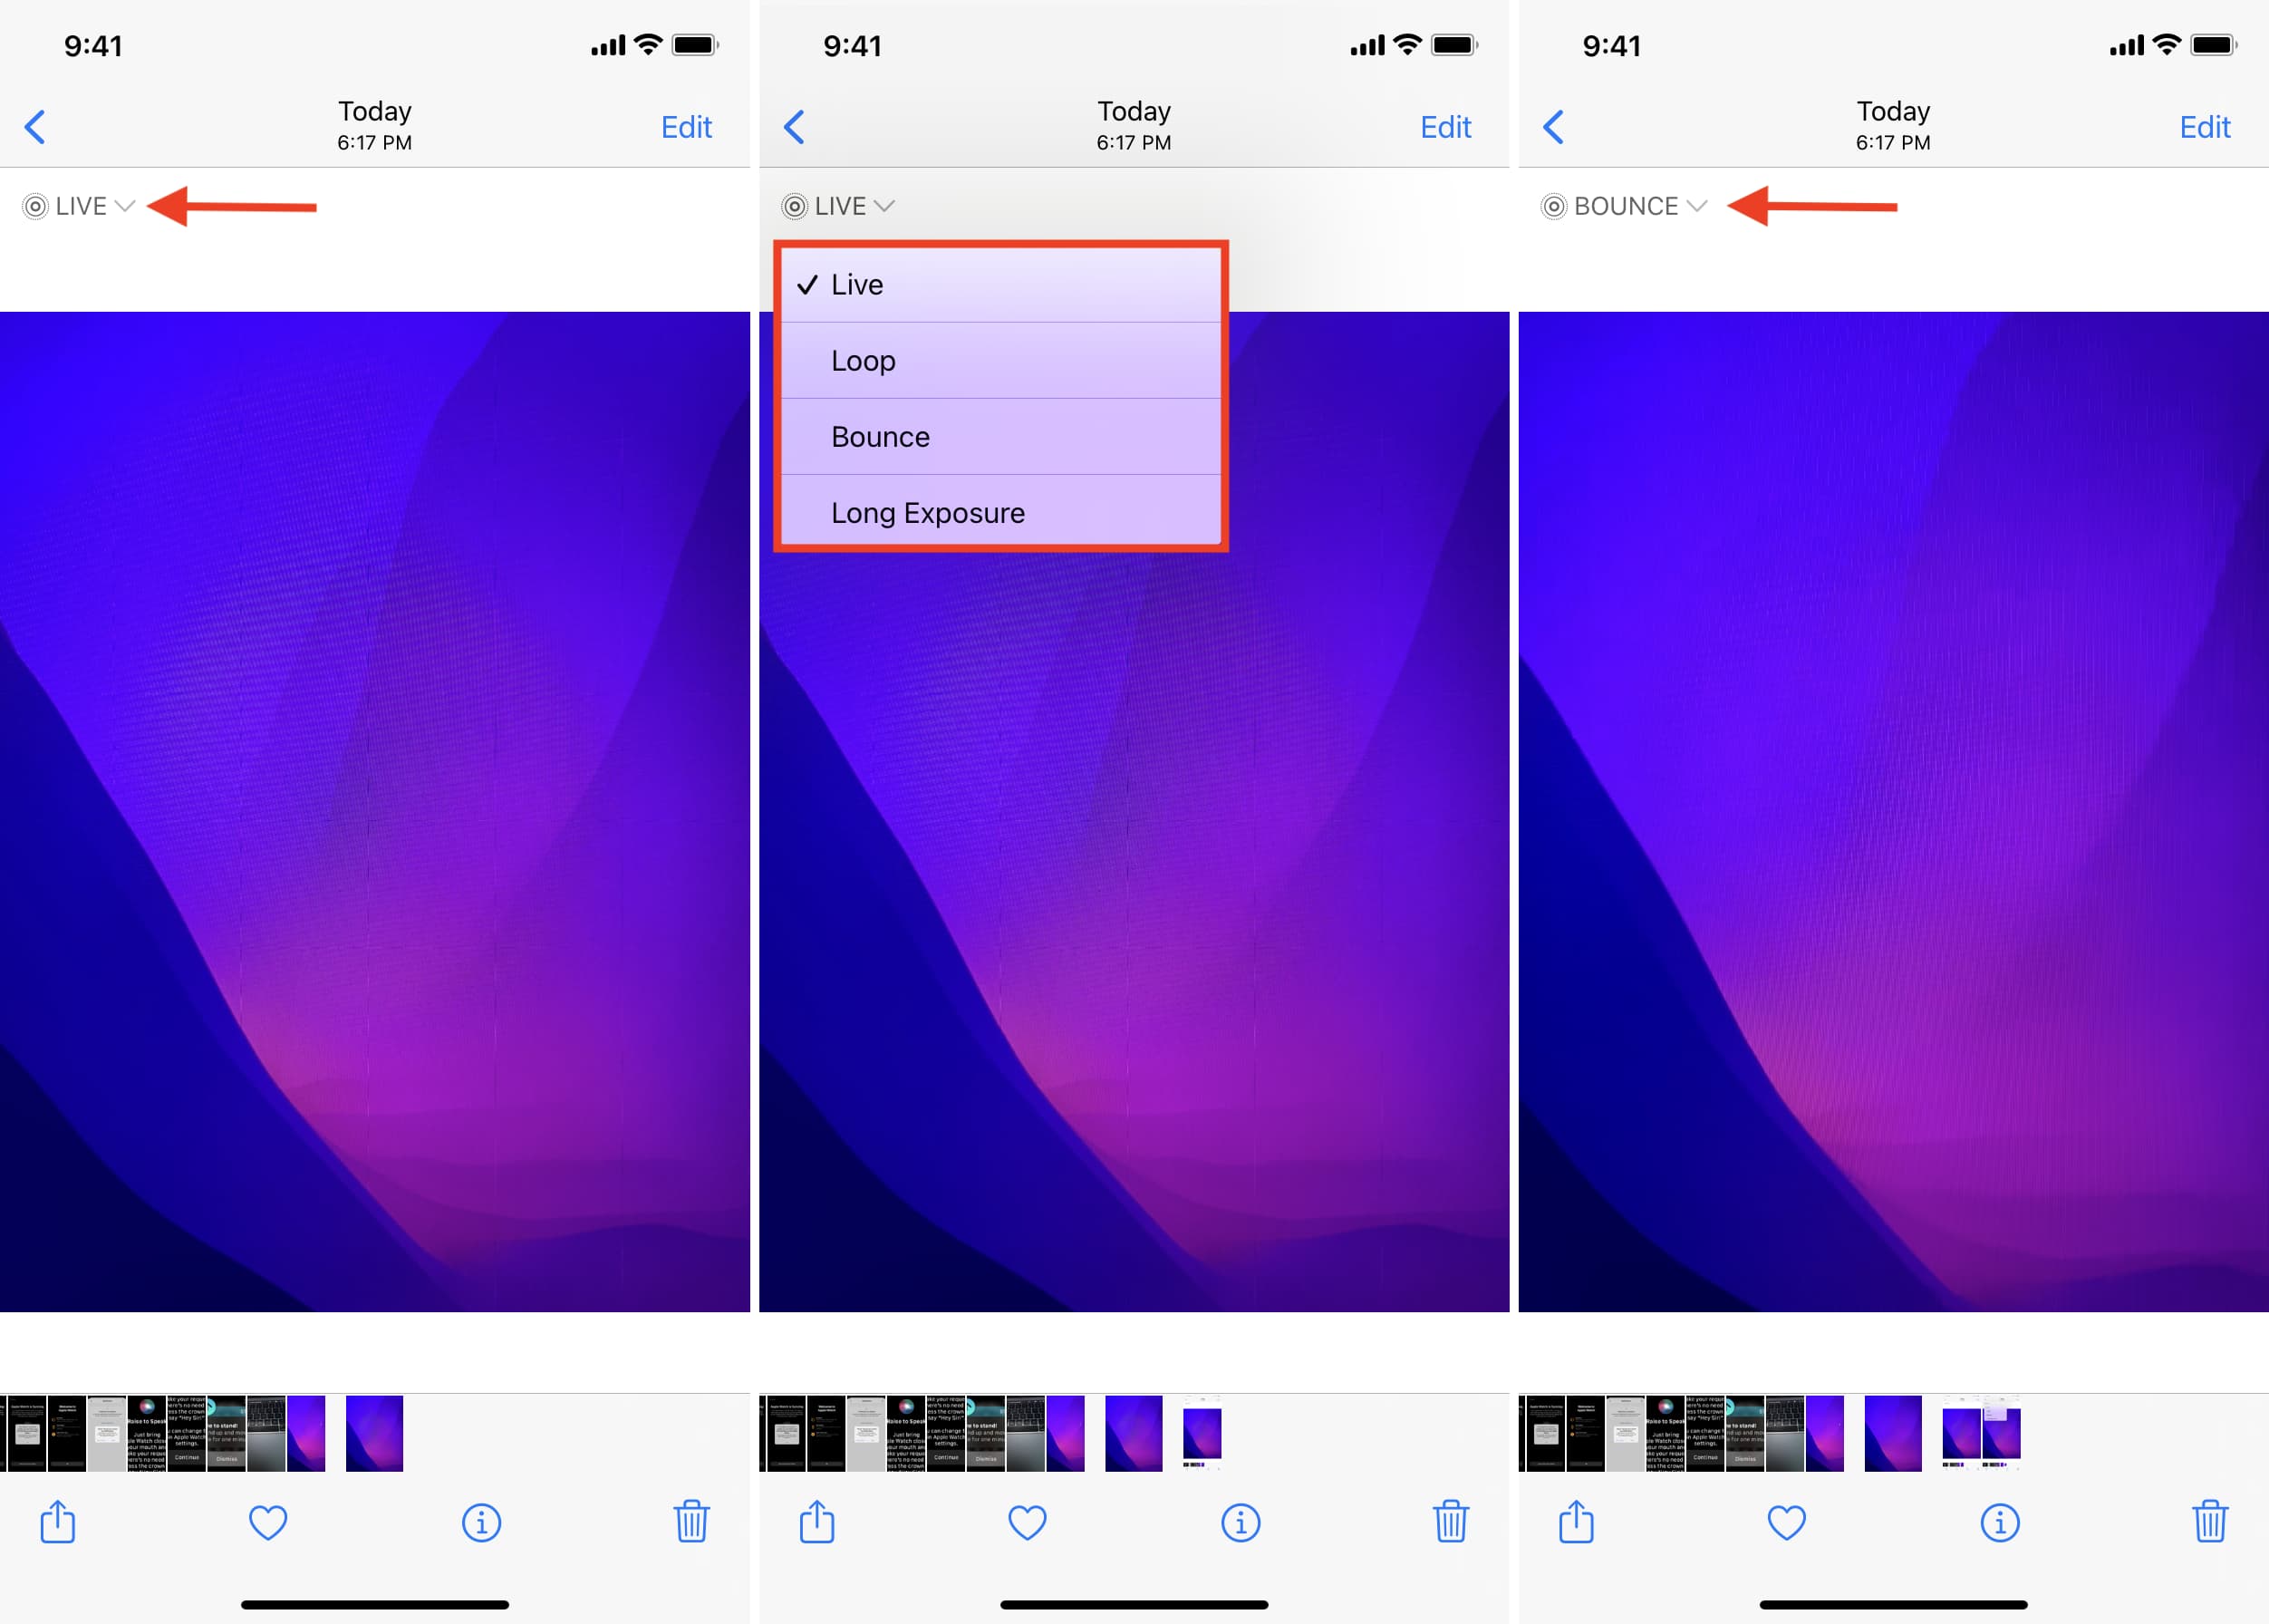
On iOS 15
Starting with iOS 15, the steps to add effects to Live Photos have changed. Here’s how:
- Open a Live Photo in the iPhone Photos app.
- Tap the word “LIVE” from the top left.
- Select Loop to create a video loop where it replays again and again. Or pick Bounce to make it rock back and forth, forward and in reverse. You can also try out Long Exposure, which creates a timing and movement effect.
On iOS 14 and earlier
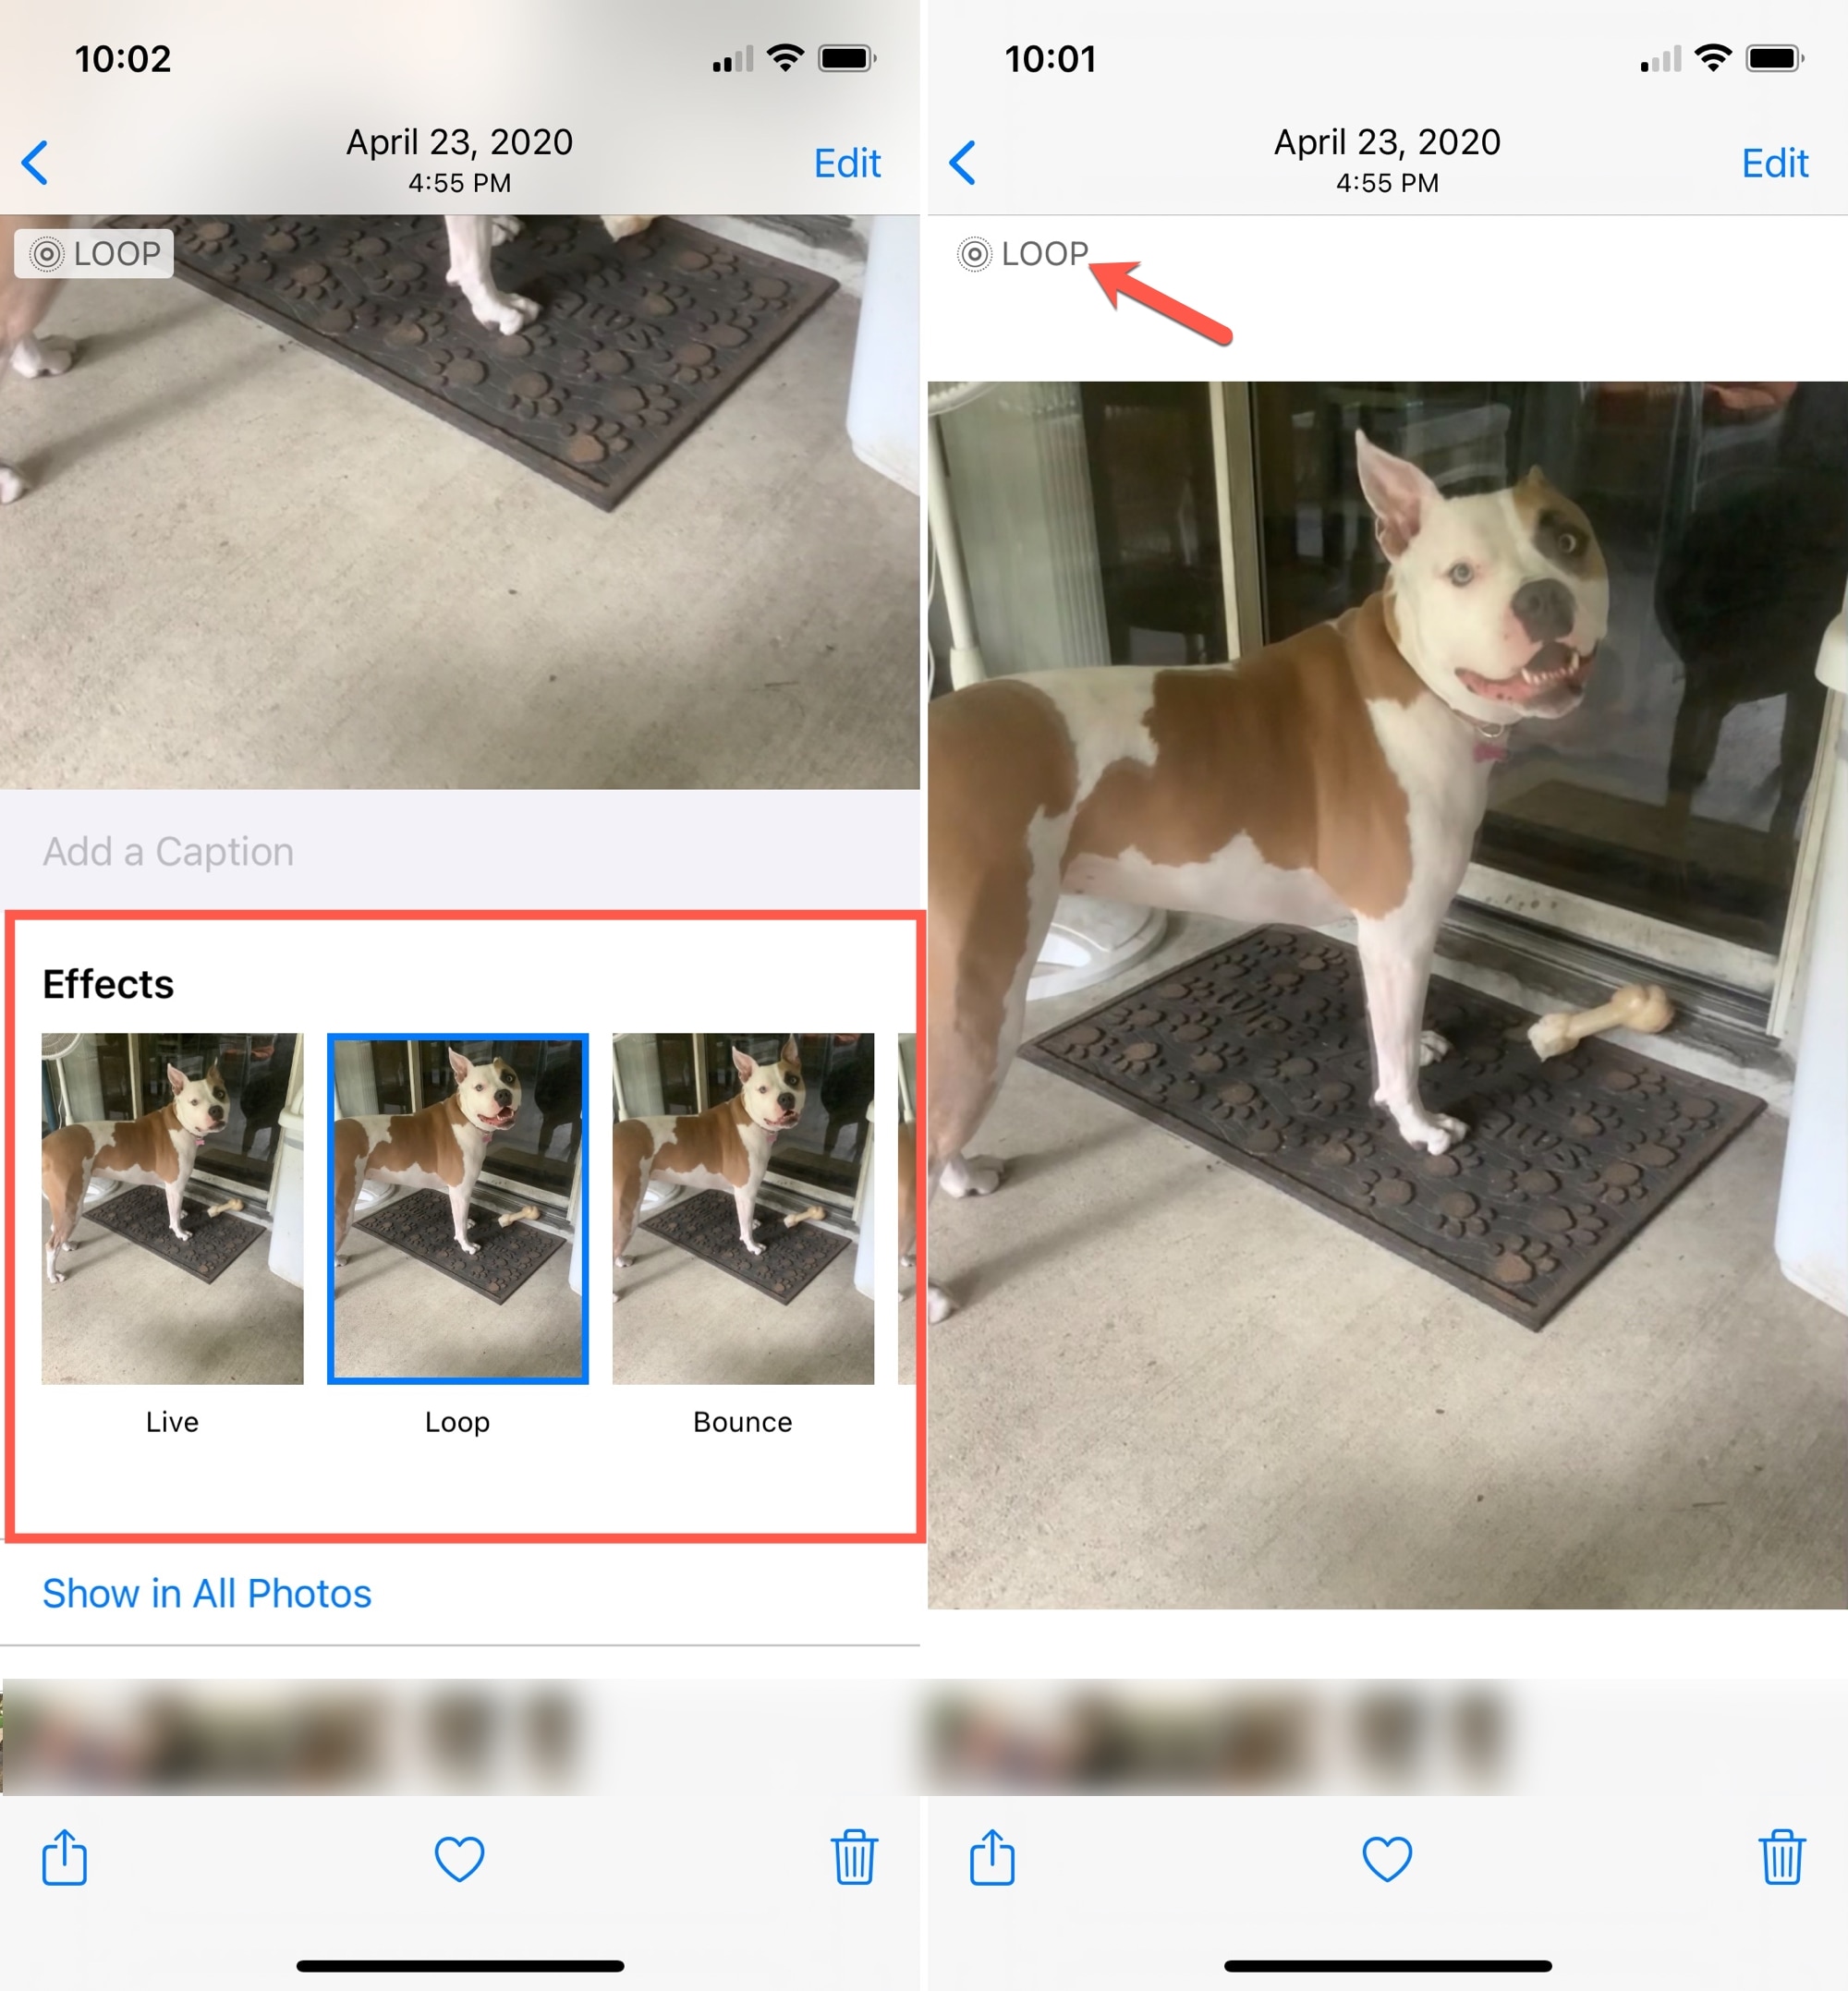
- With the Live Photo open, swipe up from the bottom of the screen.
- You’ll see the Effects area directly beneath the photo.
- Choose Loop, Bounce, or Long Exposure. Whichever effect you select will display on the top left, and it will be saved automatically.
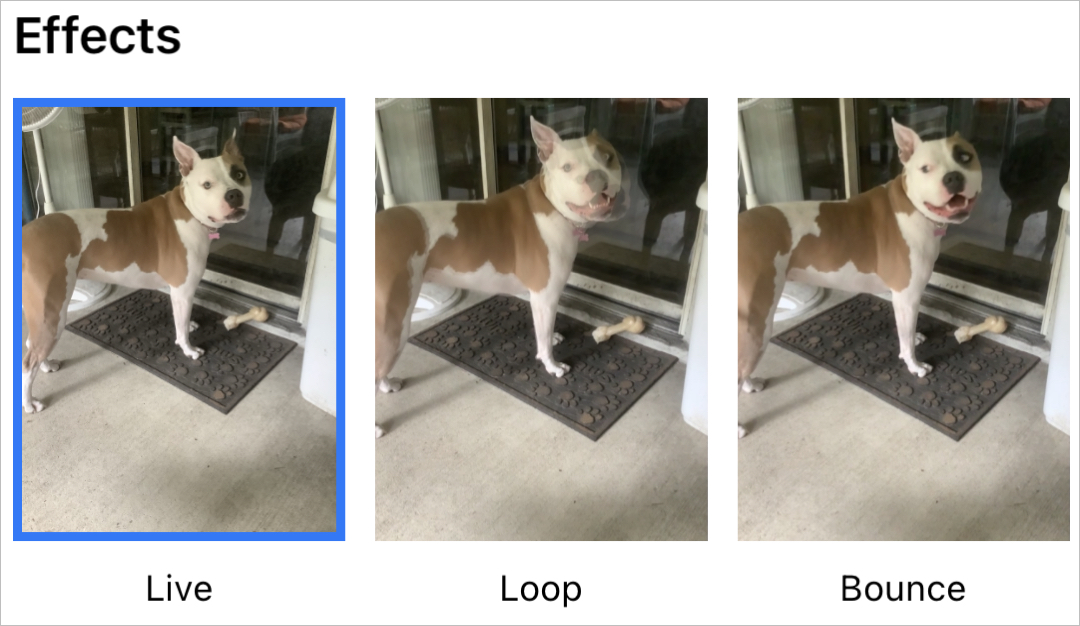
Undo the effect
If you want to revert it to its original state, follow the same steps above and select Live in the Effects area below the photo.
Add a loop or bounce effect on Mac
Open the Live Photo that you want to use by selecting it from the Live Photos album in the left-hand sidebar. Then do the following to add an effect.
- Click Edit on the top right.
- At the bottom, click the Live drop-down box. Also, make sure that the Live Photo icon to the right is enabled (it will be highlighted in yellow).
- Click to select Loop, Bounce, or Long Exposure.
- When you finish, click Done on the top right.
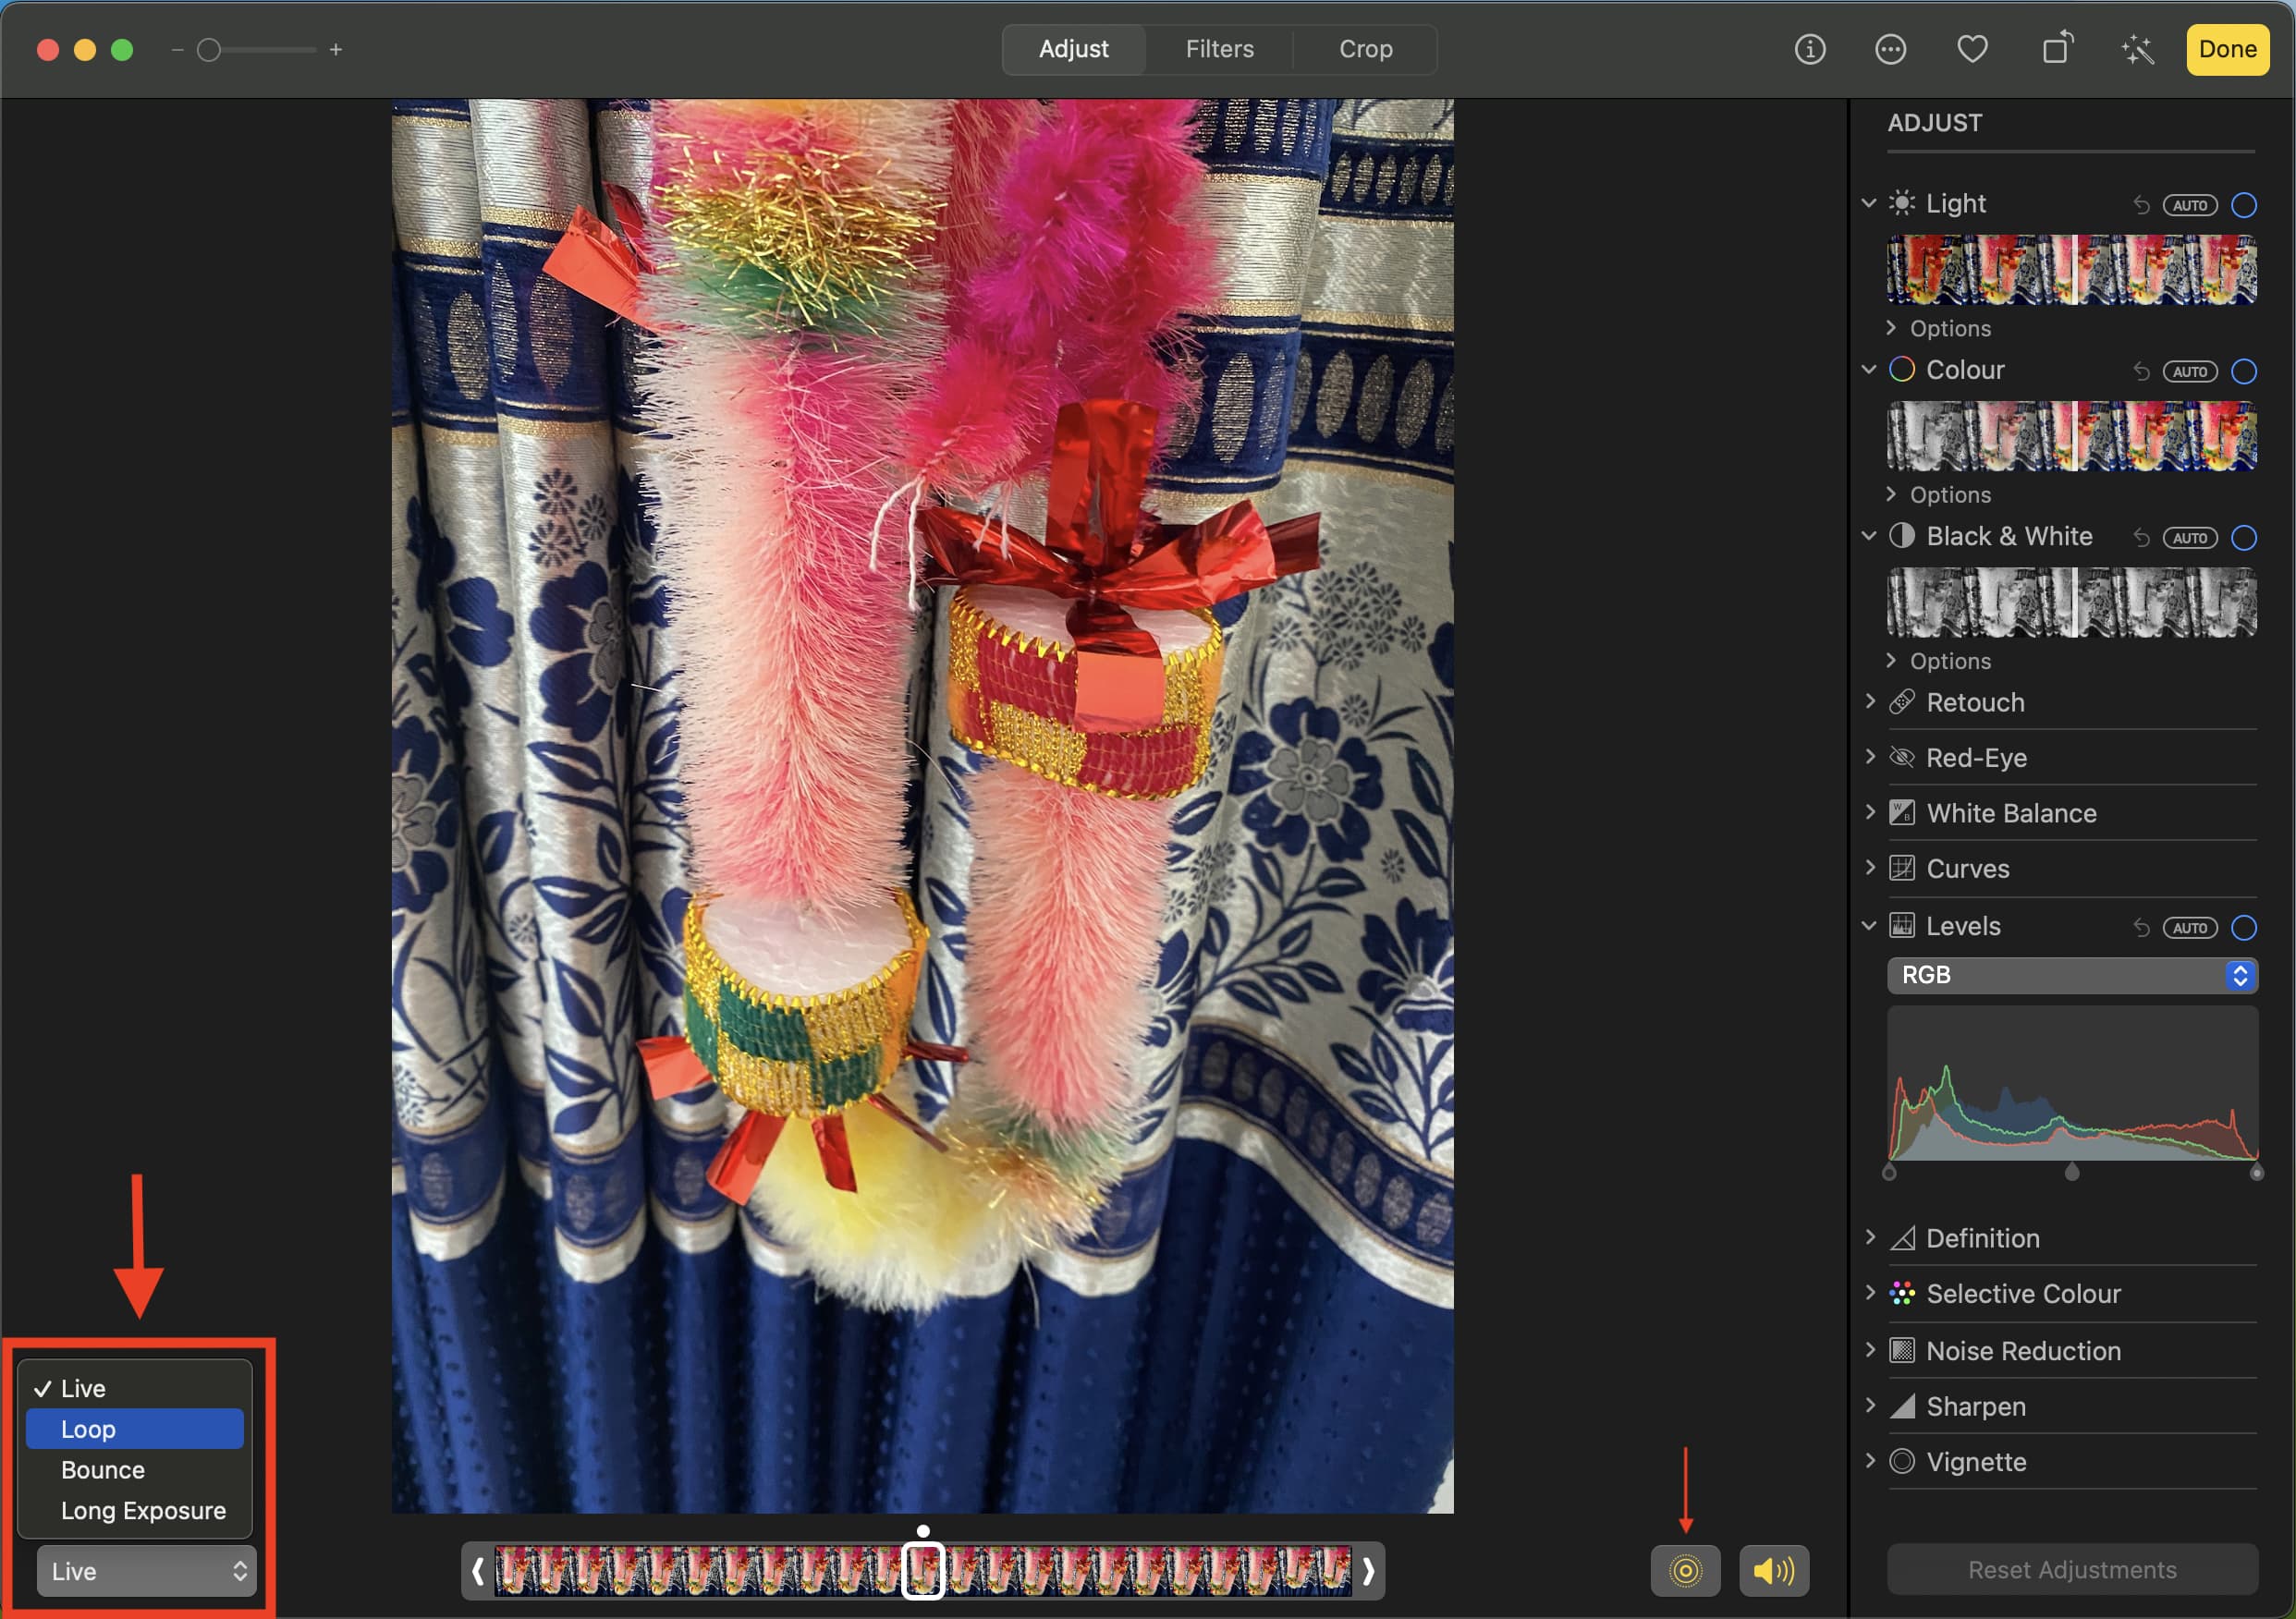
Your Live Photo will be saved automatically with your changes.
Undo the effect
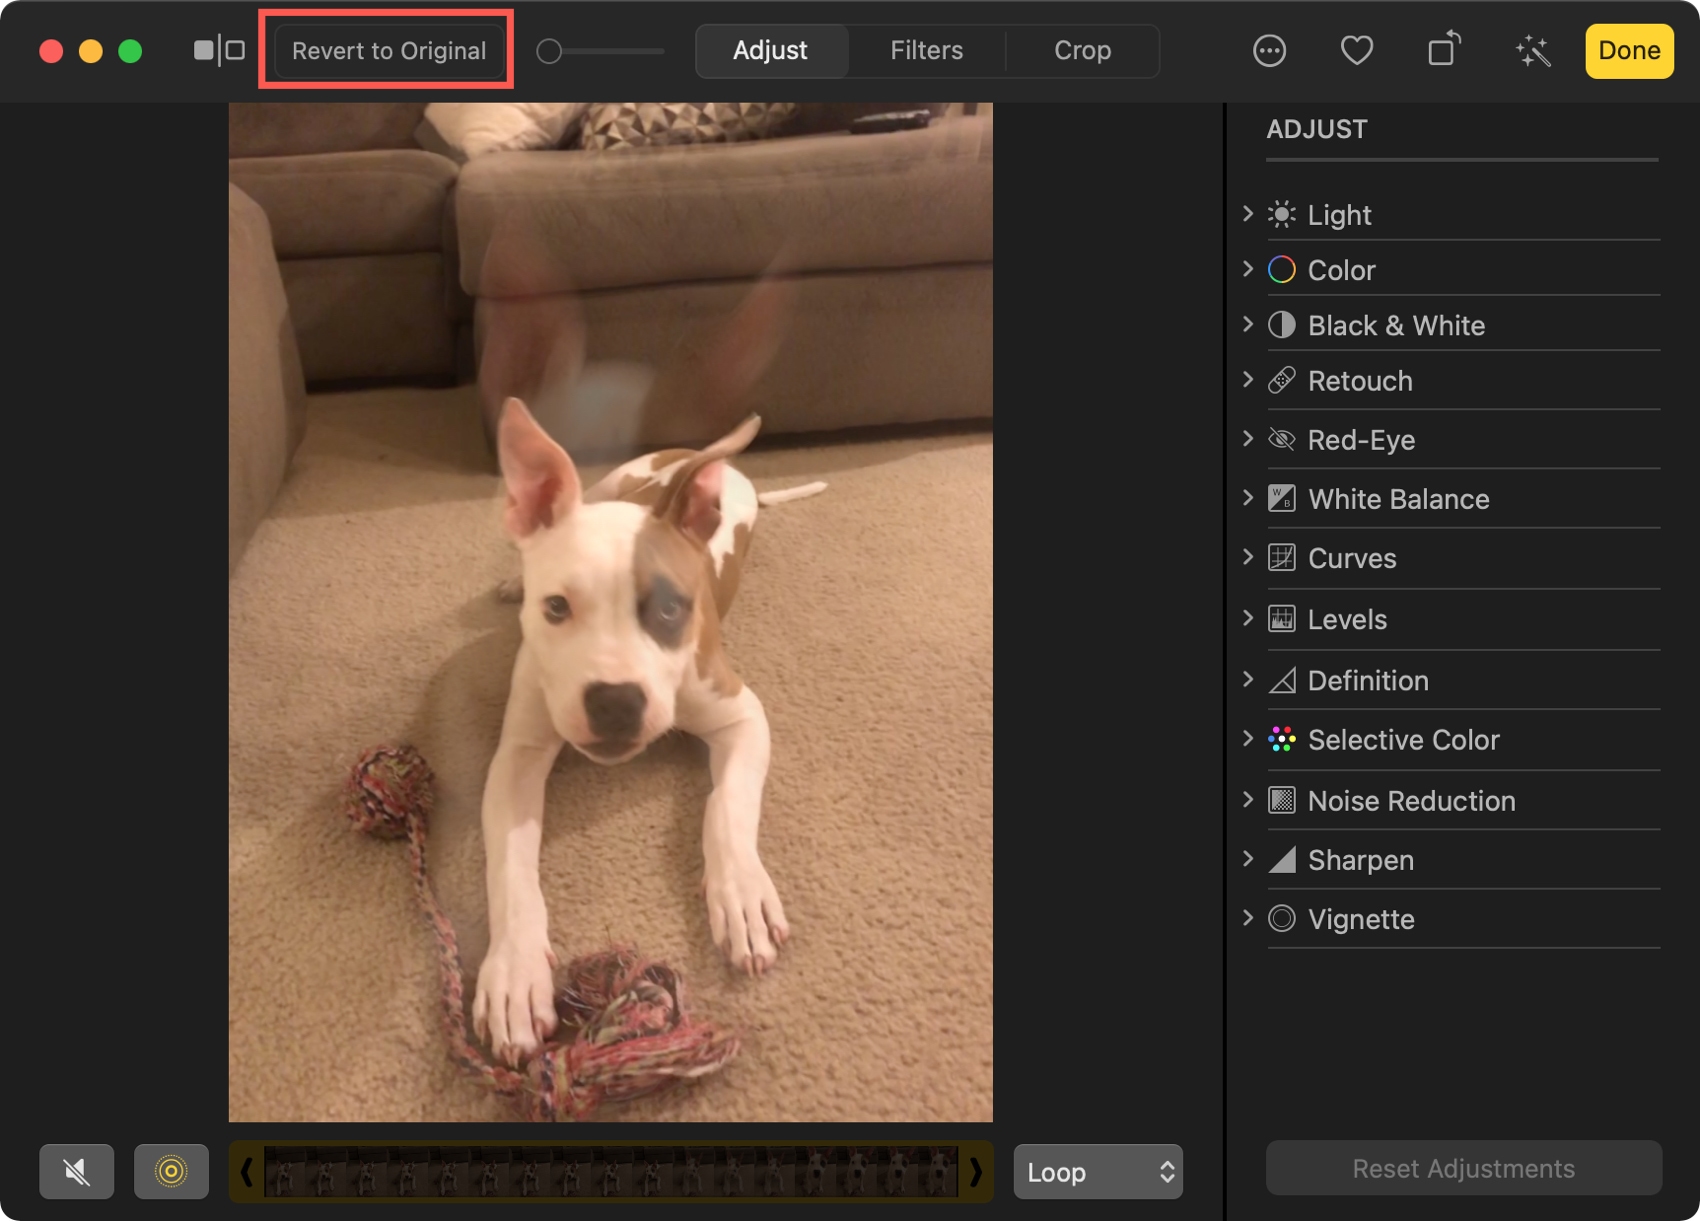
If you want to revert it to its original state, you can do this easily. Open the Live Photo, click Revert to Original at the top, and then Done. If you make other changes to the photo that you want to keep, just use the drop-down box and select Live as it was before you added the effect.
Live Photos can be a lot of fun. You get to see quick shots before and after the actual photo you capture. So why not make them more enjoyable with an effect like loop or bounce? Are you going to give it a try with one of your Live Photos? Let us know!
Related tips: