Learn how to remove the background, extract the main subject of one or several images to get a background-less PNG image, and use the subject in Messages or other photo editing apps.

AI and Machine Learning capabilities on your iPhone and iPad allow you to lift the main subject of a photo away from its background and copy it. You can then paste the extracted subject with a transparent background into a messaging app, email, or photo editing app to create a beautiful image.
Some of the reasons you might want to do that are:
- To isolate the subject of a photo and make it stand out. You can use the subject as a sticker when chatting.
- To replace the background with a different image or color when you’re trying to create a photo for your passport or ID card.
- To create a transparent background for use in design projects.
Remove the background of a photo
You can extract the main subject of a photo in the Photos app, Safari, Screenshot editing screen, and more.
In the Photos app
- Go to the Photos app and open an image.
- Touch and hold over the main subject of the photo until you see a white light run through the edges of the main subject.
- Tap Copy.
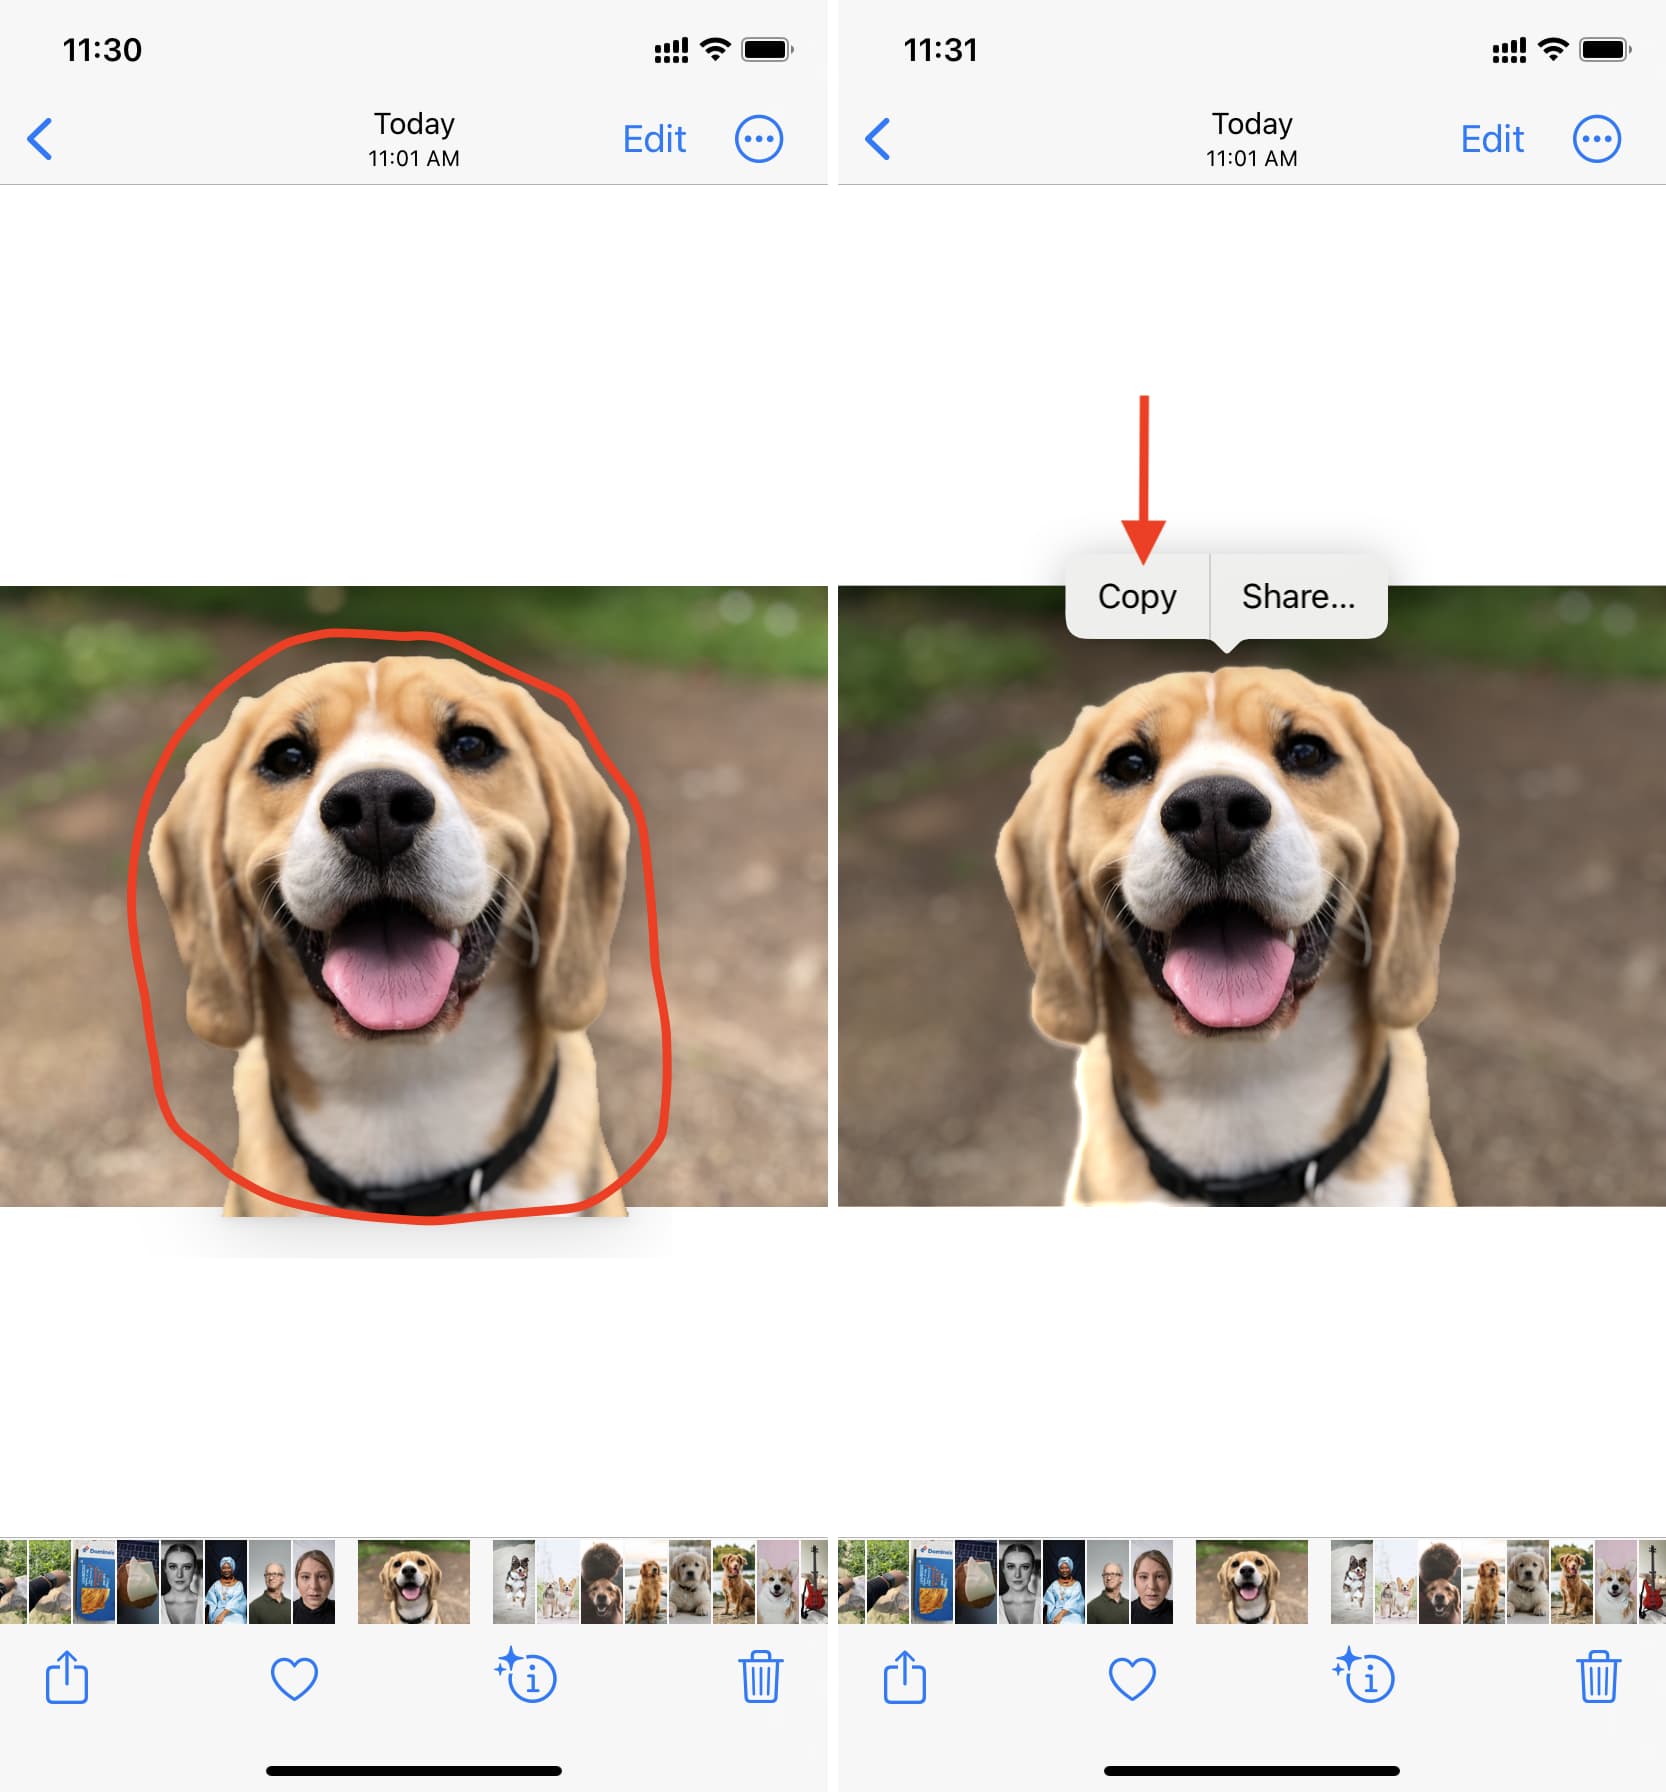
This is copied to your clipboard and ready to be used.
In a Screenshot
- Take a screenshot on your iPhone and tap the thumbnail that appears in the bottom left.
- Touch and hold over the main subject you wish to extract until you see a white light run through the subject.
- Tap Copy.
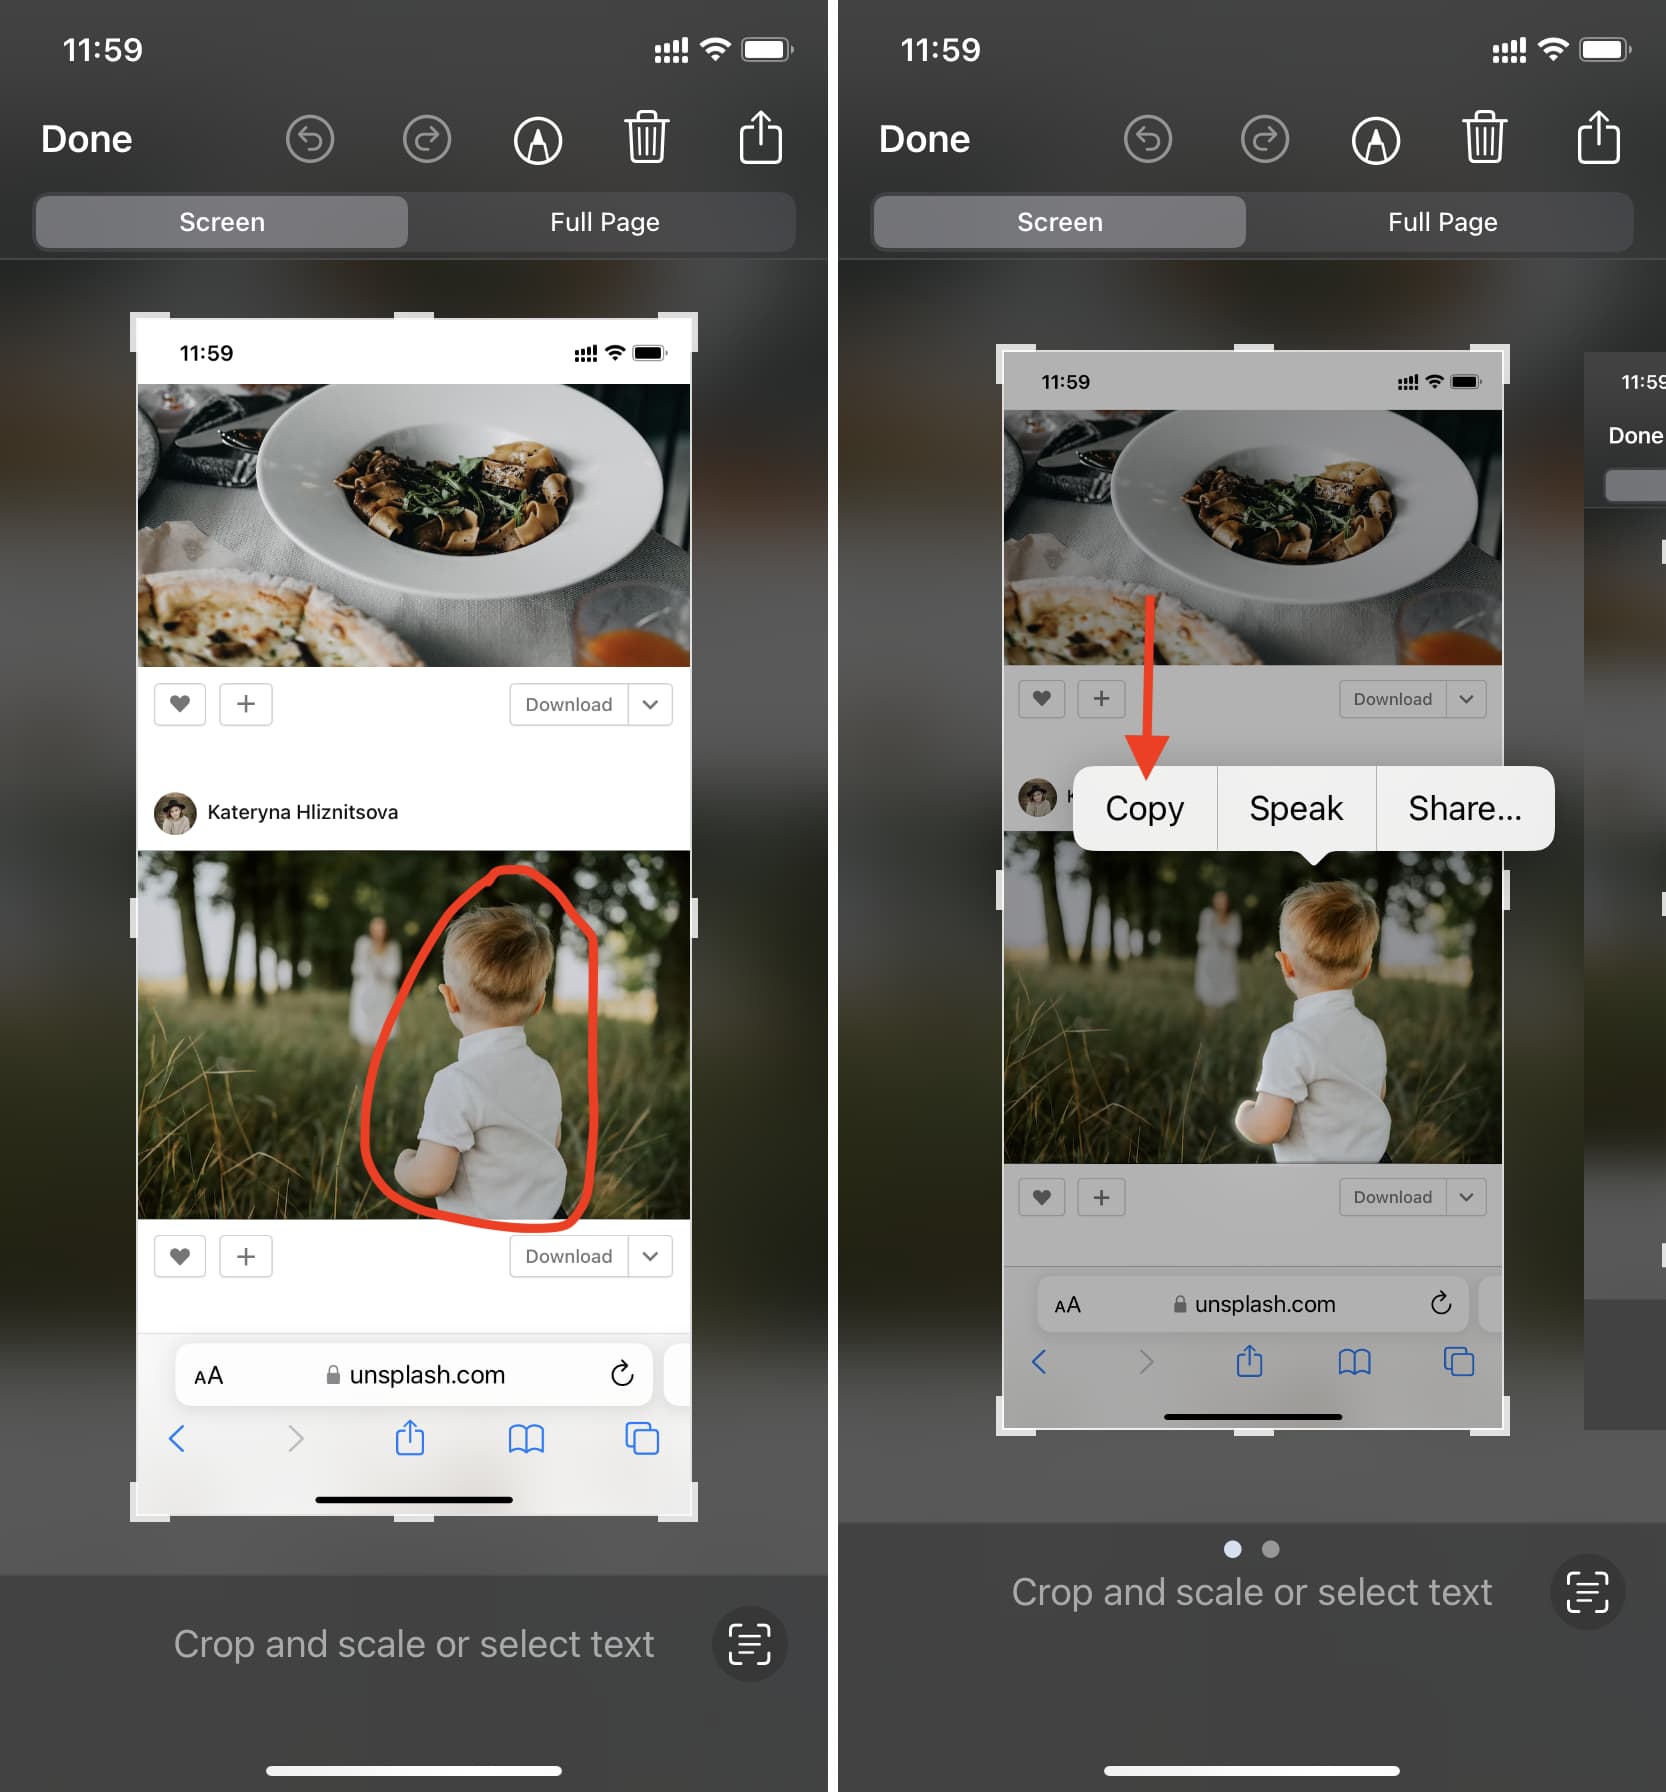
You’re now ready to use the extracted part of the image.
In Safari
- Launch Safari and go to a webpage with an image.
- Touch and hold (not tap) the image, and it will lift up, showing you a few options.
- Tap Copy Subject.
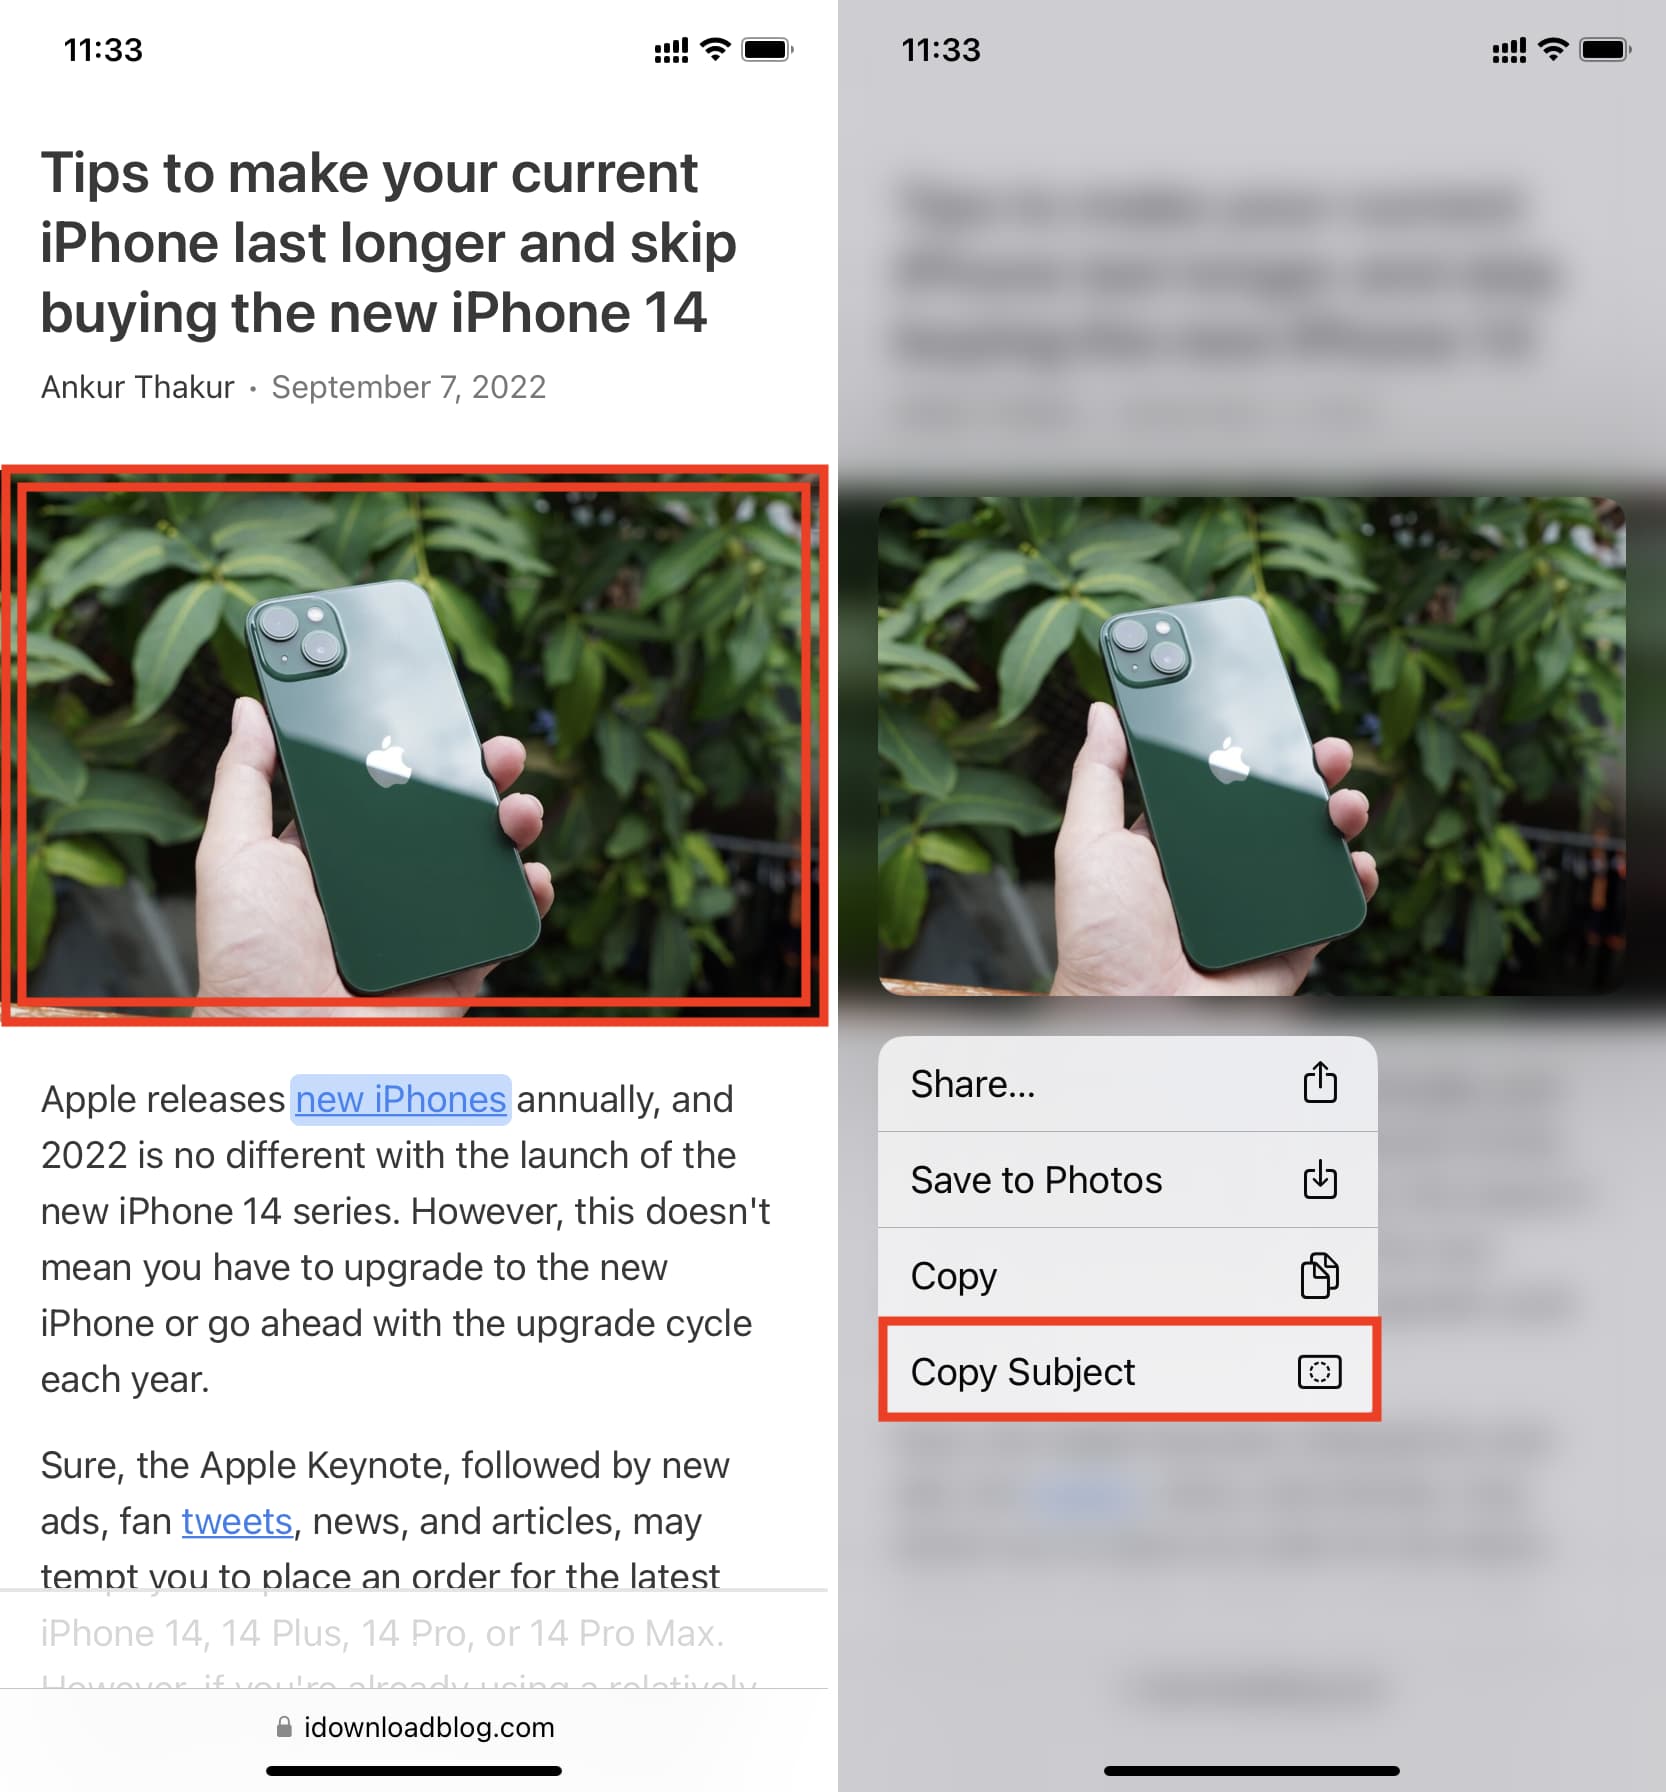
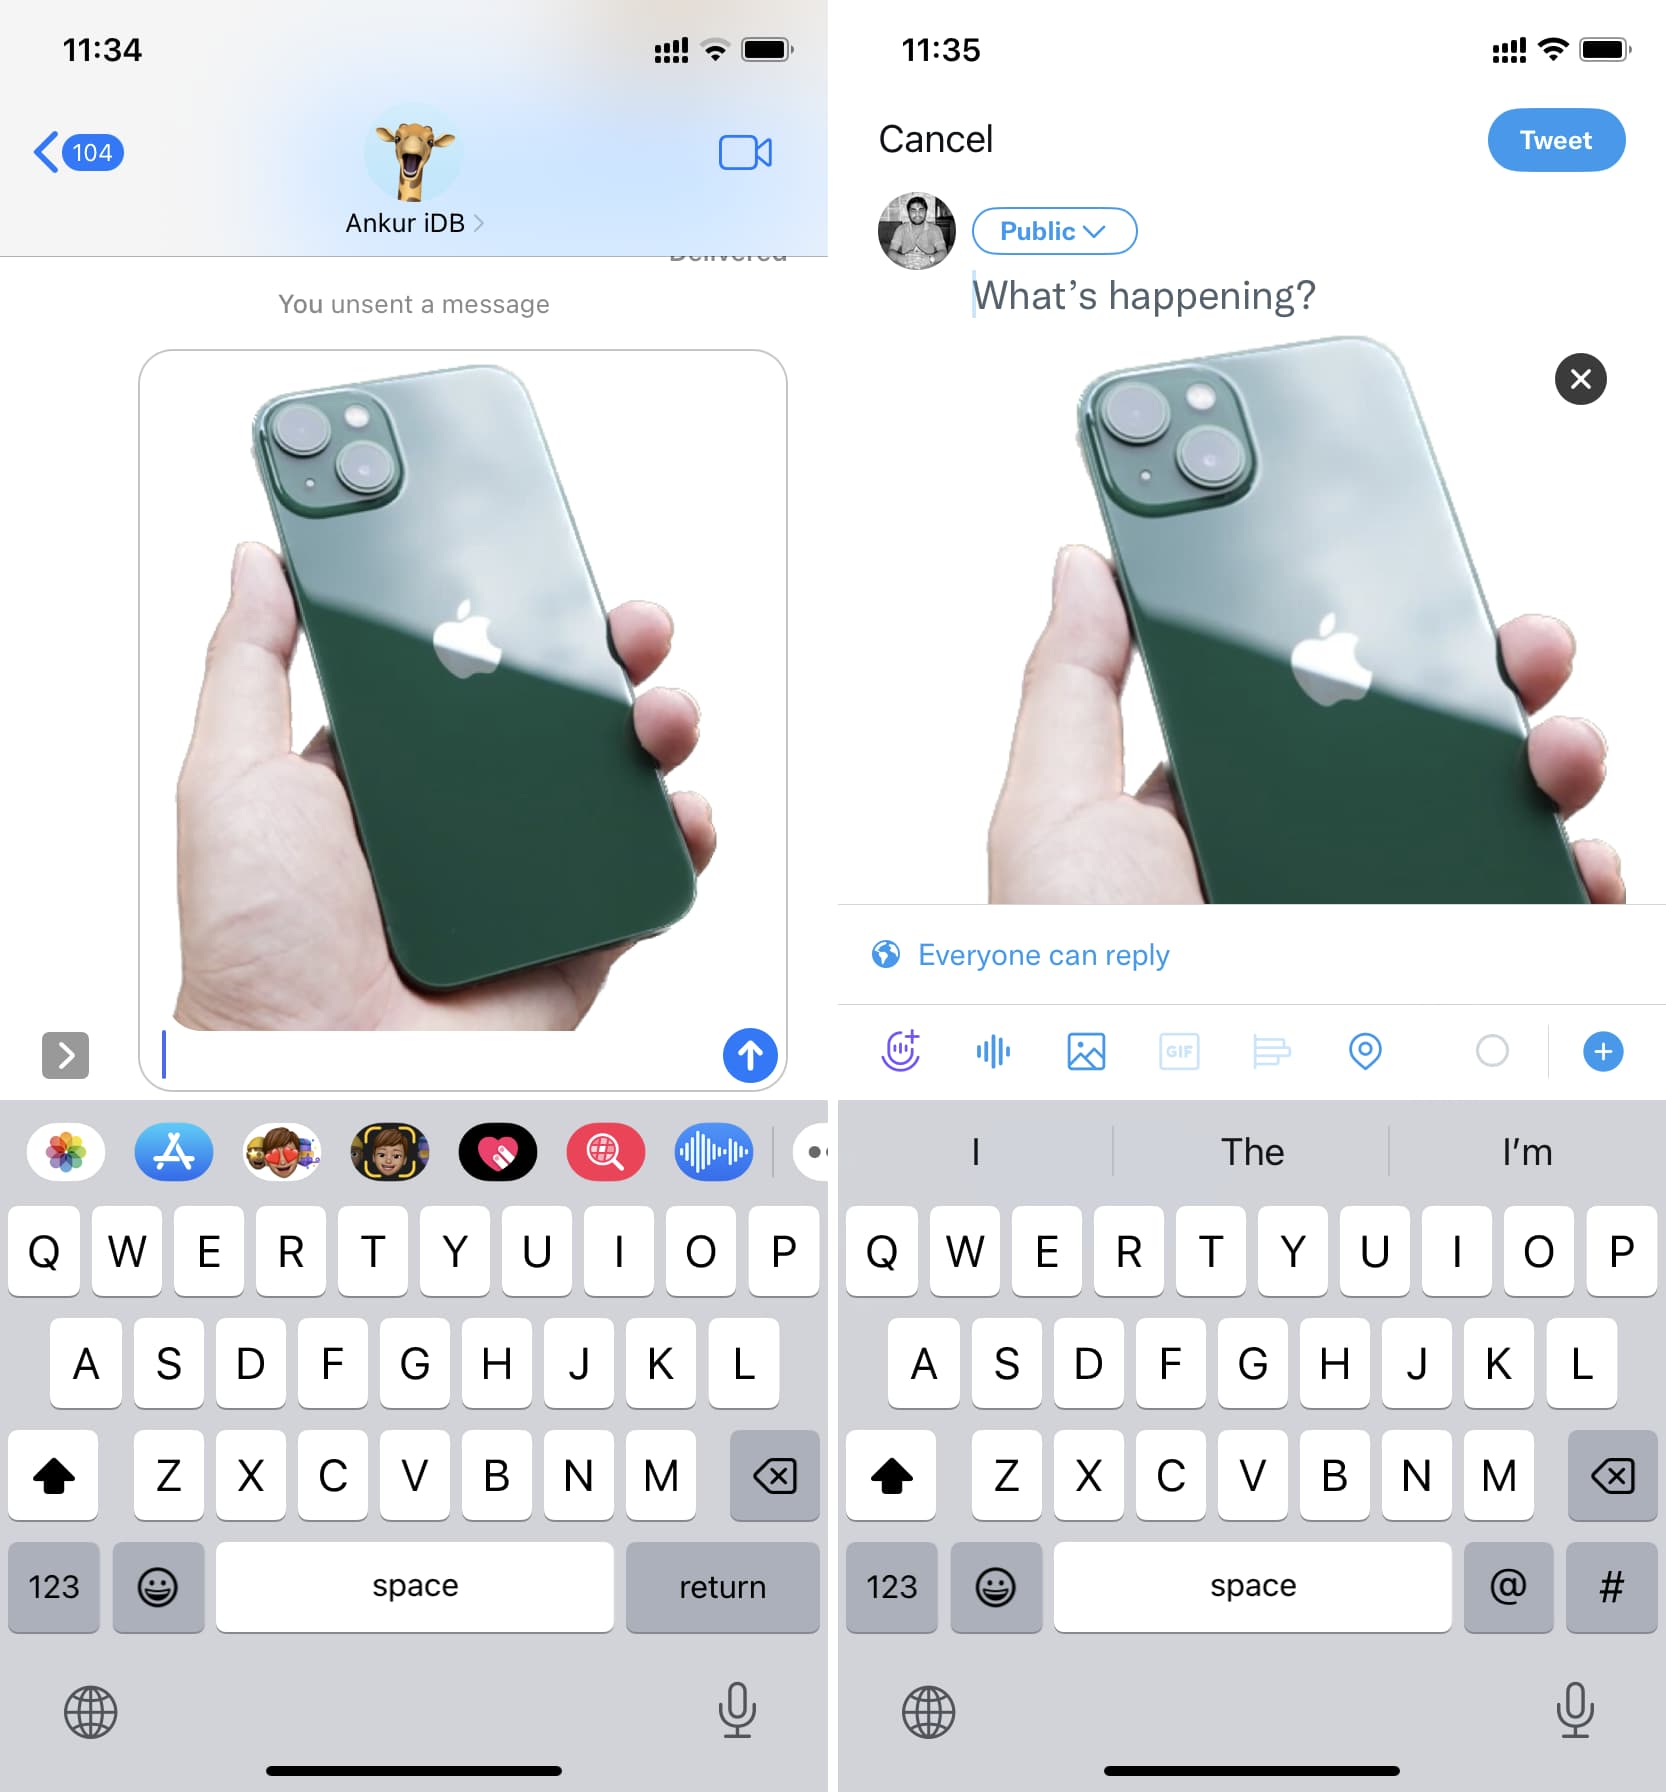
The main subject of that image is copied to your clipboard. You can now paste it into Messages, WhatsApp, email, any photo editing app, etc.
Bulk-remove the background of images
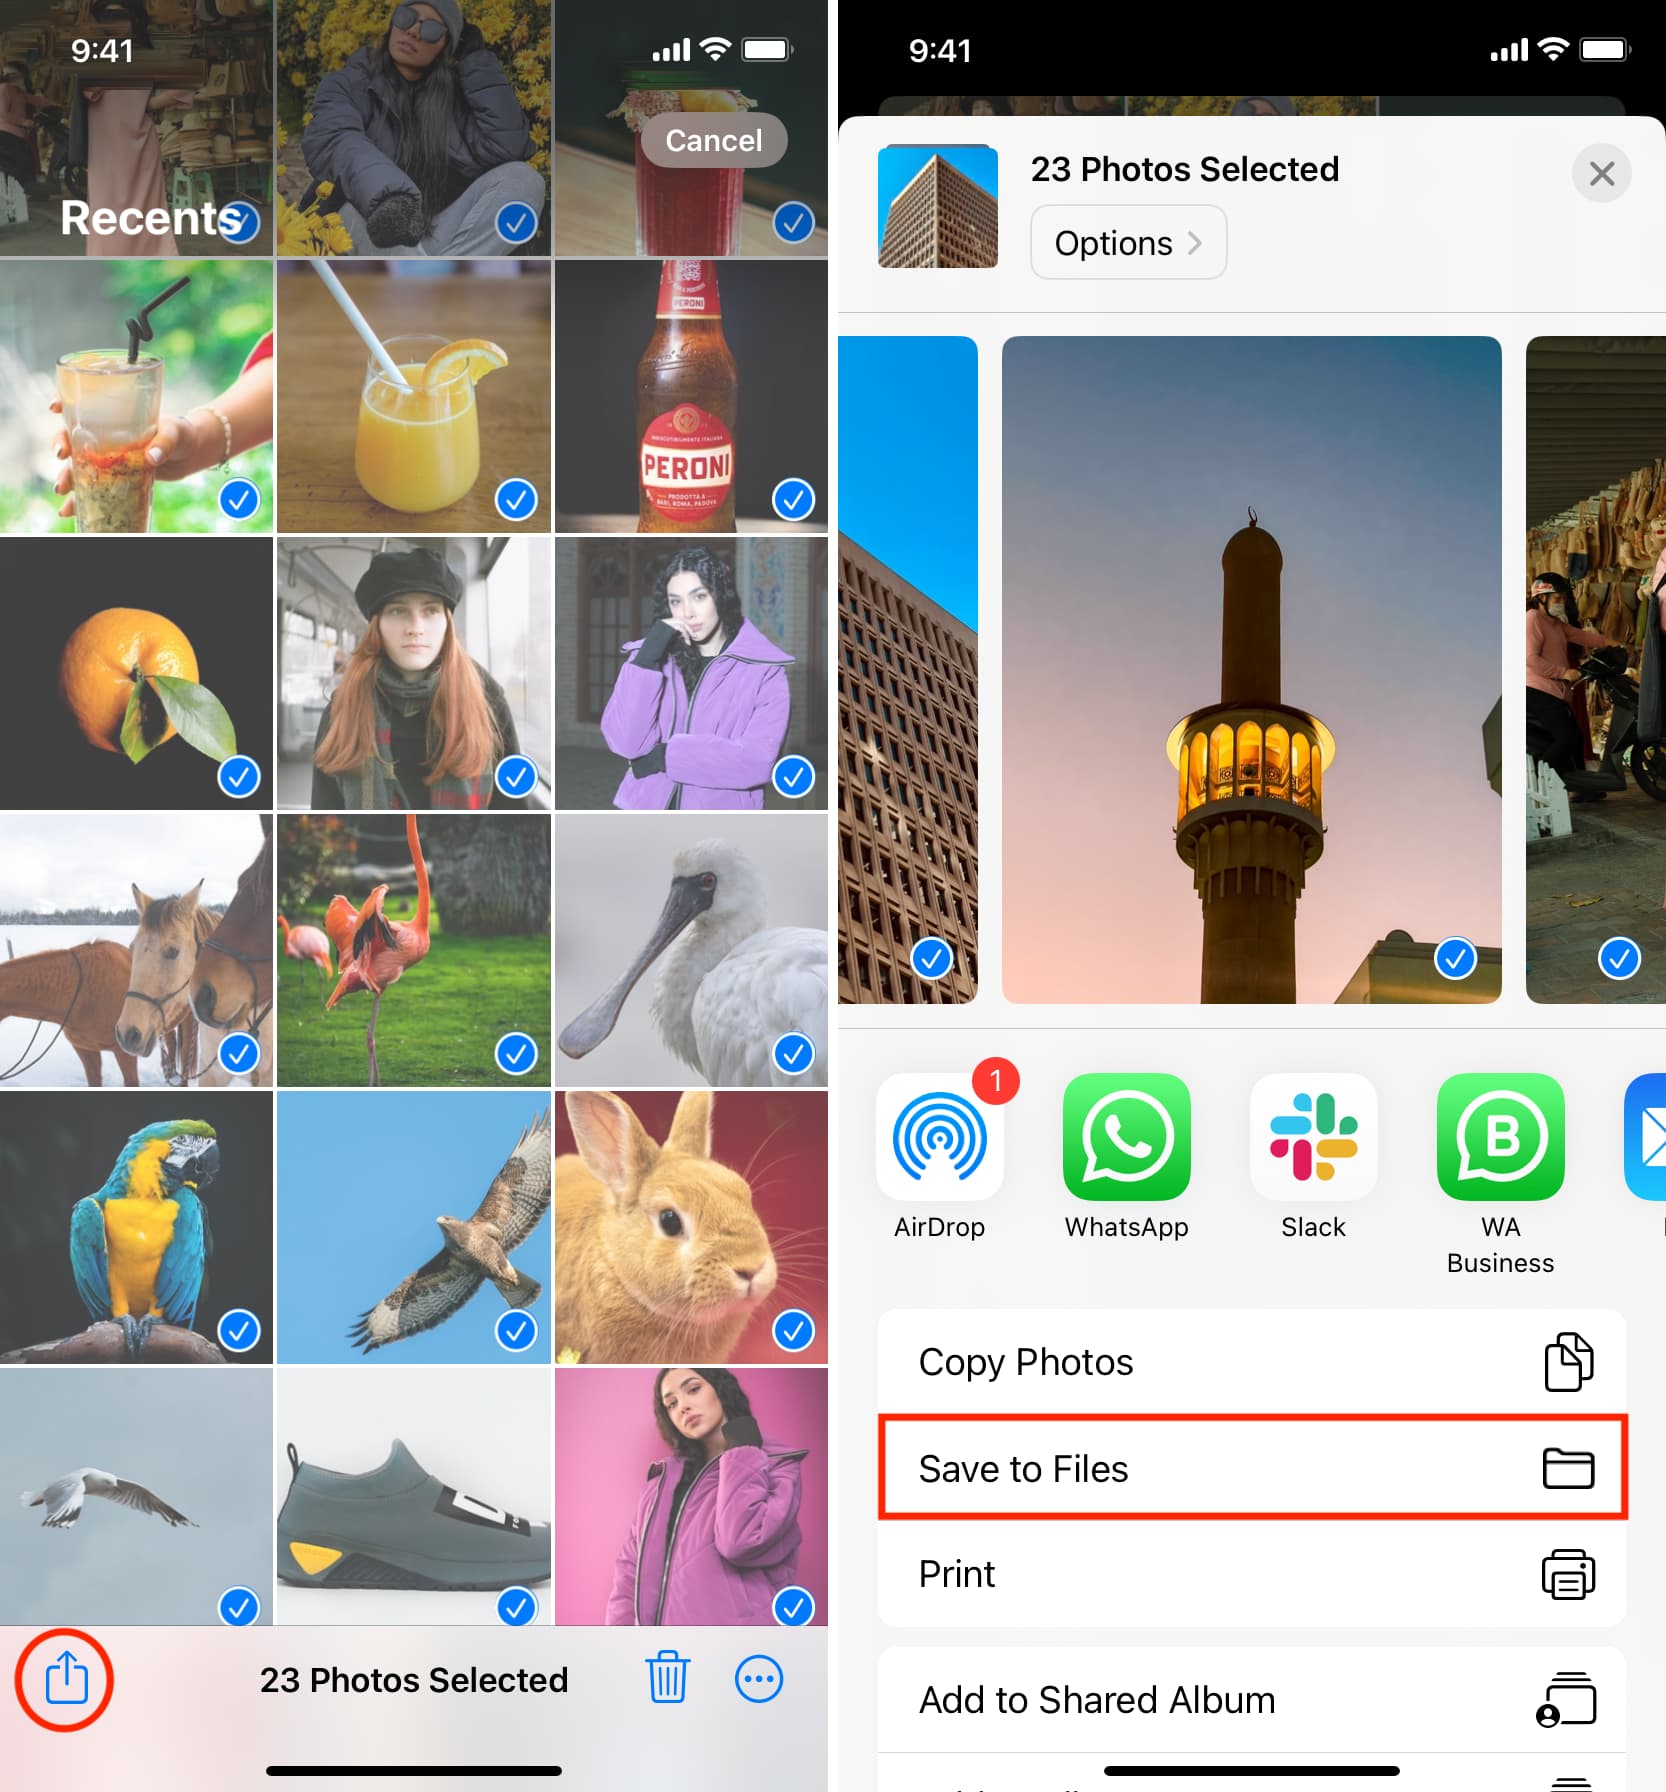
1) First, ensure the pictures are saved in the same location in the iPhone or iPad Files app.
If they are in the Photos app, you’ll have to move them to the Files app. Open the Photos app, tap Select, and pick multiple images. Hit the share button and select Save to Files. This will add the images from the Photos app to the Files app.
2) Go to the iCloud Drive or On My iPhone folder of the Files app, where all your pictures are saved.
3) Tap the menu button (inside a circle) from the top and hit Select.
4) Now select all the pictures whose backgrounds you want to remove.
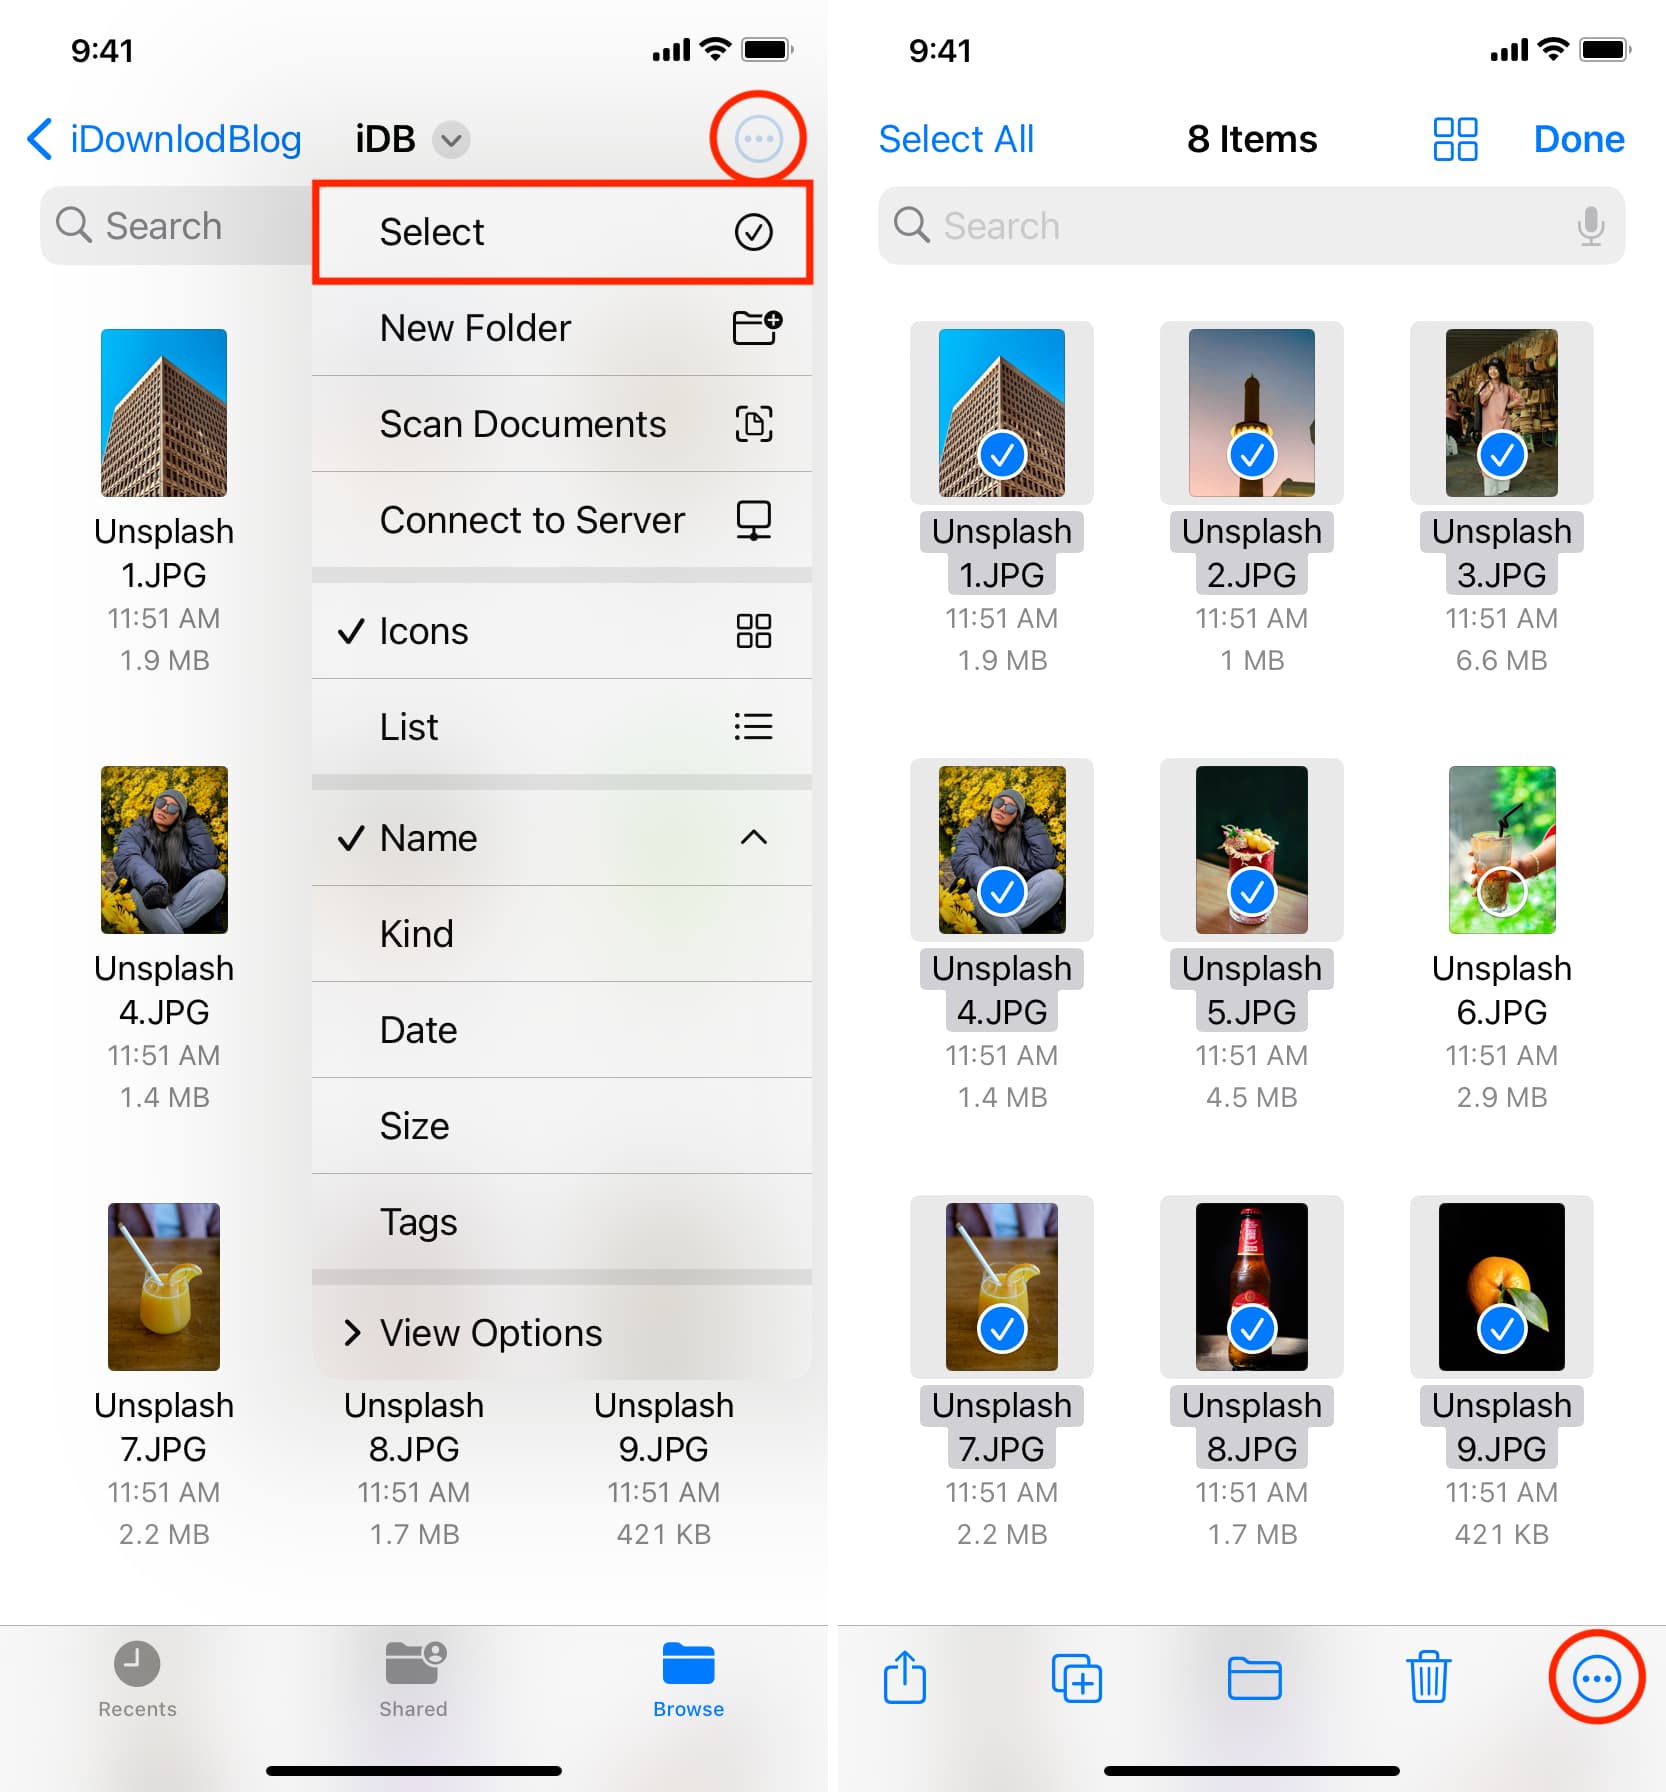
5) After selecting, touch the menu button and tap Remove Background.
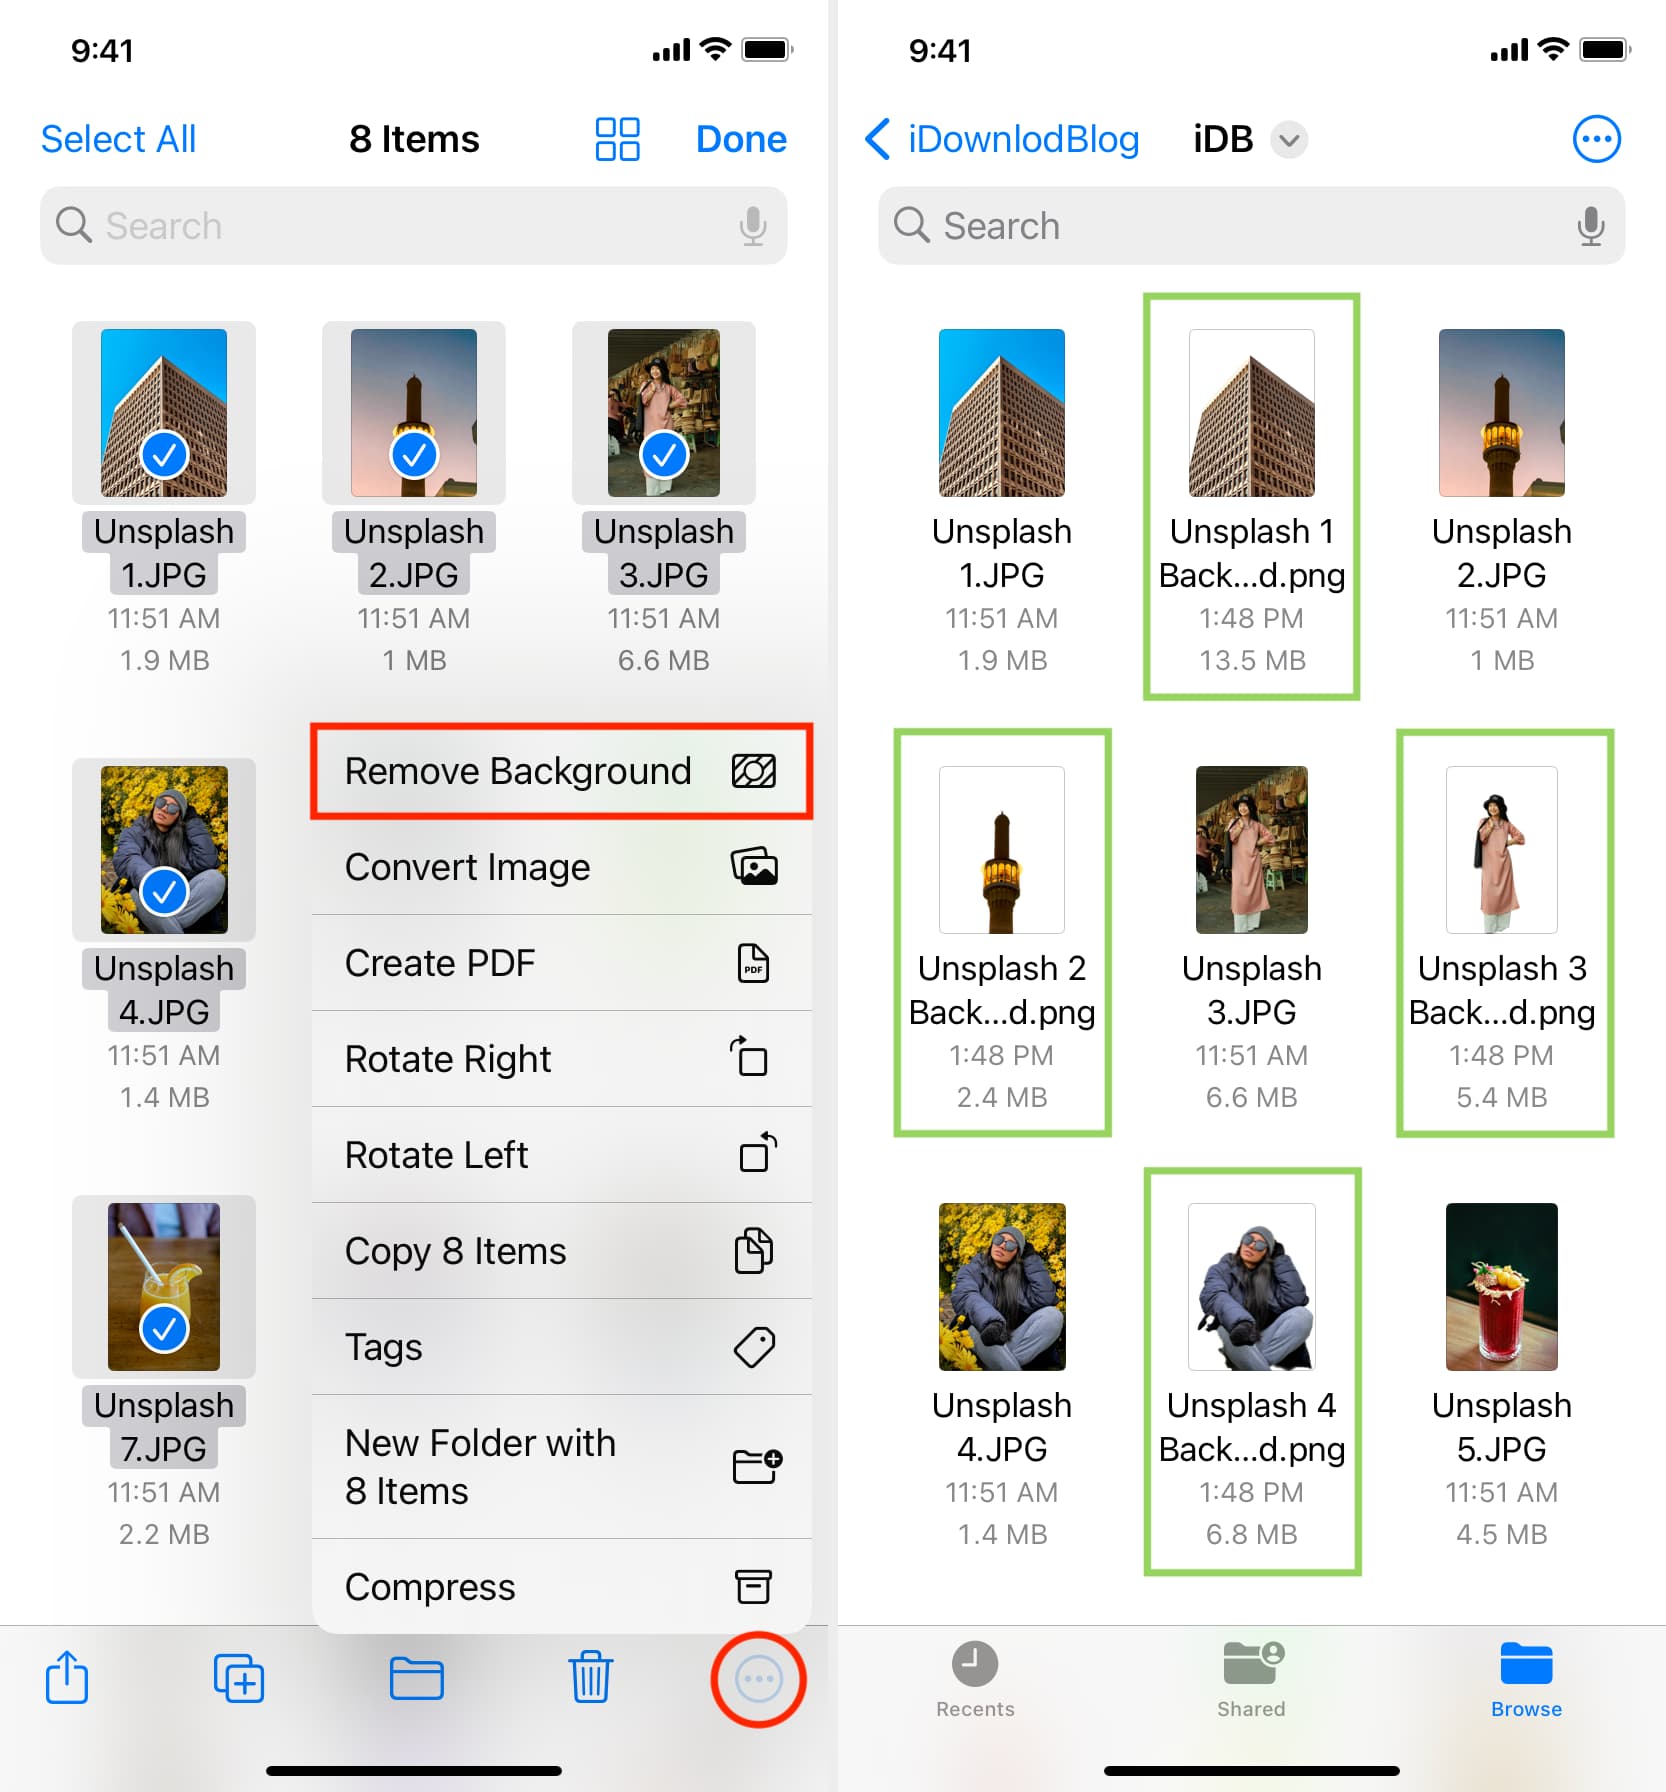
The Files app will take a while to process and then save all the images with the subject extracted and a transparent background. While that happens, don’t exit the Files app or close it. There is no progress bar that shows the status, so you’ll have to wait until you see the background-removed images in the Files app.
All these newly created PNG images will have ‘Background Removed‘ as the suffix in their file names, which you can easily rename to something else.
Add images back to the Photos app
Some chat or photo editing apps may not be able to access the pictures saved in the Files app. Therefore, you will have to add them to the Photos app.
1) Go to the location inside the Files app where the photos with transparent backgrounds are saved. From here, tap the menu button and pick Select.
2) Now, select all the images whose backgrounds you have removed.
3) Tap the share button and choose Save N Images.
4) Now open the Photos app to find all these PNG images with just the subject and a transparent background.

There was a problem running the action
In rare cases, the File app may not remove the background and show an error popup saying, ‘There was a problem running the action.’ As a result, it won’t extract the main subject of the images and save them as separate PNG files.
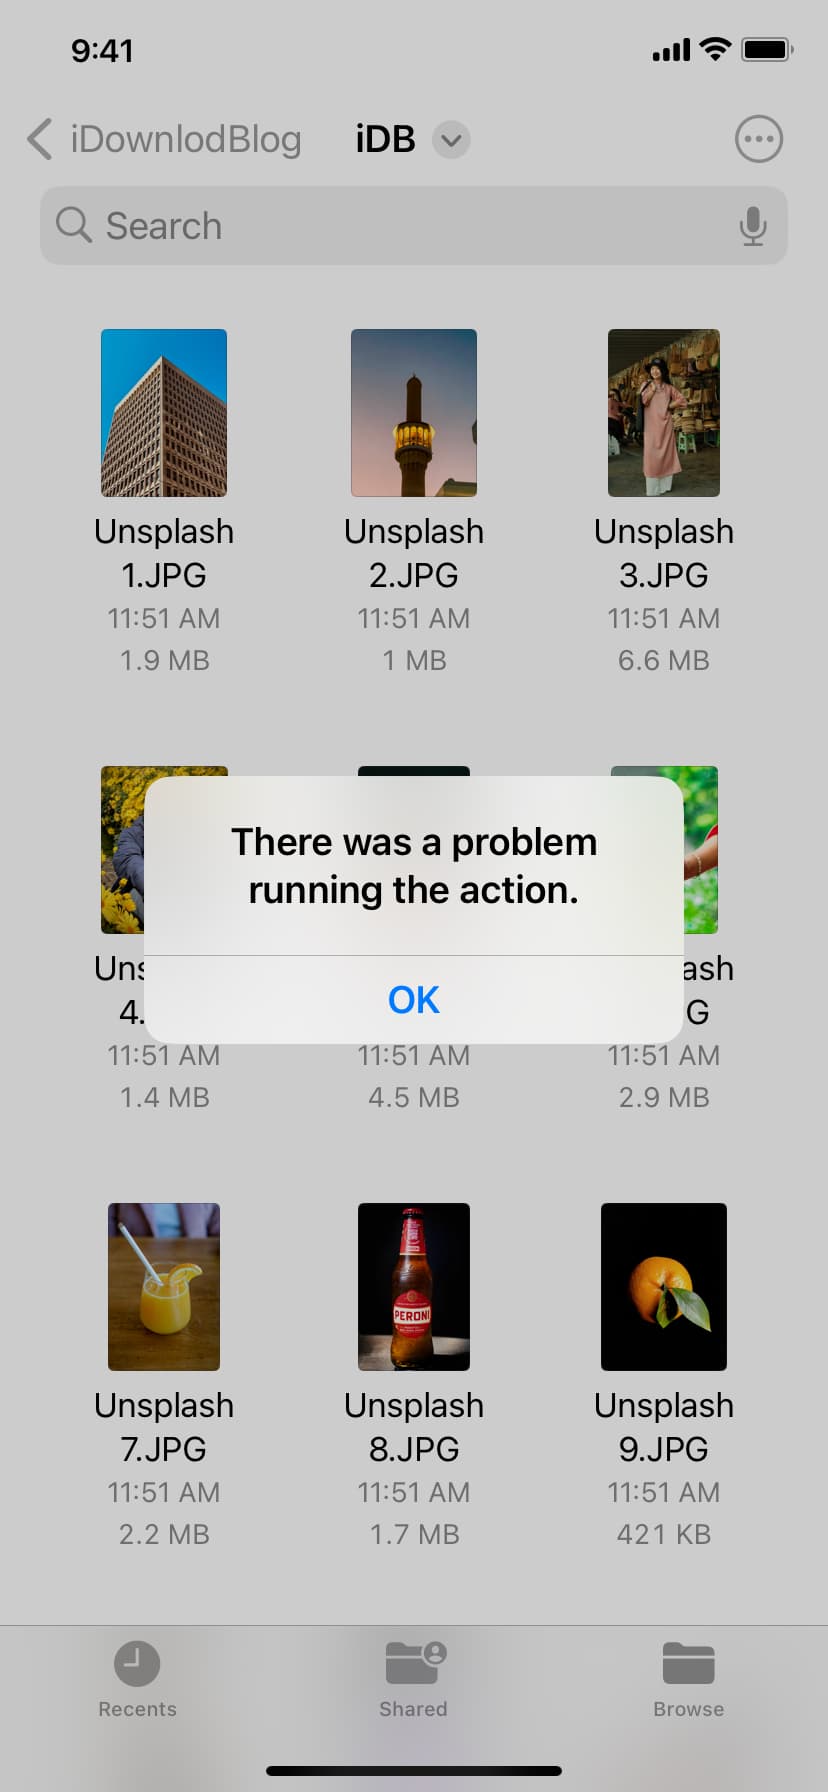
Follow these solutions to fix this issue:
- Force close the Files app and reopen it.
- Try to select the same file types in each batch. For instance, in one go, select just JPGs, and in the other, you can select PNGs. Avoid choosing both in a single set.
- Change the number of selected files by unselecting a few or selecting a few more, and then give this operation a go.
- Move the images to a different folder and then retry.
- Restart your iPhone or iPad before trying again.
Use the extracted subject of the image
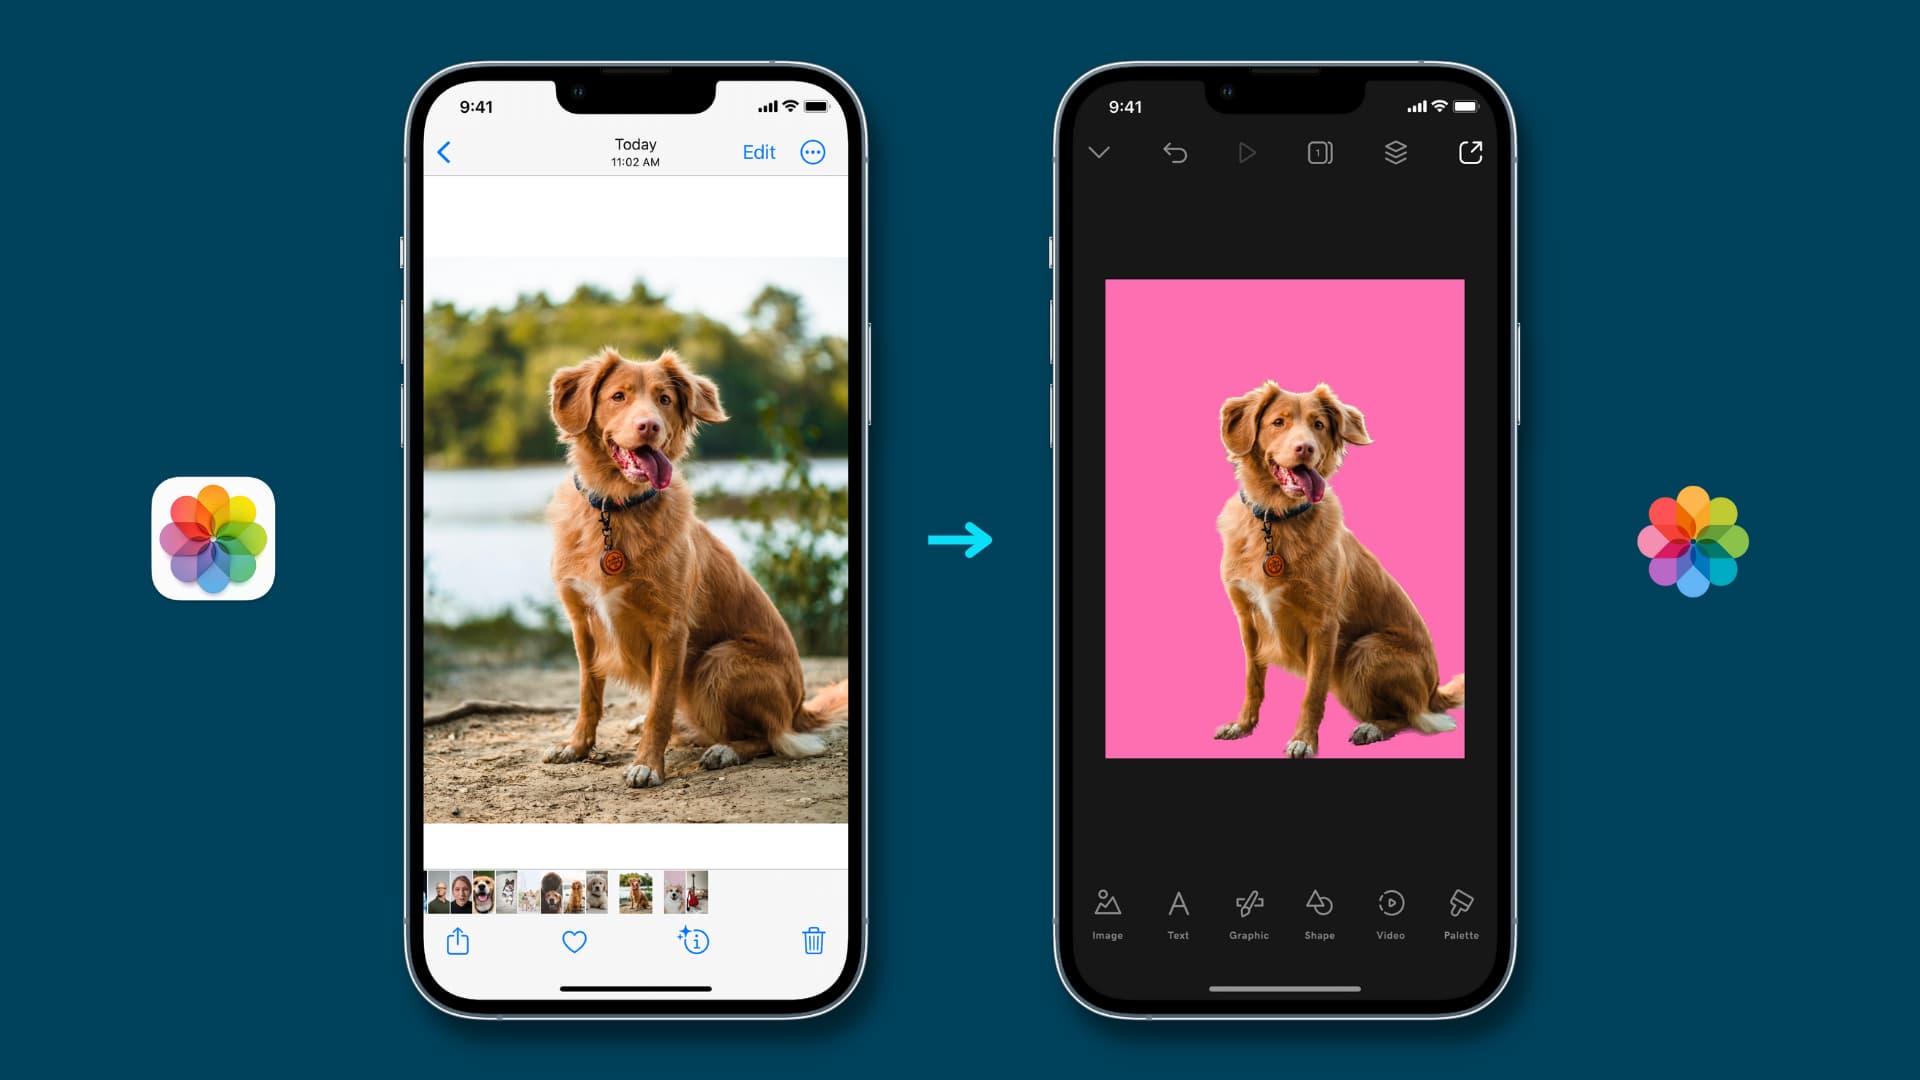
Once you have copied the main subject, you can open Messages, WhatsApp, Telegram, Twitter, or a similar app and paste it there. Depending on the app, the final image will keep a transparent background (like in Messages) or add a white background (in apps like WhatsApp that automatically convert images to JPG).
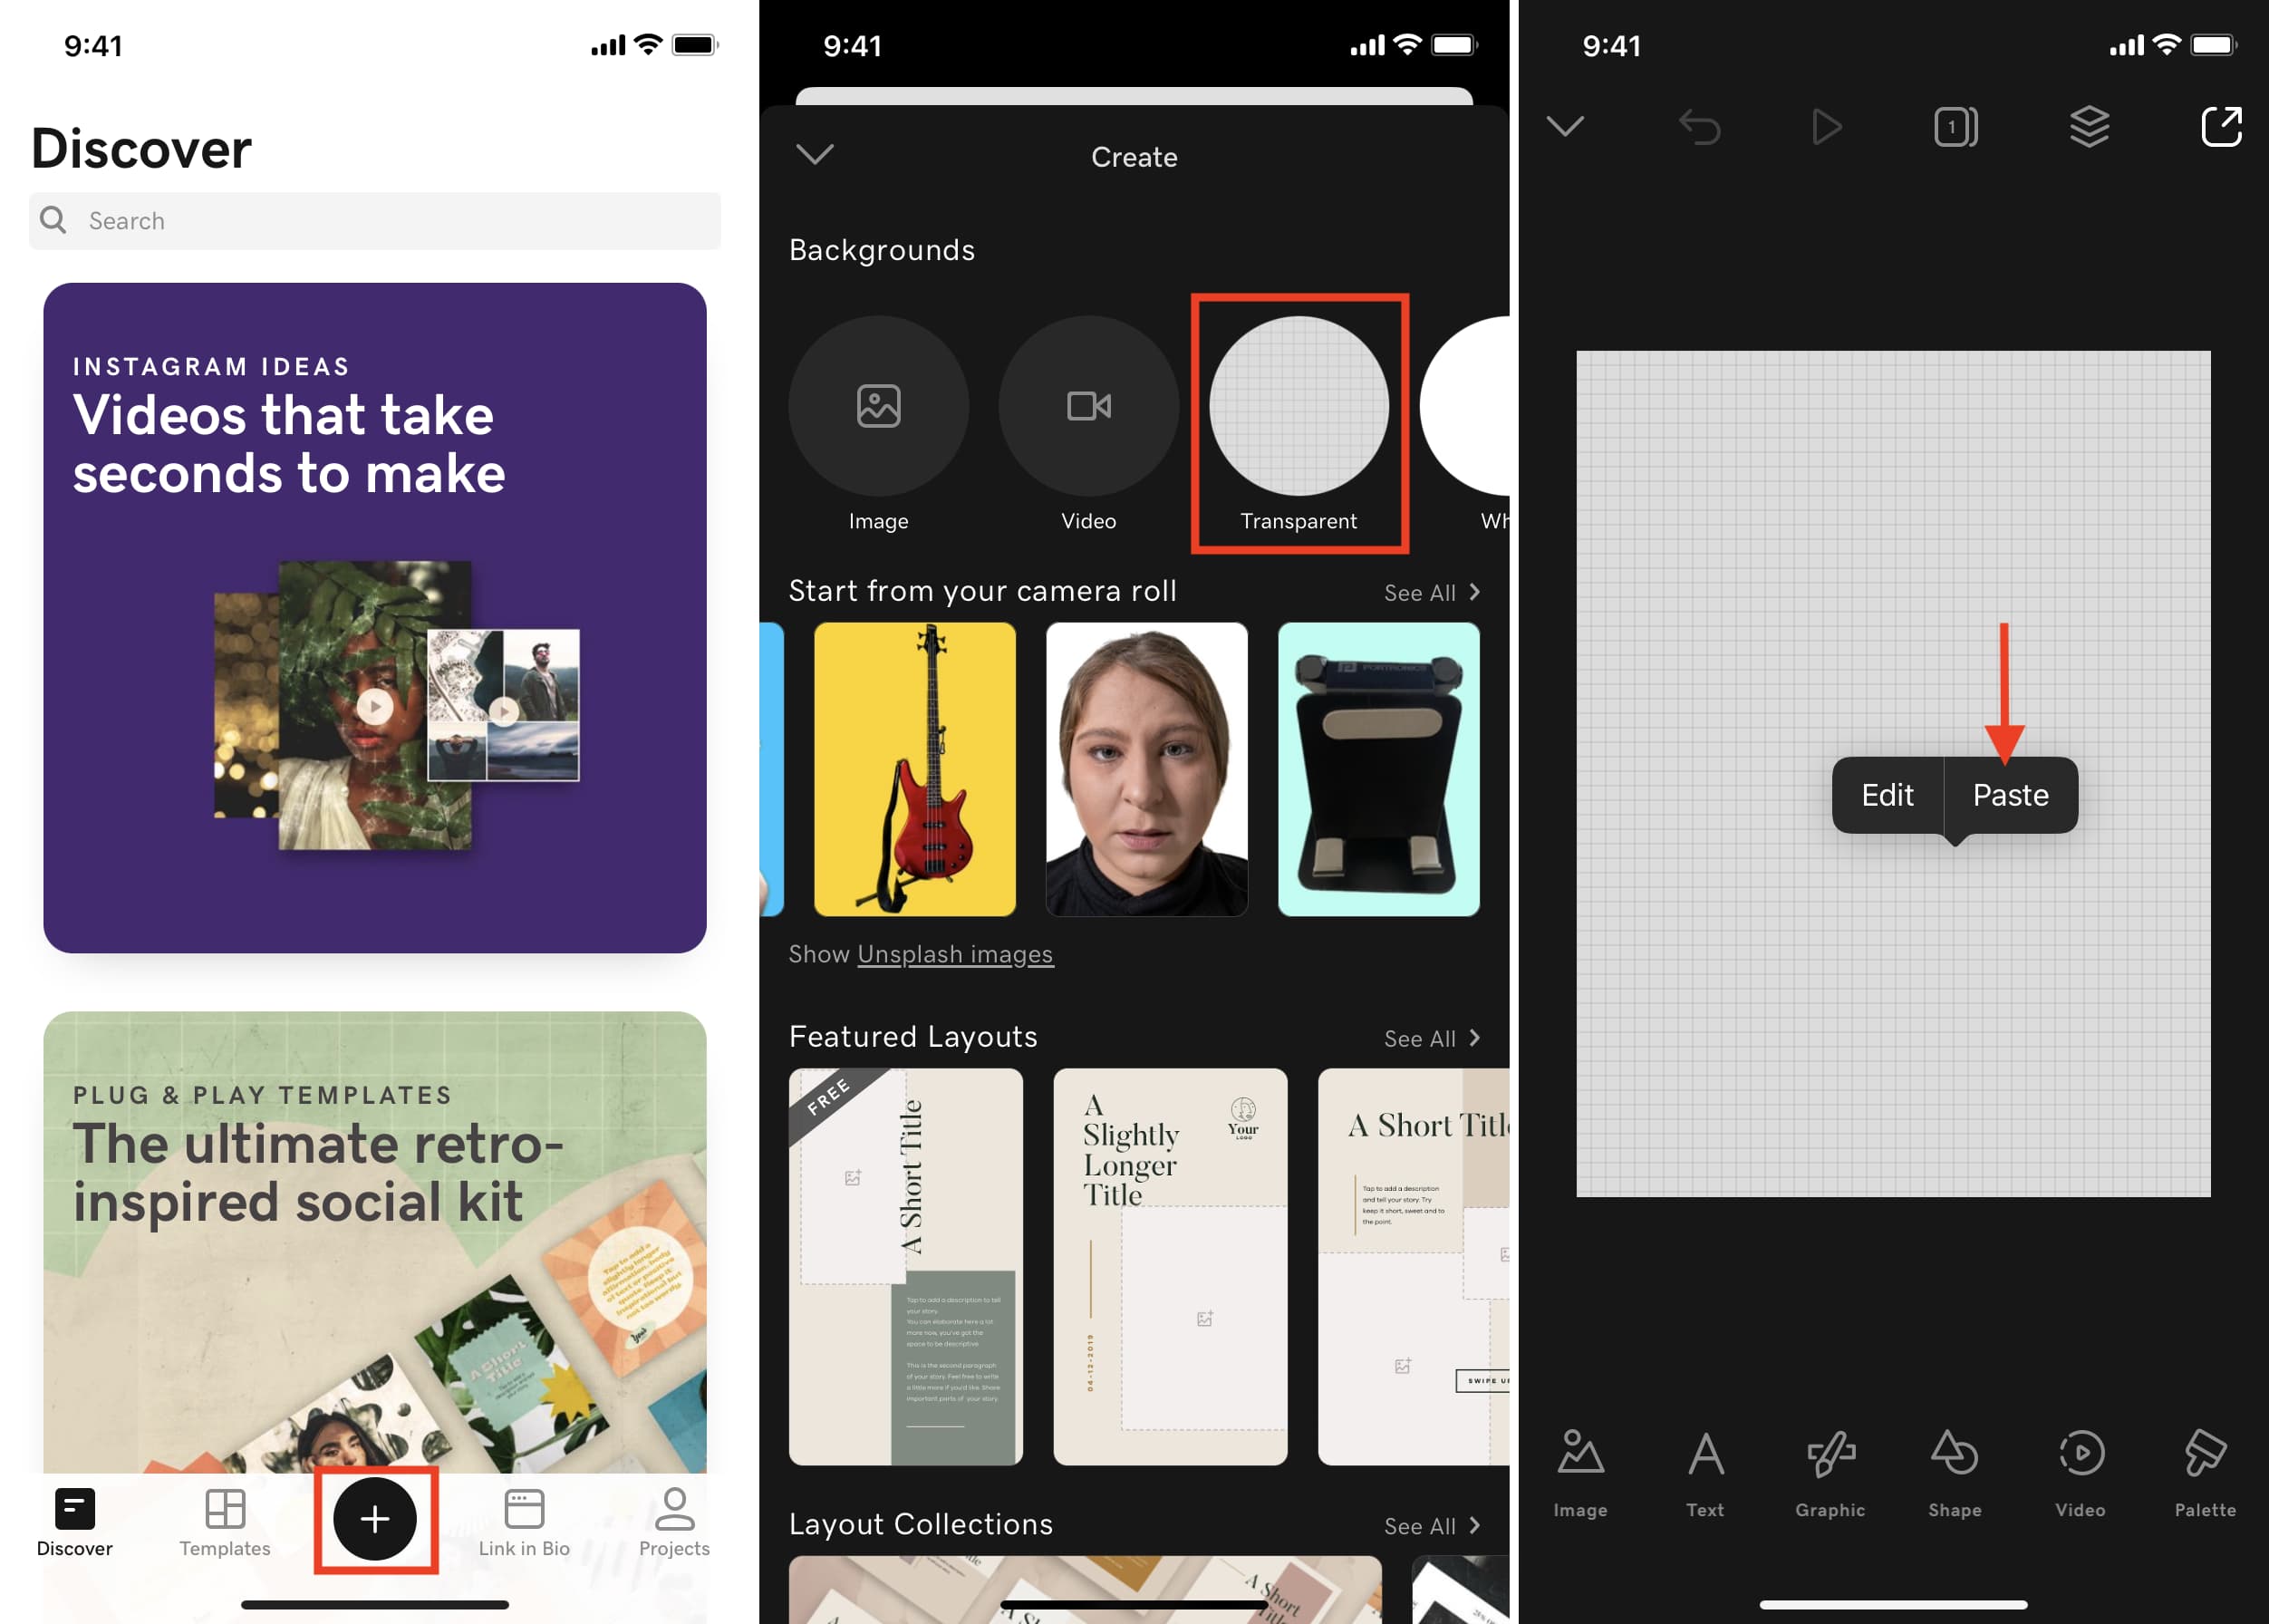
But we’re here to spice things up. To do that, download a simple design app on your iPhone, such as Canva or Studio. I use both, but for the sake of this tutorial, let’s stick to Studio.
Next, follow these steps to use the extracted subject and create a nice final image.
1) Open Studio and tap the plus button.
2) Choose the Transparent option.
3) Pick a size and tap the check button.
4) Tap somewhere on the empty canvas and choose Paste to add the subject you extracted earlier.
5) Now, to add a background color, tap anywhere on the transparent area and choose Edit.
6) Tap Color and choose the desired background.
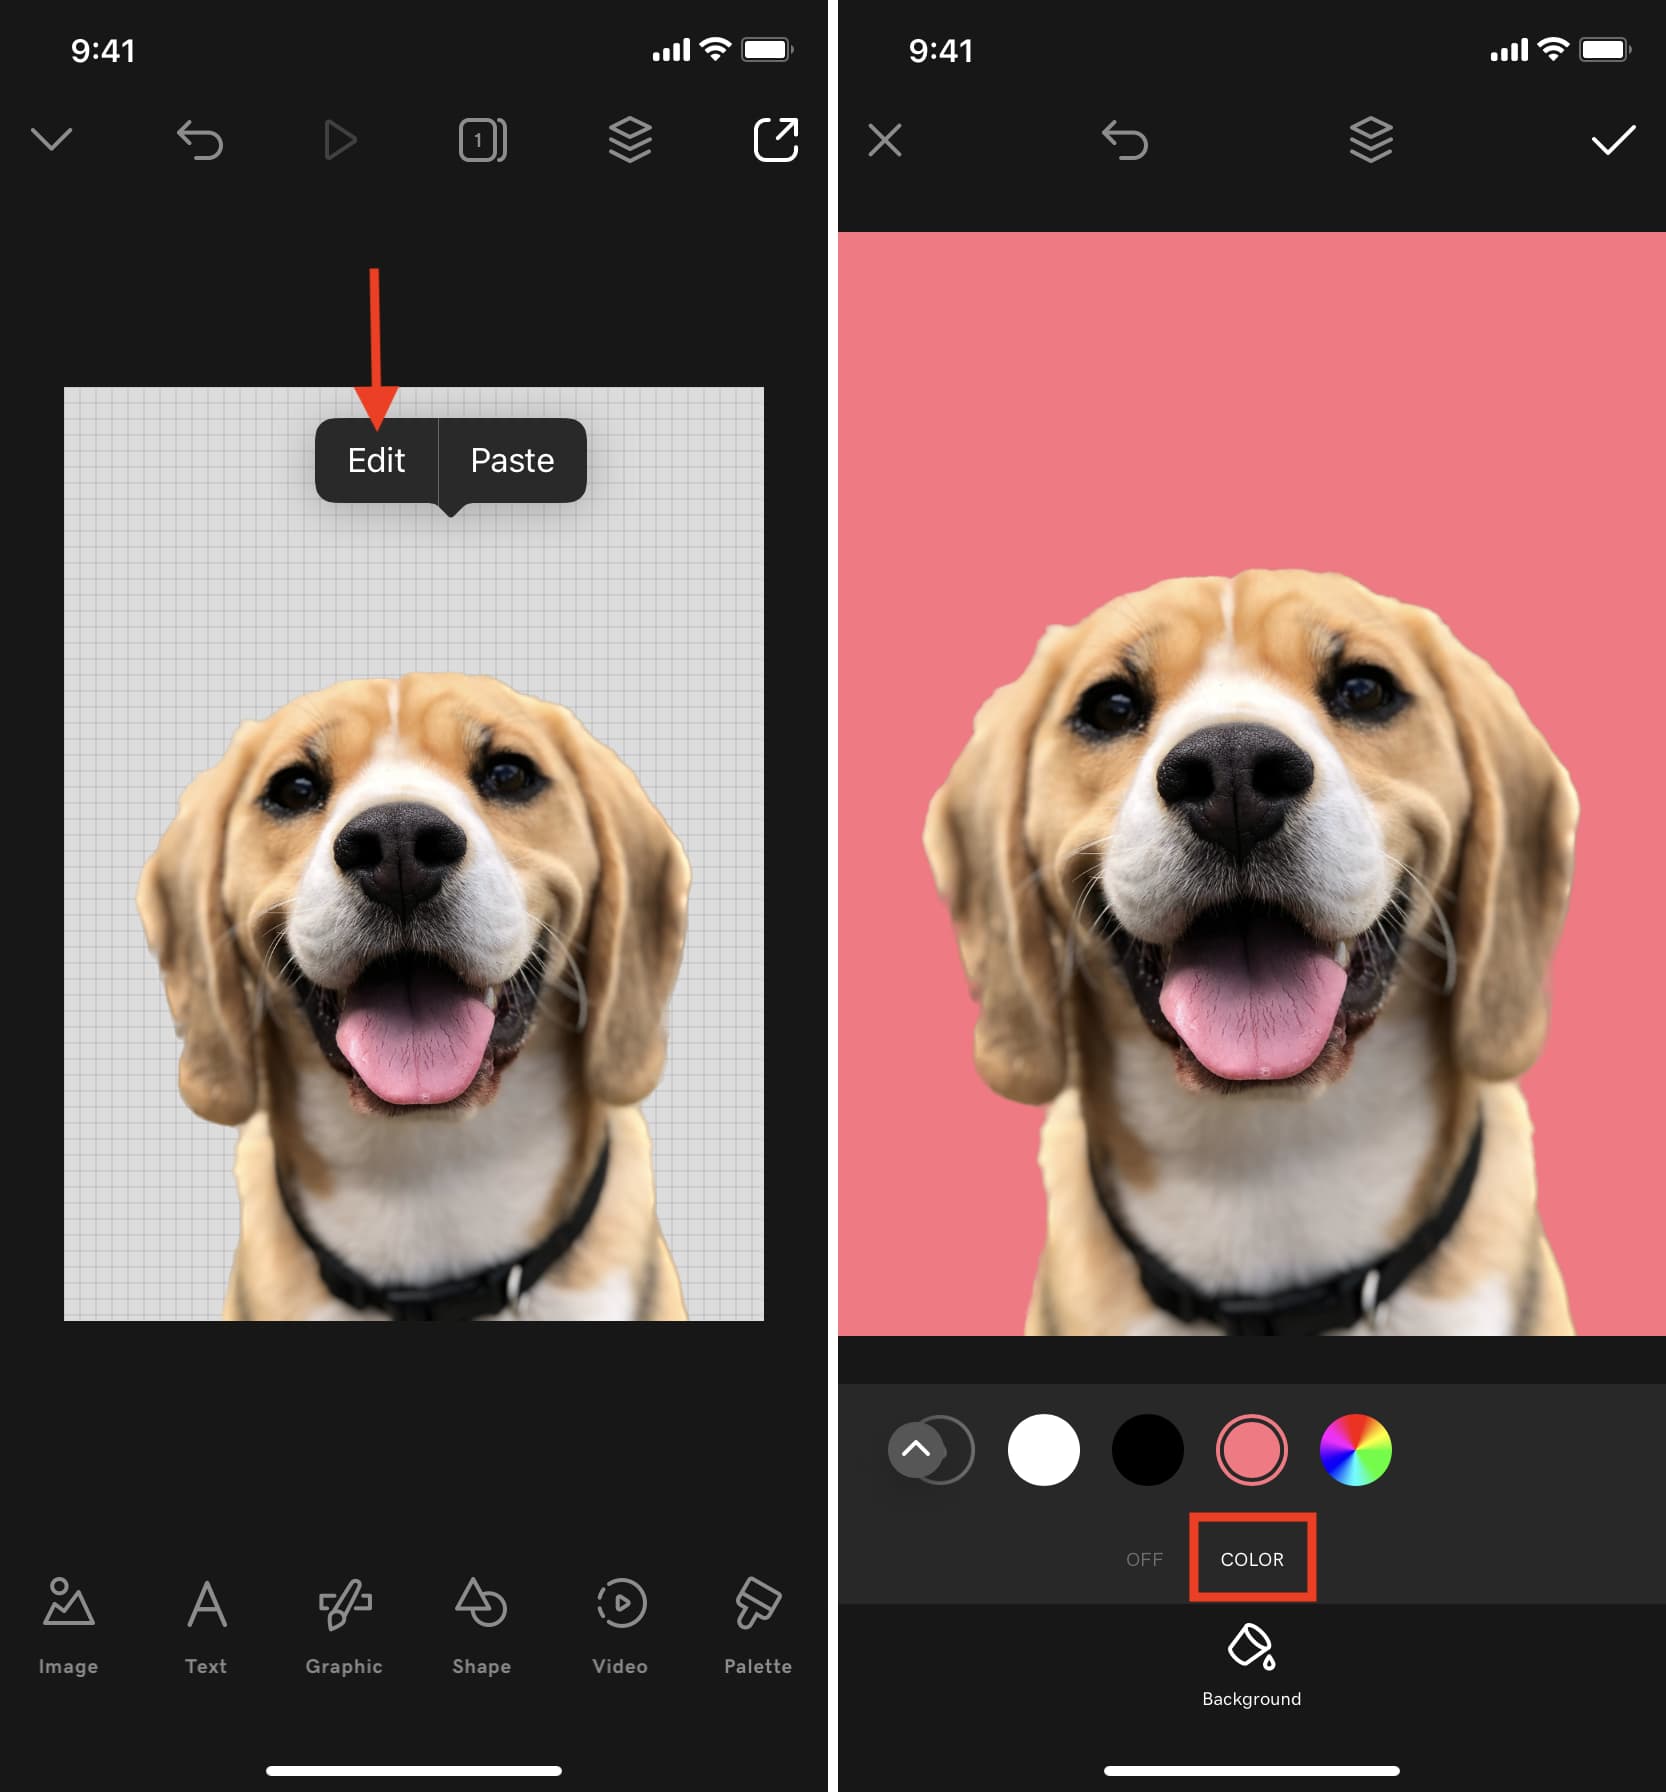
7) With everything done, tap the check button > export button > Save.

You have created an image with the main subject of another photo placed on a colored background. Of course, you can use Studio or other apps to add text, stickers, and more. You get the idea.
On a related note:
- How to remove unwanted objects from photos on iPhone
- 5 ways to create memes on iPhone and iPad
- How to add a watermark to an image on iPhone and iPad
All original images in this post are from Unsplash.