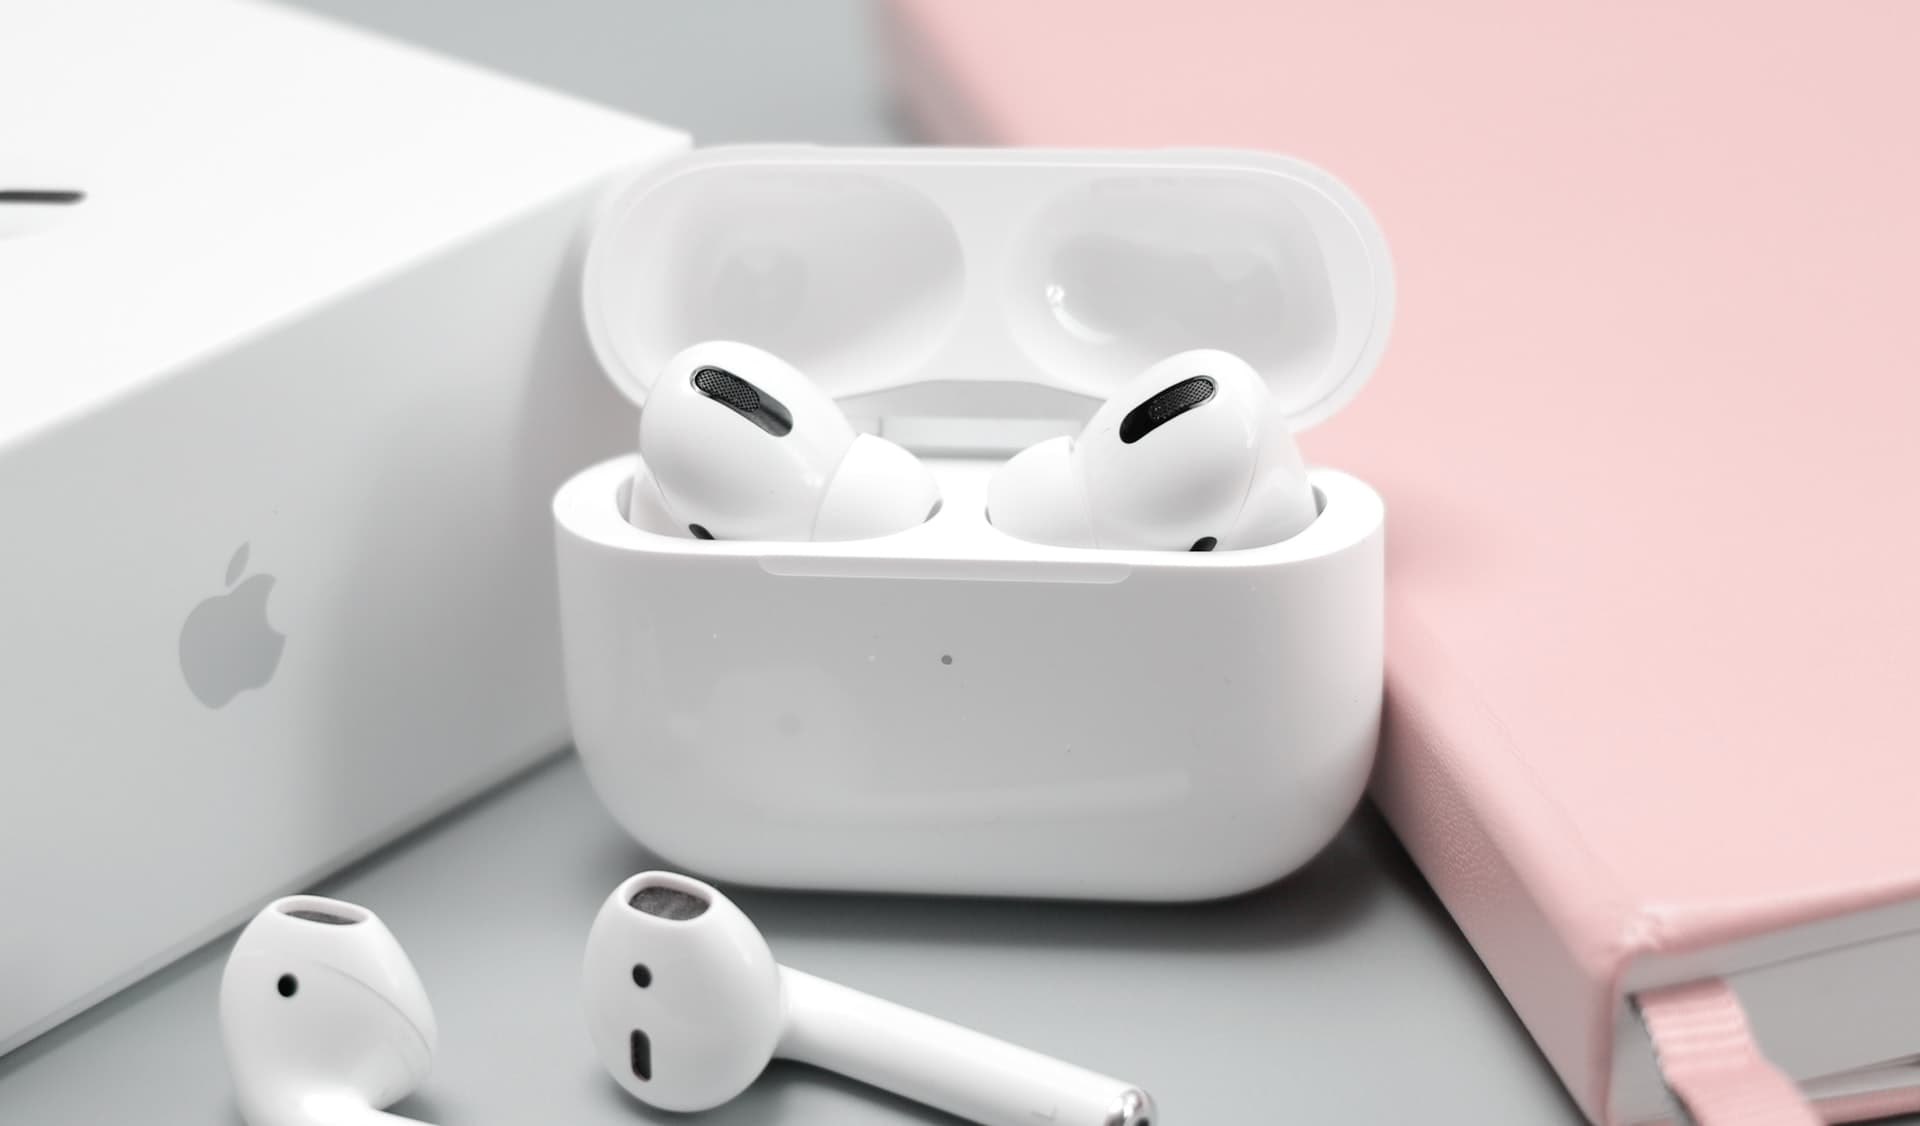
Check out all the important things you should do and know about to get the most out of your new AirPods or AirPods Pro.
1. Set up your new AirPods
It goes without saying that you must pair your AirPods to an iPhone, iPad, or Mac before using them. The good thing is you only need to pair AirPods to one Apple devices and they’ll become available to use on all your other devices that use the same Apple Account. Other wireless headphones must be paired to each device manually.
You can also pair your AirPods with Android phones, Windows PCs, and other devices as regular Bluetooth earphones (explained below).
2. About “Hey Siri” on AirPods
If you see an option to set up “Hey Siri” when configuring your AirPods, tap Use Siri to enable this feature. If you’re not a fan of Apple’s voice assistant, choose Not Now (you can always toggle Siri on AirPods later).

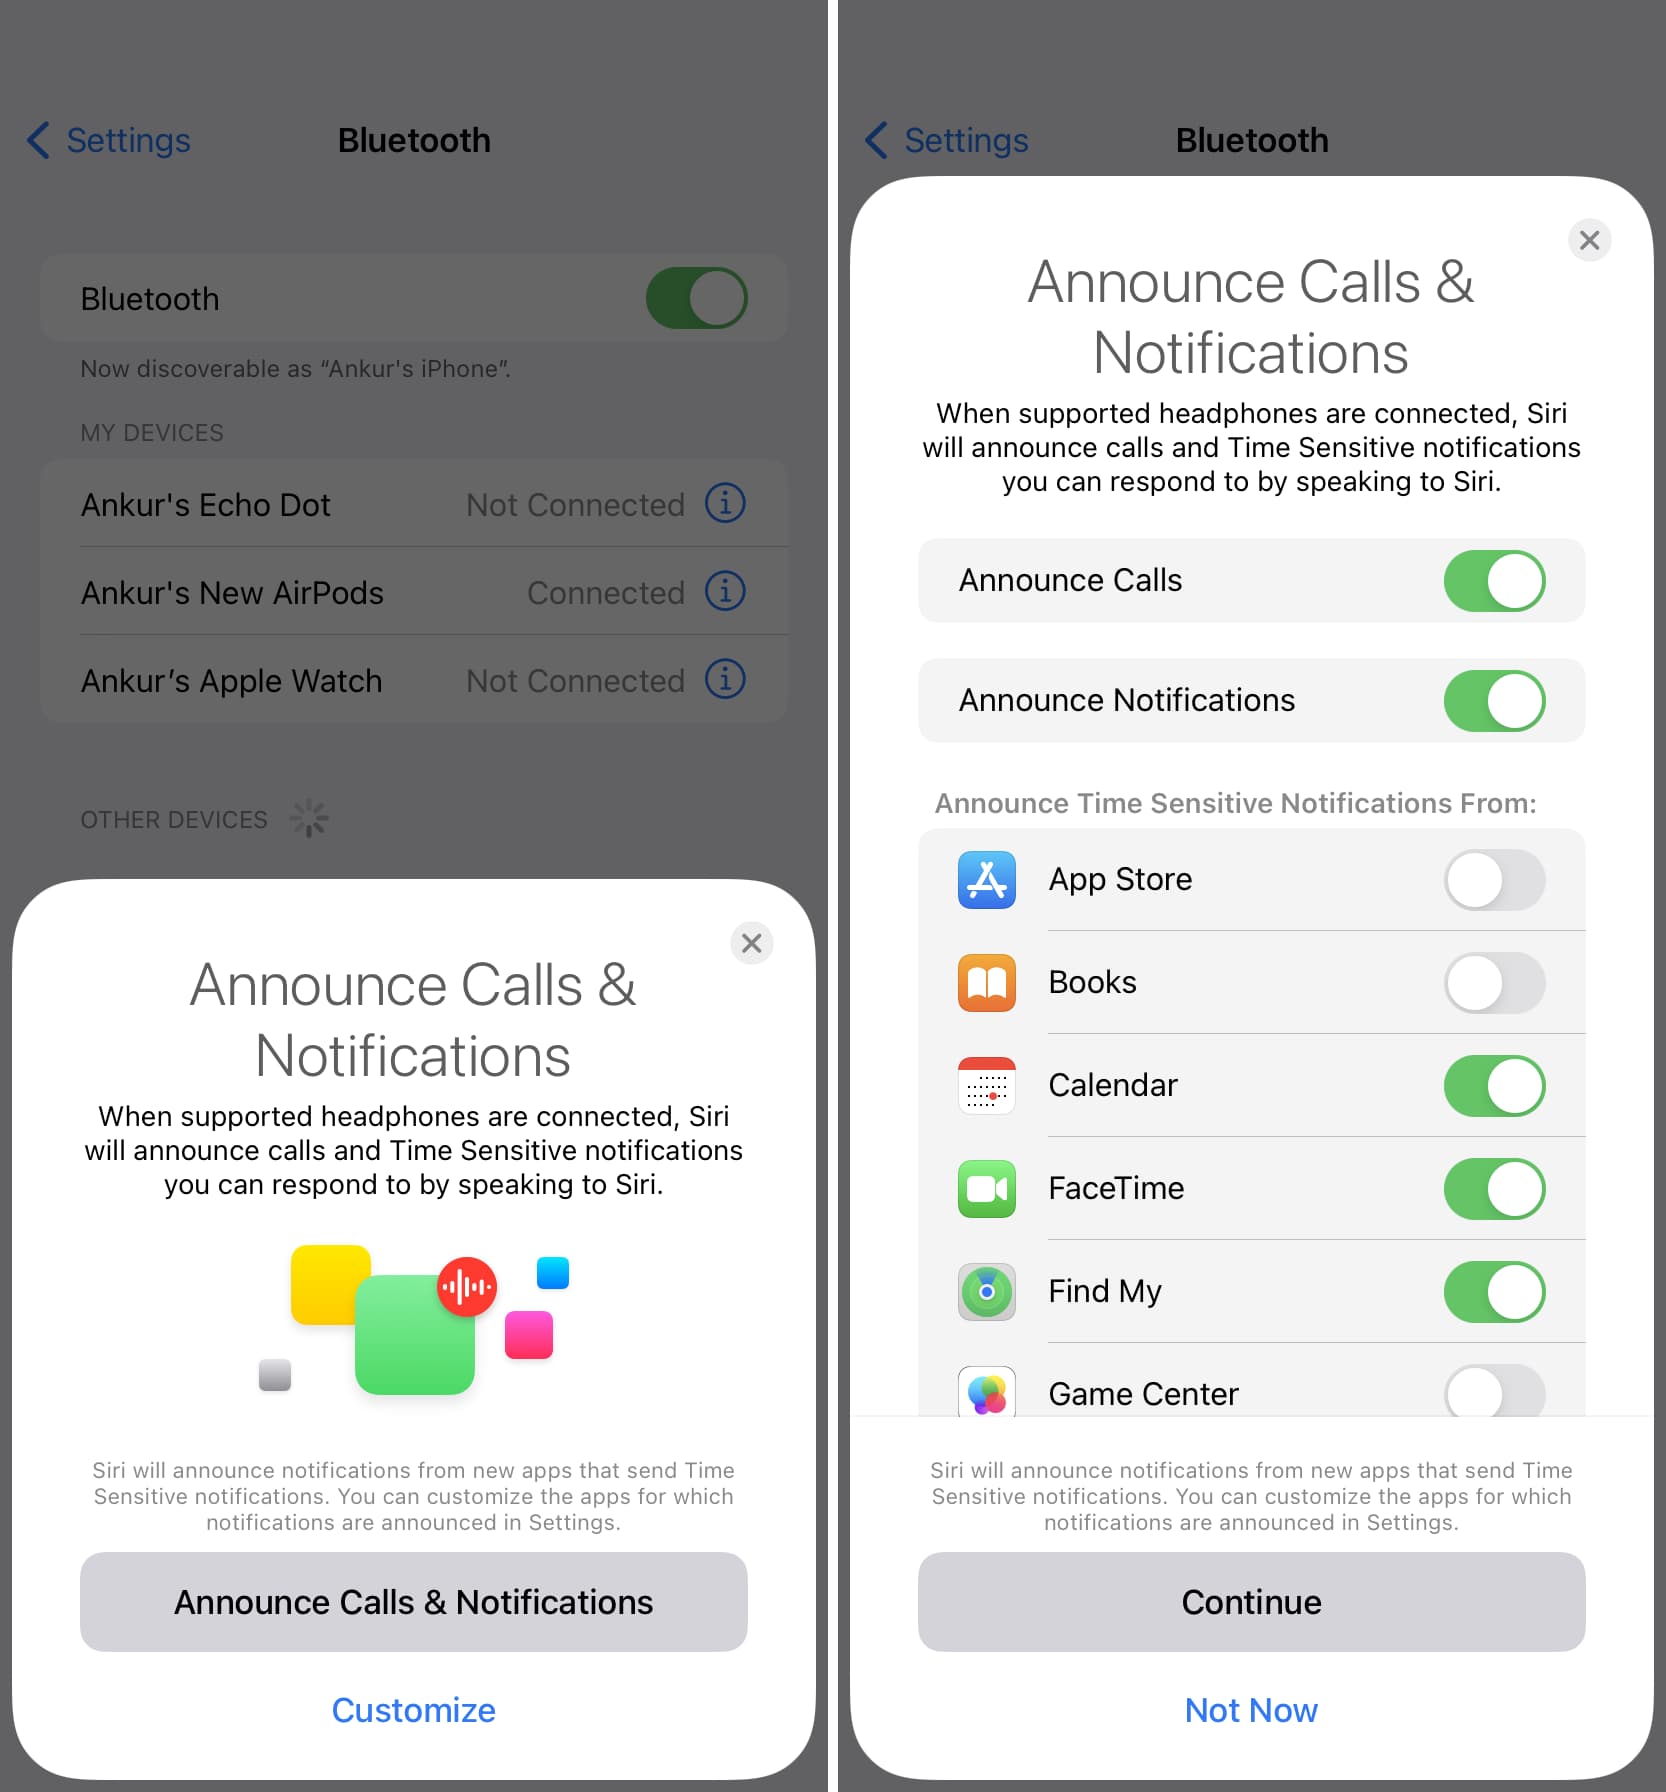
3. Announce Notifications
Another option you can when setting up your AirPods is for call and notification announcements. Select the Announce Calls & Notifications option on the AirPods setup card if you’d like Siri to announce incoming calls and read time-sensitive notifications (you can also quickly reply with your voice to messages).
You can choose to announce only calls or notifications or both, as well as enable or disable specific app notification announcements.
As I find notification announcements distracting, I tap Customize > Not Now. You can also adjust this feature later in Settings > Notifications > Announce Notifications.
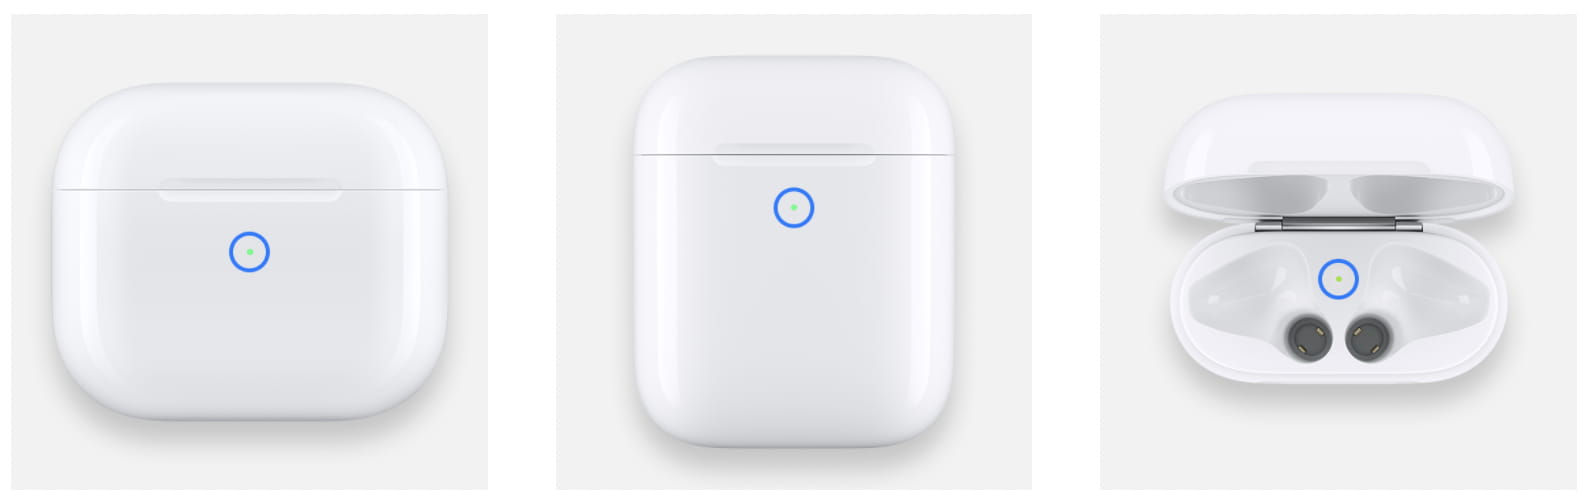
4. What do the various lights on the AirPods case mean?
The tiny light on your AirPods charging case can glow white, amber/orange, or green. Here’s what the colors mean:
- Green: Your AirPods in the charging case are fully charged. When AirPods are outside the case, the green light means the charging case is fully charged.
- Amber: Your AirPods in the case are not fully charged. Either the charging case and your AirPods have no battery, or you’ve pulled the earbuds out of the case before they’re fully charged. If your AirPods are not in the case, the amber light means your charging case battery is low.
- Flashing white means your AirPods are in Bluetooth discovery mode, ready to be paired. To enter Bluetooth pairing mode, press and hold the button on the charging case. If you own a pair of AirPods 4, simply tap the same area. The status light also flashes white after resetting your AirPods (which puts them in pairing mode).
- Flashing amber light means something is wrong with your AirPods, and you’ll have to set them up again. But first, go to your Bluetooth settings, tap the info button ⓘ next to your AirPods, and choose the Forget This Device option.
- No light on the AirPods charging case when the lid is open means there’s no charge left in the battery. This can happen if you leave the case at a low battery level idle for several days. If the light doesn’t start glowing after a 15-minute charge, there might be wrong with your AirPods.
Pro Tip: Your AirPods may also stop charging if their metallic pin at the bottom picks up grease from your fingers or your body oils. Dirt that accumulates at the bottom of the charging case over time may also interfere with charging. You can fix this by cleaning your AirPods and their case. To confirm they’re charging, put them in the charging case and the status light should flash amber or green.
Related: Interpreting the meaning of LED light states on your AirPods Max
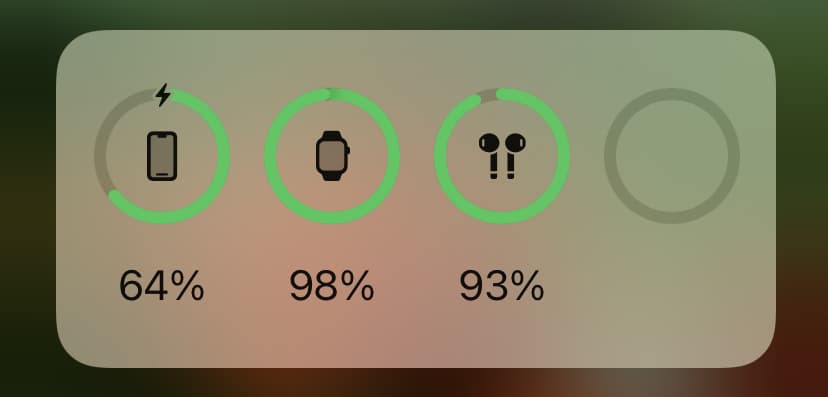
5. See AirPods battery percentage
There are several ways to see the AirPods battery percentage on Apple and non-Apple devices, like using the Battery widget, ask Siri, and more.
6. Charge your AirPods
The charging case can juice up your AirPods multiple times over. To start charging them, put both earbuds in their case. Don’t leave them unused outside the case as they’ll keep consuming battery. You can charge your AirPods case even if your AirPods aren’t inside.
Tip: You can even place your AirPods charging case on an Apple Watch charger to juice them up.
Must see: How to increase AirPods battery life
7. Pick up a call
You can pick up a phone call hands-free when wearing AirPods. On the first and second-generation AirPods, double-tap the top portion on either left or right AirPod. On AirPods Pro and other newer models, press the left or right stem. To hang up the call, double tap or press again.
8. Set up the AirPods controls
You can press and press & hold the AirPods stem to do the following:
- Call Siri: Press and hold the stem
- Manage Noise Control modes: Press and hold the stem to cycle between Noise Control modes like Noise Cancellation, Transparency, Adaptive, or Off
- Go to the next track: Double press either stem
- Go to the previous track: Triple-press either stem
- Pause and resume music playback: Press either stem once
- Answer phone call: Press either stem once when you get a call
- Mute & Unmute yourself when on a call: Press the stem once (or twice)
- End phone call: Press the stem twice (or once)
You can customize some of these actions. With AirPods connected to your iPhone or iPad (indicated by a headphones icon in the Control Center), open the Settings and tap your AirPods name near the top. In the Press and Hold AirPods section, tap Left and choose a desired action to perform. Then go back, tap Right, and choose another action. You can also customize how you answer, mute, unmute, and end calls in the Call Controls section.

9. Automatic ear detection
AirPods automatically sense when they’re inside your ear and pulled out. With automatic ear detection turned on, your AirPods automatically stop playback when taken out, which helps extend their battery life.
This is a reliable and helpful feature. I can listen to some music before going to bed knowing that AirPods will automatically pause the music if they fall out of my ears while I’m asleep. As soon as I switch to another headphones, automatic ear detection is one of the things I miss the most. If you don’t want to use this feature, you can turn off Automatic Ear Detection in the AirPods settings.
Tip: Lately, I’ve been using a Shortcuts trick to automatically pause music every day at 10 PM without doing anything!
10. Choose when AirPods should connect to your device
Say you own multiple Apple devices. You’re listening to music on your AirPods via your MacBook. Now, when you pick up a call on your iPhone, AirPods automatically connect to it. This can be both handy and annoying.
If you’re listening to music on your AirPods via your Mac and browsing social media on your iPhone at the same time, and a video in your feed starts playing automatically, the earbuds will automatically switch to the phone. To fix this, turn off the automatic AirPods connection. You can also use tricks like assigning the Action button to connect your iPhone to your AirPods.
11. Use head gestures
You can pick up calls, decline them, and dismiss message notifications just by shaking your head when wearing AirPods. We have explained everything about it in our dedicated tutorial.
12. Share audio with friends
Go to your iPhone’s or iPad’s Control Center, hit the AirPlay icon, and choose the Share Audio option to stream the same music to two pairs of AirPods so you and a friend can enjoy songs at the same time.
13. Using AirPods as a hearing aid
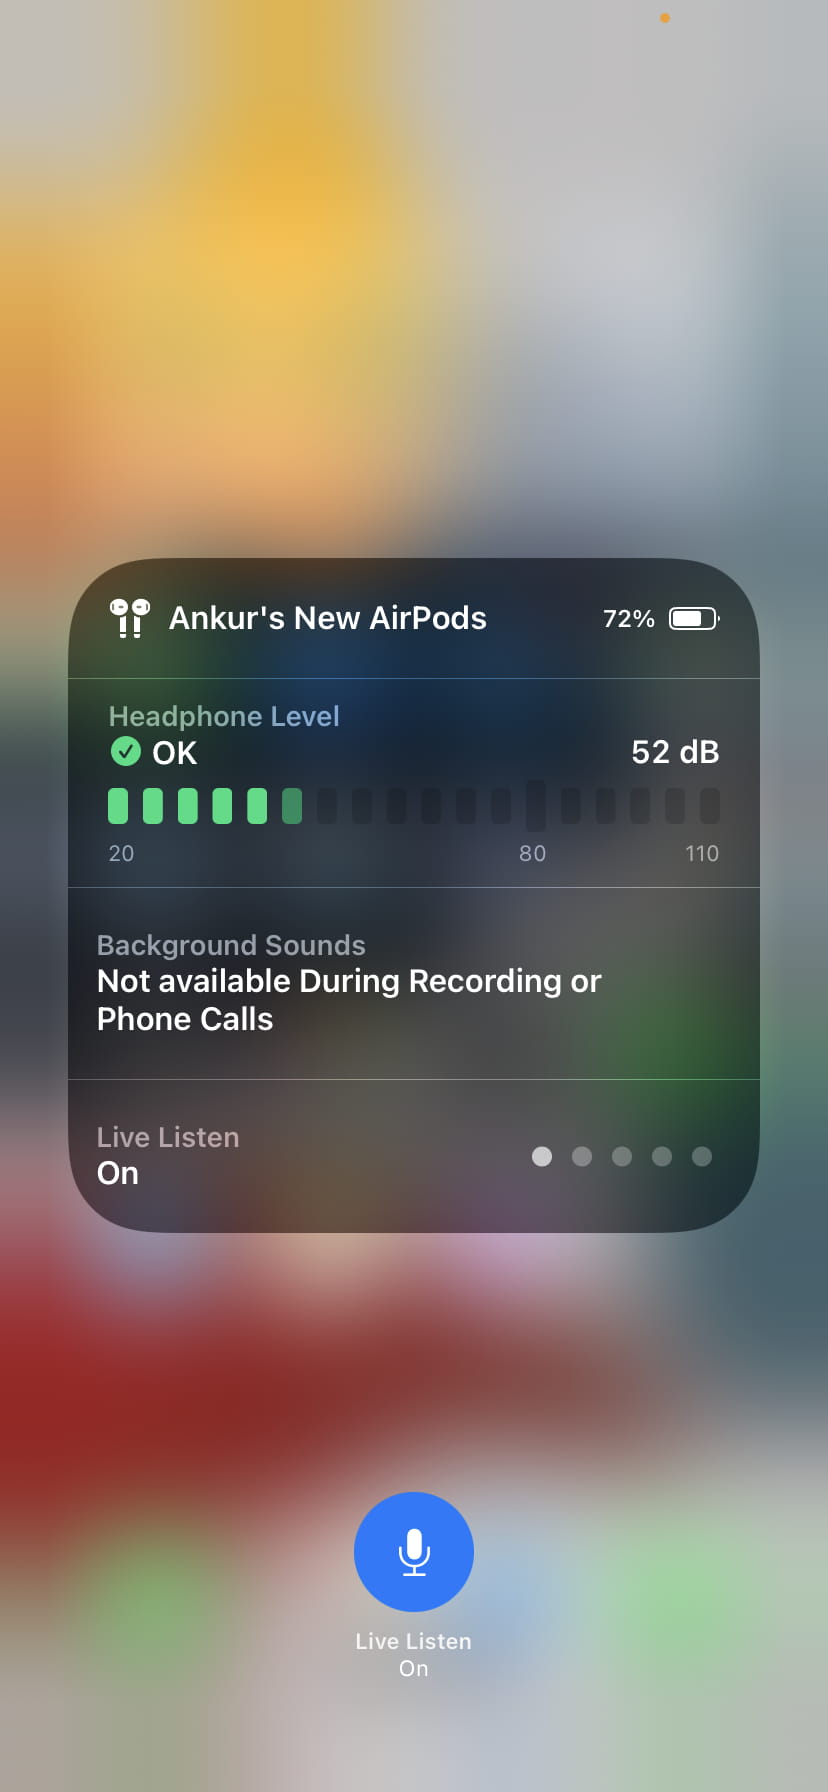
AirPods Pro 2 double as an FDA-approved clinical hearing aid. Other models can utilize the Live Listen feature to turn an iPhone into a remote microphone that picks up audio and sends it to your AirPods (you’ll see live audio levels to determine whether Live Listen is too loud).
14. Use conversation boost
This handy feature lets you hear the person speaking in front of you properly while using your AirPods in a noisy environment.
15. Enjoy spatial audio
Thanks to spatial audio, you can enjoy immersive 3D sound while watching movies and TV shows.
16. Use just one AirPod
You can use one AirPod at a time and keep the other earbud in the charging case. For example, maybe you lost or broke one of the earbuds or drained its battery by leaving it outside the case. Although audio automatically stops when you take a single AirPod out of your ear, hitting the Play button will resume music playback in another AirPod.
17. Rename your AirPods
After setting up your AirPods, you can rename them to anything you want in the AirPods settings on your iPhone, iPad, or Mac.
18. Connect with Android and Windows PC
AirPods can work on non-Apple devices like regular Bluetooth earphones, but without the smarts. To pair your AirPods on Android and Windows:
1) Go to the Bluetooth settings on your Android device or Windows PC.
2) Open the lid on the charging case with your AirPods inside, then press and hold the button on the back of the case. The status light on the case should start flashing white, signifying it’s in pairing mode. If you have AirPods 4, double-tap the front side of the case until the tiny status light flashes white.
3) Once paired, connect your AirPods using Bluetooth settings on your Android phone or Windows PC.
19. Keep AirPods and the charging case away from water
Your AirPods aren’t waterproof, so don’t submerge them in water or other liquids. For detailed information about the AirPods water, sweat, and dust resistance, peruse our guide covering 6 things to do if you drop your AirPods in water.
20. Find your missing AirPods
Use the Find My app to locate your AirPods if you misplaced them.
21. Replace a single AirPod or charging case
If you recently bought a new pair of AirPods, it’s only natural to worry about losing them. Accidents happen, and if you lose one AirPod or the charging case, Apple will happily sell you just that missing piece instead of the full set.
22. Fun fact about the AirPods serial number
All Apple devices have unique serial numbers. Your AirPods have three: one for the case and one for each AriPod. To see the serial numbers, go to AirPods settings on your iPhone and tap the Serial Number filed to see the L (left) and R (right) serial numbers.
Check out next: The best AirPods deals you can get right now