Learn how to view through and select a different still frame of a Live Photo on your iPhone or iPad.
Live Photos let you record what happens 1.5 seconds before and 1.5 seconds after you snap a photograph. These images come to life when you touch them in the Photos app. You can also share them via services like WhatsApp, Facebook, Instagram, and Tumblr.
When you take a Live Photo, the Camera app uses AI to select the best still image, called the Key Photo or key frame. It’s this still portion of a Live Photo that’s displayed in the Photos app, sent when you share it as a still image, and more.
But you have the liberty to play Live Photos frame-by-frame, select a different still frame, and export it as a normal image.
However, remember that changing the still frame of a Live Photo may result in a blurrier image with fewer details than the original. That’s because your iPhone saves only one still image at full resolution, while compressing the remaining frames into a lower-resolution video.
Follow our step-by-step tutorial to learn how to manually select the still frame for your Live Photo and export it as a still image.
Select another still frame of a Live Photo
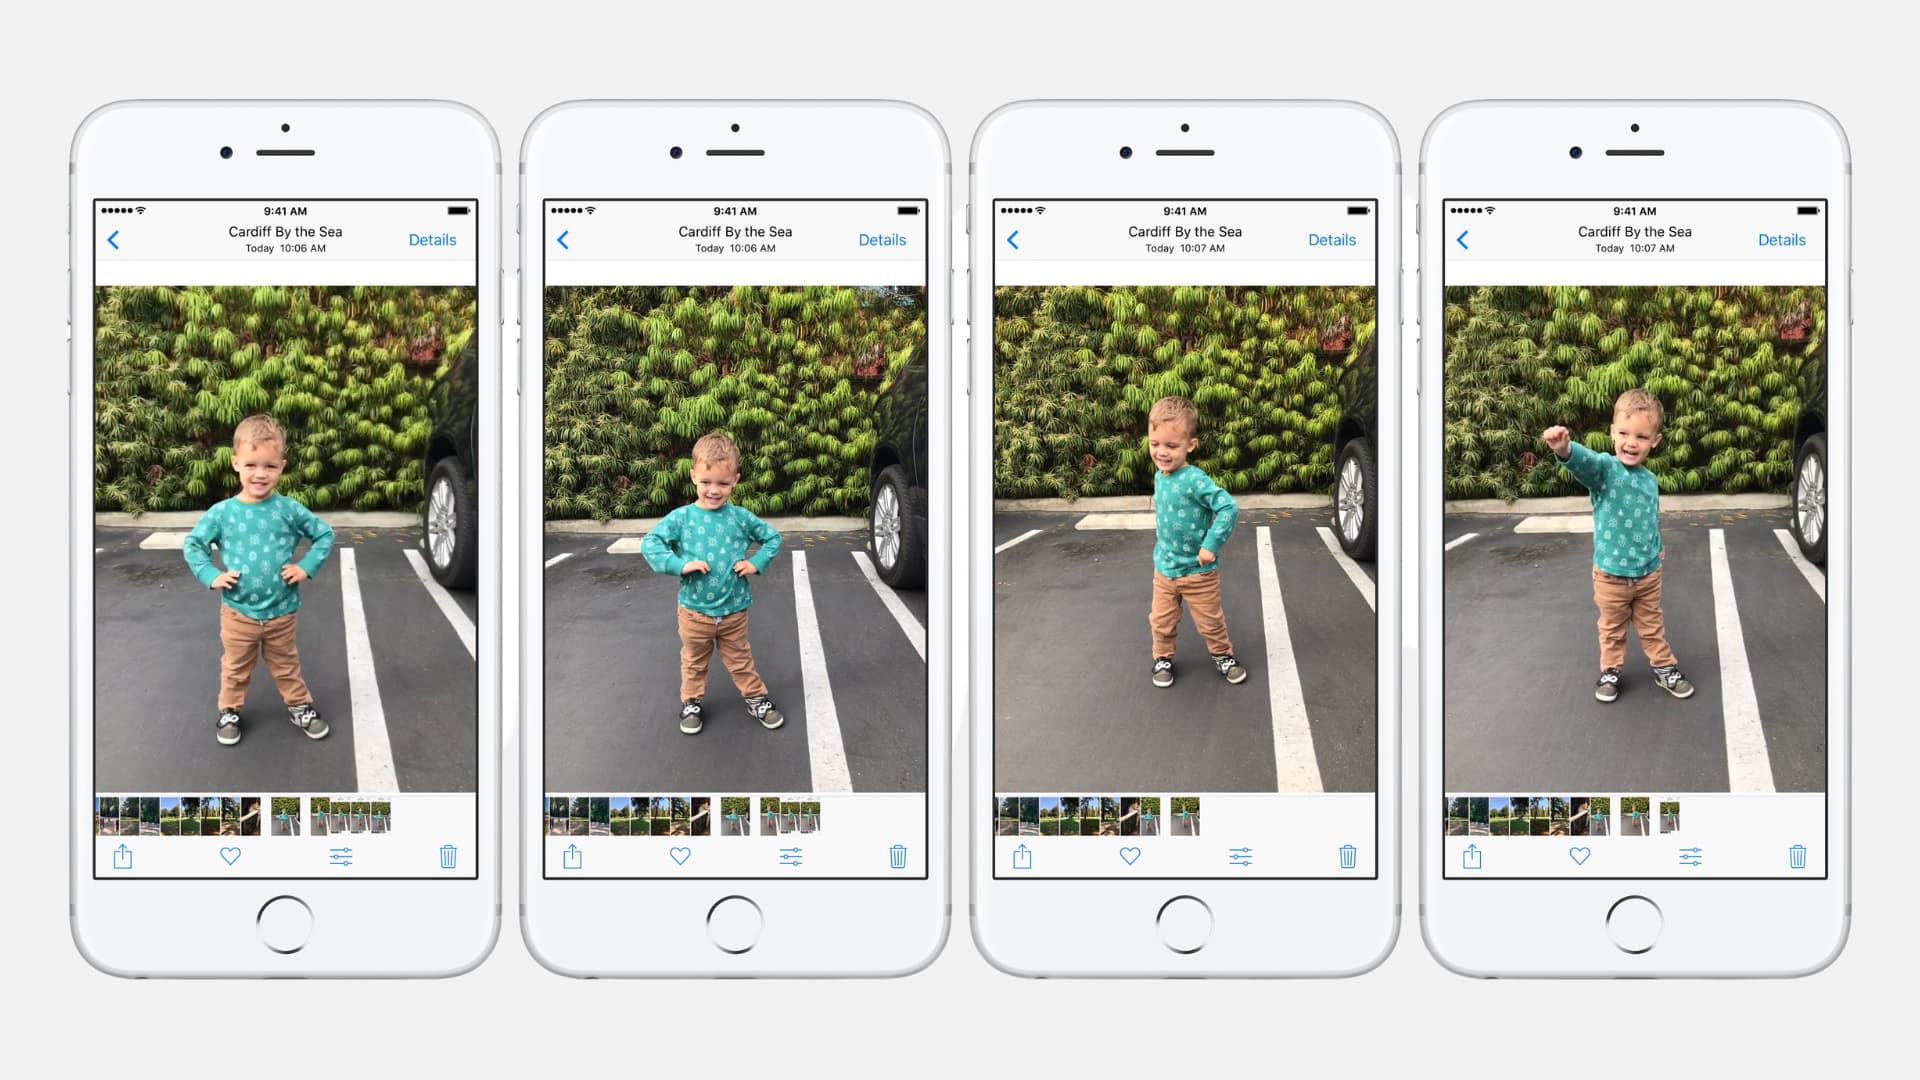
1) Open the Photos app on your iPhone or iPad and find the Live Photo whose frame you want to select and save as a still picture.
2) Tap the edit icon.
3) Go to the Live tab.
4) Move the small white box to the left or right to see all the other frames of this Live Photo and select one. When you find the frame you want to save as a still image, tap Make Key Photo. After that, tap Done from the top.

5) Tap the three dots menu icon and choose Duplicate > Duplicate as Still Photo. This frame of the Live Photo is now saved as a normal image in the Photos app.

You can repeat the above steps to export more frames as motionless images. You can also edit the Live Photo and hit Revert to switch to the original key frame.
Use a third-party iOS app
The single image you export using this app will not have the EXIF image data from your Live Photo. That means this still image won’t show the location, camera resolution, model, vendor, and so forth. Secondly, the image resolution will be reduced compared to the original Live Photo.
1) Download Live Picture Converter for free from the iPhone or iPad App Store.
2) Allow the app to access all your photos or limit access to just the Live Photo you want to work with. After that, select the Live Photo.
3) Go to the Frame tab. You can also check the High quality box.
4) Drag the white selection bar on the thin strip of frames. Once you find the desired frame, tap Export > Save Image.
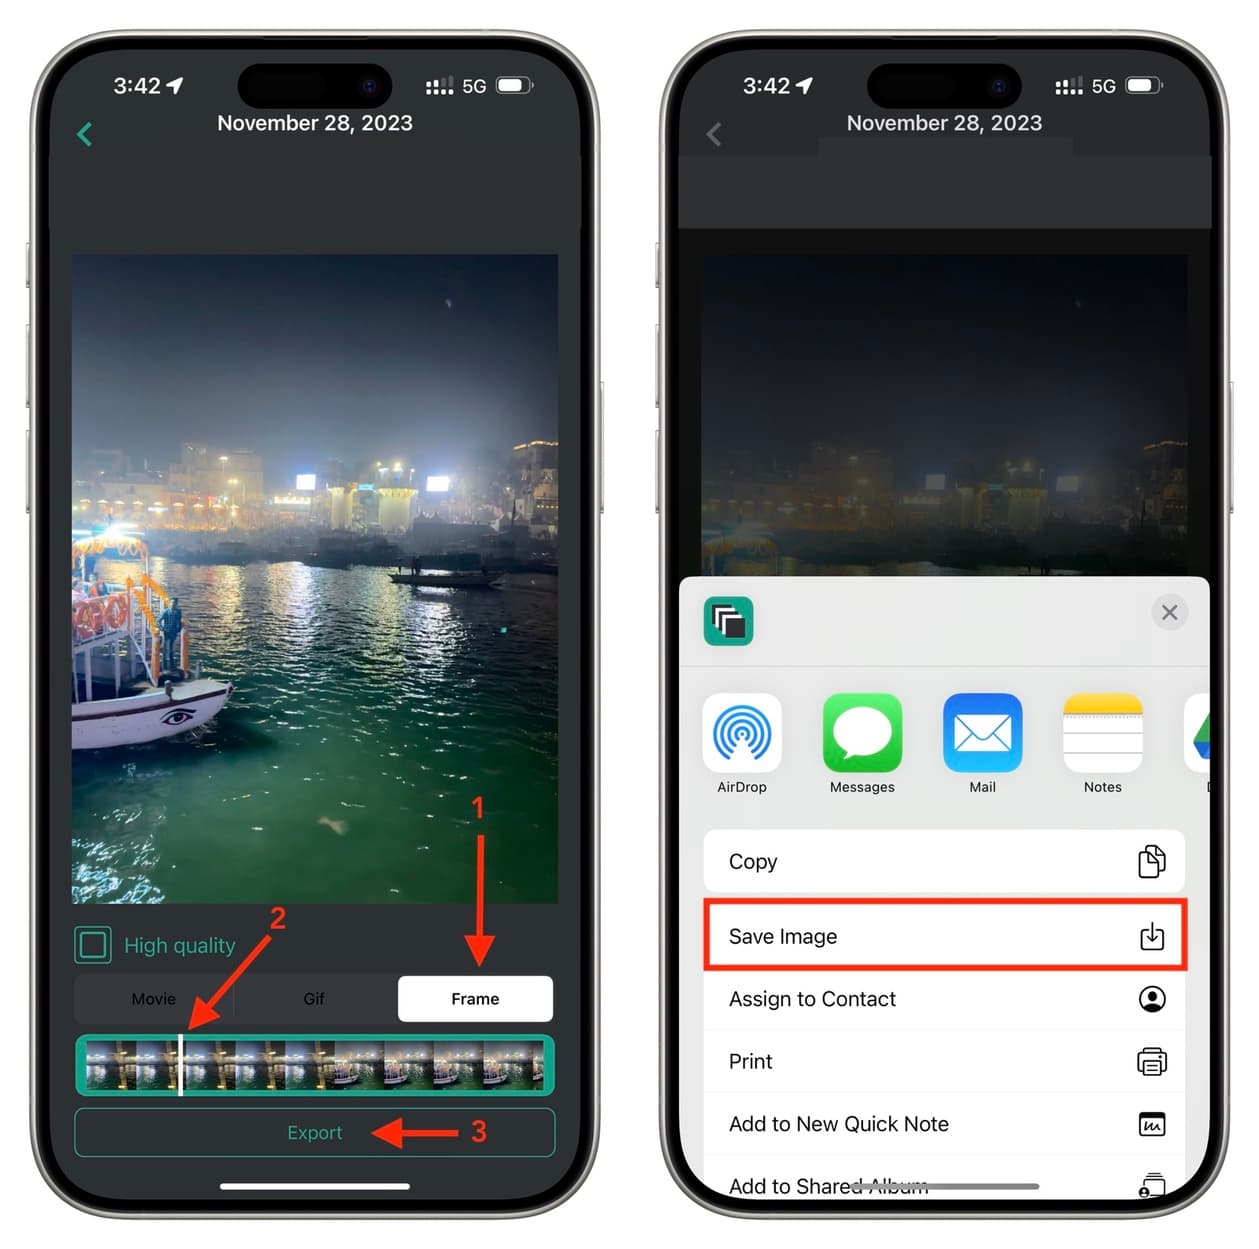
Now go to your iPhone’s Photos app, and you’ll find the still image there.
Also, check out: