Learn how to separate different frames of a GIF and save each frame as an individual image on your Mac, iPhone, and iPad.
GIFs are essentially a series of still images played in a continuous loop to create the appearance of an animated video. With just a few images, anyone can easily create a GIF on their iPhone, iPad, or Mac.
If you come across a GIF and want to save one of its frames as a separate JPG or PNG image file, this tutorial provides simple and free methods to do so.
Use your Mac’s built-in Preview app
1) Go to the Finder folder where your GIF is saved. Double-click the GIF, and it should auto-open in Preview. If not, right-click on the file and choose Open With > Preview.
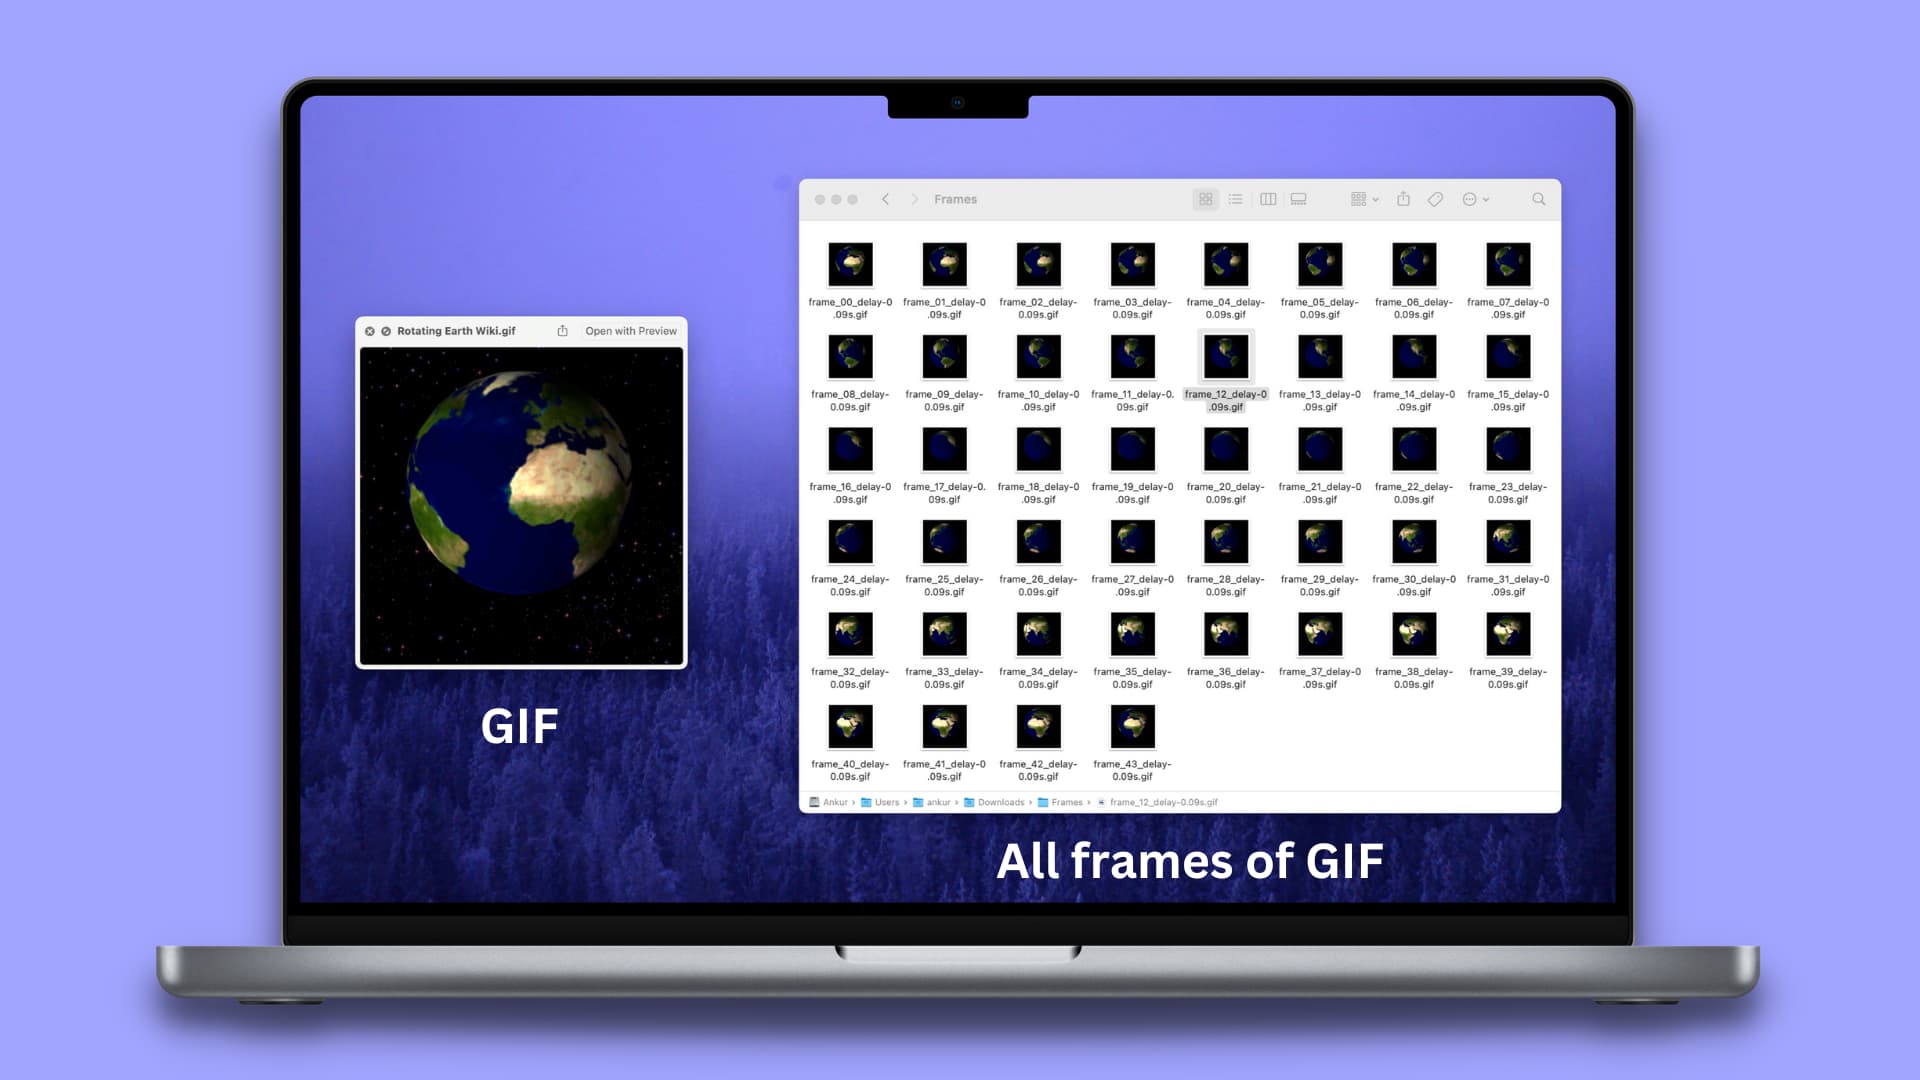
2) Once the GIF opens in Preview, you will see all its individual frames in the left sidebar. If you don’t see the left sidebar, click View > Thumbnails from the top menu bar.
3) Scroll through the sidebar and select the GIF frame you want to export as an image. After that, drag and drop the frame from Preview onto the desktop or any other folder.

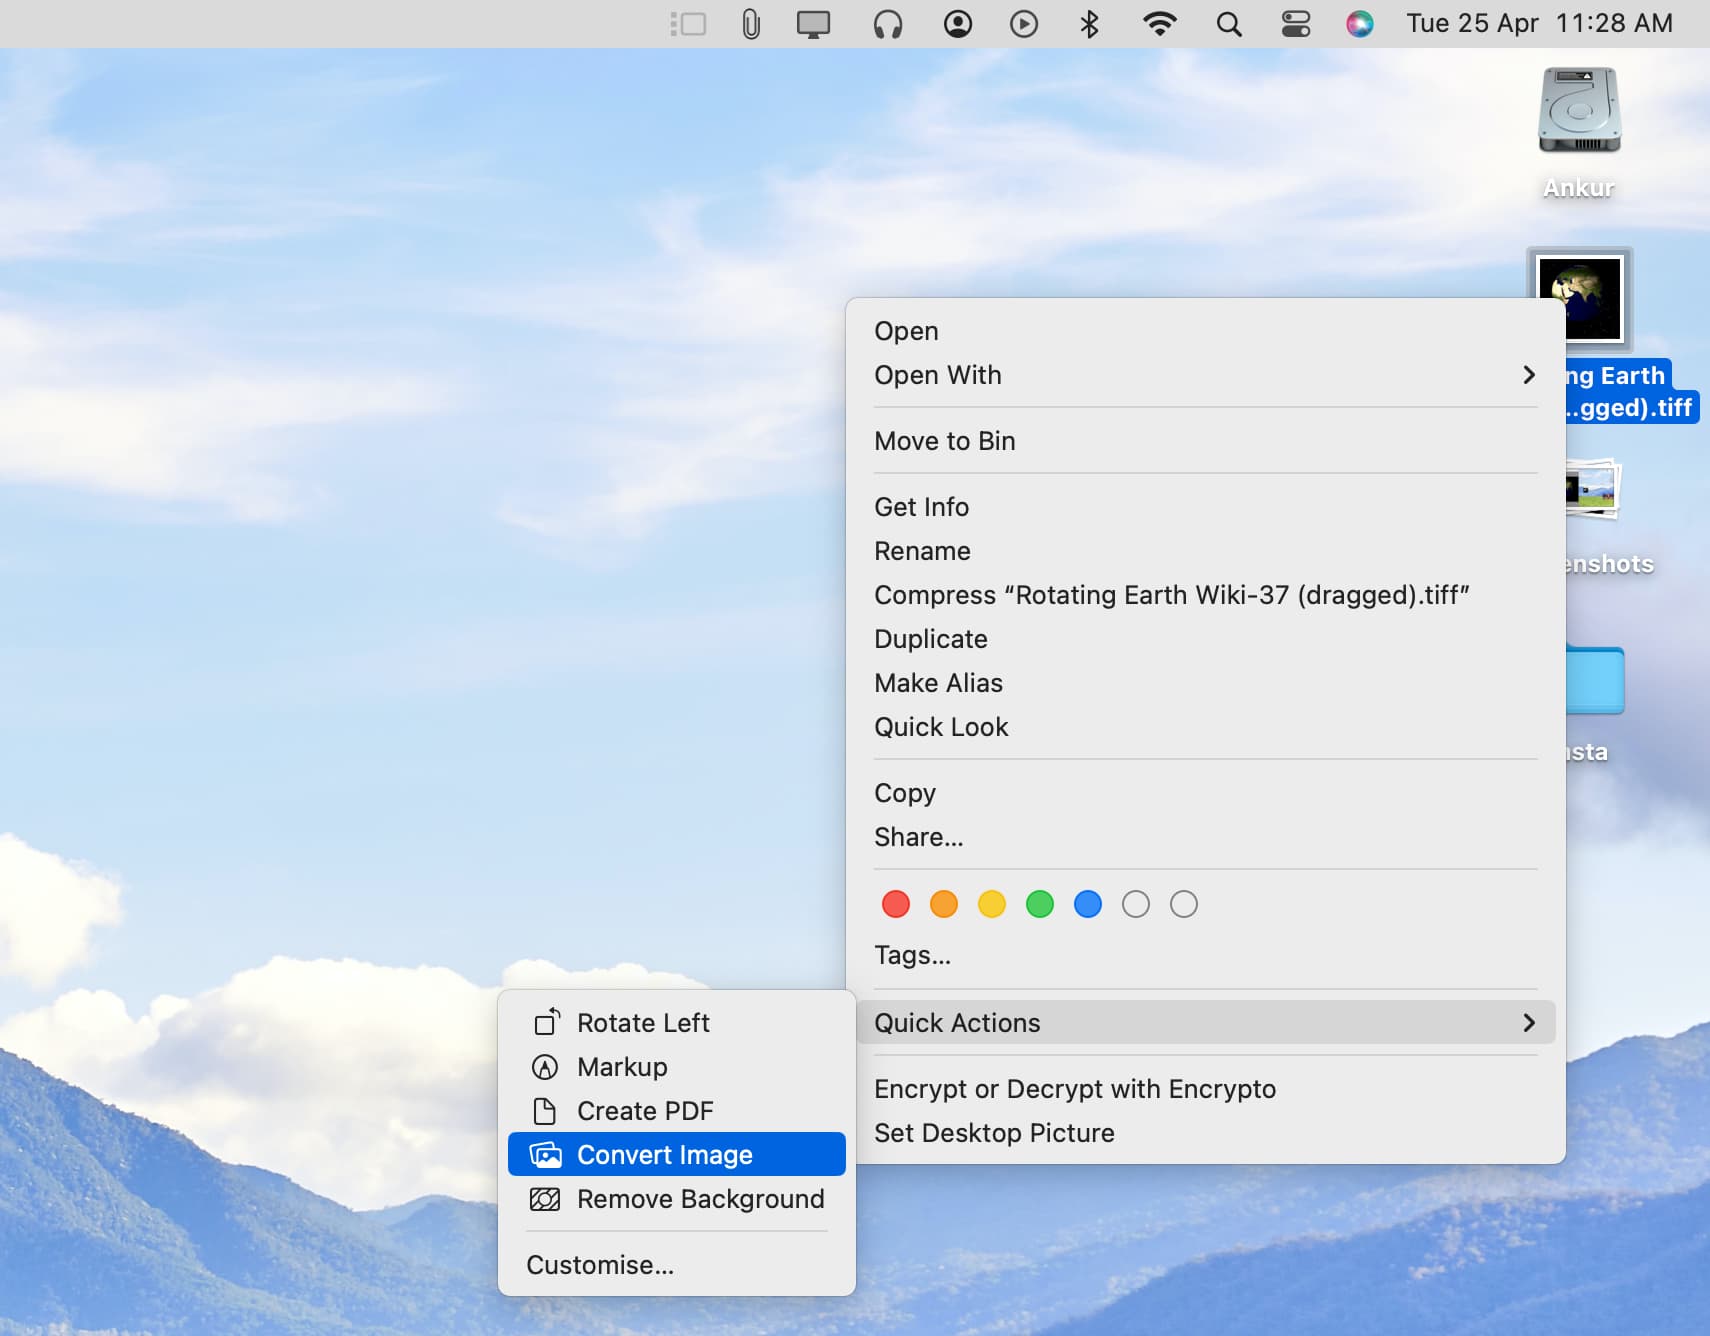
4) The GIF frame will be exported as a TIFF file. You can choose to use it or right-click on the TIFF file and select Quick Actions > Convert Image.
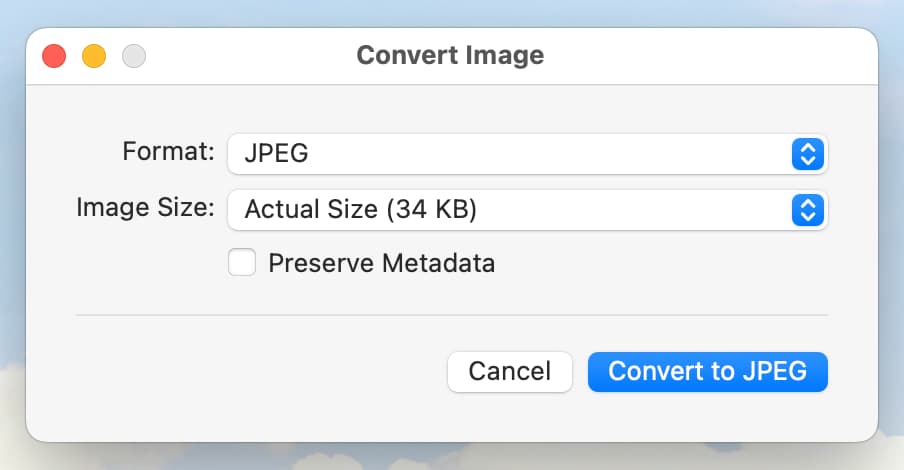
5) Now pick JPEG, PNG, or HEIF as the format. You can also choose the image size. For the best quality, go with the Actual Size. You can also choose to remove the metadata by unchecking the Preserve Metadata box.
6) Finally, click Convert to JPEG/PNG/HEIF, and it will save the image in the chosen format.
You can now use this picture in any way you like.
Use ezgif.com
Besides the Preview app, there are several free websites that help you split a GIF into individual frames or images. Here’s how to do that using one of the popular websites:
1) Visit the GIF frame extractor section of the ezgif.com website.
2) Click Choose file, select the GIF, and hit Open.
3) Now, click Upload.
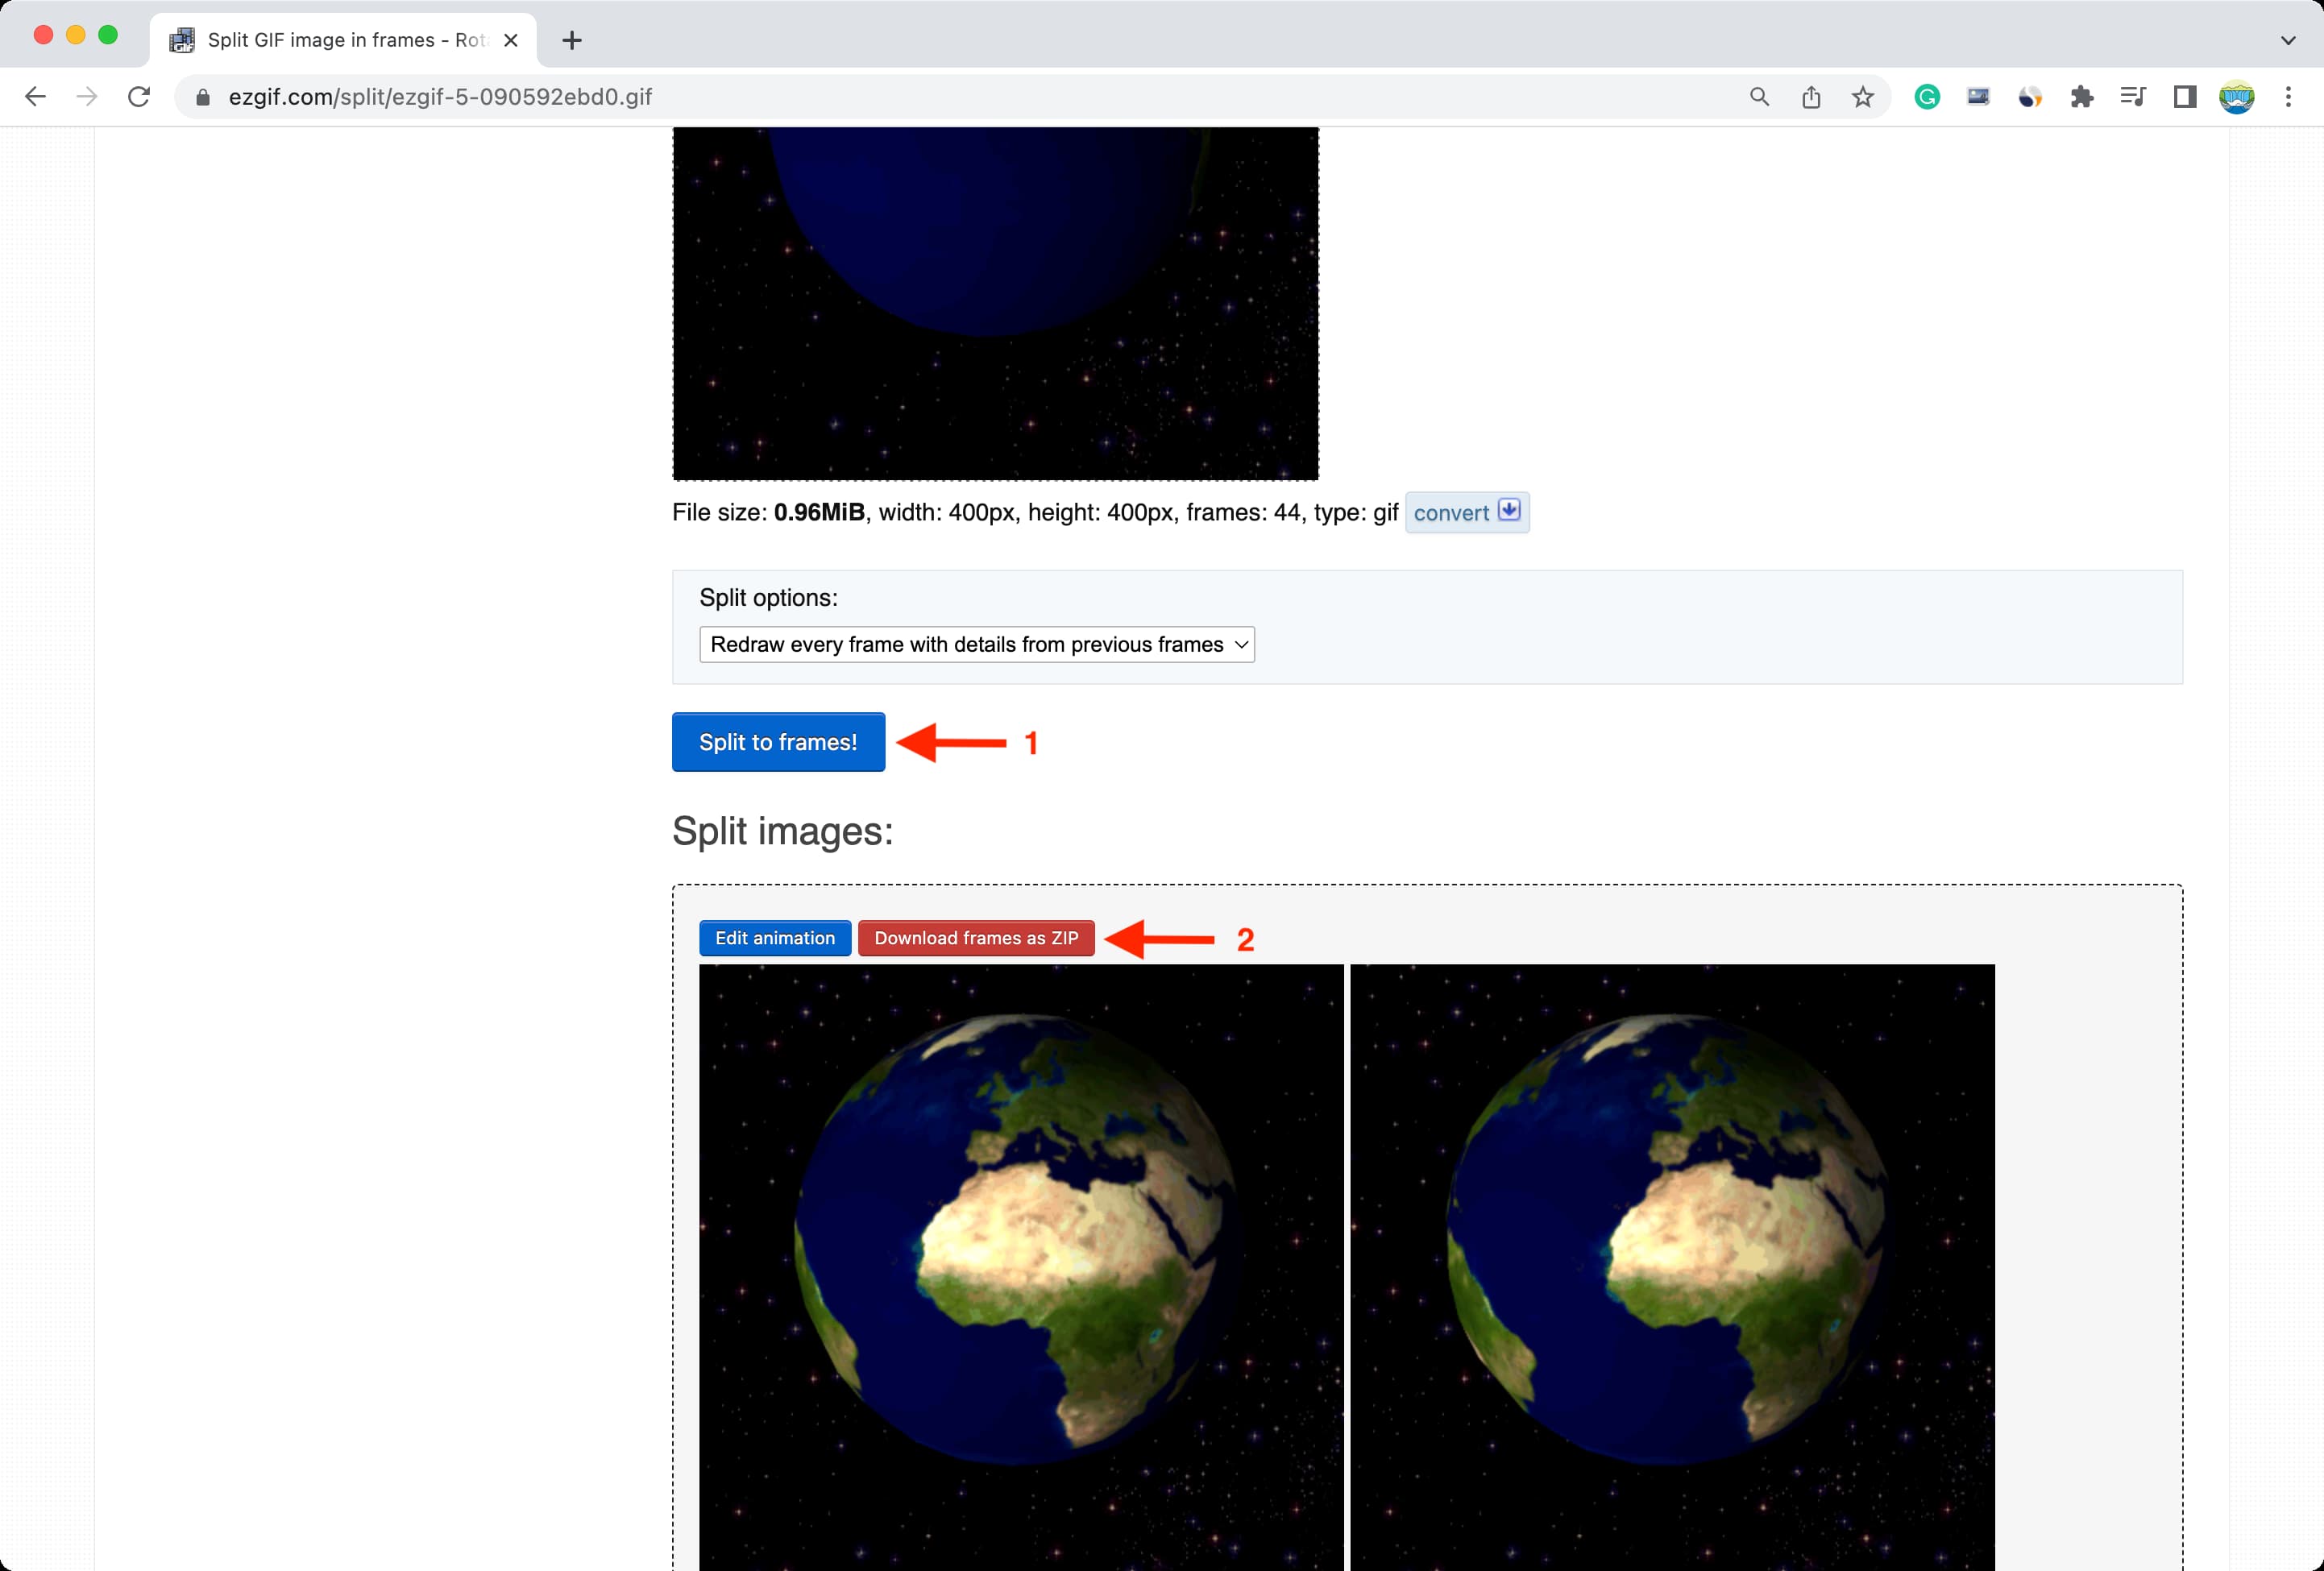
4) Once the GIF is uploaded, click Split to frames.
5) You will now see all the frames of the GIF. Click the Download frames as ZIP button, and it will download a compressed file to your Mac.
6) Double-click the ZIP file in the Downloads folder to unzip it. Next, go to the newly created folder, and you will find all the split frames of that GIF as individual images.
Use imageonline.co
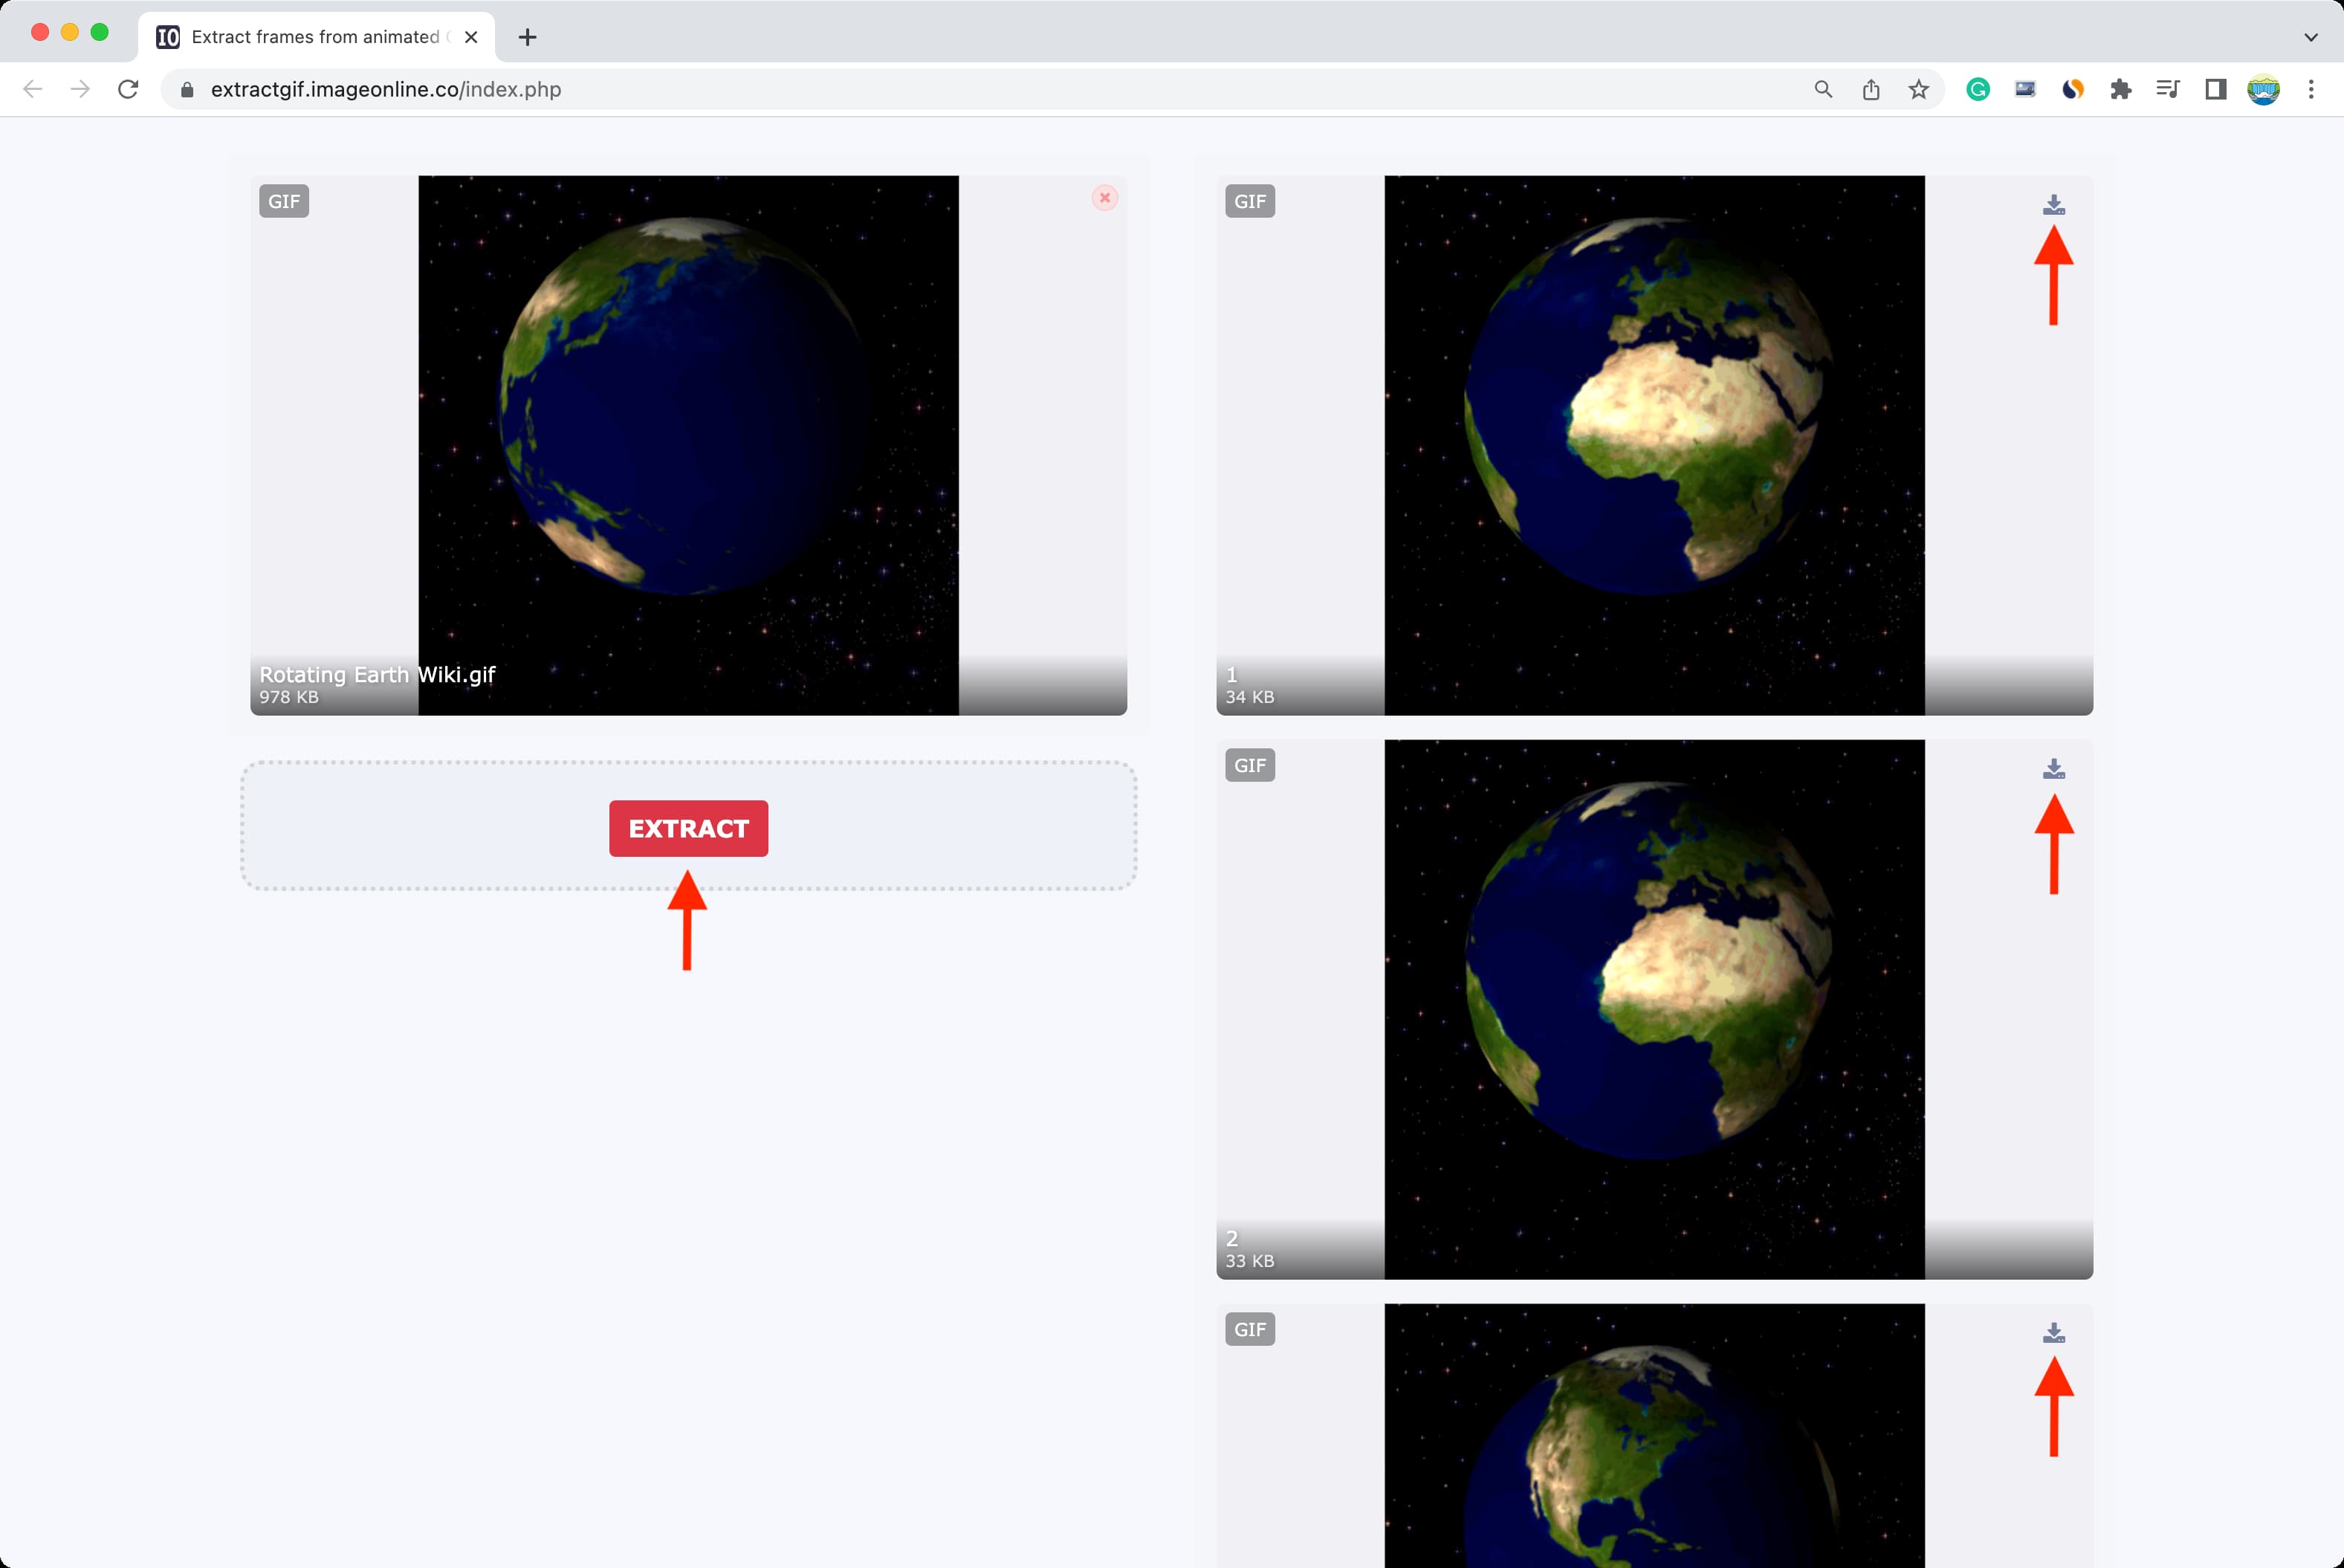
Besides ezgif, I also found that the ‘Extract frames from animated GIF image‘ page of the imageonline.co website does this job well. You can see all the frames of the uploaded GIF and hit the download button just to save the particular frame as an image.
However, note that the downloaded frame is saved in the GIF format but with no animation, as it’s just a single frame. You can easily convert it to JPEG or PNG.
Extract frames of a GIF on iPhone and iPad
You can use the websites mentioned above to see all the individual frames of a GIF and save them as images on your iPhone or iPad.
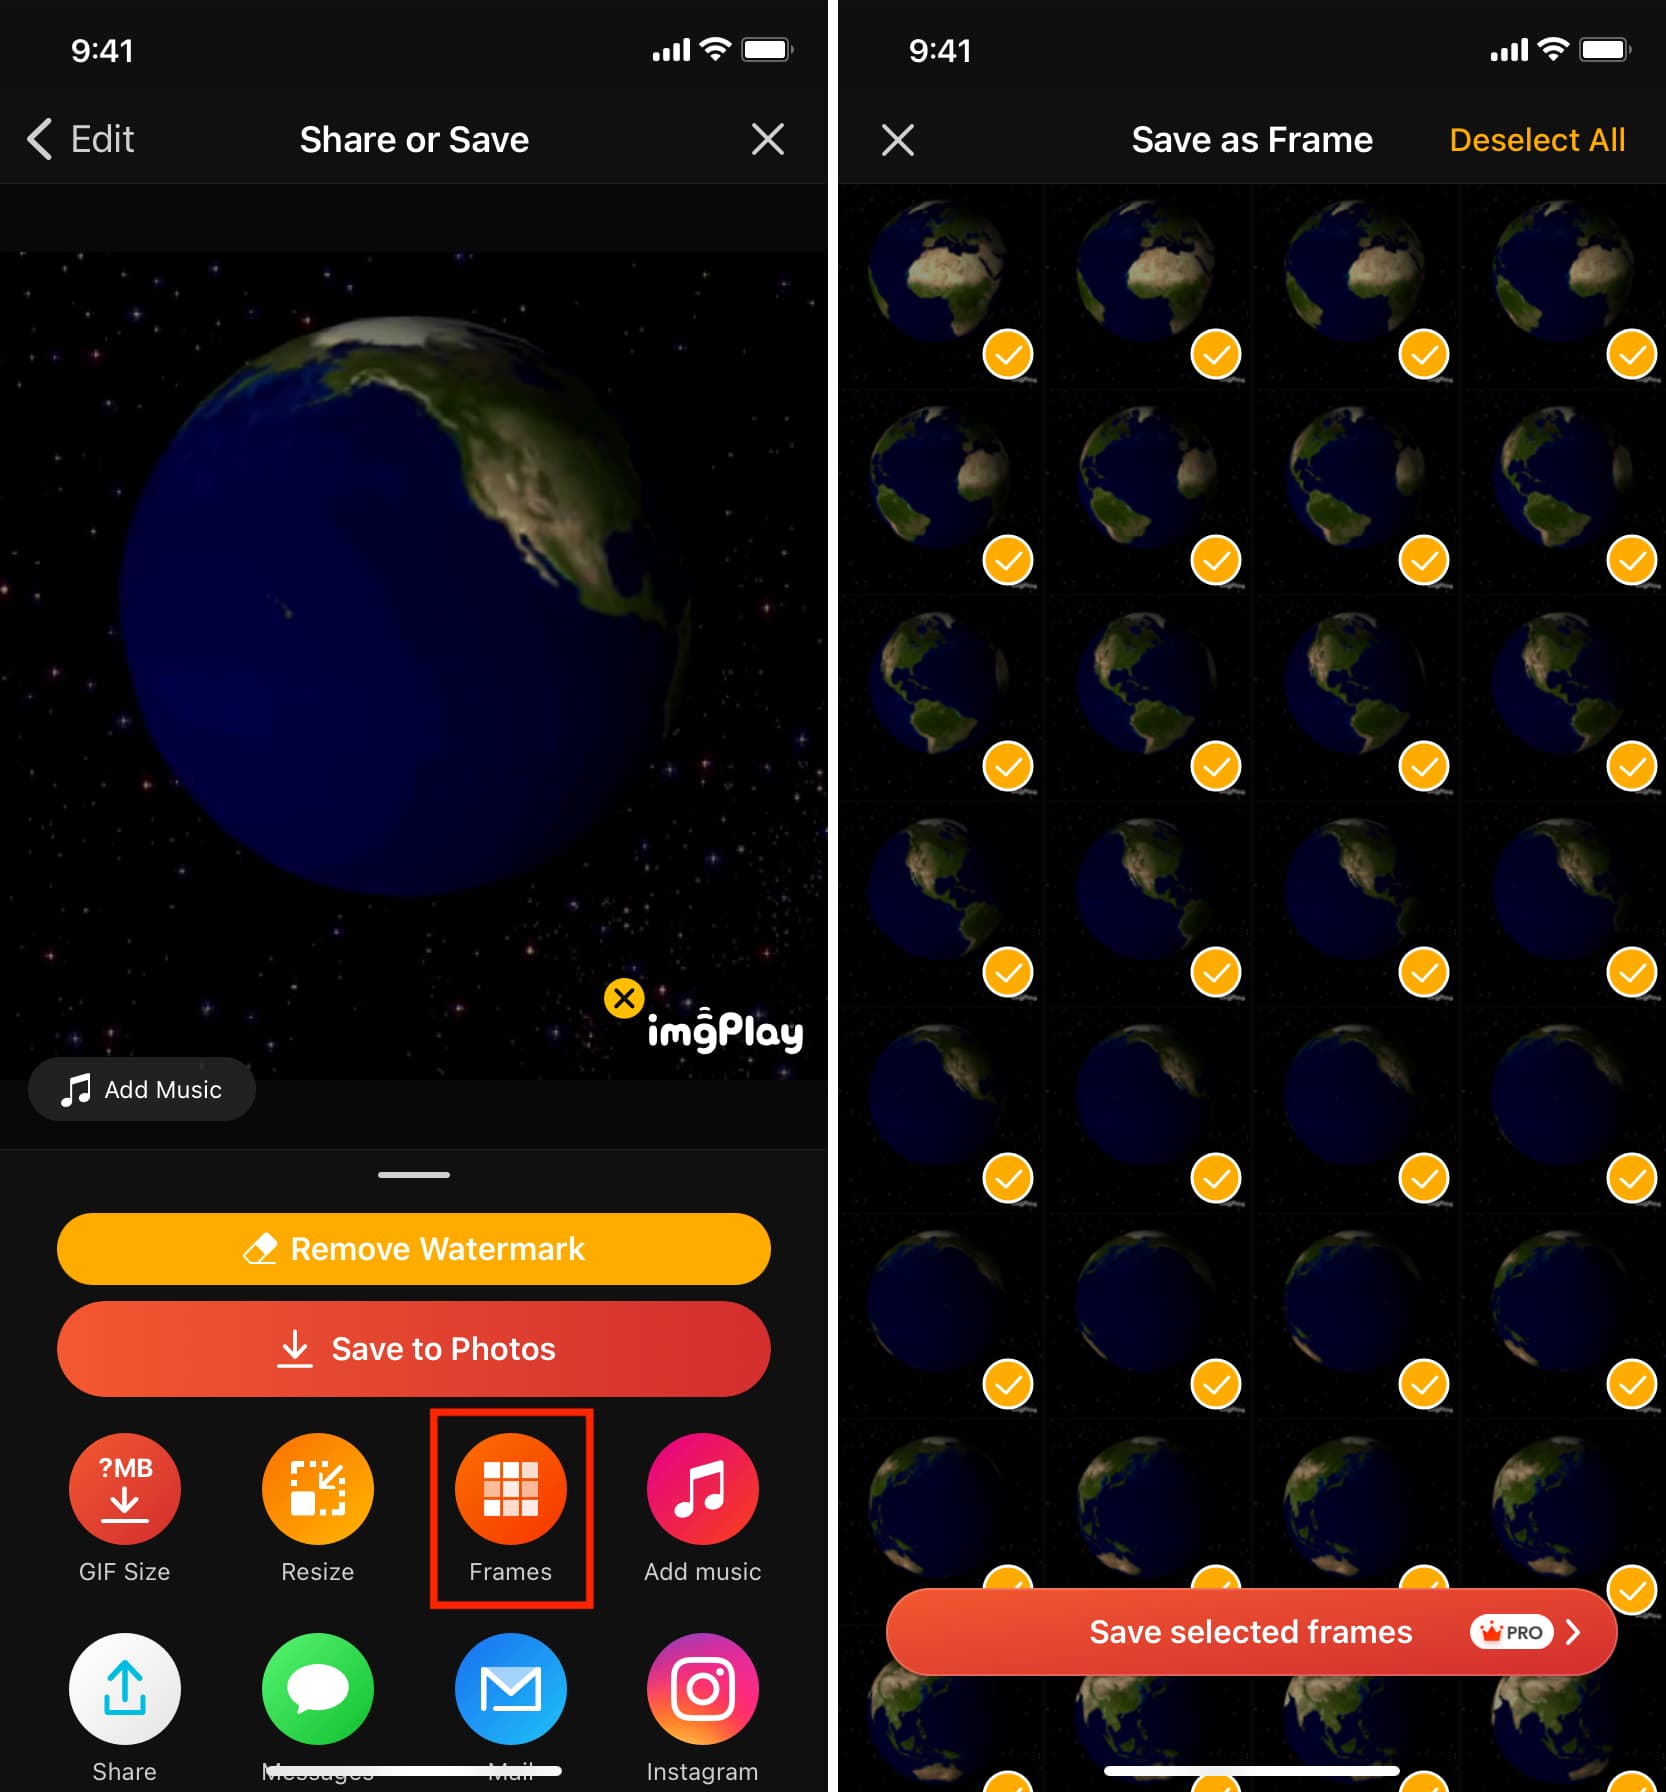
You can also use the paid version of the ImgPlay app to save all or selected frames of a GIF as photos. And if you want to do that for free, you will have to convert the GIF into a video and then extract the frames of that video with the Frame Grabber app.
Check out next:
- How to send short videos or Live Photos as GIFs on WhatsApp
- How to create an animated GIF in Keynote
- How to convert Animoji to GIF
The Earth GIF used in this post is taken from Wikipedia.