Learn how to use the Mini Player feature to turn the full Music app window into a tiny one that can even stay floating above all other app windows.
The Music app’s Mini Player on Mac is probably not something you give much thought to. Heck, you might not use it at all. But if you find yourself struggling for real estate on your screen, it’s definitely a tool to check out.
You might listen to music while you work or even while playing a game. So why stop what you’re doing to open the Music app just to forward to the next song or see if the lyric you’re singing along to is correct? The Mini Player is small, resizable, movable, and gives you what you need to control your tunes.
Here’s how to take advantage of that little Music Mini Player on your Mac.
Activate the Music app Mini Player on Mac
You’ve three ways to do that.
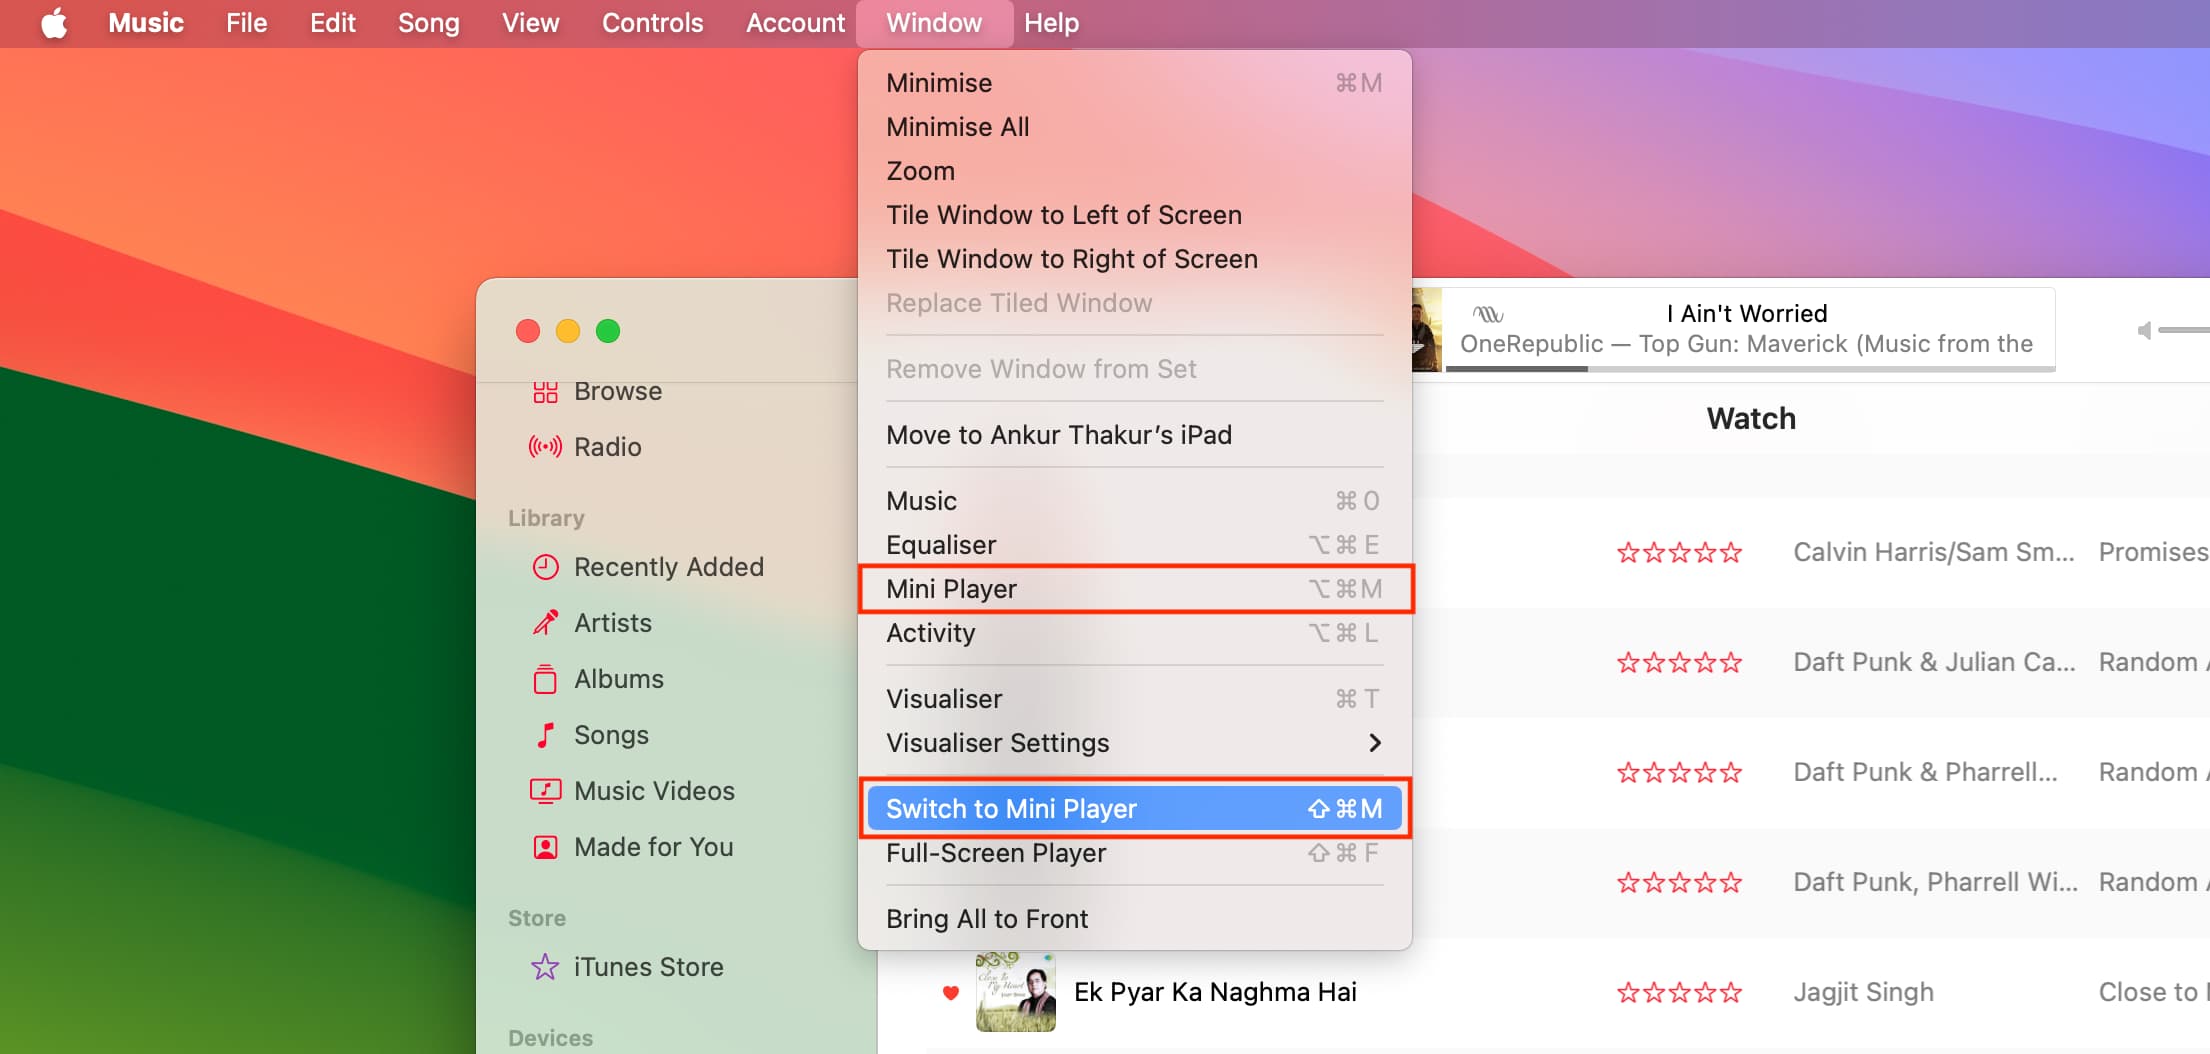
Open the macOS Music app, click Window from the top menu bar, and select one of the following:
- Mini Player: If you want to have the standard Music window as well as the Mini Player.
- Switch to Mini Player: If you want to close the big Music app window and only have the Mini Player.
Method 2: From Now Playing controls
Click the tiny album art at the bottom of the Music player and select Mini Player, as shown in the image below.

Method 3: Keyboard shortcut
You can pop in and out of Mini Player mode by pressing Shift + Command + M (Switch to Mini Player) or Option + Command + M (Mini Player).
Customize the Mini Player
There are a few ways to get the Mini Player just how you want it, starting with resizing it. That part is simple; just drag an edge or corner to resize it.
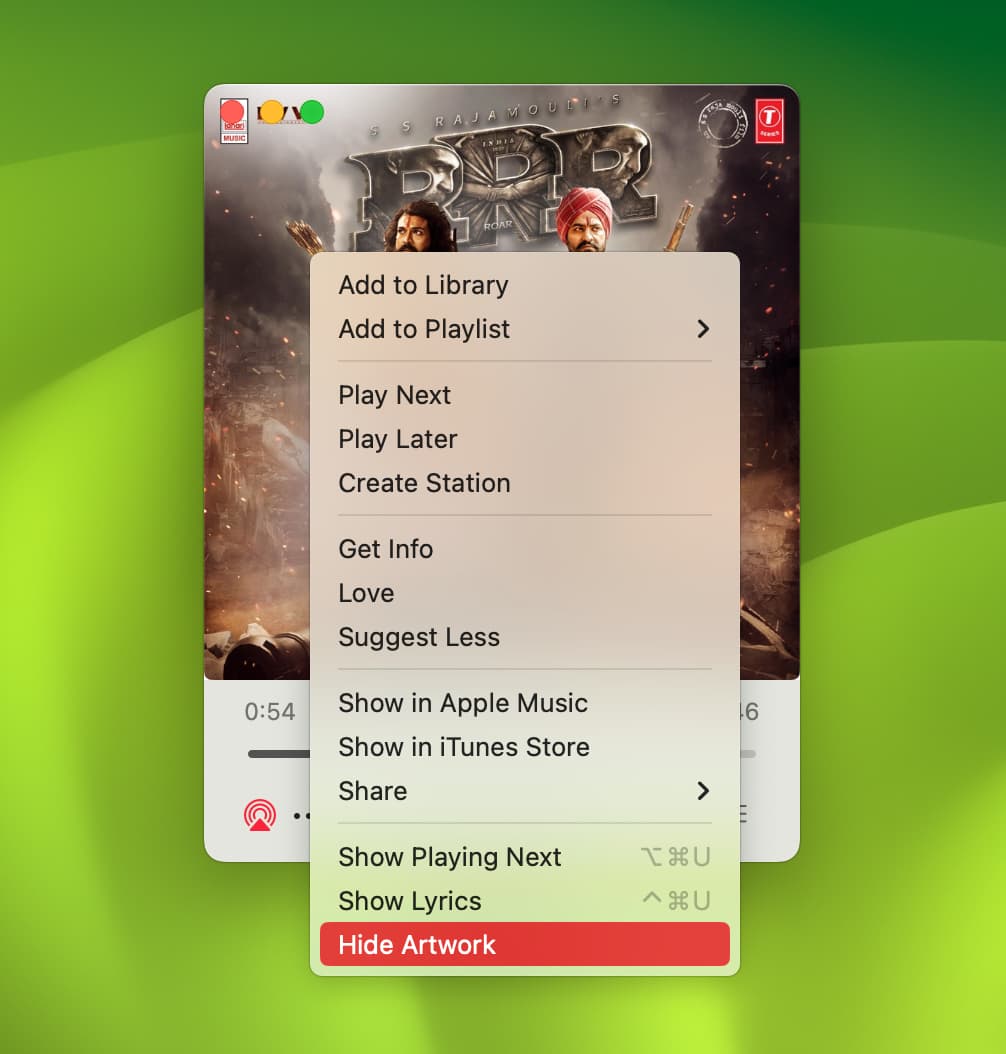
You can also simply remove the artwork from the window on older versions of macOS. Click the three-dot button on the Mini Player and pick Hide Artwork from the menu.
Make the Mini Player stay on top of all apps
In addition to being able to move the Mini Player anywhere on your screen, you can keep it always in view.
- Open the Music app and click Music > Settings from the top menu bar.
- Go to the Advanced tab.
- Check the box for Keep Mini Player on top of all other windows and click OK.

If you decide to shrink the Mini Player as small as you can get it, keeping it on top of your other windows won’t be quite so distracting. Plus, you’ll have easy access to it no matter what you’re doing.
The nice thing about customizing the Mini Player is that the next time you open it, your adjustments will be remembered.
Using the Music app Mini Player
Now that you know how to open and customize the Mini Player, you’ll need to know how to navigate it, which is pretty easy.
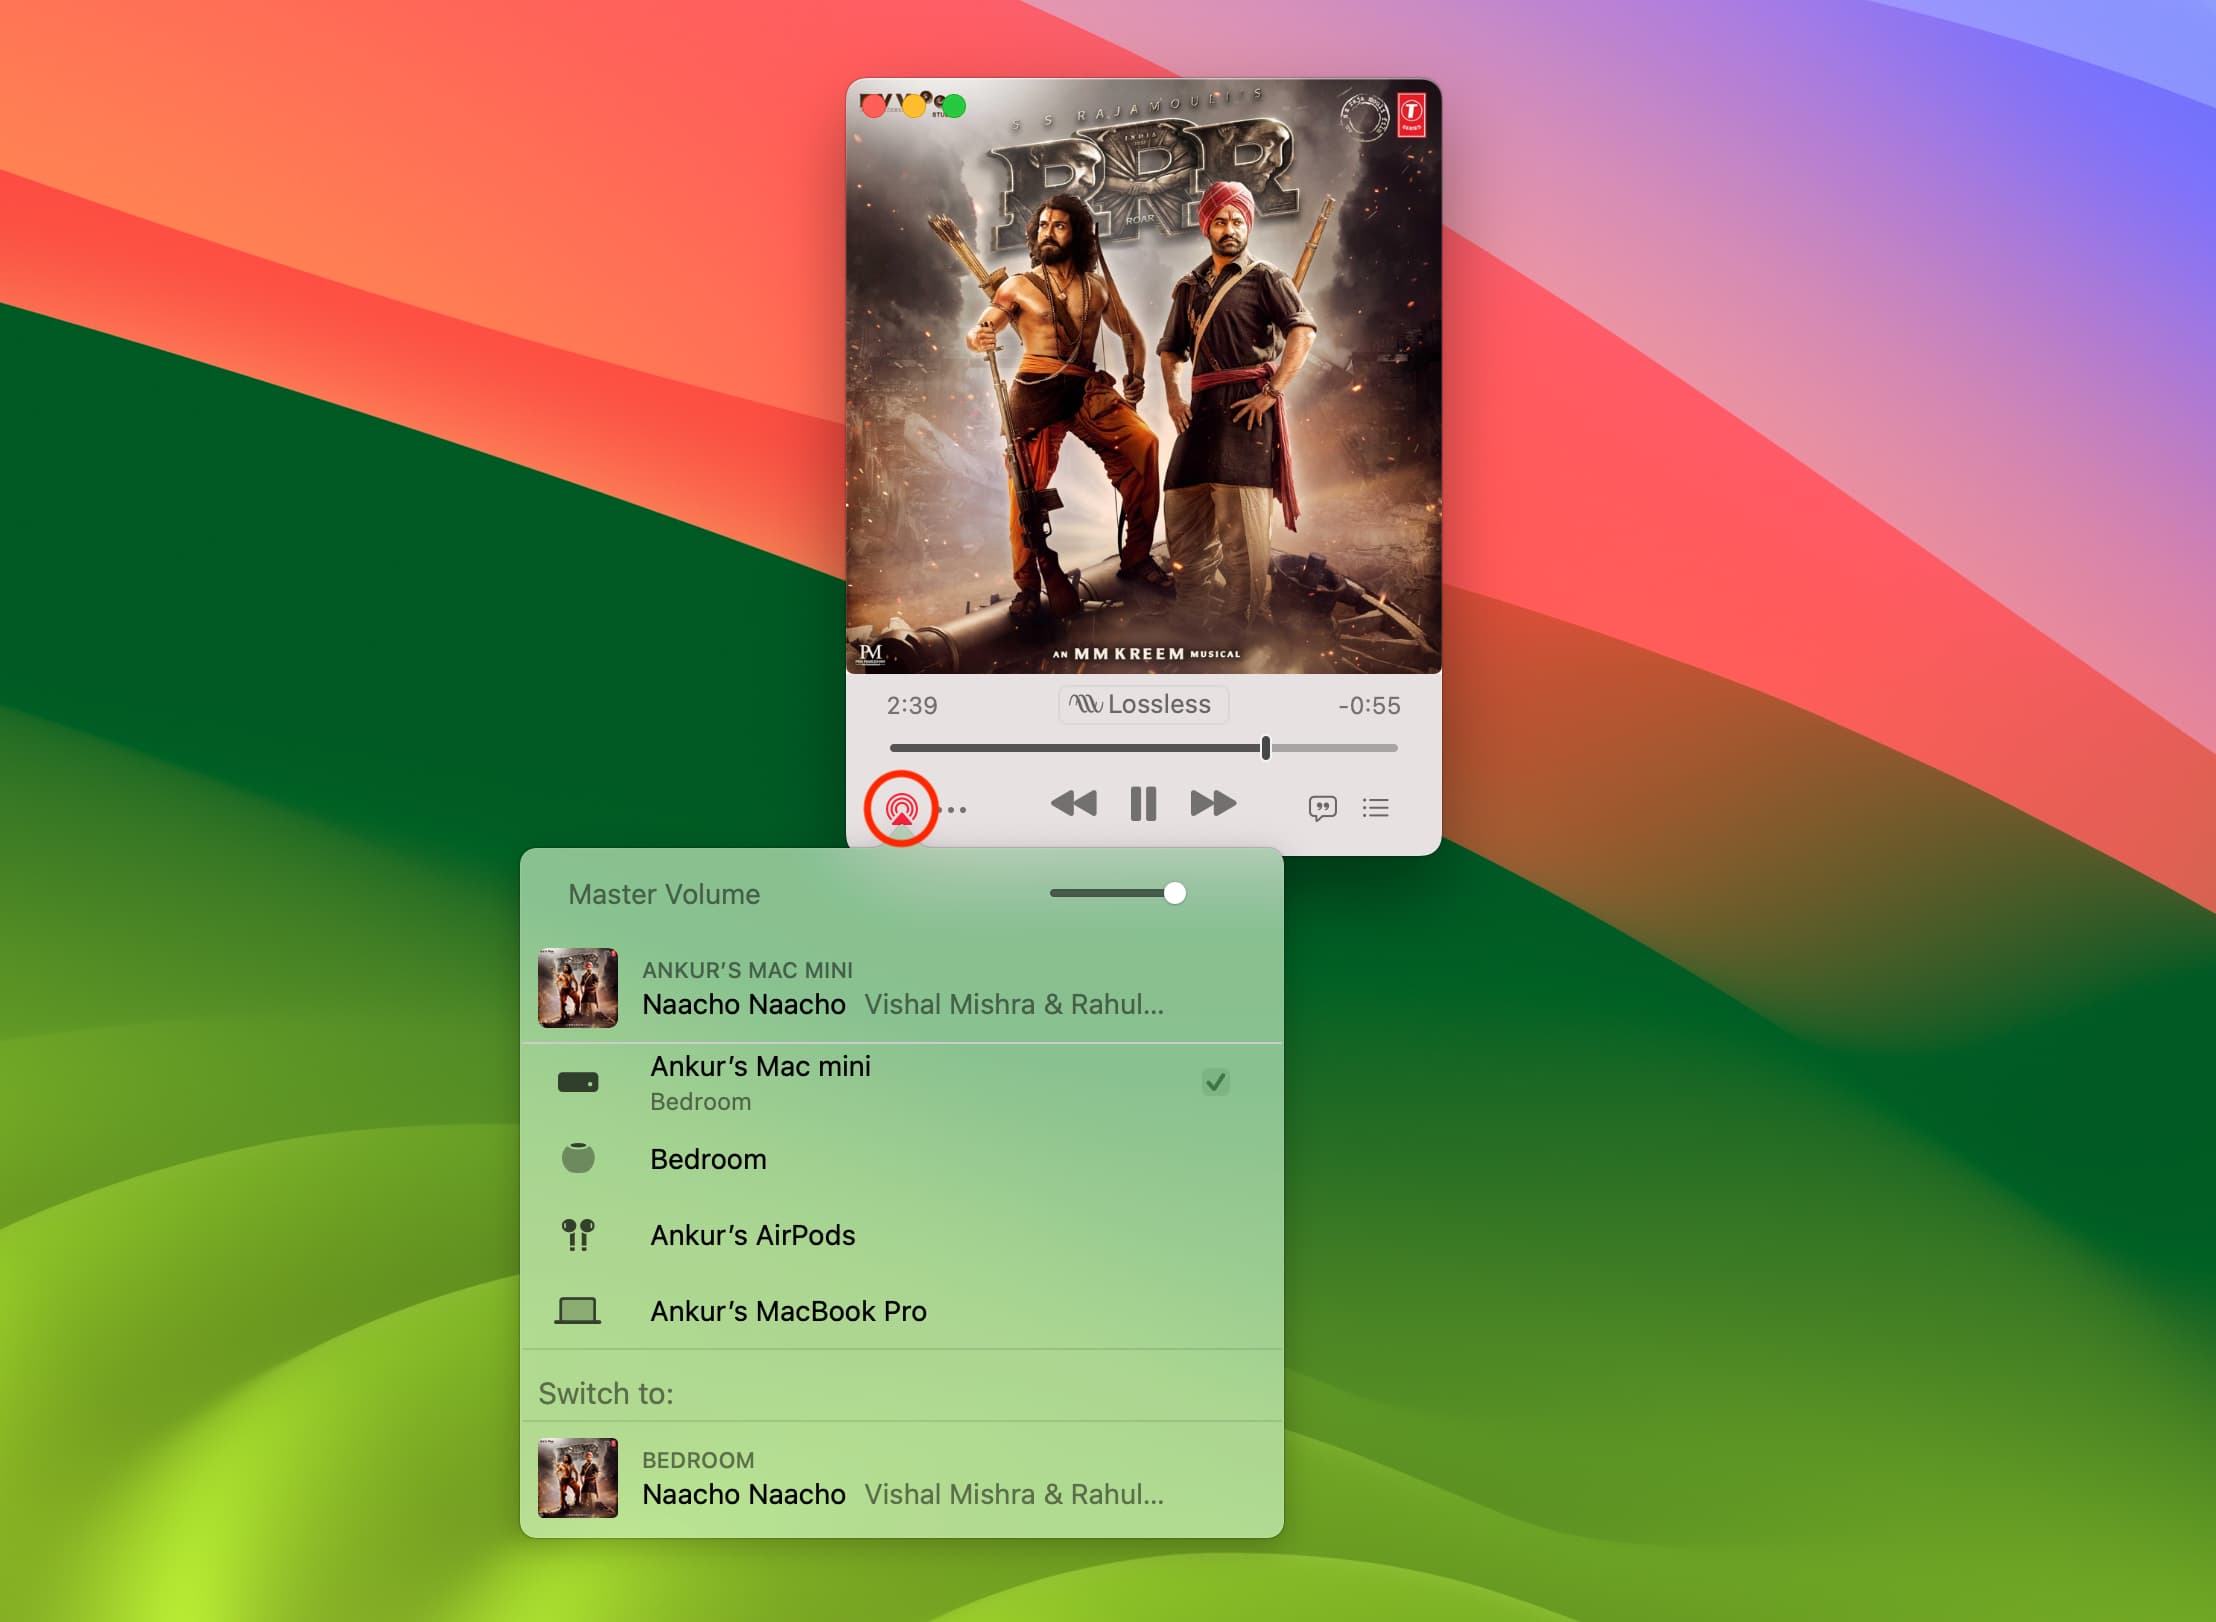
You’ll see the duration and time for the song at the top, with the title and artist below. It may also show other info, like your music being streamed in Lossless quality.
Put your cursor on the Mini Player, and the controls will display. From left to right, you have:
- AirPlay/Volume
- More (three dots icon)
- Rewind/Previous song
- Play/Pause
- Next Song
- Lyrics
- Playing Next/History. It also shows the AutoPlay and AutoMix buttons.

The Volume button not only controls the volume of the music on your Mac but also allows you to enable connected devices like your HomePod and control those volumes too.
If you click the Lyrics or Playing Next buttons, those sections will expand. Just hit the button again to collapse the section.
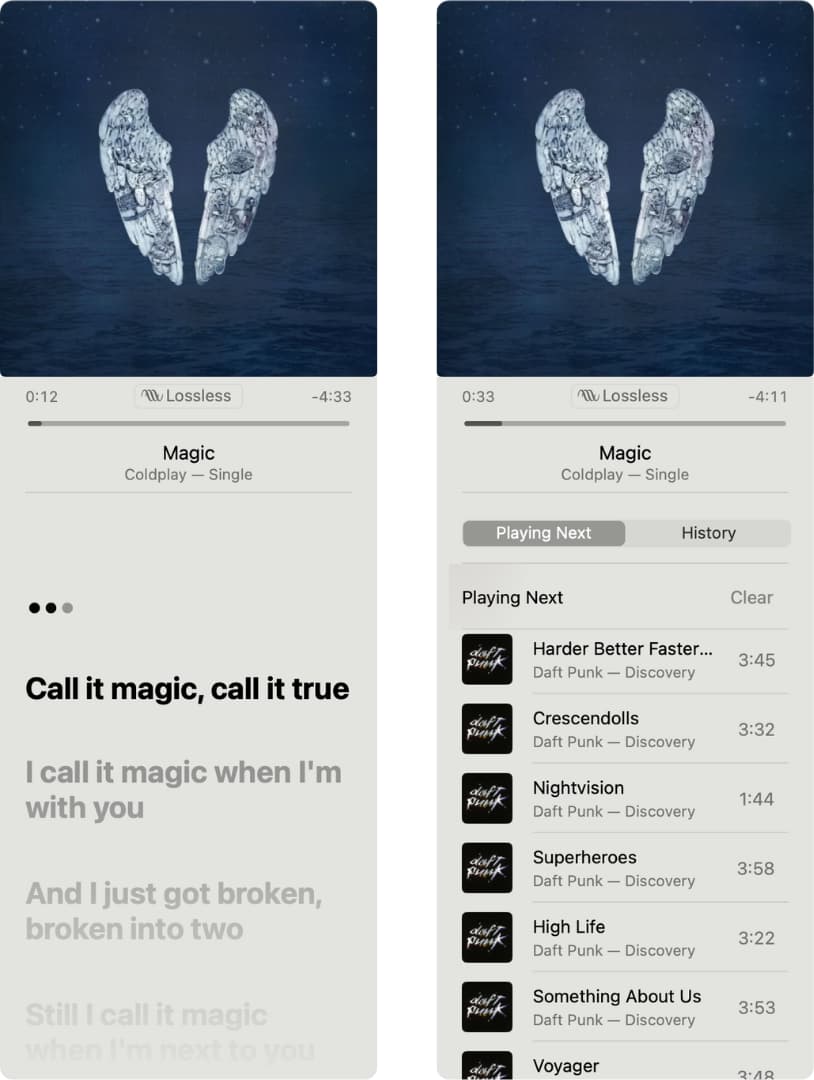
Also, in the Playing Next list, you’ll see a link to your History, so you can play a previous tune easily. Plus, each song has a three-dot menu button for you to take action, like in the Music app. You can do things like add the song to your library or a playlist, create a station, love or dislike the song, and more.
The Music Mini Player is a convenient tool for controlling music on your Mac without the Music app window itself. Hopefully, you’ll put the Mini Player to good use while you work or play. Are you going to give the Mini Player a try to save some space on your screen?
On a related note: