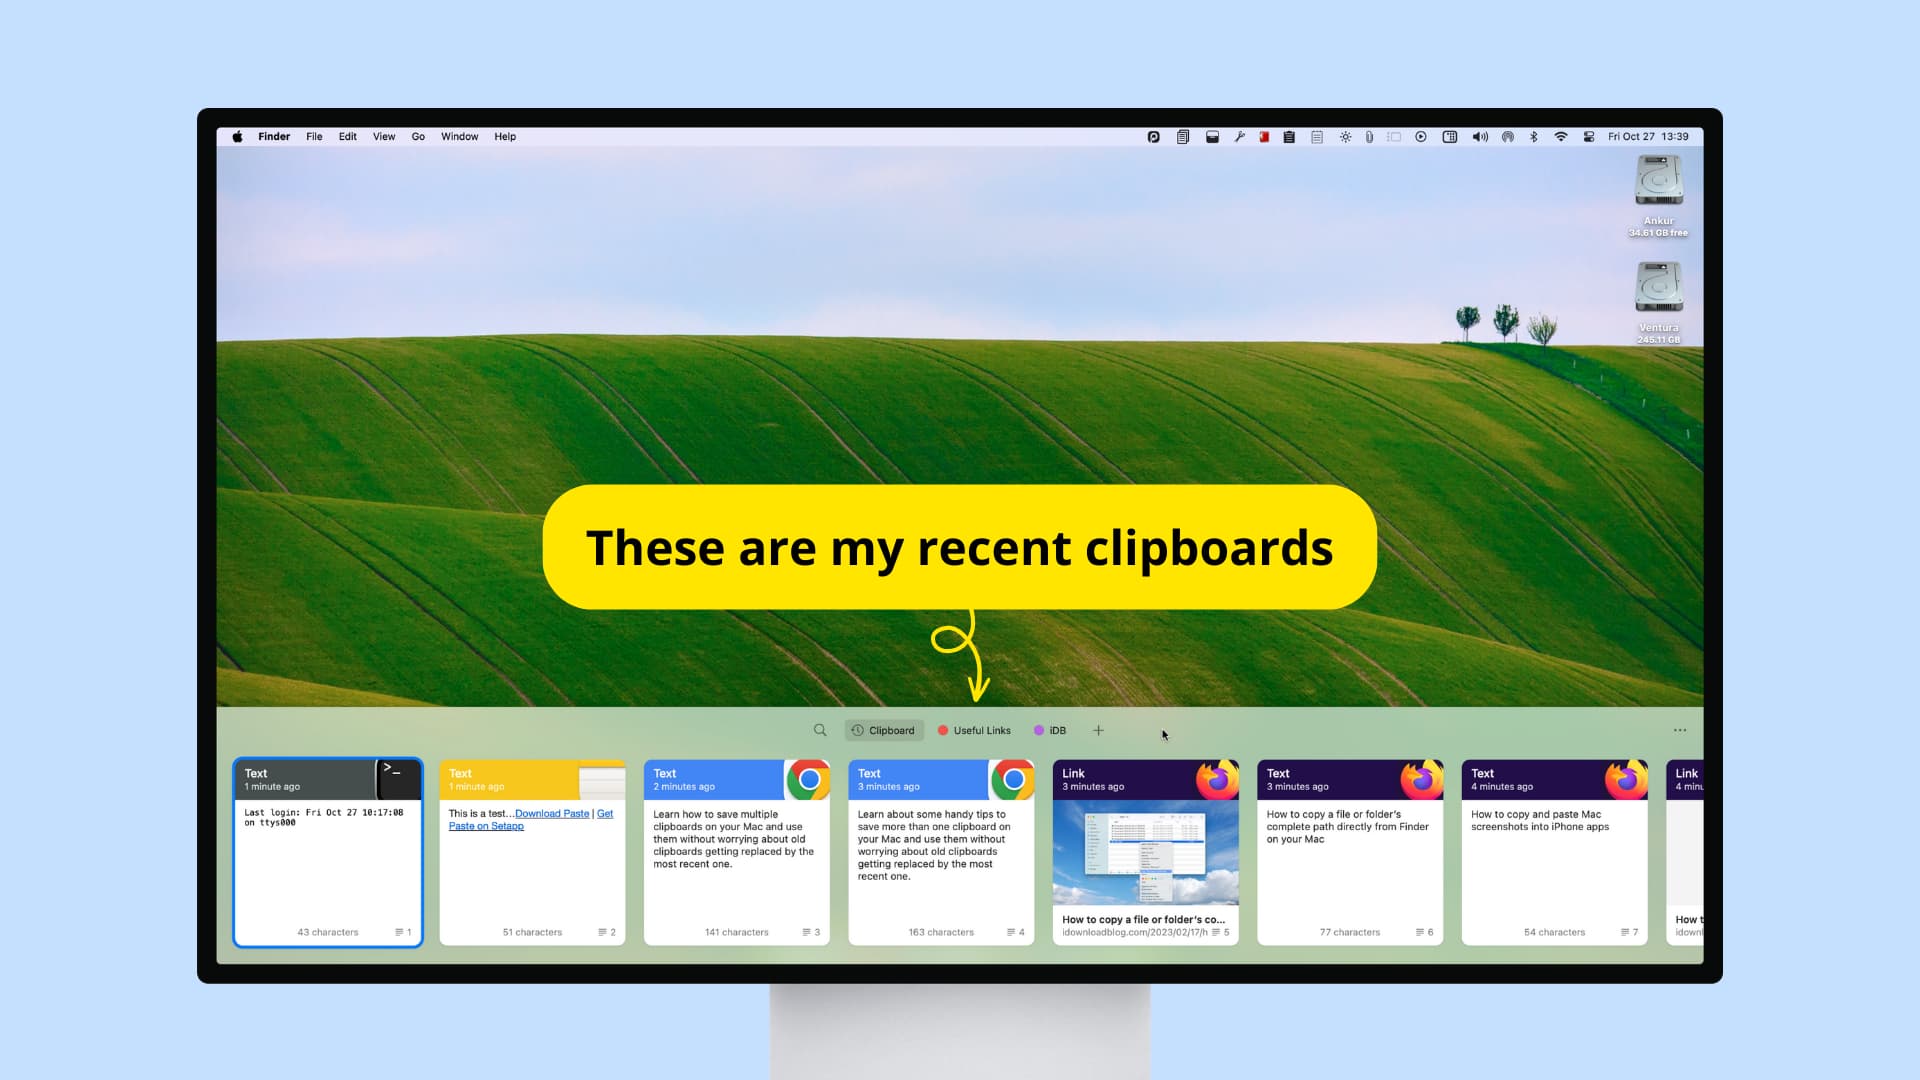
Check out these handy tips to use multiple clipboards on your Mac, allowing you to copy new items without losing previous ones.
You’re likely aware that when you copy text or a file to your clipboard, the item that was previously in the clipboard is replaced by the new one.
For instance, if you copy this first sentence and then copy this second sentence, the first sentence is no longer in your Mac’s clipboard, and when you use the paste option (Command + V), the second sentence is pasted.
But what if you want your Mac to remember both the first and second sentences, simultaneously? In this tutorial, we’ll show you how to do this to help improve your workflow.
Use the built-in clipboard history feature

Starting with macOS Tahoe 26, Mac will automatically save your clipboard, including text snippets, URLs, copied images, PDFs, and more, thanks to the new and revamped Spotlight Search feature. All you need to do is:
- Press Command + Space Bar + 4 to go to the Clipboard section of the new Spotlight Search. If this is your first time here, click Turn On.
- Moving forward, what you copy will get saved automatically to this clipboard section. Press the same Command + Space Bar + 4 keys to access what you copied earlier, and click the copy icon to copy it again to the clipboard for use. You can also double-click a clipboard to insert it directly into your current text field.
See your Mac’s clipboard
You have two ways to know what’s in your Mac’s clipboard:
- Method 1: Go to the Clipboard section in macOS Tahoe Spotlight and look at the top-most entry, as that’s the most recent one. You can even see the time when you copied it.
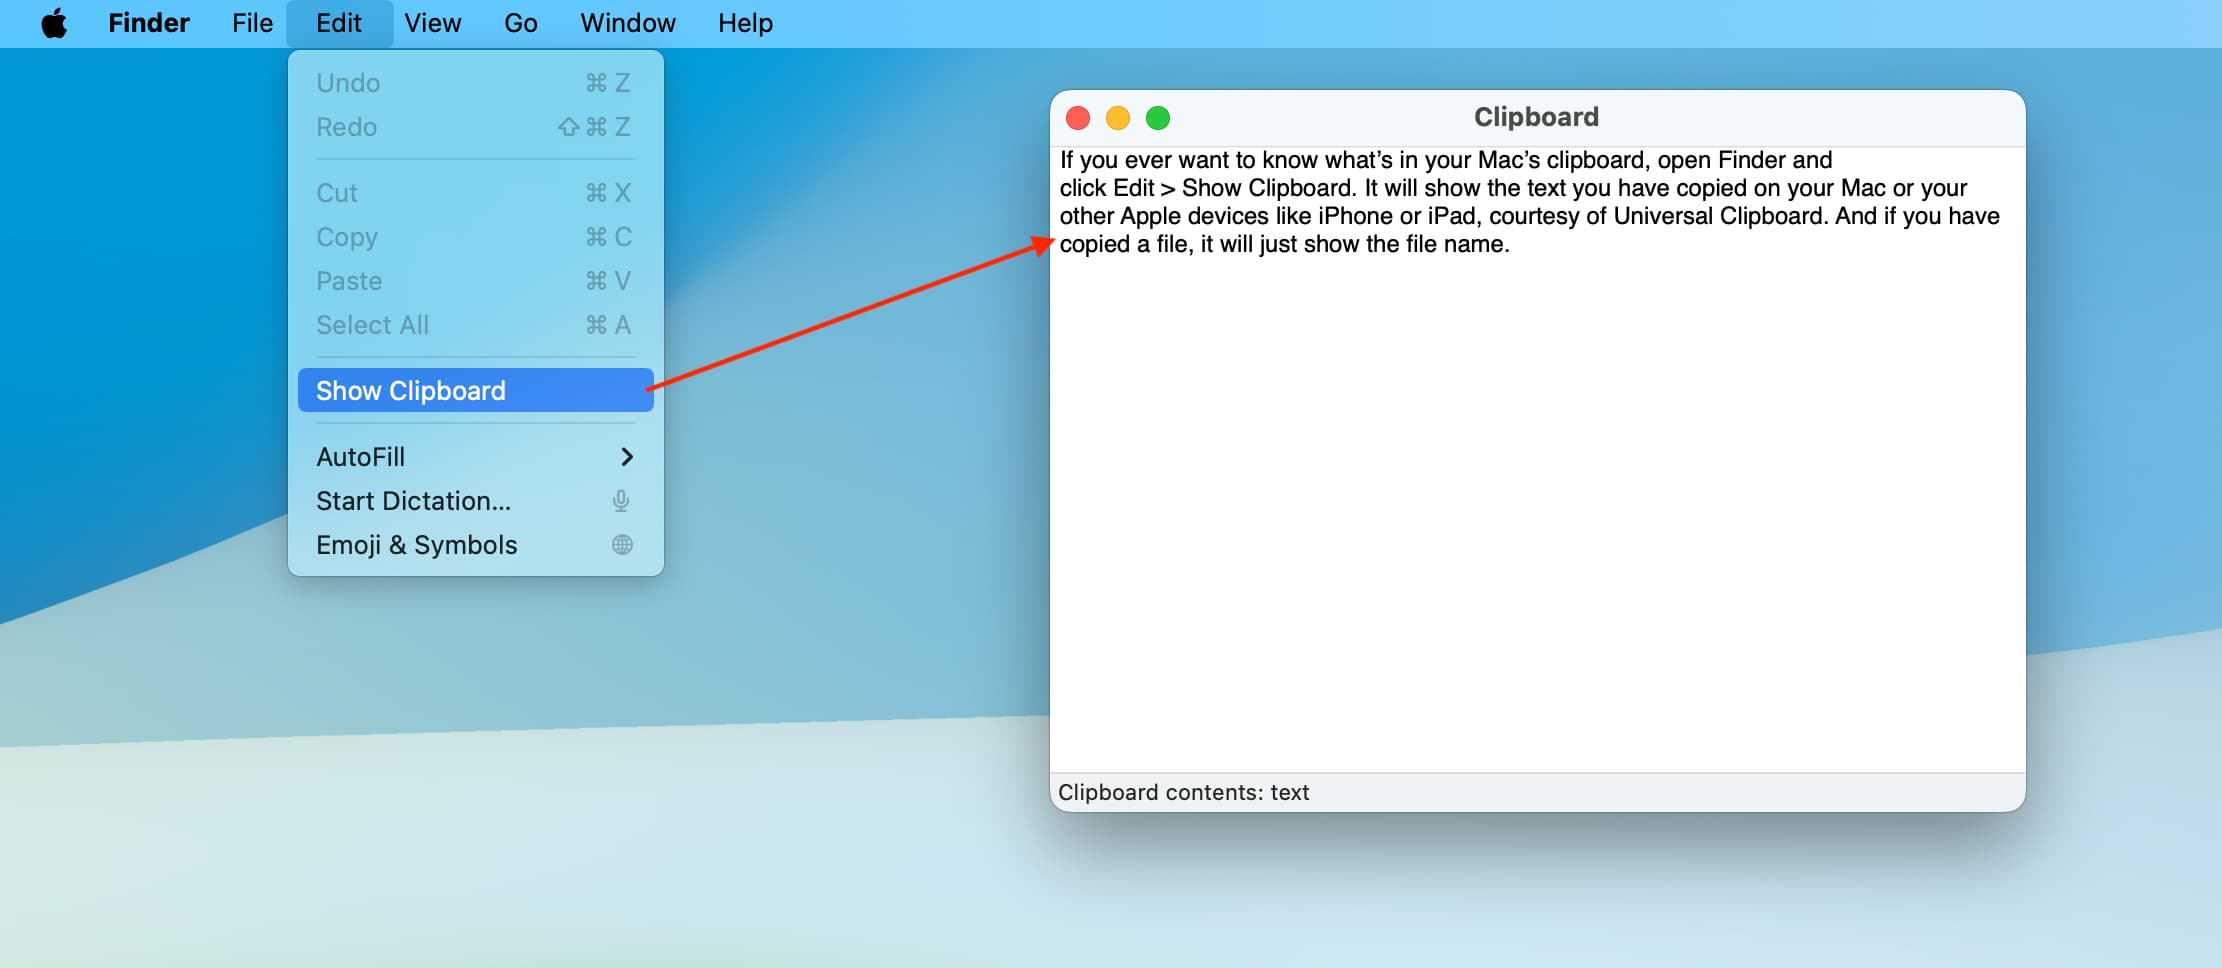
- Method 2: Open Finder and click Edit > Show Clipboard. It will show the text you have copied on your Mac or your other Apple devices, like iPhone or iPad, courtesy of Universal Clipboard. And if you’ve copied a file, it will just show the file name.
Clear your Mac’s clipboard
If you want to clear your clipboard on Mac, just copy something else, and it will replace your current clipboard. Or, paste pbcopy < /dev/null into Terminal and hit the return key to empty your Mac’s clipboard. Alternatively, you can access your clipboards in macOS Tahoe’s new Spotlight Search, right-click/Control-click over a clipboard, and choose Delete Item.

Use two clipboards simultaneously
Being a Mac user, you probably know these keyboard shortcuts:
- Command + C keys to copy
- Command + X keys to cut text
- Command + V keys to paste
When you cut or copy something, it instantly gets saved to your Mac’s clipboard. And when you copy something else, the previous clipboard is replaced.
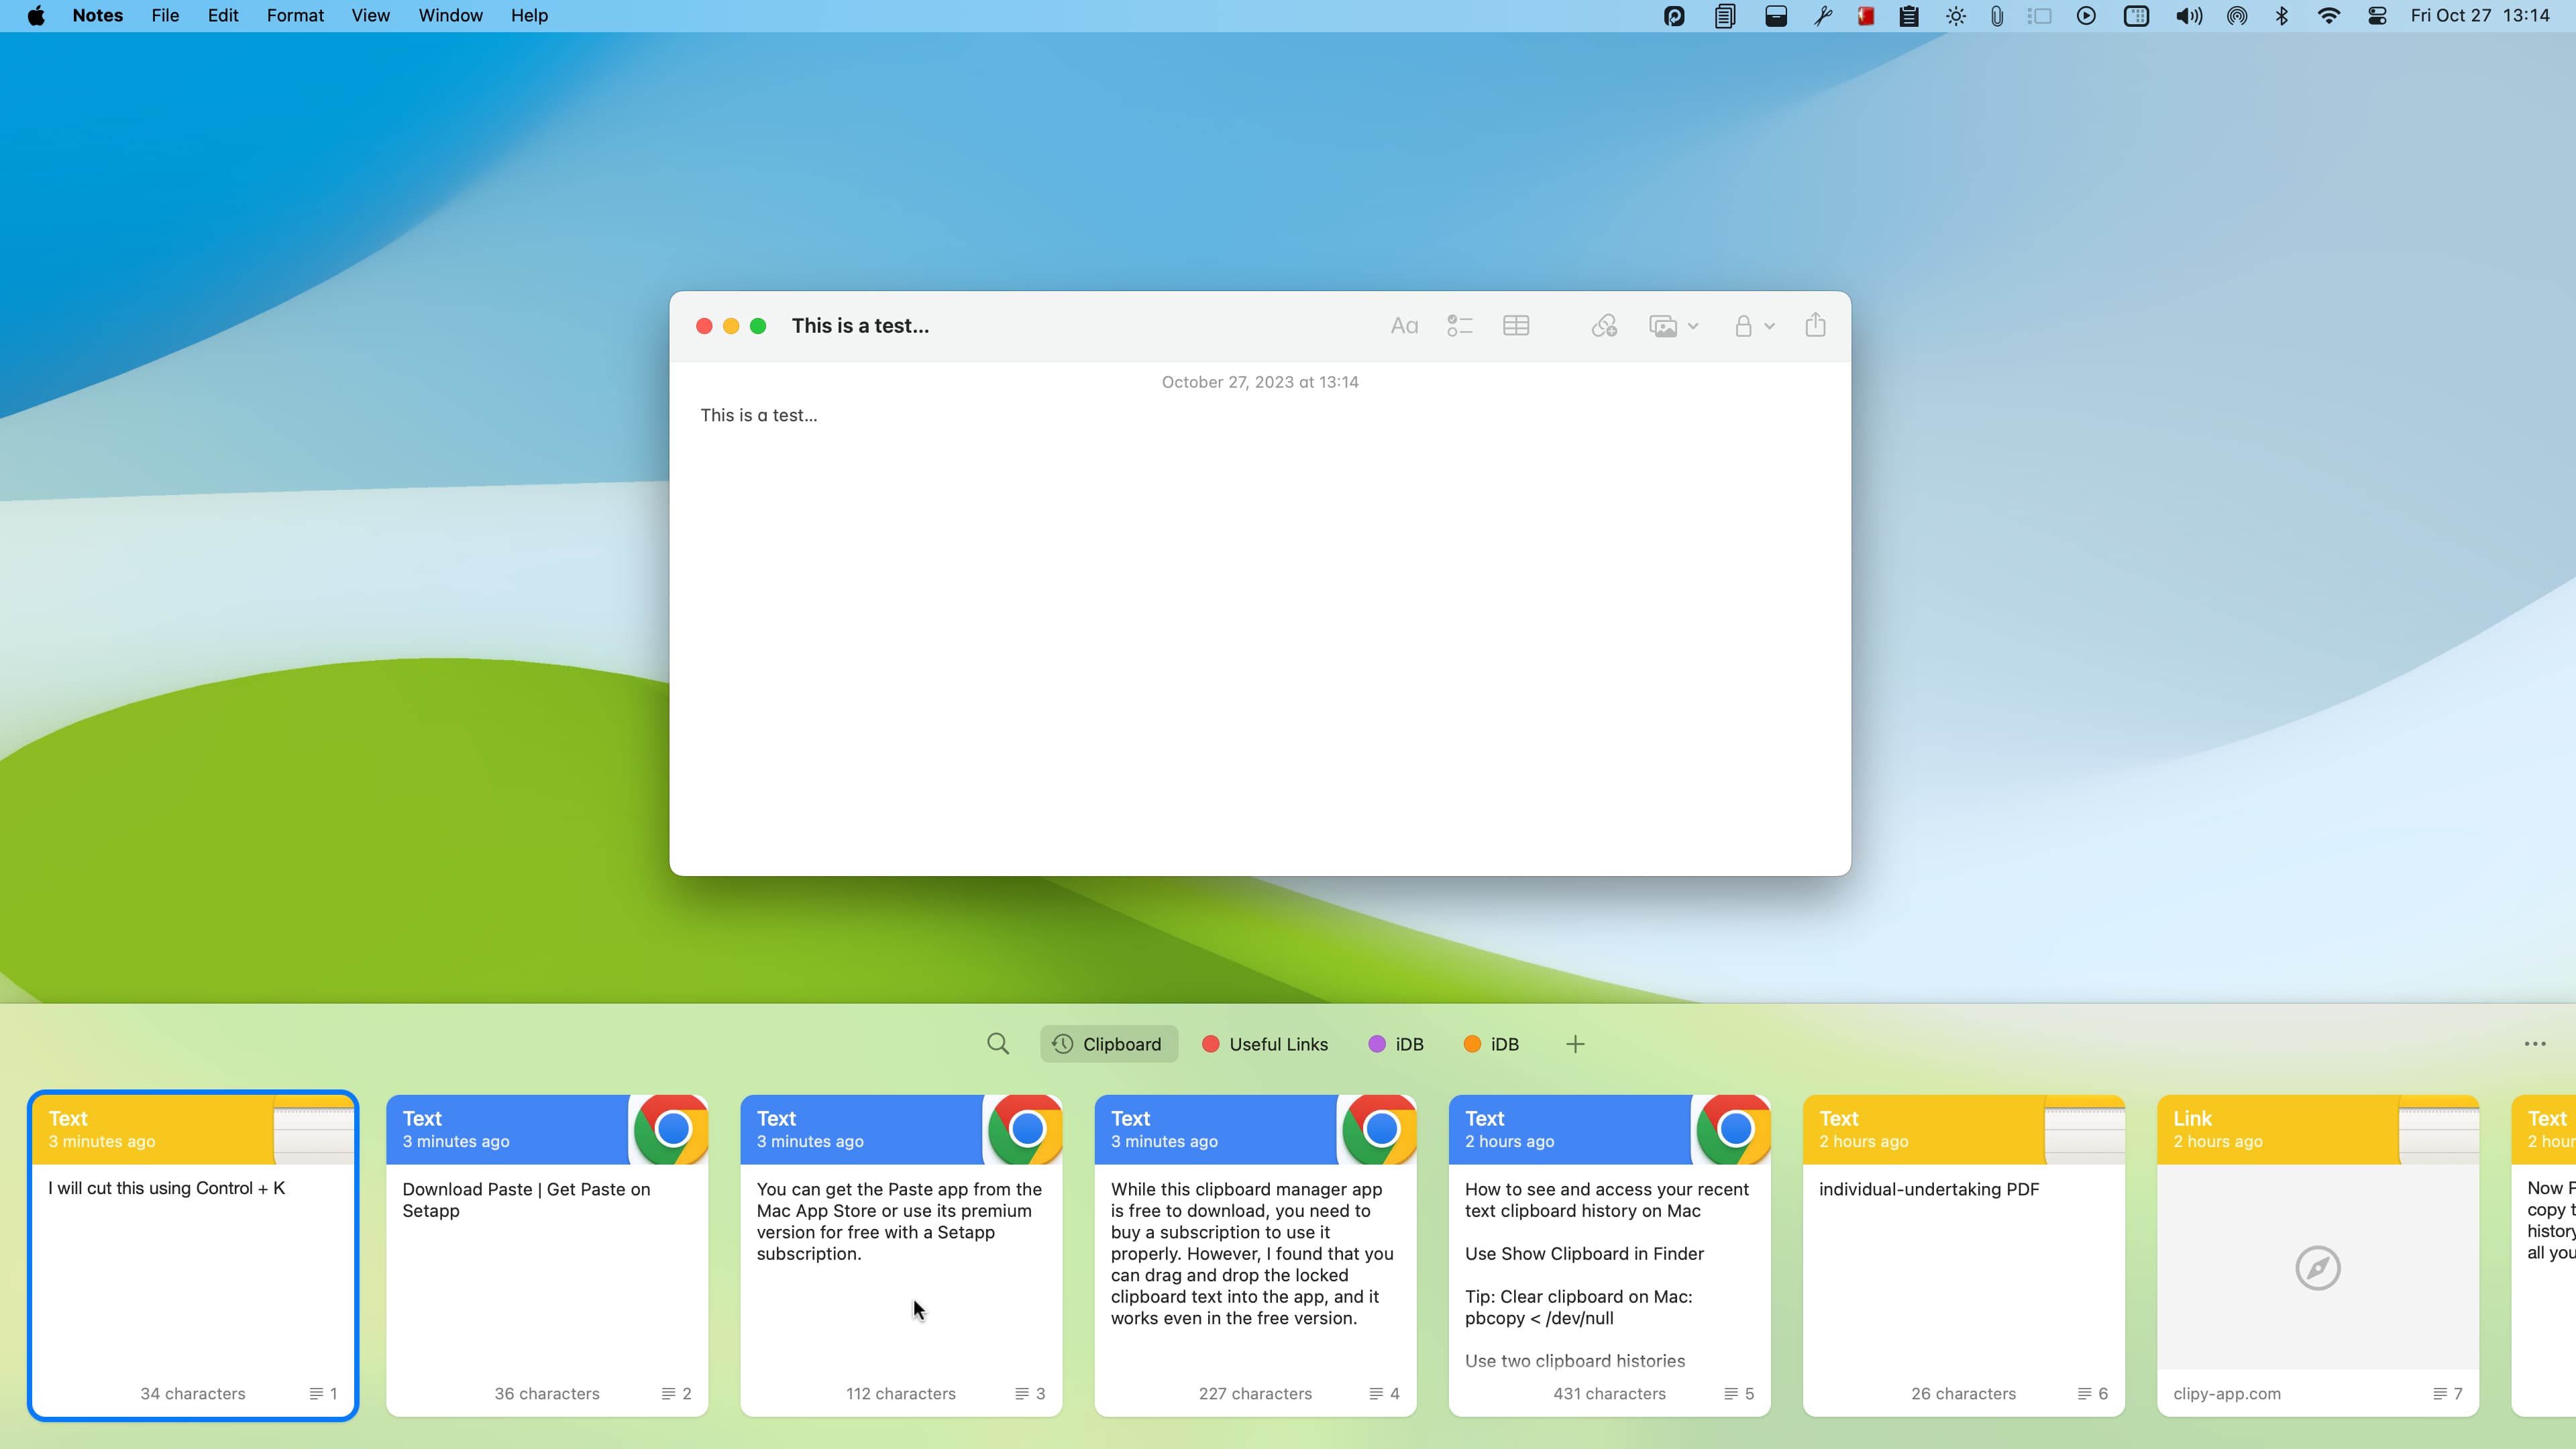
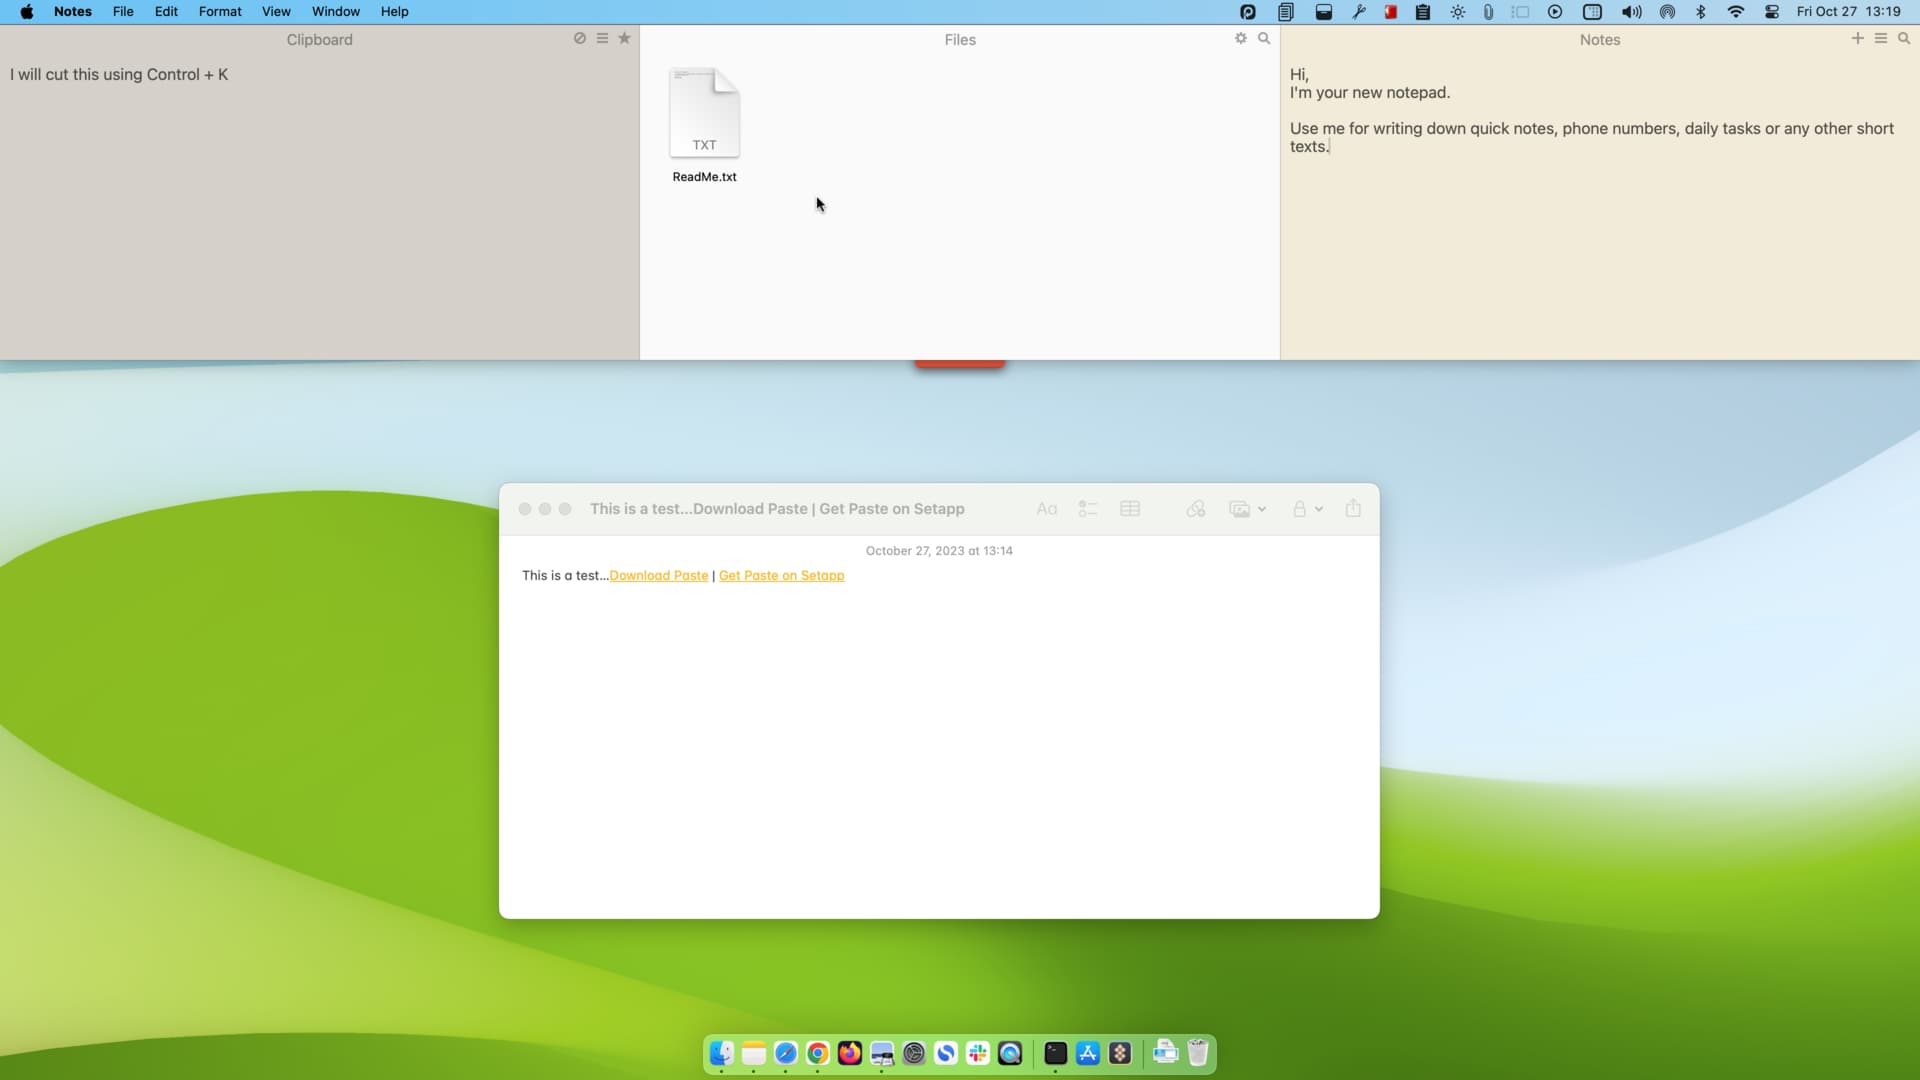
What you may not know is that macOS also allows you to cut and paste using another set of keys in some specific apps, like Notes:
- Press the Control + K keys to cut
- Press the Control + Y keys to paste
When you cut something using Control + K, the current clipboard content that you have using Command + C is not replaced. In other words, Control + K has its own clipboard, and you can paste it using Control + Y.
To sum it up, using Command + C and Control + K key combinations, you can effectively have two sets of clipboards on your Mac!
The best clipboard manager apps for Mac
Even though I’m on macOS Tahoe, I will continue to use my favorite third-party clipboard app (CopyClip), as it’s far easier and quicker to access and use.
You can use these third-party clipboard manager apps for Mac to preserve dozens of recent clipboards, view them all, choose from them, and use them without fear of losing any.
CopyClip – Clipboard History
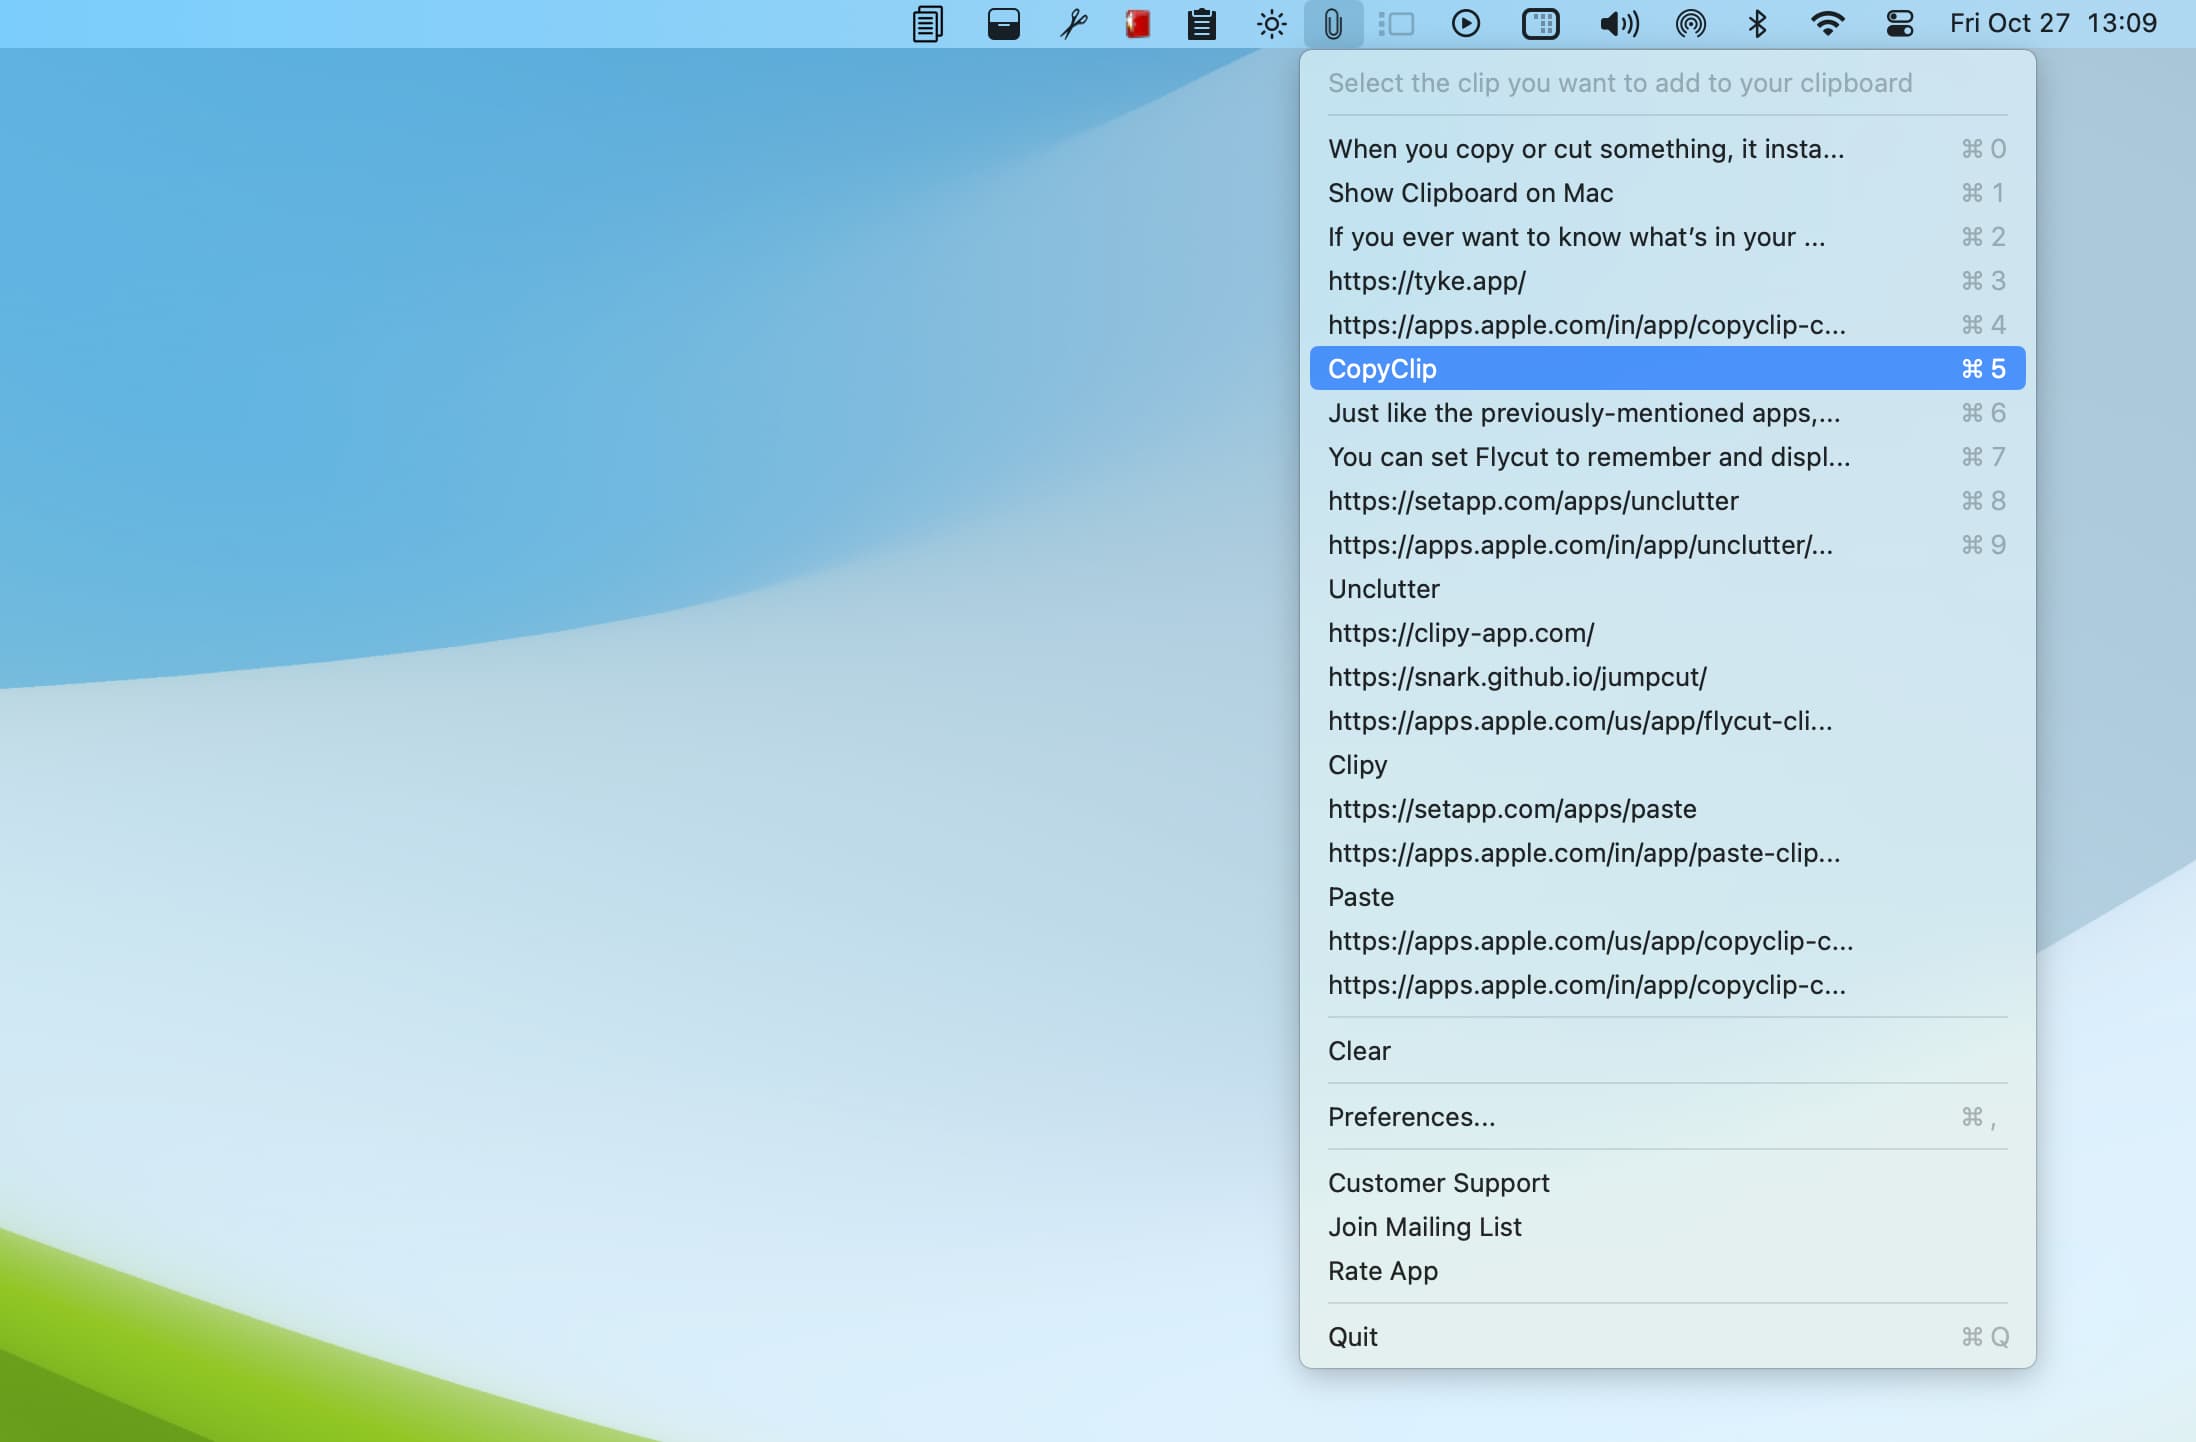
I’ve been using CopyClip for many years now, and it’s one of the first apps I install after setting up my Mac.
CopyClip keeps my clipboard history and, by default, shows the 20 (you can change this number) most recent text clippings I’ve copied or cut. I can copy several words, sentences, and paragraphs in a row without worry, as CopyClip automatically saves them in the background. When I need to use one, I simply click the CopyClip icon in the Mac’s top menu bar and select the desired clipboard.
One thing to keep in mind is that it won’t save text formatting. If that’s important to you, try the Paste app mentioned below. Another habit I have with all clipboard managers is quitting the app when I’m about to copy sensitive information, such as account passwords.
Paste
It’s an excellent app that keeps multiple text and file clipboards while also showing the app they were copied from. If the text has formatting, like a URL embedded in the words, it keeps them intact.
Paste clipboard manager is free to download, but you need to purchase a subscription to fully utilize it. However, I found that you can drag and drop the locked clipboard text into the app, and it works even in the free version. You can access your clipboard history by launching the app and pressing Shift + Command + V.
You can get the Paste app from the Mac App Store or use its premium version for free with a Setapp subscription.
Download Paste | Get Paste on Setapp
Clipy
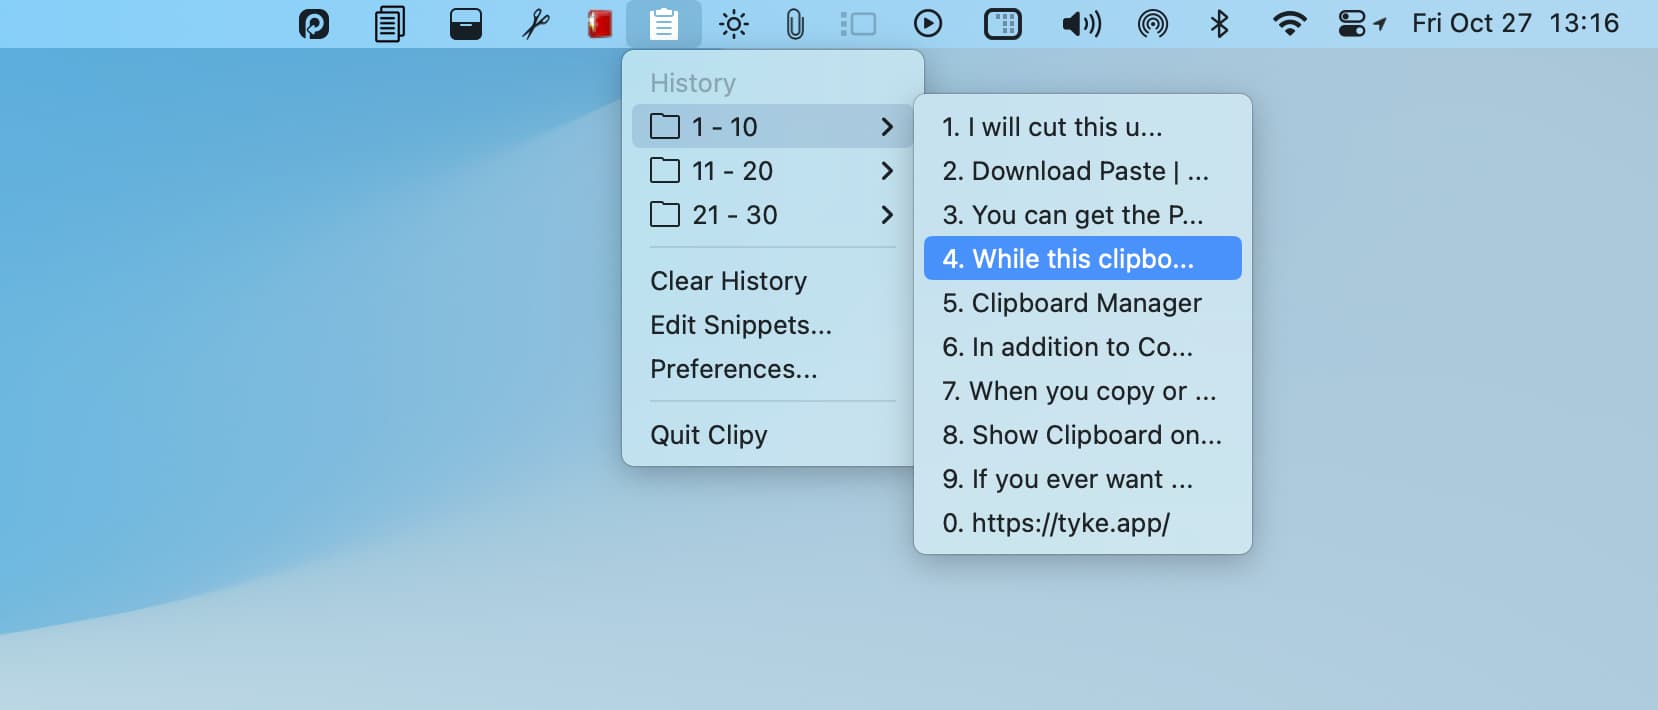
This is another tiny app that keeps your recent clipboards organized in folders. It can even auto-paste the selected clipboard item. The Clipy clipboard app has several useful options in its settings to make it work the way you want it to.
Download Clipy from its website
Flycut
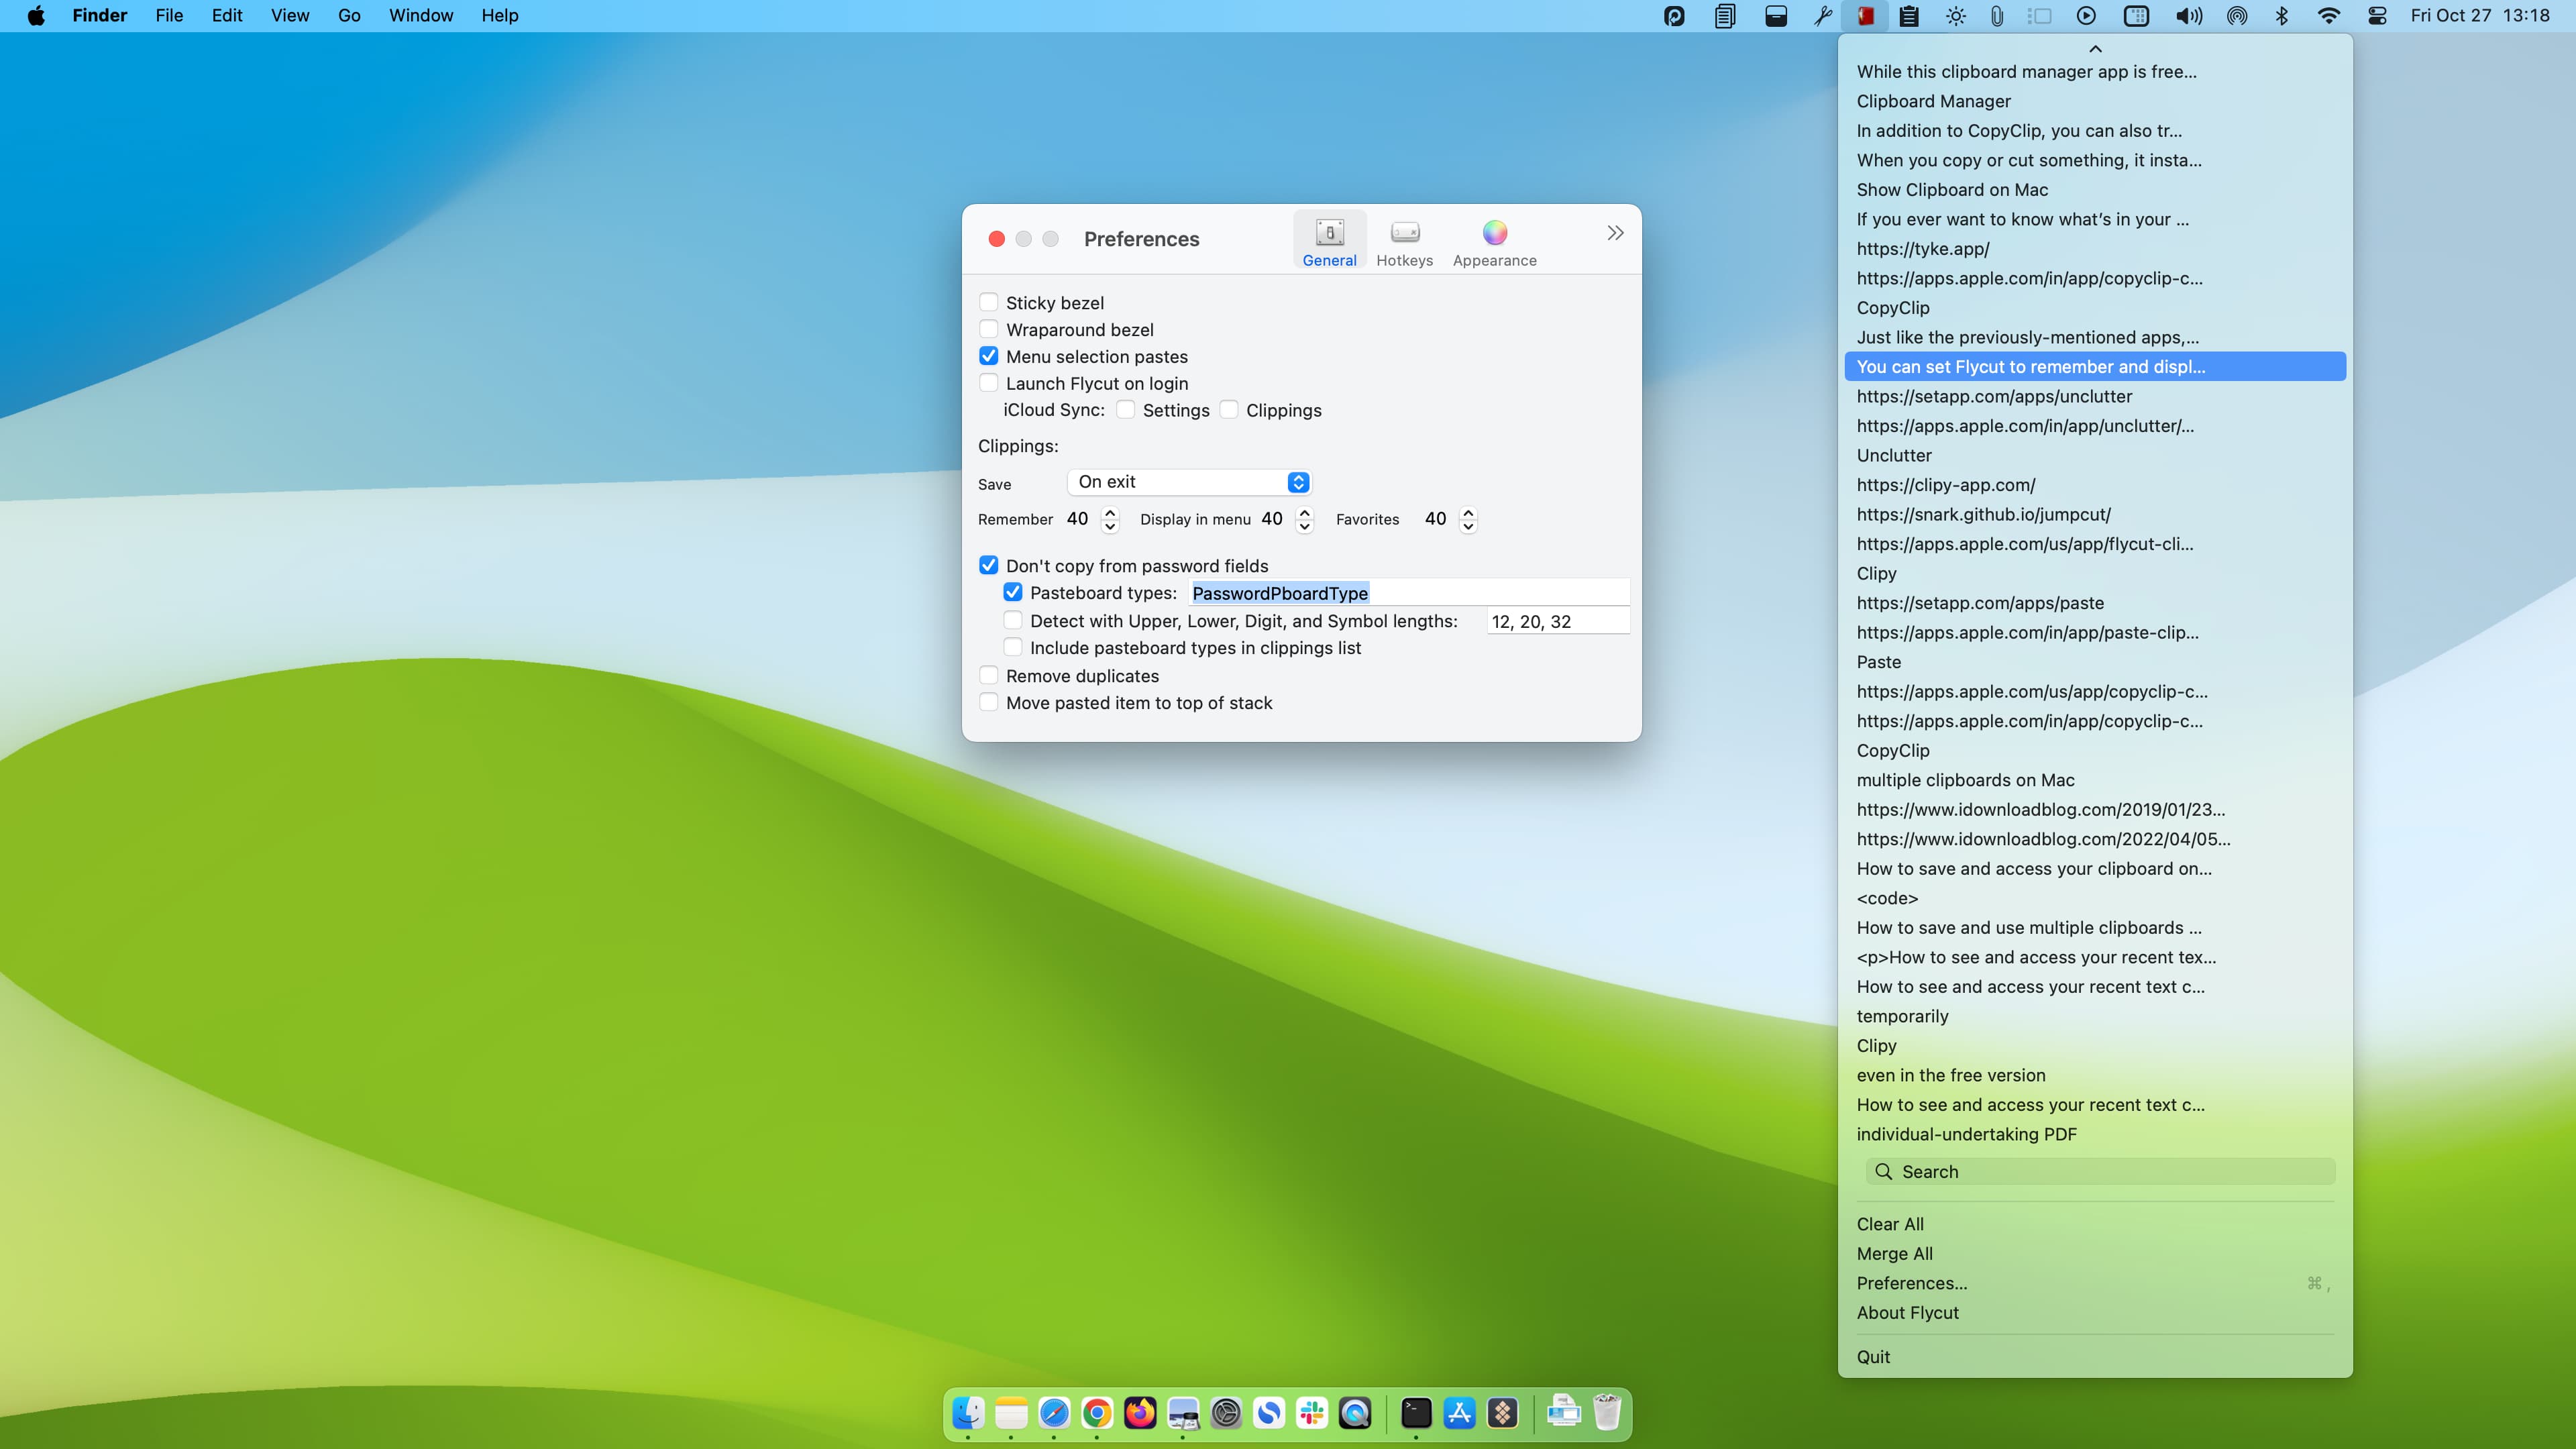
You can set Flycut to remember and display up to 40 most recent copied or cut items in its memory. From there, you can either auto-paste the chosen item into an app or just copy it to your Mac’s built-in clipboard. It also has a search bar to find the specific clipboard item quickly.
Jumpcut

Just like the previously mentioned apps, Jumpcut is an open source app that sits in your Mac’s top menu bar and can display your most recent 99 copied texts!
Unclutter
Next, we have Unclutter, whose interface looks like the Paste app. It shows sections for text clipboards, files, and notes. You can give it a go and see if it suits your needs. It’s a paid app on the Mac App Store.
Buy Unclutter ($19.99) | Get Unclutter on Setapp
CopyClip – Clipboard Manager
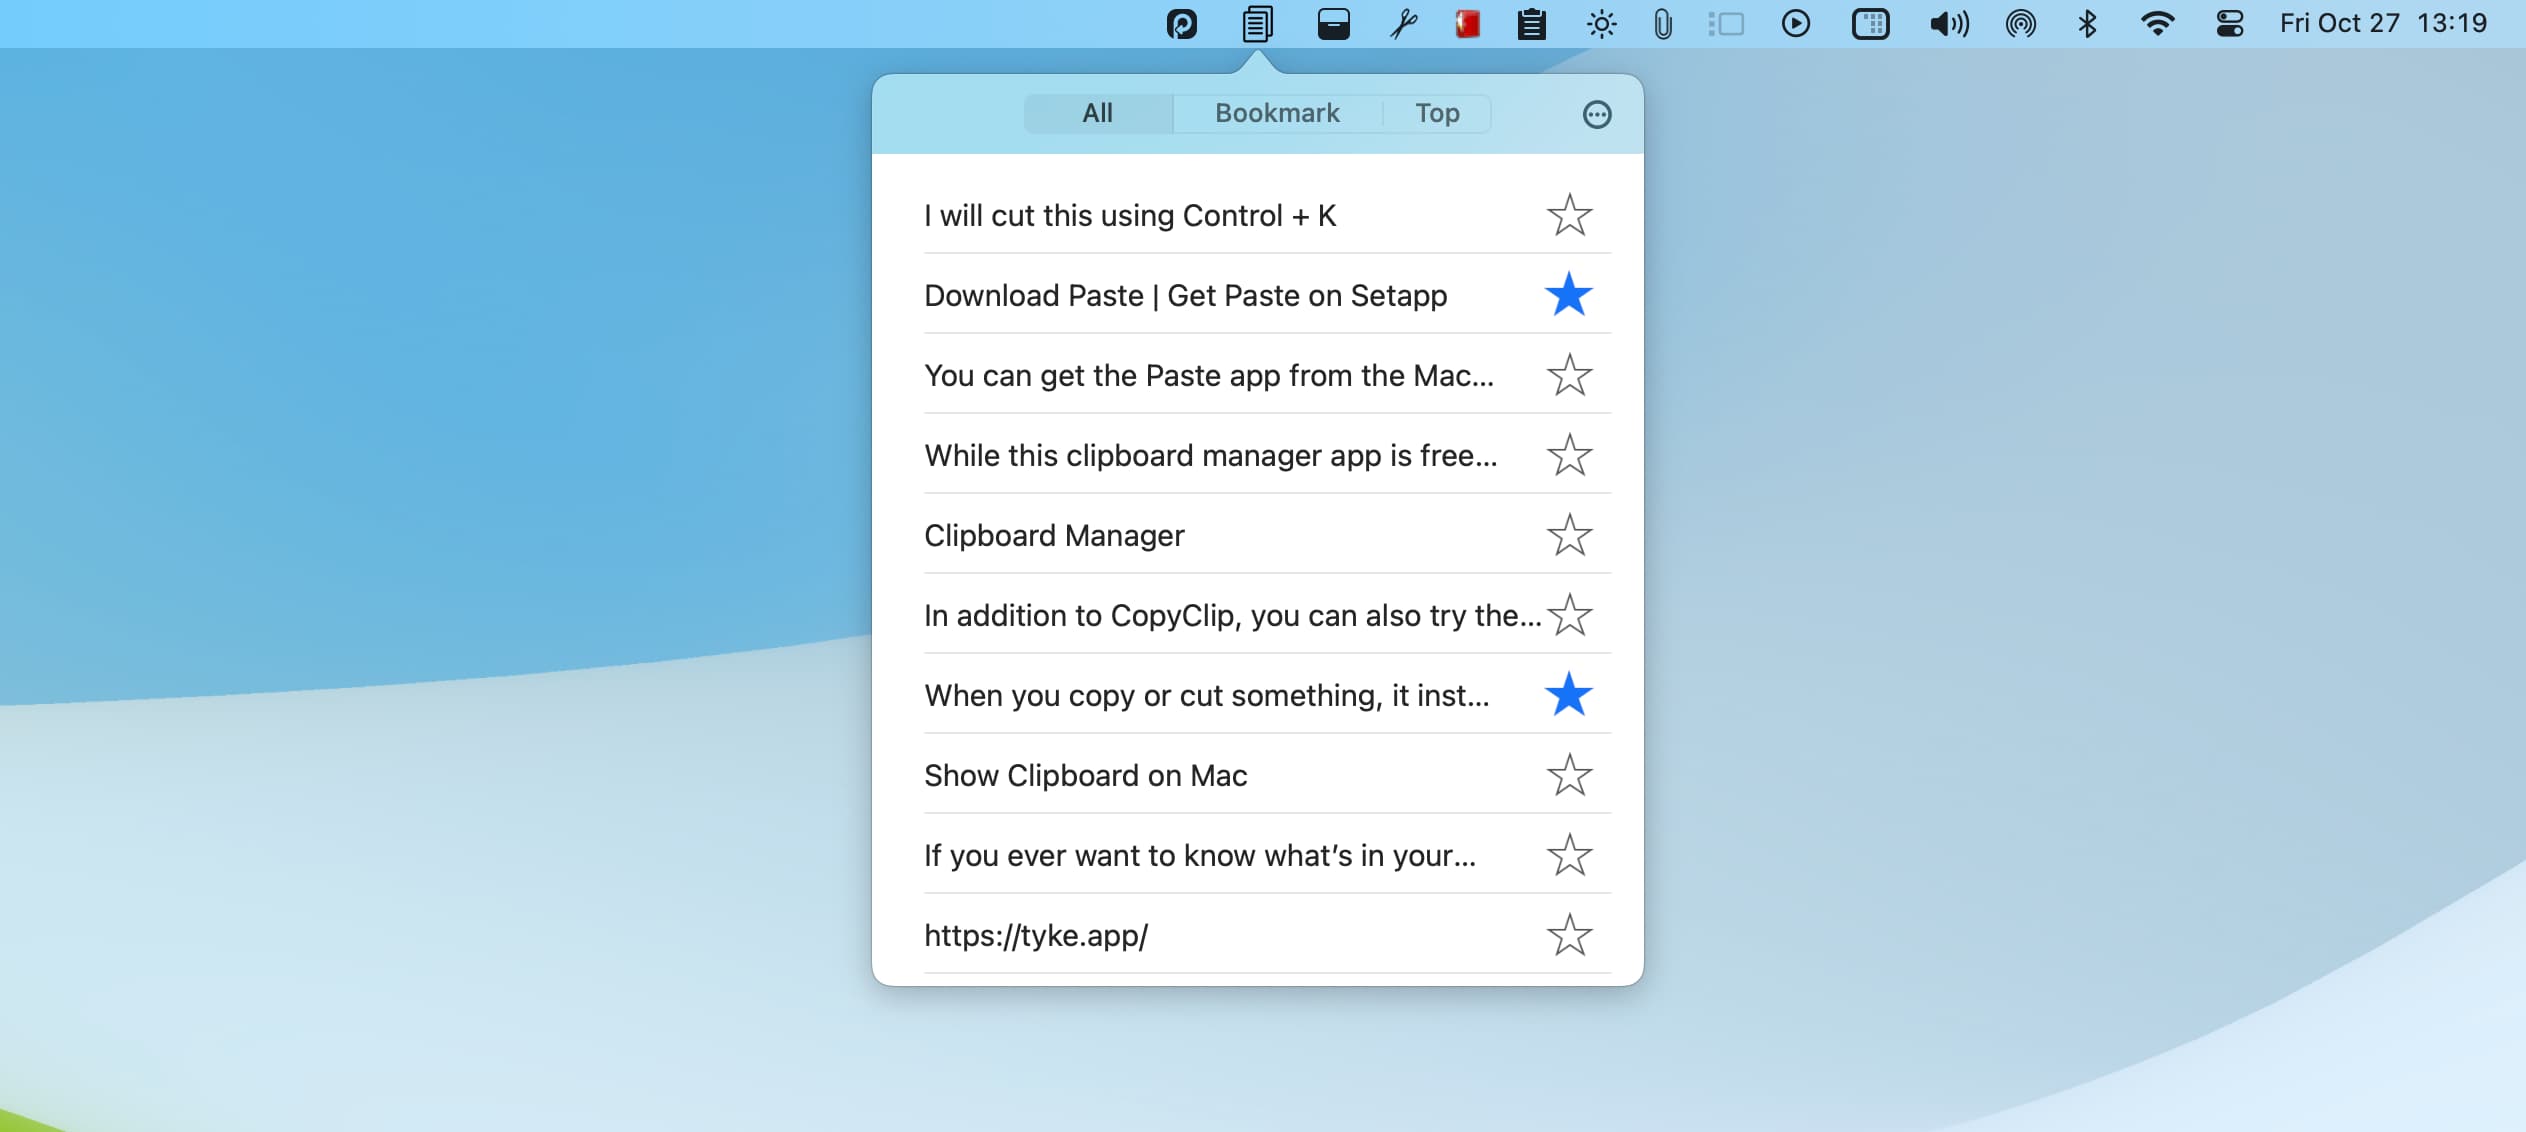
Lastly, let me tell you about a different CopyClip app. It’s a simple application that keeps your text clipboards organized. You can even star important clipboards.
Try all the above apps and keep the one you find the most useful. You can easily uninstall the rest.
Manually back up text in Notes or Tyke
Finally, I’d like to remind you that when you’re working on an important project or document, keeping two backups is always a good idea. Never rely solely on clipboard manager apps for keeping your copied texts.
For instance, when working on a big document in Pages, I keep the copied contents in the Notes app, Simplenote, or the Tyke app. The latter sits in the top menu bar and lets me temporarily keep some important text snippets.

Also, check out: