Learn what to do if you’re not receiving new notification banners or sounds on your Mac for all or specific apps and websites.
The problem
- No app alerts: You’re not getting new notifications from apps like Slack, Teams, Zoom, Messages, WhatsApp, etc.
- No notifications from websites: Safari, Chrome, Firefox, or another web browser is not sending you website notifications.
- No sound: You see a notification banner on your Mac but hear no alert sound.
- No message banner: You hear the new notification sound but do not get the notification banner in the top right corner of your Mac’s screen.
The solutions below will fix all the problems mentioned above and similar ones.
Turn off Do Not Disturb or Focus
- Click the Control Center icon in the menu bar.
- If the top right tile shows the Do Not Disturb (DND) or Focus icon in purple or another color, that means you have enabled DND or a Focus like Sleep, and because of this, you’re not getting the notifications.
- To turn off DND or Focus, click the Focus tile to expand it and then click the enabled Focus name. After this, the Focus icon will turn black, signifying it’s not active.
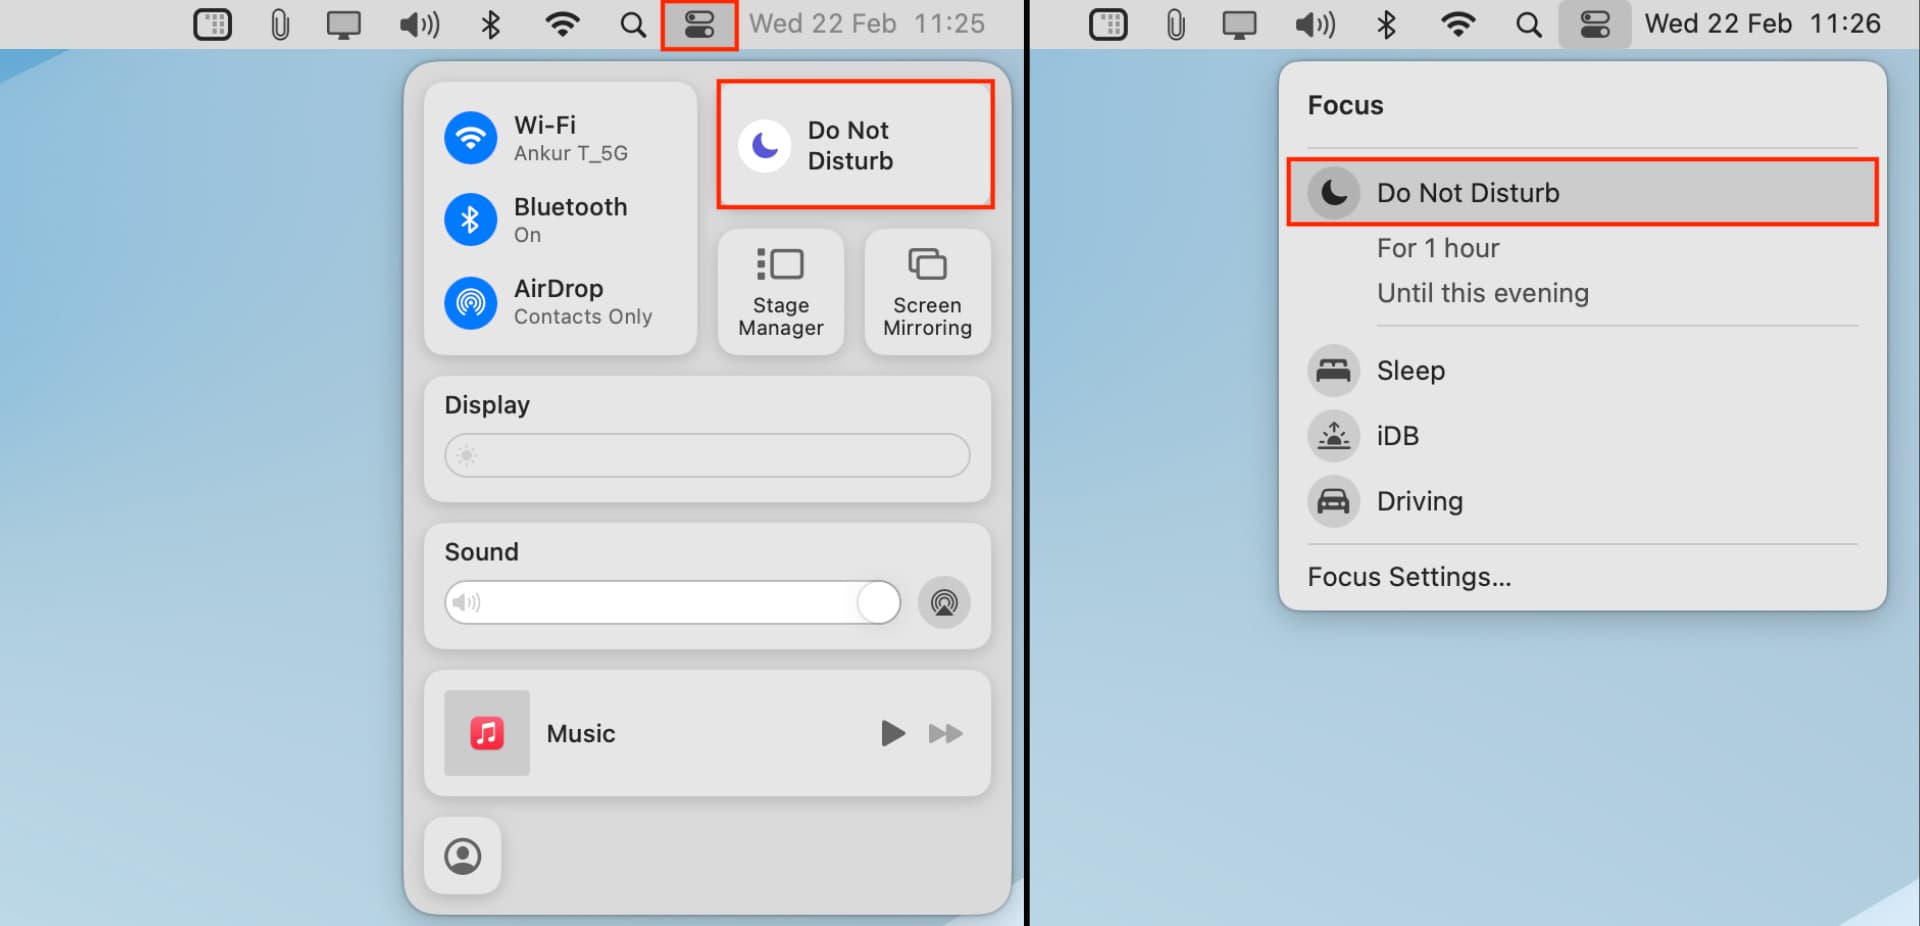
To manage DND and Focus, go to System Settings > Focus.
Make sure individual app notifications are enabled
If an app like Chrome or Mail isn’t sending your new alerts, ensure the app is open. If alerts still don’t appear, verify that its notifications are enabled.
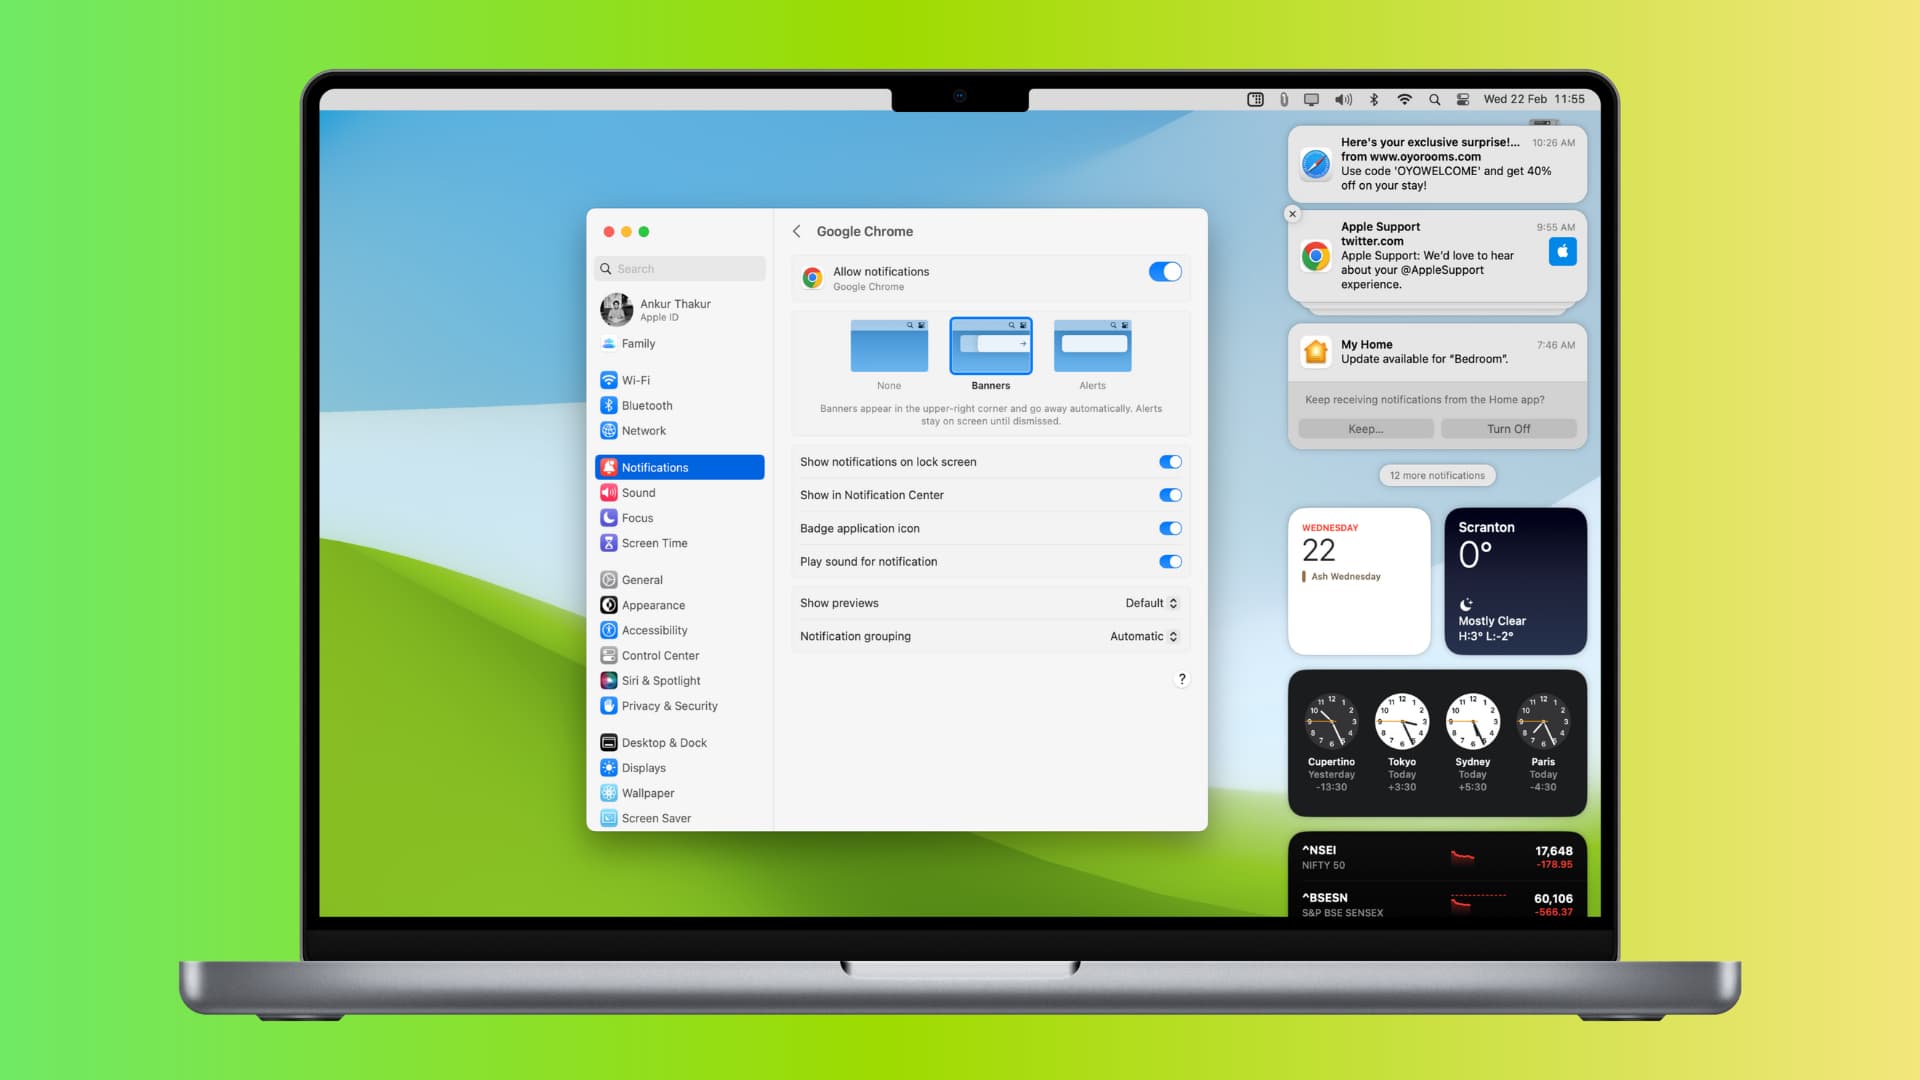
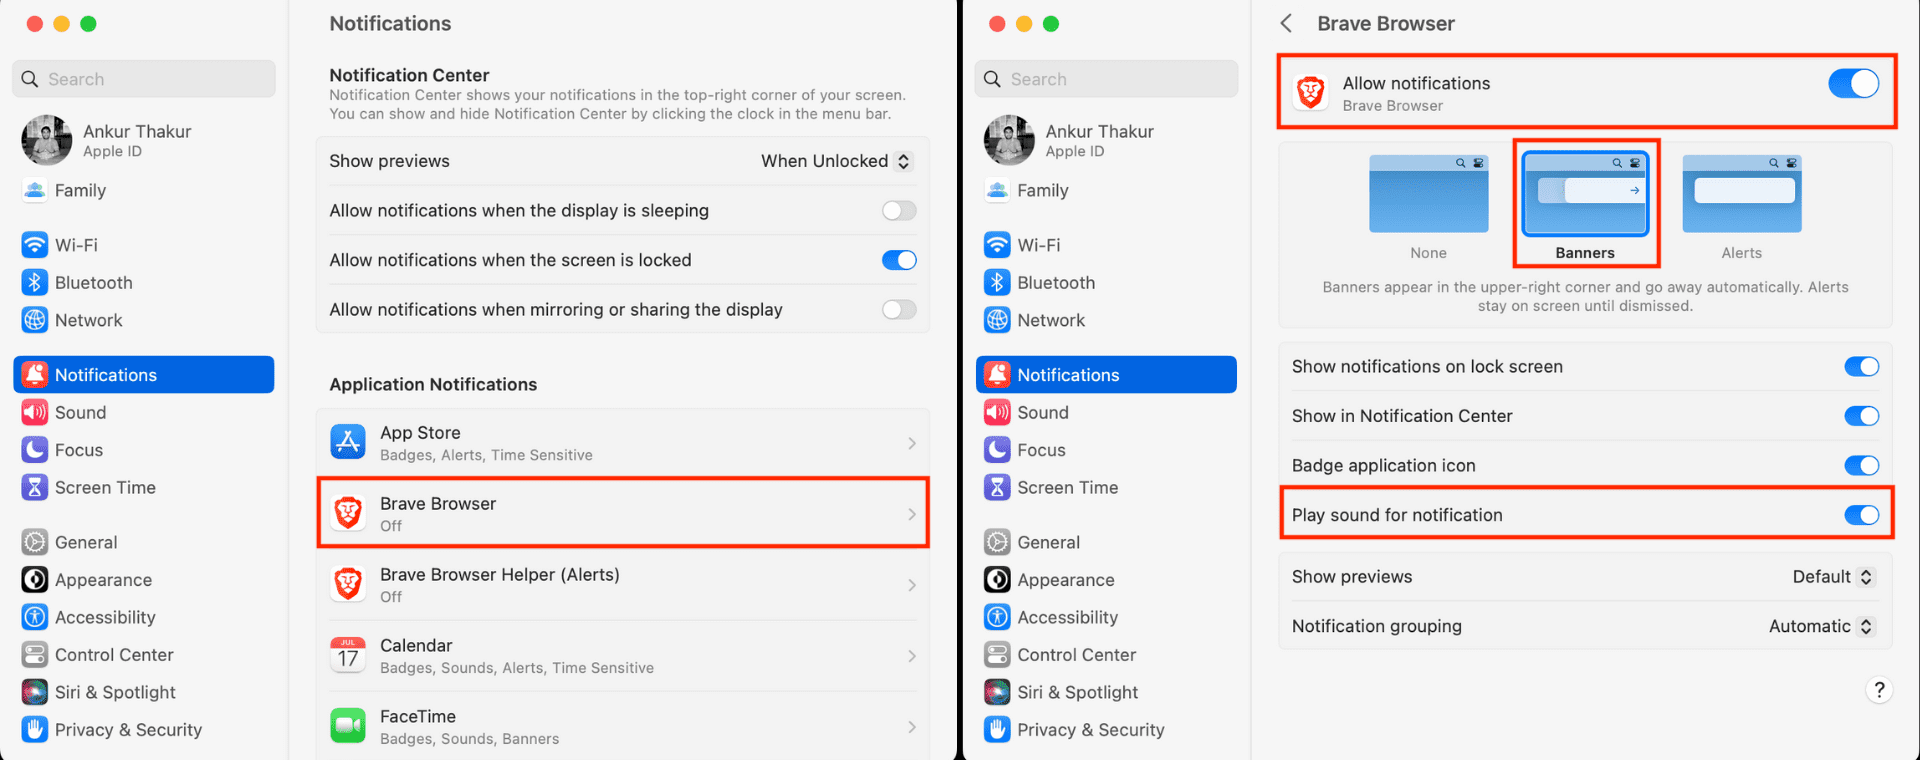
- Open System Settings and click Notifications.
- Select the app whose notifications you’re not getting.
- Toggle Allow notifications on.
- Make sure the Banners option is selected. Note: Banners disappear after a few seconds, Alerts stay on the screen until dismissed, and None ensures you get no visual notification.
- Next, enable the switch for ‘Play sound for notification.’
In addition to the above options, you can customize other settings, such as showing the notification on the lock screen and Notification Center or putting a red badge over the app icon in your Mac’s Dock and Launchpad.
Check other notification settings
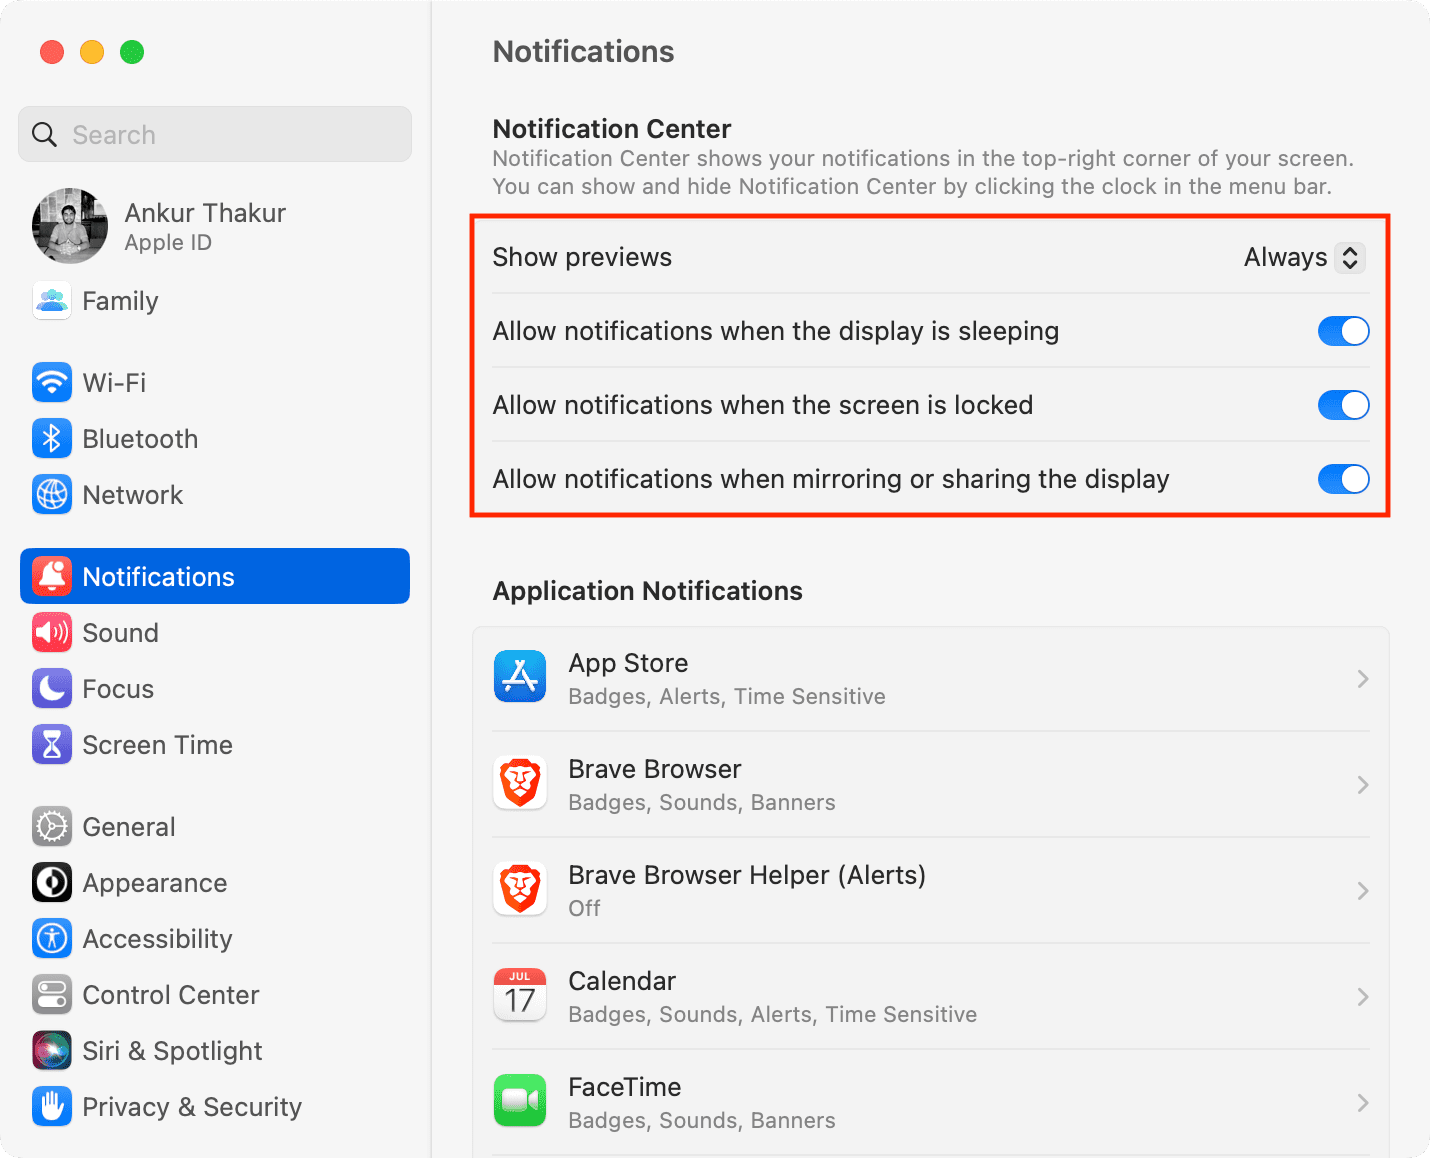
Go to System Settings > Notifications. From here, you can:
- Choose to show the message previews when your Mac is unlocked, always, or never.
- Allow notifications even when the display is sleeping, the screen is locked, or you’re mirroring or sharing your Mac’s display.
Check in-app notification settings
Some Mac apps, like Slack, WhatsApp, and Telegram, have internal settings to control notifications. Follow these steps if you’re not receiving new notifications from a specific app:
- Open the app in question and go to its settings. Most macOS apps allow you to go to their settings by clicking the app name next to the Apple icon and selecting Settings/Preferences. Alternatively, you can press the Command + Comma (,) keys.
- Next, look for the notifications setting and make sure it’s enabled.

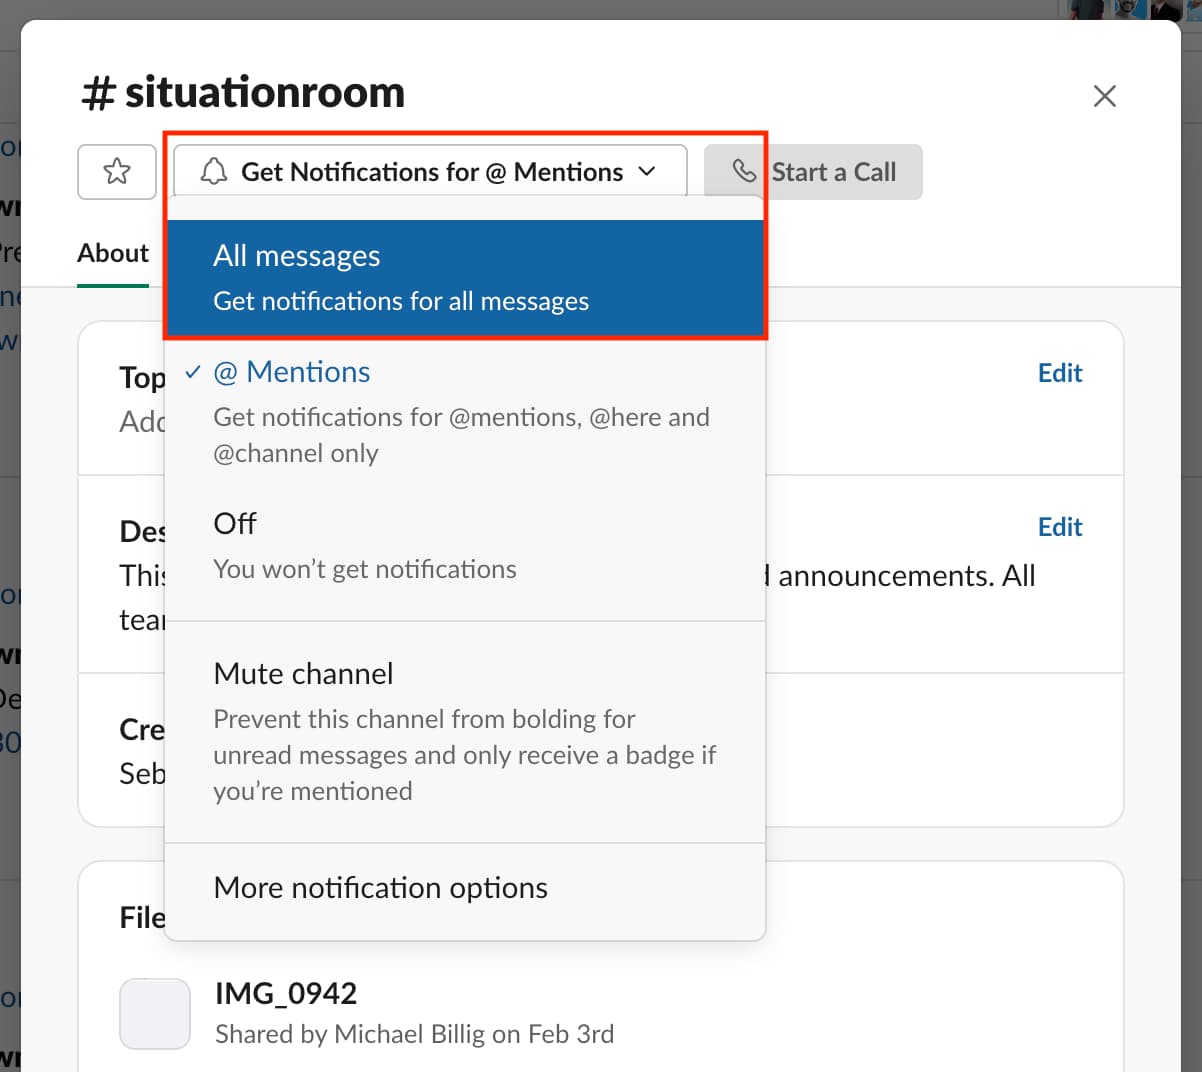
Unmute the conversation in apps like Messages and Slack
If you were bombarded with a slew of messages in a group or Slack channel and muted all new alerts from that conversation, open the app and unmute that group text or allow all notifications from that channel.
Check browser notification settings
For all websites
It’s up to you whether you want to allow a website to notify you. But for this to work, you should set your web browser to allow websites to ask your permission to send notifications.
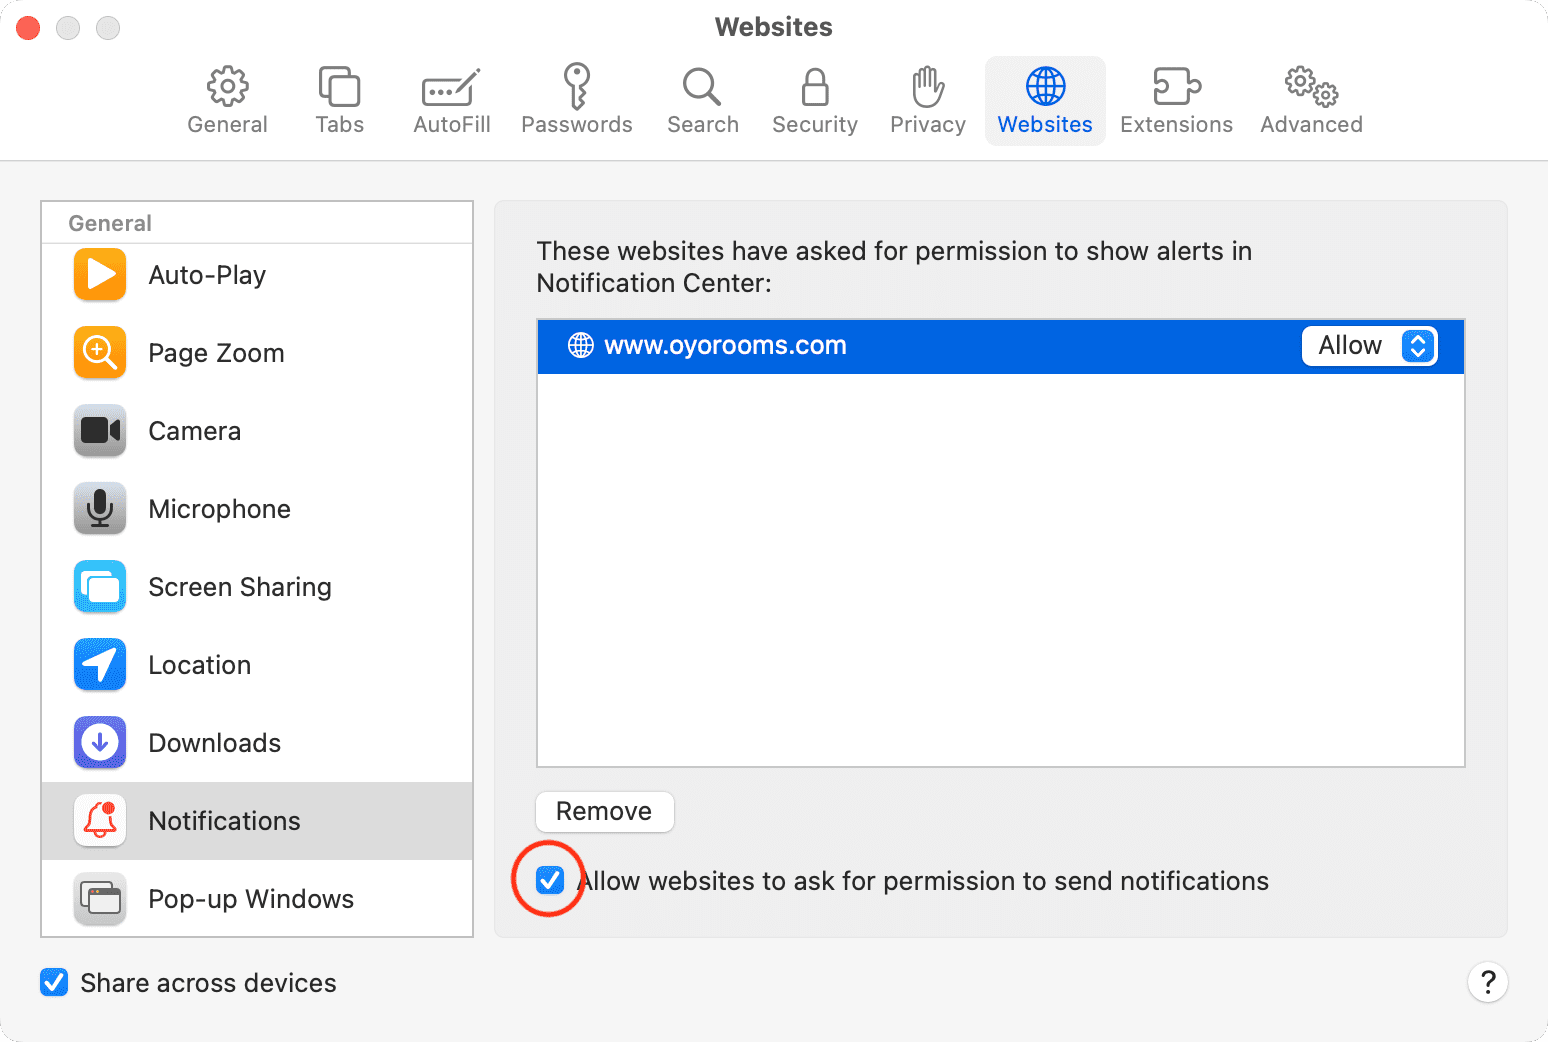
Safari: Open Safari, and click Safari > Settings from the top menu bar. Now go to Websites > Notifications and check the box for ‘Allow websites to ask for permission to send notifications.’
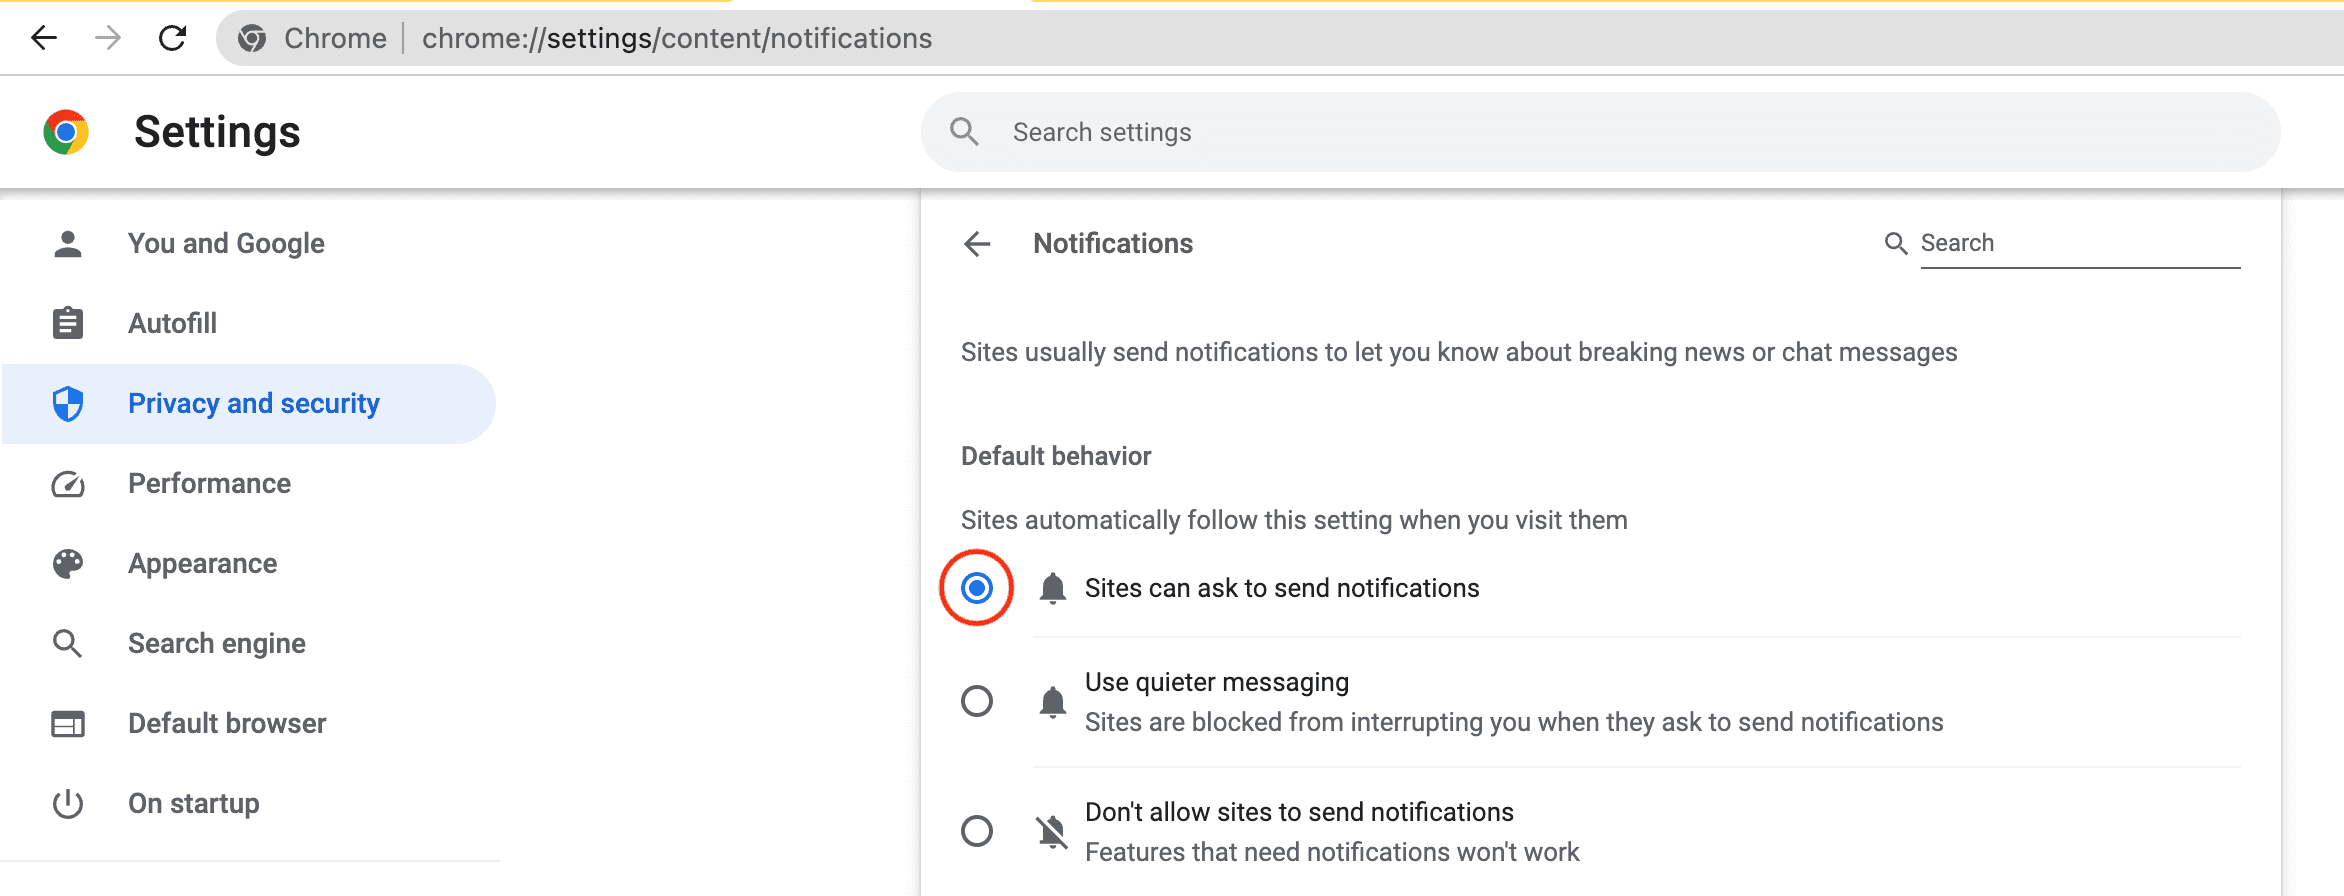
Chrome: Open Chrome and click Chrome > Settings from the top menu bar. Select Privacy and security > Site settings > Notifications and check the box for ‘Sites can ask to send notifications.’
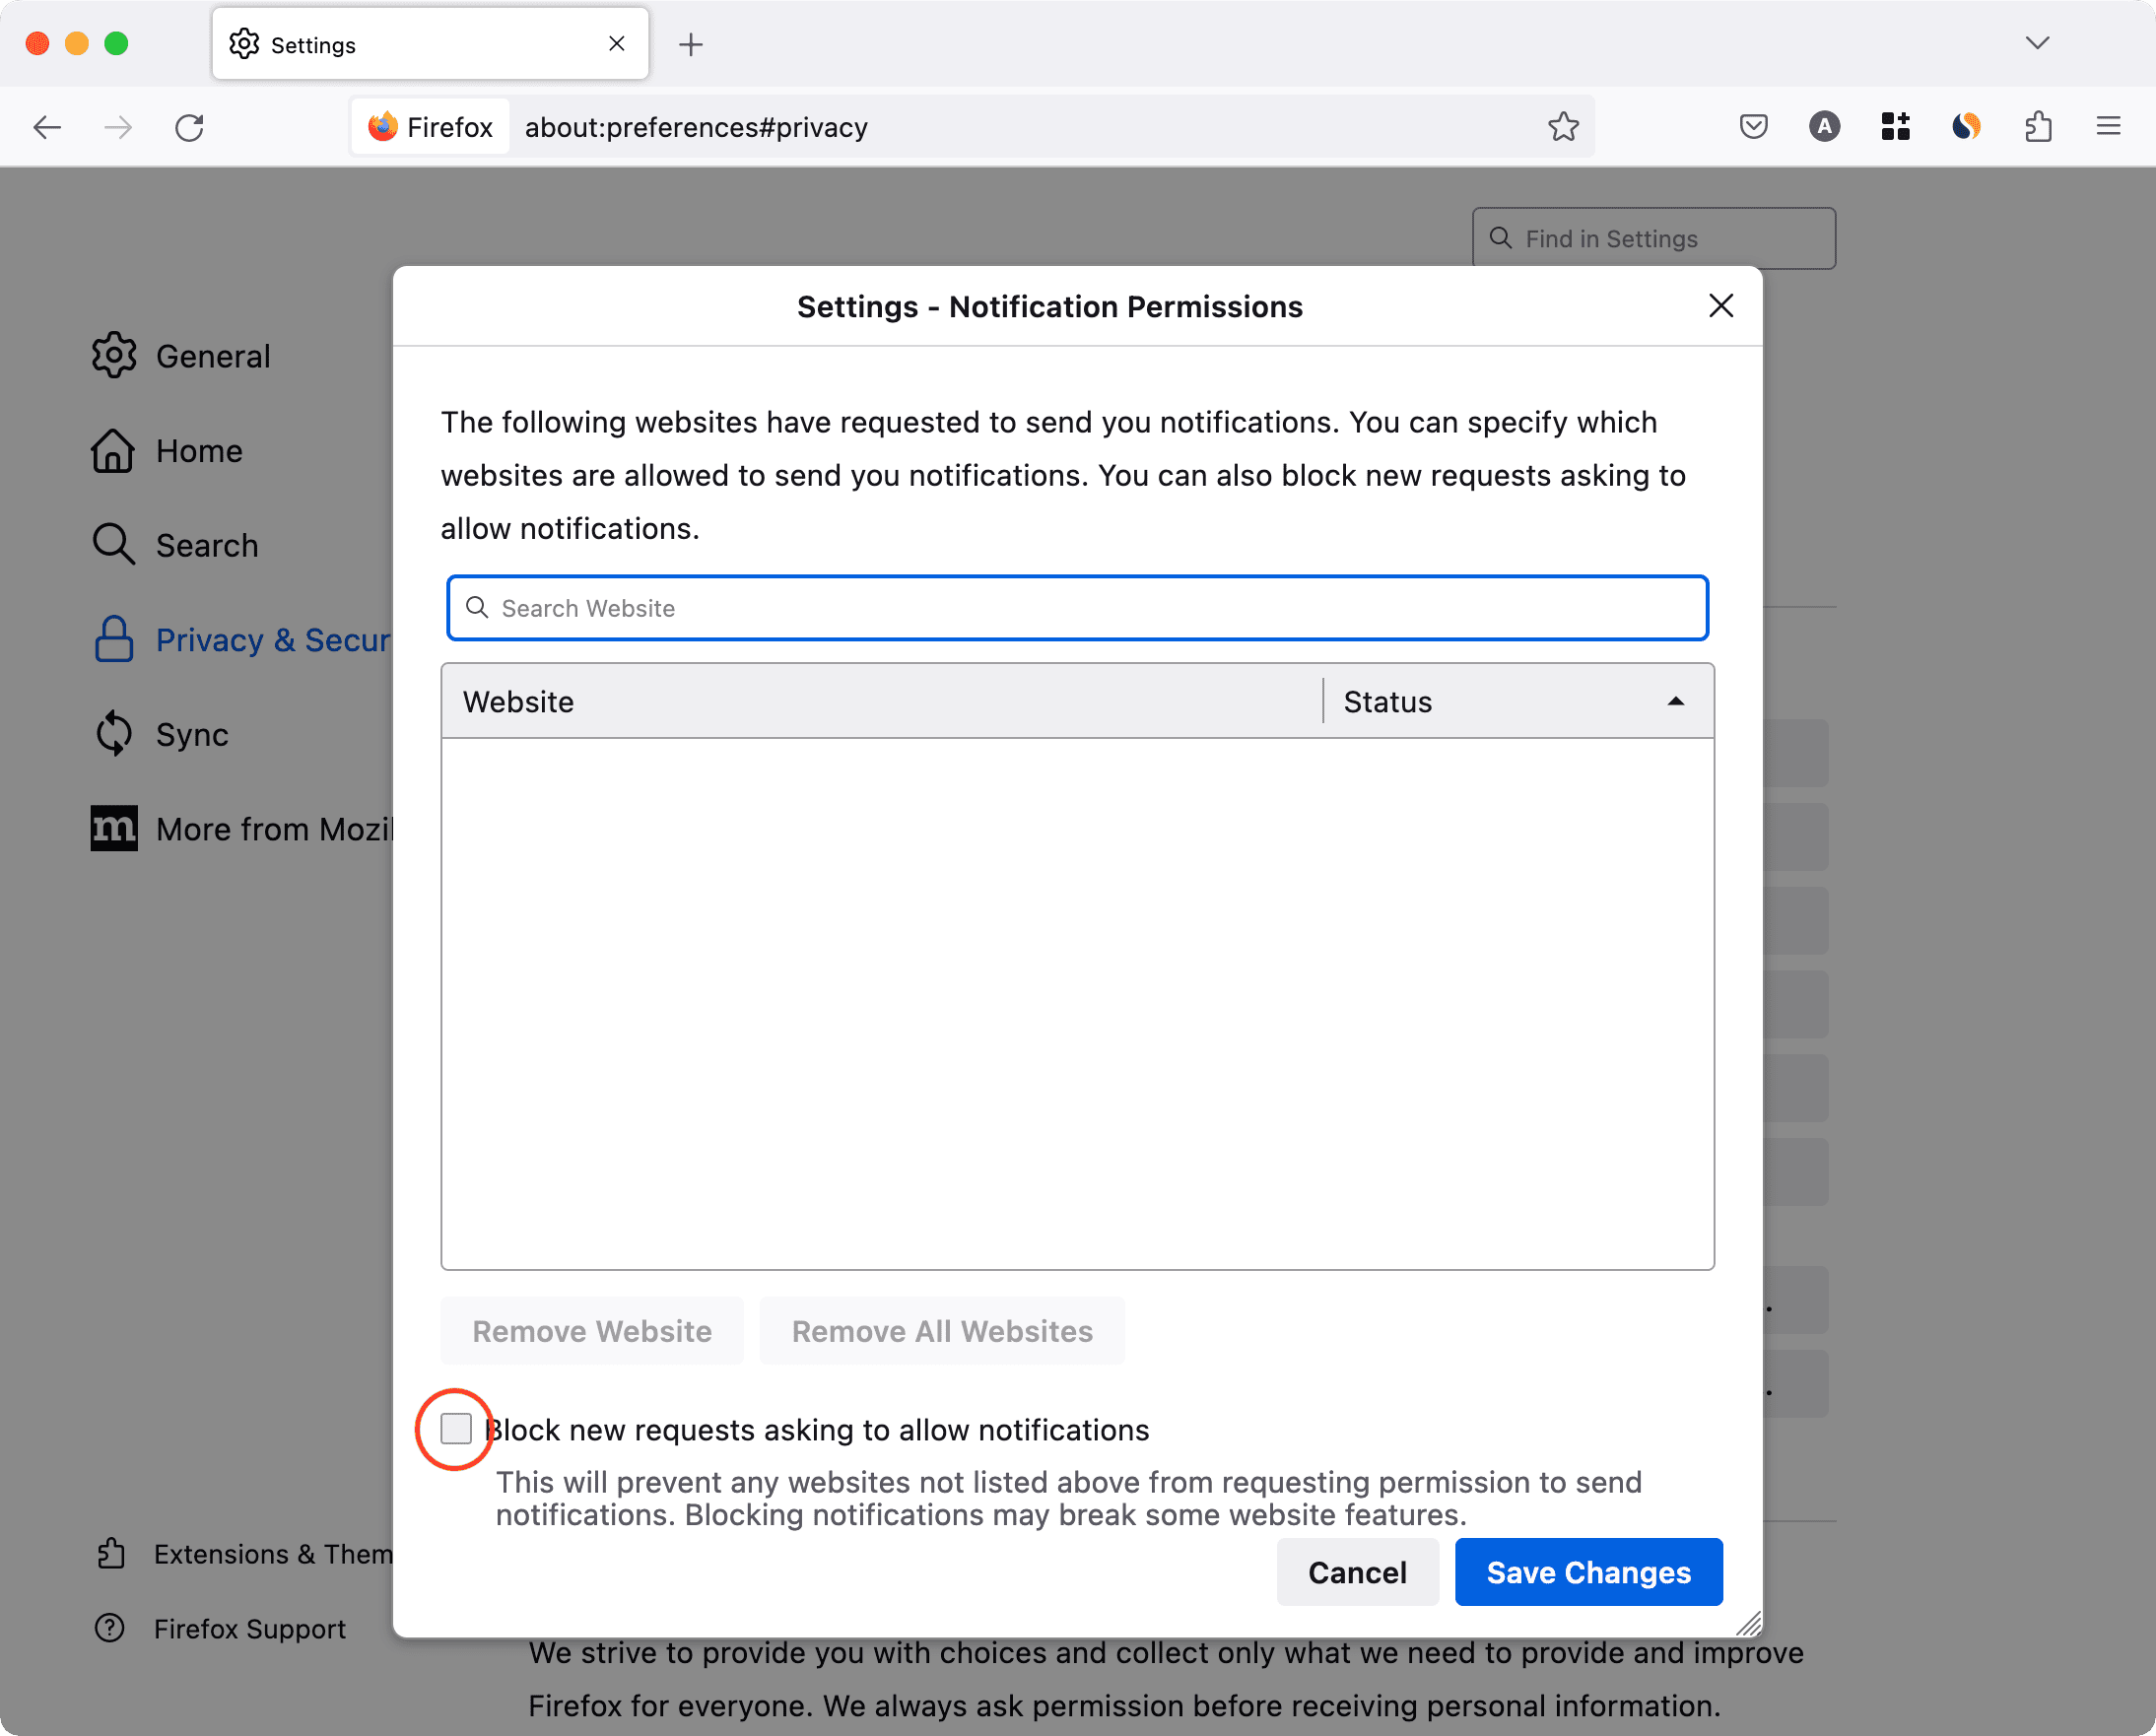
Firefox: Open Firefox and click Firefox > Settings from the menu bar. Now go to Privacy and Security, scroll down to Permissions, and click Settings next to Notifications. Finally, uncheck the box for ‘Block new requests asking to allow notifications.’
For specific websites
If you use Slack inside Chrome on Mac, you’ll only be alerted if you allow Slack’s website to send notifications. To quickly check and fix whether a website can send notifications, go to the browser’s notification settings (explained above) or follow these steps if you use Google Chrome.
- Visit the website and click the tiny settings or padlock icon in the address bar.
- From here, enable the switch for Notifications.
Note: If you don’t see the Notifications option, this site can’t send notifications, or it has never asked for your permission to send them.
Increase your Mac’s system volume
You may not hear new notifications if your Mac’s volume is set to a very low level. To fix this:
- Use the volume key on your keyboard to increase it.
- Open Control Center and drag the Sound slider to the right.
- Or, go to System Settings > Sound and drag the Output volume slider to the right. While you’re here, make sure the Mute box isn’t checked.
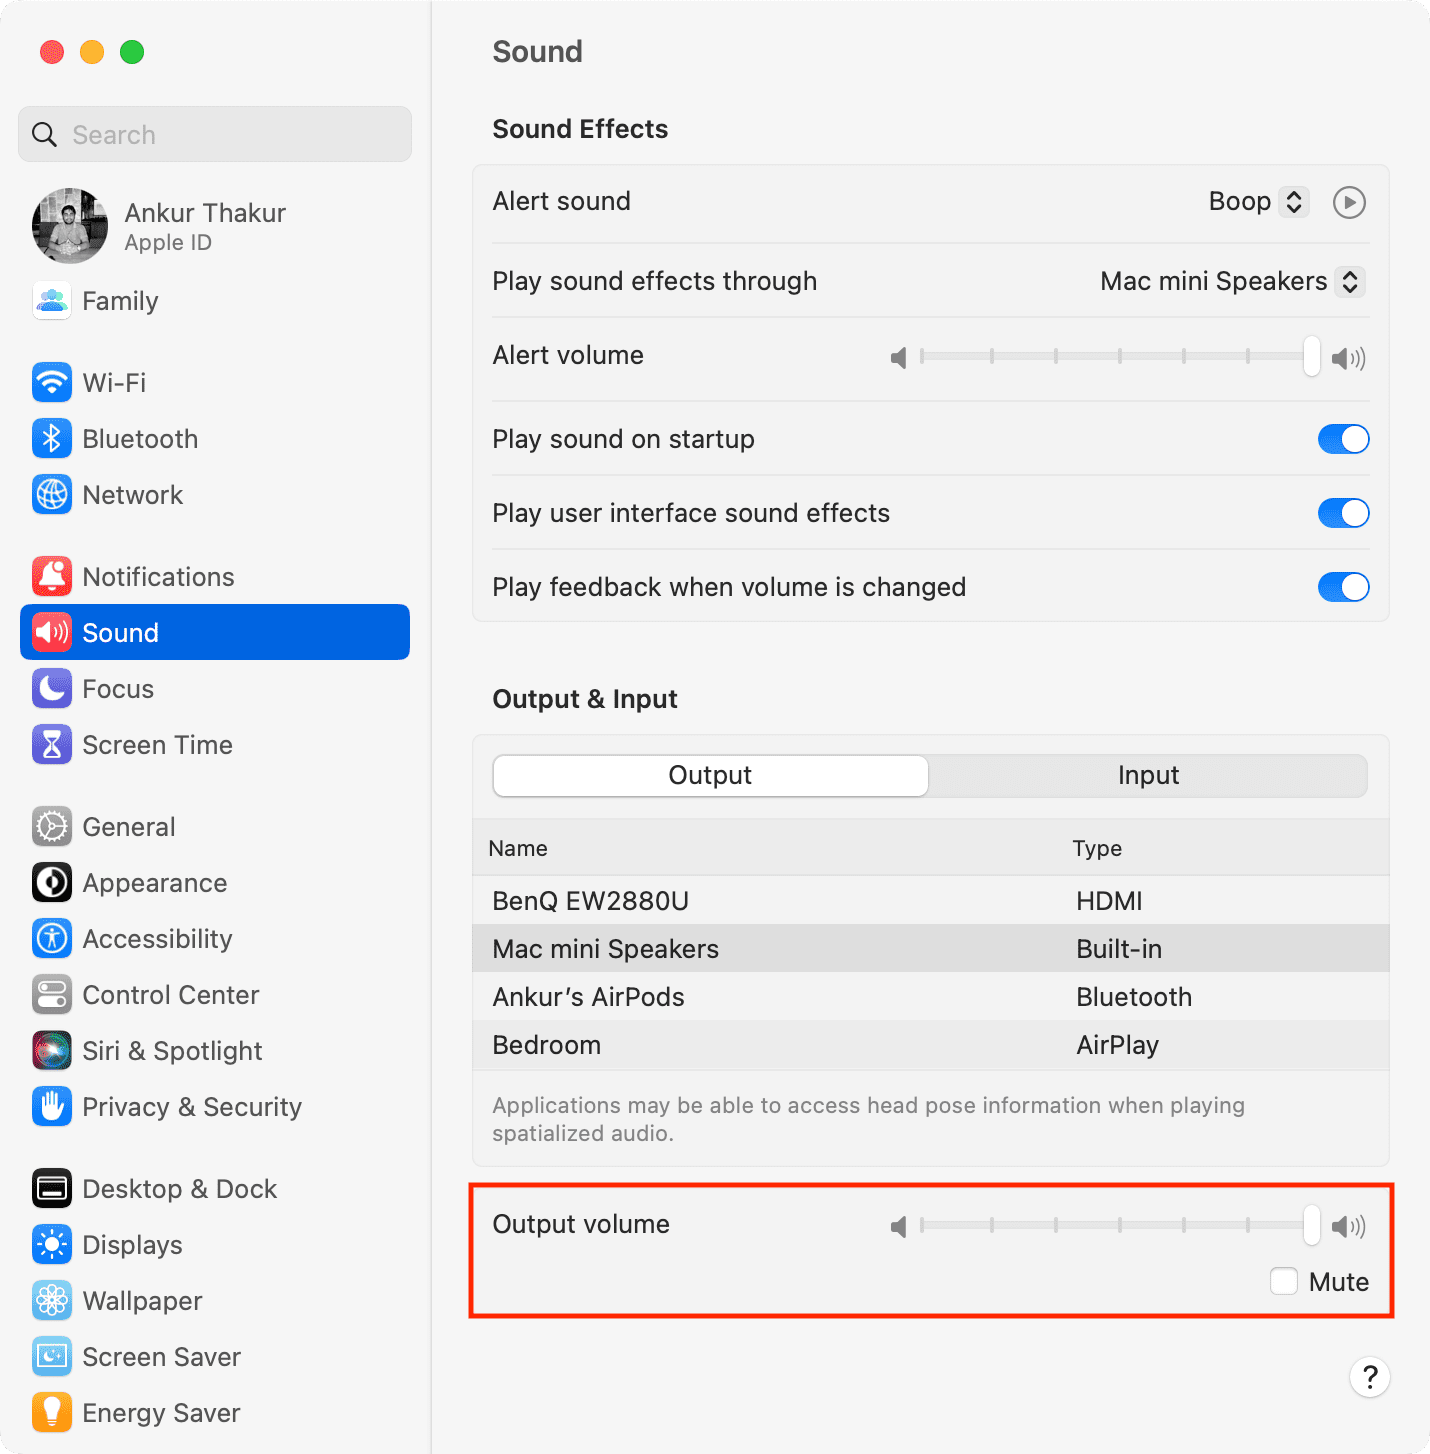
Note:
- If the volume slider is grayed out, select another speaker under the Output heading above. And after that, reselect the previous output speaker.
- You may not be able to change and control your Mac’s output volume if you have selected some external speaker like the connected third-party monitor’s speaker.
Check the sound output speaker
Every Mac, including the Mac mini and notebooks like the MacBook Pro and MacBook Air, has one or more built-in speakers. By default, the built-in speaker should be selected as the sound output.
If you’re not hearing notification sounds on your Mac, make sure the correct output channel is selected:
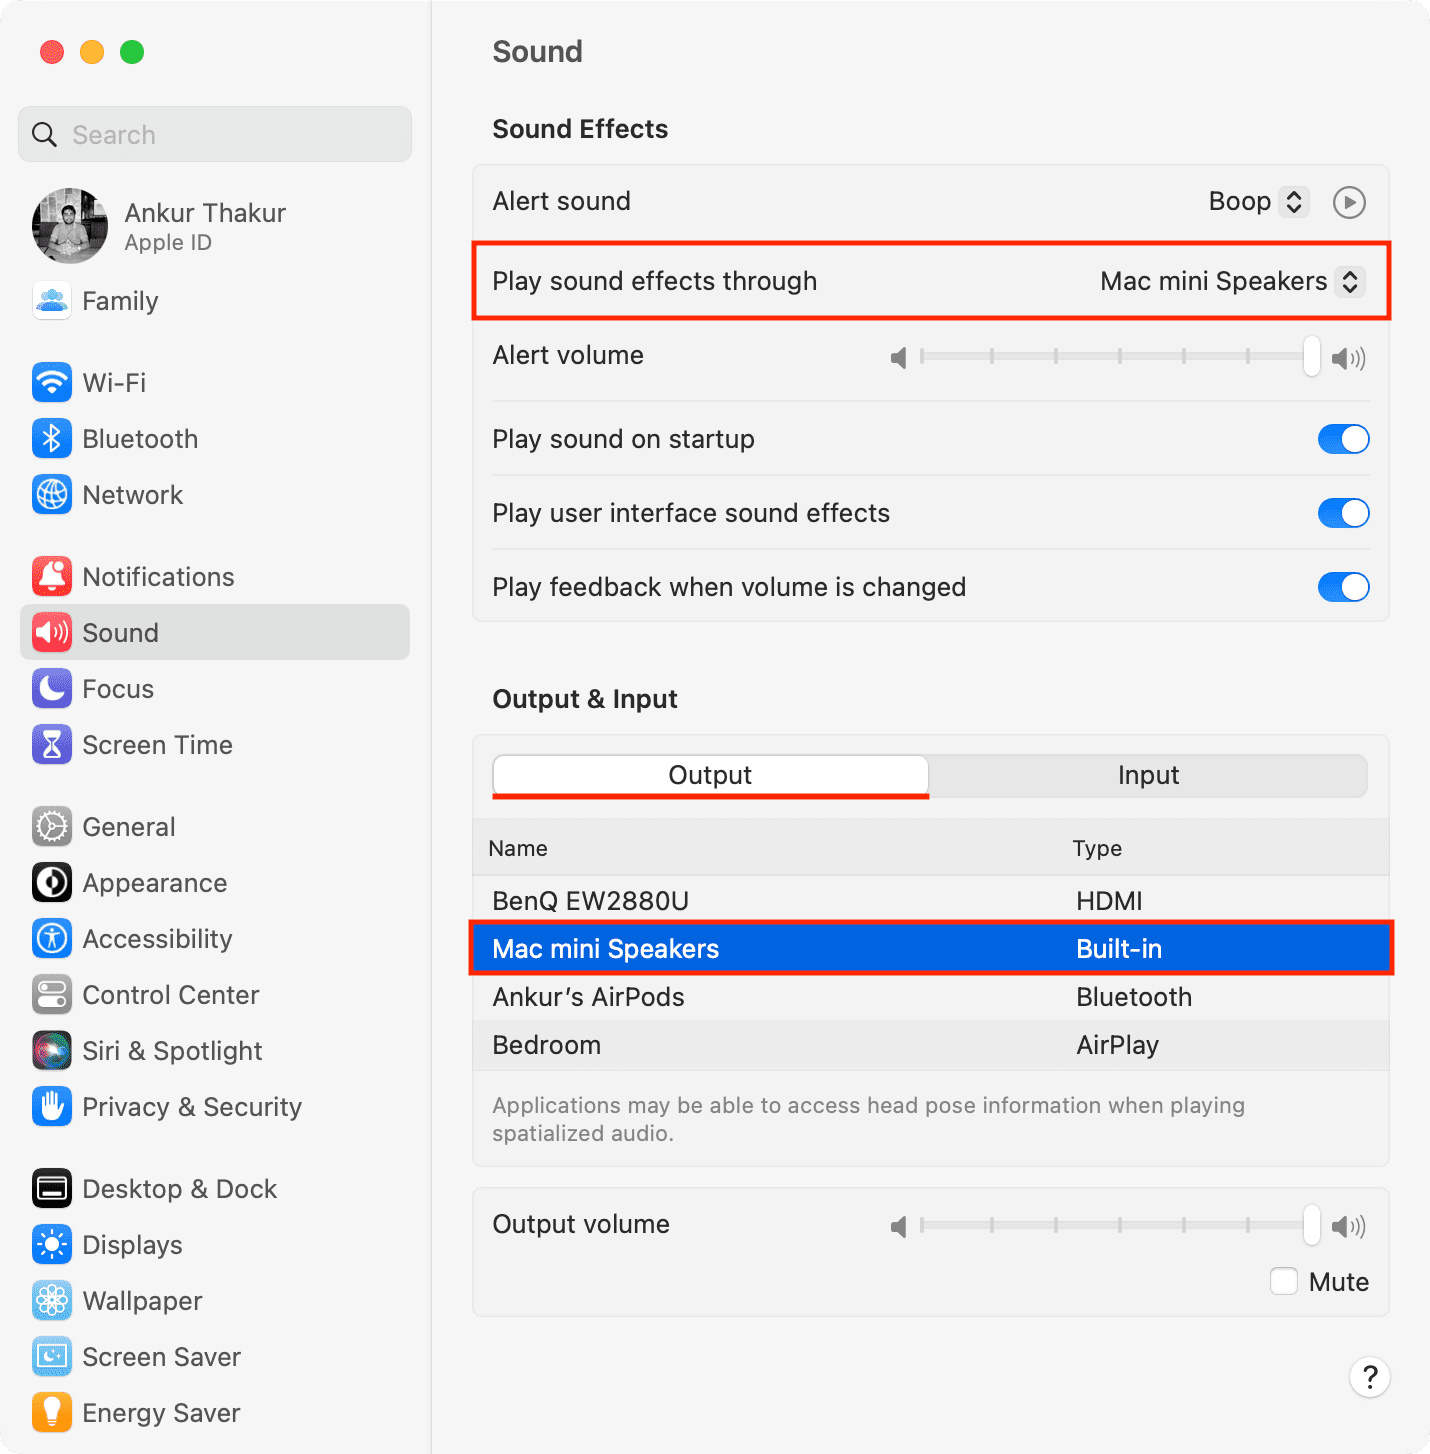
- Go to System Settings and click Sound.
- Click the drop-down menu next to ‘Play sound effects through‘ and select your Mac’s speaker or one connected to it that’s working properly.
- Next, select the built-in Mac speaker or other working speaker under the Output heading.
Restart your Mac
Your Mac may also fail to send new notifications due to temporary glitches. You can fix this by restarting your computer ( > Restart).
Update Mac apps
Are you getting notification banners and sound from most apps, except a few? In that case, update those misbehaving apps.
Delete and reinstall the app
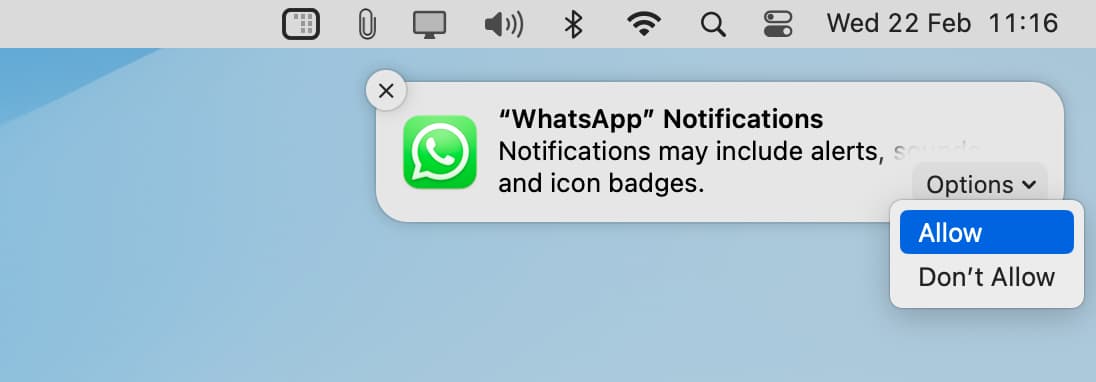
If updating doesn’t solve the problem, delete and reinstall the app.
Important: When you open the app for the first time, you will see a banner in the top right corner of your Mac’s screen asking to send notifications. Make sure you click Options > Allow.
Turn off Low Power Mode
In rare cases, you may not receive new notifications, or they may be delayed because your MacBook is in battery-saving mode. To solve this, turn off Low Power Mode on your Mac by going to System Settings > Battery.
More Mac notification tips: