In this tutorial, we will show you how to allow, block, customize, and turn off website notifications in popular browser apps like Safari, Chrome, and Firefox on your Mac.
These tips will be helpful if you’re getting too many notifications or not receiving alerts from sites that are important to you.
But before you do that, remember that not all websites are designed to send notifications. And ones that do have this feature will probably show you a banner to allow notifications when you visit them for the first time, after a few weeks, or after clearing all your web browser data.
Allow browser notifications
When you install a browser app like Chrome, Firefox, Brave, or Opera, you will get an alert in the top right corner of your Mac’s screen asking your permission to allow notifications from this app. Click Options to Allow (or block) alerts.

If you don’t get that automatic alert, visit a website like bennish.net, Slack, or something similar that can send notifications. Then, you may see the macOS notification asking your permission to send browser notifications.
- Visit bennish.net and click Authorize > Allow.
- Now, if you see the macOS notification for browser notification, click Options > Allow and confirm if prompted.
Manage browser notifications for a specific website
Once the browser app in question is permitted to send notifications, you can decide which websites can send you notifications and which cannot.
Allow notifications
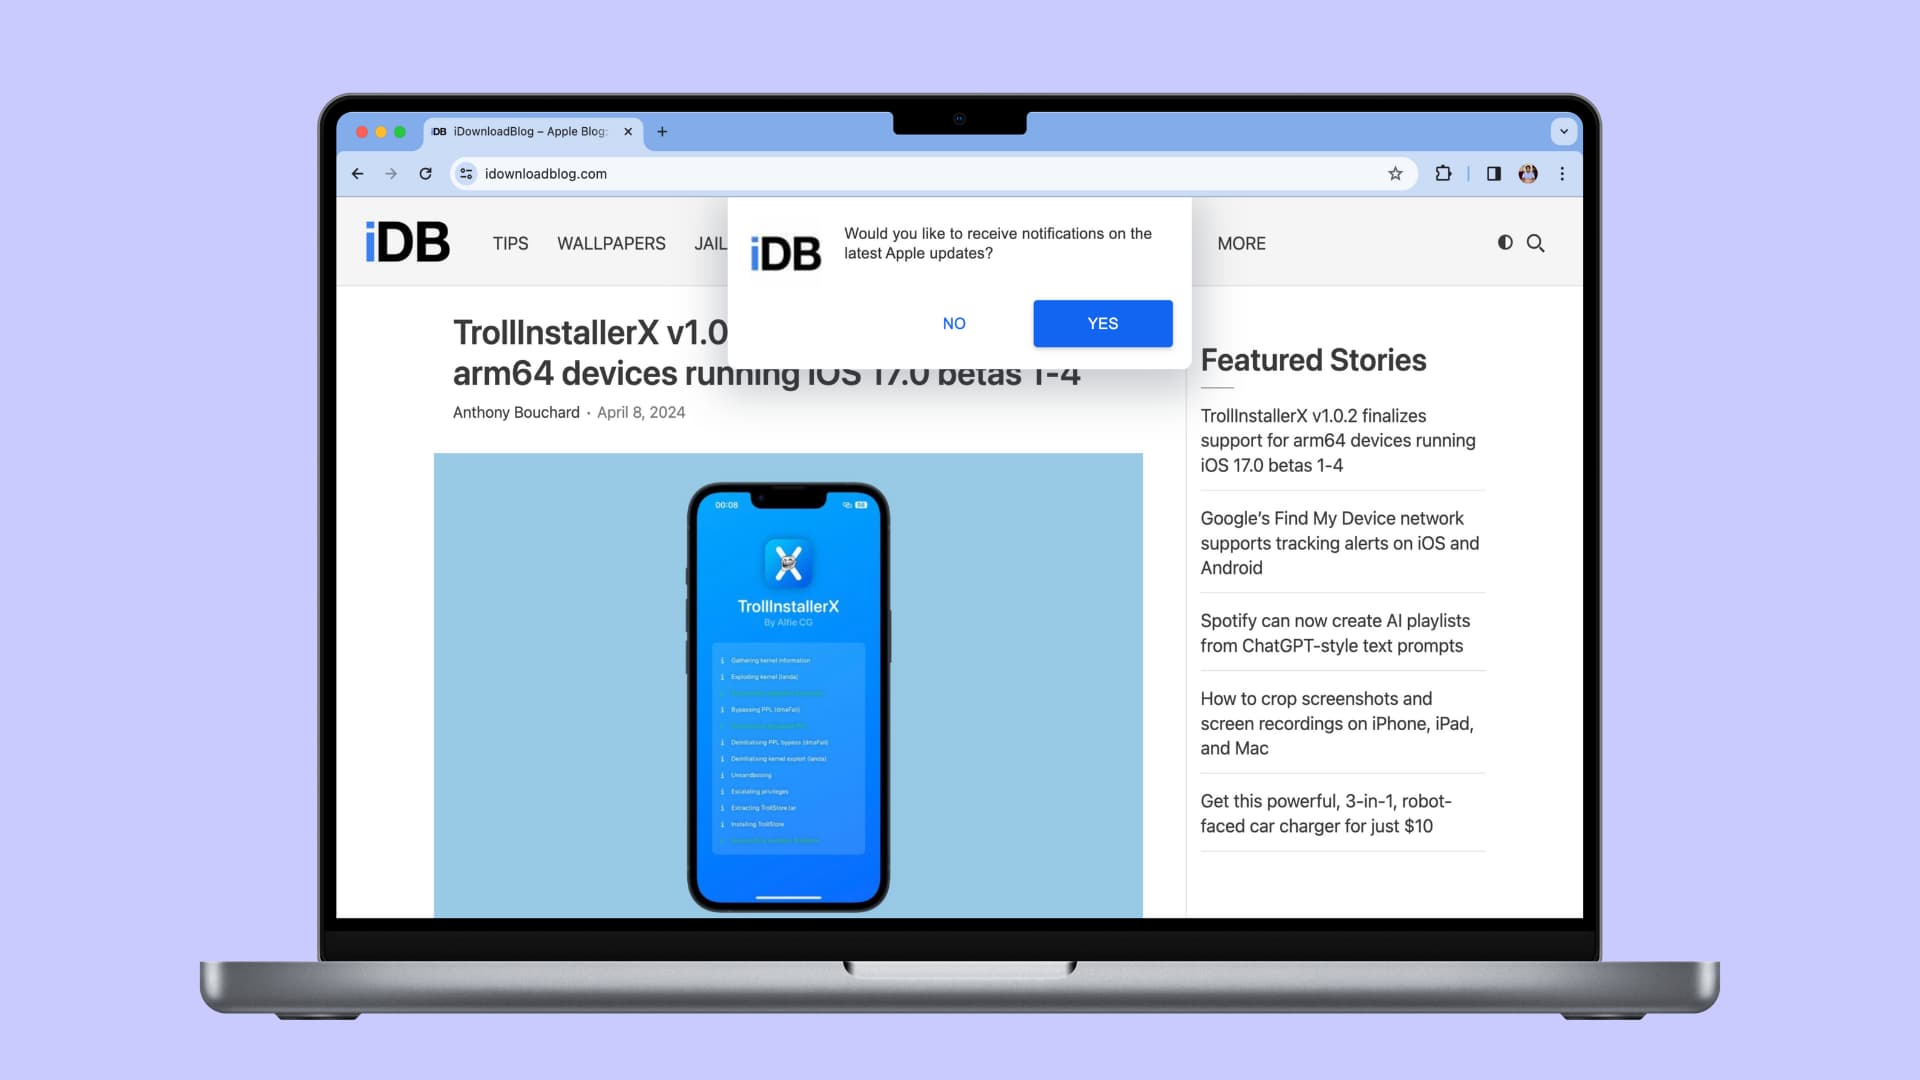
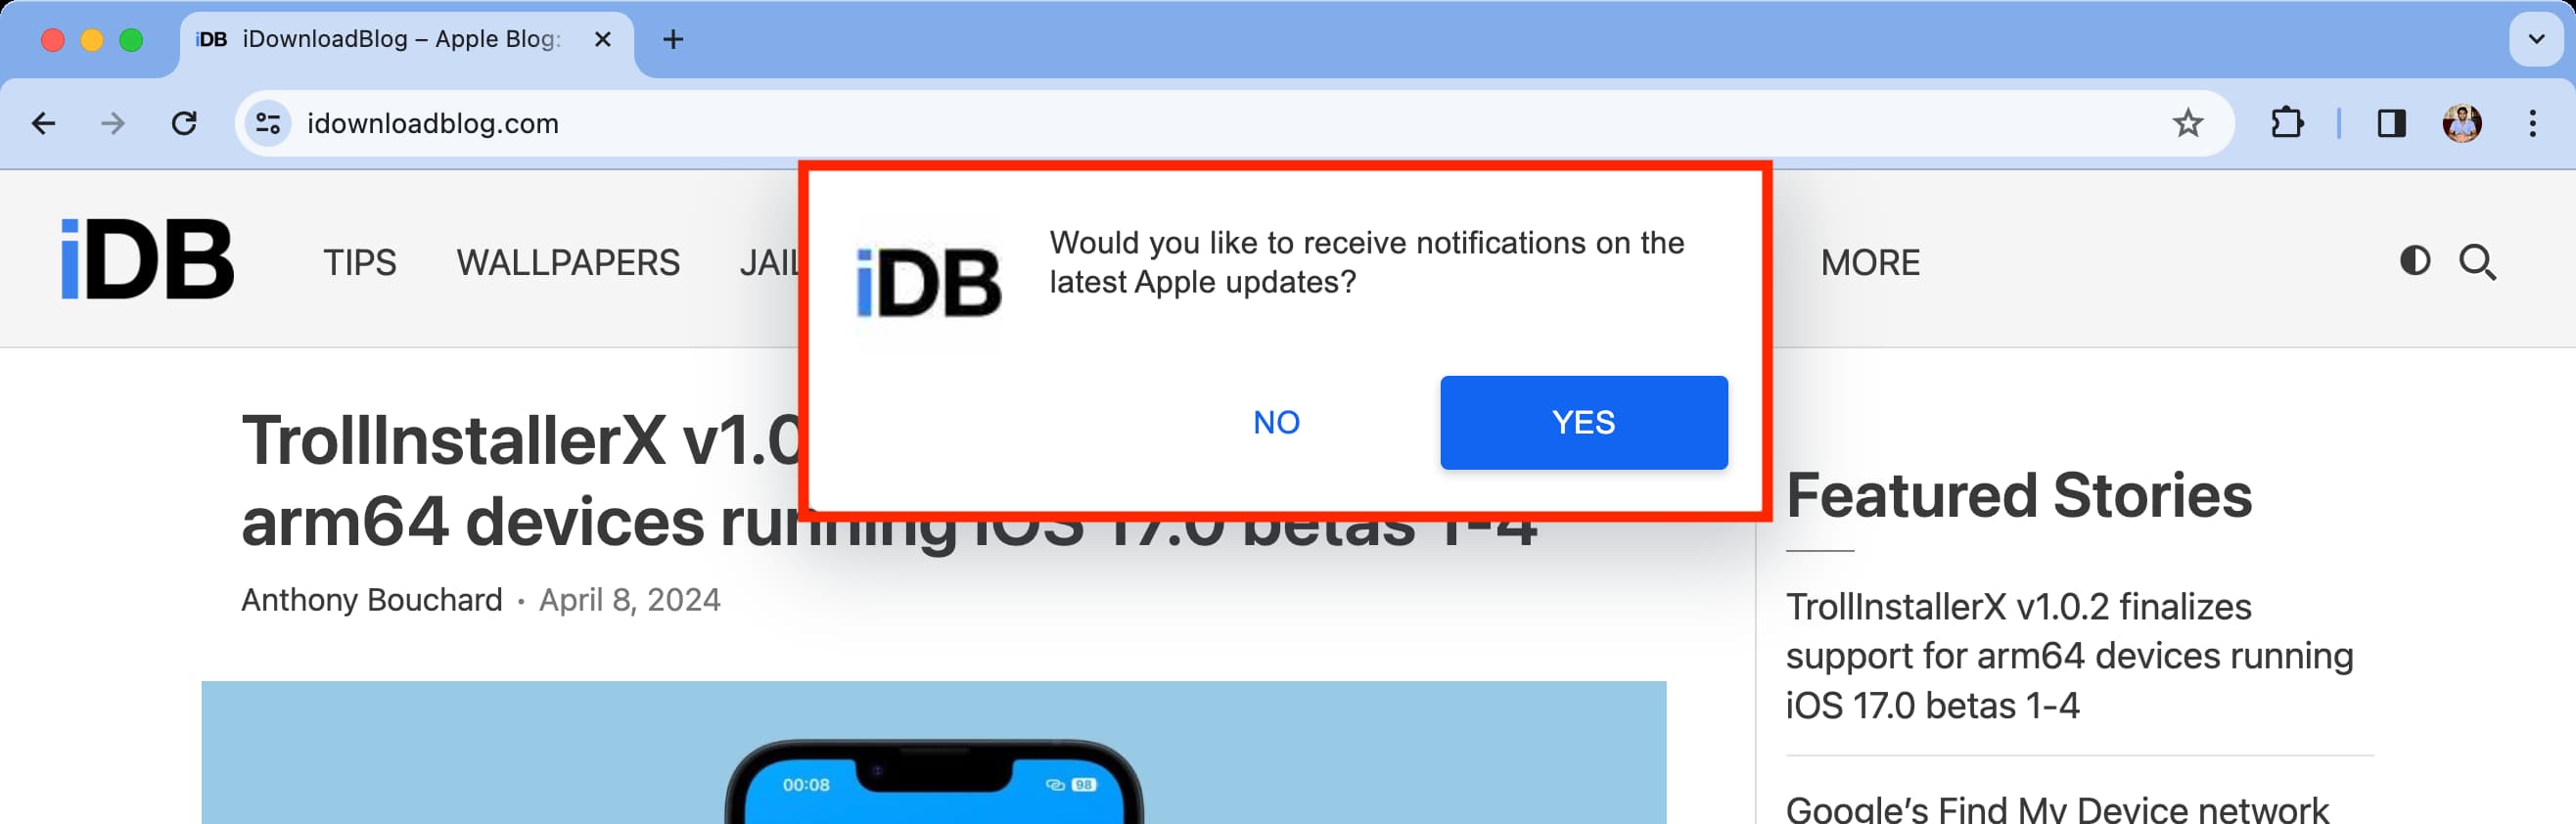
When you visit a website that is designed to send notifications, you will see a popup. Allow that and then confirm if prompted. Remember that websites use different popup styles.
Block notifications
You can prevent a website from sending notifications when it asks for the first time. If you have already allowed it, you can block it later by following these steps.
Safari
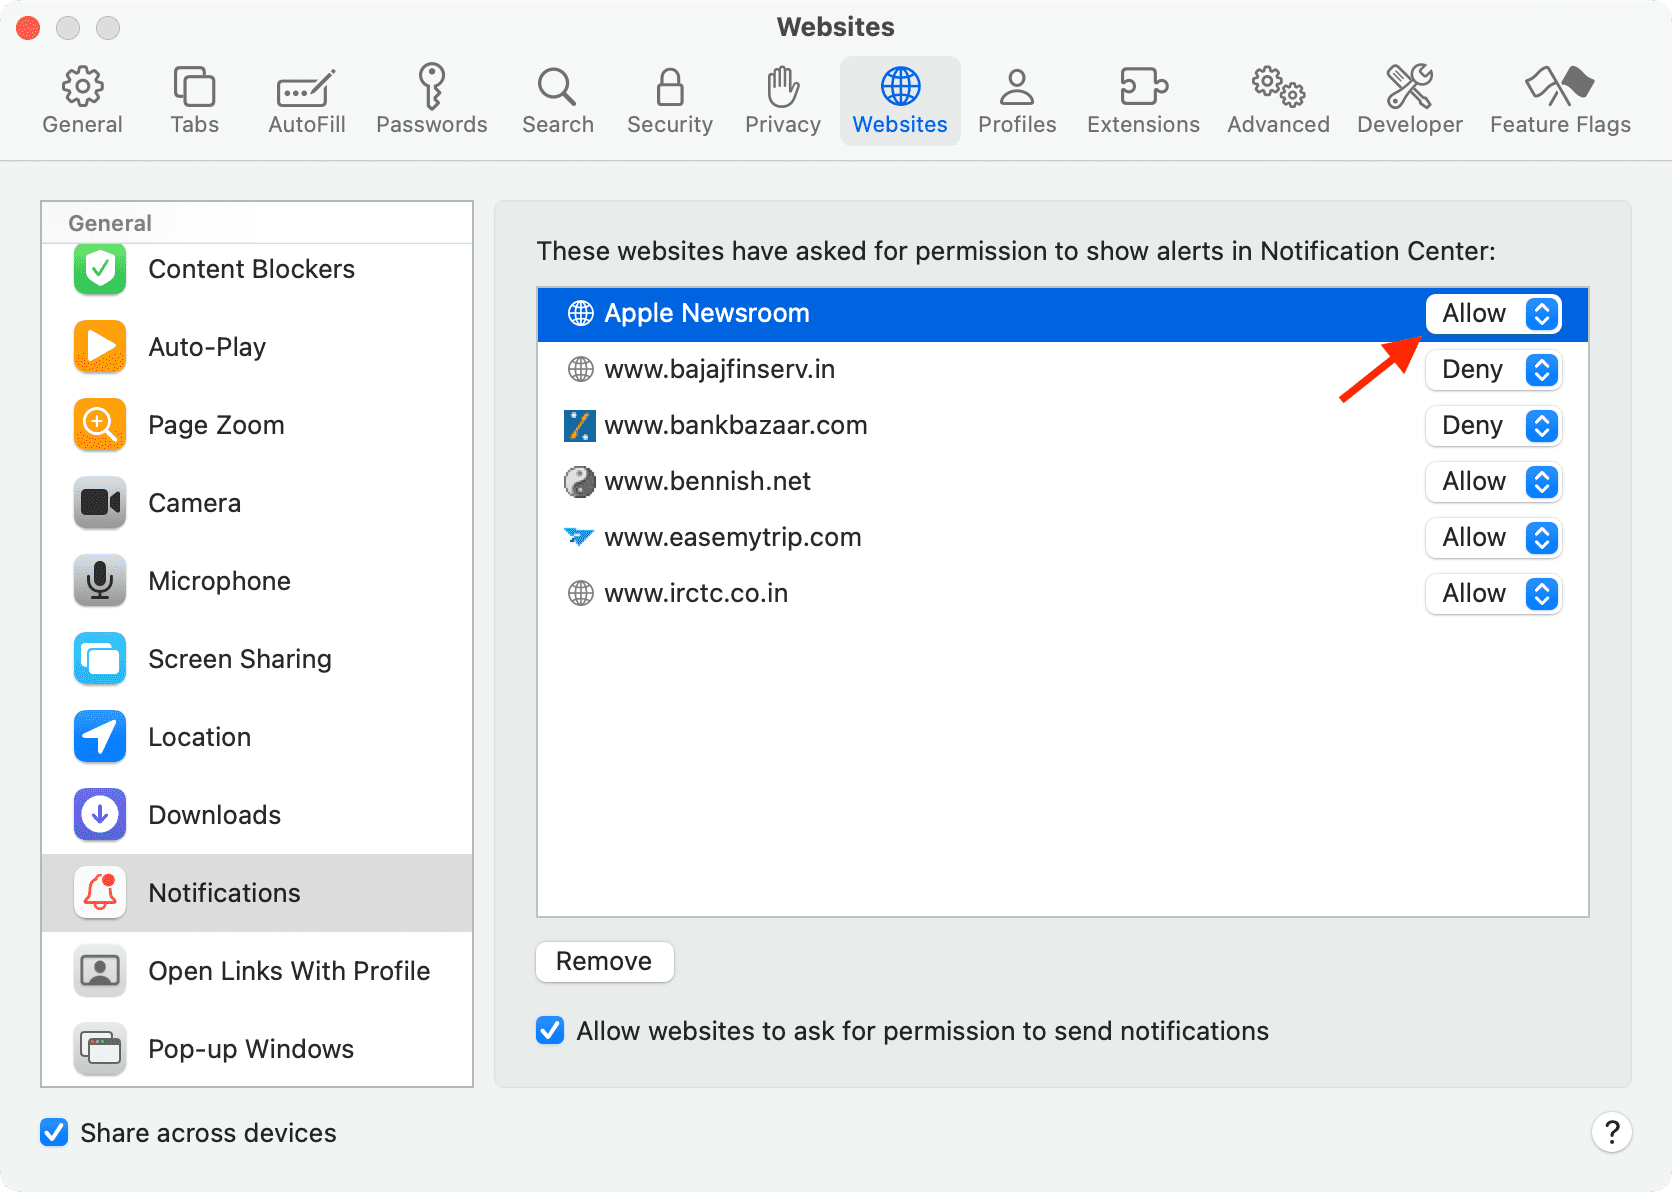
Open the app and click Safari > Settings from the top menu bar. Now, go to the Websites tab and select Notifications. Here, you’ll see all the websites that you have allowed or blocked from sending notifications. Click the dropdown menu next to an allowed site to block it.
Chrome
Visit the website that sends you notifications and click the settings icon from the top address bar. Now, turn off the Notifications switch. If you don’t see it, that means you did not permit this site to send notifications, or it does not have that feature.

Additionally, you can go to chrome://settings/content/notifications or click Chrome > Settings from the top menu bar and then go to Privacy and security > Site settings > Notifications. From here, click the three dots icon next to a website under the “Allowed to send notifications” and block it.

Firefox
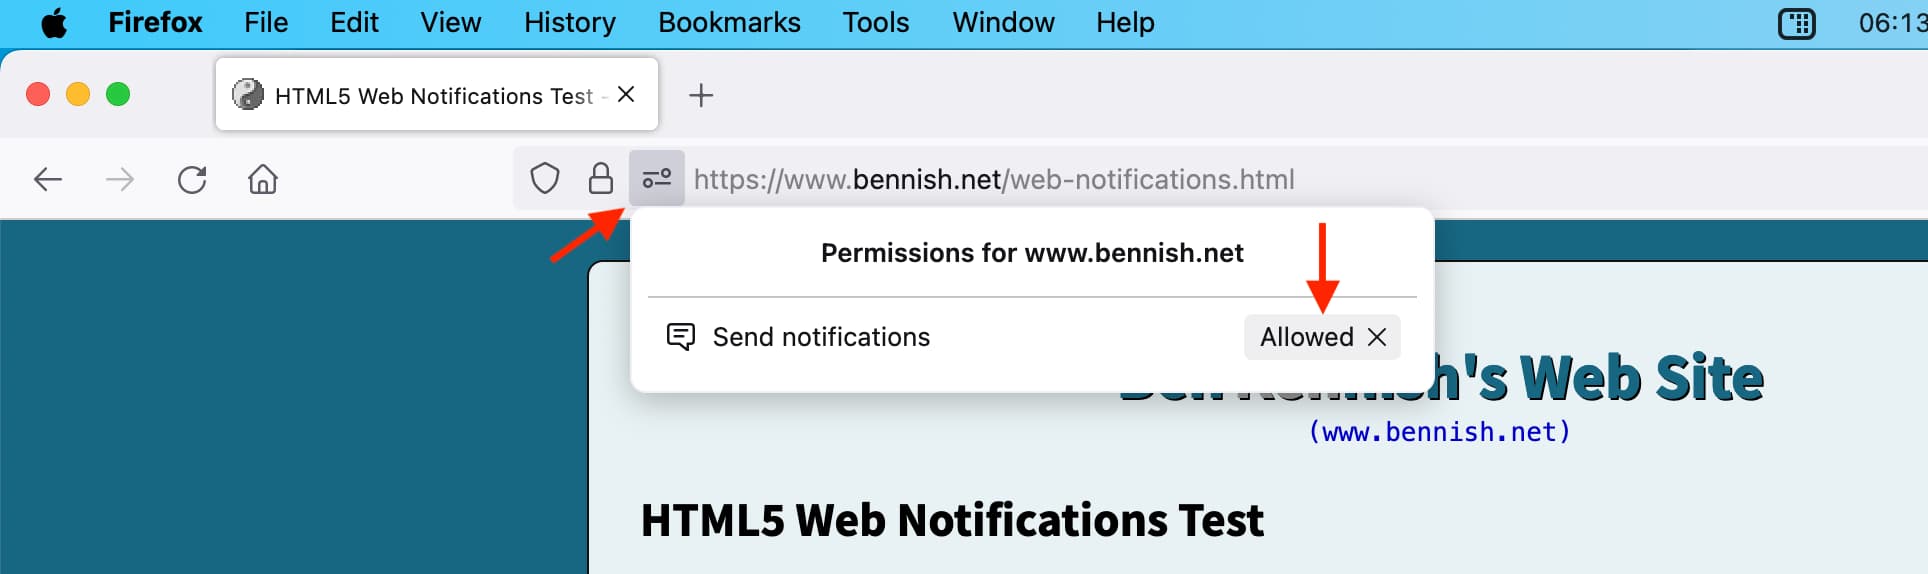
Visit the website that sends you notifications. Now, click the settings icon and hit Allowed next to Send notifications to block it. Don’t forget to reload the page for changes to take effect.
In addition to that, you can click Firefox > Settings from the top menu bar. Then select Privacy & Security and scroll down to the Permissions heading. From here, click Settings next to Notifications to see all allowed or blocked sites. Click the dropdown menu next to a site listed here to block (or allow) notification privileges for it.

Customize browser app notifications
A third-party web browser does not offer many per-website notification customization options. You are pretty much limited to allowing or blocking alerts from that site.
However, macOS offers handy notification settings for web browser apps. Furthermore, when you allow a website to send you notifications in Safari, macOS treats that website as an app in its notification settings. So, you can customize that website’s notifications as if it were an app.
Here’s how to mute, change style, block previews, and do other personalizations for your web browser notifications on Mac:
1) Open System Settings and click Notifications.
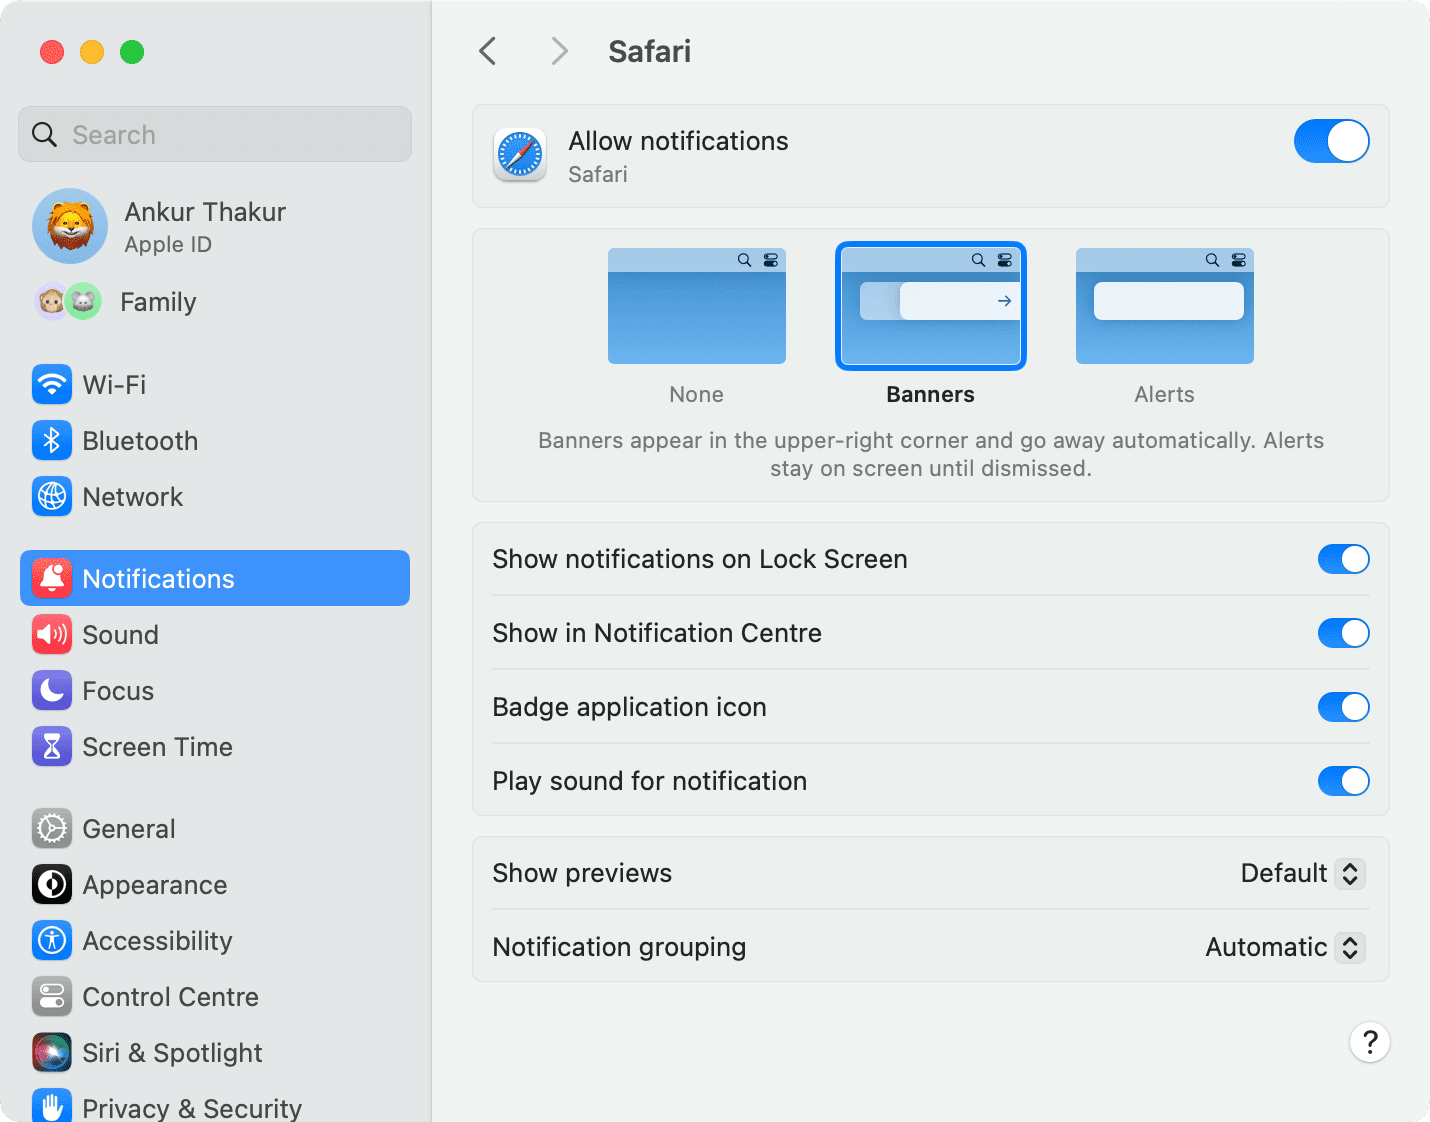
2) You will see your browser apps like Safari, Chrome, Firefox, etc. Additionally, as mentioned, websites that are permitted to alert you in Safari may also be listed here. Click a browser app or Safari website.

3) Now, you can customize it like you would with a regular Mac app.
You can change the notification style, block it from appearing on the locked Mac screen, prevent it from stacking in your Notification Center, turn off the red number badge on the app’s icon in Launchpad and Dock, turn off the notification sound, display or hide the preview, and decide a grouping style.
Turn off all browser notifications
Go to Mac’s System Settings > Notifications and select the browser app. Now, turn off the Allow notifications switch from the top. After this, you won’t receive notifications from this browser at all. It will even block alerts from websites you had previously allowed to send notifications.
Check out next: Not getting app notifications, banners, or sound on Mac? Here’s how to fix it