Go through these tips to remove unnecessary files and reclaim lots of storage on your Mac desktop or MacBook’s internal SSD if you’re running out of space.
1. Find the largest files and delete unnecessary ones
Over time, we download or transfer countless large files on our Mac and forget about them. This includes video files, DMG app files, installer packages (.pkg), ZIP, RAR, music, documents, and much more. Using the following steps, you can identify the largest files on your Mac across all categories and delete the ones you don’t need.
- Open System Settings and go to General > Storage.
- Click the info button ⓘ next to Documents.
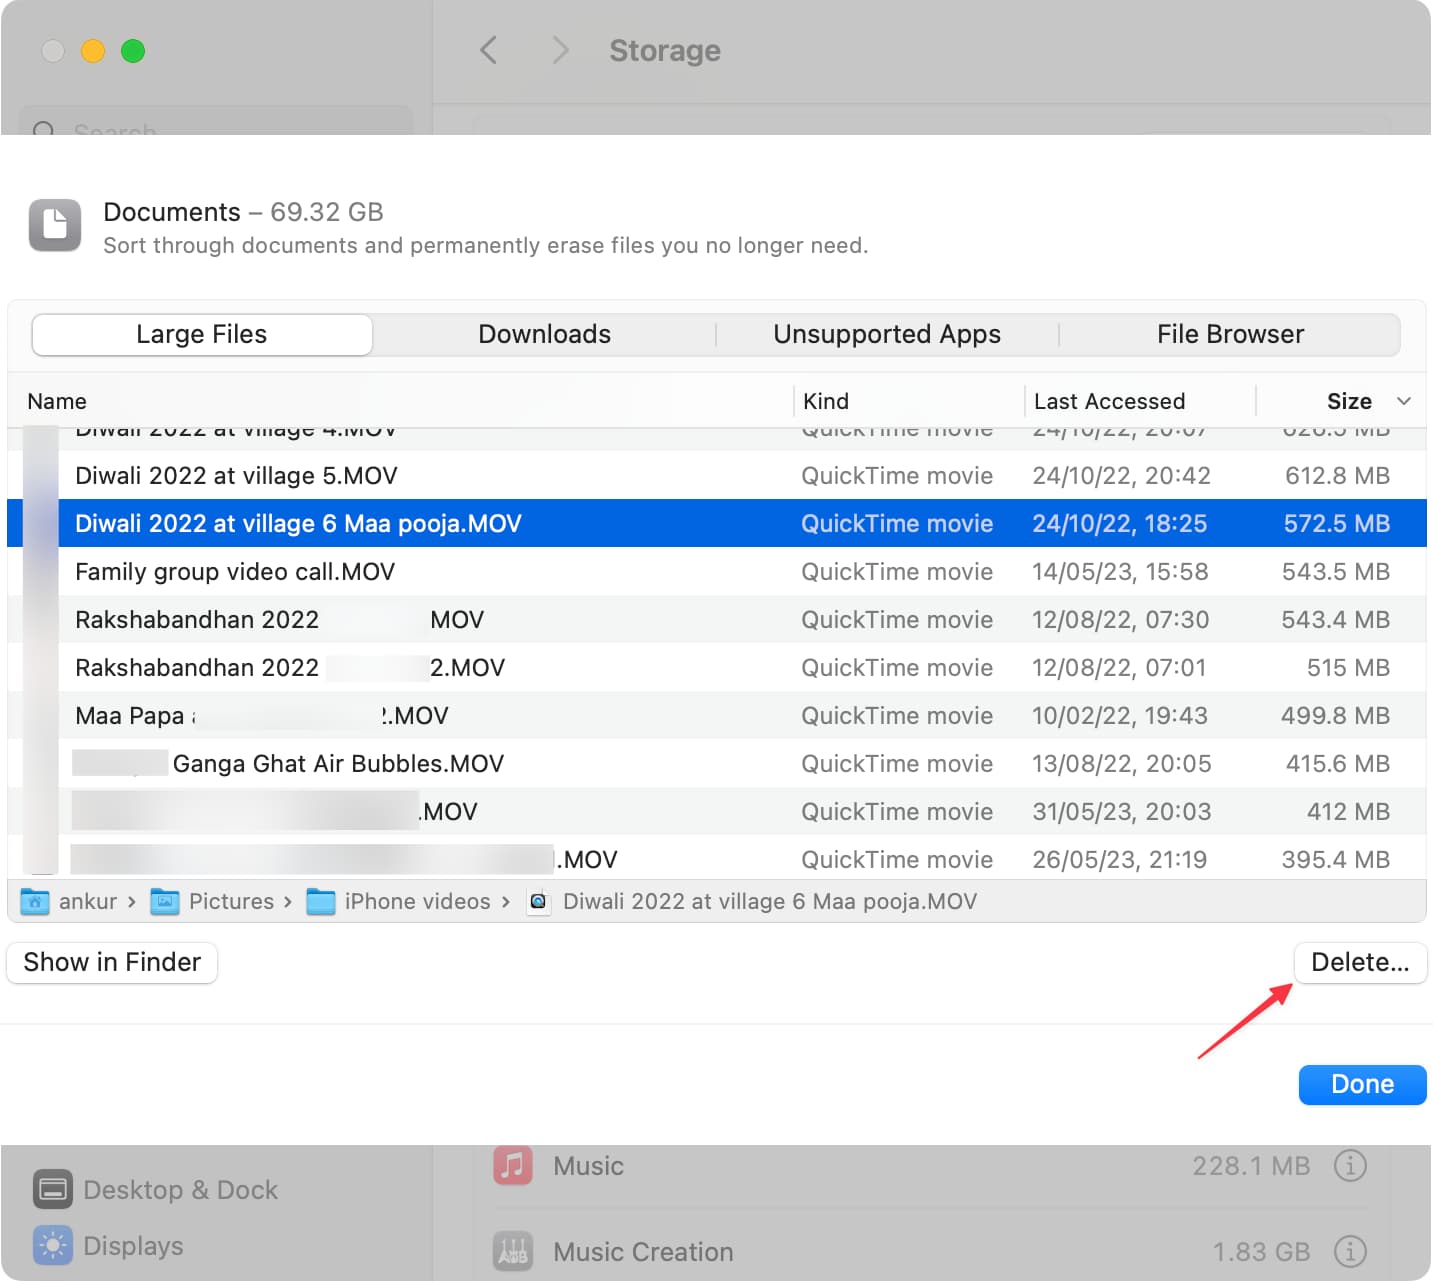
- Under Large Files, you’ll see the files listed in order, with the biggest ones at the top.
- To preview a file, click to select it and press the return/enter key. At the bottom, you’ll also see the location where the file is saved. To view the file in Finder, click Show in Finder.
- Once you have figured out that you don’t need a file, select it and click Delete. To delete multiple files together, press the Command key, select the files, and click Delete.
Tip: When you’re in a Finder window with lots of files, click the Size tab to arrange them according to their size. From there, you can easily see the large files and move them to Trash.
2. Delete unused Mac apps
Applications are another significant occupier of your Mac’s local storage. Unless you’re extremely tidy with your app management, chances are there are multiple apps installed on your Mac that you rarely use. To reclaim substantial space, cleanly uninstall such apps.
3. Empty the Trash and set it to delete automatically
When you delete a file, it is removed from that location but sits inside your Mac’s Trash, thus continuing to fill space. To clear this, right-click or Control-click on the Trash can icon in Mac’s Dock and choose Empty Trash.

If you like, you can enable your Mac to automatically delete the files in the Trash that have been sitting there for 30 days. To do this, go to System Settings > General > Storage and click Turn On next to Empty Trash automatically.
Pro Tip: How to skip the Trash and delete files on Mac immediately
4. Update your Mac (very important)
Your Mac automatically downloads new macOS updates. These update files are huge and may take several GBs.
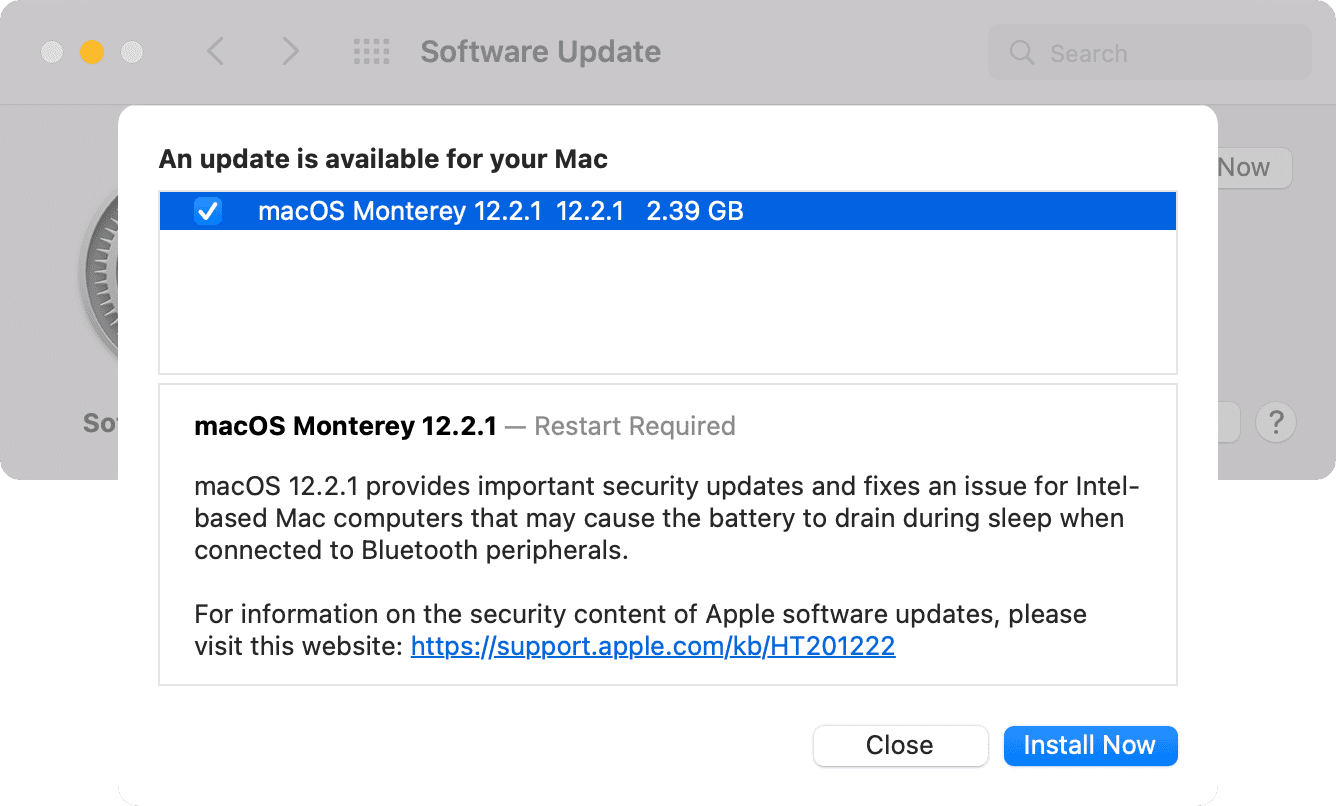
If you’re in dire need of some free space, go to System Settings > General > Software Update. If a new macOS update file is already downloaded, click “Install Now” (your Mac will remain unusable during this time).
On older versions of macOS, if you don’t want to install the update, select the file and press the delete key on your Mac (screenshot below).
5. Delete iPhone, iPad, and iPod touch backups
If you back up your iOS devices to your Mac, they take a significant portion of your Mac’s internal drive. To get rid of these and free your Mac’s local space, learn how to delete old and unused iPhone and iPad backups.
6. Delete cache on Mac
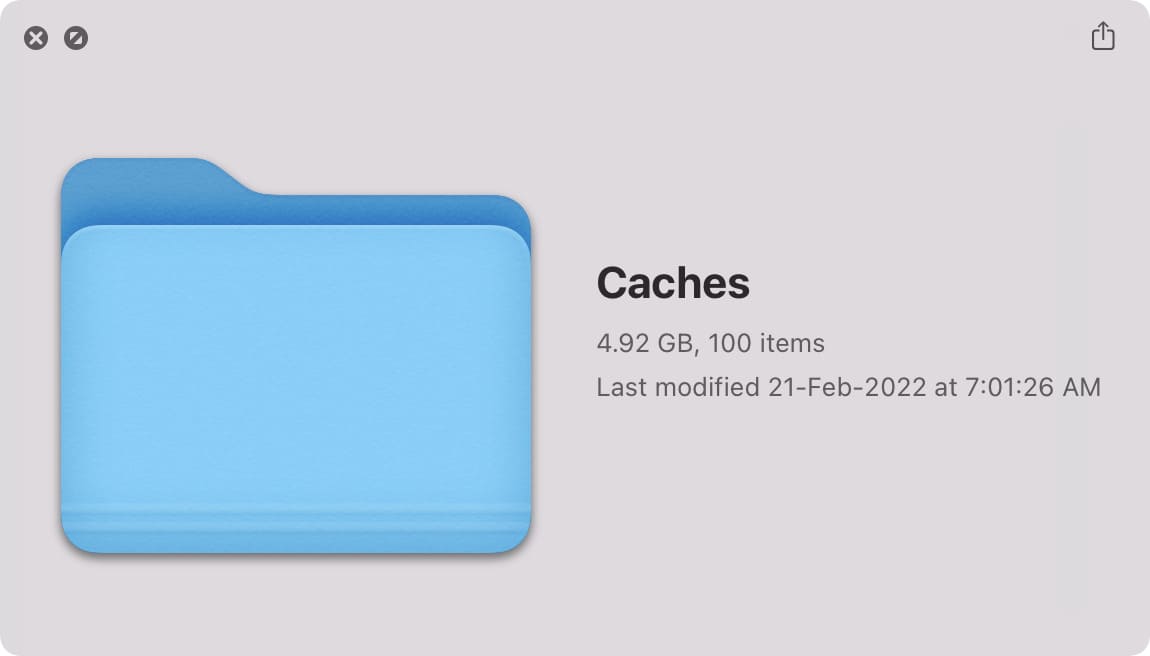
Just before writing this guide, I checked the size of my Mac’s cache folder, and it’s 4.9 GB!
If you want to free up space on your Mac right away, clear the cache to reclaim substantial space. However, in the course of using your Mac, these files will be created once again.
Note: After you clear the caches, you’ll notice that many sites and apps have to re-download some files. Plus, you may be logged out of several services. If you notice something isn’t working properly, restart your Mac, and macOS will automatically fix the problem.
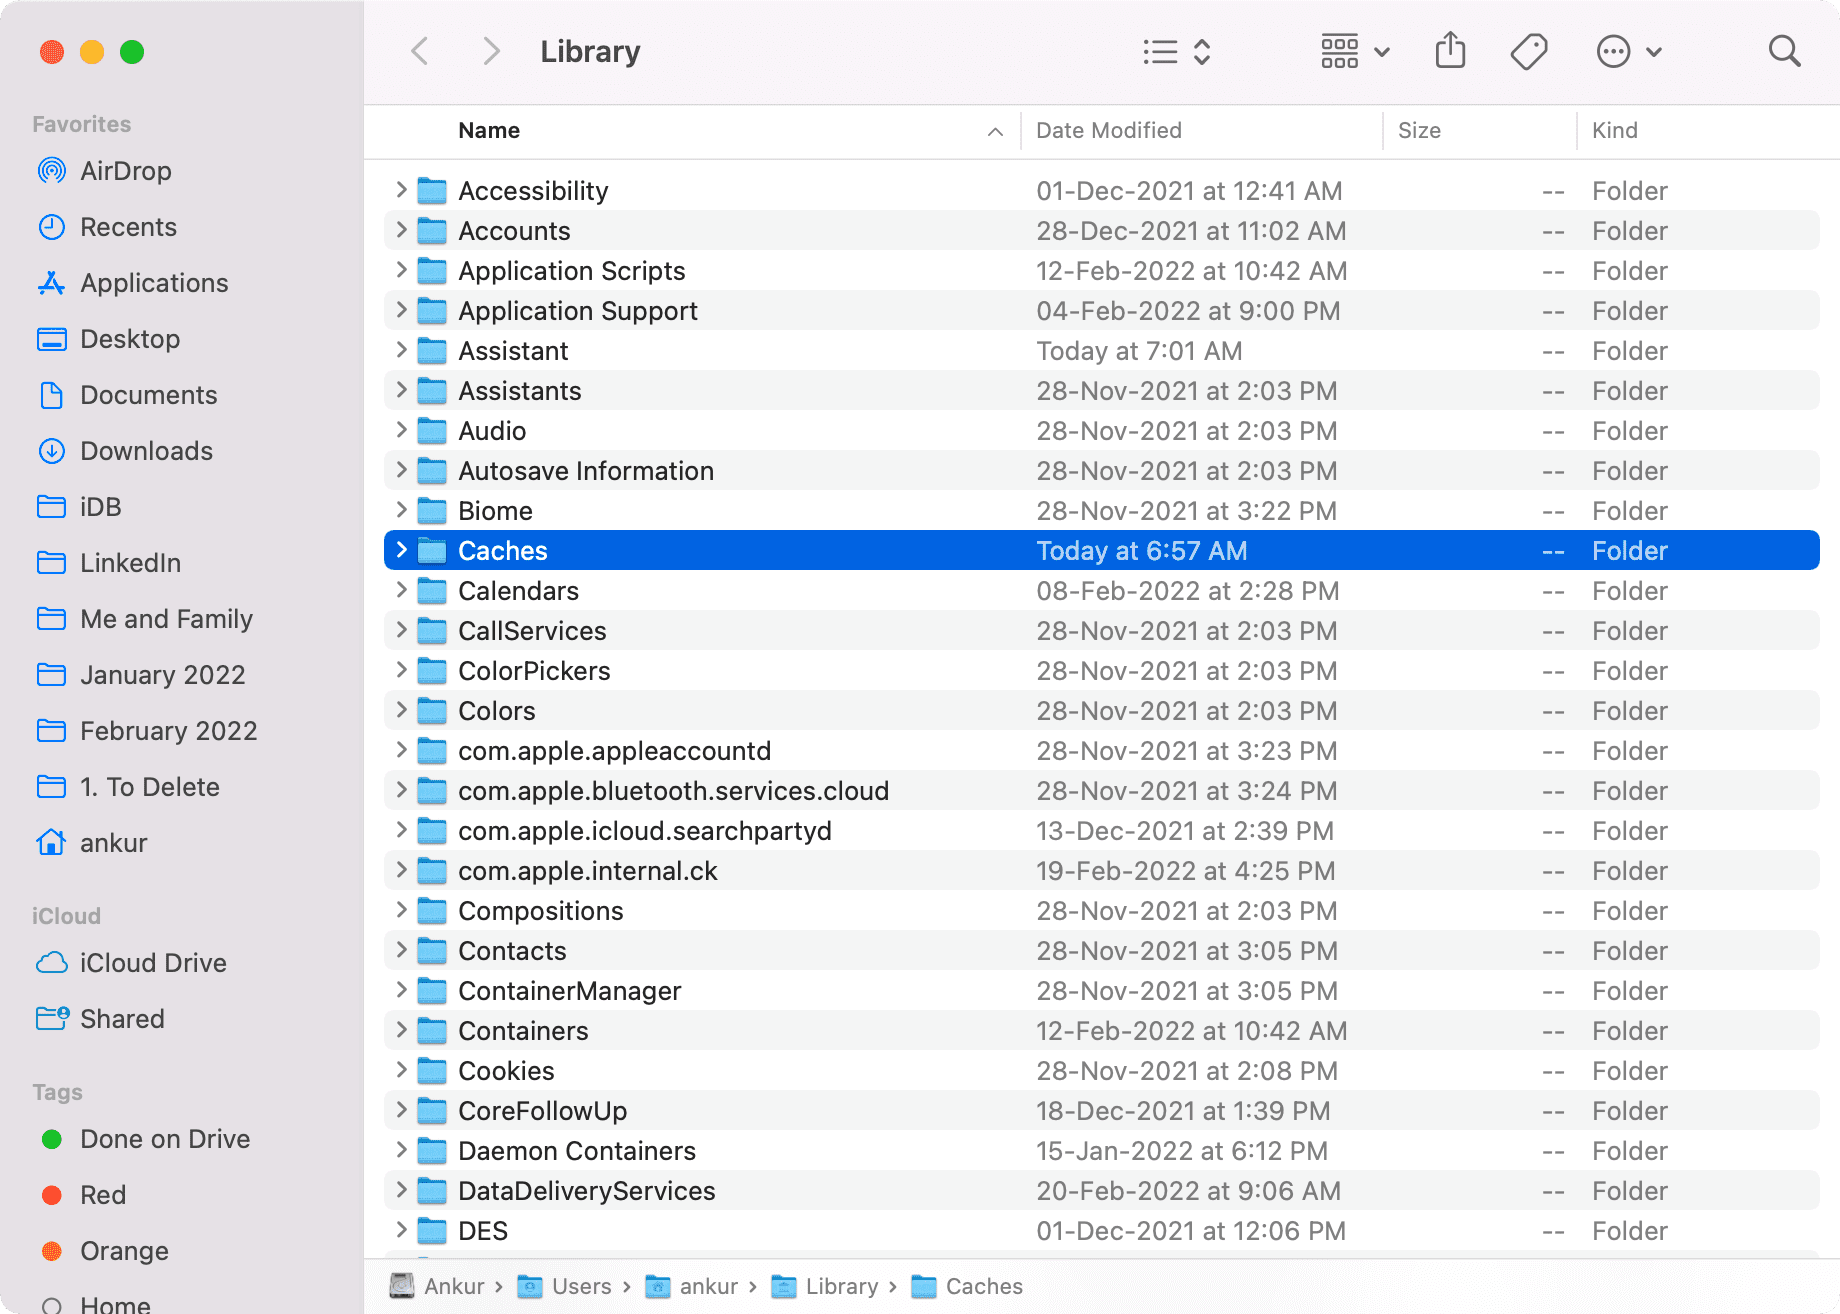
- Open Finder.
- Click Go from the top menu bar, hold the Option key, and select Library.
- Select the Caches folder and press the Space Bar to see its size.
- Open the Caches folder and delete folders and files from here. You can also select everything and move to Trash if you want to go extreme.
- First, enable developer mode from Safari settings.
- Then, you can quickly clear its cache by pressing Command + Option + E or clicking Develop > Empty Caches. If you’ve created multiple profiles, it will say Empty Caches for All Profiles.

8. Clear temporary files, such as browser data
We spend a lot of time in our browser of choice, like Safari, Chrome, Firefox, Edge, etc. To free space, delete the browser files like caches, cookies, etc.
9. Remove duplicates from the macOS Photos app and clear its Trash
The built-in Photos app is another app that consumes significant space on your Mac. You can use an app like Duplicate Cleaner to eliminate duplicate photos and videos inside the Photos app.
Important: Photos app has its own separate Trash/Recently Deleted section. Once you delete unwanted images and videos inside the Photos app, click Recently Deleted > Delete All > Delete.
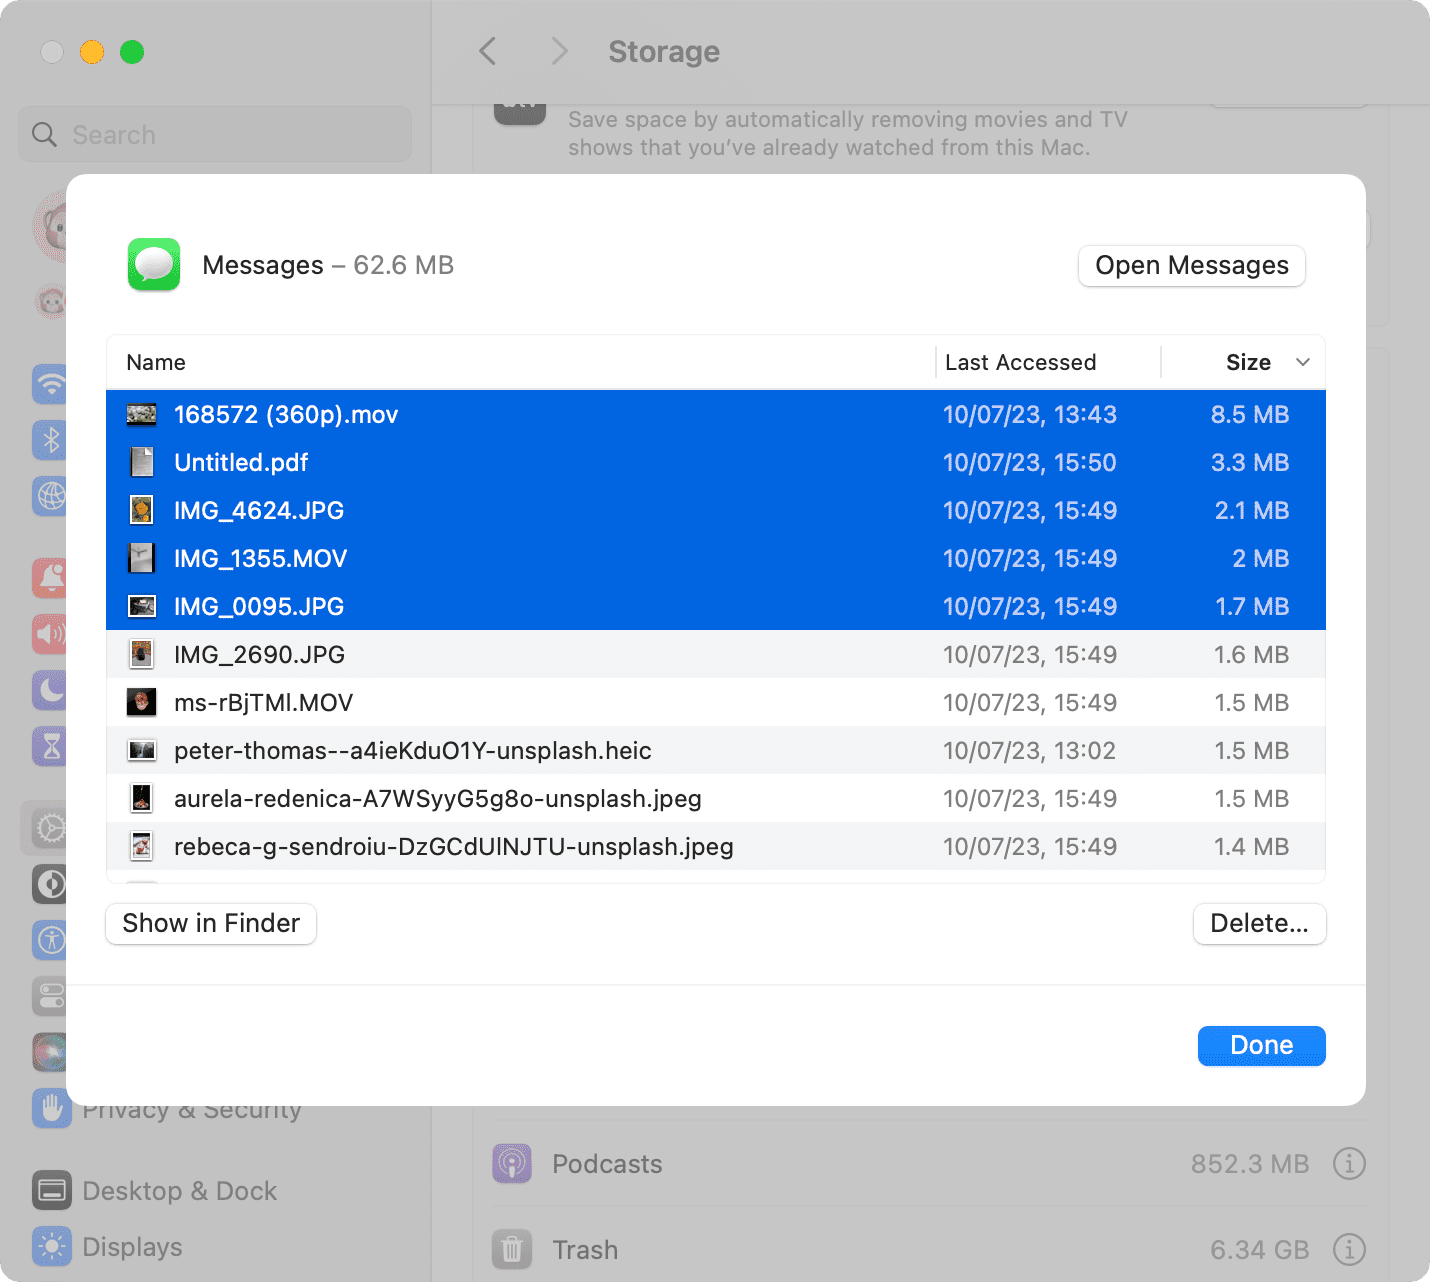
10. Delete attachments from Mac’s Messages app
You’ll be surprised to see a lot of attachments from your Mac’s Messages app taking up space. You can delete them effortlessly from the Messages app or go to System Settings > General > Storage and hit the info icon ⓘ next to Messages. From here, you can erase individual or all attachments.
11. Clean files from the Mail app
Just like Messages, your Mail app also has tons of files that you might not need on your Mac. Follow this guide to delete them.
Tip: To remove junk email, open the Mail app and press Command + Option + J or click Mailbox > Erase Junk Mail.
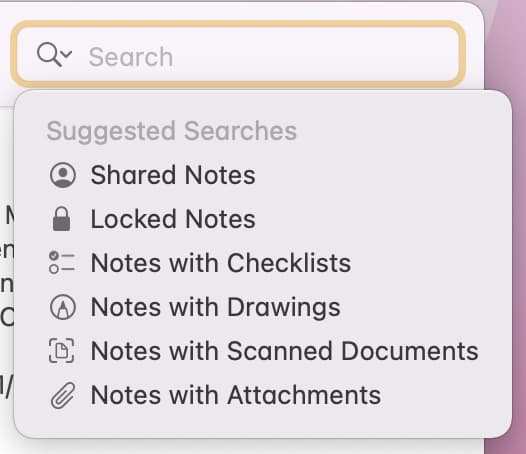
12. Delete sketches and attachments from the Apple Notes app
The sketches you create in the Notes app on your iPhone and iPad sync to your Mac. Plus, notes with image attachments might take considerable space on your Mac and iCloud.
To free space, locate such notes by clicking the search bar and deleting the unnecessary ones. Remember that what you delete here will be removed from all your other Apple devices and iCloud.
13. Remove downloaded Voice Memos
If you don’t care about voice memos on your Mac, go to System Settings > Apple Account > iCloud > See All and turn off Voice Memos to prevent new iPhone and iPad voice recordings from syncing to it and occupying space.
14. Delete iMovie and GarageBand projects
In case you have random, finished, or unfinished iMovie or GarageBand projects that you no longer need, open these apps and delete them. Doing this will free up a significant amount of space on your Mac.
15. Delete Mac screenshots and screen recordings
If you take lots of screenshots and screen recordings on your Mac, it might be cluttering your desktop and taking up space. So, here’s a tip to delete all of them at once.
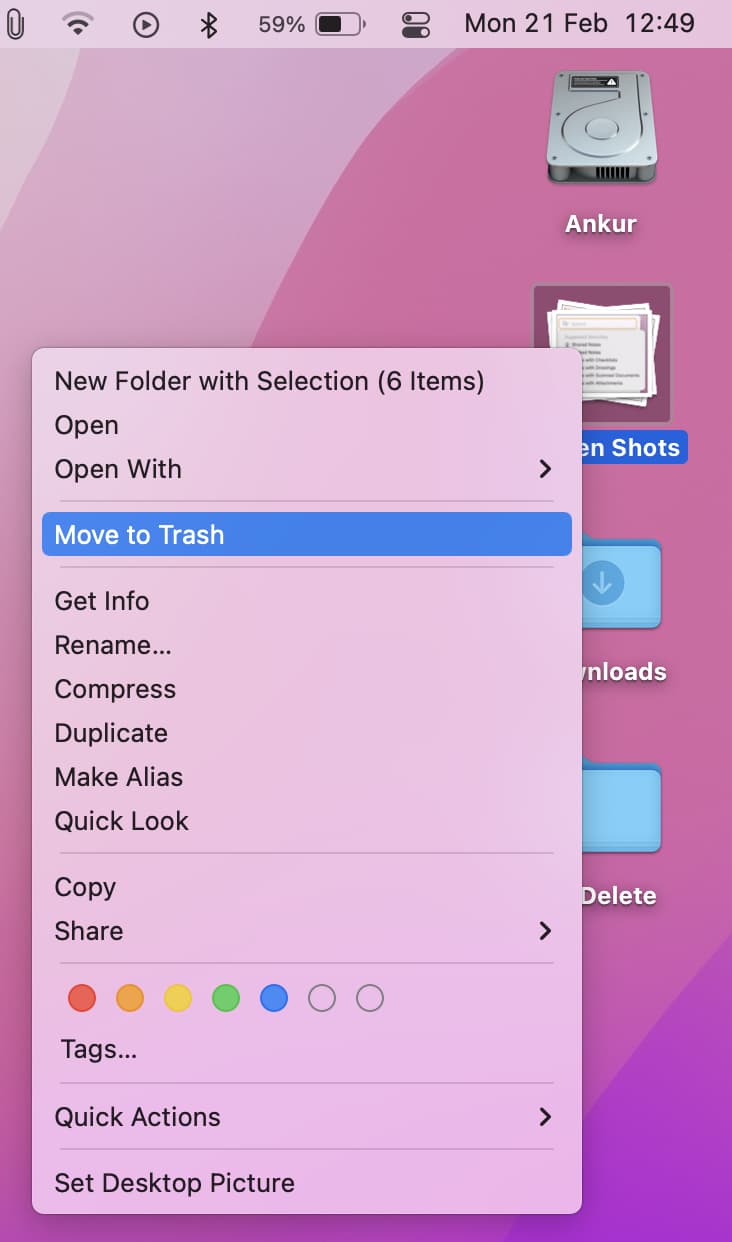
- Right-click on Mac’s desktop and choose Use Stacks. This will put all your screenshots in one bundle. Screen recordings are bundled in the Movies stack.
- Place the mouse pointer near this bundle and drag it to select it.
- Right-click and choose Move to Trash to delete all Mac screenshots at once! Similarly, click the Movies stack to make sure it only has screen recordings, and then delete this stack to get rid of all of them at once.
Note that if you have changed the location of your Mac’s screenshots, they are in that folder. So, follow the usual steps to delete them.
Tip: How to quickly find ALL screenshots on your Mac
16. Take care of the Downloads folder
Your Mac’s Downloads folder is the default home for files and attachments you download using Safari, Chrome, Slack, and other apps. With time, it accumulates tons of things you don’t need. So, look through and clean your Mac’s Downloads folder to free space.
17. Remove duplicate files from your Mac
Duplicate files on Mac are a major nuisance because they unnecessarily take up extra space. Learn how to get rid of this problem to reclaim your precious internal storage.
18. Remove downloaded music, movies, and TV shows
Open the respective media apps and delete the songs, movies, and shows you no longer need. You can repeat the same for downloaded books, podcasts, and other files.
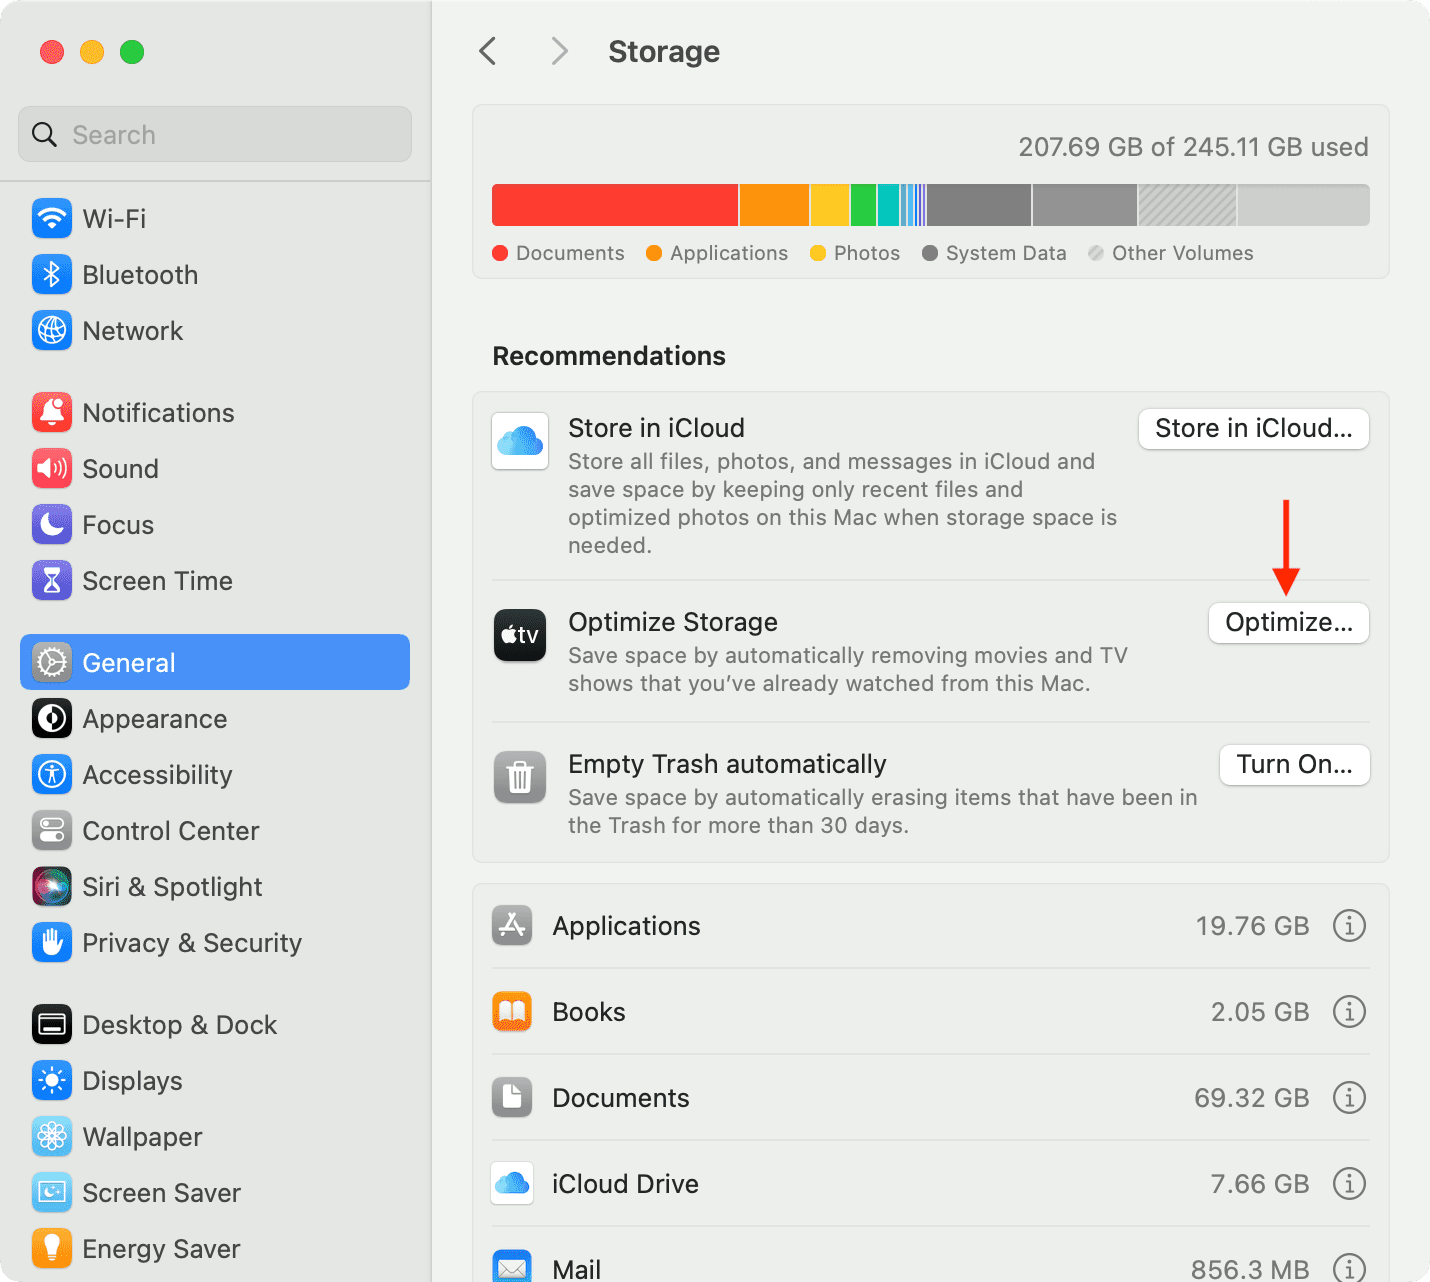
macOS also lets you free up storage by automatically removing movies and TV shows you have watched. To enable this, go to System Settings > General > Storage and click Optimize next to Optimize Storage.
19. Compress files to occupy less space
Another reliable solution to free space without deleting a file or folder is to compress it. We have the following guides to help you do this:
- How to quickly zip and unzip files and folders on Mac
- 7 free ways to compress images on Mac
- How to reduce video file size on Mac
20. Reduce the number of Mac accounts and macOS installations
Do you use various accounts on your Mac? If yes, consider deleting the unnecessary ones.
And if you have more than one version of macOS installed on your computer, delete the other one to free up at least 20GB of space.
21. Remove unwanted system voices
Your Mac downloads voice files, and if you limit the number of voices, it can help save some space.
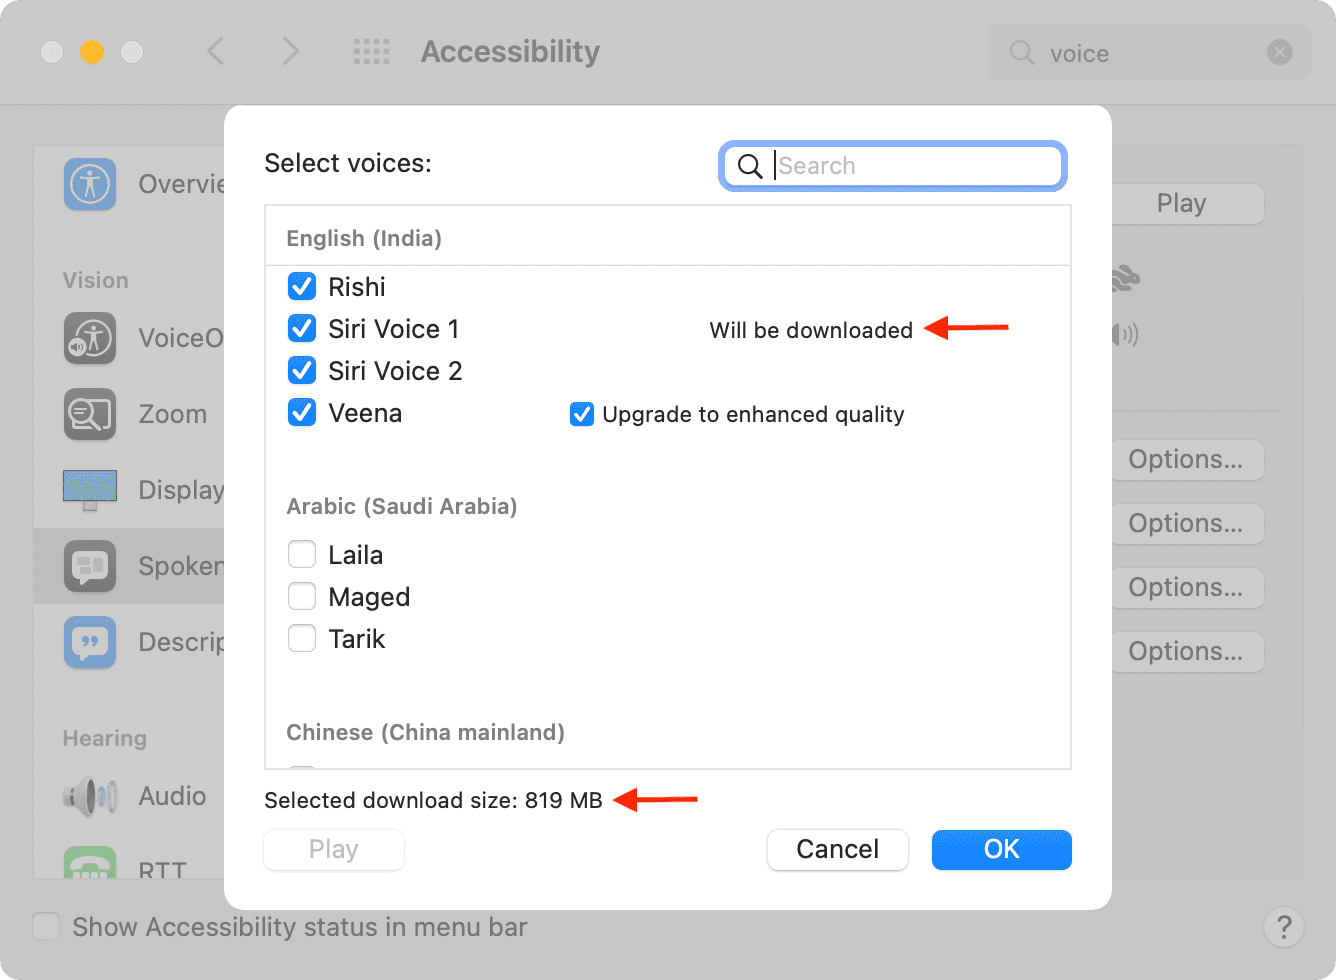
To do that, go to System Settings > Accessibility > Spoken Content. From here, click System Voice > Manage Voices. Now, hit the trash icon next to a downloaded voice.
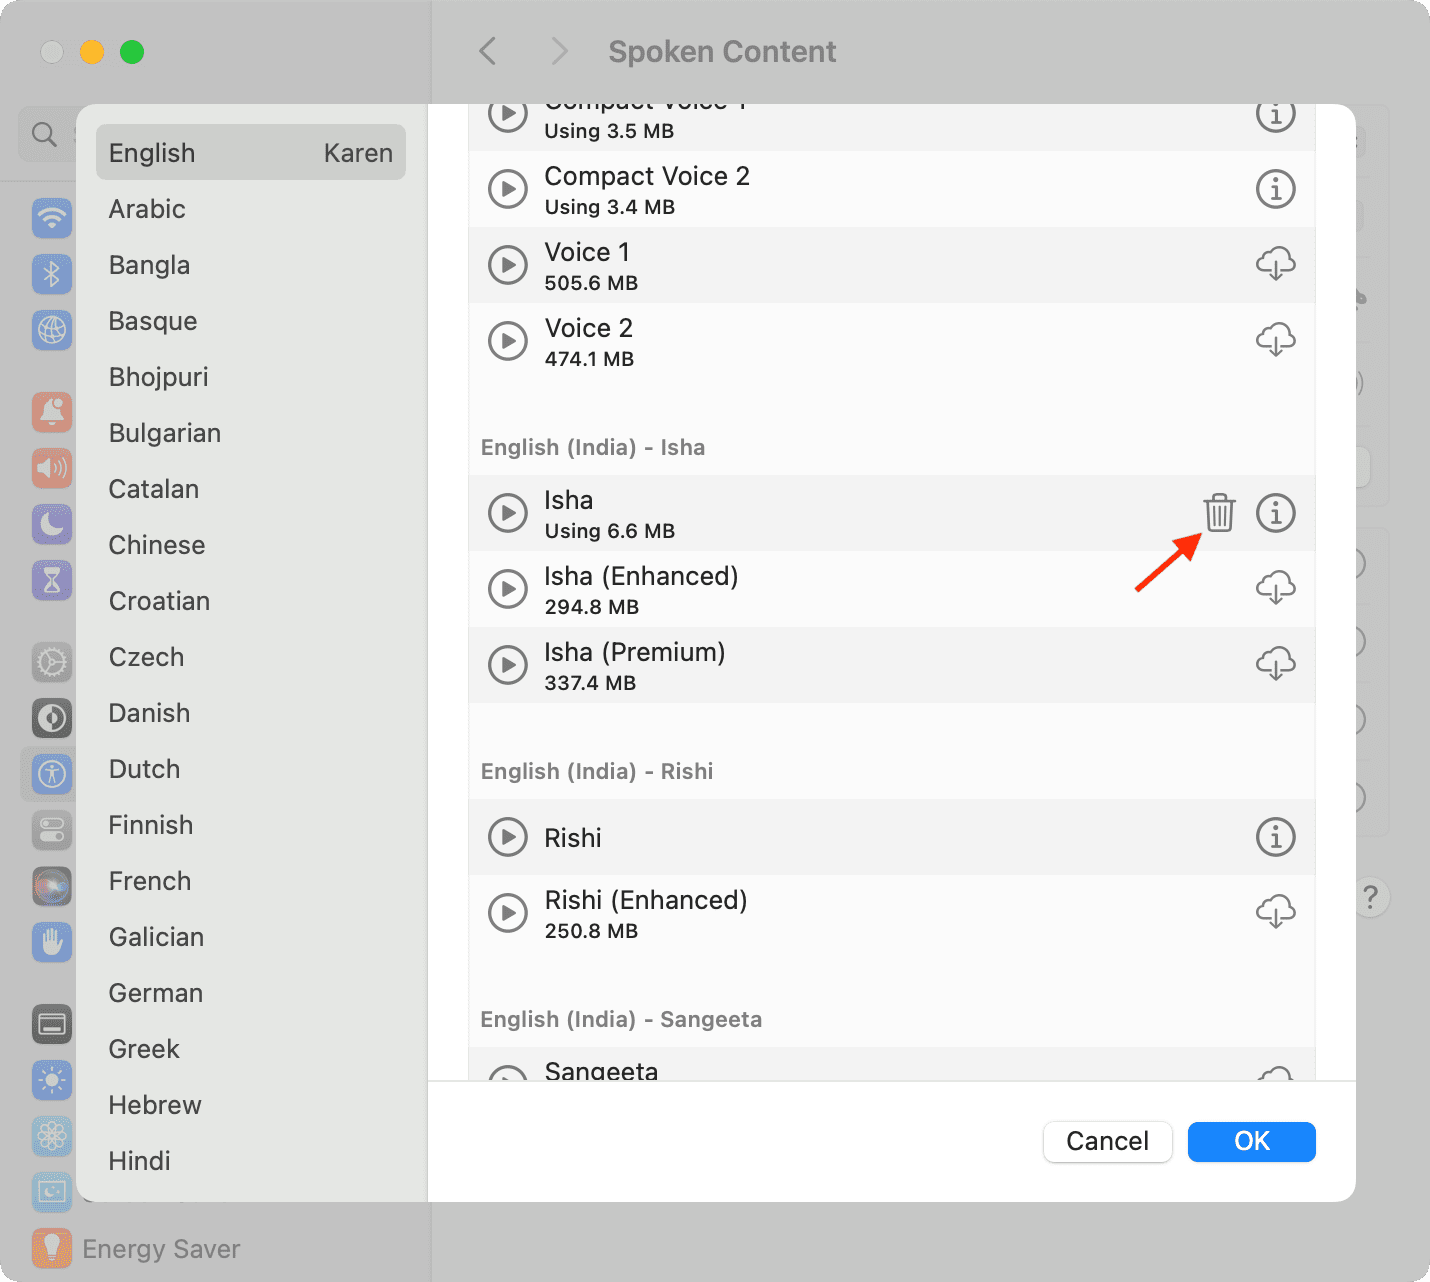
Note that you may not see the trash icon on newer versions of macOS, such as macOS Sequoia and macOS Tahoe.
22. Turn off Dictation
Offline dictation on your Apple devices works by downloading a file locally to the device. If you don’t use this feature, turning it off can help. Go to System Settings > Keyboard and turn off Dictation.
23. Delete language files
Follow our separate guide to remove unused Mac languages and free space. In addition to that, if you want to go stingy, you can go through these steps to remove additional languages from third-party apps.
1) Open the Applications folder, right-click on an app, and choose Show Package Contents.
2) Click Contents > Resources.
3) From here, you can delete .lproj folders. The one named en.lproj is for English, so avoid deleting that.
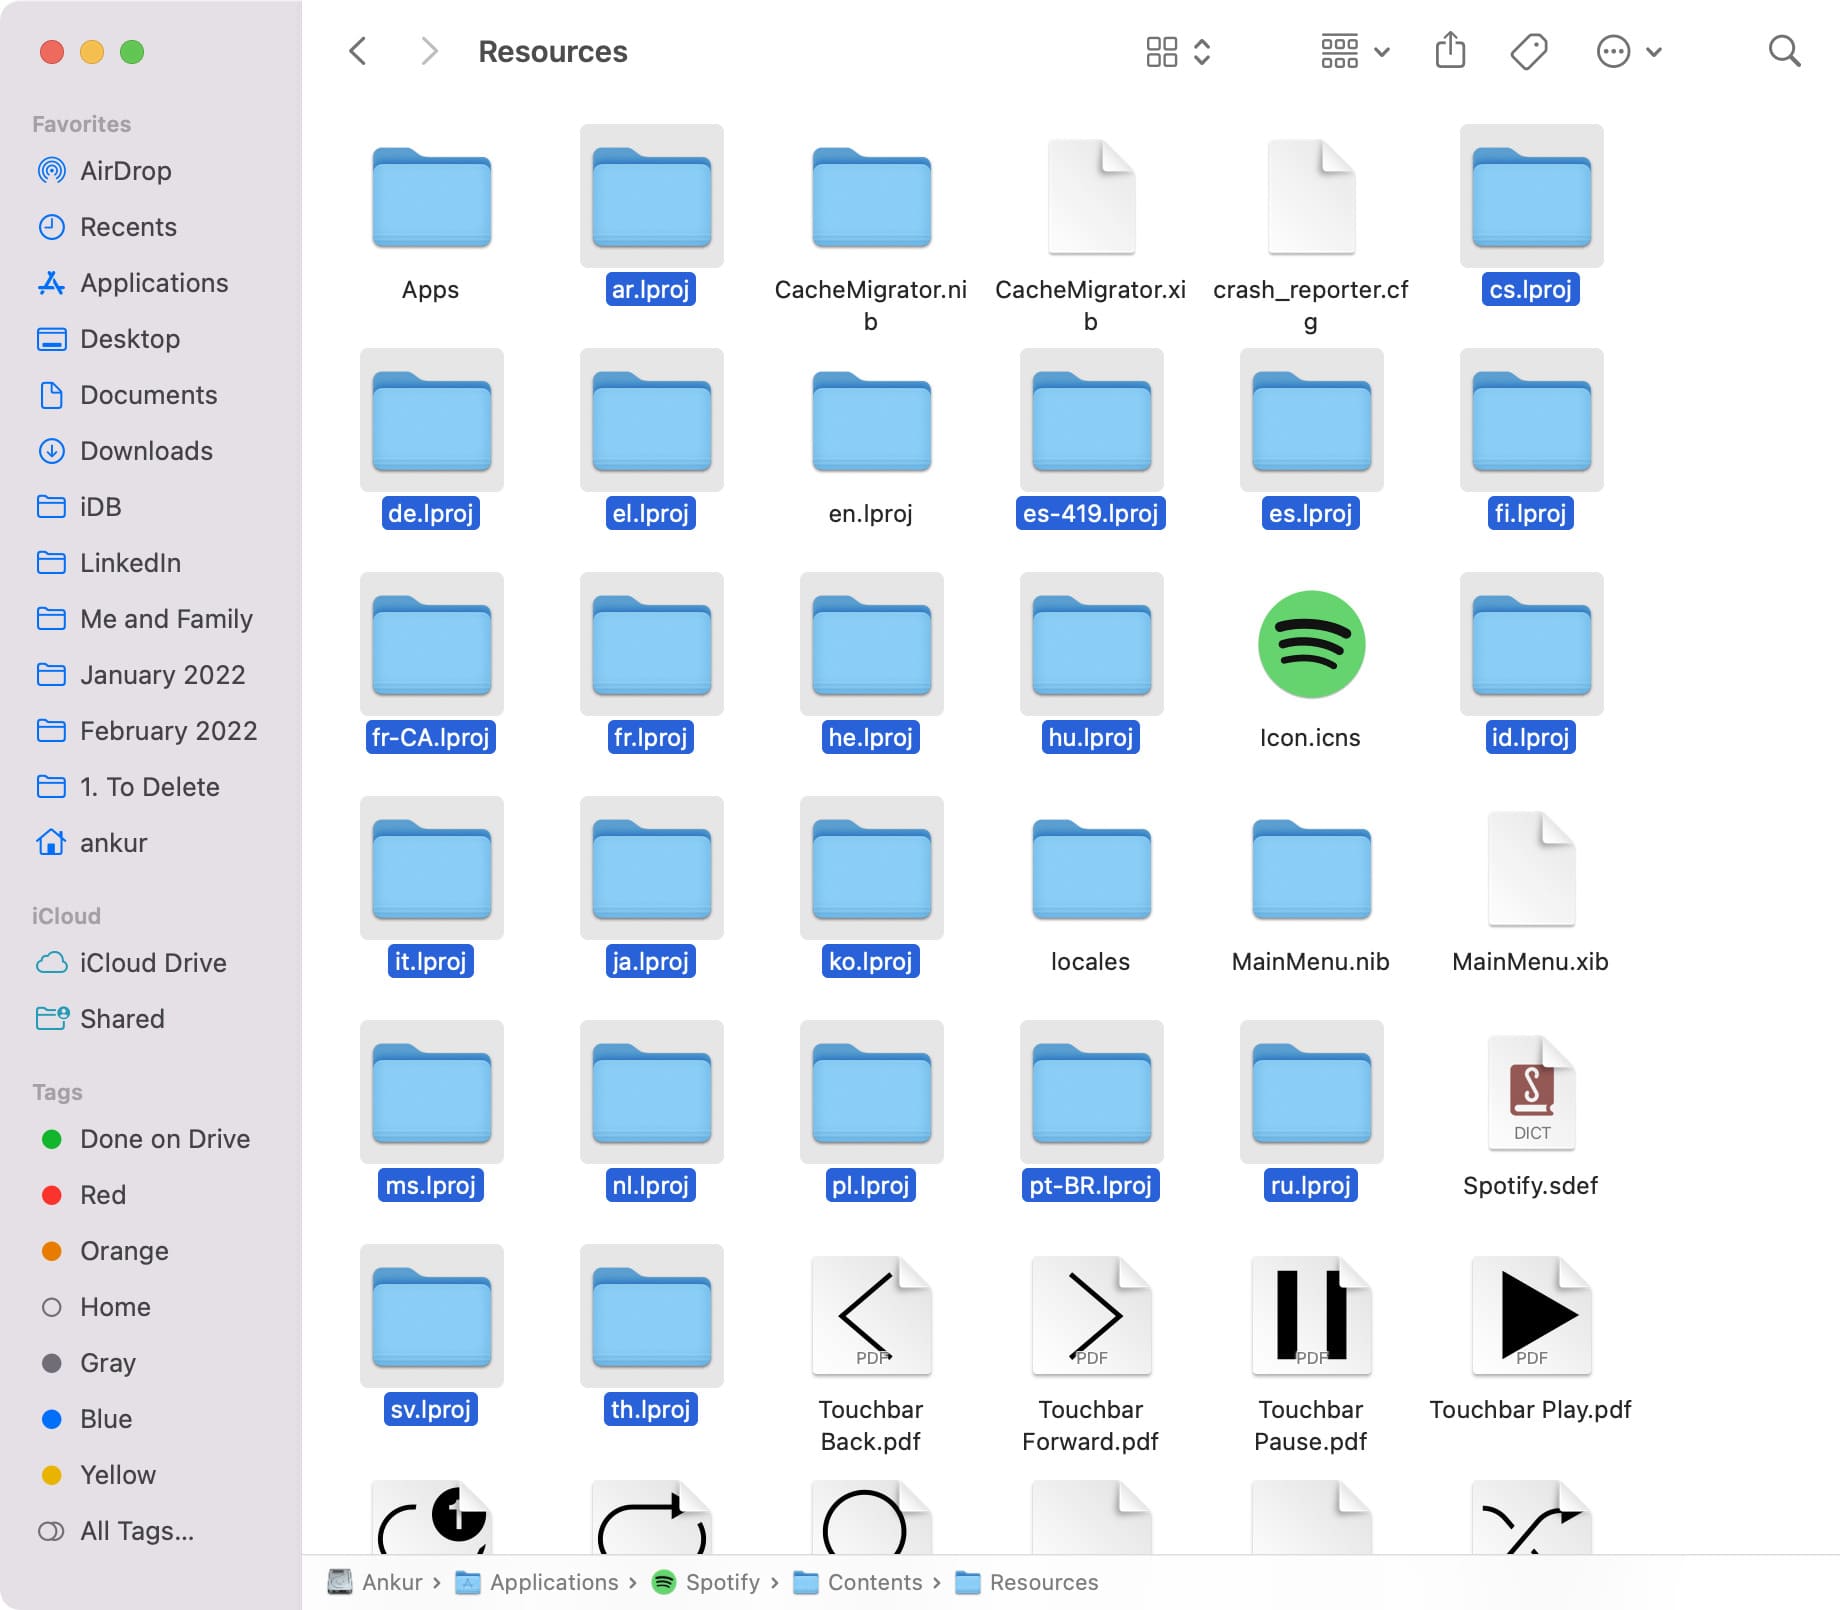
Note: This frees up an almost negligible amount of space, and you have to follow this for each app individually. So, I would recommend you skip it.
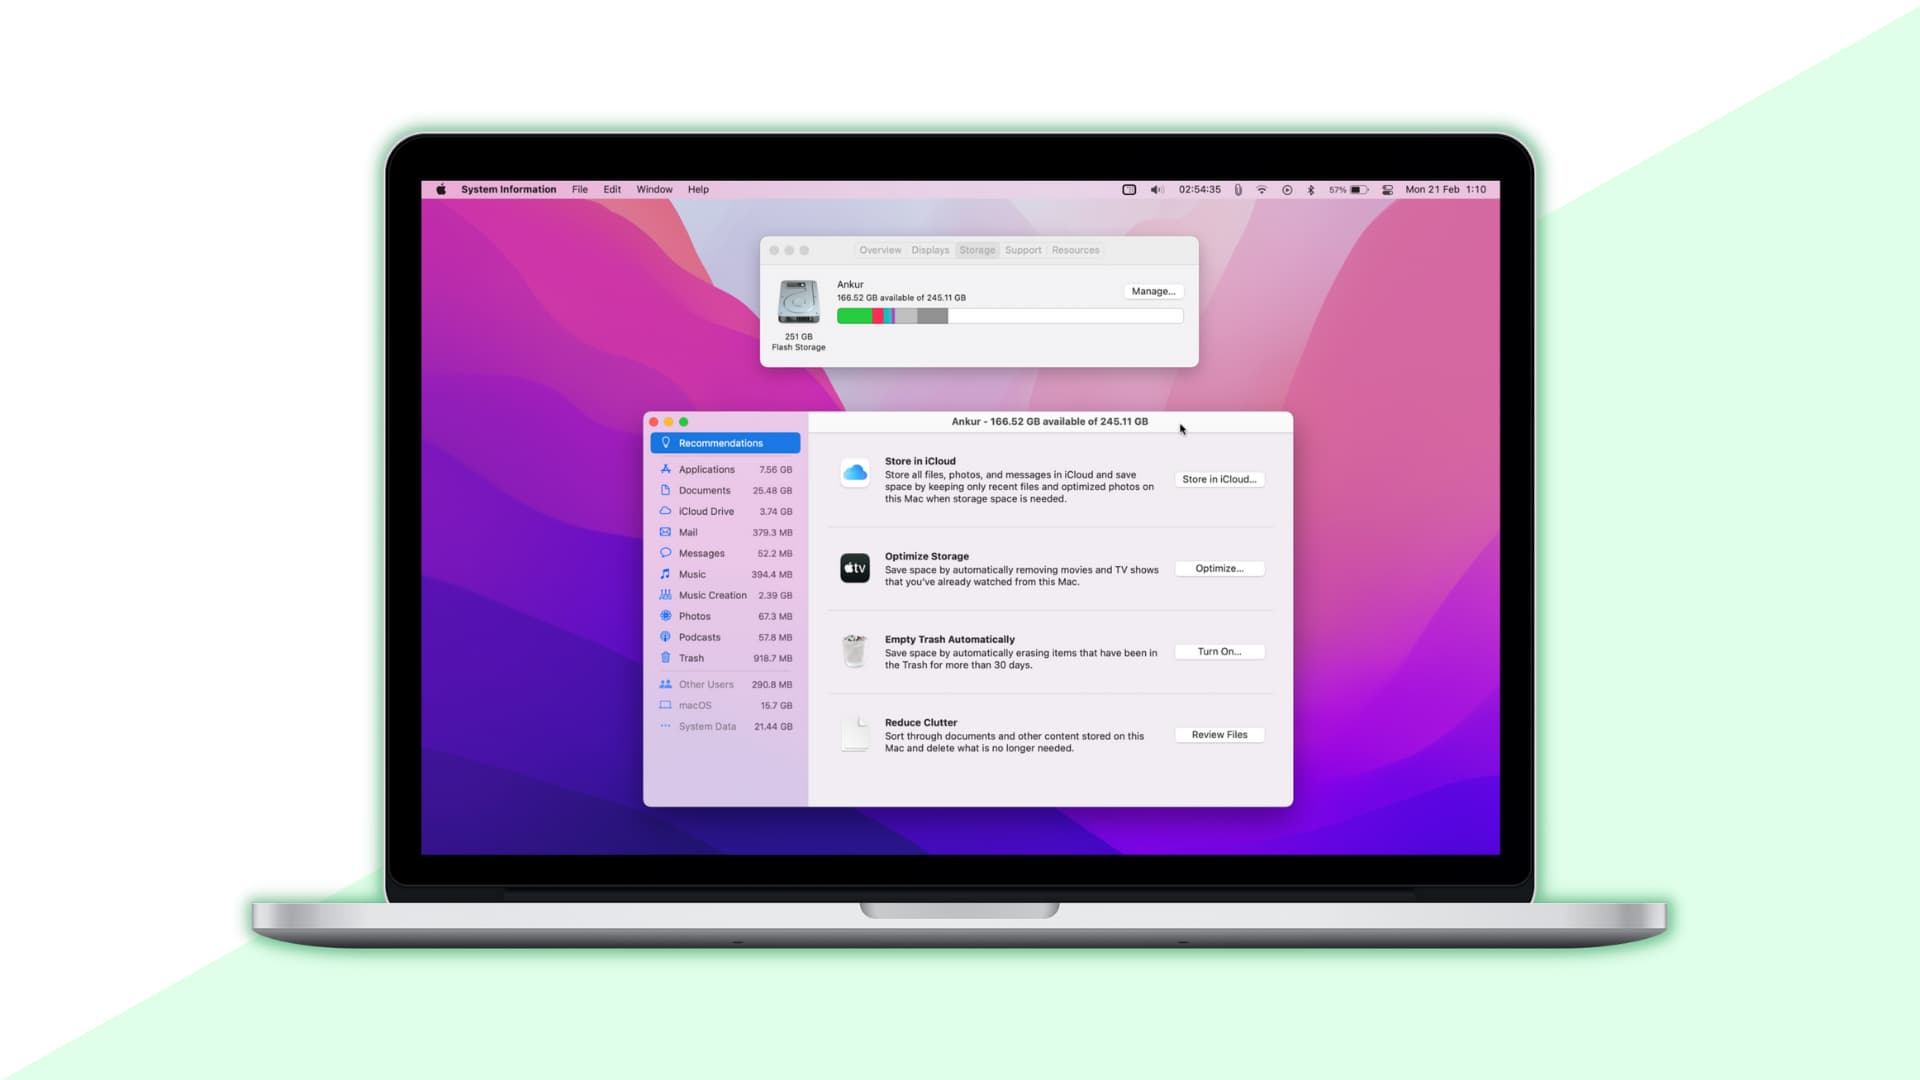
24. Optimize storage using Apple tools
Previously, in this post, we discussed Apple’s handy Storage screen to free space. To keep your Mac in good standing, you should visit this section about once every month to remove big, unused files. This practice will help keep your Mac’s local space free, fast, and clutter-free.
25. Turn off Optimize Mac Storage
When you turn on Optimize Mac Storage, the contents of your iCloud Drive may be stored locally on your Mac’s drive. You can turn it off from System Settings > Apple Account > iCloud > Drive > Optimize Mac Storage.
26. Get a Google One, Dropbox, or another cloud storage subscription
You can use cloud storage solutions like Google Drive, Dropbox, Backblaze, etc., to move and store your big files in the cloud. The prices are comparable to iCloud Drive, and you can use these effortlessly, even on Android and Windows.
27. Stop the Music app from duplicating files
When you open a song (stored in a Finder folder) in the Music app, it copies the file to its own folder. This means the same song is saved twice on your Mac, occupying double the storage.
You can prevent Mac’s Music app or iTunes from making a duplicate version of a song or music video by following these steps:
- Open Music and click Music > Settings from the top menu bar.
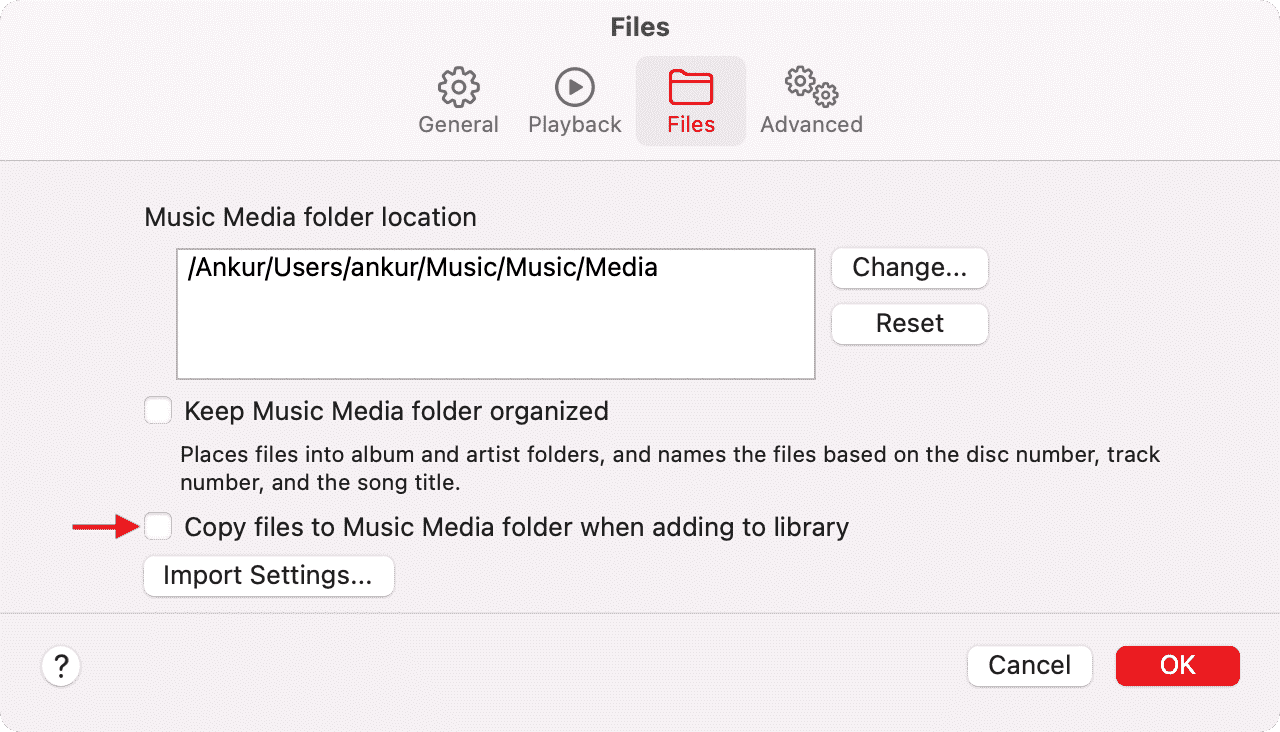
- Click Files.
- Uncheck Copy files to Music Media folder when adding to library.
You can also go to the Advanced tab and uncheck Automatically update artwork for imported songs and Reset Cache.
28. Use an external drive to store movies and large files
Cloud storage services are excellent if you have fast & unlimited internet access and are comfortable paying a monthly or annual subscription fee. If even one of these three conditions doesn’t sit well with you, consider buying an external SSD or a cheap hard disk.
Check out external SSD on Amazon
If you have a Mac desktop like an iMac, Mac Pro, or Mac mini, you can connect one permanently to it and leave it there.
29. Move your Music library to an external drive
If your Mac’s internal drive is 120 GB, 256 GB, or is full of other essentials, you can free space by moving your music library to an external drive.
30. Move the Photos library to an external drive
Similar to music, you can also move your Mac’s Photos library to an external drive to reclaim local space on the internal drive.
After going through the above suggestions, you may have restored significant space on your Mac. Following these practices regularly will keep your Mac’s internal drives free and fast.
If you struggle to manage storage because of your heavy workflow, make sure the next Mac desktop or MacBook you buy is one with a large internal drive.