Learn how to delete the Apple Music cache to regain storage space on your iPhone, iPad, Android phone, Mac, or Windows PC.

Apple Music uses caches to improve streaming efficiency.
The more music you stream, the more storage space the cache consumes.
Modern operating systems like iOS and macOS automatically delete caches to free up storage space when needed.
But you can also delete your Apple Music cache manually if you know where to find it, and that’s where our step-by-step tutorial comes in handy.
What is the Apple Music cache? How does it work?
Both iTunes and the Music app cache audio streams to avoid wasting bandwidth and time when you play the same tracks again. Apple’s streaming implementation requires a song to be fully downloaded. Other data, like album artwork, is cached in separate subfolders within the cache folder:
- fsCachedData: cached album artwork for streamed songs and other items
- SubscriptionPlayCache: caches of streamed songs
You can safely delete both folders to reclaim storage space without breaking any functionality. The Music app will simply recreate these folders the next time you launch it, and save temporary data in them as needed.
Delete Apple Music app cache on computer
1) Locate where caches are saved:
On Mac: Open Finder and press the Command + Shift + G keys. Or click Go > Go to Folder in the top menu bar. Paste the folder path (see below) and press the return / enter key:
- macOS Catalina and later:
~/Library/Caches/com.apple.Music - macOS Mojave and earlier:
~/Library/Caches/com.apple.itunes
On Windows PC: Navigate to the following location in Windows Explorer, replacing YourUsername with your Windows account name:
- Apple Music:
C:\Users[YourUsername]\AppData\Local\Apple\Apple Music\CacheorC:\Users[YourUsername]\AppData\Local\Packages\AppleInc.AppleMusic_[randomstring]\LocalCache - iTunes:
C:\Users\YourUsername\AppData\Local\Apple Computer\iTunes\
2) Select the fsCachedData and SubscriptionPlayCache folders, right-click them and choose Move to Trash (Mac) or Delete (Windows).
3) Empty the Trash on Mac or the Recycle Bin on Windows PC to delete them permanently.
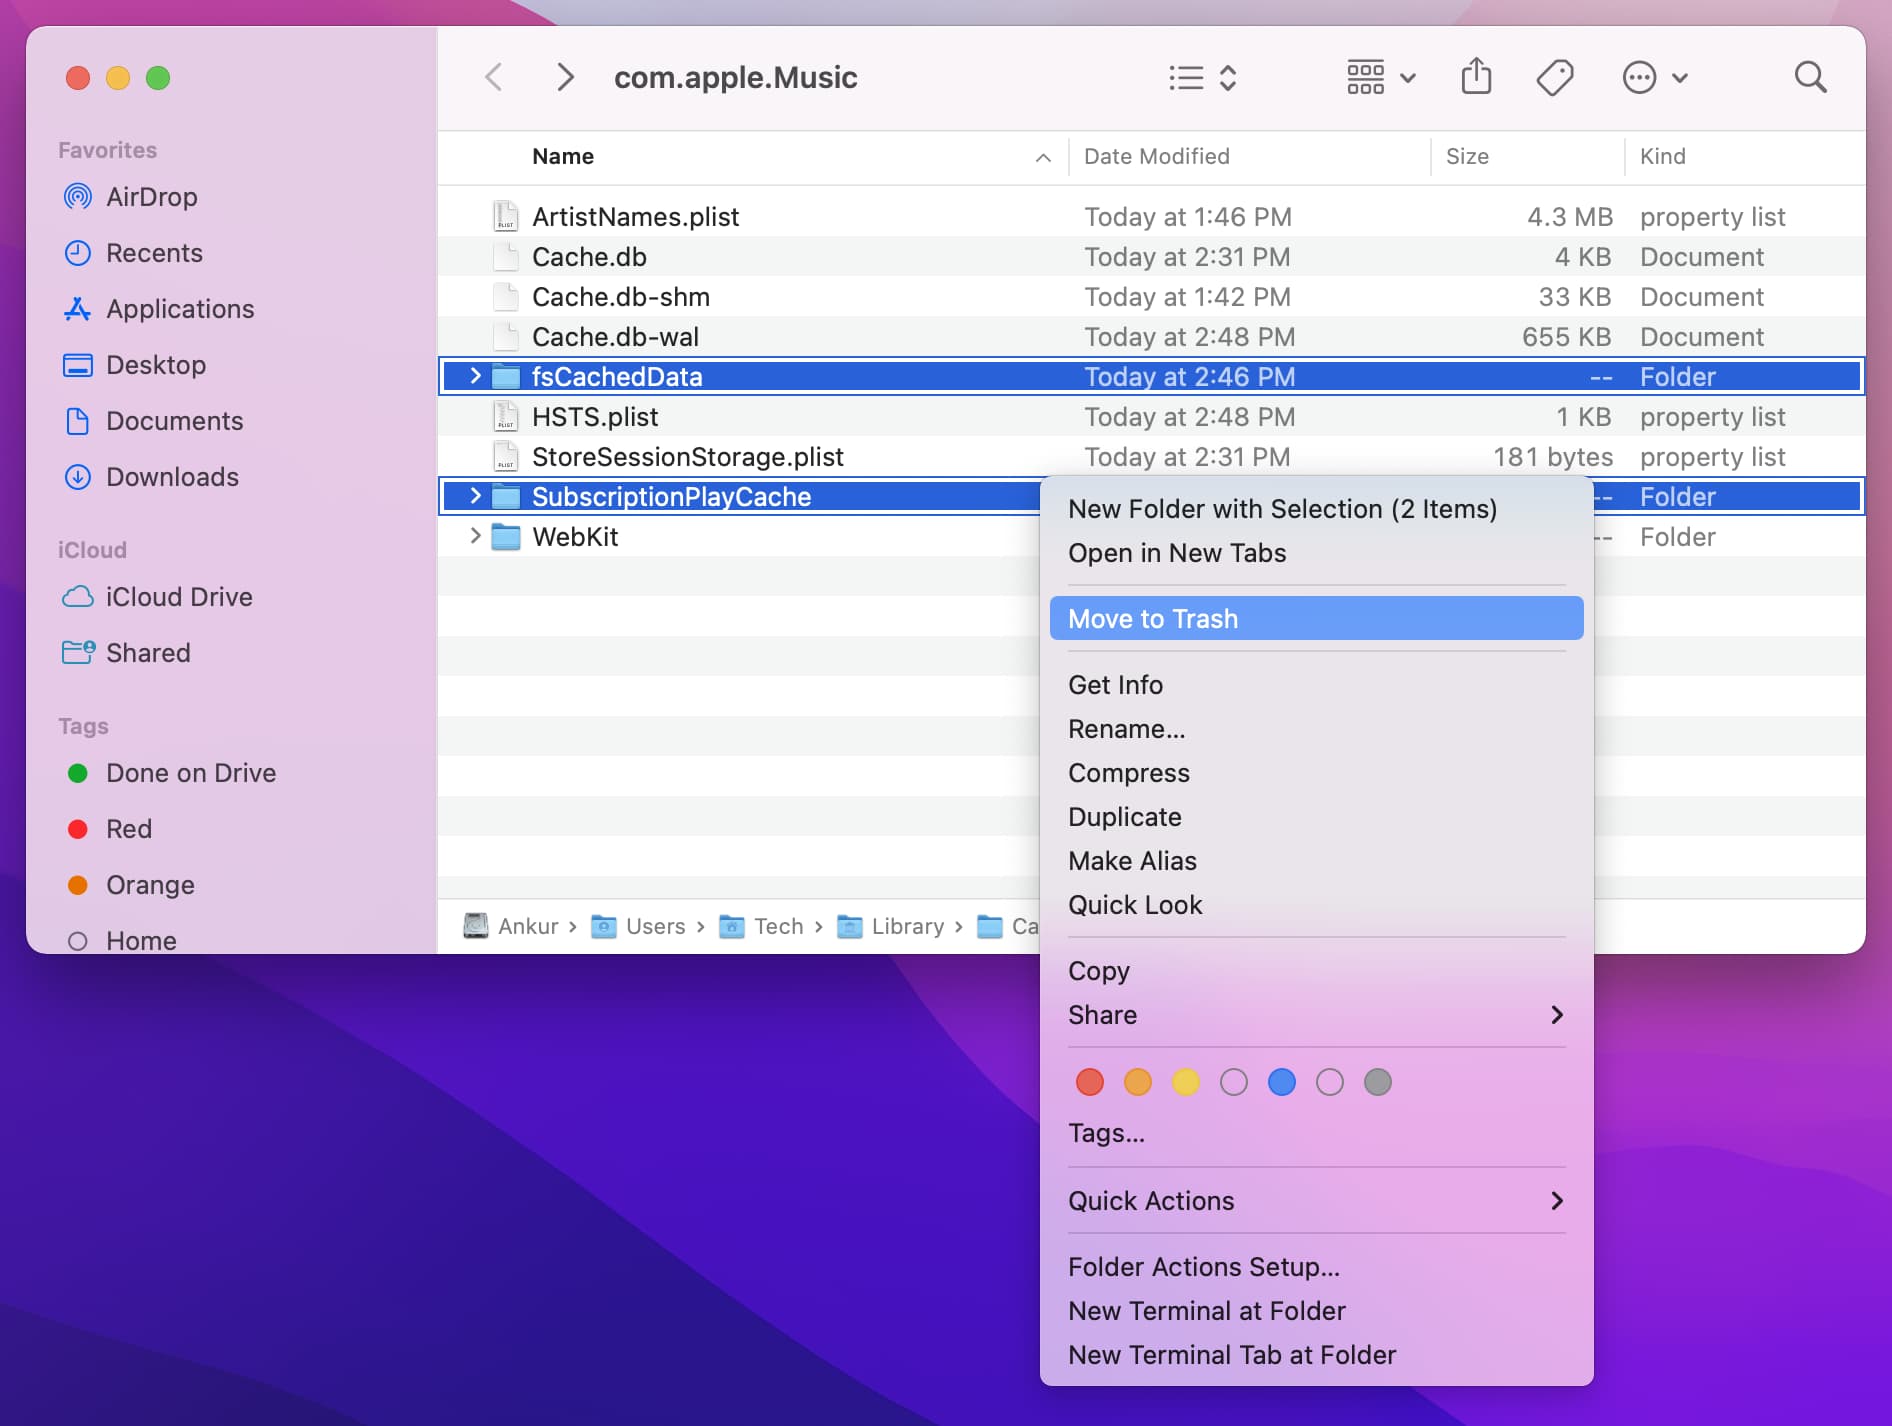
And that’s it! You’ve just reclaimed storage space on your computer lost to temporary Apple Music caches.
Depending on your listening habits and library size, you may have gained anywhere from a few megabytes to one or more gigabytes of storage space.
Don’t worry, the Music app will recreate folders for caching album artwork and other data, as needed. But avoid touching other files and subfolders in the Apple Music cache because they’re needed for Apple Music and iTunes to work properly.
To clear the Music Store cache instead, click Music > Settings in the Music app’s menu, go to the Advanced tab, and click Reset Cache.

Clear the Apple Music cache on iOS and Android
On iPhone: Go to Settings > Apps > Music and turn off Sync Library. Wait a few minutes for iOS to free up storage space used by the cache, then turn Sync Library back on. If that doesn’t work, sign out of your Apple Account and then back in.
On Android: Go to Settings > Apps > See all apps > Apple Music > Storage & Cache and tap the Clear Cache button.

Deleting the Music app from the device will also remove the caches, along with any purchased and downloaded music. If you only stream music, this action won’t affect you, but I don’t recommend doing this just to free up storage space on your iPhone!
Also, check out: