In this comprehensive guide, we’ll show you how to take screenshots of full or selected portions of your Mac’s screen without having to download third-party applications.
Take a screenshot on Mac using the keyboard
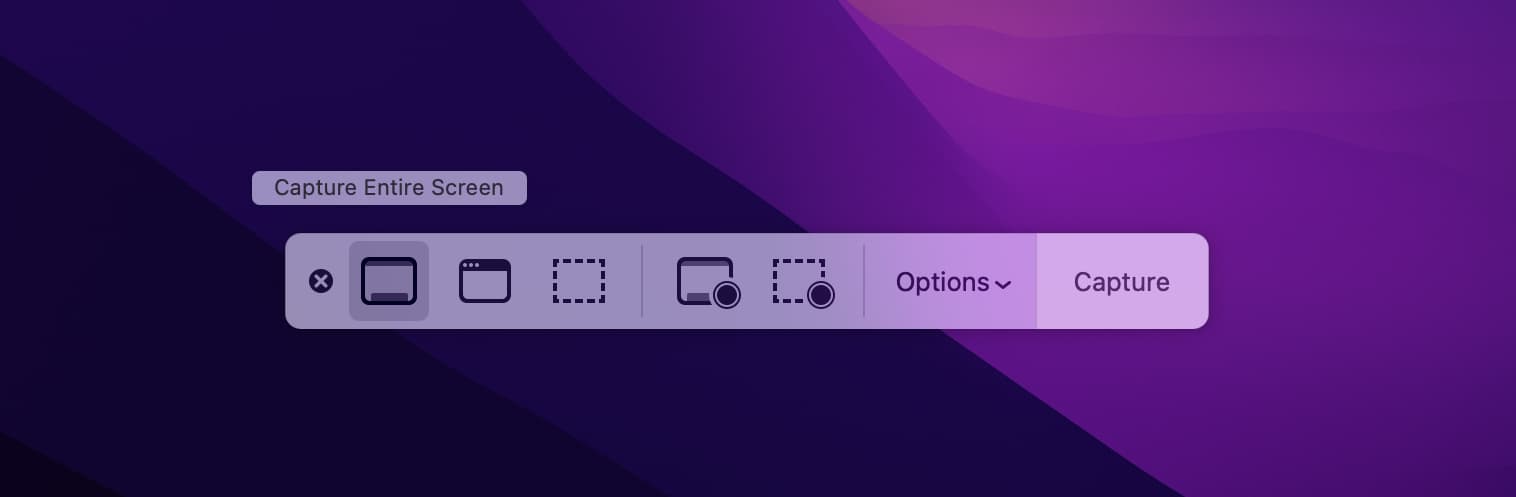
Press Command + Shift + 5 to open the screenshot toolbar. From here, you can take screenshots or screen recordings of the full or selected part of your Mac’s screen.
Of the entire screen
Press Command + Shift + 3 to take a screenshot of your entire Mac screen.
Of a portion of the screen
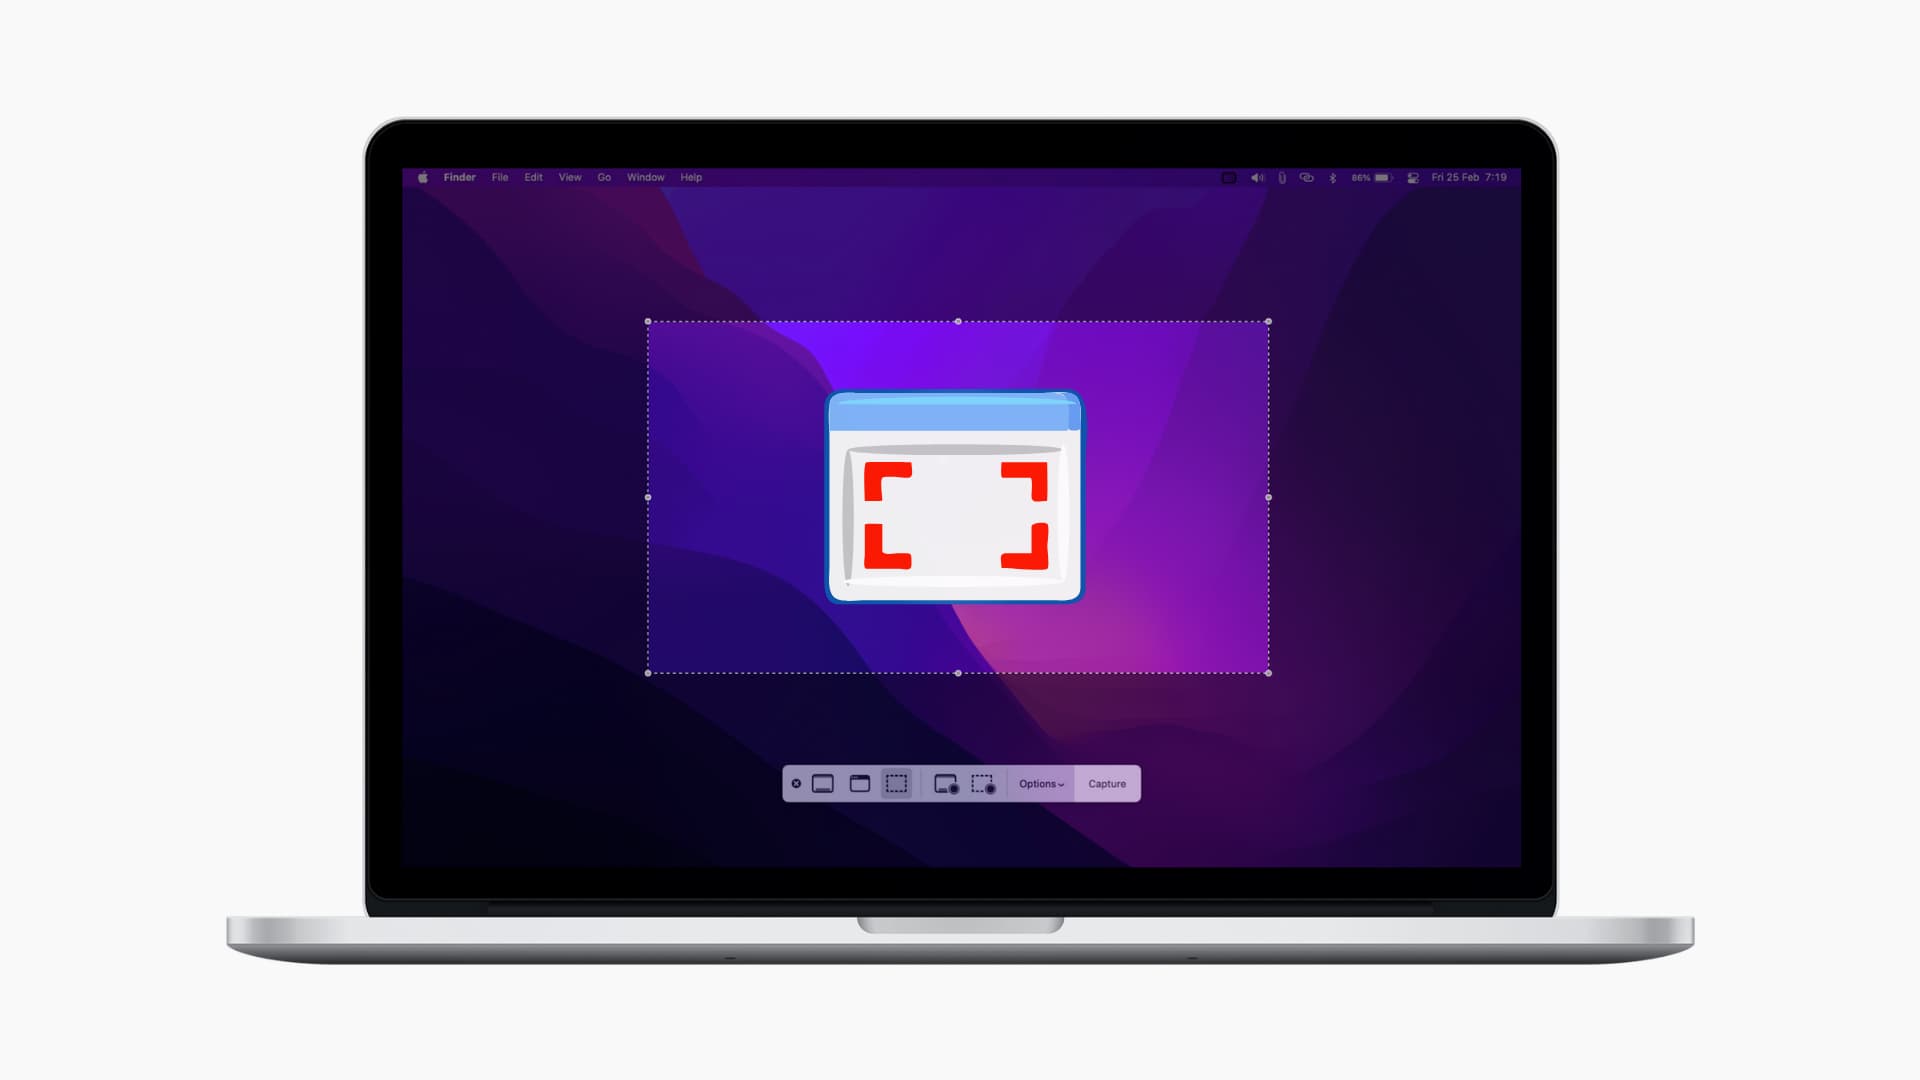
Press Command + Shift + 4 and then select the portion of the screen you want to take the screenshot of.
Pro tip: After you press Command + Shift + 4 and are making a selection, use the following keys to adjust the selected area:
- Space Bar: When you have selected a portion of the screen, press and hold the space bar to move the screen selection anywhere else.
- Option: Press and hold the option key to change the screen selection area from all sides.
- Shift: Press and hold the shift key to move the selection edge in only one set of directions (horizontally or vertically).
- Option + Shift: You can press and hold both keys to combine the action.
Press Command + Shift + 4 and then press the space bar. After this, place the camera cursor on a window to highlight it and click to take a screenshot of only that app window.
For this to work, it isn’t necessary that the app window be on the screen or selected. Even if a window is visible slightly (behind other apps) and you’re able to put the camera cursor on it, macOS will take the full screenshot of that app.
Pro tip: When you take a screenshot of an app window, it shows a shadow. You can use a simple Terminal command to remove shadows from your Mac screenshots.
Press Command + Shift + 4 and then press the space bar. After that, take the mouse cursor on the top menu bar or the Dock to take its screenshot.

Of desktop icons without wallpaper
Press Command + Shift + 4 and then press the space bar. After that, place the camera cursor on the desktop files. It will select all files and folders, including the SSD icon. Click to take the screenshot.
Make sure the menu is on the screen. If you want to highlight something, place the pointer on the action. Next, press Command + Shift + 4 and then press the space bar. After that, place the camera cursor on the menu and click to capture its screenshot without the title.
Of MacBook’s Touch Bar
Press Command + Shift + 6 to take a screenshot of the MacBook’s Touch Bar.
Select something and then take a full screenshot
Imagine you want to highlight something in gray and take a screenshot of the entire page, including that highlight. To do that, press Command + Shift + 4, use your mouse to select the section of the screen you want to highlight, and make sure not to release the mouse button. Finally, press Command + Shift + 3 to take a full screenshot, which will include the selected portion and work as a highlight.
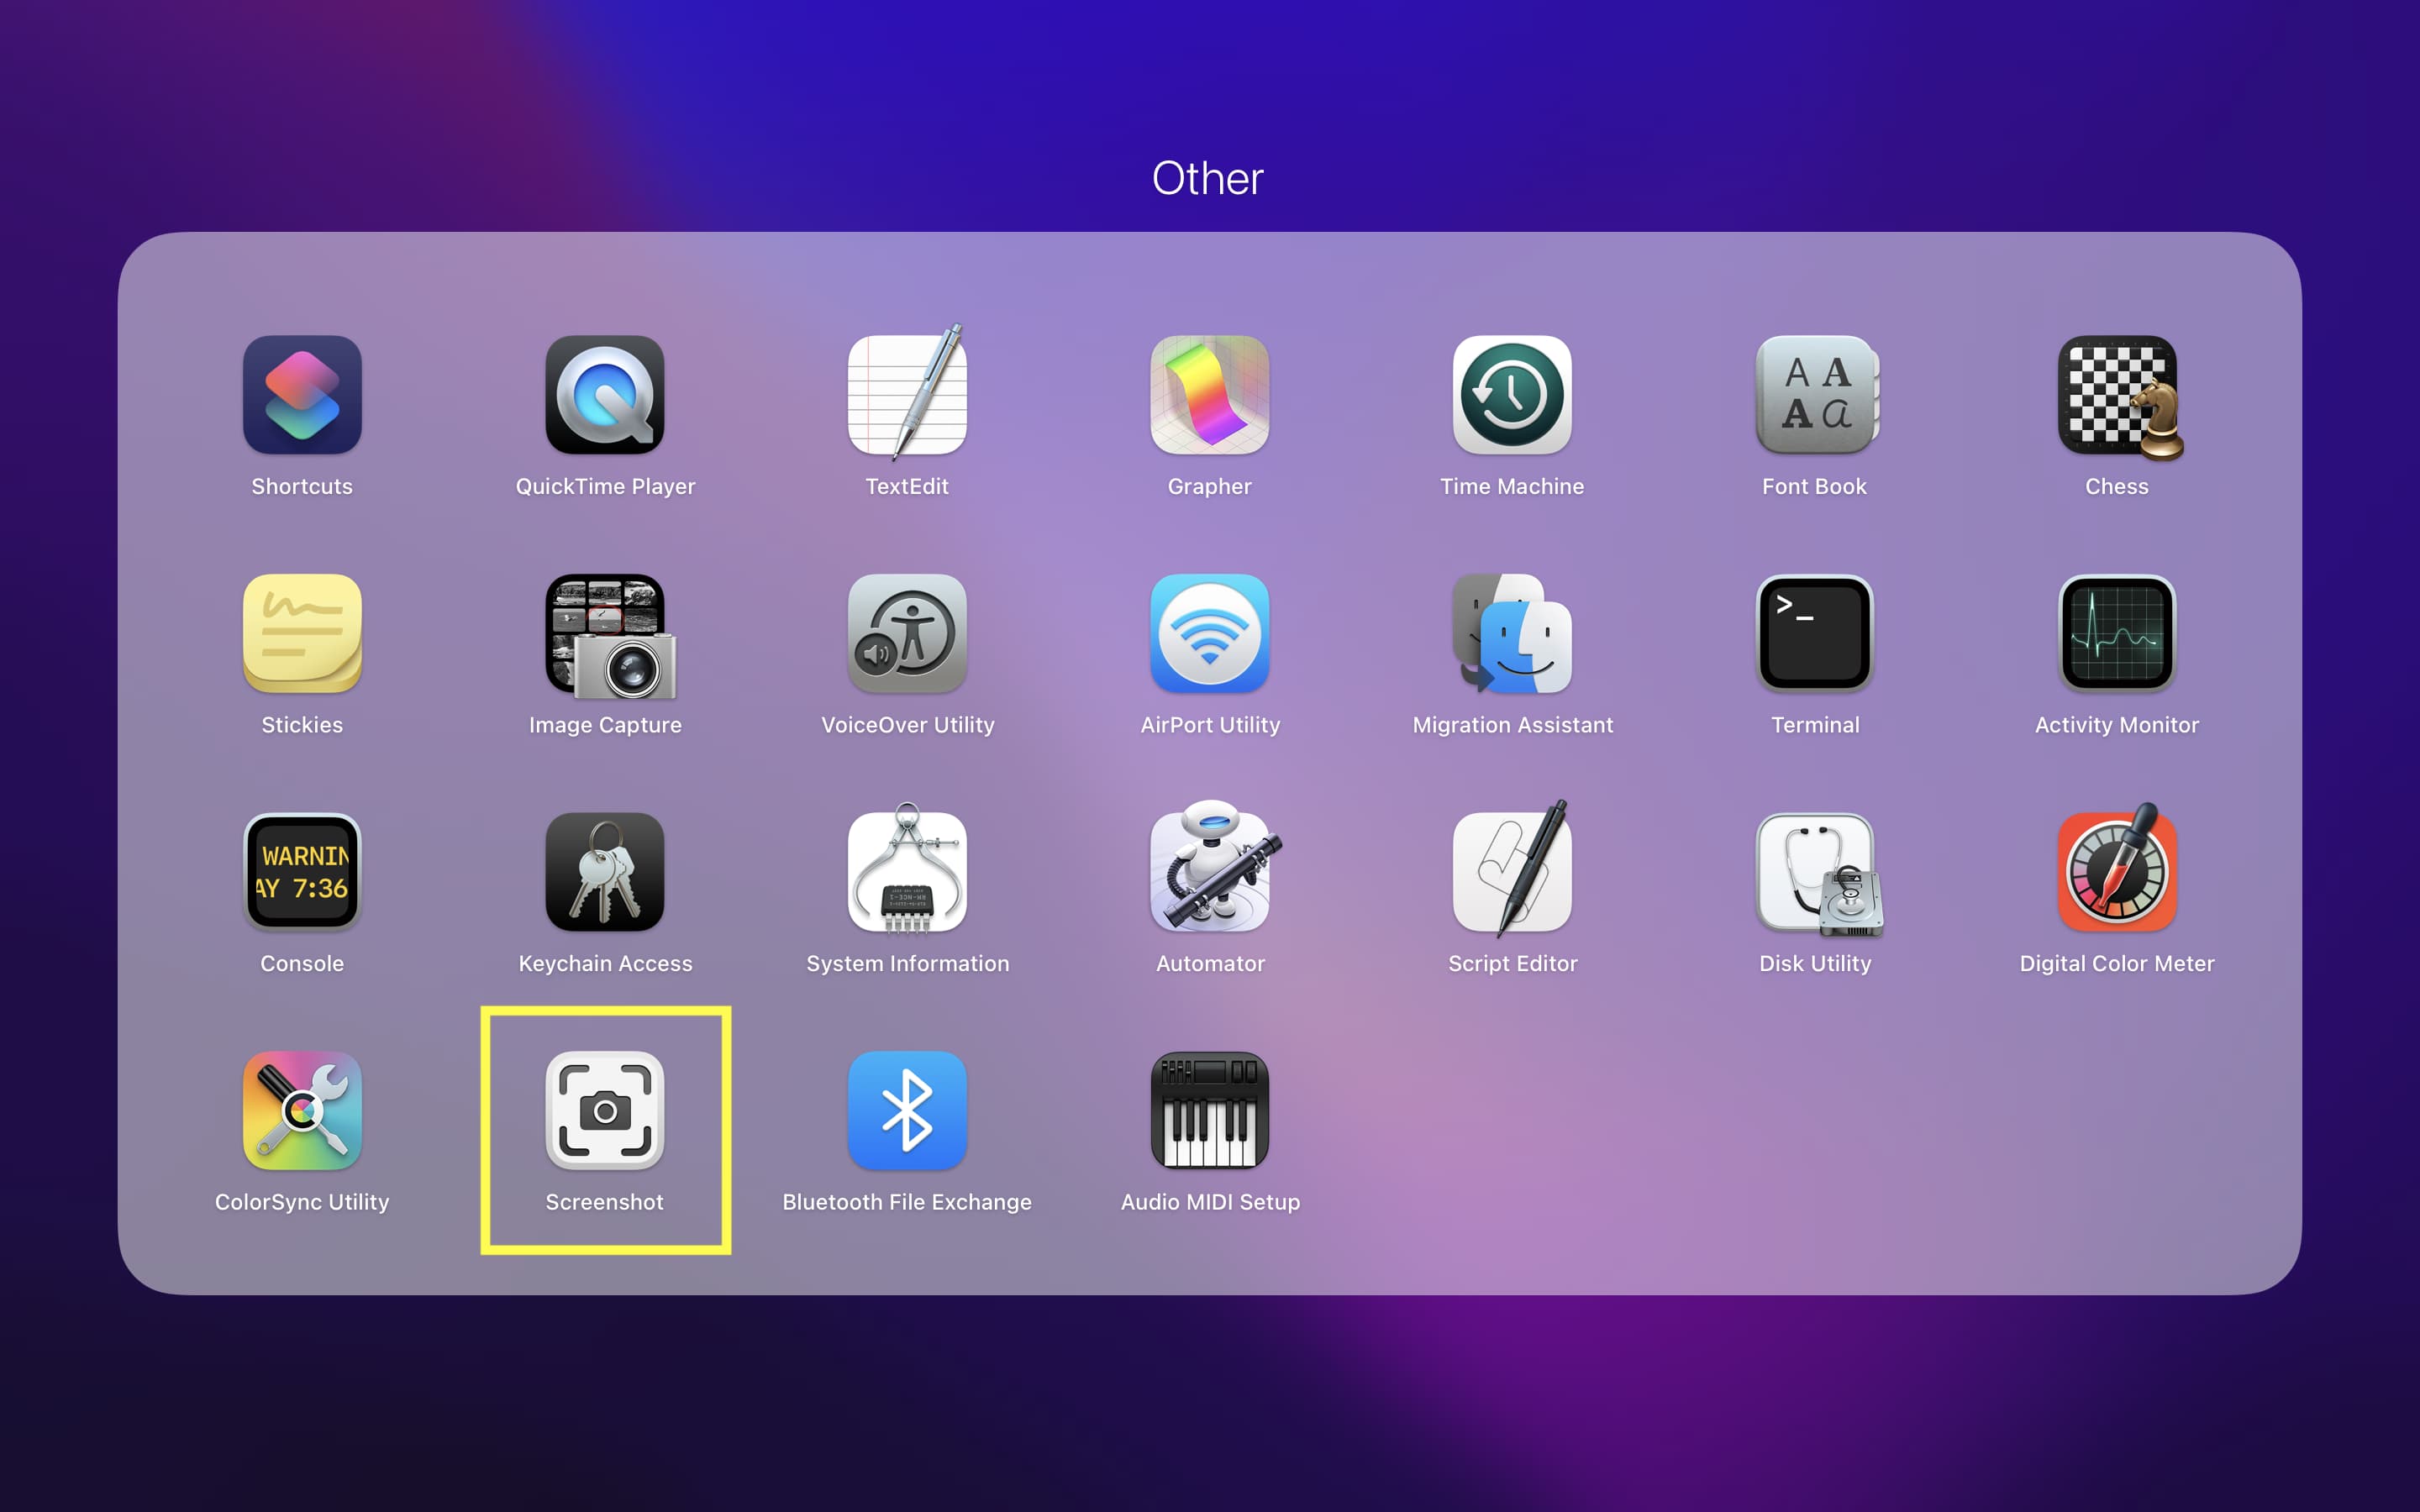
Take a screenshot on Mac using the Screenshot app
Recent versions of macOS have the Screenshot app (before macOS Mojave, it was called the Grab app). When you open this app, it shows the screenshot and screen recording toolbar on the screen, which is the same as pressing Command + Shift + 5. Use it to take a screenshot.
Take a screenshot on Mac using Preview
The built-in Apple Preview app on Mac lets you open images and PDFs. But did you know that Preview also has an option to take screenshots?
Though it isn’t as effortless as other methods, you should explore this if you take lots of screenshots.
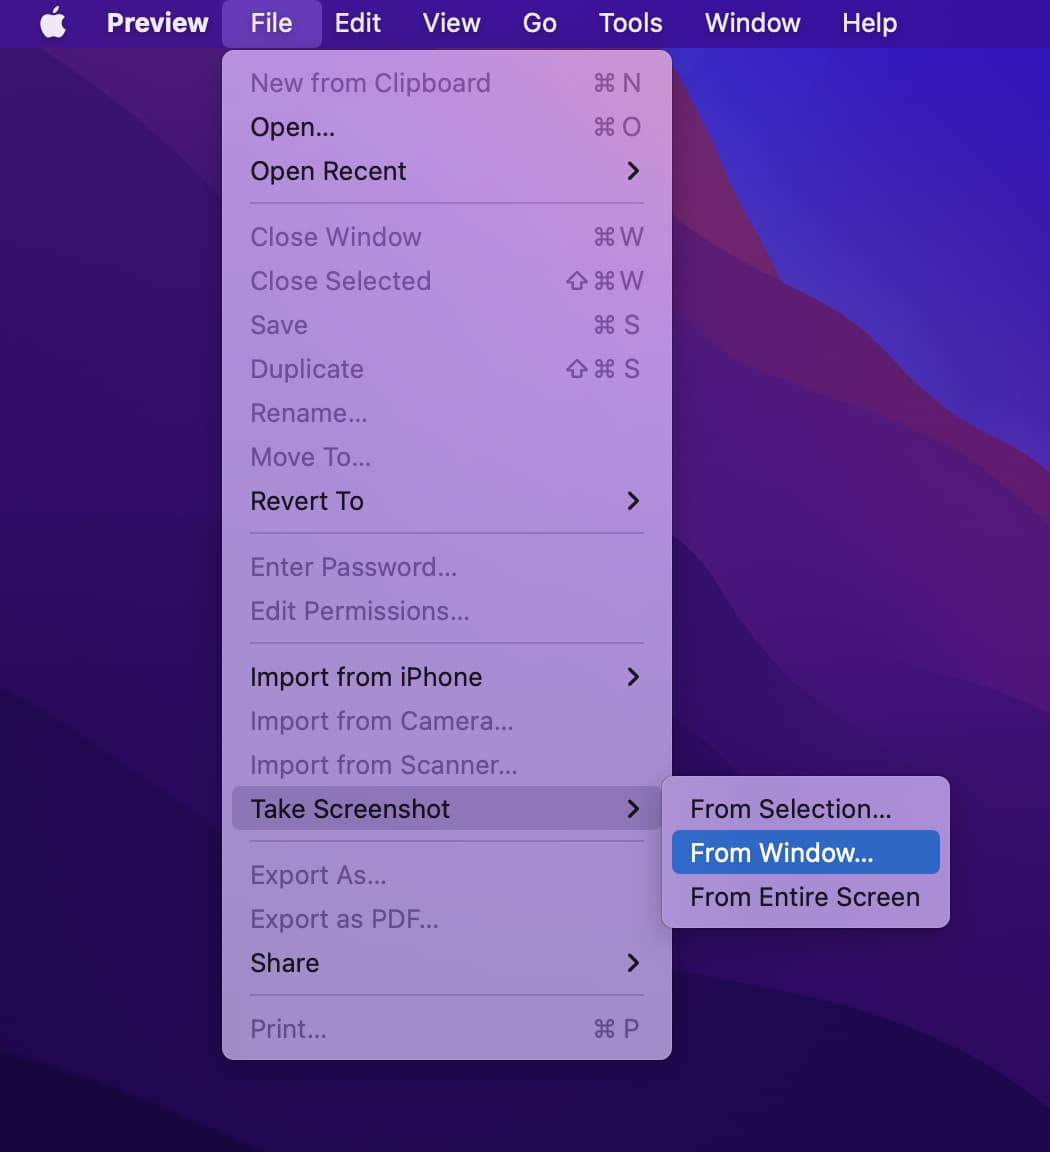
1) Open the Preview app from the Launchpad.
2) Click File > Take Screenshot from the top menu bar and choose an option.
3) After you take a screenshot, it immediately opens for edits and Markup in the Preview app. You can make the edits if needed and then click the red button from the top left to save the screenshot.
FAQs
Where are the screenshots saved on Mac?
By default, all screenshots on Mac are saved on the desktop. Right-click on the desktop and choose Use Stacks to group them all. This will create a bundle of all your screenshots. You can also easily change the location of screenshots from the desktop to some other folder.
How to delete screenshots?
You can delete Mac screenshots like a regular image by right-clicking and choosing Move to Trash. You can also select the screenshots and press Command + delete keys to remove them.
How to take a screenshot and copy it straight to the clipboard?
When you press the Control key while taking a Mac screenshot, the screenshot isn’t saved as a file but gets copied to your clipboard. You can paste this in a text field, document, Preview, an editing app, or even your iPhone, iPad, and other Mac via Universal Clipboard. However, you can’t paste it as a file on the desktop or a Finder folder.
So, when you want the screenshot of the full screen in the clipboard, press Command + Shift + Control + 3. For the selected area, press Command + Shift + 4 > make a selection > press and hold the Control key > lift the hold to take a screenshot. This screenshot is saved to your Mac’s clipboard.
What’s the format of Mac screenshots?
Screenshots on Mac are saved in PNG format. You can easily change this to JPG, TIFF, GIF, and even PDF.
How to cancel a screenshot midway?
When making a screenshot selection, press the esc key to cancel the screenshot.
Can I use Siri to take a screenshot on Mac?
You can’t use Siri to take a screenshot on Mac, but you can on iPhone and iPad.
I don’t think I will remember these tips. What to do?
You’ll become an expert in Mac screenshots over time. But if you can’t remember them all now, just remember one set of keys — Command + Shift + 5 — and this will help you take almost all types of useful screenshots and screen recordings on Mac.
On a related note: