If you take screenshots on your Mac, you may wonder if macOS supports screenshotting the Touch Bar. The default Shift (⇧)-Command (⌘)-3 keyboard shortcut captures a screenshot of everything shown on the display, sans the Touch Bar.
With macOS 10.12.2, Apple has implemented a brand new shortcut specifically designed for taking screenshots of the Touch Bar.
Here’s what you need to know about capturing everything that’s shown on the Touch Bar as an image file on your computer. You’ll also learn how to save Touch Bar screenshots to the clipboard for pasting in other apps and how to add screenshot-taking shortcuts as buttons to the Touch Bar itself.
To reiterate, you must own a Mac with the Touch Bar and macOS Sierra 10.12.2 or later to be able to capture screenshots of what’s shown on the Touch Bar.
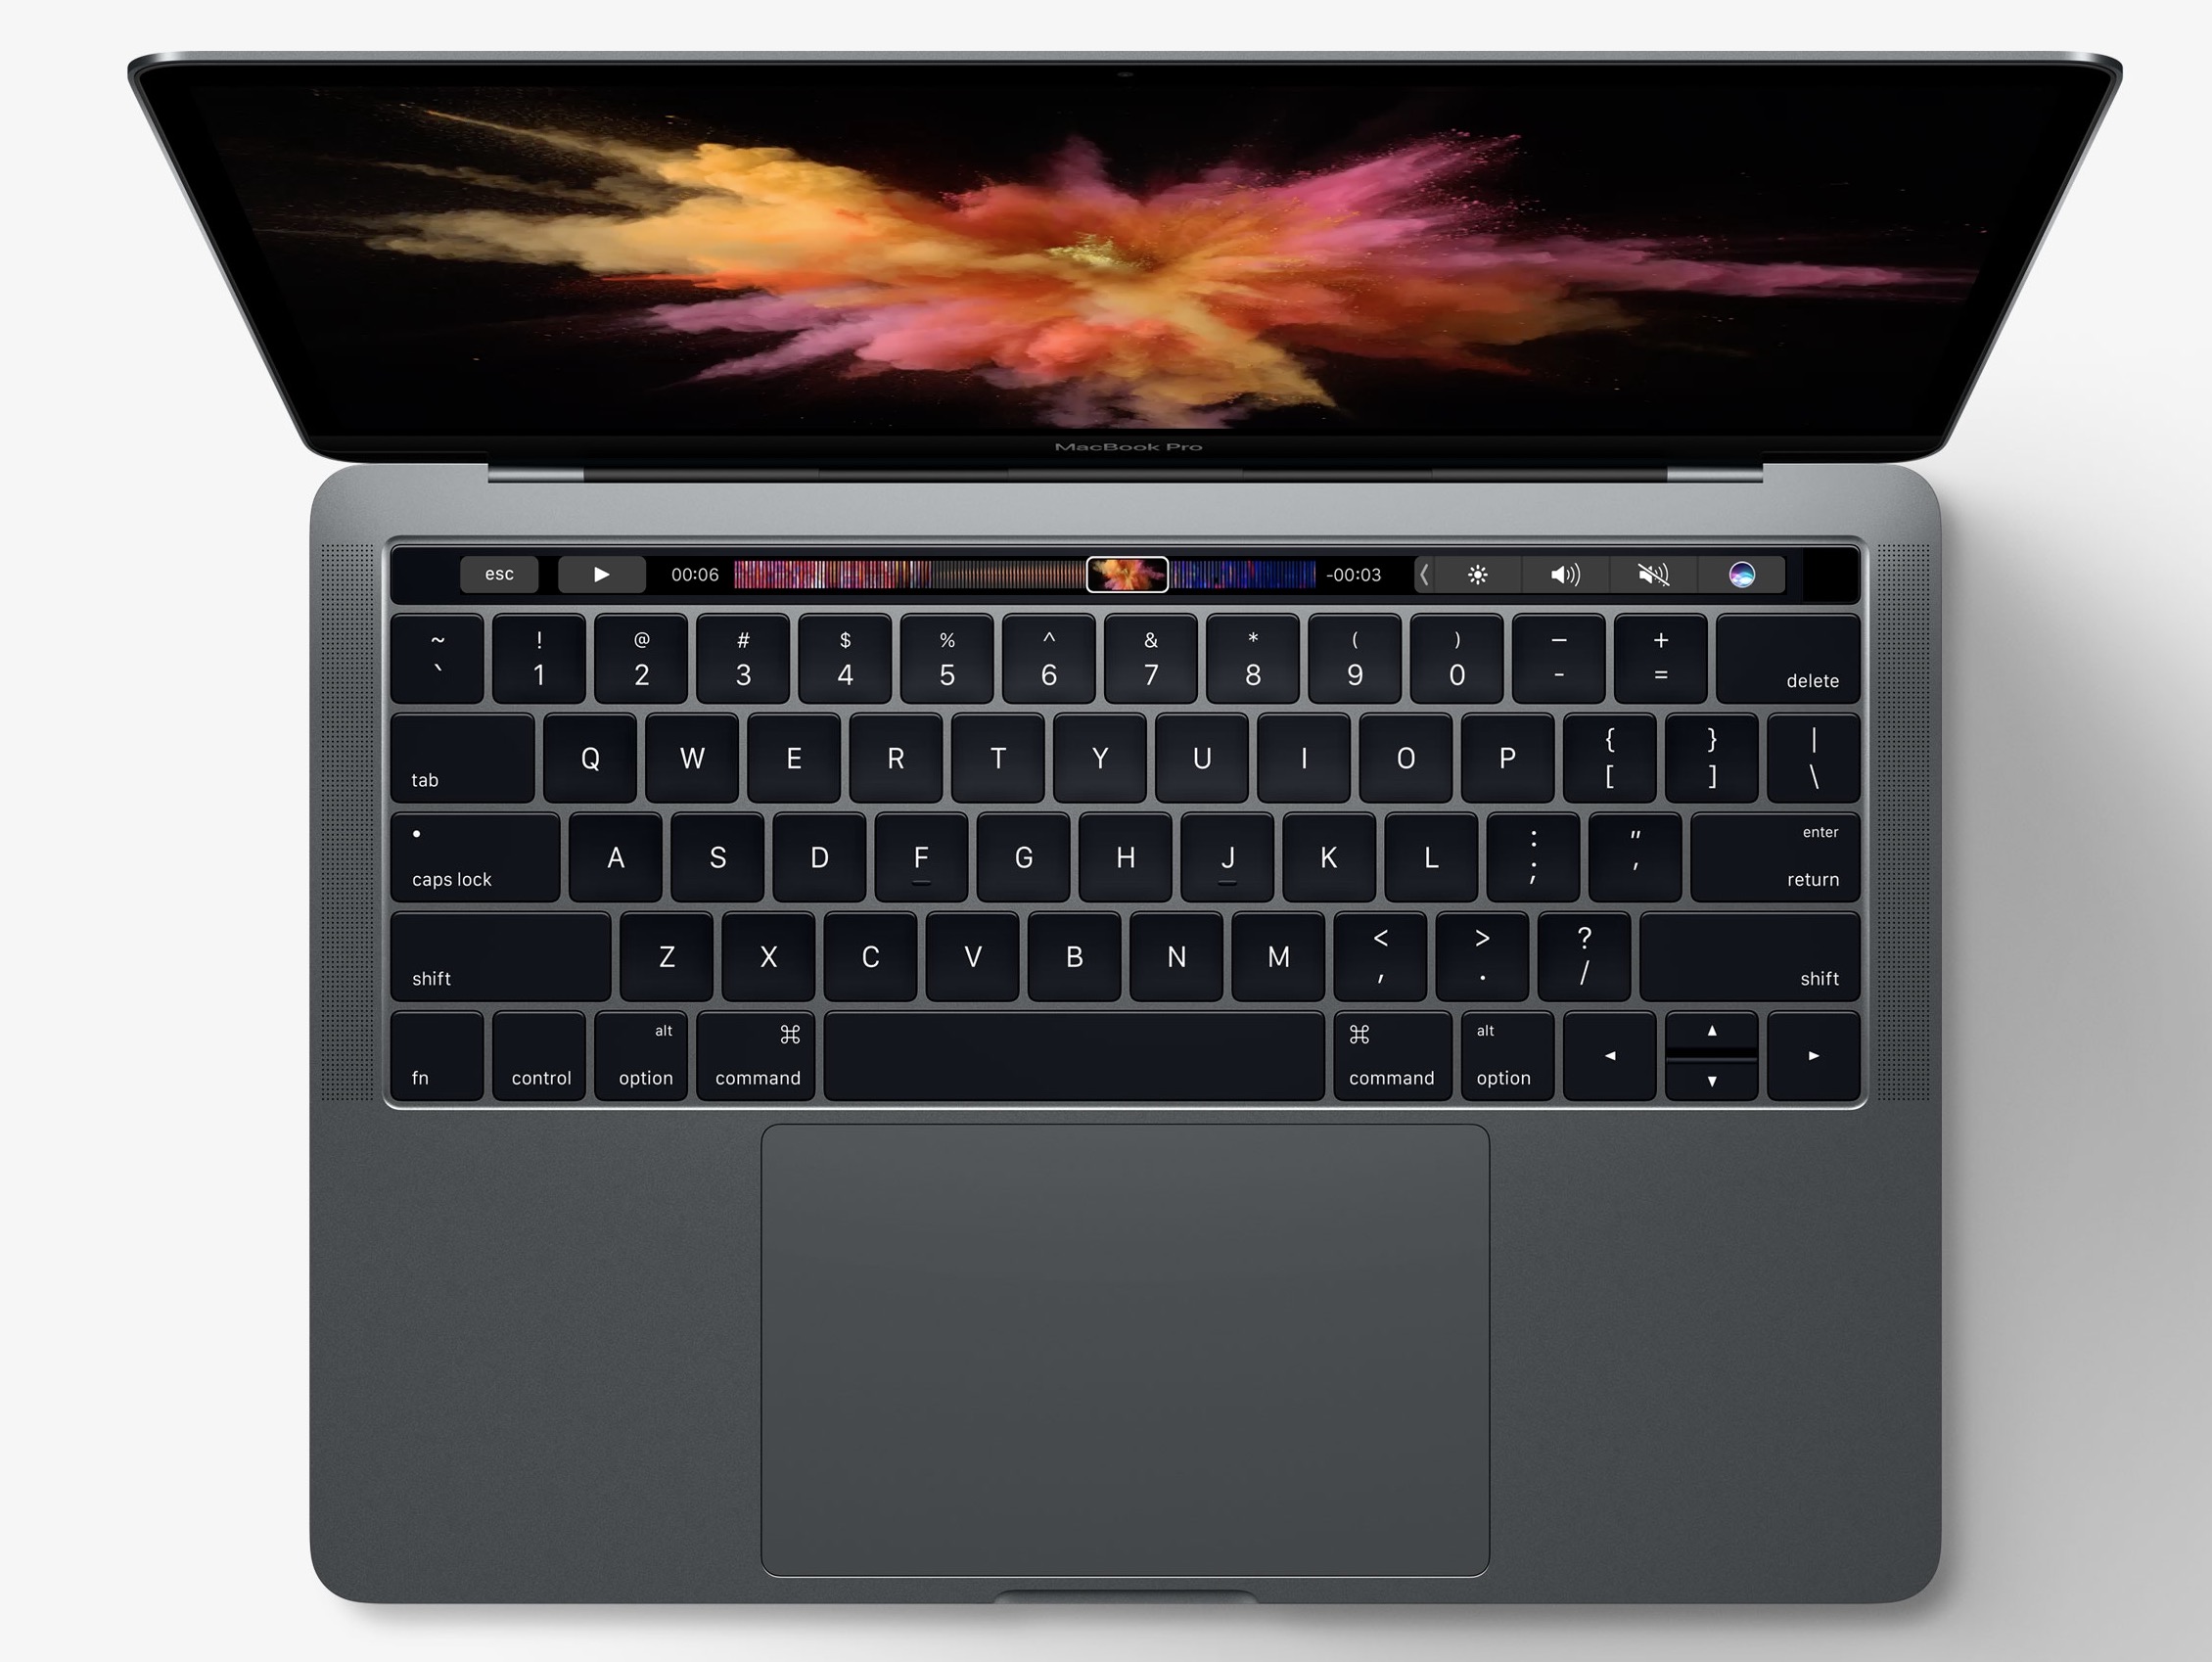
How to take screenshots of Touch Bar
Press the Shift (⇧)—Command (⌘)—6 combination on the keyboard. Everything that’s currently displayed on the Touch Bar is captured in an image file saved on the desktop.
To take timed screenshots of the entire screen, a selected area of the screen or the Touch Bar itself, use the built-in Grab app in your /Applications/Utilities/ folder.
How to save screenshots of Touch Bar to clipboard
Press Control (⌃)—Shift (⇧)—Command (⌘)—6 to copy everything you currently see on the Touch Bar to the system clipboard for quick pasting in other apps.
Customizing shortcuts for screenshotting Touch Bar
macOS lets you customize its screenshot-taking shortcuts to your liking. In System Preferences → Keyboard → Shortcuts, click Screen Shots in the lefthand column.
In the righthand column, select the shortcut for saving an image of the Touch Bar as a file, then press a new key combination that you’d like to use. If you want, feel free to also customize the shortcut for saving a screenshot of the Touch Bar to the clipboard.
Adding screenshot-taking shortcuts to Touch Bar
Your Mac’s Touch Bar can be customized to your liking.
Folks who take a lot of screenshots may prefer having a dedicated button in the Touch Bar’s Control Strip for even faster access to various screenshot-taking features, including selecting where the screenshots are saved on the computer and more.
Go to System Preferences → Keyboard → Customize Control Strip. Now click and hold the Screenshot button, drag it to where you want it on the Touch Bar and let go.
Now when you need to take a screenshot, simply hit the Screenshot button on the Touch Bar’s Control Strip section, then choose one of the following options.
- Selected Portion—take a screenshot of a user-selected area of the screen.
- Window—take a screenshot of a window, menu or menu bar.
- Entire Screen—take a screenshot of the entire screen.
Additionally, tapping the Save To menu lets you decide whether screenshots are sent to the clipboard, saved on the desktop/in the Documents folder or sent to apps like Preview, Mail or Messages.

If your Mac is connected to one or more external displays, screenshotting the entire screen will save an image file for each of the displays individually.
Screenshots and Universal Clipboard
If your devices support Universal Clipboard, a Continuity feature in iOS 10 and macOS Sierra or later, saving a screenshot to the system clipboard lets you quickly paste it into another app or another device without sending image files back and forth.
After capturing a screenshot on your Mac, launch an app on another Mac, iPhone, iPad or iPod touch and use the Paste command like you normally would. On another Mac, choose Paste in an app’s Edit menu. On an iOS device, launch an app like Messages or Pages, tap and hold to bring up the popup menu, then tap Paste.
The devices immediately establish a direct Wi-Fi connection between them and the screenshot in your Mac’s clipboard is sent wirelessly to another device, just like that. This method of pasting screenshots between devices bypasses the clunkier sharing features such as AirDrop or iCloud Photo Library.
Your devices must use the same iCloud account, have Wi-Fi enabled and be within Bluetooth range in order for Universal Clipboard to work.
More about taking screenshots on Mac
To learn even more about the various ways of taking screenshots on your Mac, changing their file format and default location and more, see our previous tutorials:
- Various ways of taking screenshots
- Saving Mac screenshots directly to the clipboard
- Taking timed screenshots
- Changing where screenshots are saved
- Changing file format for screenshots
- Removing date and time from screenshot names
- Adjusting default file name for screenshots
Do share your favorite screenshotting tips and tricks in the comment section below.
Like this tip?
If you like this tip, please pass it along to other people and share the article with friends and family on social media. Submit your ideas regarding our tutorial coverage at tips@idownloadblog.com.