Chances are, you’re probably so accustomed to taking screenshots on your Mac with the stroke of a few keyboard keys that you didn’t even know you could take a timed screenshot. In this tutorial, we’ll show you how you can set your Mac up to take a timed screenshot, which depending on the situation, can be very useful.
Why to take a timed screenshot
As experienced of a Mac user as I am, I only just learned about this feature and I found it very useful when I discovered it.
I was trying to take a screenshot for an earlier tutorial that I wrote, and it was one of those situations where you have to hold down the Option key to reveal a hidden menu.
The only problem was, I wanted to take a screenshot of the hidden menu and I couldn’t because OS X wouldn’t let me hold the Option key and take a screenshot at the same time; as soon as I would let go of the Option key, the hidden menu disappeared.
The other alternative I found was to take a timed screenshot, which would let me set up a 10-second timer and then perform the keystroke to reveal a hidden menu for one of the steps in one of my tutorials.
From there, all I had to do was wait for the Mac to take the screenshot on its own while the hidden menu was showing.
Taking a timed screenshot on Mac
To take a timed screenshot, you have to use a little-known stock utility known as Grab. To use it to take a timed screenshot, you’ll follow these steps:
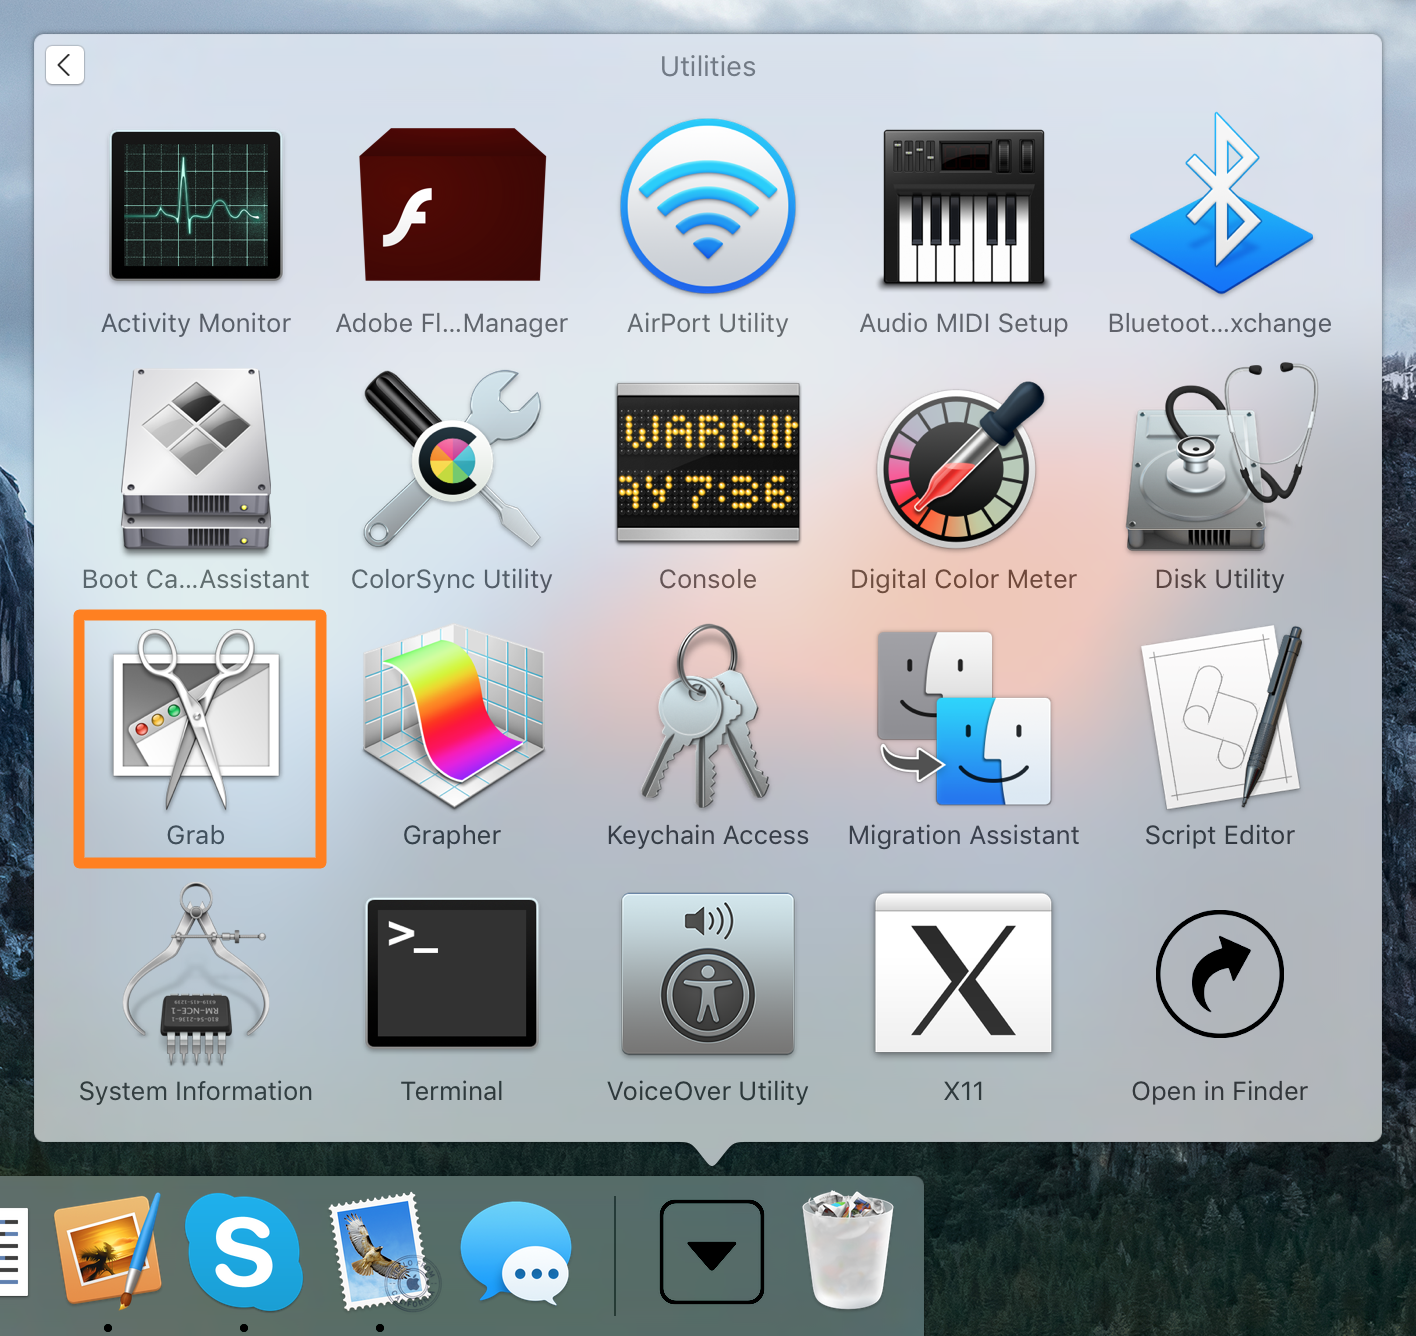
1) Launch the Grab app from the Applications > Utilities folder on your Mac.
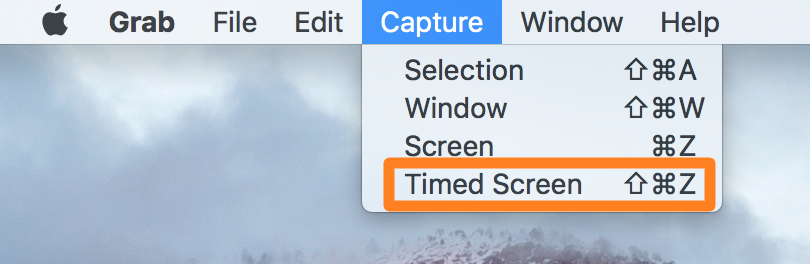
2) From the Menu Bar, navigate to Capture > Timed Screen. Alternatively, you can press Shift ⇧ + Command ⌘ + Z on your keyboard.
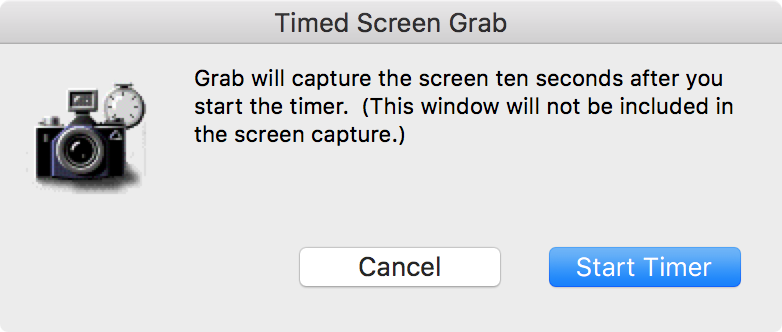
3) Next, a pop-up window will appear that asks you if you want to take a timed screenshot after 10 seconds. Click on the blue Start Timer button.
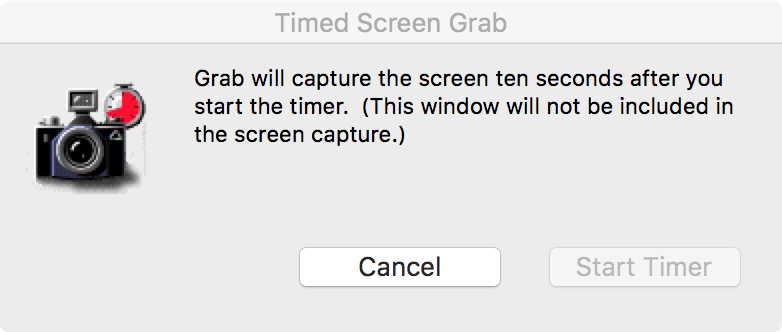
4) As you wait, the clock in the window’s icon will fill red slowly. When it becomes fully red, the timer is up.
Note: During the period of waiting, you are free to do anything you wish, including holding down the Option key to reveal hidden menus.
5) After the timer is up, a screenshot of your entire screen will be taken and you’ll then be able to save it anywhere you’d like.
Congratulations! You’ve just taken a timed screenshot.
Conclusion
The ability to take a timed screenshot is one that I found incredibly useful for my needs, but it’s obviously a very niche feature that not everybody is going to need.
Nevertheless, it’s a good trick to know. It’s something Apple includes in their OS X operating system that is very much under-used because hardly anyone actually knows about it.
Also read:
Will you be using timed screenshots for any of your own needs? Share with us how you’ll use this feature in the comments below!