Create an Apple ID or iCloud account for your child so they can have their own Apple Account on their iPhone, iPad, Apple Watch, or Mac and take full advantage of the features that come with it.

If you have a young child whom you’d like to include in your Family Sharing group, they need their own Apple Account (formerly called Apple ID). Maybe you’d like to share apps or books with them, let them use your Apple Music subscription, buy a new HomePod Mini for their room for intercom use, or use Find My to track their device and location.
Children under the age of 13 (age varies by country/region) cannot create their own Apple Account. But you, as the family organizer for your Family Sharing group, can create one for them.
Before you begin
Regardless of which device you plan to create the Apple Account on, you’ll need a valid payment method on file for your Apple Account. You’ll not be charged anything for creating the account; this is merely a verification of parental consent.
So before you walk through these steps, add a supported payment method if necessary or have your existing card information handy because you’ll be asked for the CVV or security code.
Create an Apple Account for your child
We’ve mentioned the steps for both iOS and macOS.
1) Open the Settings app on your iPhone and tap Family from the top. If you don’t see it, tap your name at the top and select Family.
2) At the top of the Family Sharing settings, tap Add Member or its icon.

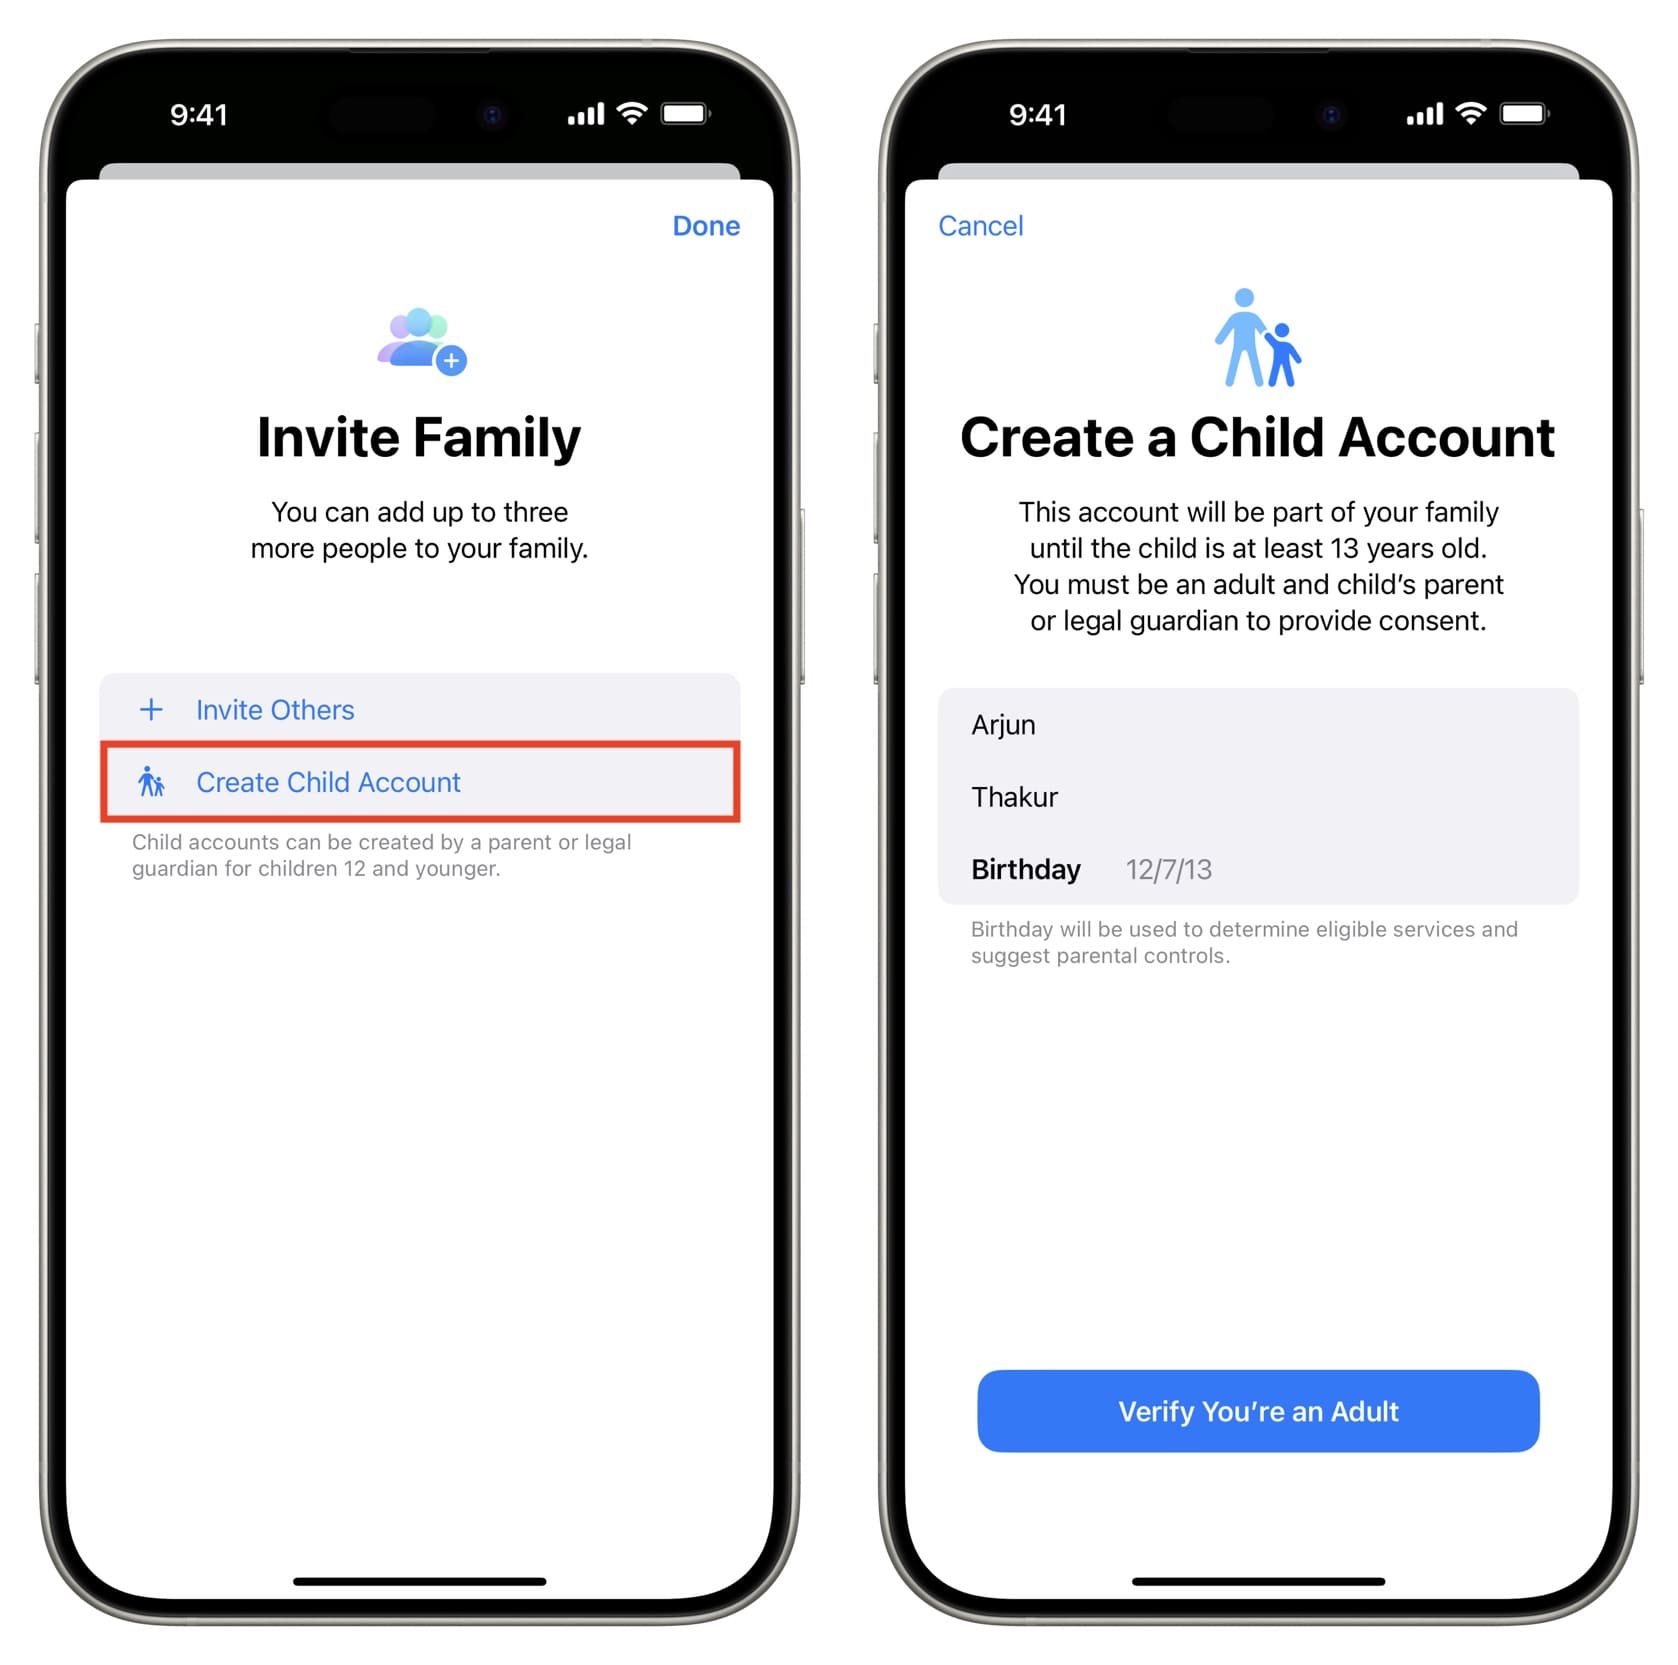
3) Choose Create Child Account.
4) Enter your child’s name and date of birth and tap Verify You’re an Adult.
5) Enter your Apple Account password and tap Next.
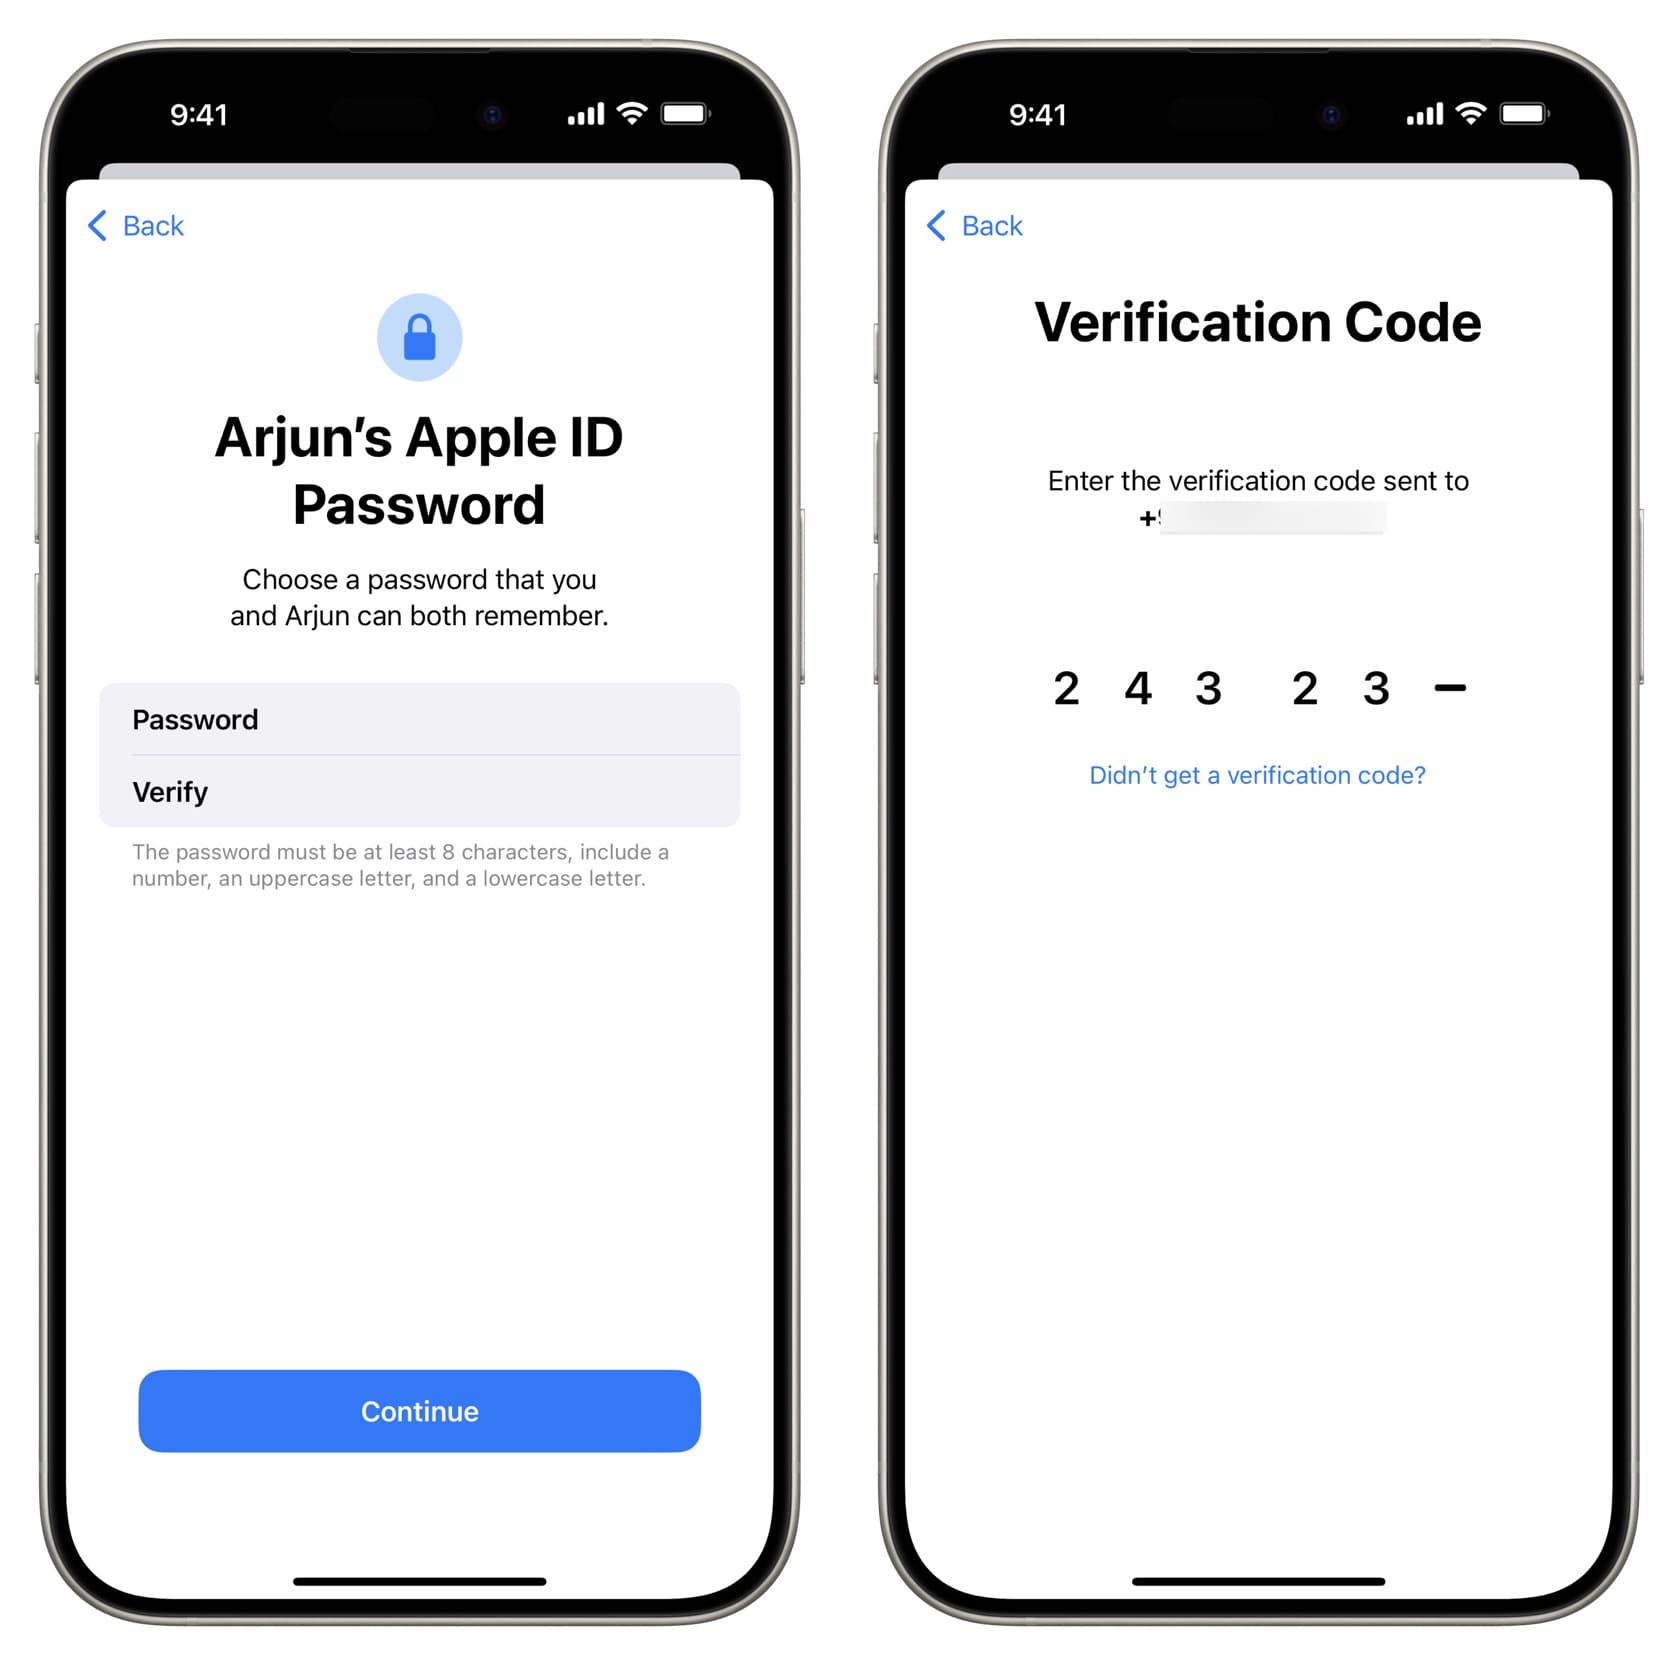
6) Choose to receive a verification code on one of the email addresses added to your Apple Account and enter it on the Verification Code screen.
7) Review the Family Privacy Disclosure and tap Agree if you do.
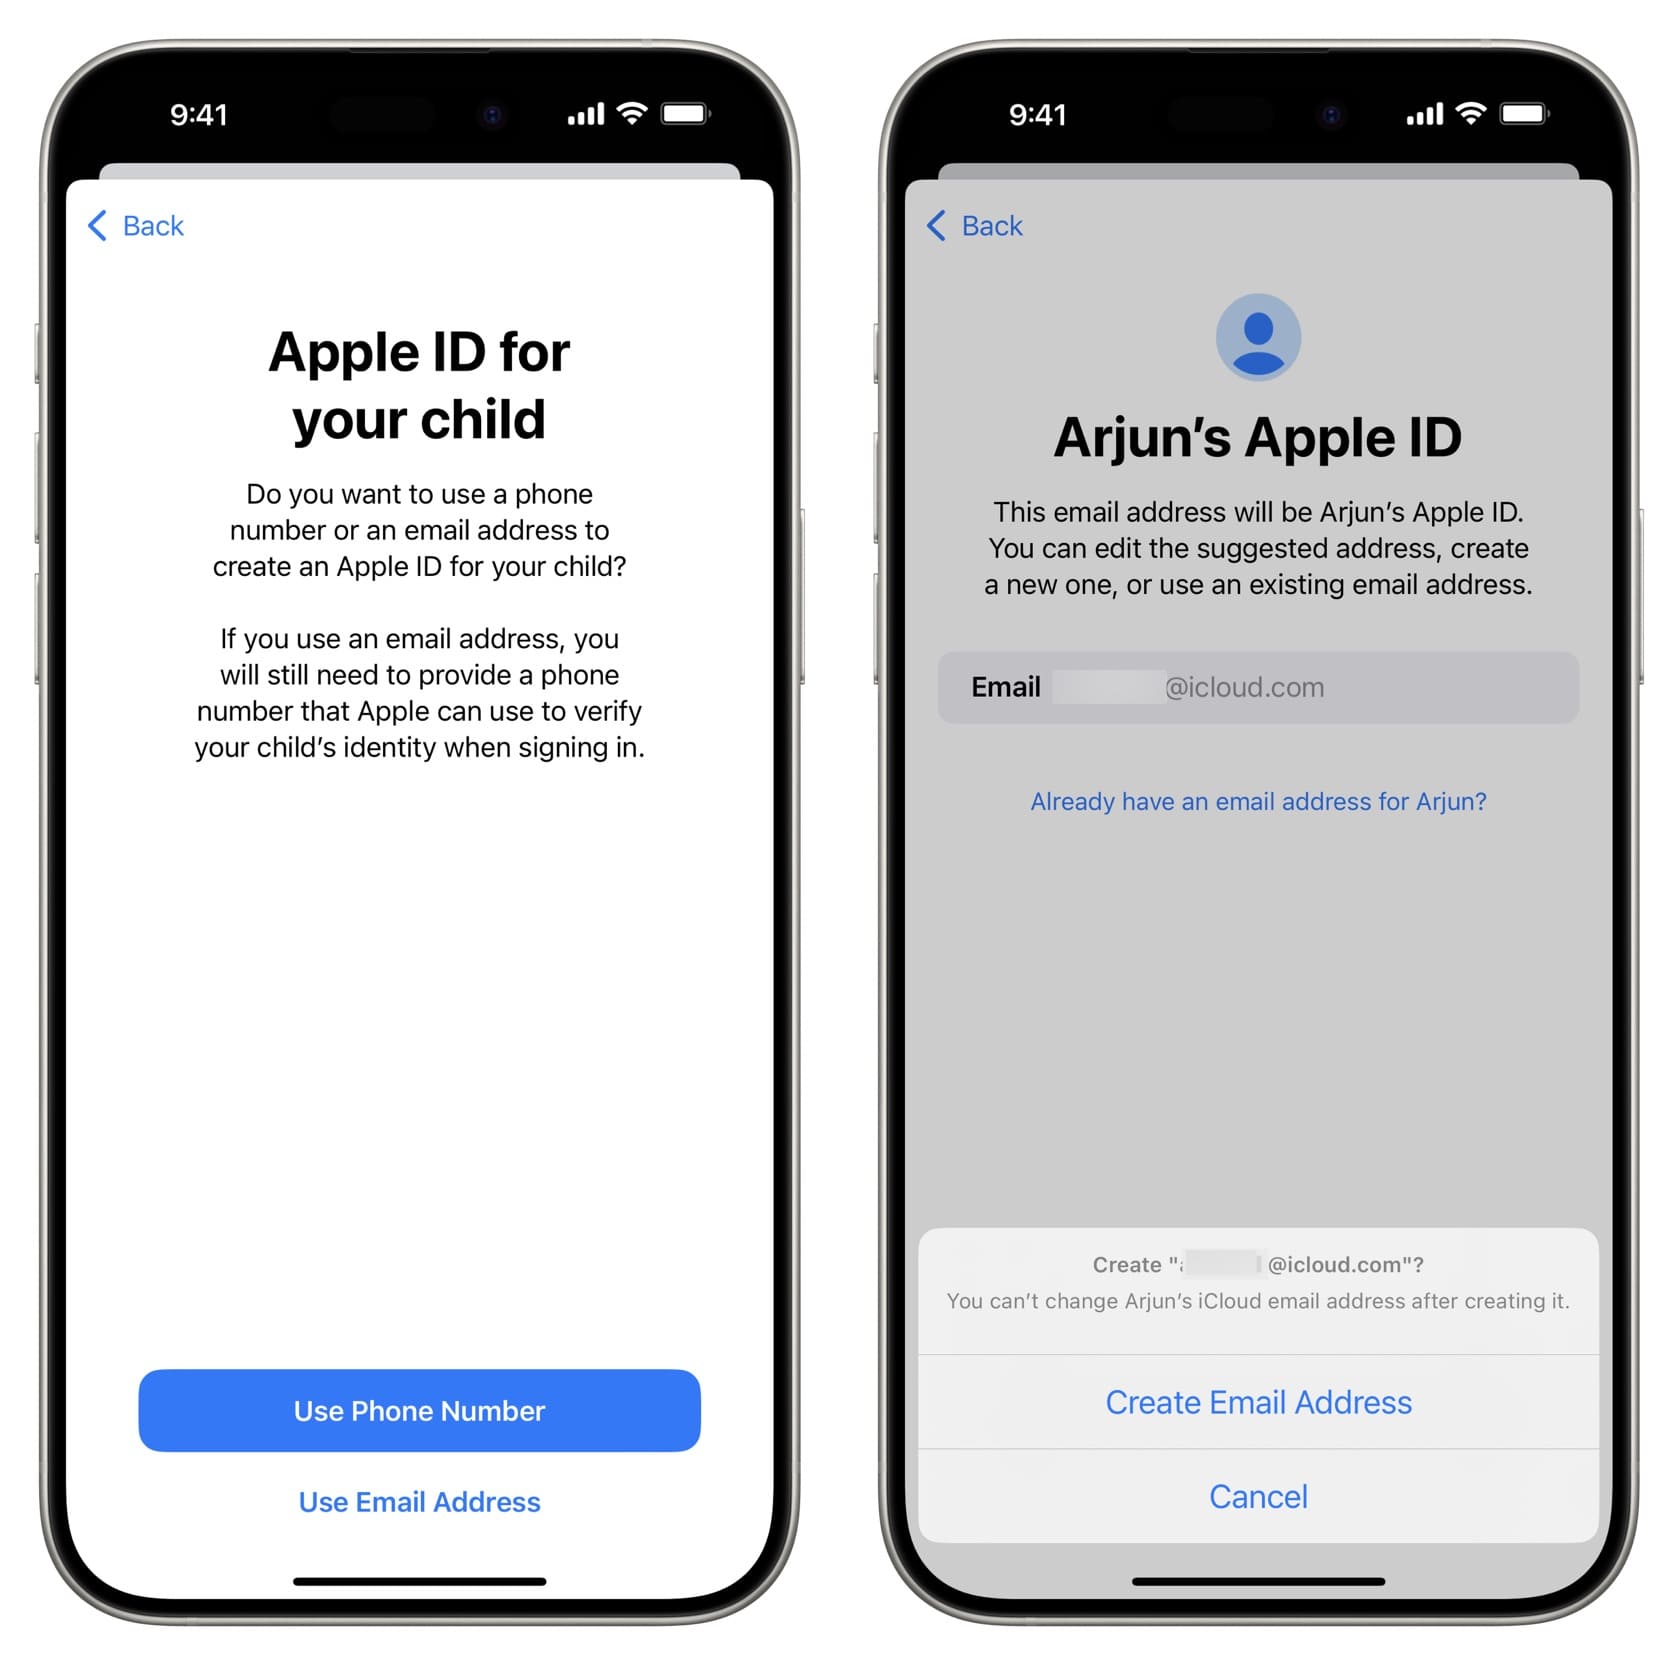
8) Use a phone number or email address to create an Apple Account for your child. We’ll go with an email address.
9) You can create an iCloud email address. To do that, enter a desired email address username, and tap Create Email Address.
Or, if you already have a Gmail, Yahoo, or other email address for your child, tap ‘Already have an email address for child’s name?’ and enter their existing email address.
10) Enter a password for your child’s Apple Account and tap Continue.
11) Then, use one of your phone numbers or a different number that your child may have to verify.
Important: If selecting an existing number here shows an error saying, “Cannot Create Account. Error Description not available,” try using another number on file until it’s successful. This can get annoying, but eventually, it will be successful.
12) After verifying with the OTP sent to the phone number, you have successfully created a child Apple Account. Now, you can go ahead and customize the settings for your child’s Apple Account.
Even if you exit the process now, you’ll find the child’s Apple Account in the Family section of your Settings app, from where you can change its options.
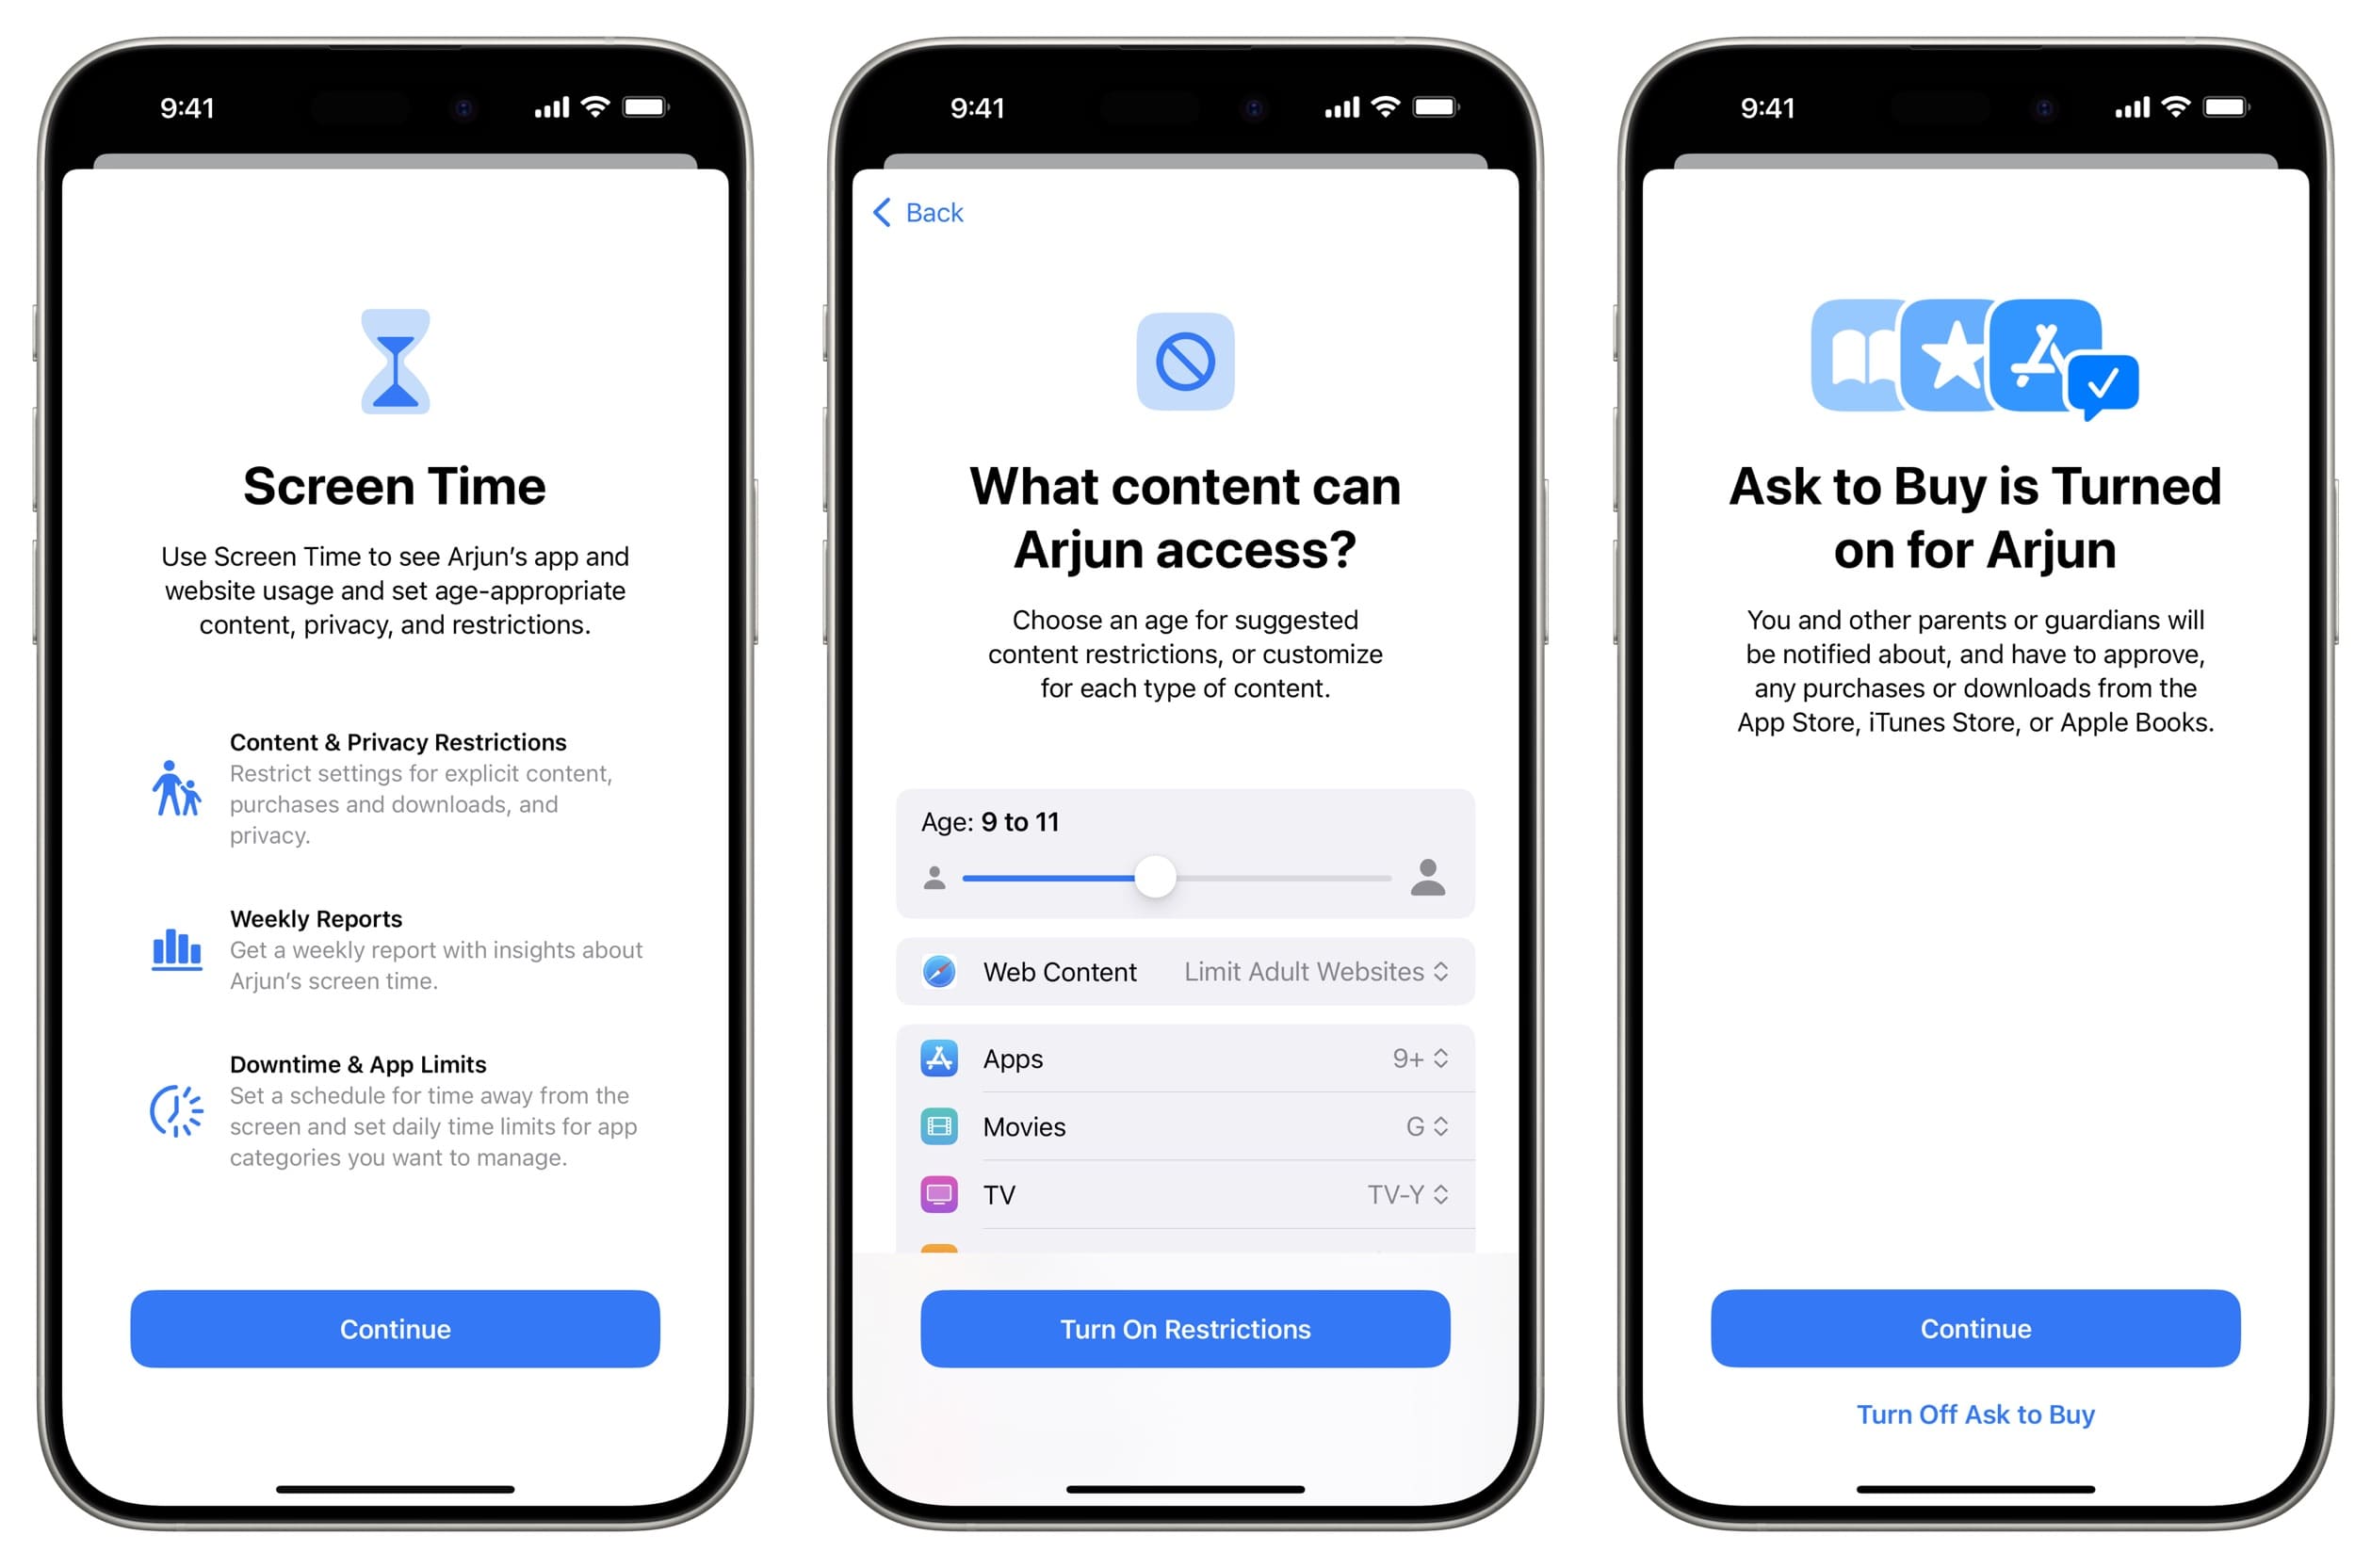
But if you continue with the process, you can set what content your child can access. It includes setting restrictions related to web browsing, apps, movies, TV shows, Books, Music, Podcasts, News, and more. Decide accordingly, and tap Turn on Restrictions.
It also includes information about Sensitive Photos and Videos Protection, Screen Distance, and parental lock. After that, you’ll see the Ask to Buy screen. When it’s on, you’ll have to approve the purchases your child wants to make, including free app downloads.
Next, choose to share your kid’s location with your family. If you tap Share Location here, you and other family members can always see the kid’s location in your Find My app (provided the child’s Apple Account is on an iPhone or iPad).
Finally, if you’ve other adults added to family sharing, like your spouse, you can add them as a parent or guardian for this child.
Once the child’s account is created, you can sign in to it on their iPhone, iPad, or Mac.
If you’re on a Mac
The steps to create a child account on a Mac are similar to those for iPhone or iPad. So, we won’t take you through each step, but we’ll guide you through the initial ones to help you get started.
1) Open System Settings on your Mac and click Family. If you don’t see it, click Apple Account > Family Sharing.
2) Click Add Member.

3) Choose Create Child Account, enter the asked information, and follow along.

After your child turns 13
Once your child turns 13, you can remove them from your Family Sharing group if necessary. Before the age of 13, they must remain part of your family or be transferred to another family group.
Are you planning to set up an Apple Account for your child? Remember, these steps can vary by device and any updates that Apple makes to the process.
Other tips for Apple ID: