Not too long ago, we showed you how you can edit your Apple ID payment information from your iOS device, but the same task can also be accomplished from your Mac or PC in a similar number of steps.
Whether you’ve received a new credit card that you want to use, or you wish to change the credit card you have on file for your Apple ID, changing your payment information allows future purchases made through Apple’s online stores, such as the App Store, Books Store, or iTunes Store, to be billed to the new credit card you’re adding.
In this tutorial, we’ll show you how you can change your Apple ID payment information from your Mac or PC.
Changing your Apple ID payment method
Changing your Apple ID payment information on Mac
You can change your payment method on Mac in a few different locations, the App Store and the Music or Books app. We’ll show you steps for both.
Change your card in the App Store
1) Open the App Store app and access your account by clicking your profile on the bottom left or Store > View My Account from the menu bar.
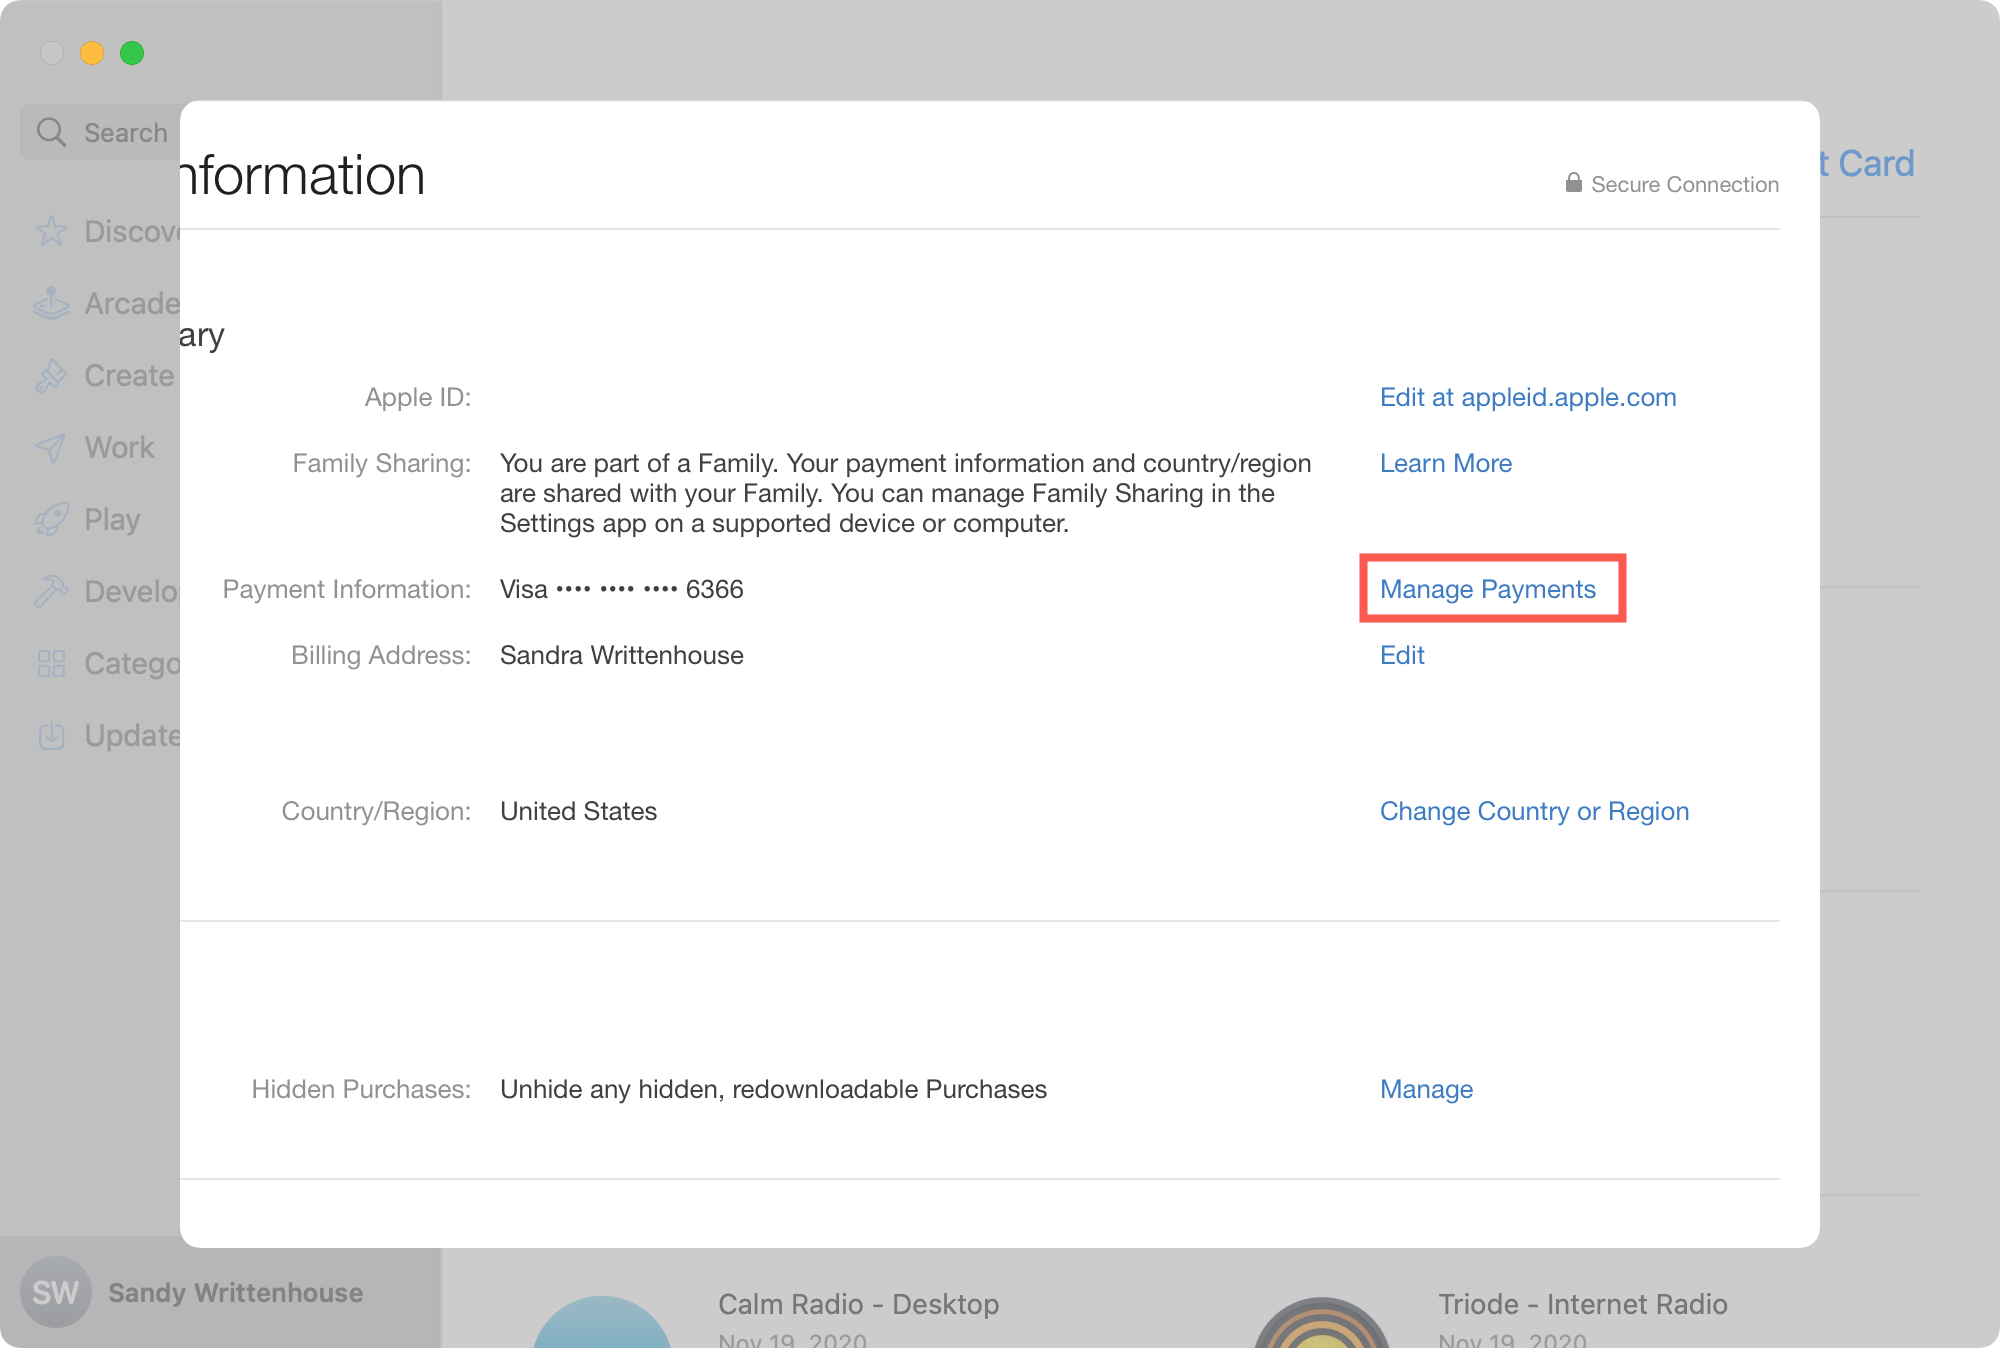
2) Select View Information at the top.
3) On the next screen, you’ll see Apple ID Summary. Next to Payment Information, click Manage Payments.
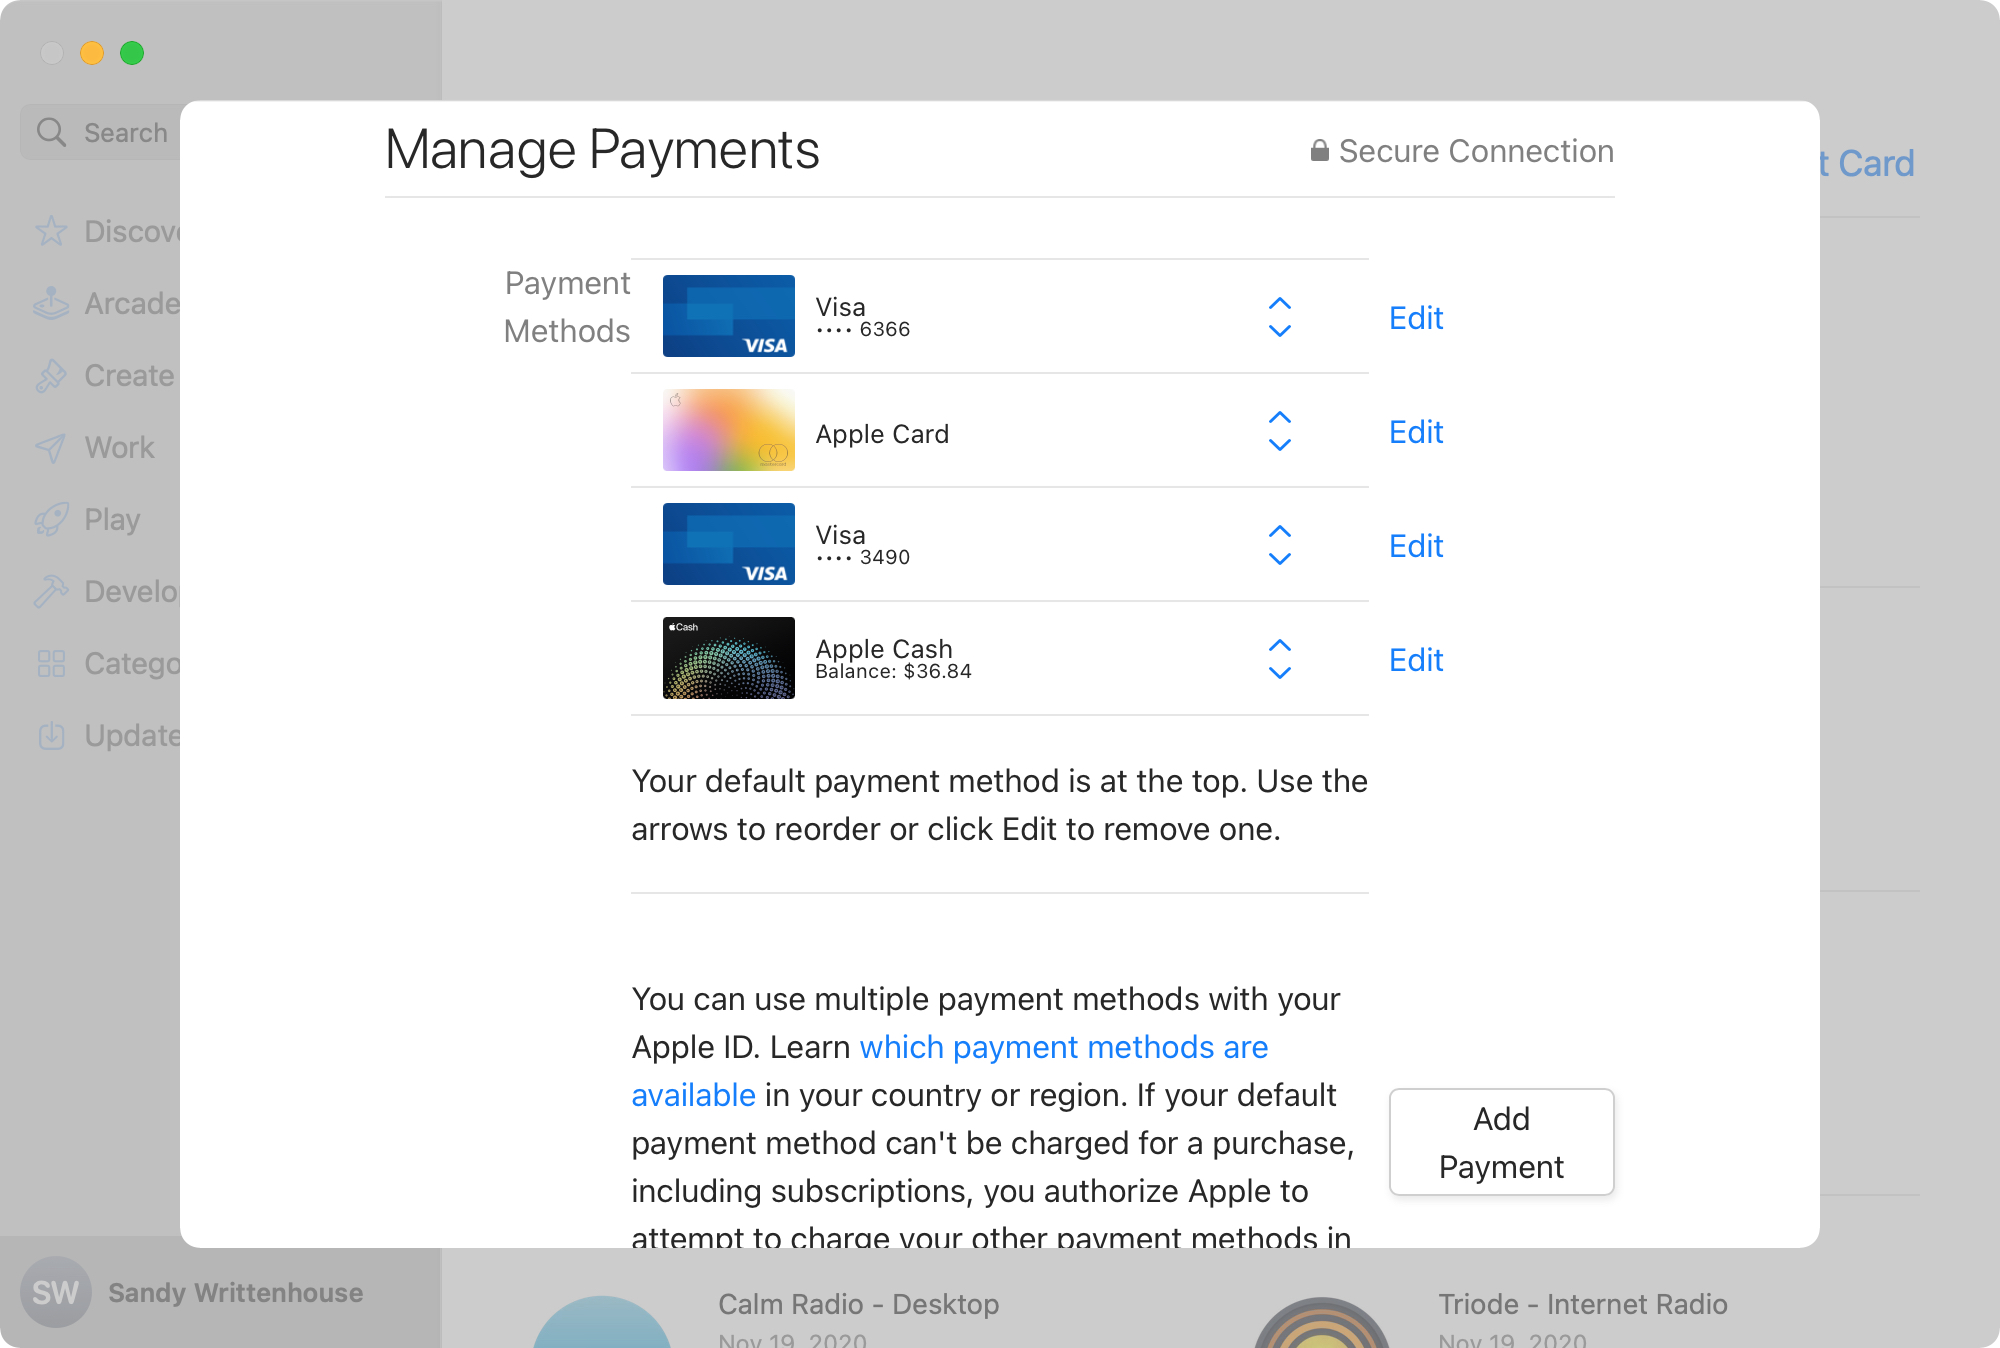
4) You’ll see a list of your payment methods, if you have more than one assigned to your account. The one at the top is the default card.
- To rearrange the payment methods, drag the arrows to move one to a new position in the list. Again, place the one you want as your default at the top.
- To remove one, click Edit and pick Remove Payment Method.
- To add a new one, tap Add Payment and follow the prompts.
5) Click Go Back and then Done.
Change your card in Music or Books
1) Open the Music or Books app and access your account by clicking Account > View My Account or Store > View My Apple ID from the menu bar.
2) Enter your password if prompted.
3) At the top, you’ll see Apple ID Summary. Next to Payment Information, click Manage Payments.
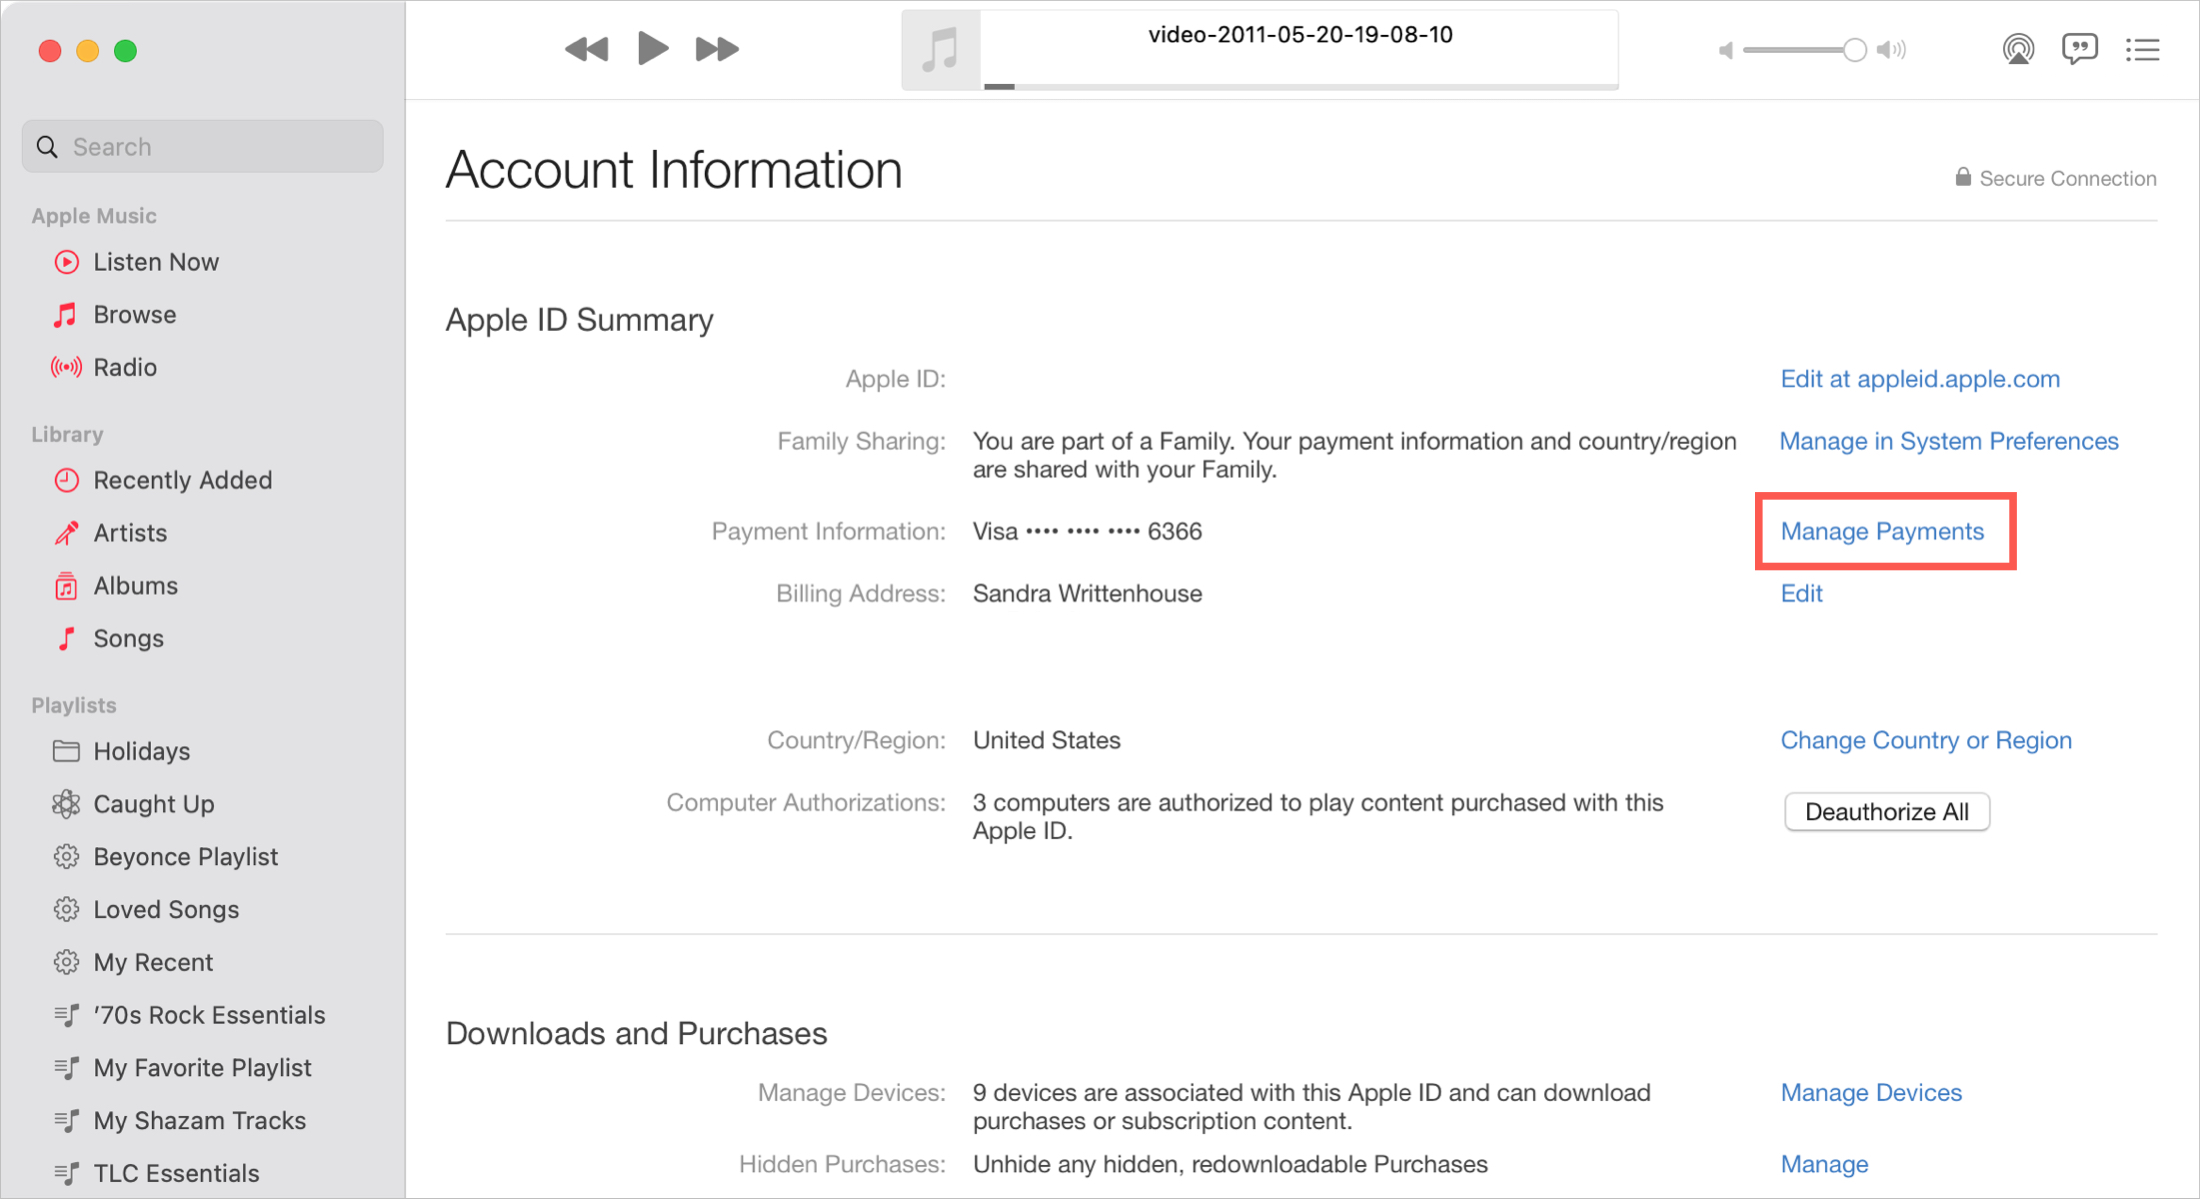
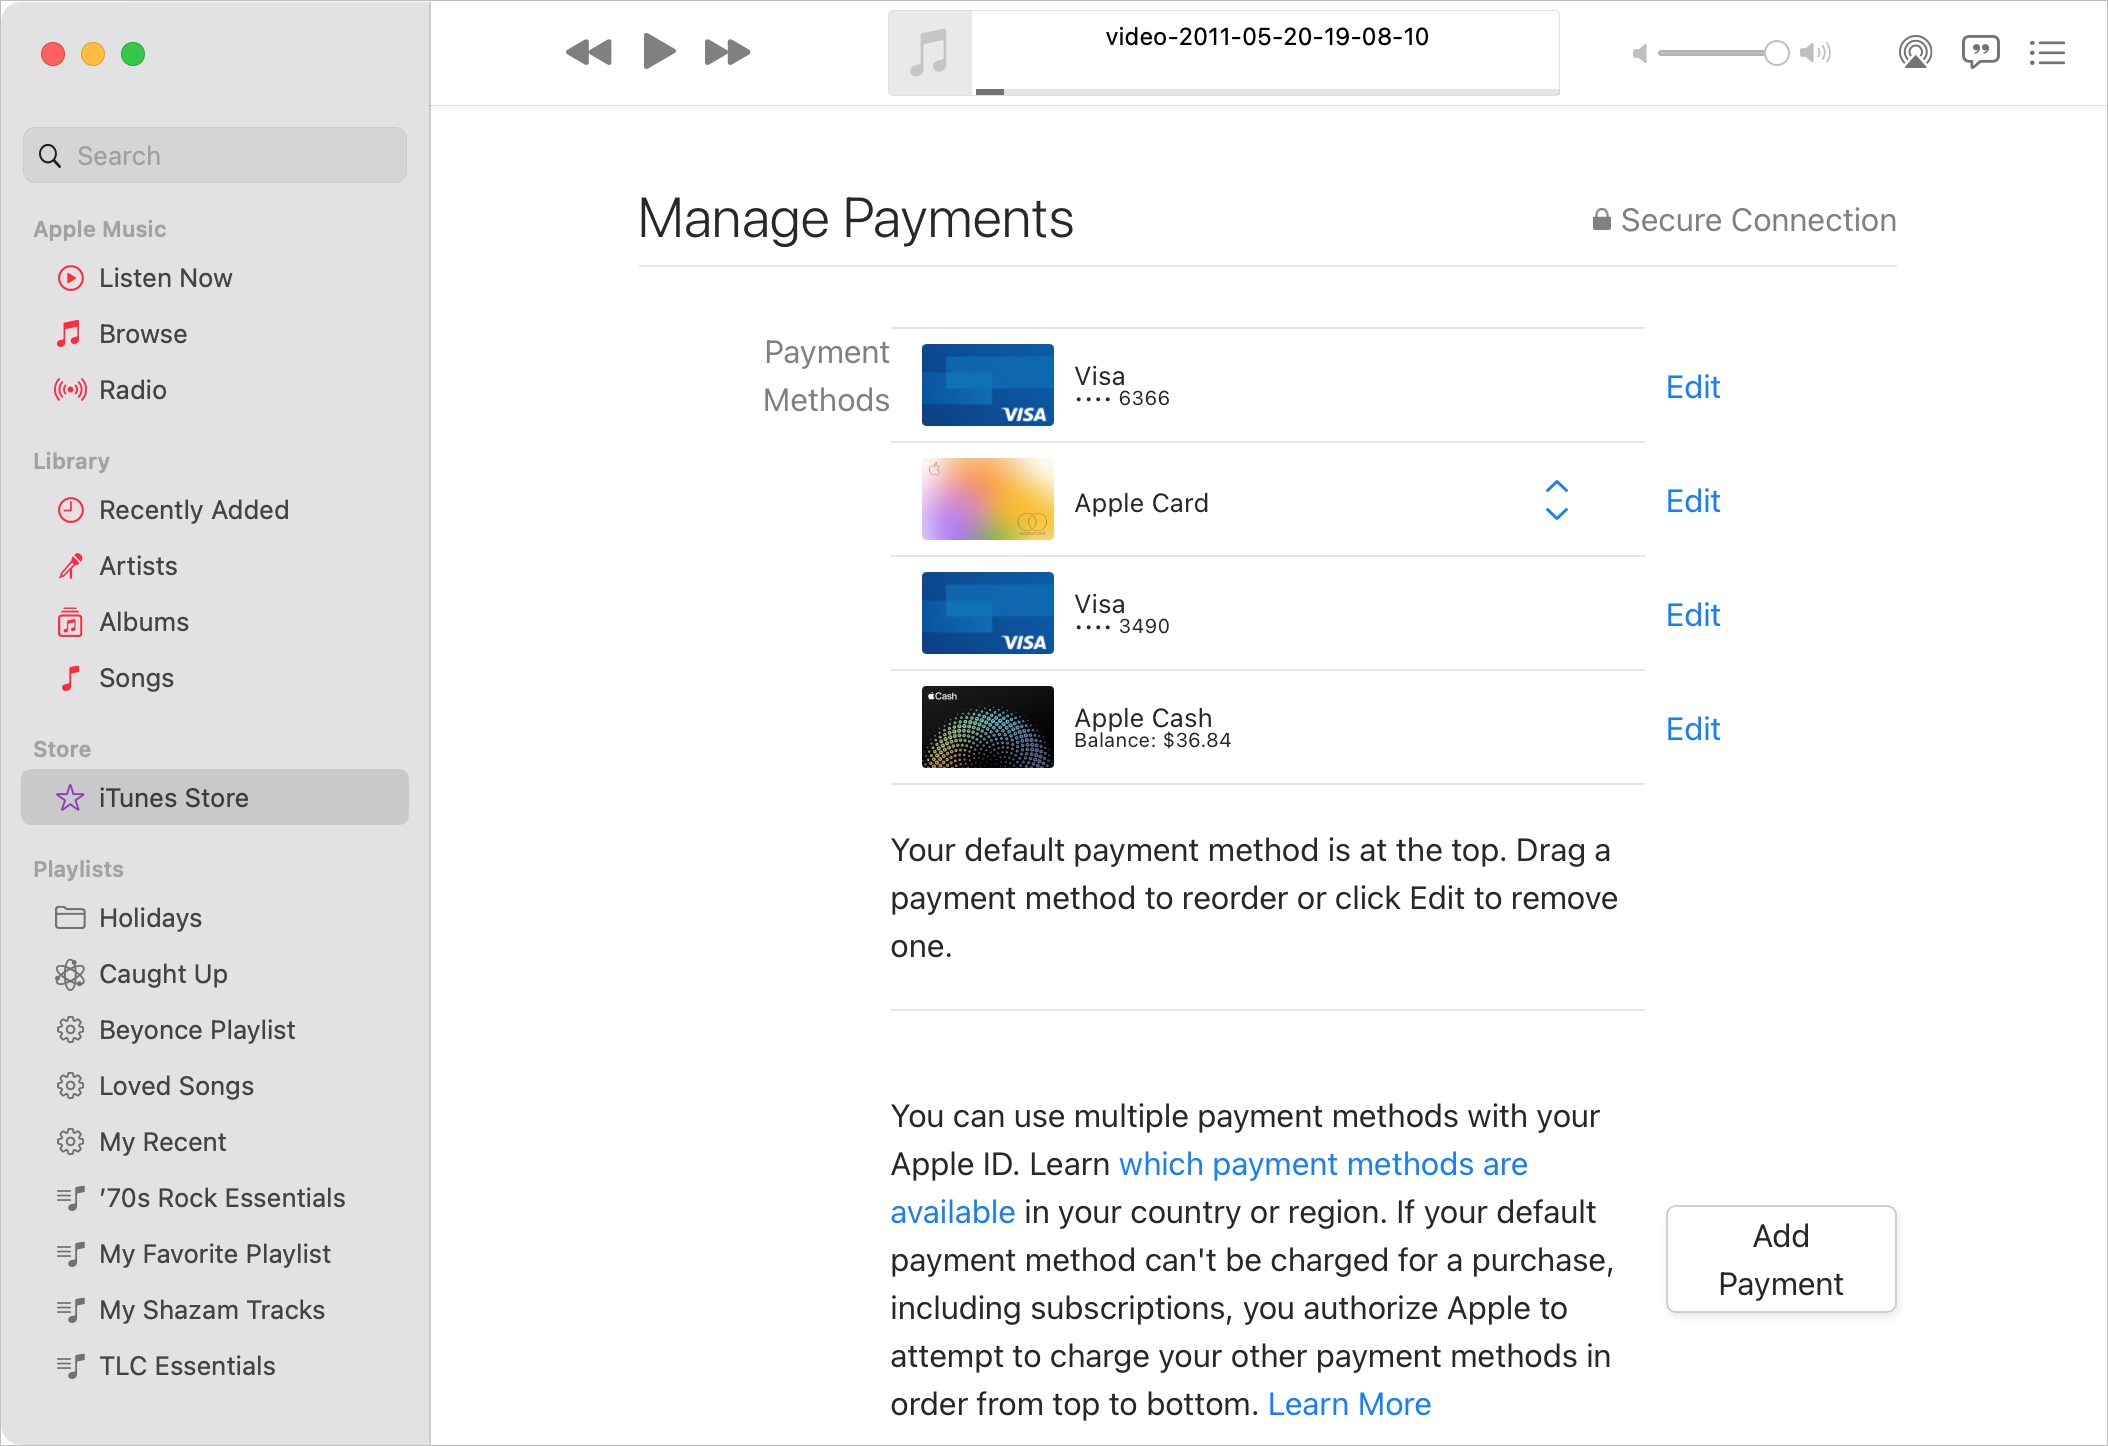
4) Just like above in the App Store, you’ll see a list of payment methods with the one at the top as the default card.
Use the same actions as Step 4 above to rearrange, remove, or add a card.
5) Click Go Back and then Done.
Changing your Apple ID payment information on PC or an older Mac
If you have a PC or older version of macOS before Catalina that offers iTunes, follow these steps to change your payment method.
1) Launch the iTunes app on your computer.
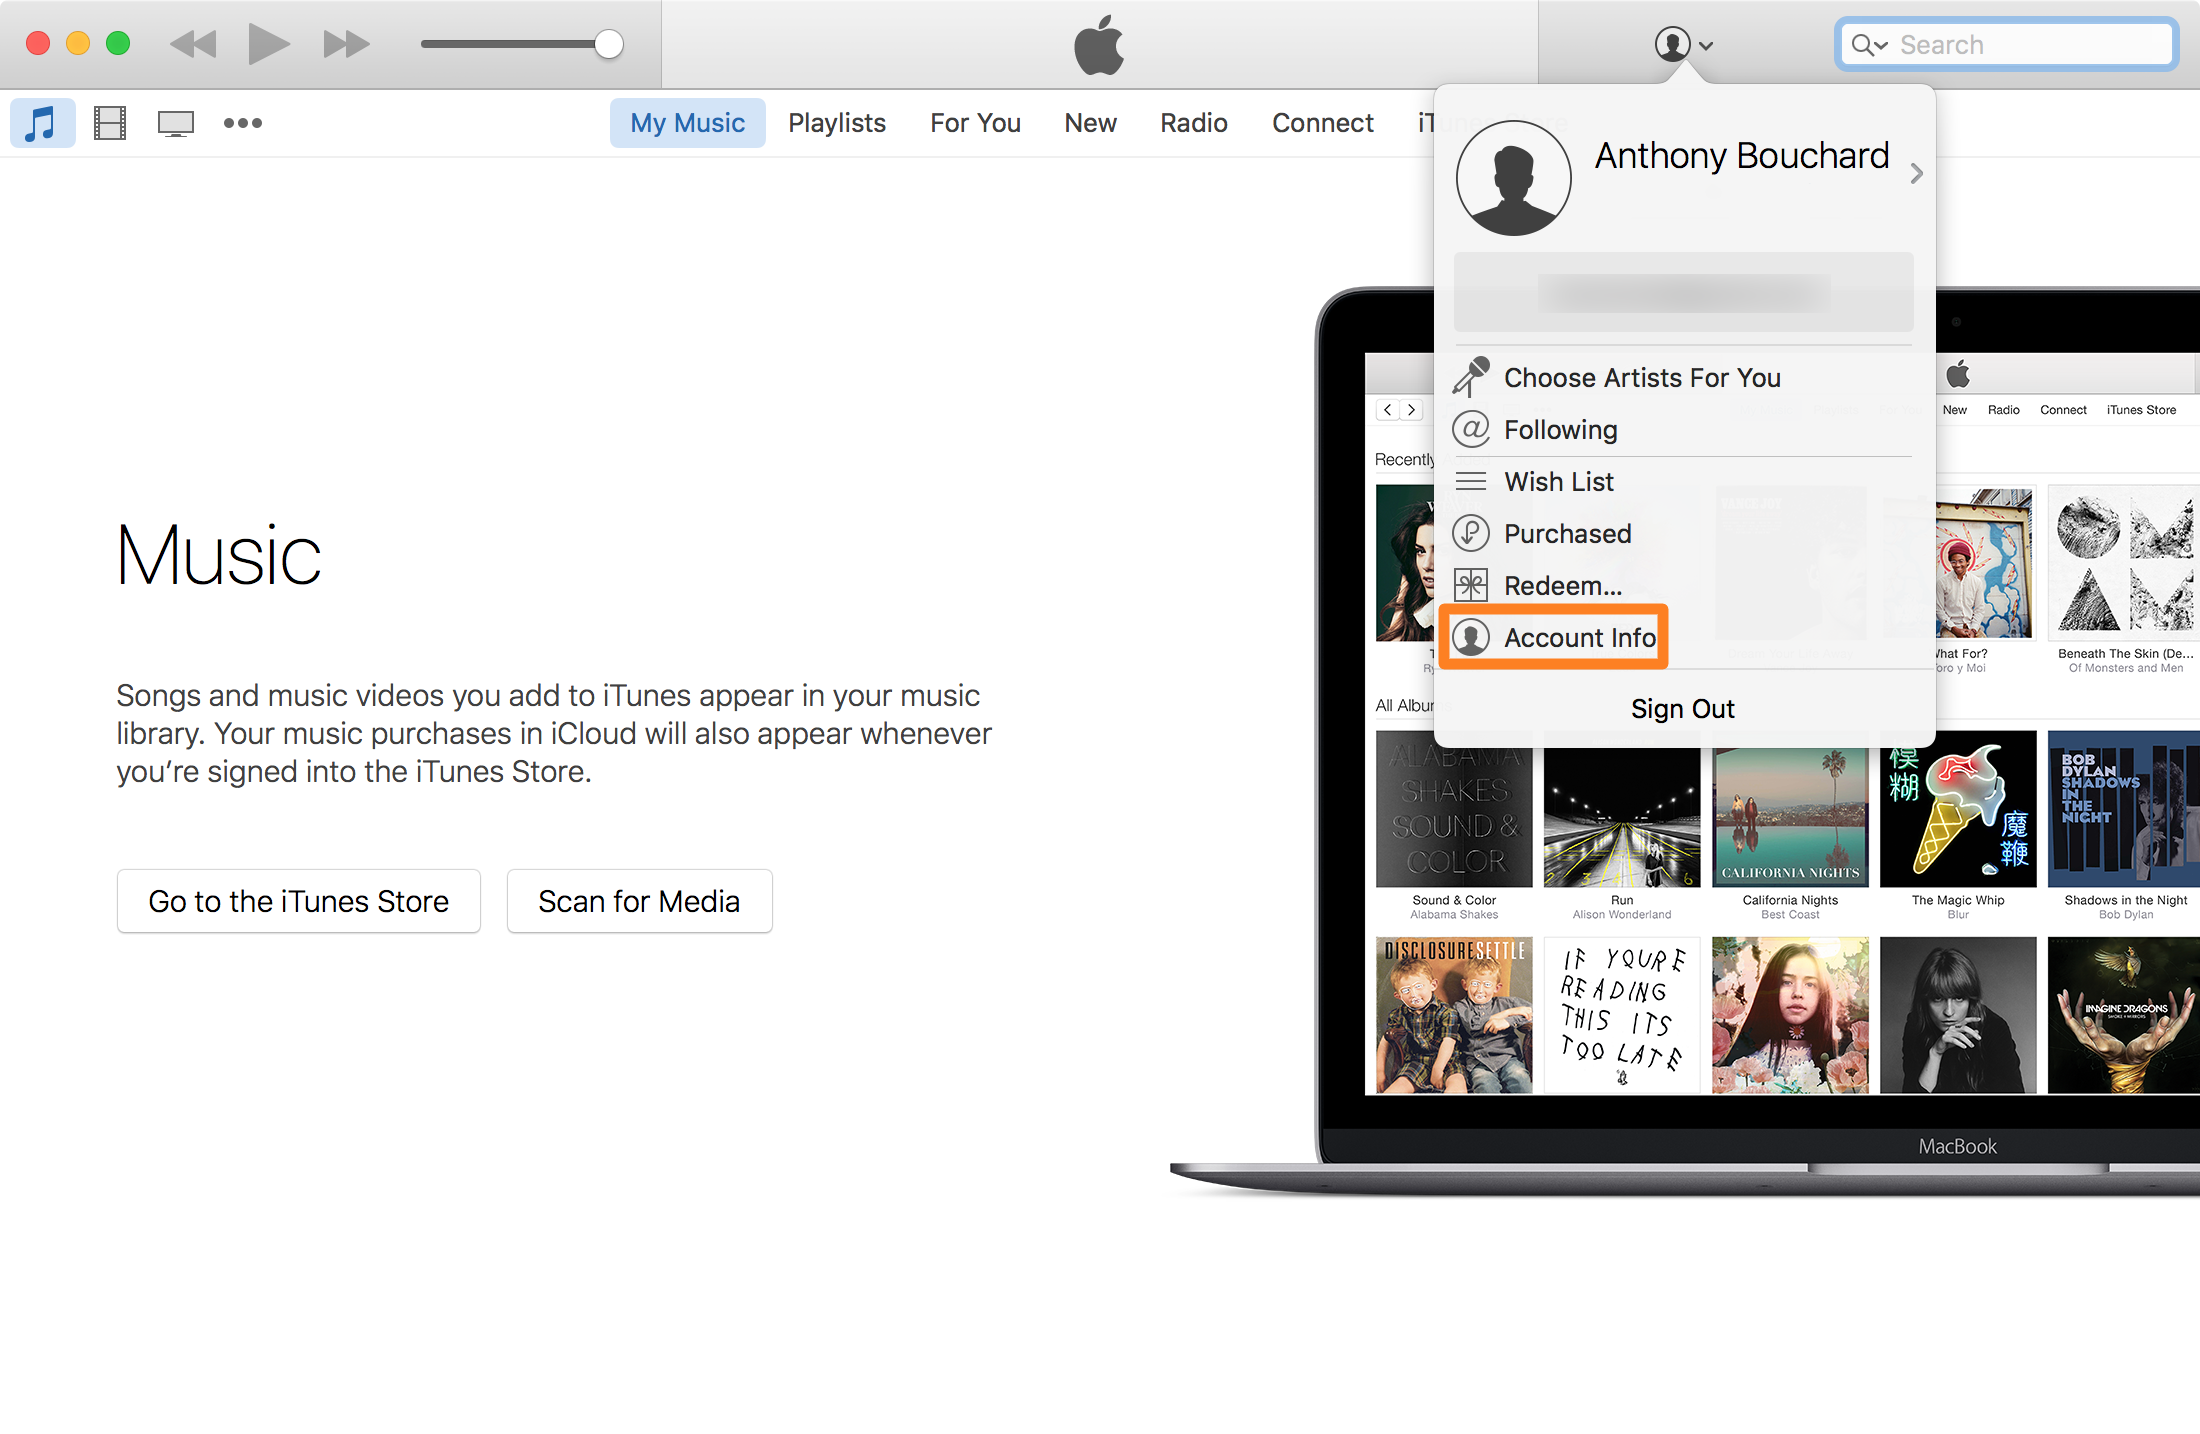
2) At the top of the iTunes app, click on the account button that appears to the left of the search bar.

3) If you’re not already signed in, sign in your Apple ID from the prompt window that appears. If you’re signed in, skip to the next step.
4) Once signed in, you can click on the button again and it’ll reveal a pop-up. From here, click on the Account Info button.
5) You will now be prompted to enter your Apple ID password, so go ahead and type in your password and then click the View Account button.
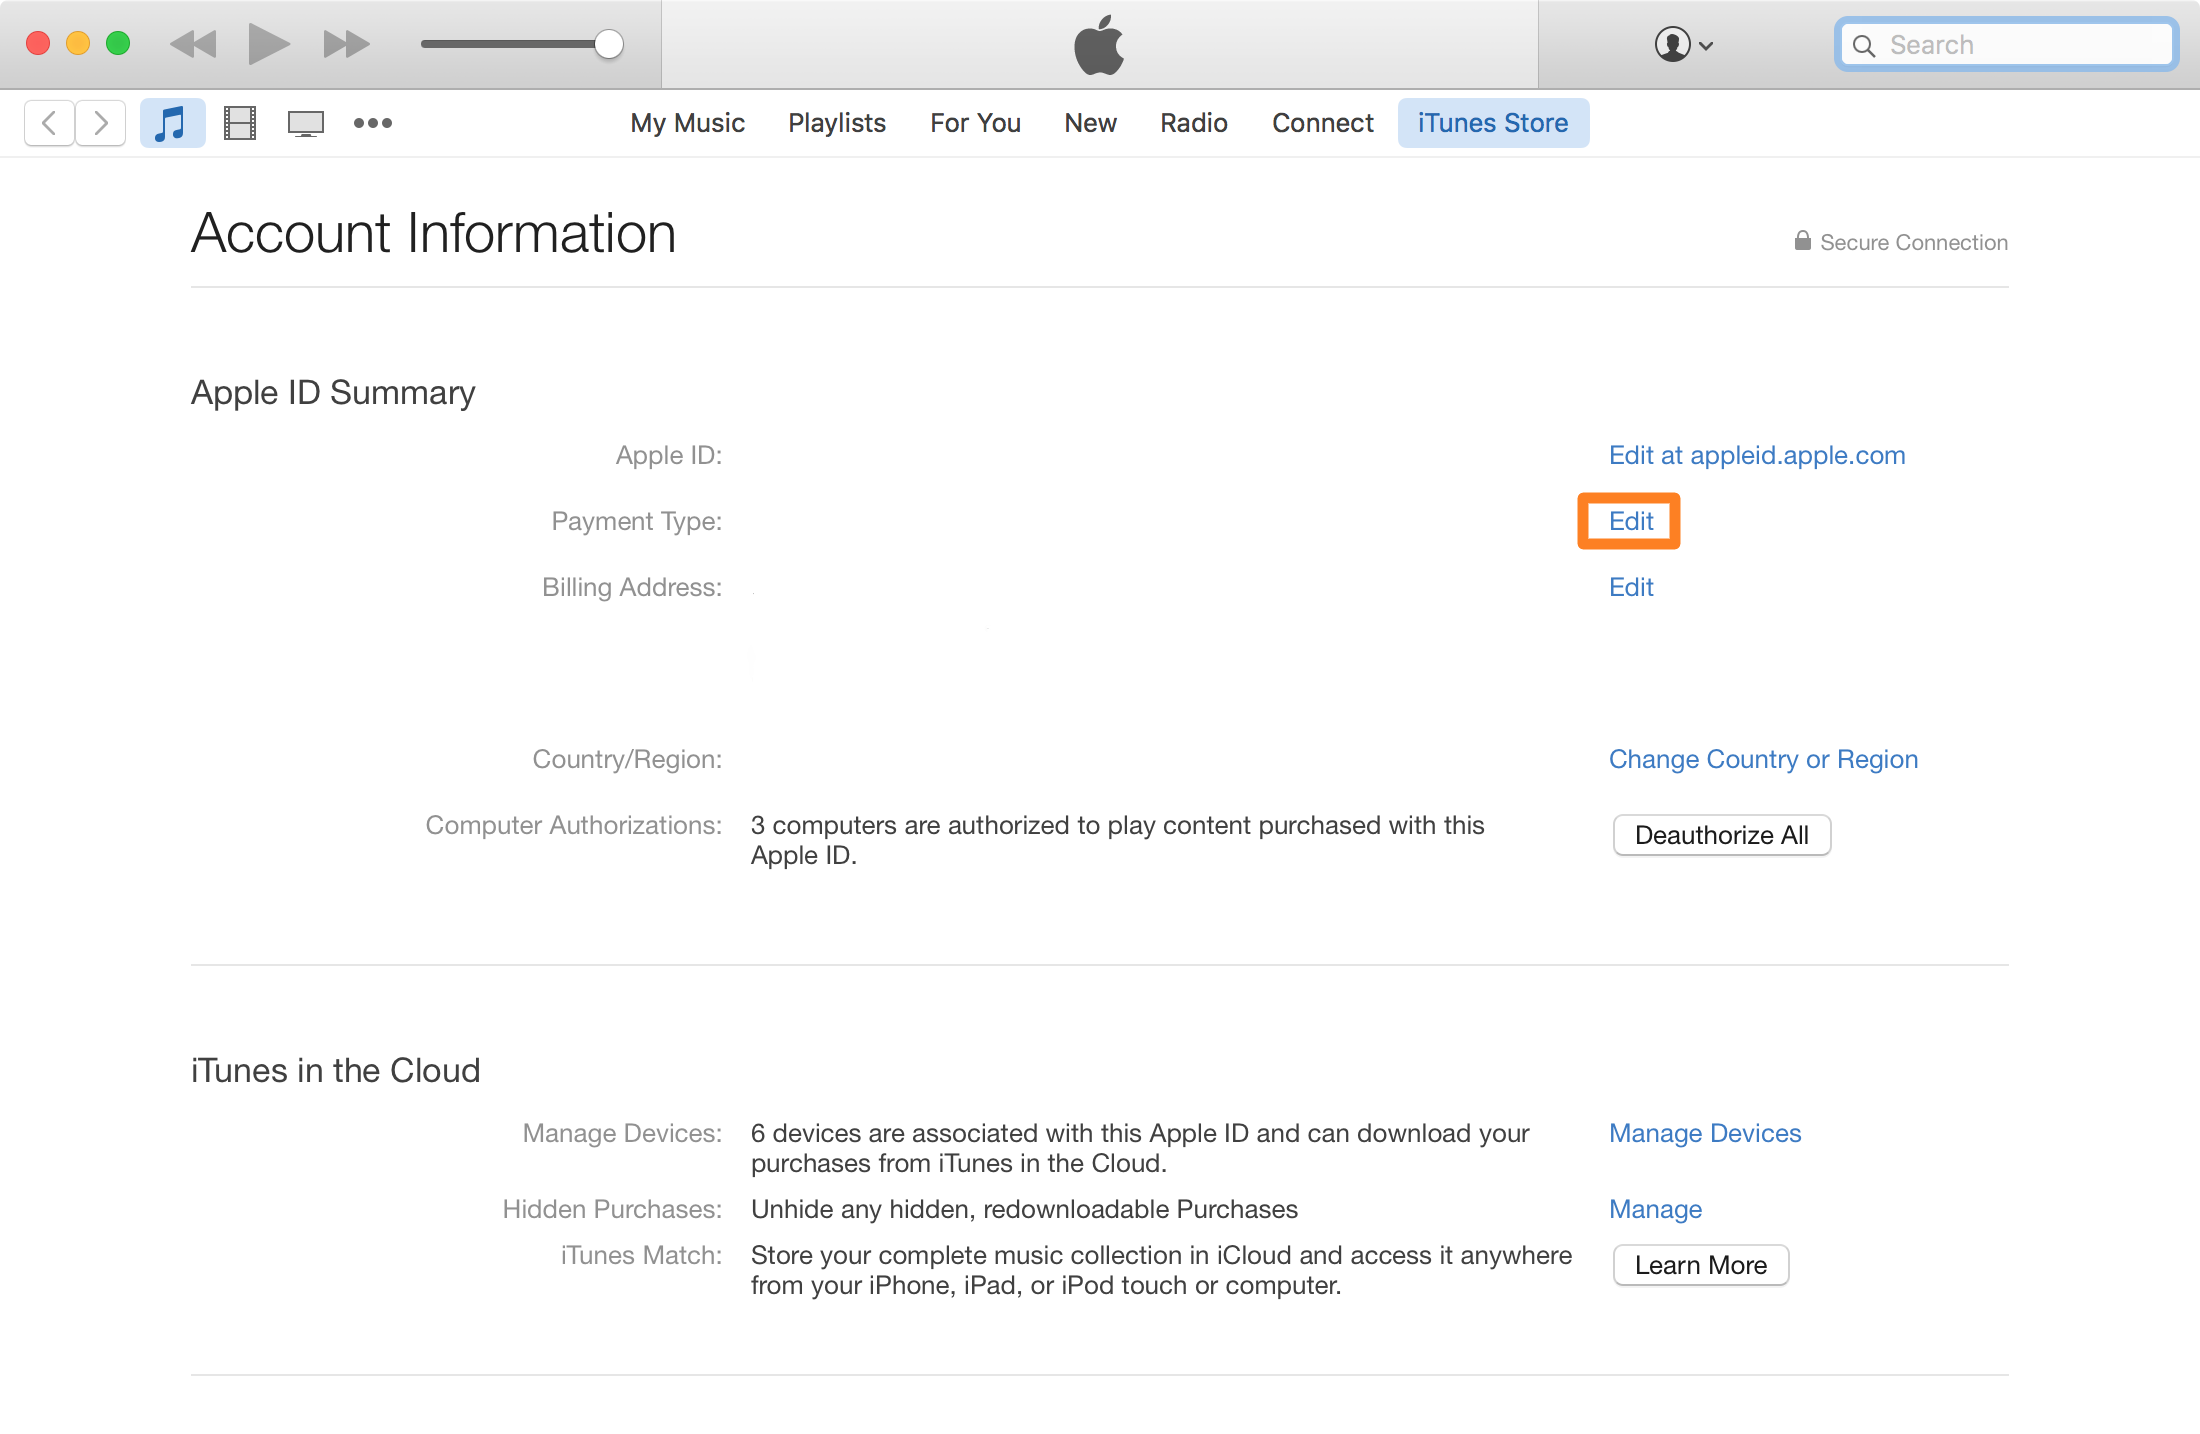
6) This brings you to your Account Information screen in iTunes. You’ll now want to click on the Edit button to the right of Payment Type.
7) Now you’re brought to a form where you can enter your new credit card information. Once satisfied, click on the Done button at the bottom right of the iTunes app to save your changes.
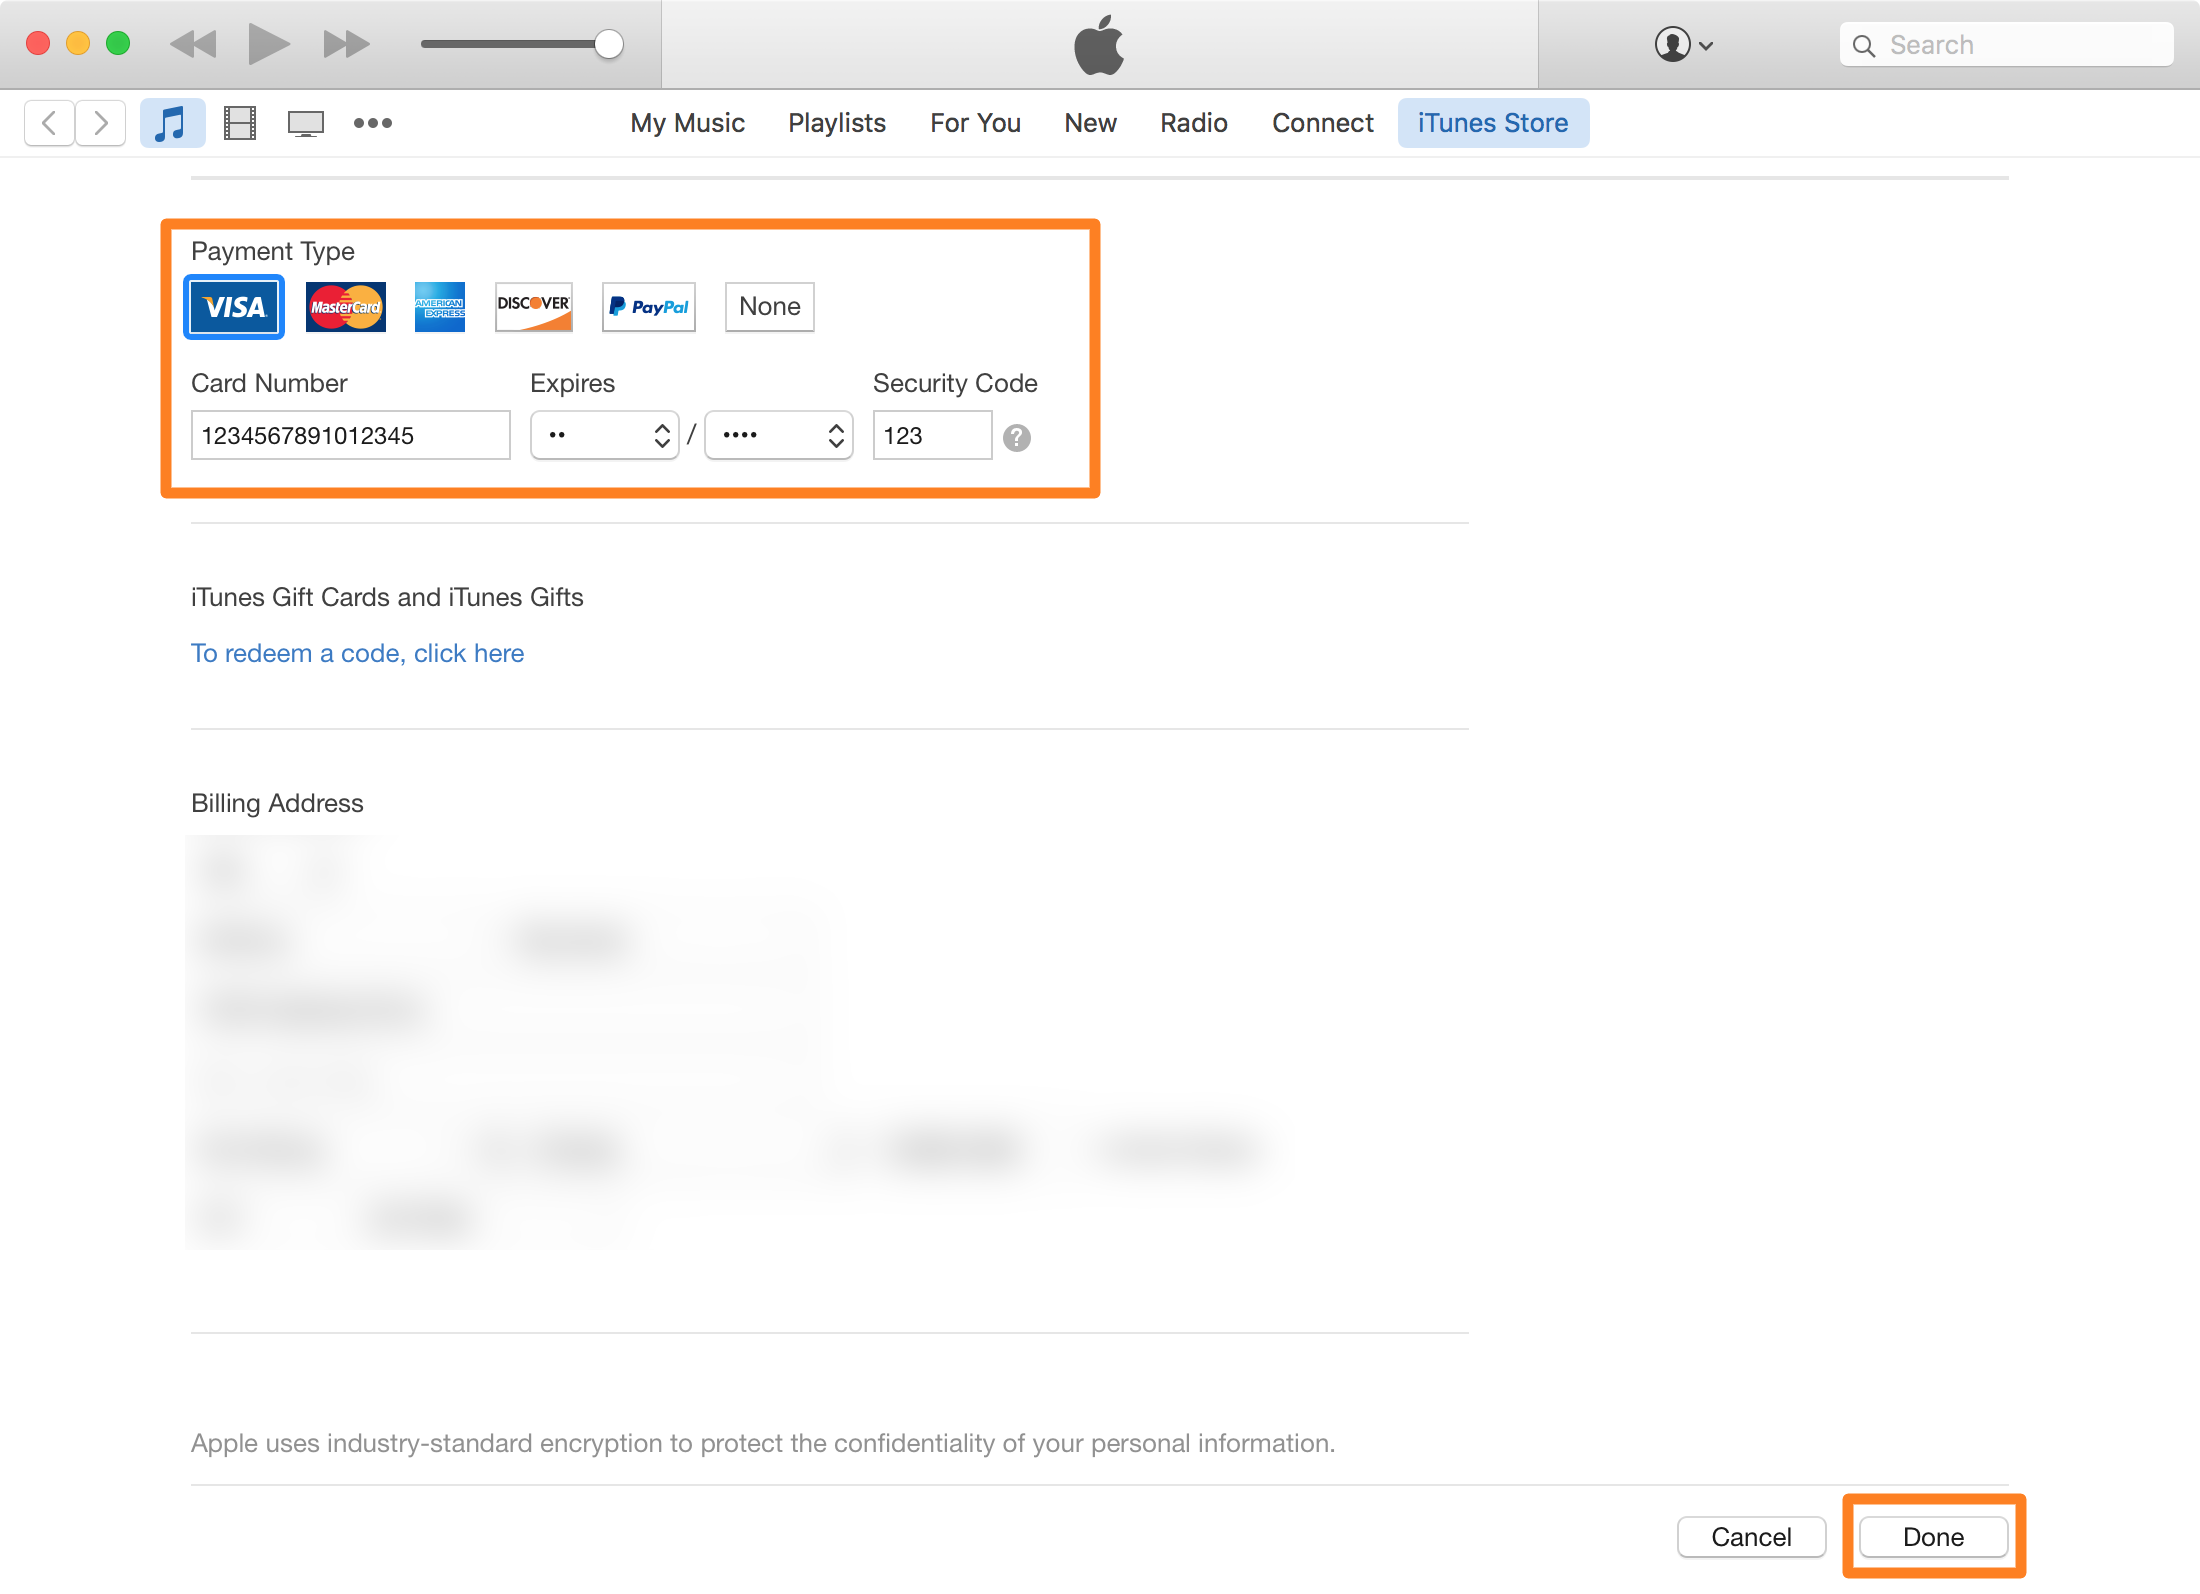
8) Now you should receive a confirmation email from Apple, confirming the credit card change on your account.
That’s all there is to it!
Changing your Apple ID payment information online
No matter what type of computer you use, you can always change your Apple ID payment method online. You can go directly to the Manage your Apple ID website or navigate there from iCloud.
If you’re using iCloud.com, click your name on the top right and select Account Settings. On the next screen, click Manage under Apple ID.

1) Once you arrive at the Manage Your Apple ID site, sign in.
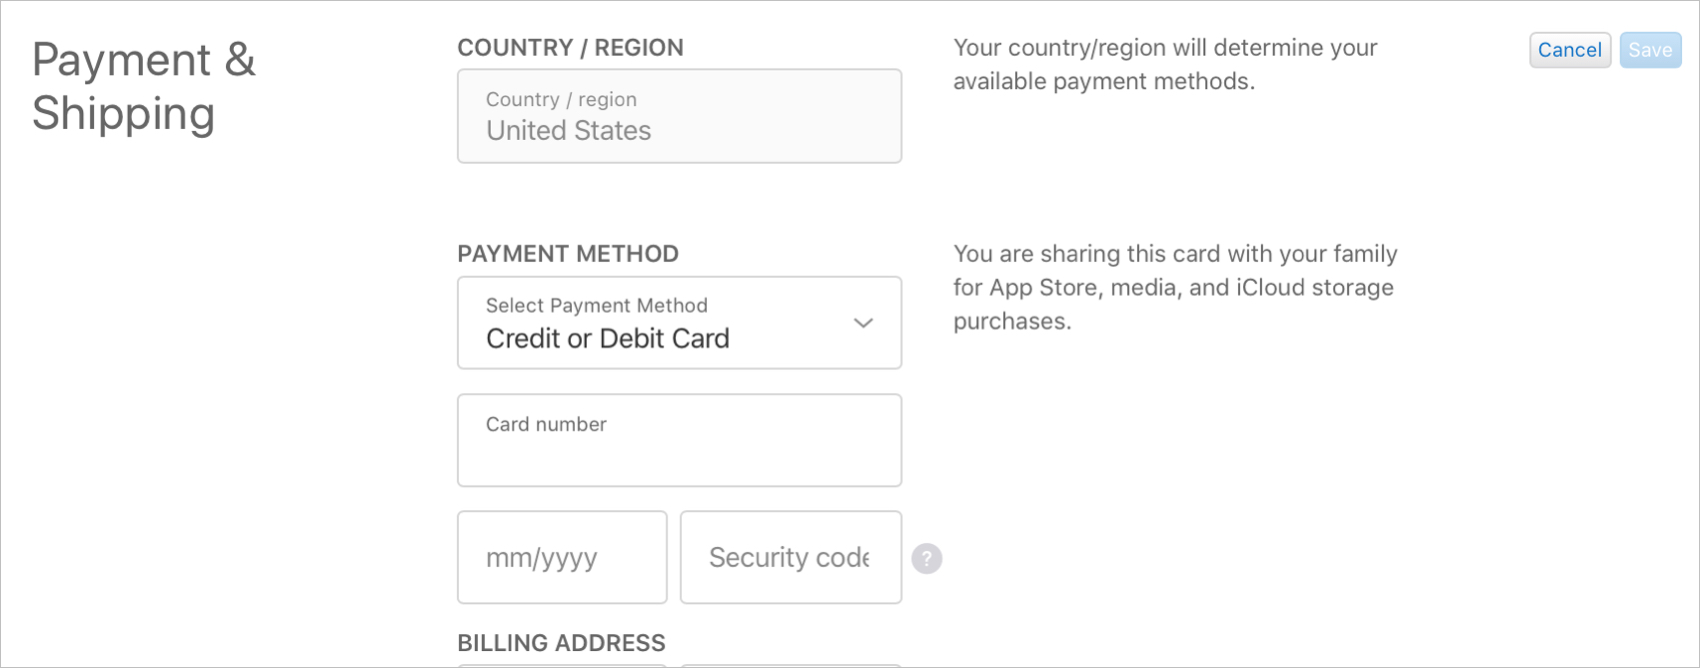
2) Scroll toward the bottom to Payment & Shipping and click Edit.

3) Enter the information for the new payment method you’d like to use, including the Billing Address.
4) Click Save.
Conclusion
Whether you’re using a Mac or a PC, the steps to change your Apple ID payment information are going to be the same because they’re performed through the iTunes app itself.
Now, whenever you get a new credit card, or choose to switch a payment type, you know how that can be done from your computer.
Also read:
- Changing your Apple ID credit card info directly from your iPhone
- Creating an Apple ID without a credit card
- How to change your Apple ID
Do you prefer changing your Apple ID payment information in iOS, or on your computer? Share below!