In this tutorial, we will share how to set up and configure parental controls on your child’s Mac so you can keep them protected from inappropriate content and fine-tune what your kid is allowed to access.
The benefits of parental controls
The parental controls on Mac allow you to have more control over your child’s activity on the device.
With parental controls, you can deny access to certain apps, websites, and the people they may want to interact with. These settings can be applied to any standard user on your Mac but not other administrator accounts.
These are very useful tools for parents who want to make sure their child is only using the computer for academic activities rather than playing online video games, watching videos on YouTube or Netflix, or communicating with friends on Facebook or Twitter.
Likewise, schools and institutions that use Macs in libraries and computer labs can use these features to prevent students from getting distracted while in an educational environment.
Your child and their Mac
If you’ve given a separate Mac to your child, make sure their Apple ID is signed in to it. You can even create a child Apple ID from your iPhone if the kid is under 13.
However, if you let them use your Mac, you should create a separate standard user account for your child on that computer. It has several benefits, as outlined in our dedicated tutorial. Secondly, Apple encourages you to set the Screen Time passcode on a standard user account, not the admin one.
Turn on parental controls on Mac
You have to use Screen Time to set up content and privacy restrictions on Mac. You can follow these steps directly on the child’s Mac or their separate user account on your Mac. But, if you use Family Sharing, you can even do this from your Mac (steps below). Family Sharing also lets you remotely manage your child’s Screen Time settings and see their device usage from your iPhone or Mac.
1) Open System Settings and select Screen Time.
If you’re following the steps on your Mac, click the drop-down menu next to Family Member and select your child’s name.
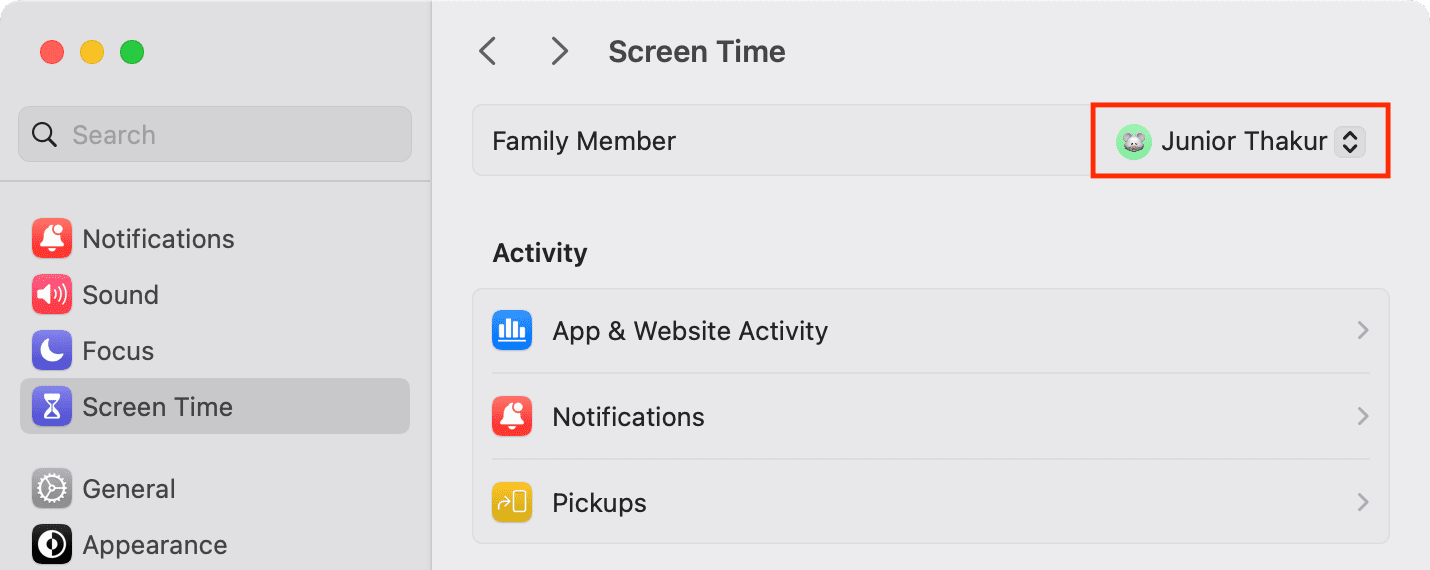
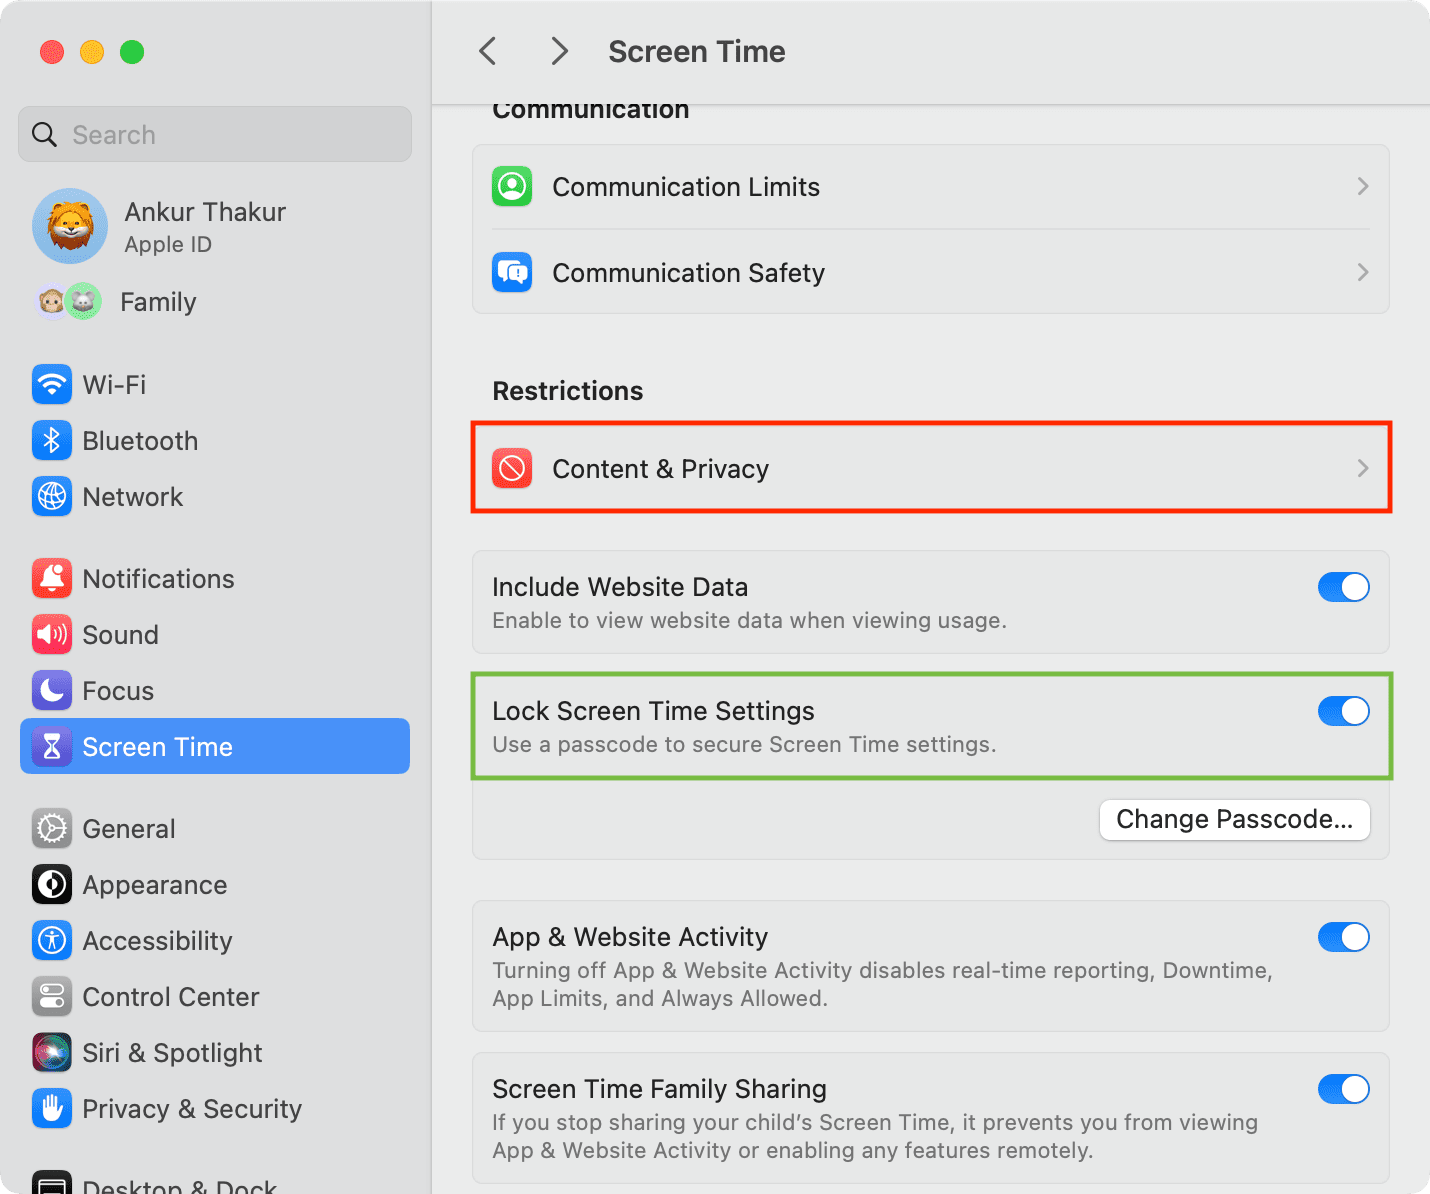
Important: Make sure Lock Screen Time Settings is switched on and a Screen Time passcode is set up.
2) Click Content & Privacy and turn it on from the next screen if it isn’t already.
3) From here, you can set up:
- Content Restrictions
- Store Restrictions
- App Restrictions
- Preference Restrictions
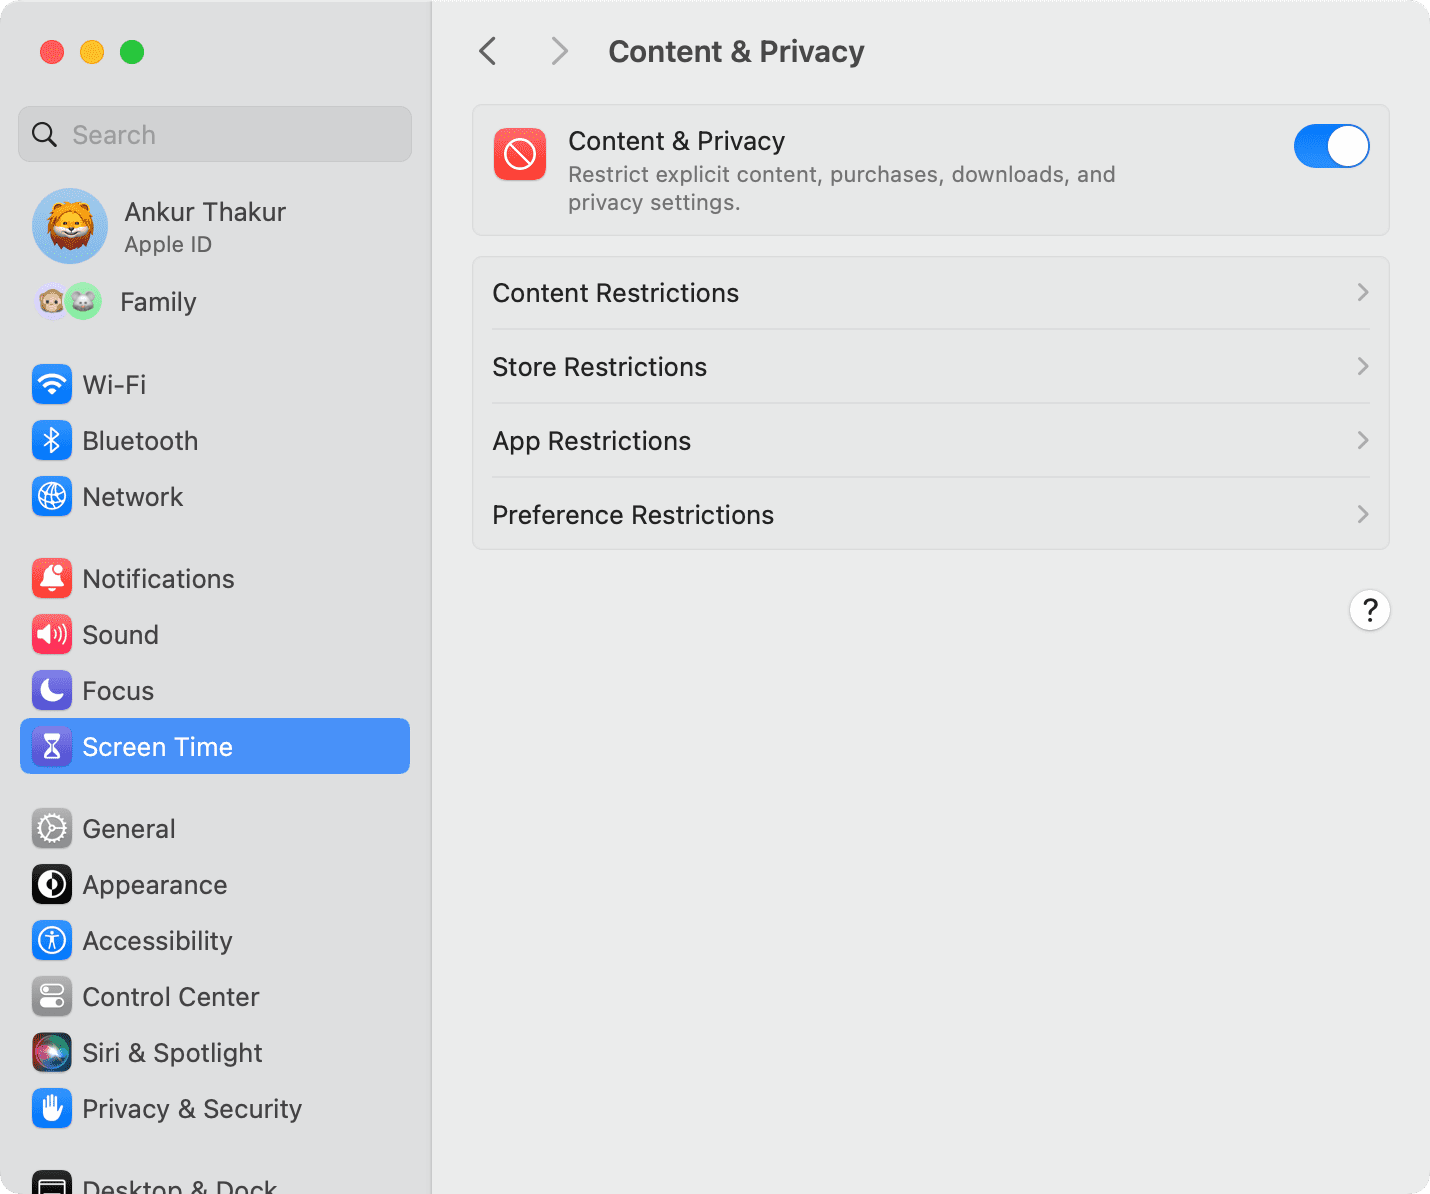
We have explained these four options below. You can also learn more using Apple’s built-in help tool by clicking the question mark (?) button on the screen.
Content Restrictions
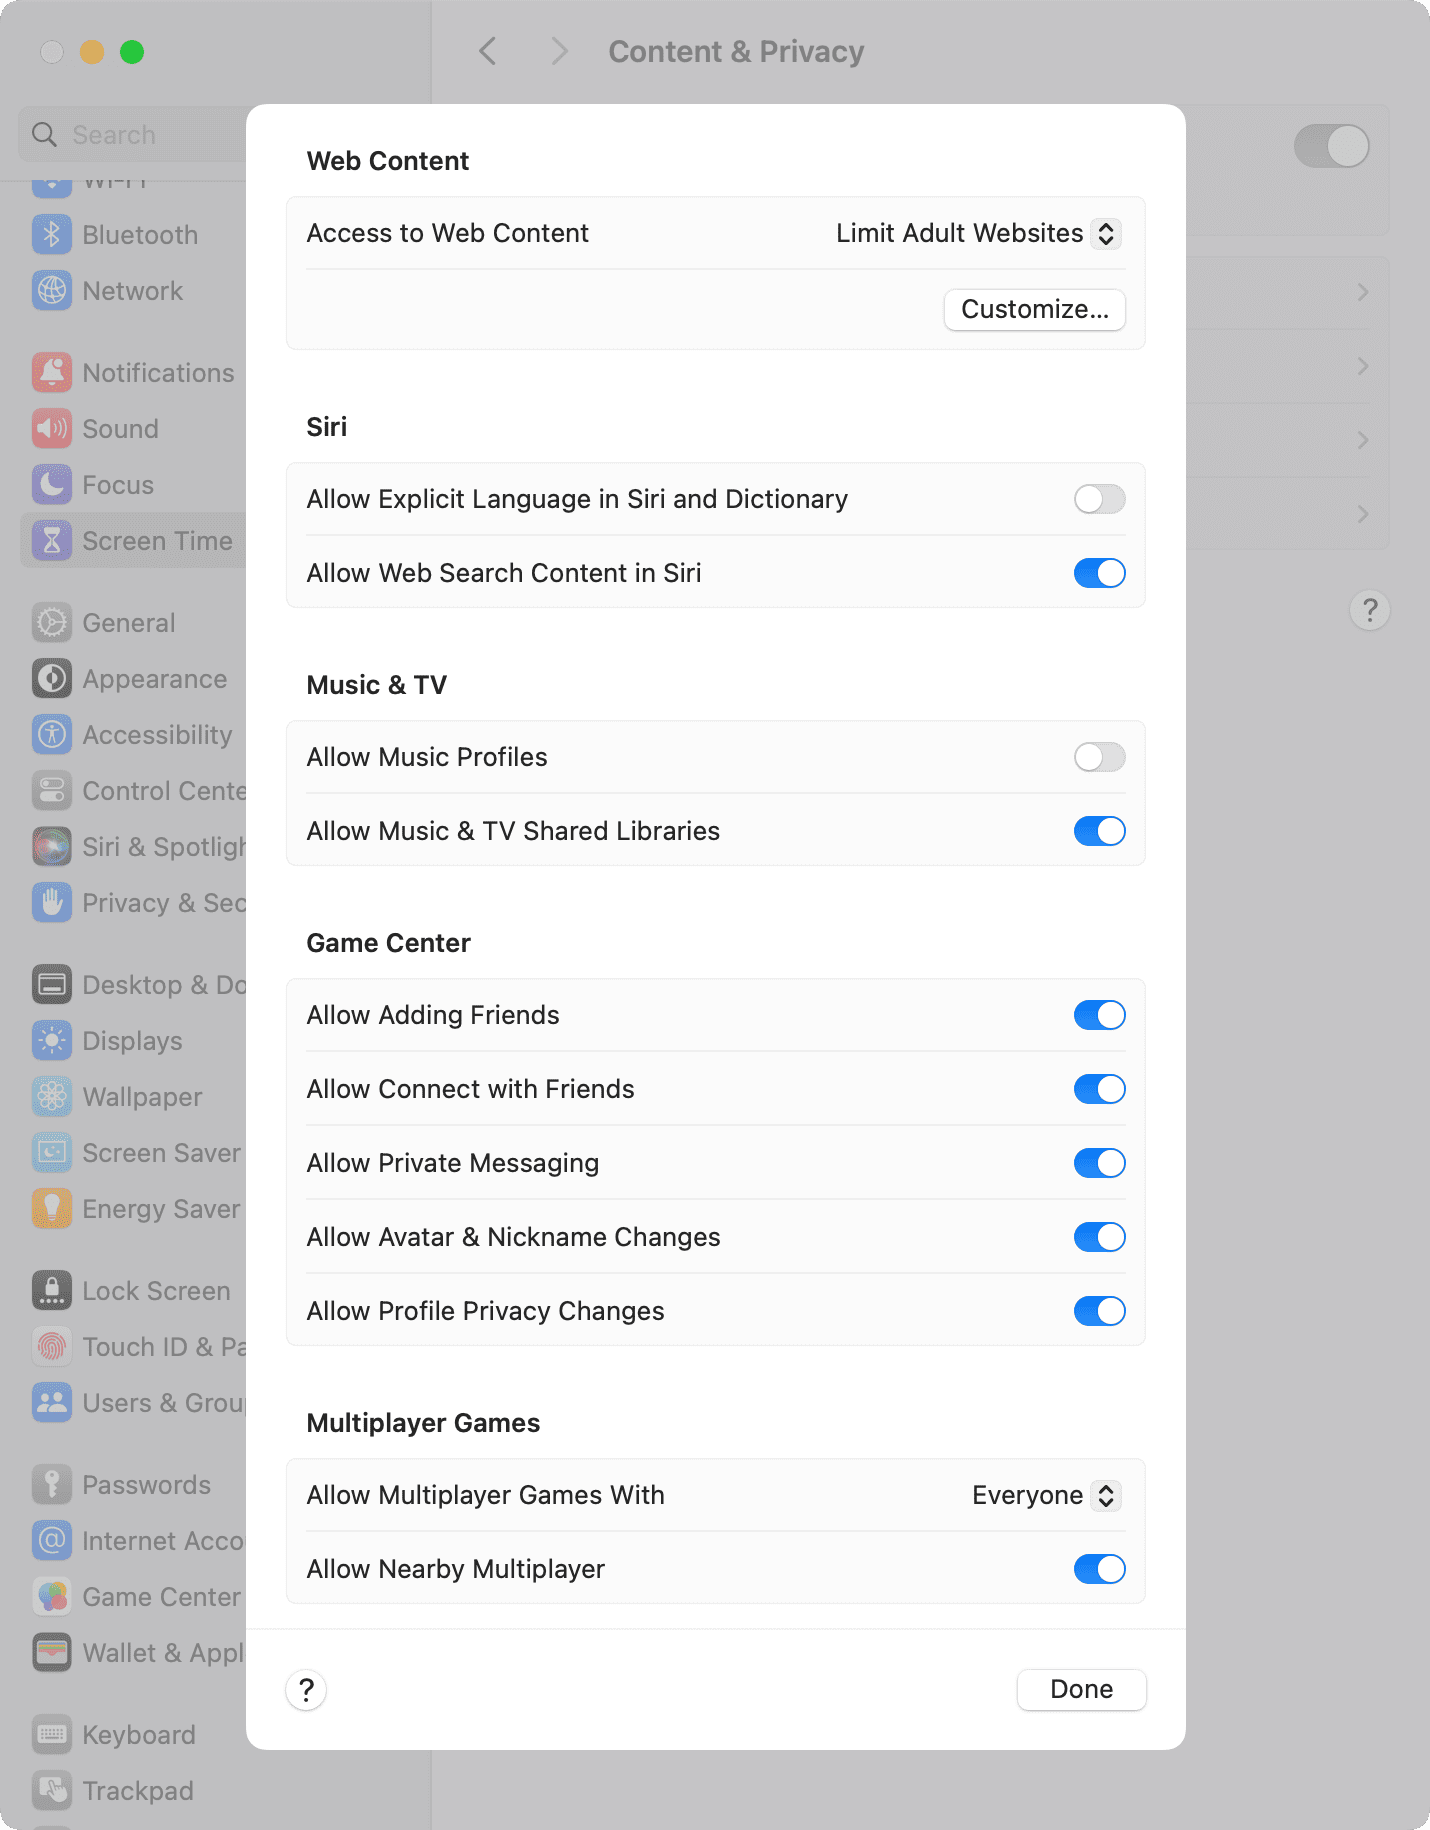
Use this option to restrict web content, Siri, Music & TV, and Game Center. One of the most important options here is web content, using which you can block all adult sites or permit only a few allowed sites.
Store Restrictions
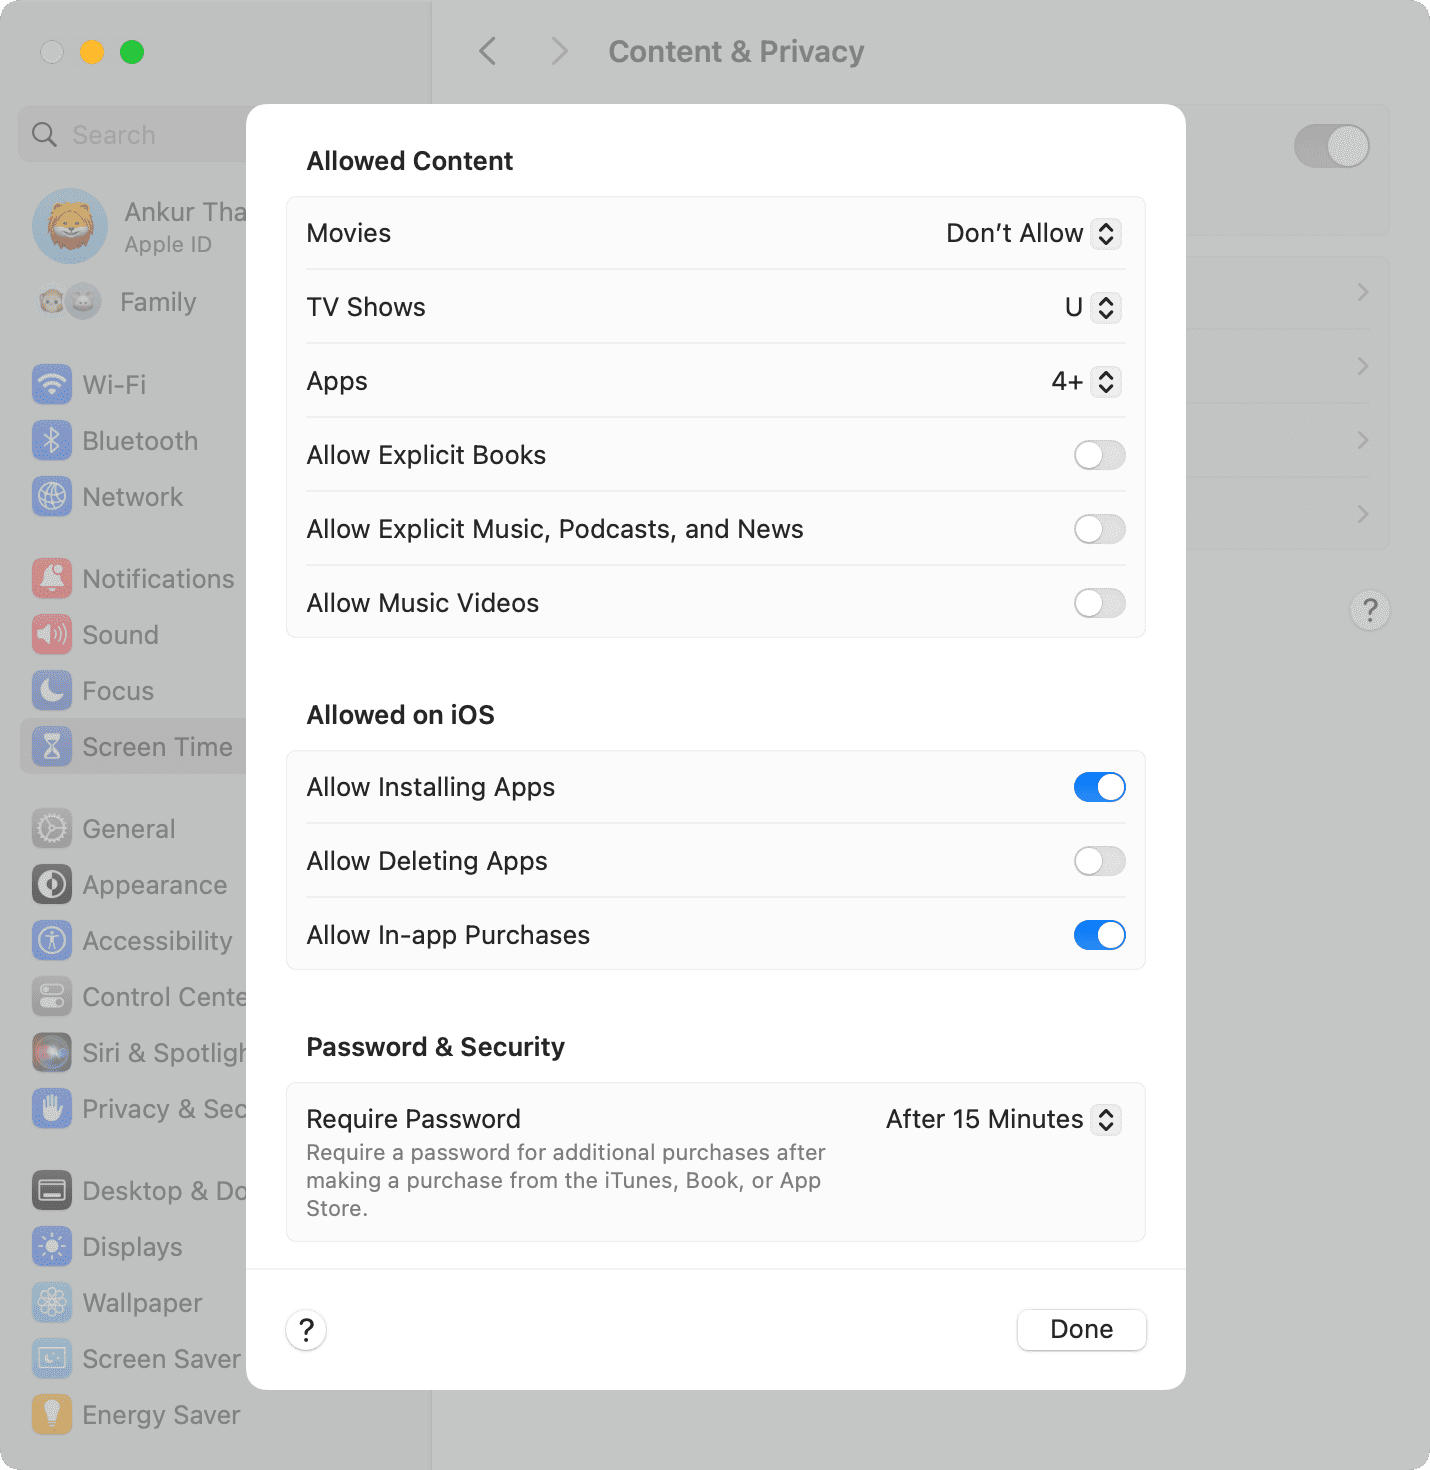
This is yet another important area that lets you control several things:
- Movie and TV shows: You can choose not to allow these things or only allow titles that are suitable for the child.
- Apps: Use this to permit only certain age-appropriate apps. For instance, if you select 4+, only apps rated to be used by kids above 4 years of age can be installed. 9+ means the app is not suitable for child under 9.
- Next, you can choose to allow or block explicit books, music, podcasts, news, and music videos.
- Allowed on iOS: This will only affect the kid’s iPhone or iPad. With it, you can block the installation or deletion of apps or restrict in-app purchases.
- Password & Security: You can have the App Store, Book Store, or iTunes Store ask for the Apple ID password every time the child makes a purchase or after 15 minutes of a successful authentication.
App Restrictions
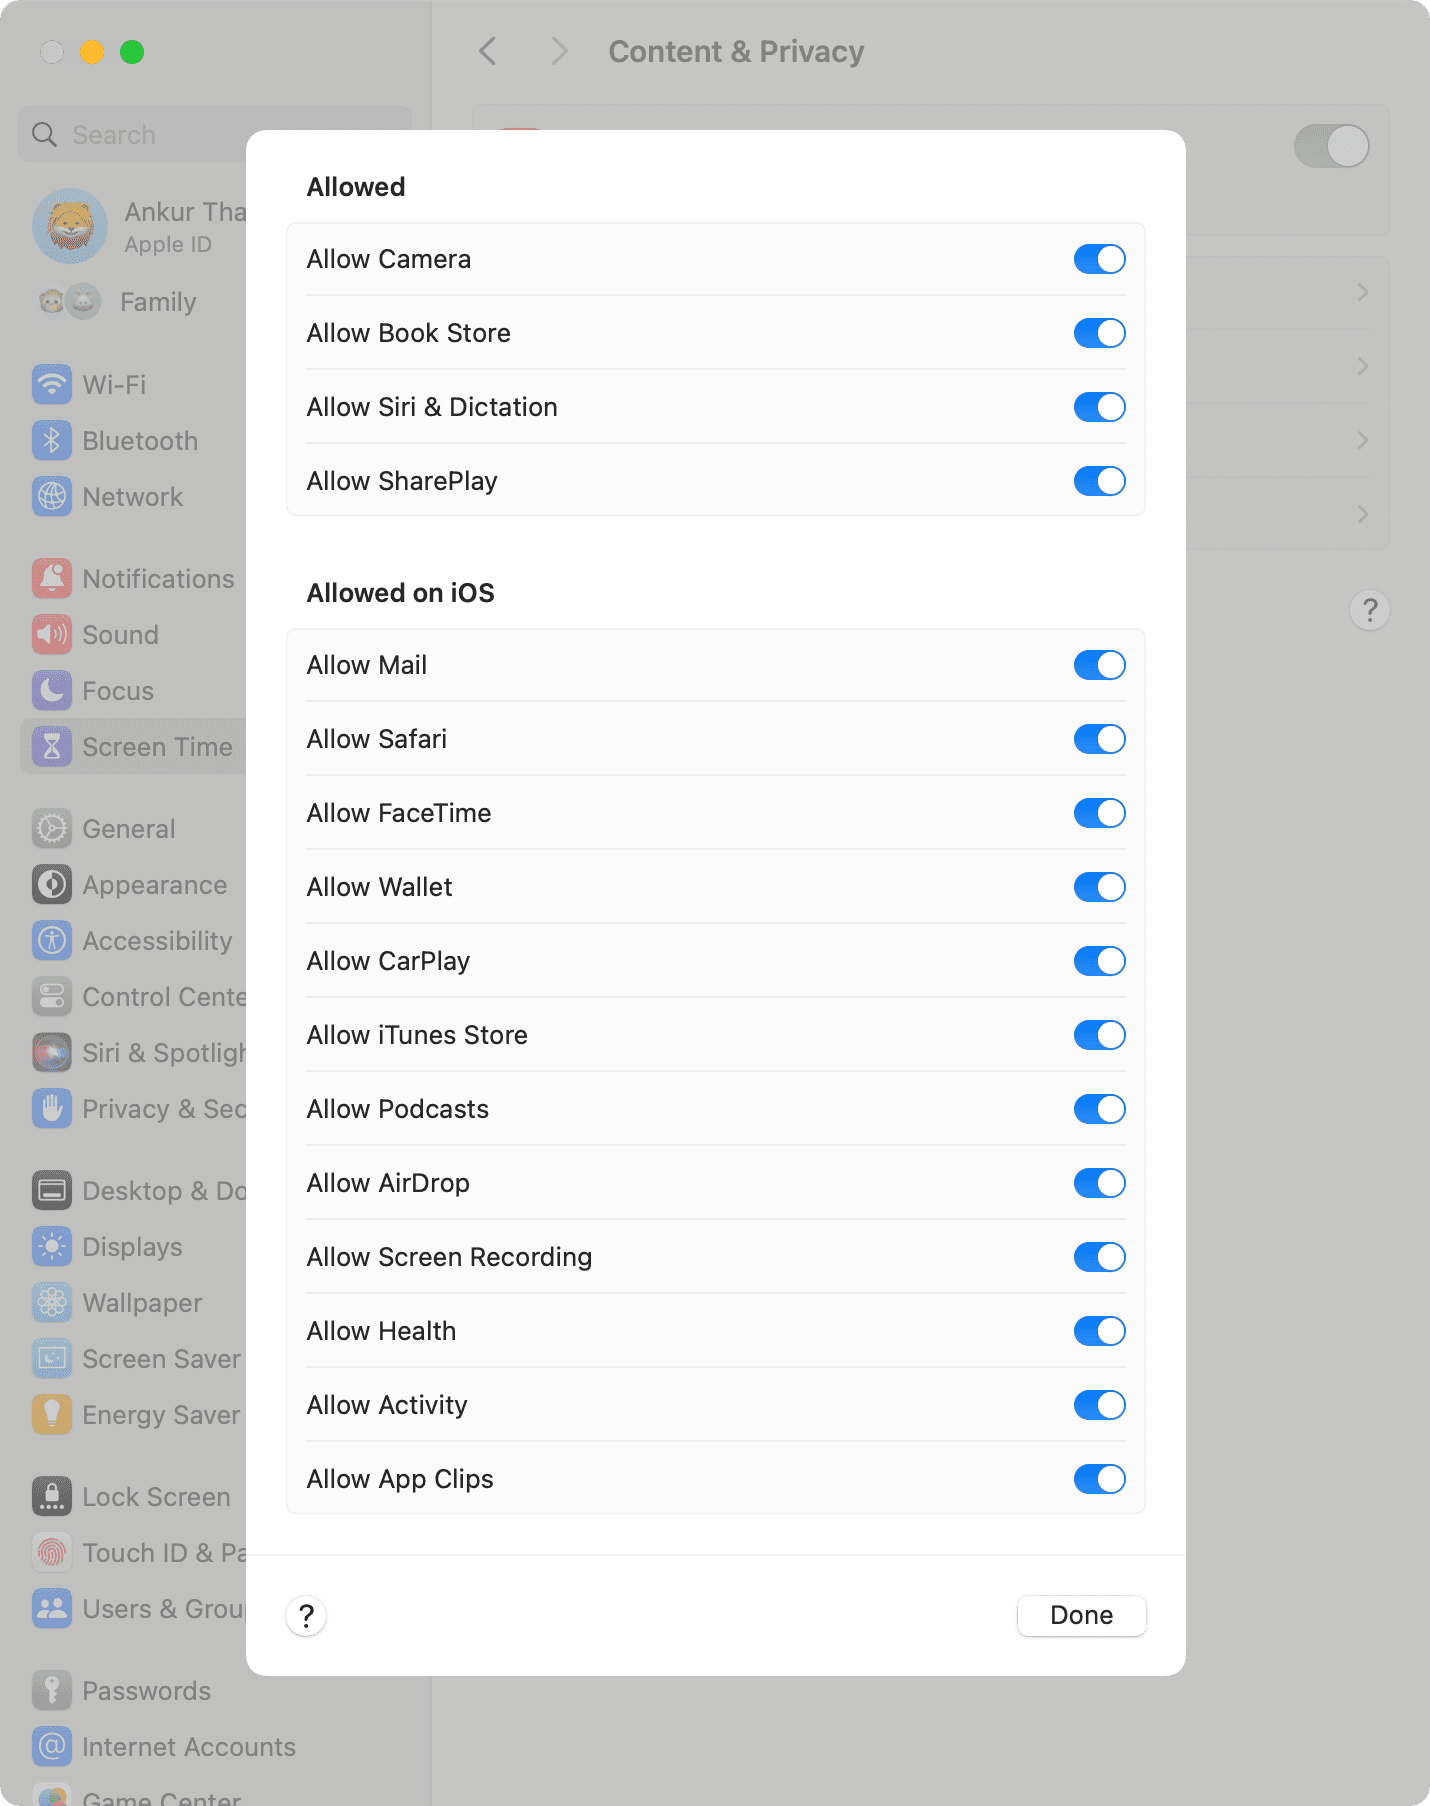
This section lets you block access to things like Camera, Siri, Mail, Safari, FaceTime, AirDrop, Screen Recording, and more. Just remember that things under the ‘Allowed on iOS’ only affect the child’s iPhone or iPad and not the Mac.
Preference Restrictions
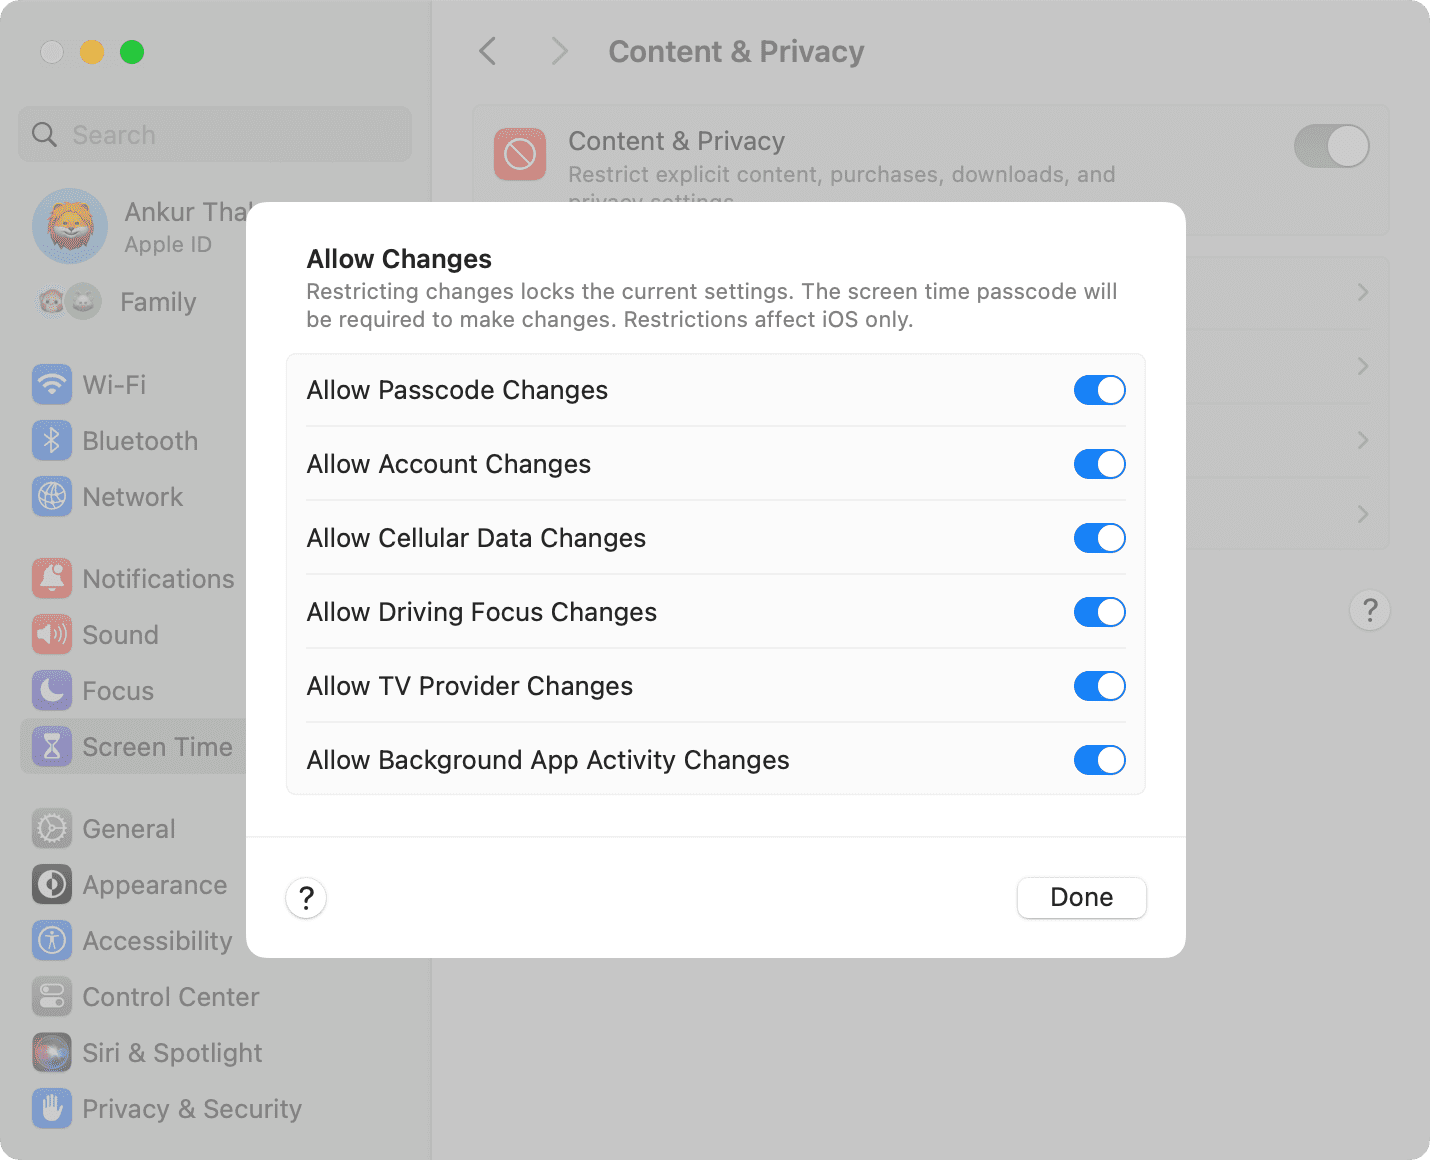
Once again, these settings only affect your child’s iOS device. You can use it to prevent changes to their account settings, cellular data, Driving Focus, TV provider, etc.
Other Screen Time settings
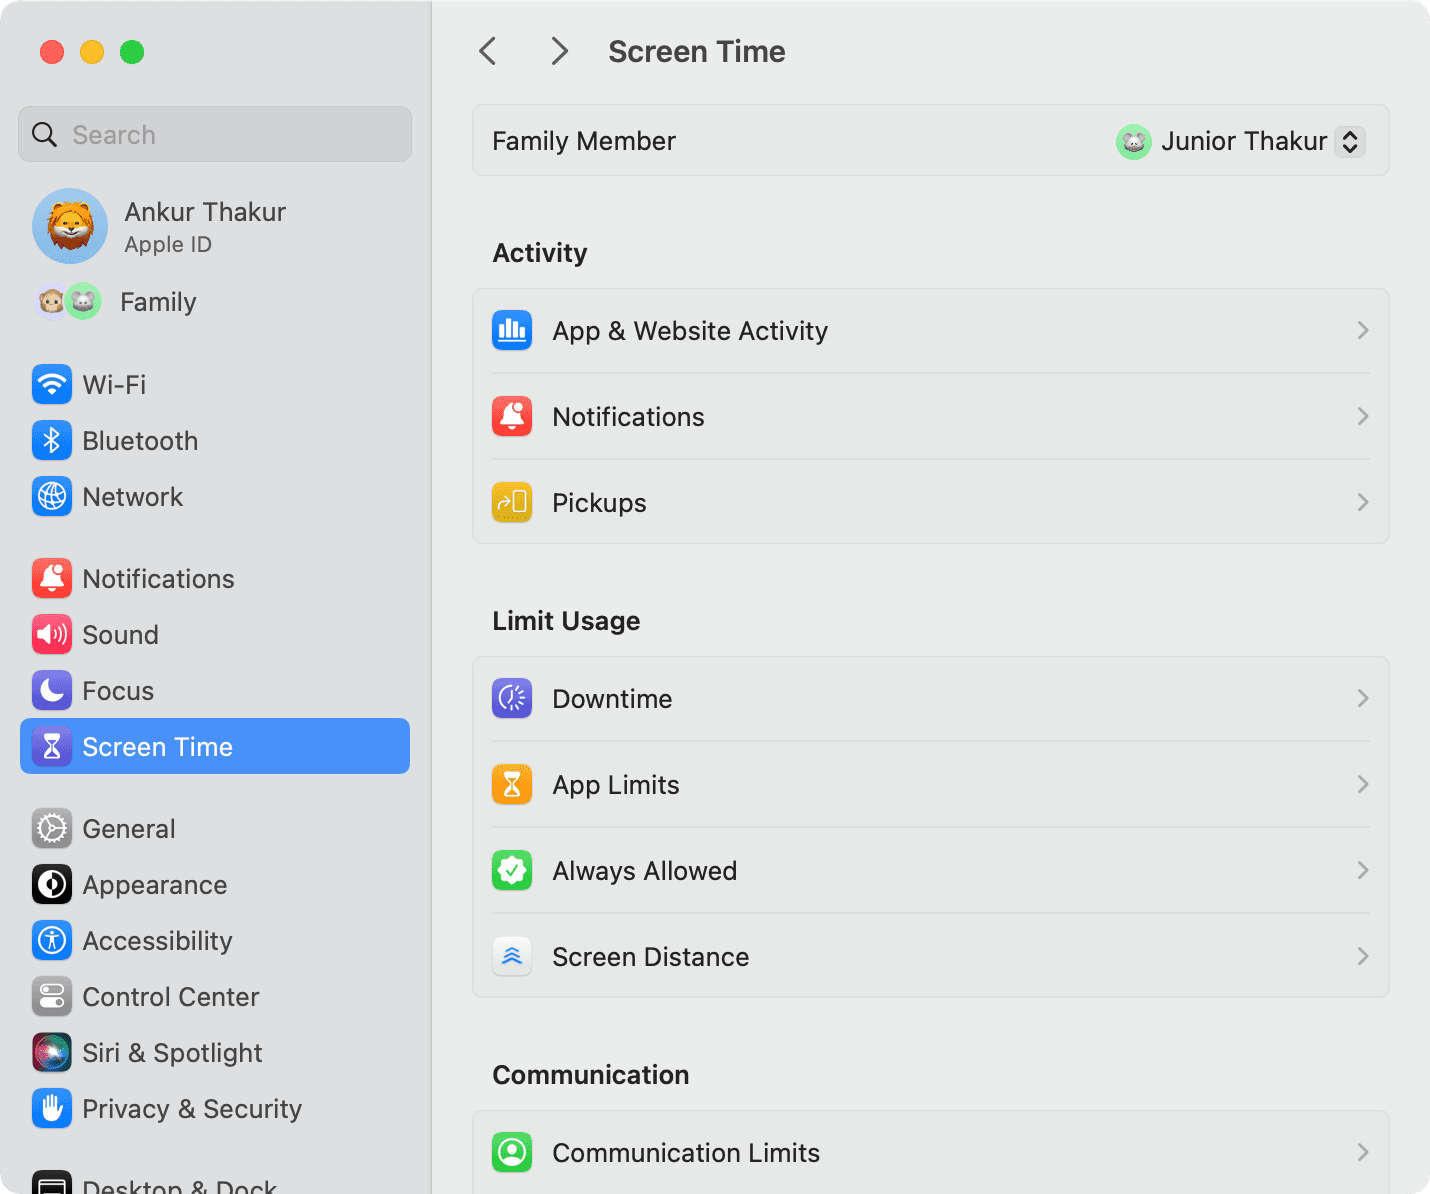
In addition to the above-mentioned restrictions, you can also use Screen Time to see your child’s app & website activity and configure Downtime, App Limits, Communication Limits, and Communication Safety. You can learn more about these in our dedicated tutorial on using Screen Time on Mac.
On a related note: How to use Screen Time limits on Mac to concentrate on your work