Learn how to block adult, sensitive, or distracting websites on a Mac with built-in Screen Time parental controls or allow only specific ones to keep your child safe online.
Screen Time on the Mac includes built-in parental controls that let you set limits and restrictions on your child’s device. With it, you can block access to inappropriate websites, including adult content, to help keep your child safe online. These protections are useful for kids of all ages.
Setting up parental controls on a Mac is straightforward. Screen Time offers two main approaches: you can limit access to adult websites while still adding non-adult websites to the restricted list. Or, you can go further by allowing access only to specific websites, with everything else blocked by default.
In this guide, we’ll walk you through how to set up both options so you can choose the method that works best for your family.
Block adult or unwanted websites on Mac
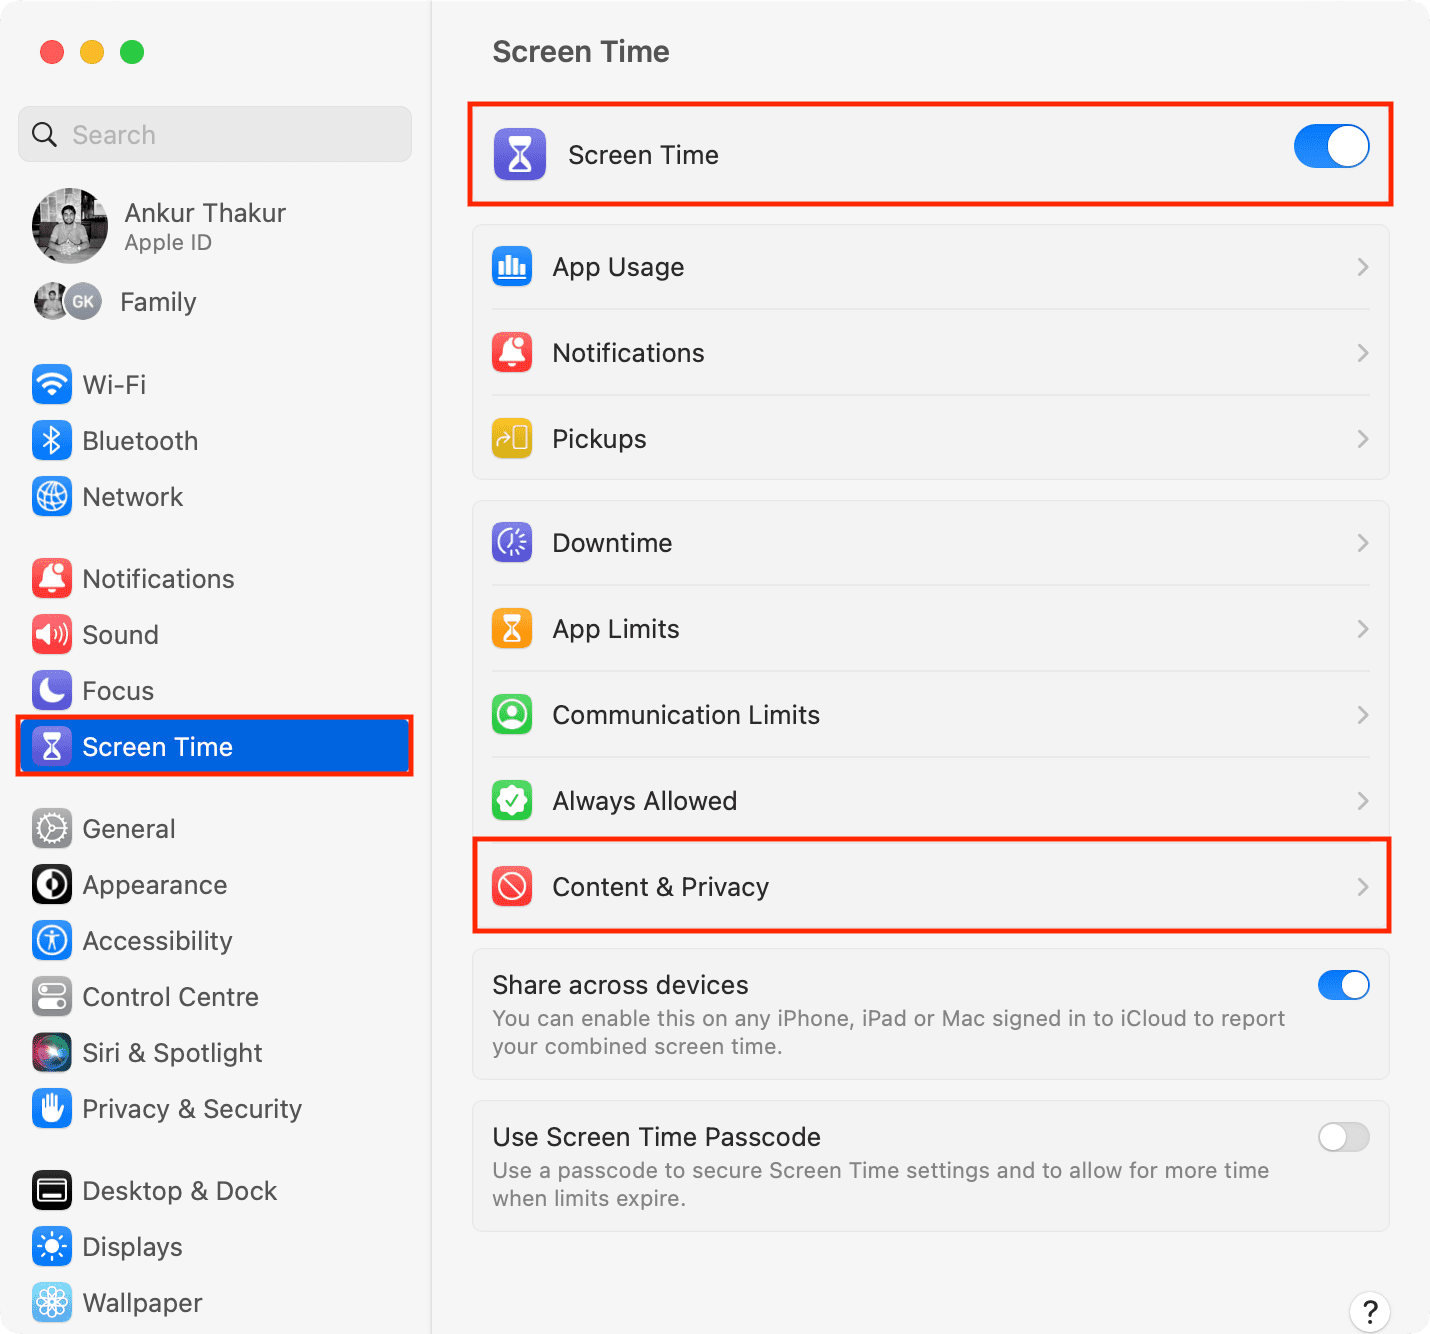
1) Click the Apple menu in the top-left corner and choose System Settings.
2) Select Screen Time in the System Settings sidebar, then click “Lock Screen Time Settings” on the right and set up a Screen Time passcode (different from your login password). Avoid sharing the Screen Time password with your junior, or they’ll be able to turn off restrictions.
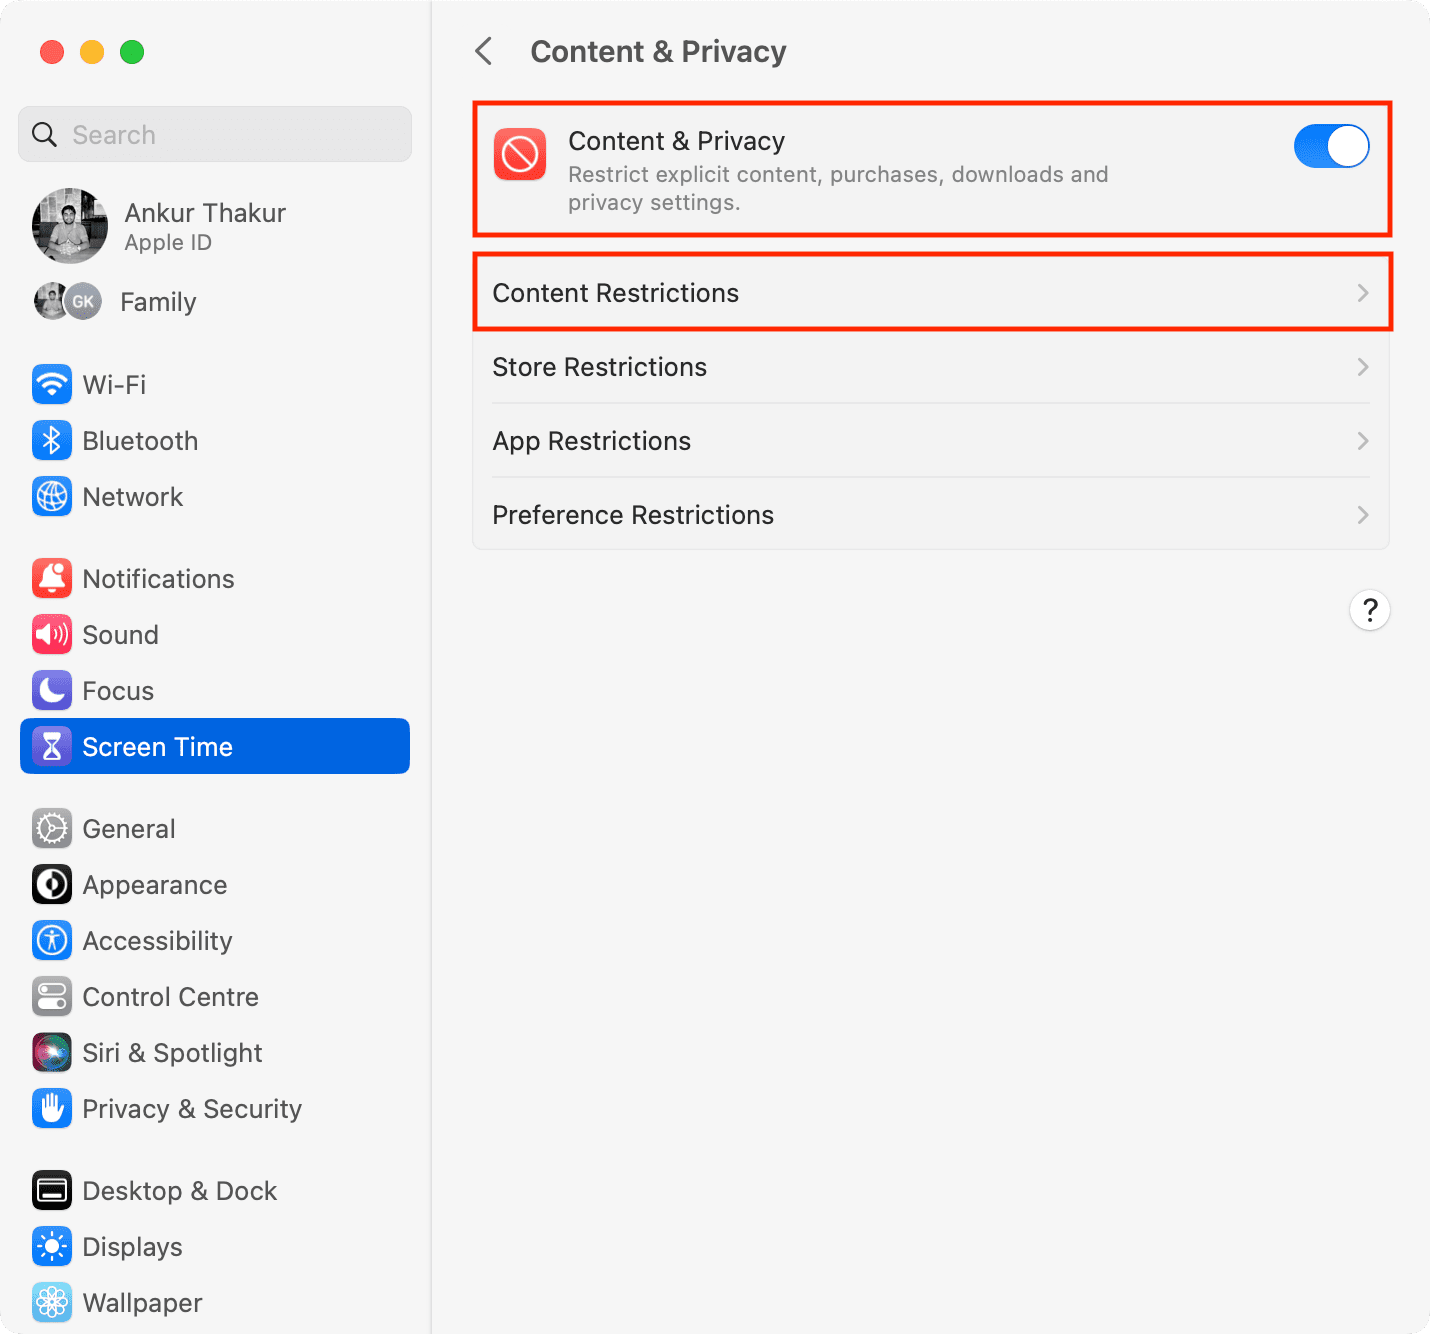
3) Select Content & Privacy.
4) Turn on the Content & Privacy switch at the top, then click App Store, Media, Web, & Games (Content Restrictions in older macOS versions).
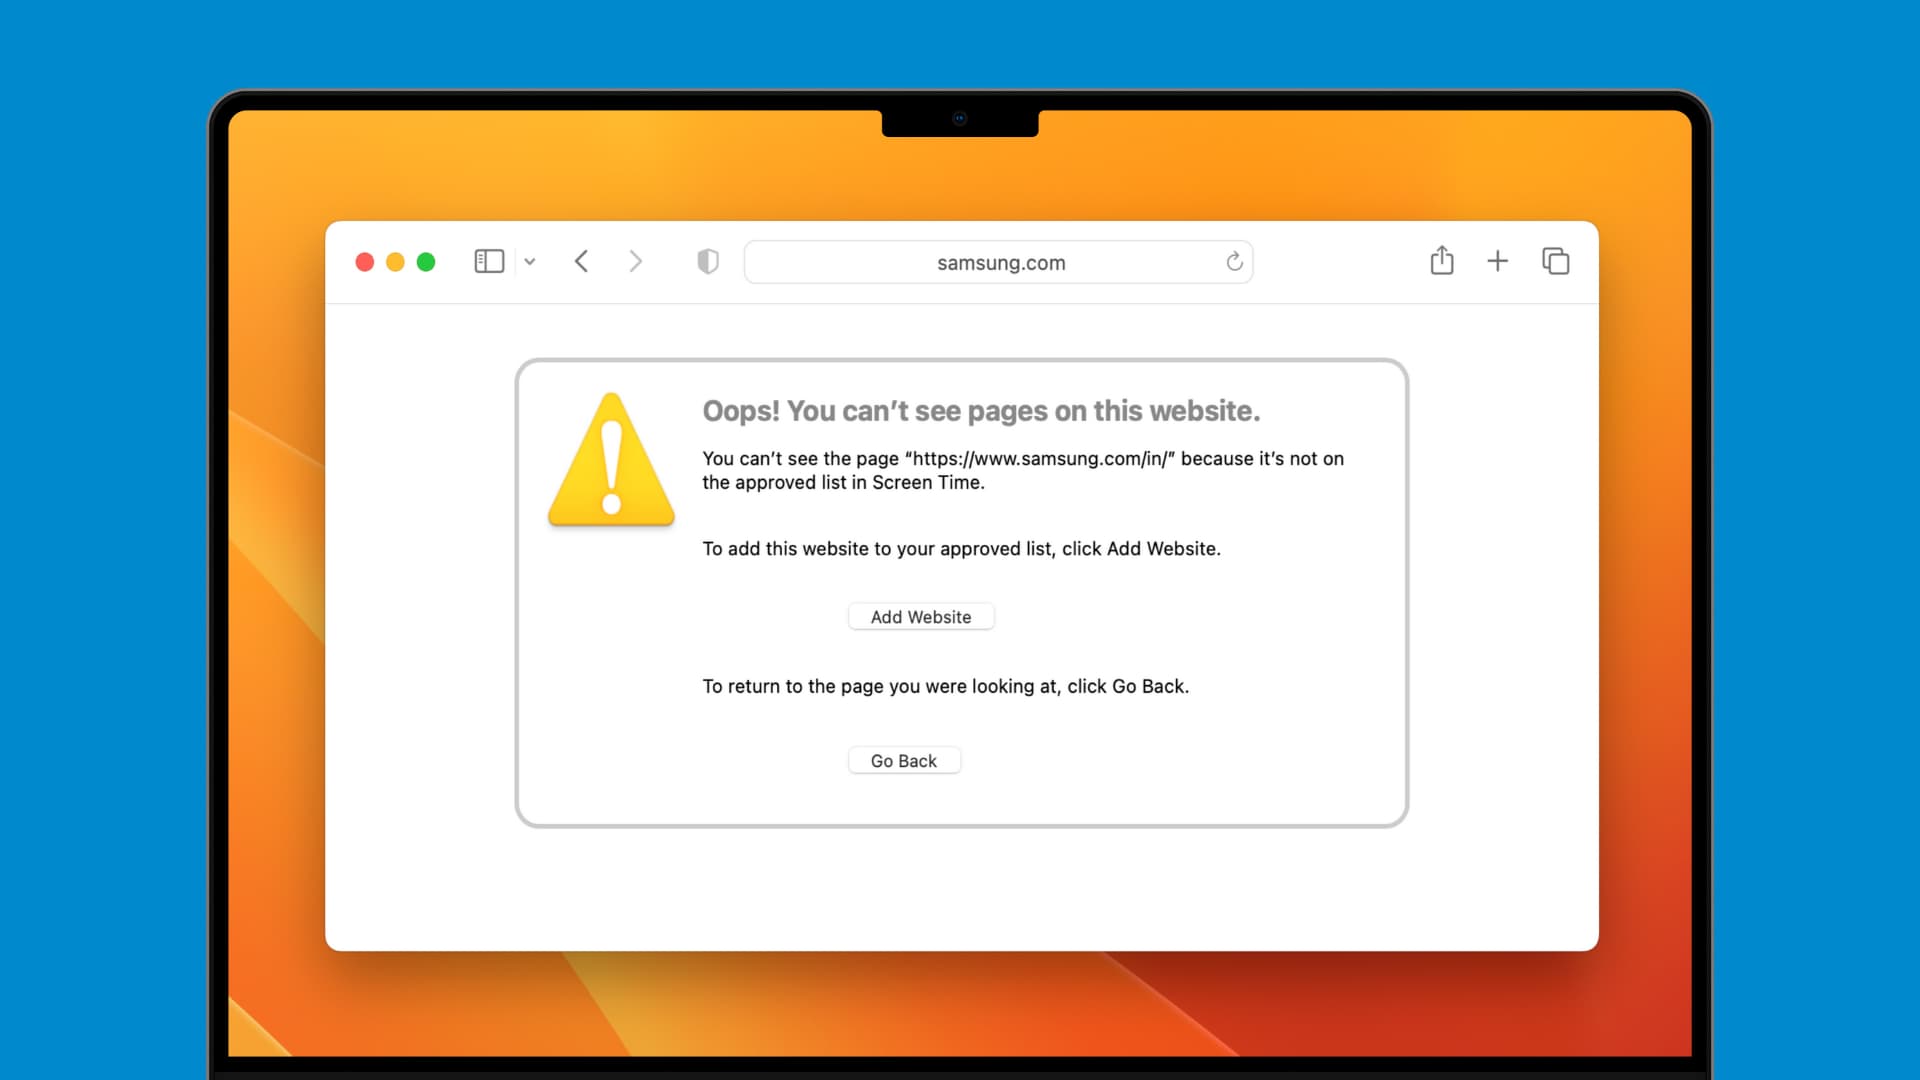
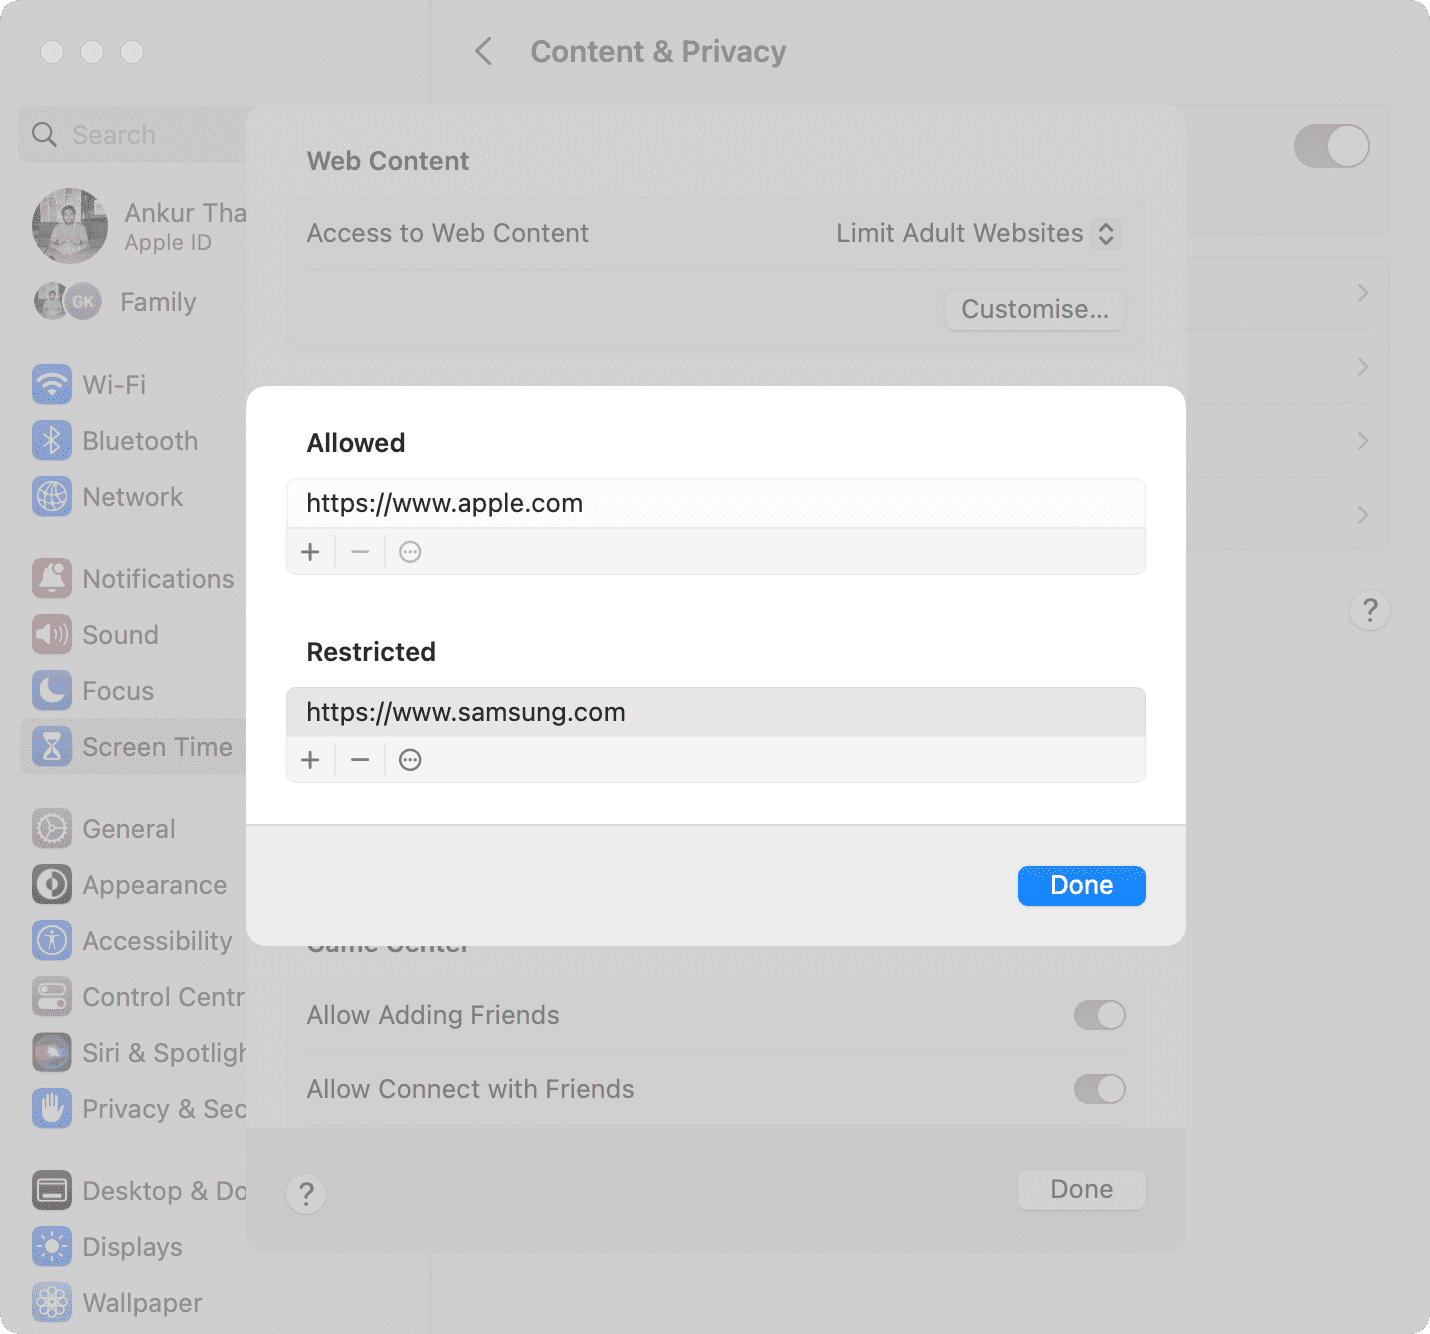
5) Click the menu next to “Access to Web Content” and choose Limit Adult Websites, then enter your Screen Time passcode if prompted. This will automatically block most adult websites. However, Screen Time may permit an adult website or block a safe website. If that happens, you can add specific websites to the allowed or restricted sections by following the steps below.
6) Click the Customize button.
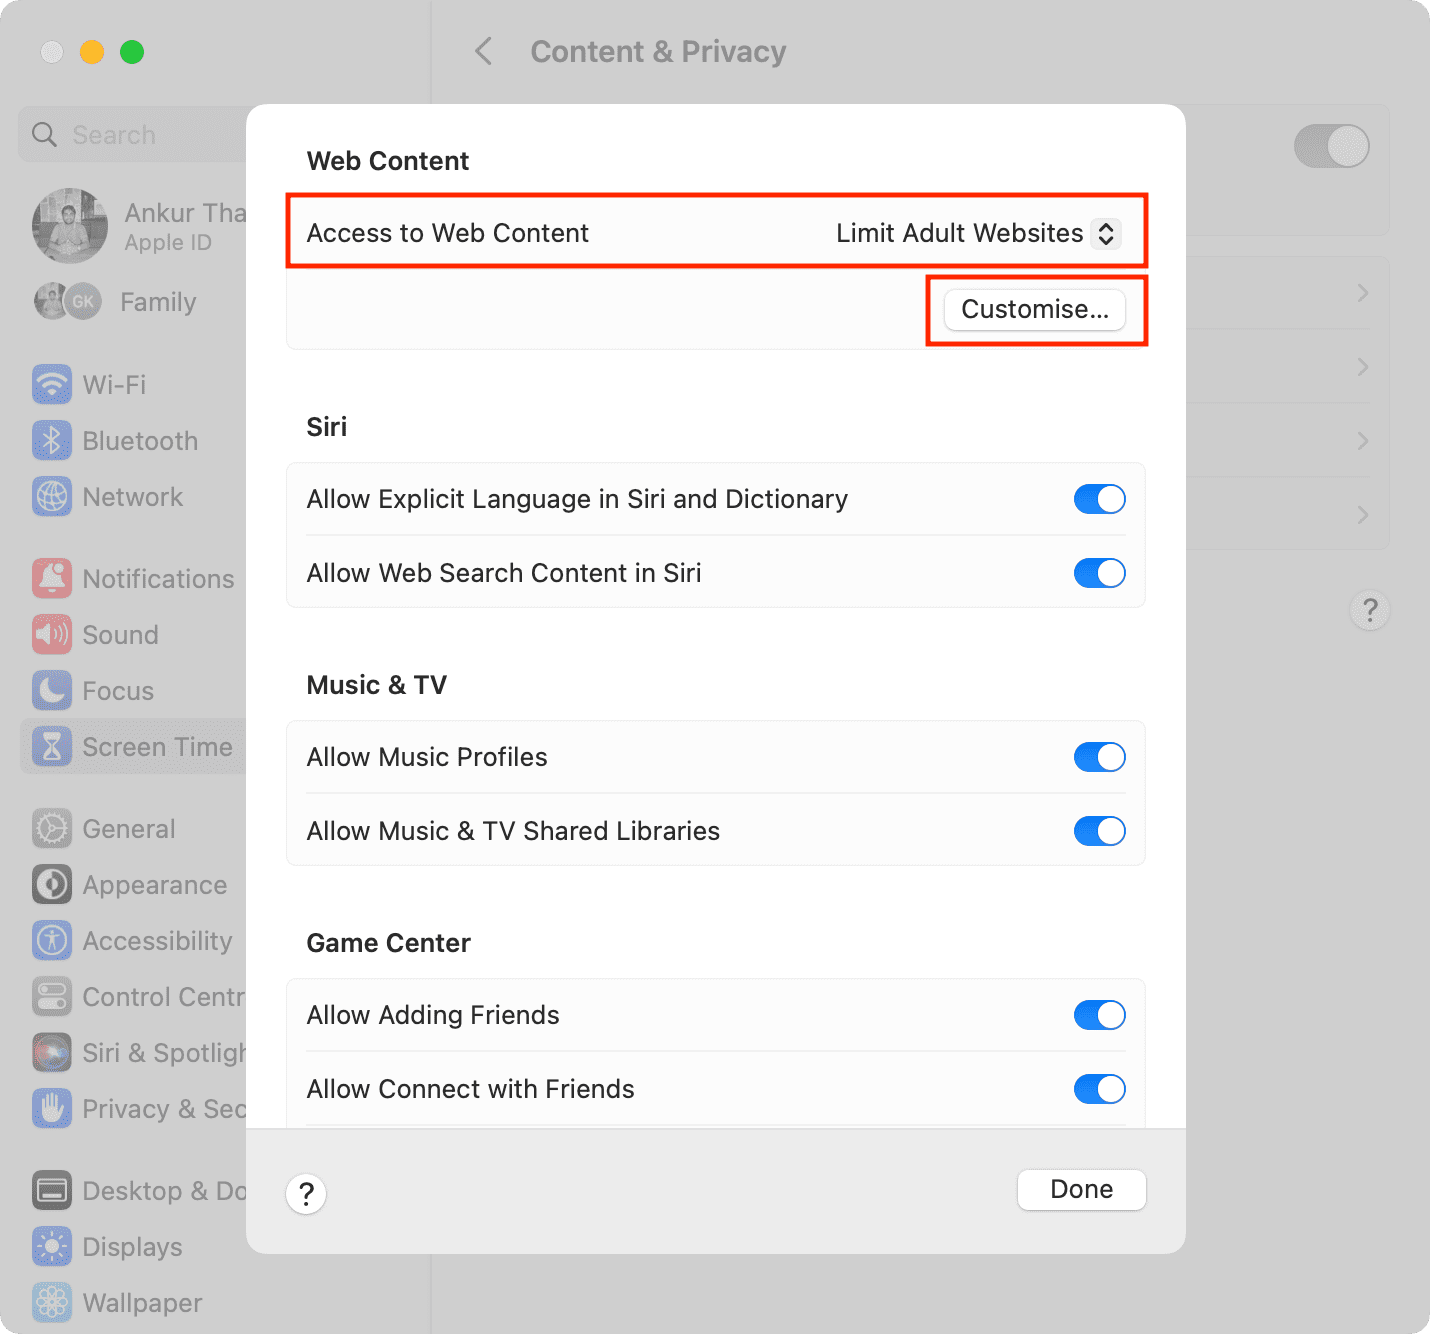
7) You’ll see two sections: one for Allowed sites and the other for Restricted ones. To add a site to either section, click the plus button (+).
8) Enter the URL for the website and click Done. When finished adding sites to the list, click Done to save the changes.
Set your Mac to access only allowed websites
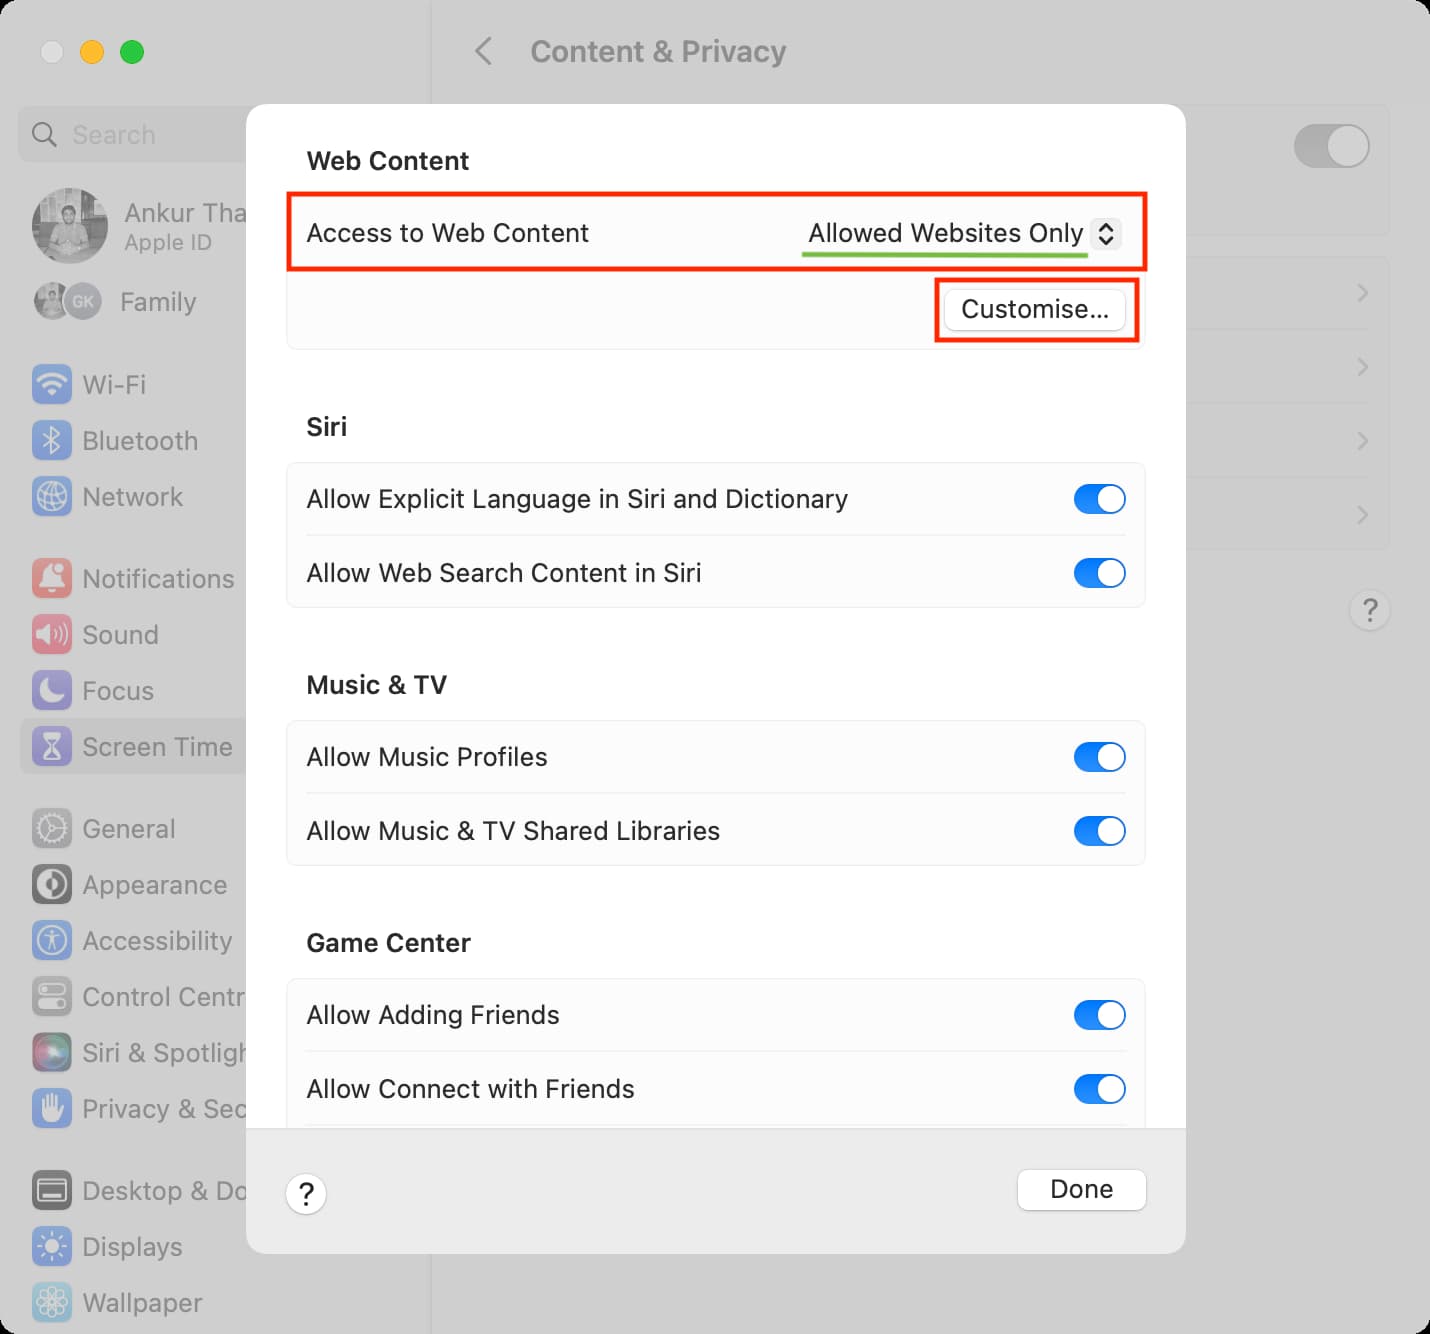
1) Navigate to System Settings > Screen Time > Content & Privacy > App Store, Media, Web, & Games or Content Restrictions.
2) Set “Access to Web Content” to Allowed Websites Only, and then click the Customize button.
3) You’ll see a list of sites already added. Click the plus button (+) to add a site to the list and the minus button to remove one.
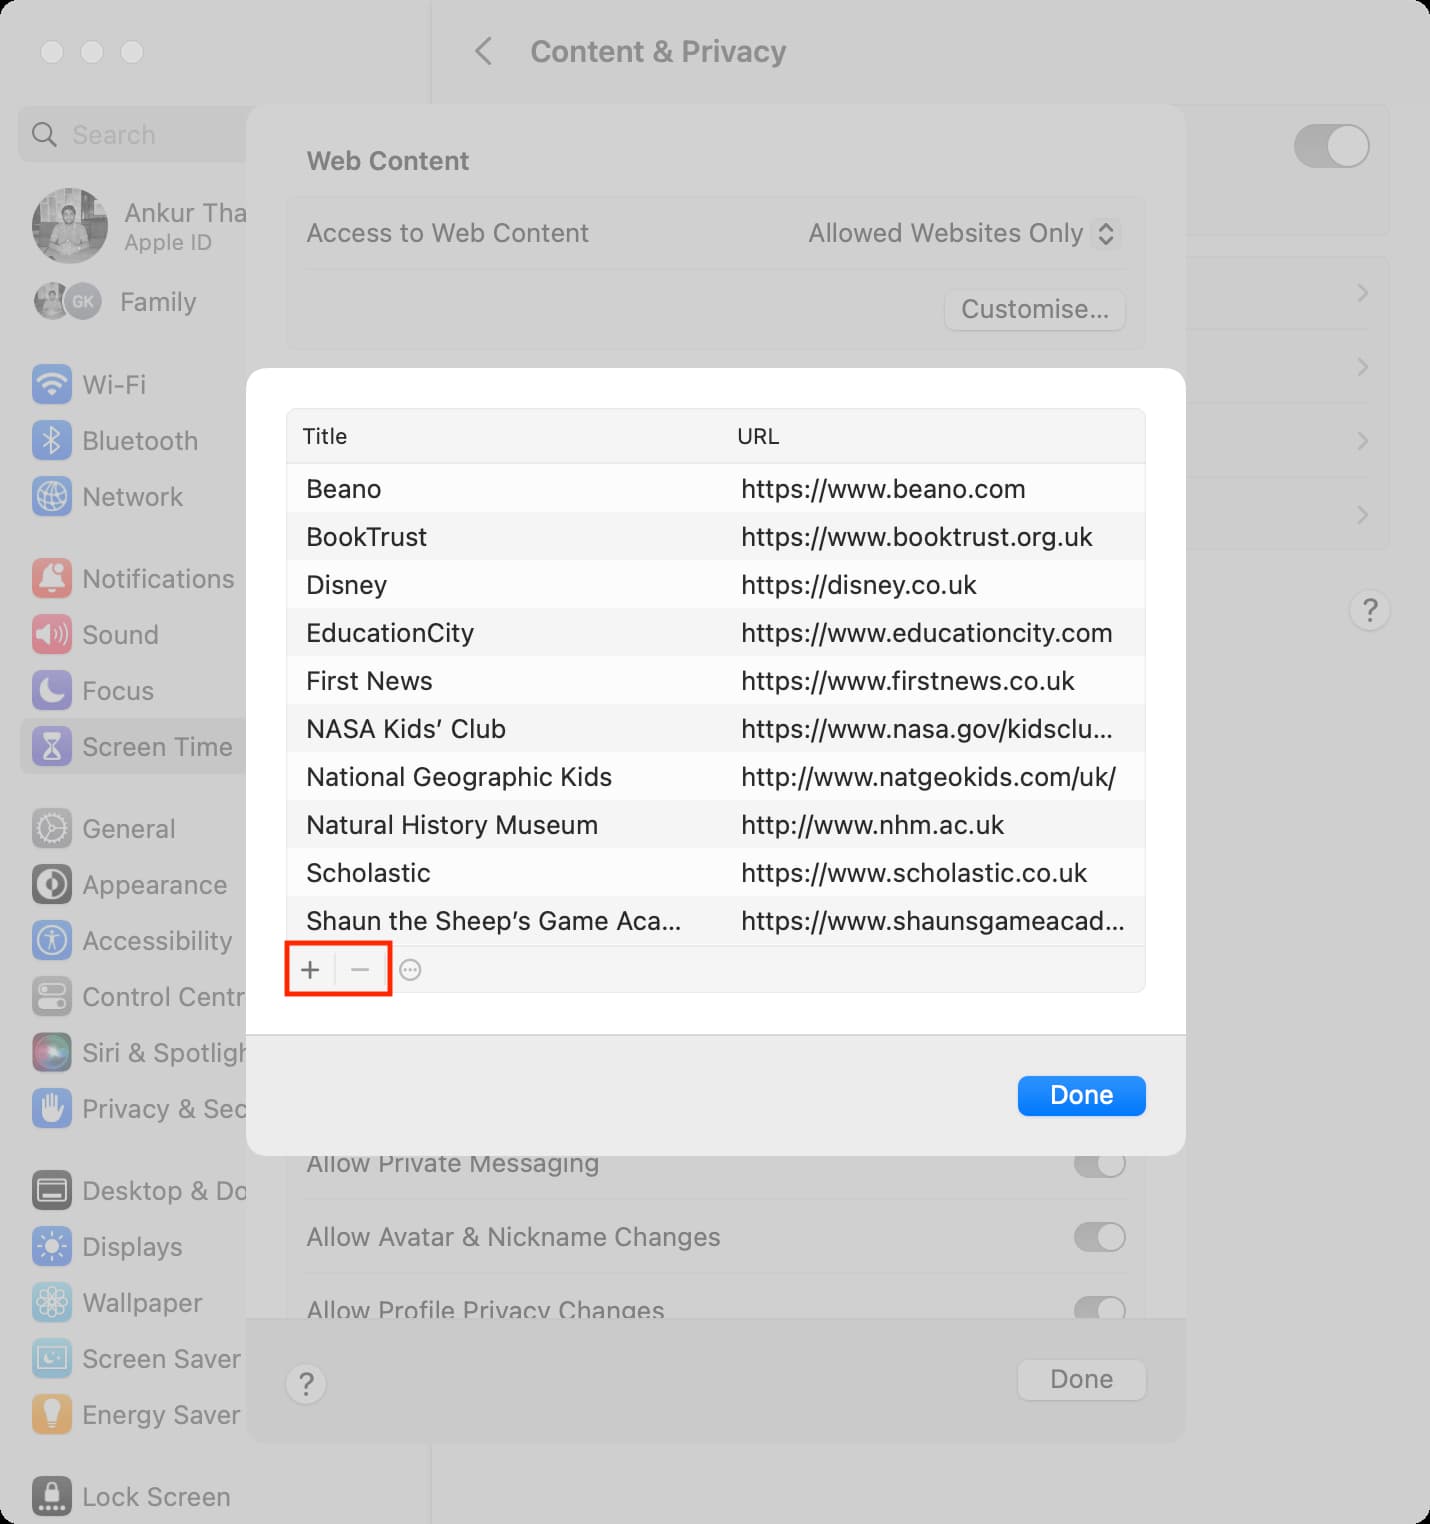
4) Enter the name and URL for any websites you’d like to add, then click Done. When finished removing and adding sites, click Done again to save everything.
Things to keep in mind…
If you use Family Sharing, you can log into your own Mac account and select your child’s name from the Screen Time pane. Otherwise, follow the steps on your child’s Mac.

If you’ve given a computer to your child and they are the admin, then when setting up the secret Screen Time passcode, don’t enter their Apple ID, thus preventing them from resetting the Screen Time passcode. Be sure to note this passcode in a safe location, as if you forget it and no Apple ID is provided, your only option will be to erase the Mac. Alternatively, Apple recommends that you be the administrator of your child’s Mac, create a separate user account for them, and set up the Screen Time passcode on this separate user account.

Screen Time is a great feature to restrict content, impose app limits, and reduce your overall screen time. And with the restrictions you can set for web content, it’s a great way to ensure the online safety of your children. Keep in mind that website restrictions in Screen Time only work in Safari and don’t apply to other browsers, such as Google Chrome or Firefox. So, if your junior has non-Apple browsers installed on their computer, take a minute to remove them.
Do more with parental controls
Apple provides built-in parental controls across its software platforms. For example, the same Screen Time settings and features you know and love on your Mac are available on the iPhone and iPad. So yes, you can also block access to unwanted websites on a child’s iPhone. If you’re a parent, you’re wholeheartedly recommended to check out these 15 child-focused features on the iPhone and iPad.