Check out these 3 quick ways to send photos and videos to your family and friends using iMessage on your iPhone or iPad.
The iPhone and iPad Messages app lets you use small apps right on the chat screen. With these, you can send YouTube videos, spice up the conversation with unique stickers, share your location using Google Maps, play quirky games, and more – all while texting your friend.
Additionally, there is a built-in Photos Messages app by Apple, which is a glorified photo selector so you can browse your pictures & videos and send them in chat using iMessage or MMS.
Tap the smart suggestion
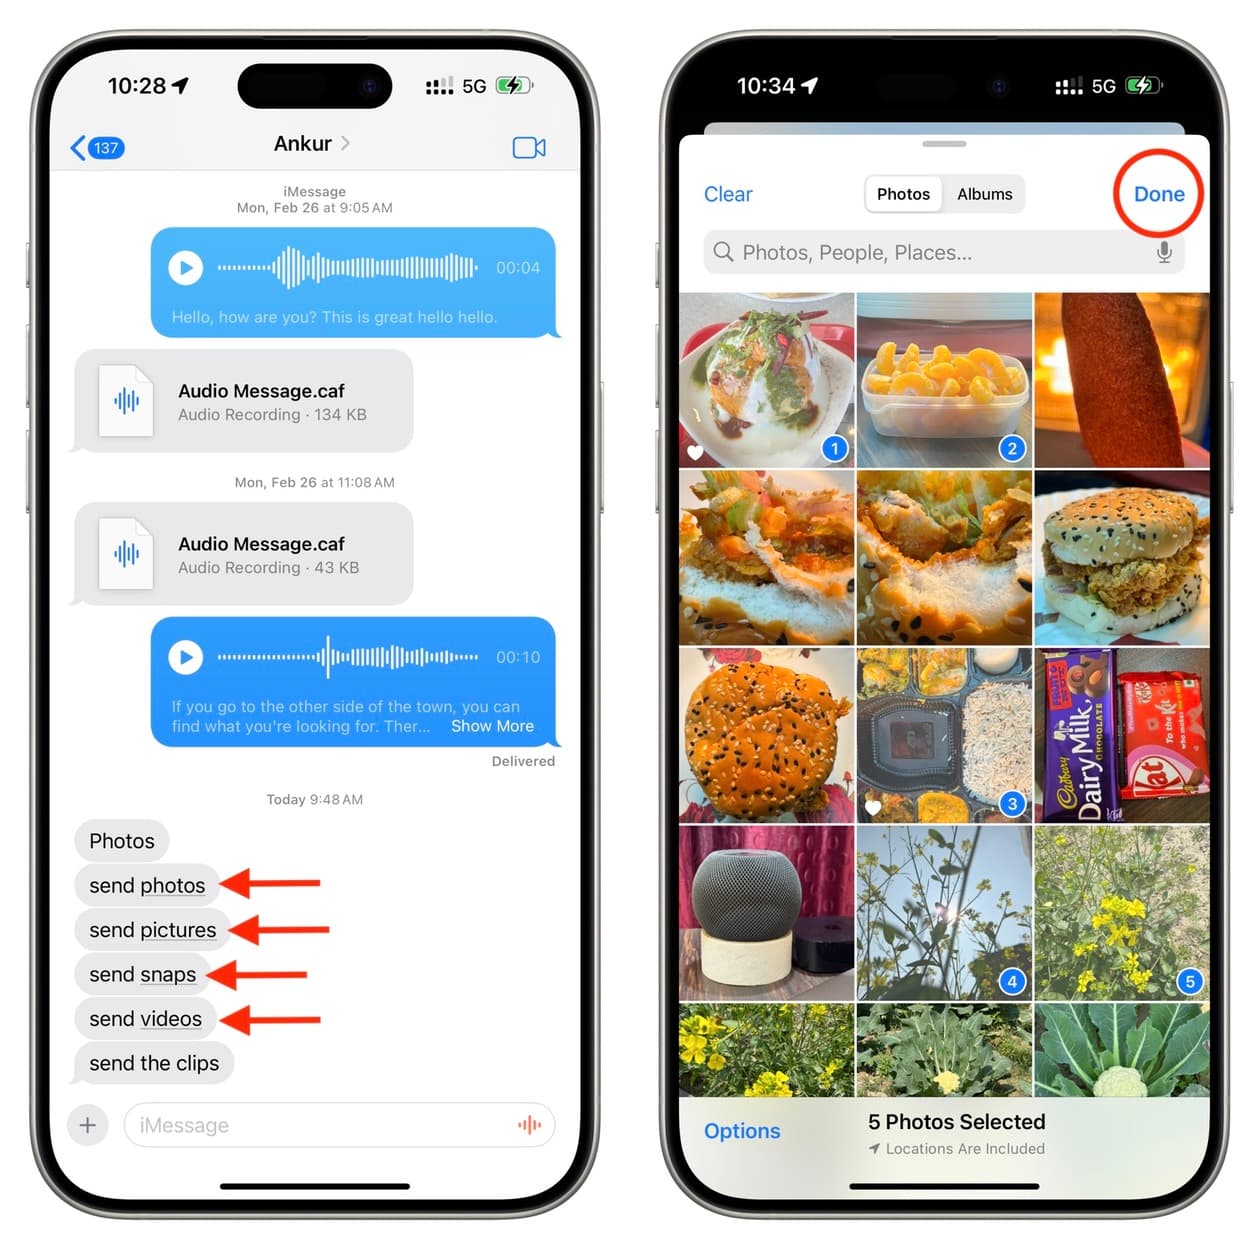
If a friend messages you something like “send photos, send pictures, send snaps, or send videos,” the Messages app is smart enough to understand this phrase and its meaning. So, the app will underline the main words, like pictures or videos. Simply tap it, and it will open the photo picker. Now, select the images or videos and send them.
Extra info: The Messages app has another smart feature that lets you convert time zones, currencies, temperatures, and more.
Use the Photos iMessage app
Follow these steps to browse your stored pictures and videos and send them via Messages.
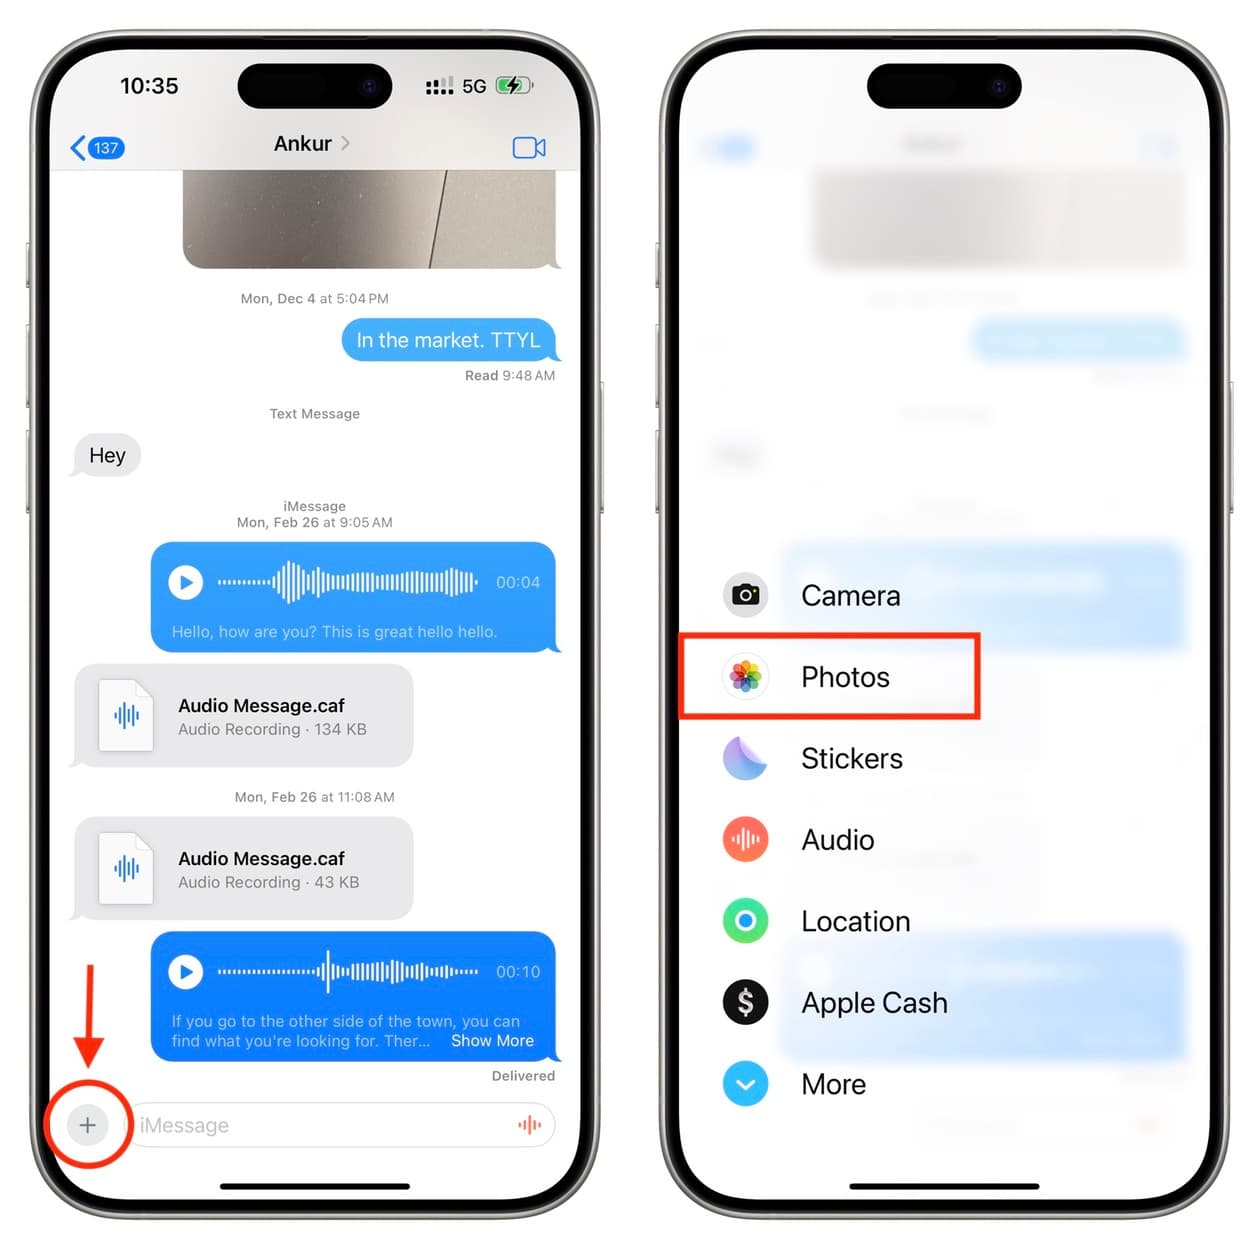
1) Open the Messages app on your iPhone or iPad and go inside a conversation or start one by tapping the compose button.
2) Tap the plus button (+) and select Photos.
Tip: You can also just touch and hold the plus button (+) to open the photo picker instantly.
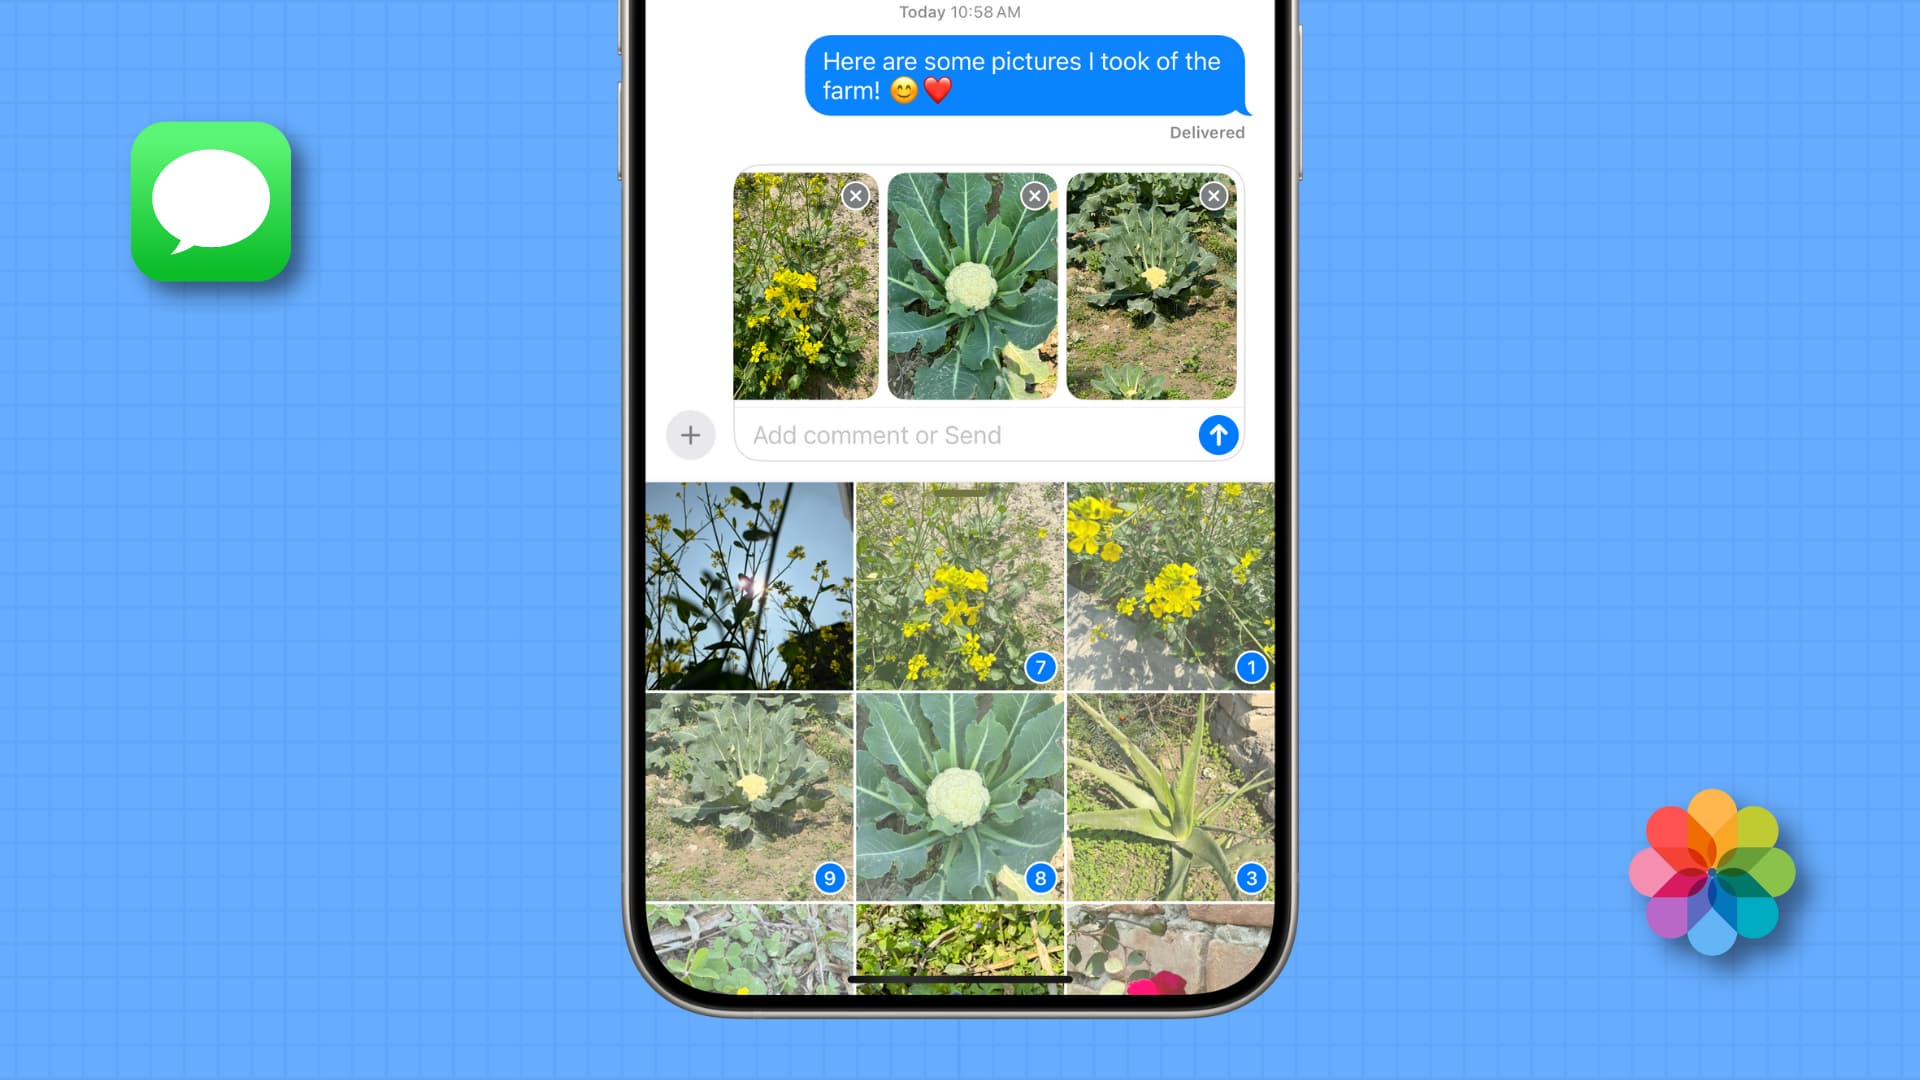
3) Select one or more recent media and tap the send button.
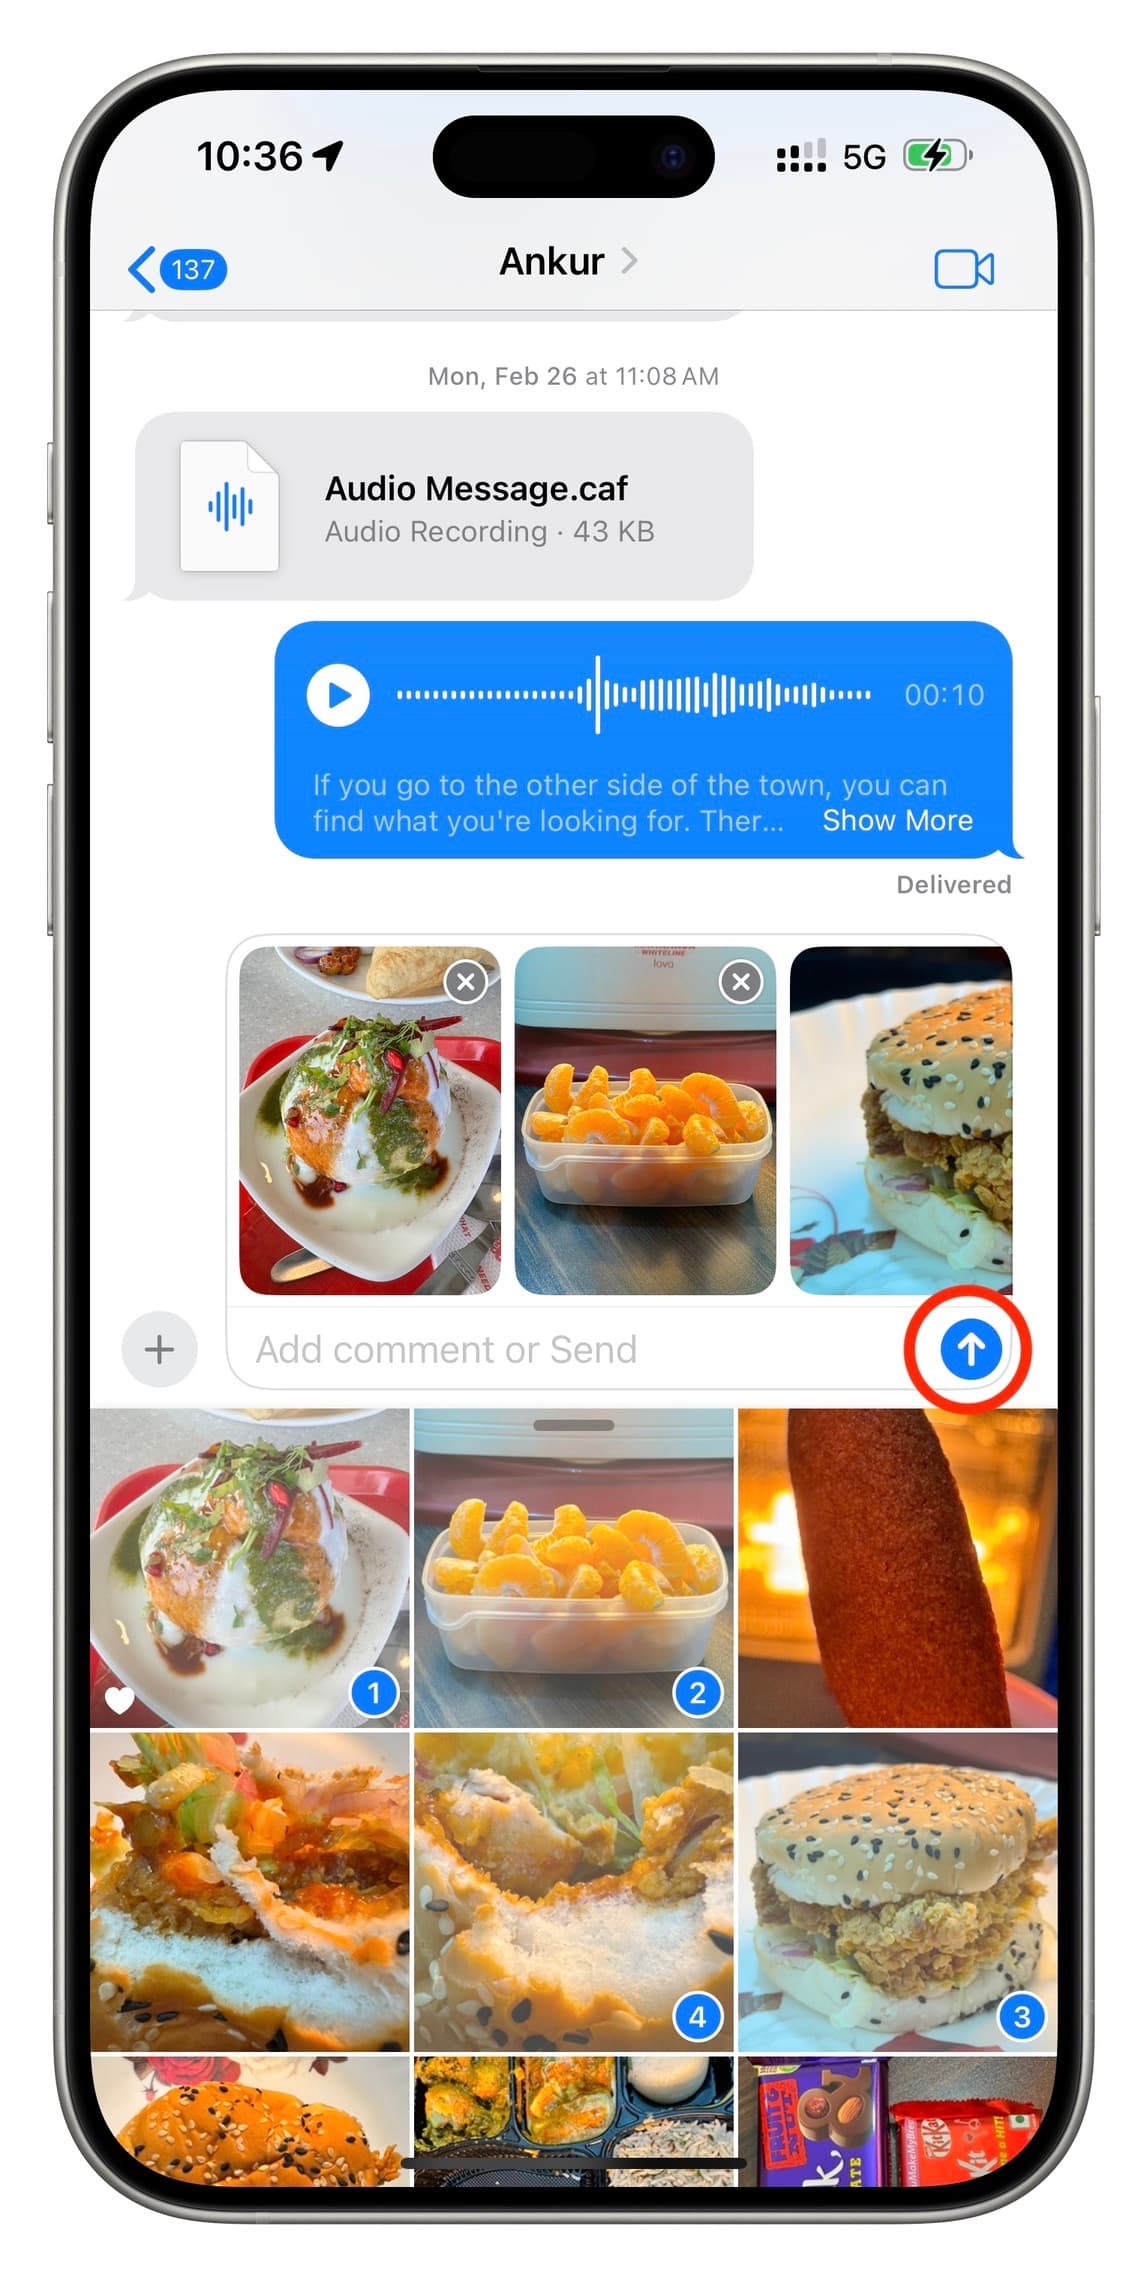
4) You can also swipe up or pull up the small tab, and the photo picker screen will automatically take the full screen so you can browse and pick the desired media comfortably.
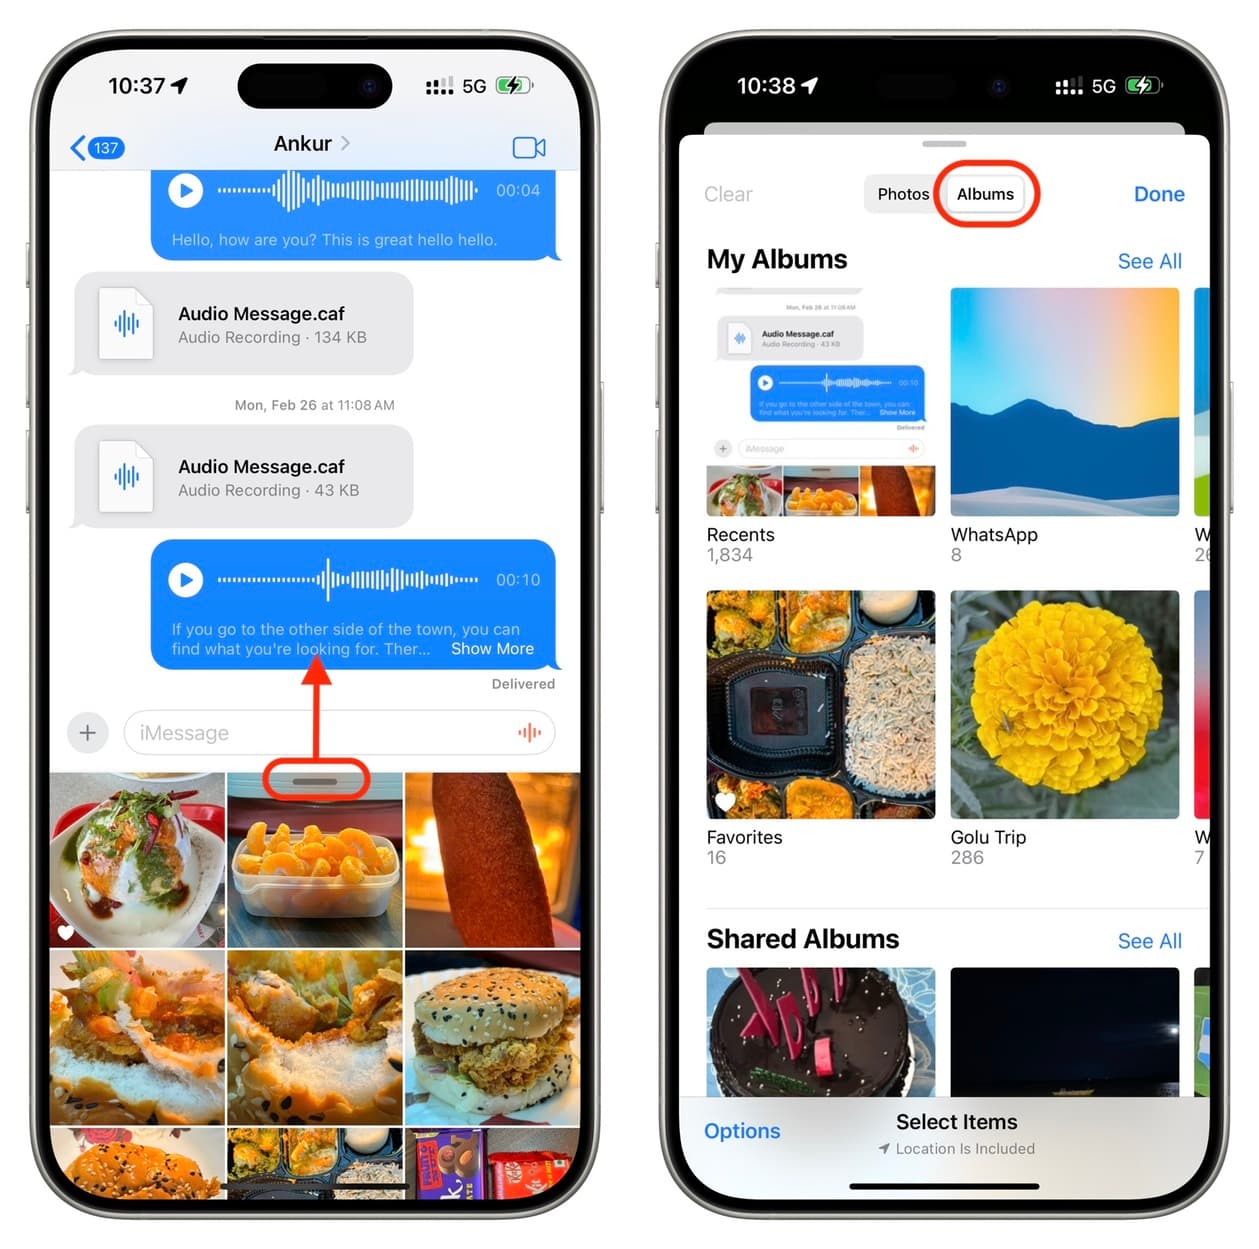
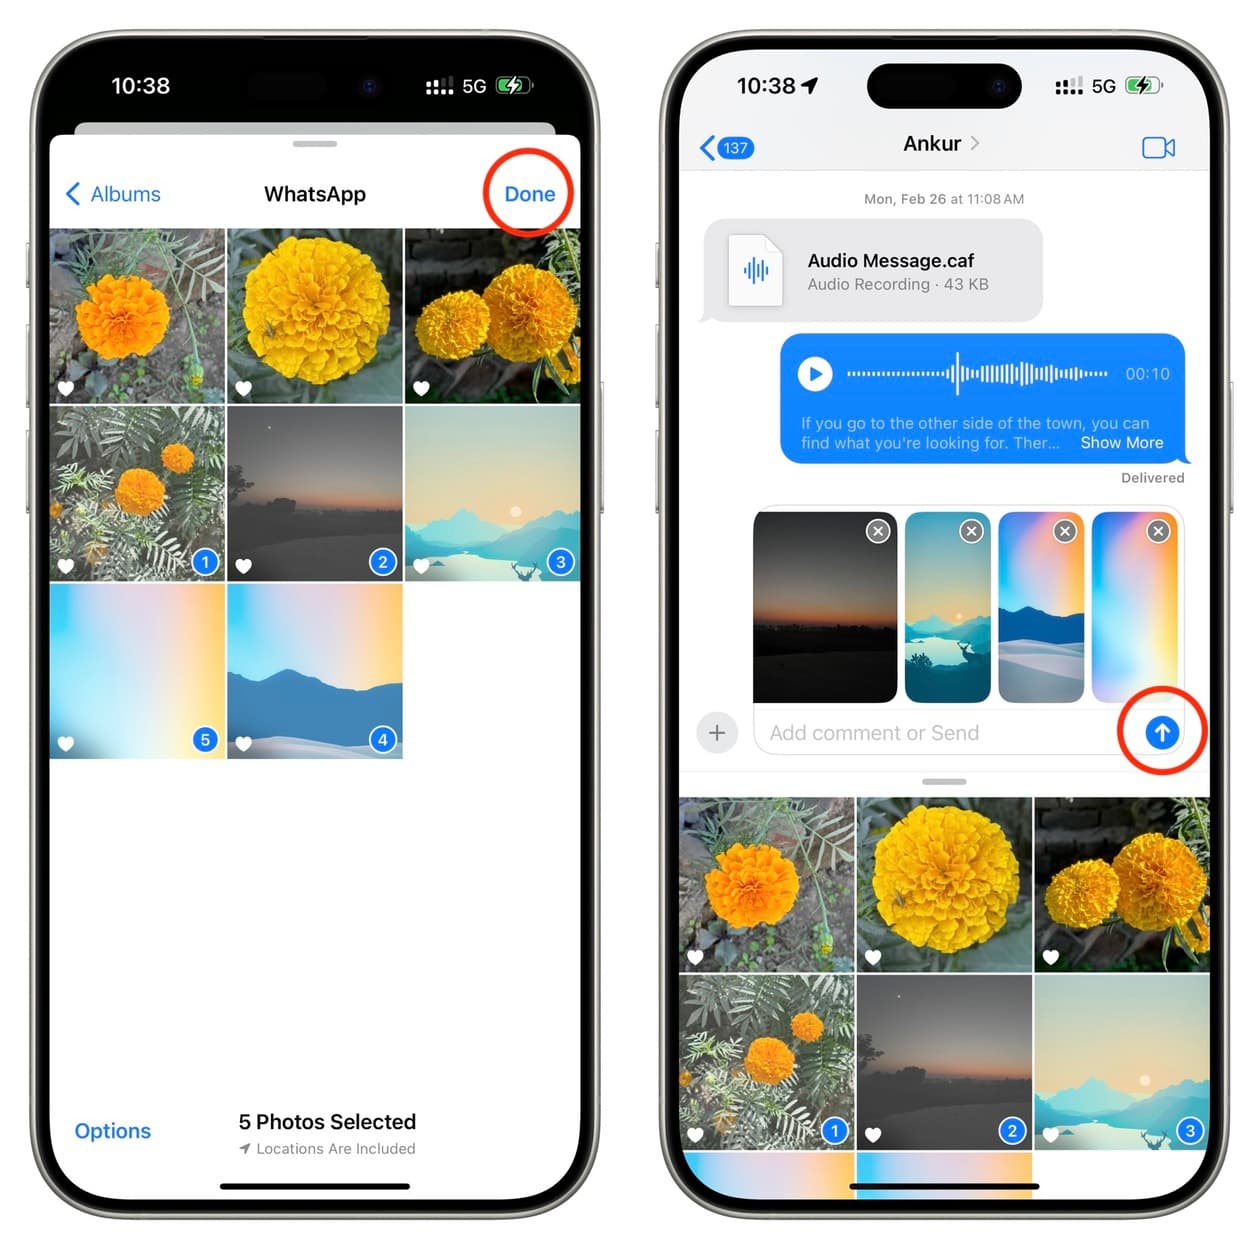
Tap Collections or Albums from this screen to bring up the familiar Photos app interface with all your albums, shared albums, and media types. Go through them to find what you’re looking for and select them.
Note that you can also tap the options button from the bottom left and choose to exclude the photo location and captions from being shared with the person.
Finally, tap the arrow button to send them on their way.
Use the iOS Share Sheet inside Photos and other apps
In addition to using the Photos app inside Messages, you can tap the share button for one or several selected media in the iPhone Photos app and select Messages. After that, enter the person’s name in the To field and hit the send button.
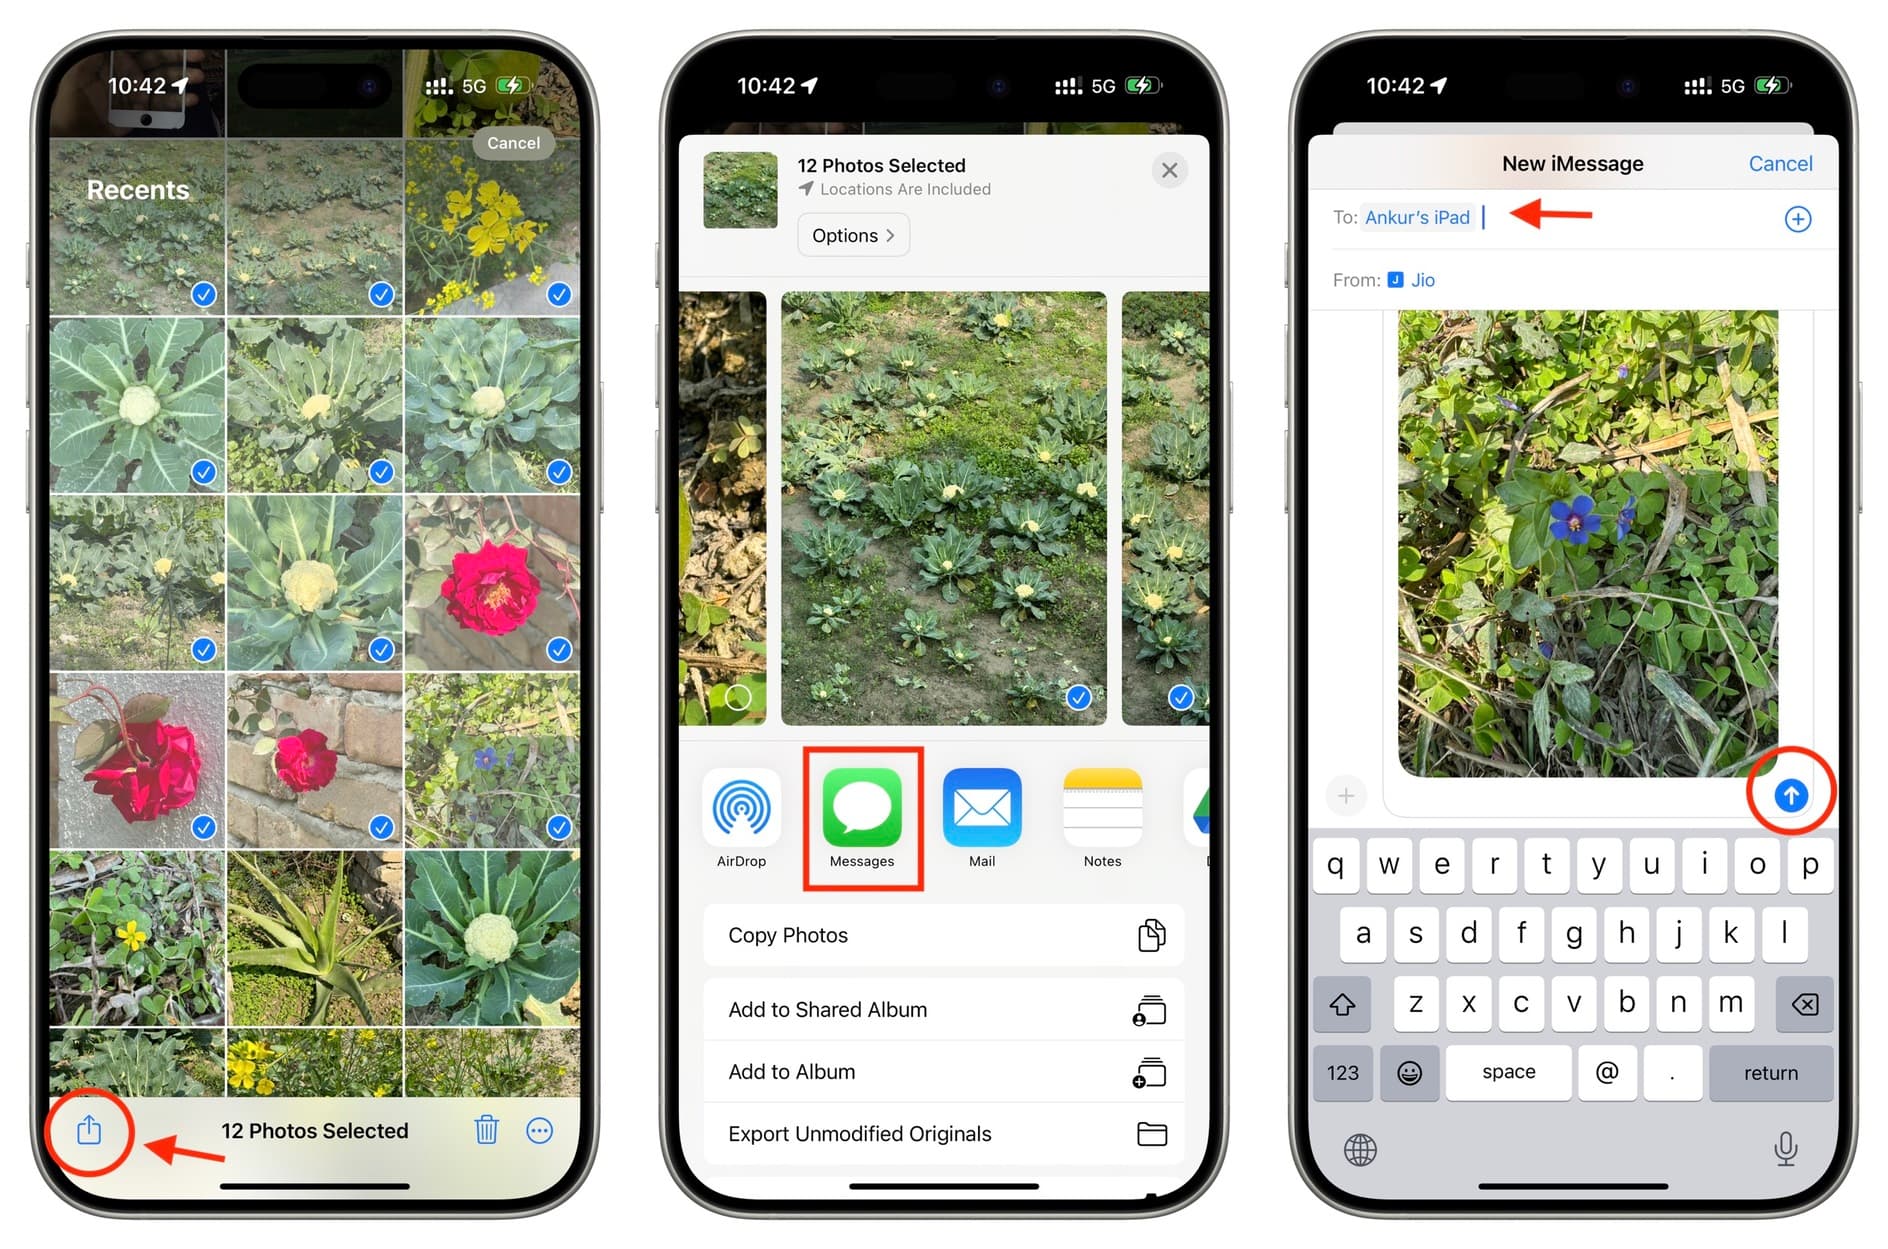
This method also works if you’re sharing an image from other apps like Safari. Just remember to hit the share icon and select the Messages option from the iOS Share Sheet.
You can even use this approach to send PDFs, ZIPs, and other files using iMessage!
On a related note: