Have you ever created an album in Photos that a friend or family member wanted access to? Did you make an album and then realize that you meant for it to be a shared album instead? Or maybe you didn’t know when you created an album that you would later want to share it?
While there isn’t a simple switch to convert a plain old album in Photos into a shared one, it is possible. Here, we’ll show you how to turn an existing album in Photos into a shared album on iPhone, iPad, and Mac.

Convert an existing album to a shared album
On iPhone and iPad
Open the iOS or iPadOS Photos app, go to the Albums tab, and tap the album. To view all your albums, tap See All. Then follow the steps below to make it a shared album:
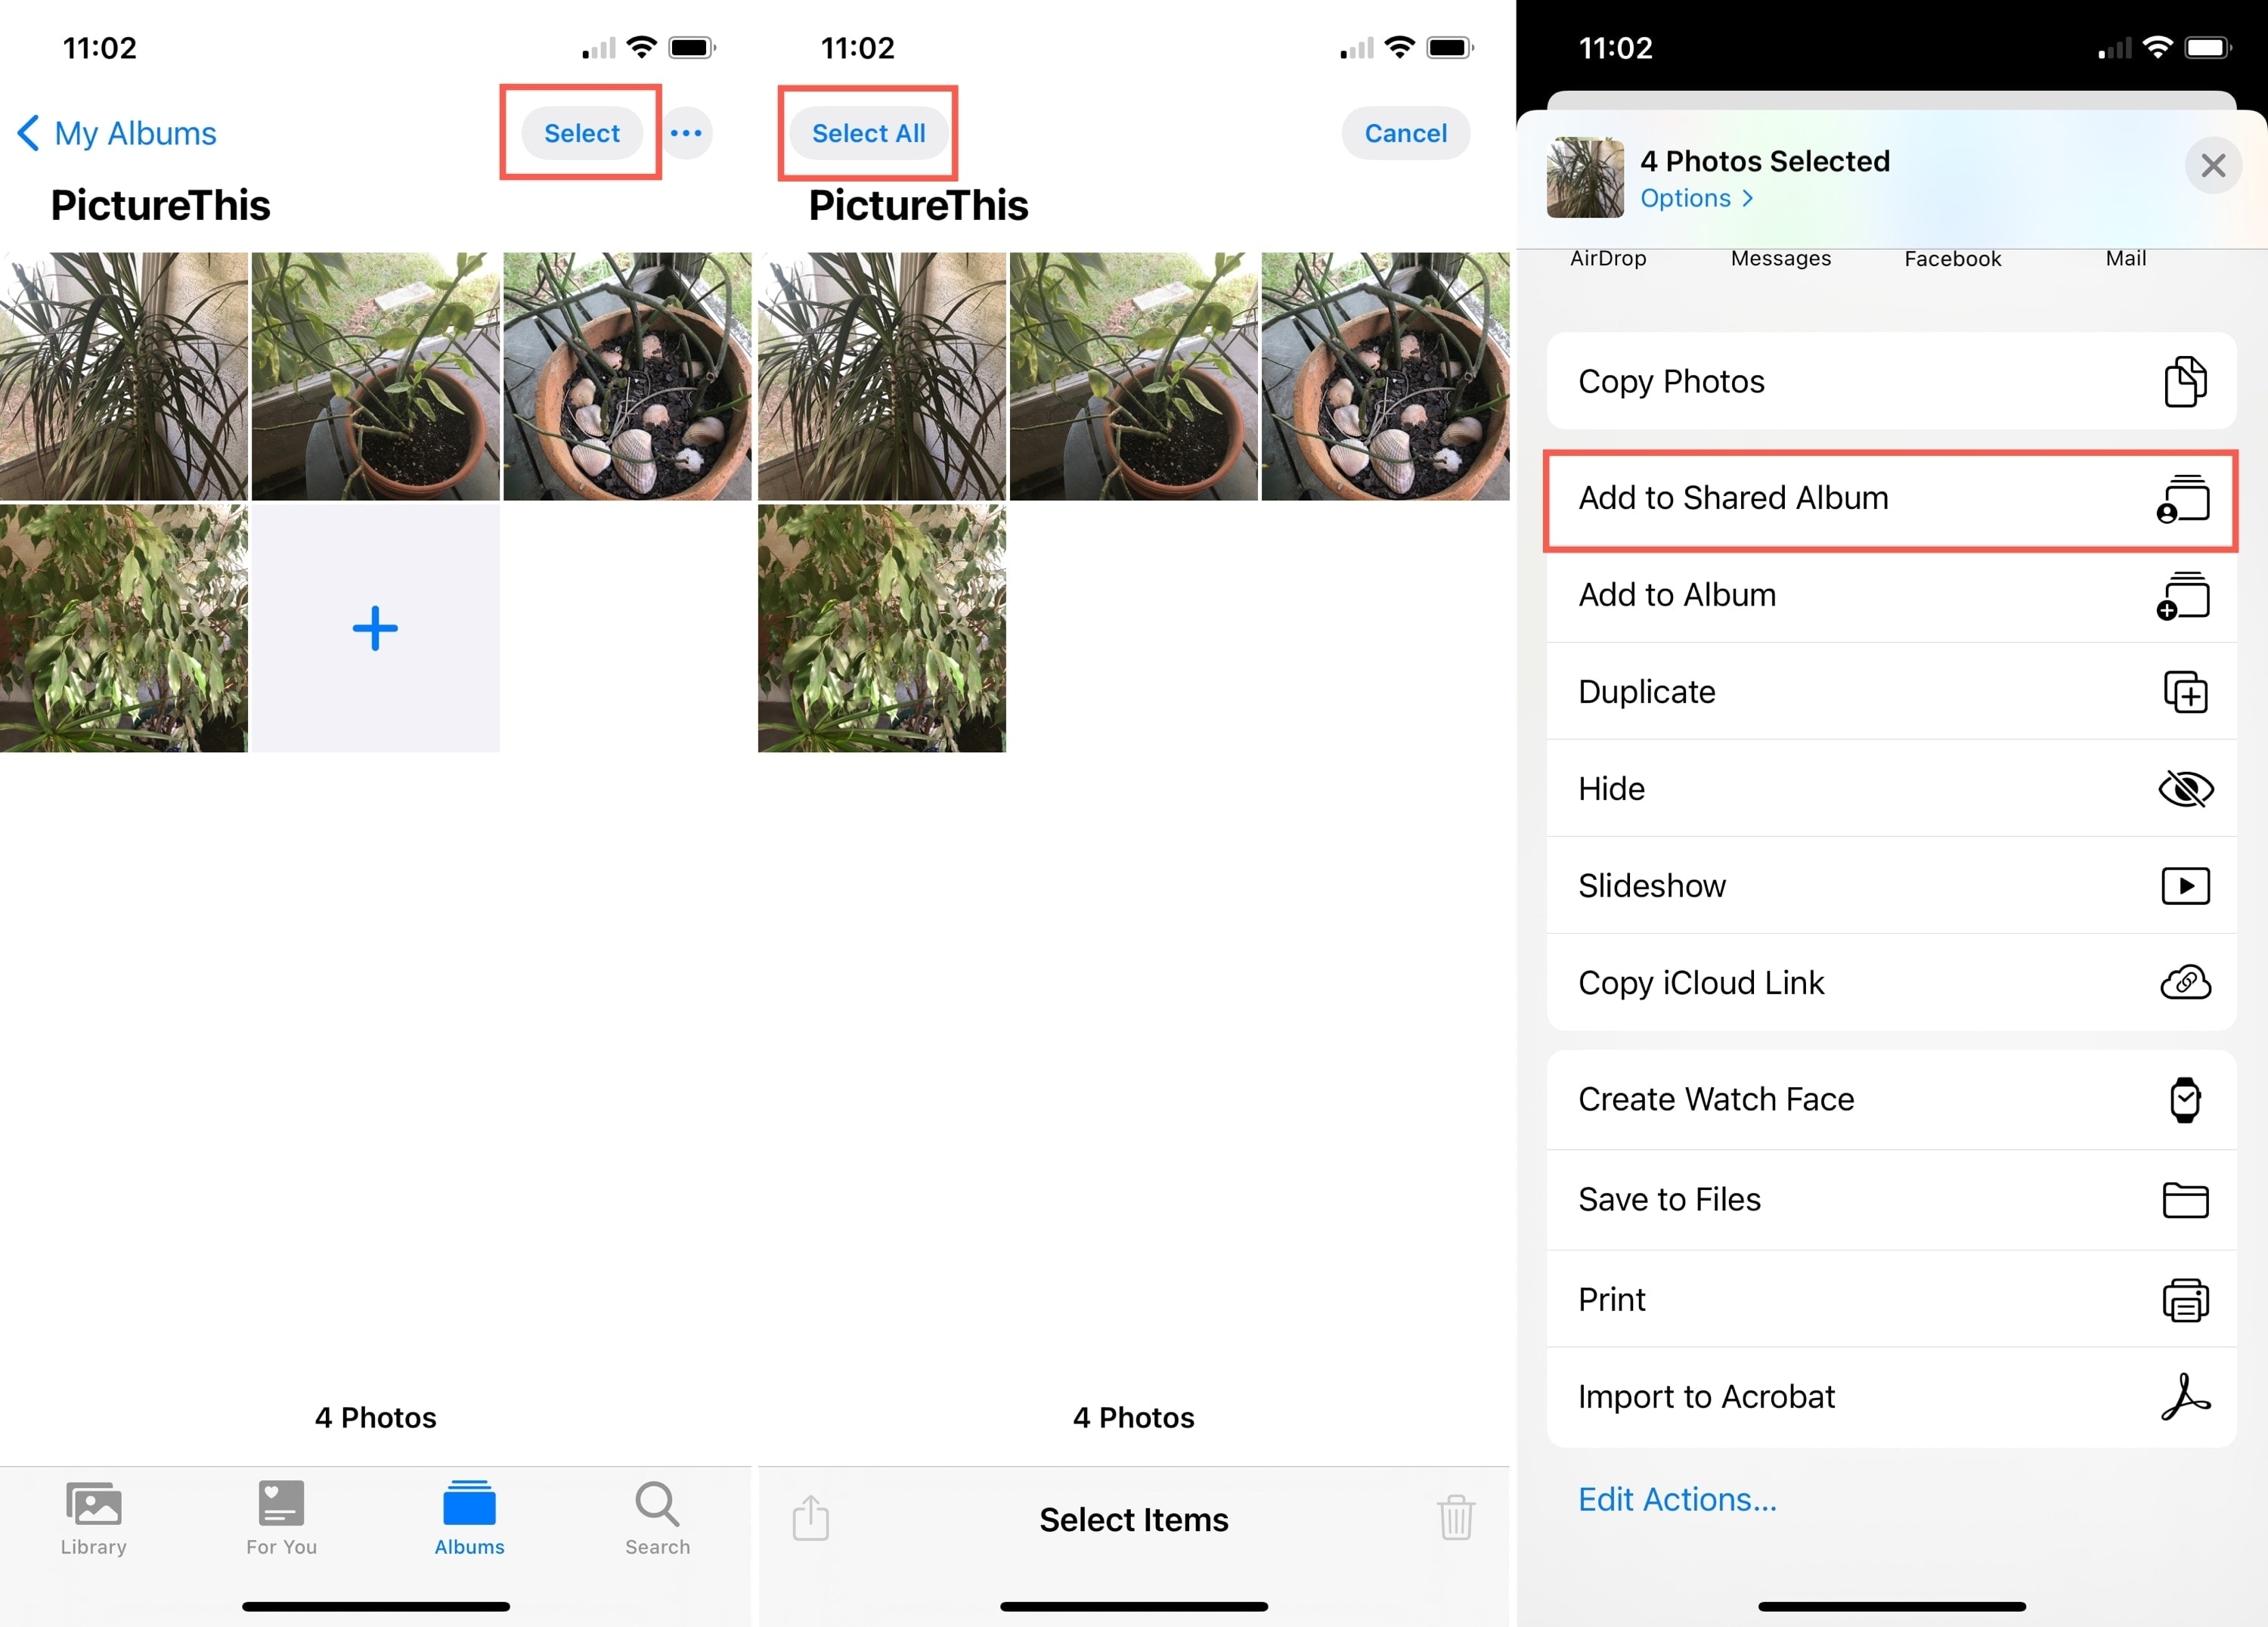
1) With the album open, tap Select on the top right.
2) Then tap Select All, on the top left.
3) Tap the Share button at the bottom.
4) In the Share Sheet, pick Add to Shared Album.

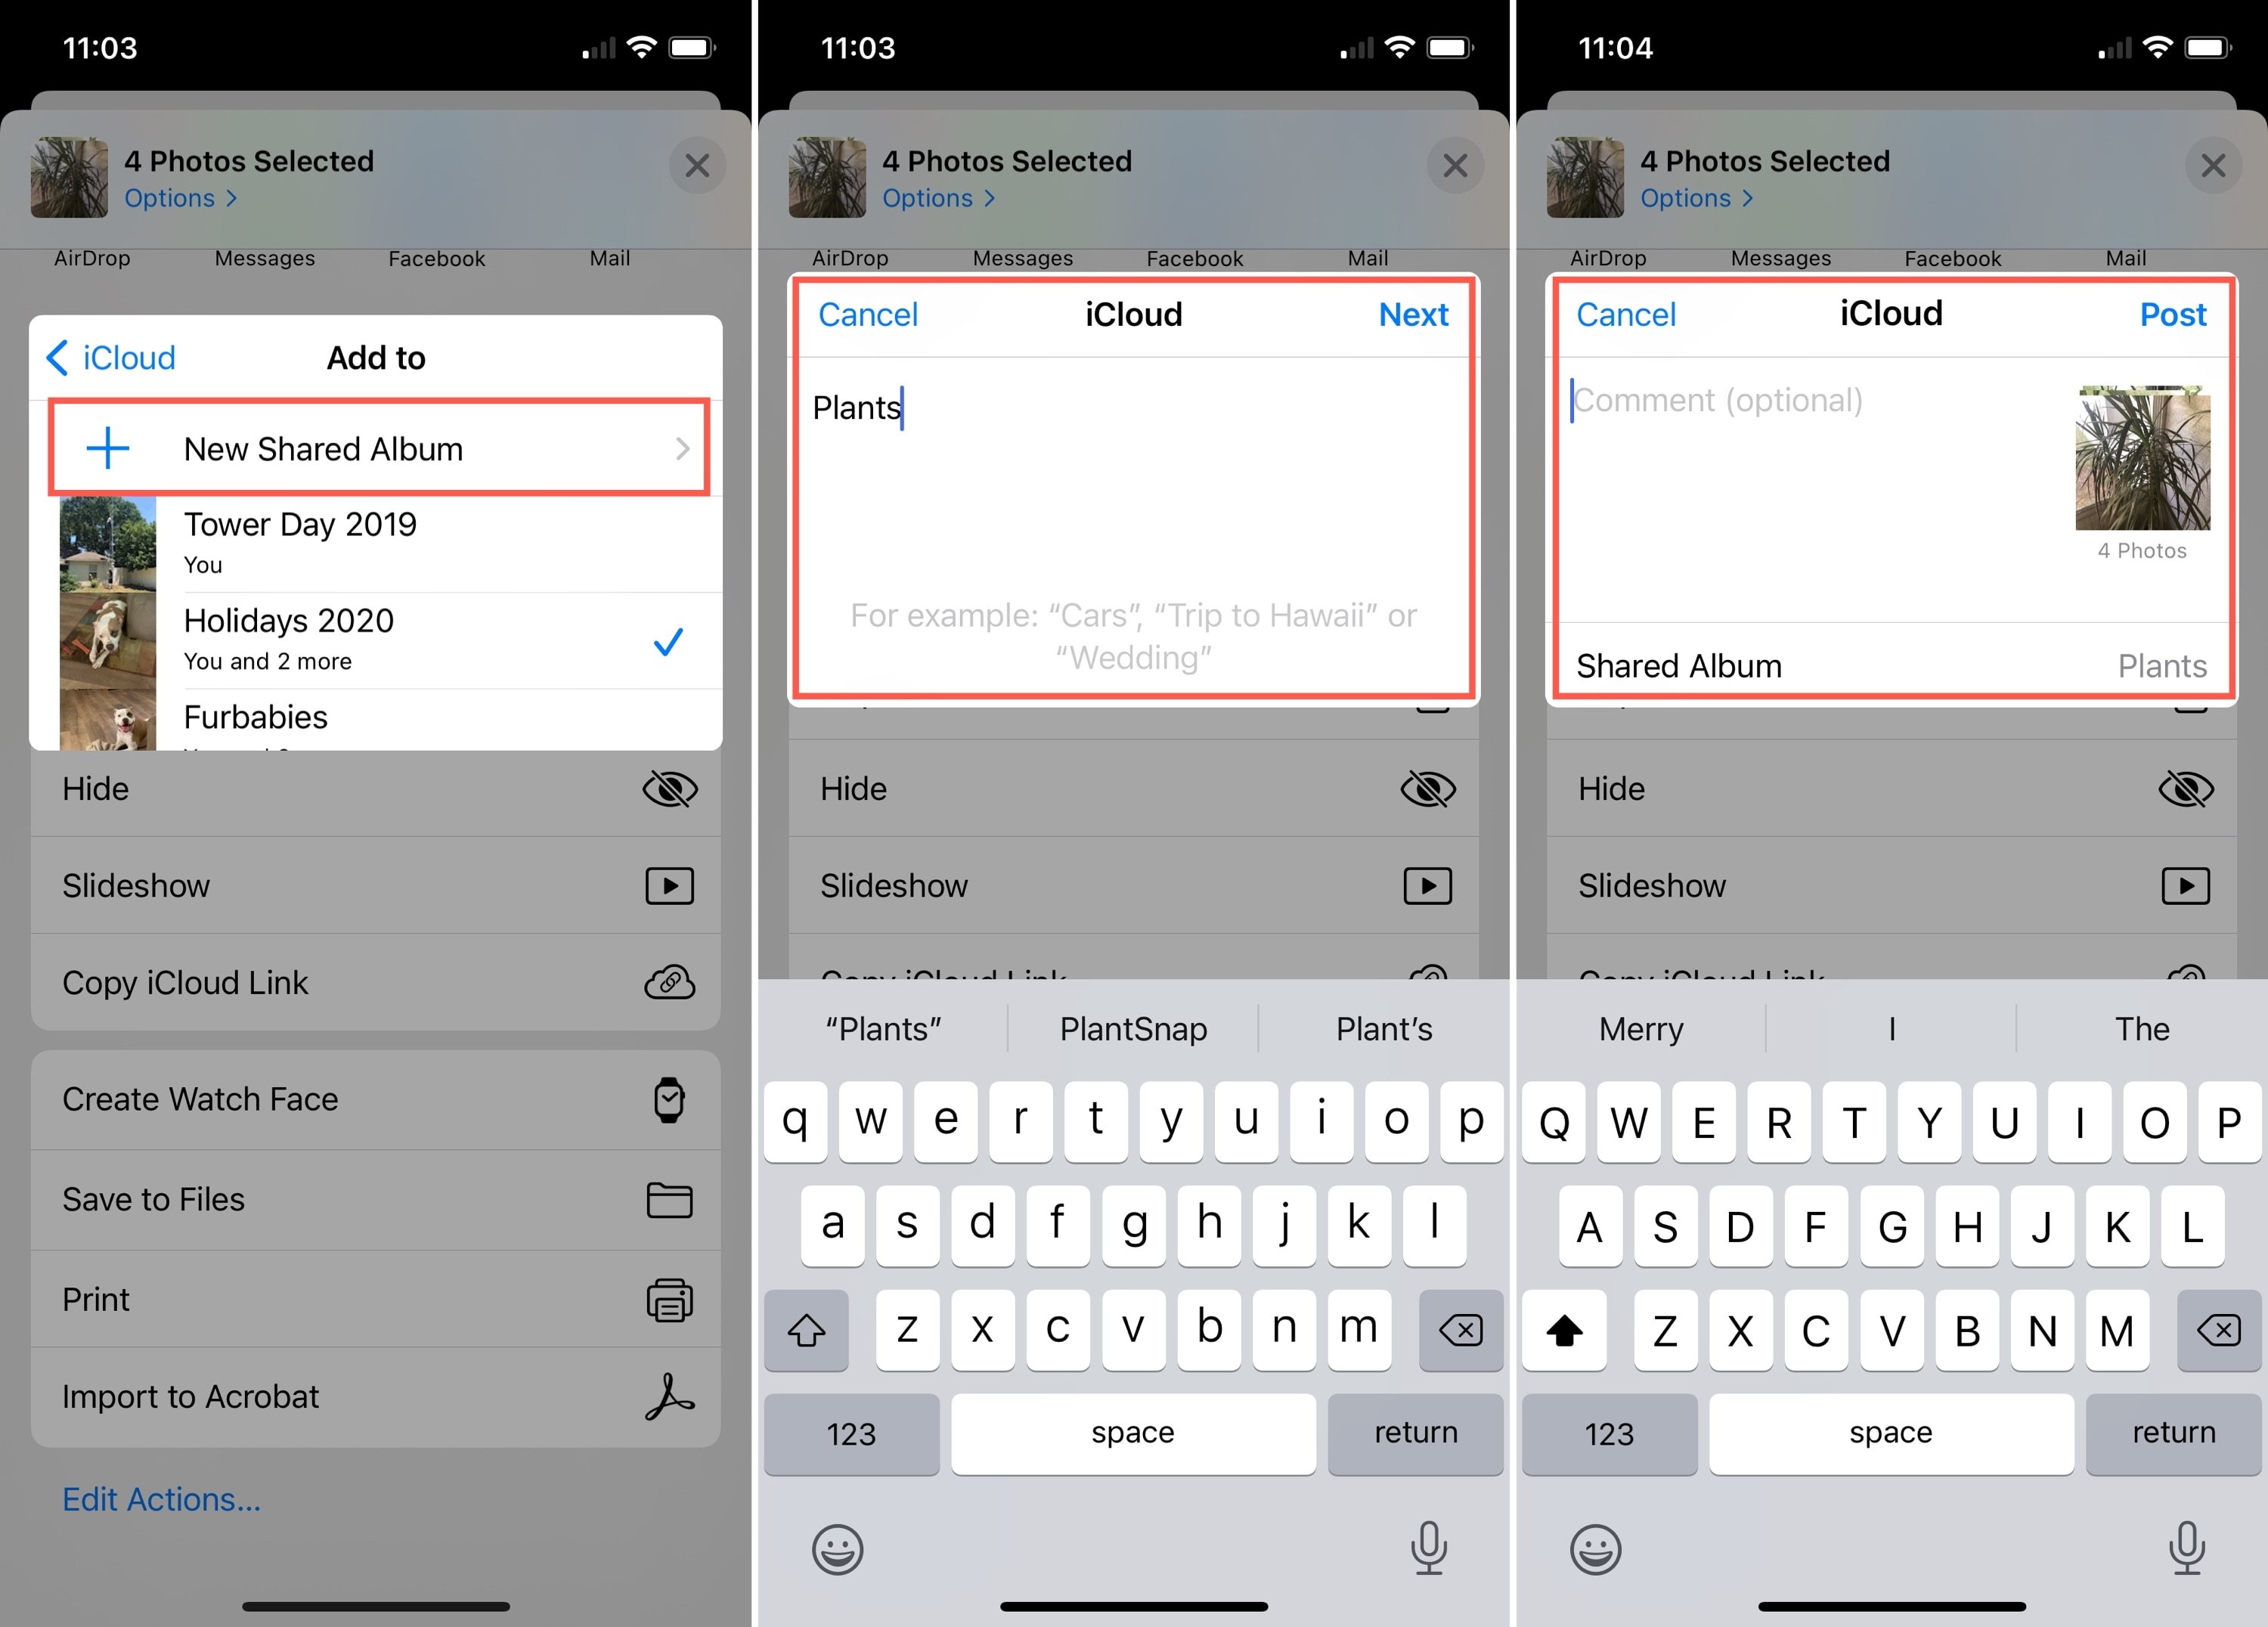
5) When the small window pops open, you may see a shared album already selected. Tap Shared Album and then New Shared Album.
6) Name your album and tap Next.
7) You can add people to share it with immediately or wait until later by just tapping Next.
8) Optionally, add comments to the album and/or tap Post.

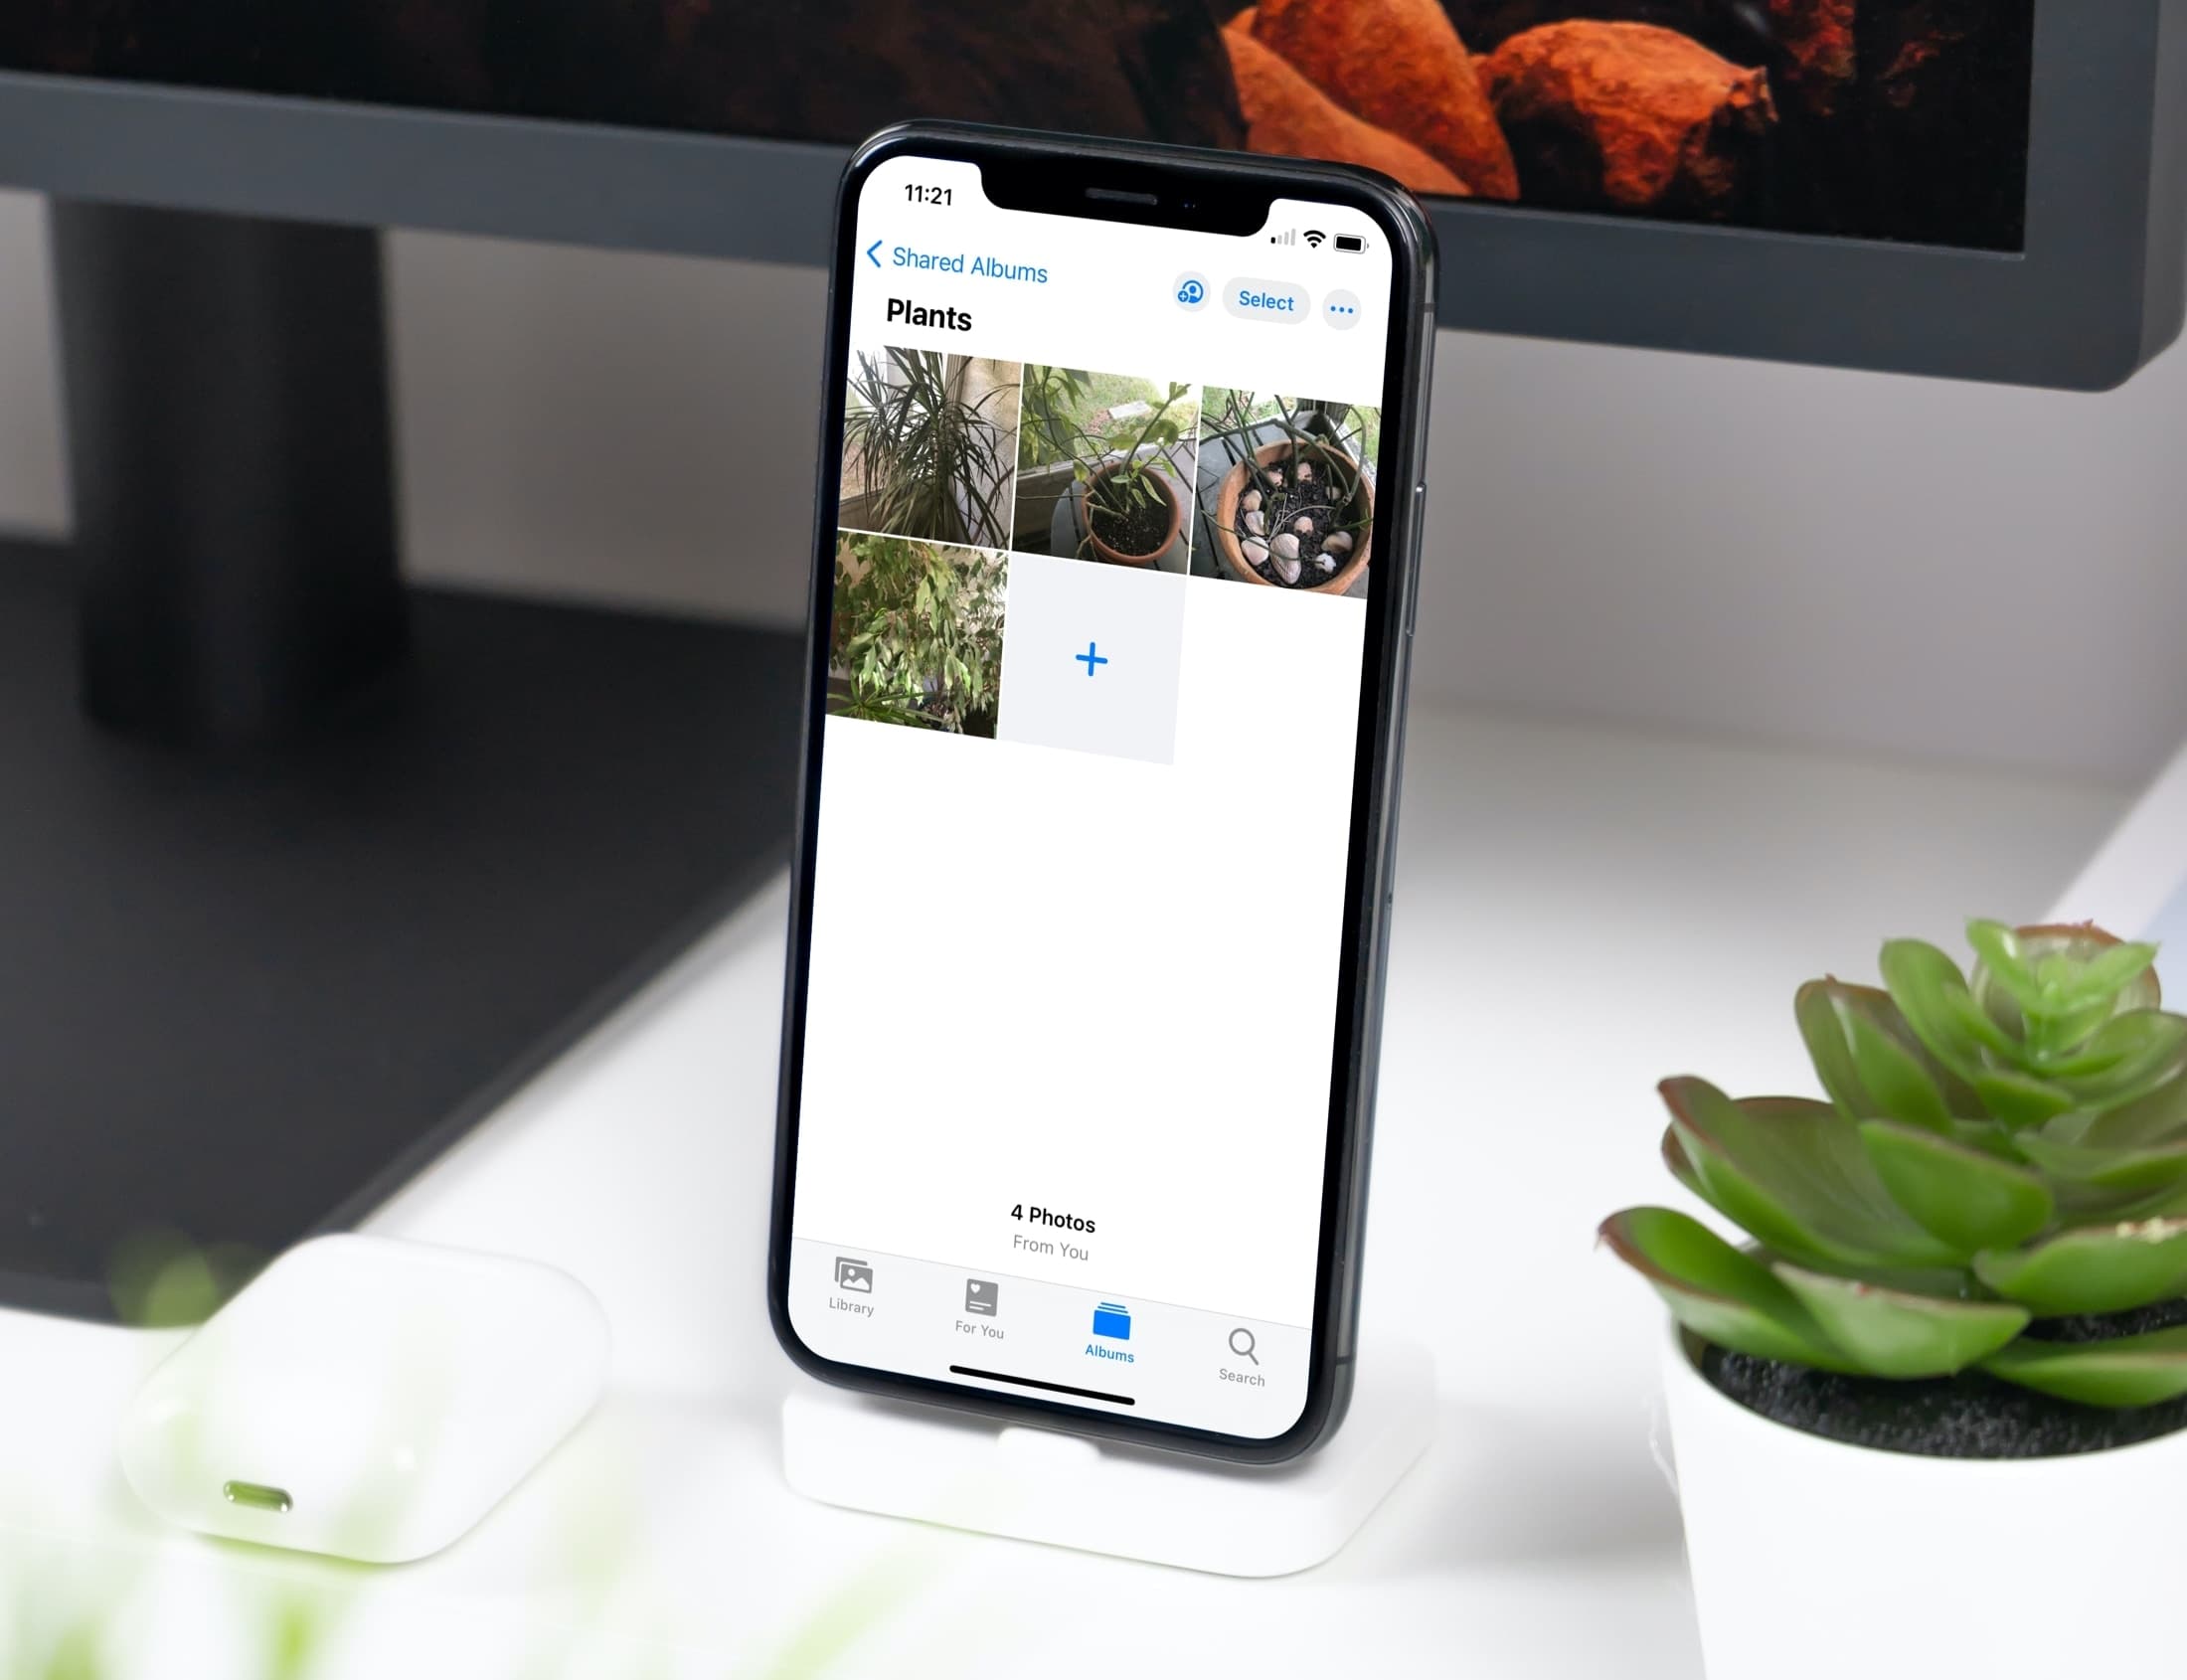
Now when you go to the Albums tab in Photos, you’ll see that album in the Shared Albums section.
Related: How to create and manage albums in Photos on iPhone
On Mac
Open the Photos app on your Mac and select the album in the left sidebar under My Albums to get started. Then, follow these steps to make the album shared:
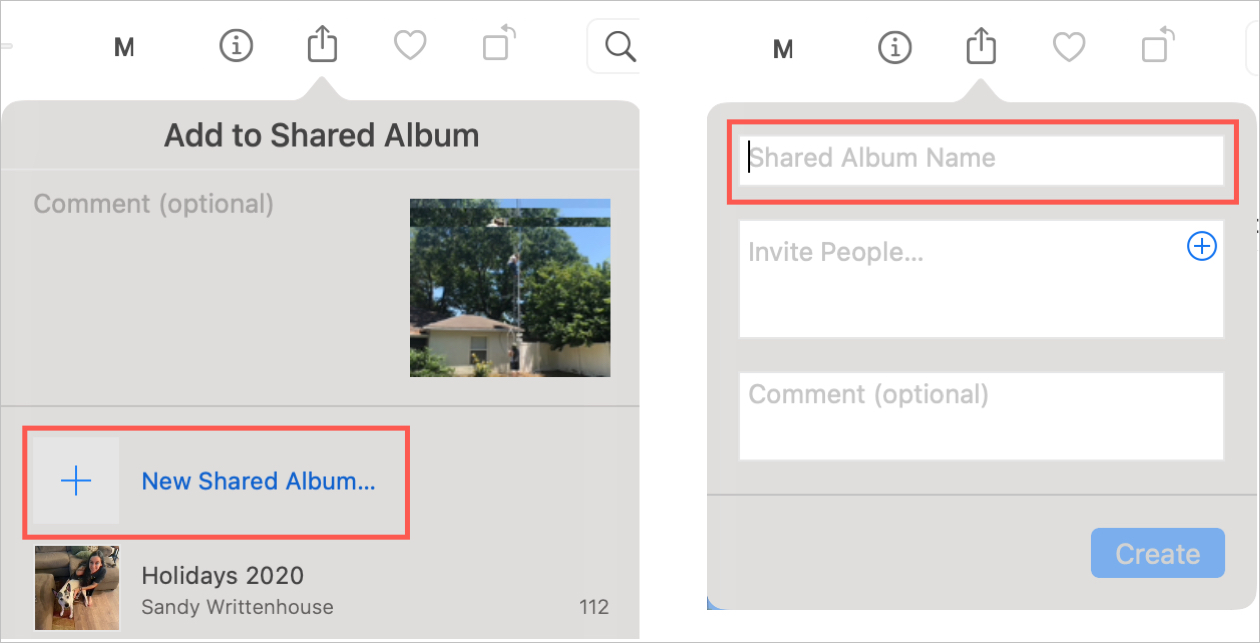
1) With the album open, click the Share button in the toolbar or File > Share from the menu bar.
2) Select Shared Albums. You’ll notice at the top of the small window the number of photos you have in the album that you’ll be sharing.

3) Pick New Shared Album.
4) Give your album a name. You can add people to share it with immediately or wait until later. Optionally, you can add comments to the album.
5) Click Create.

You should then see your newly created shared album in the sidebar under Shared Albums.
Related: How to create and manage albums in Photos on Mac
You don’t always know at the time you set up an album in Photos that you’ll want to share it down the road. It could be photos from a recent holiday or other celebration, or simply pictures of pets or your home projects.
Are you going to turn any of your recently-created albums into shared ones? Let us know if you find the process easy!
Do more with Photos: