Learn about 3 simple, free techniques to remove the background of a photo on Mac and take your visual content to the next level.
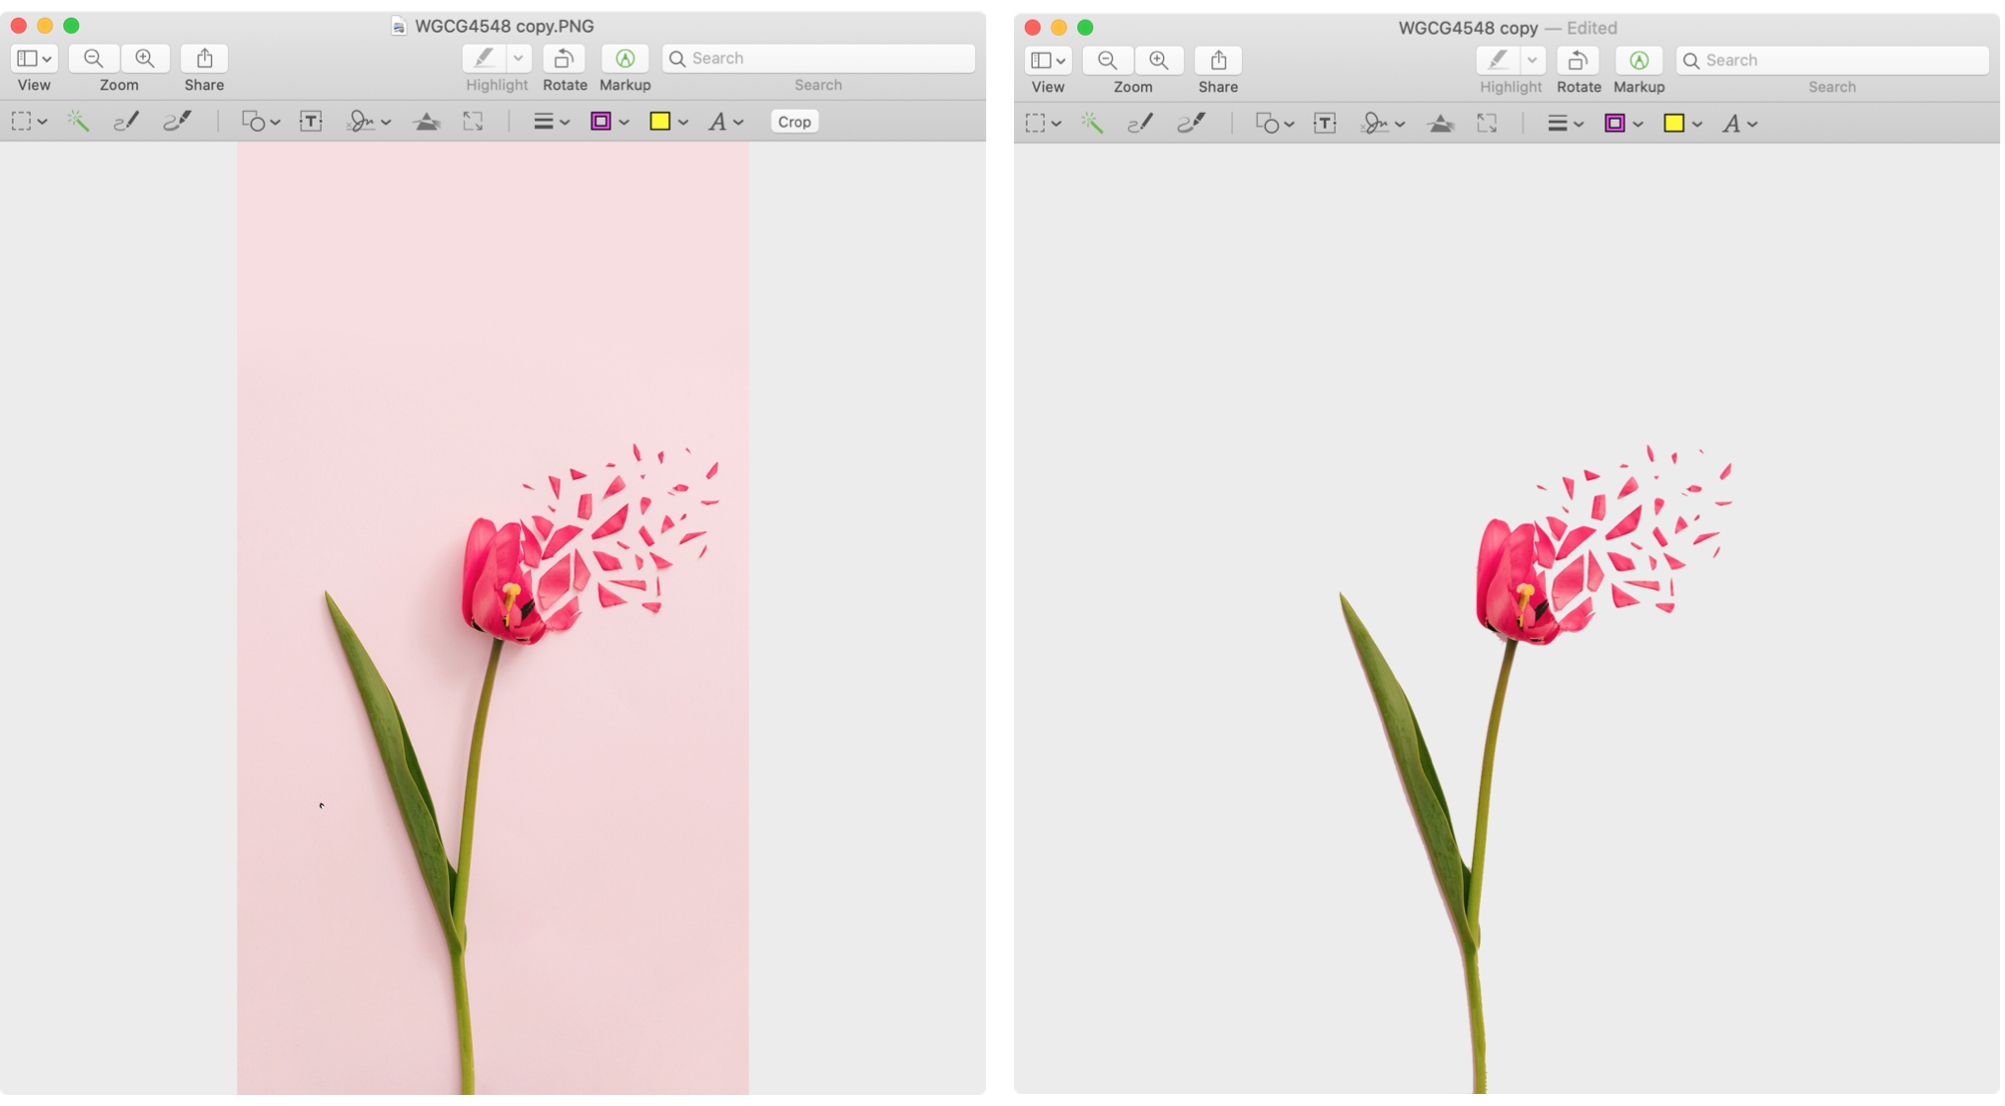
Removing image backgrounds can feel daunting without professional software like Photoshop or Pixelmator Pro.
macOS provides built-in tools to separate the background from the rest of the image. Try them all to find one that generates the best results for you.
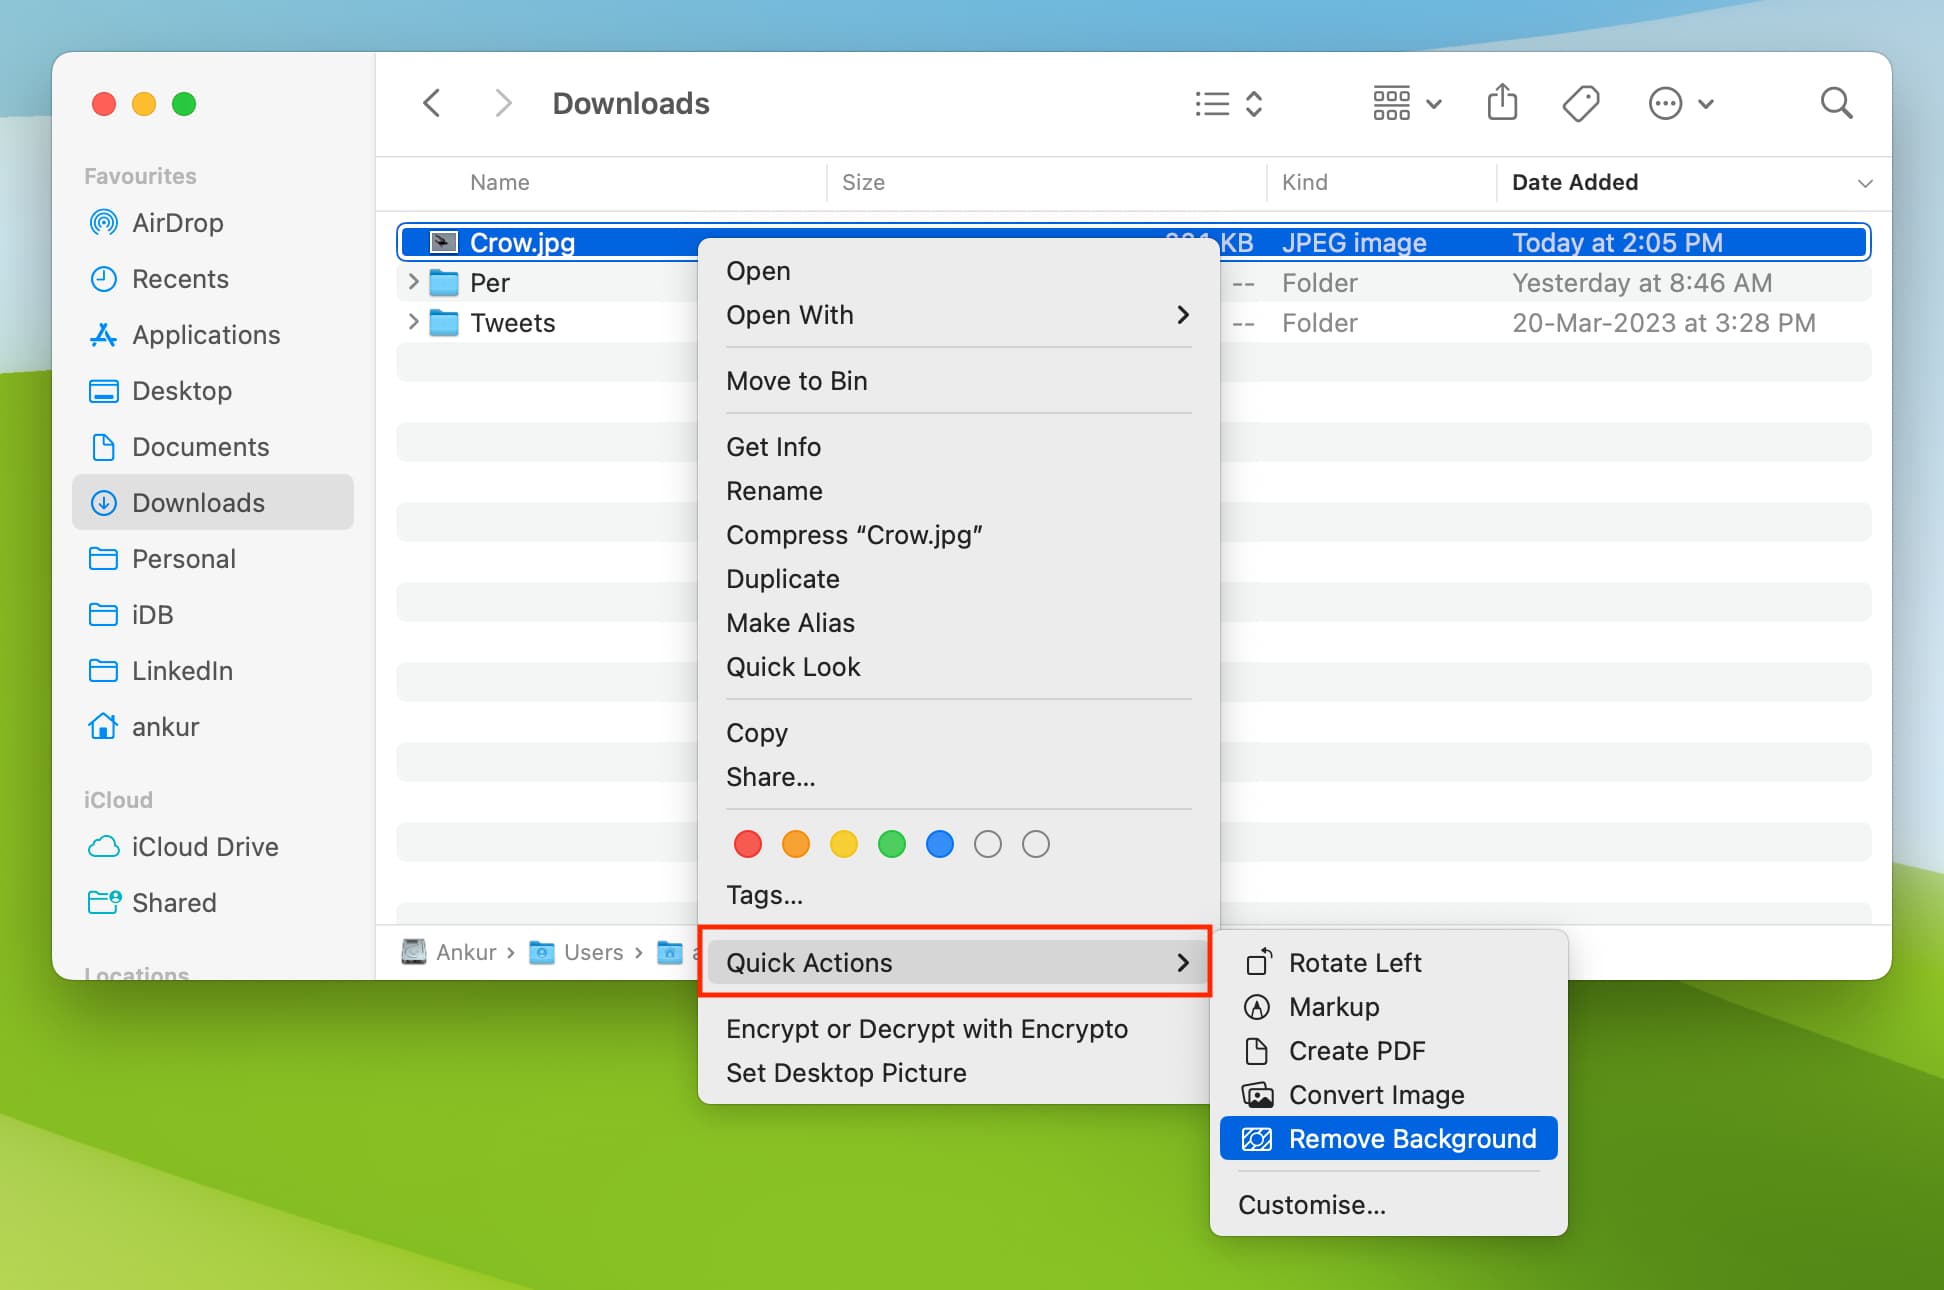
Quick actions in Finder
- Open Finder and navigate to the folder containing your image.
- Right-click or Control-click it and choose Quick Actions > Remove Background from the menu. macOS will remove the background and save the resulting image as a transparent PNG file in the same location as the original.
Preview app
This method works best if the background doesn’t blend in with or has colors different from the part of the photo you want to keep.
Select the image file and press Command + D to duplicate it, so you keep the original intact.
Then, open the copy in Preview and follow the steps below to remove the background.
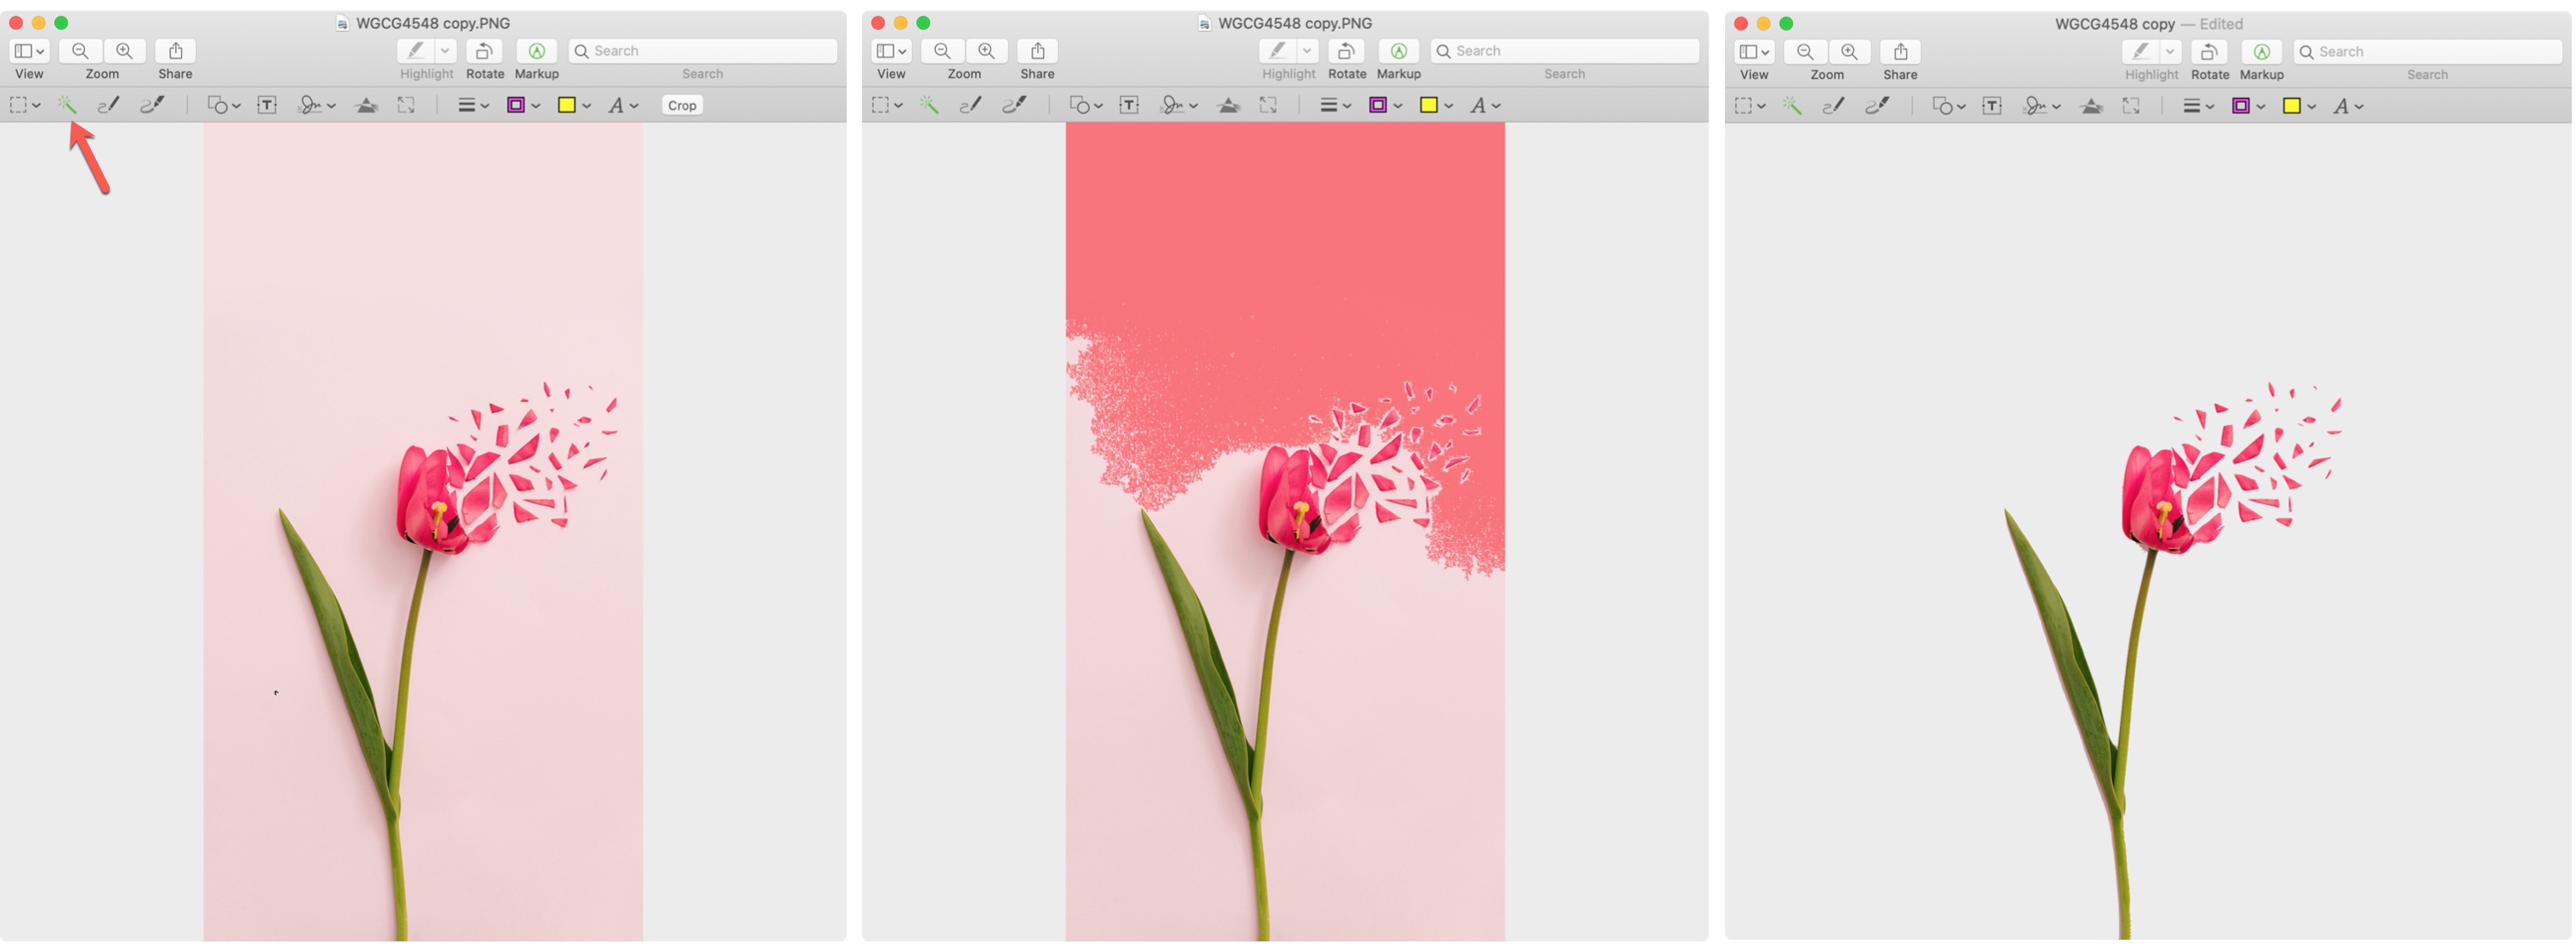
- Click the Markup button in the Preview toolbar.
- On the left, click the Instant Alpha tool, which looks like a wand.
- Begin dragging the background, and the tool will automatically select adjacent pixels in matching colors as you drag. This method works best when the background is a different color from the section you want to keep.
- You can also select one background section, delete it, and then select another. Stop dragging when you capture a section, press the delete key, and click Convert when prompted to change the image format from JPG/JPEG to PNG.
- Select other sections closer to the part you want to keep and delete those, too. Repeat until the entire background is gone.
Extract an image in Preview
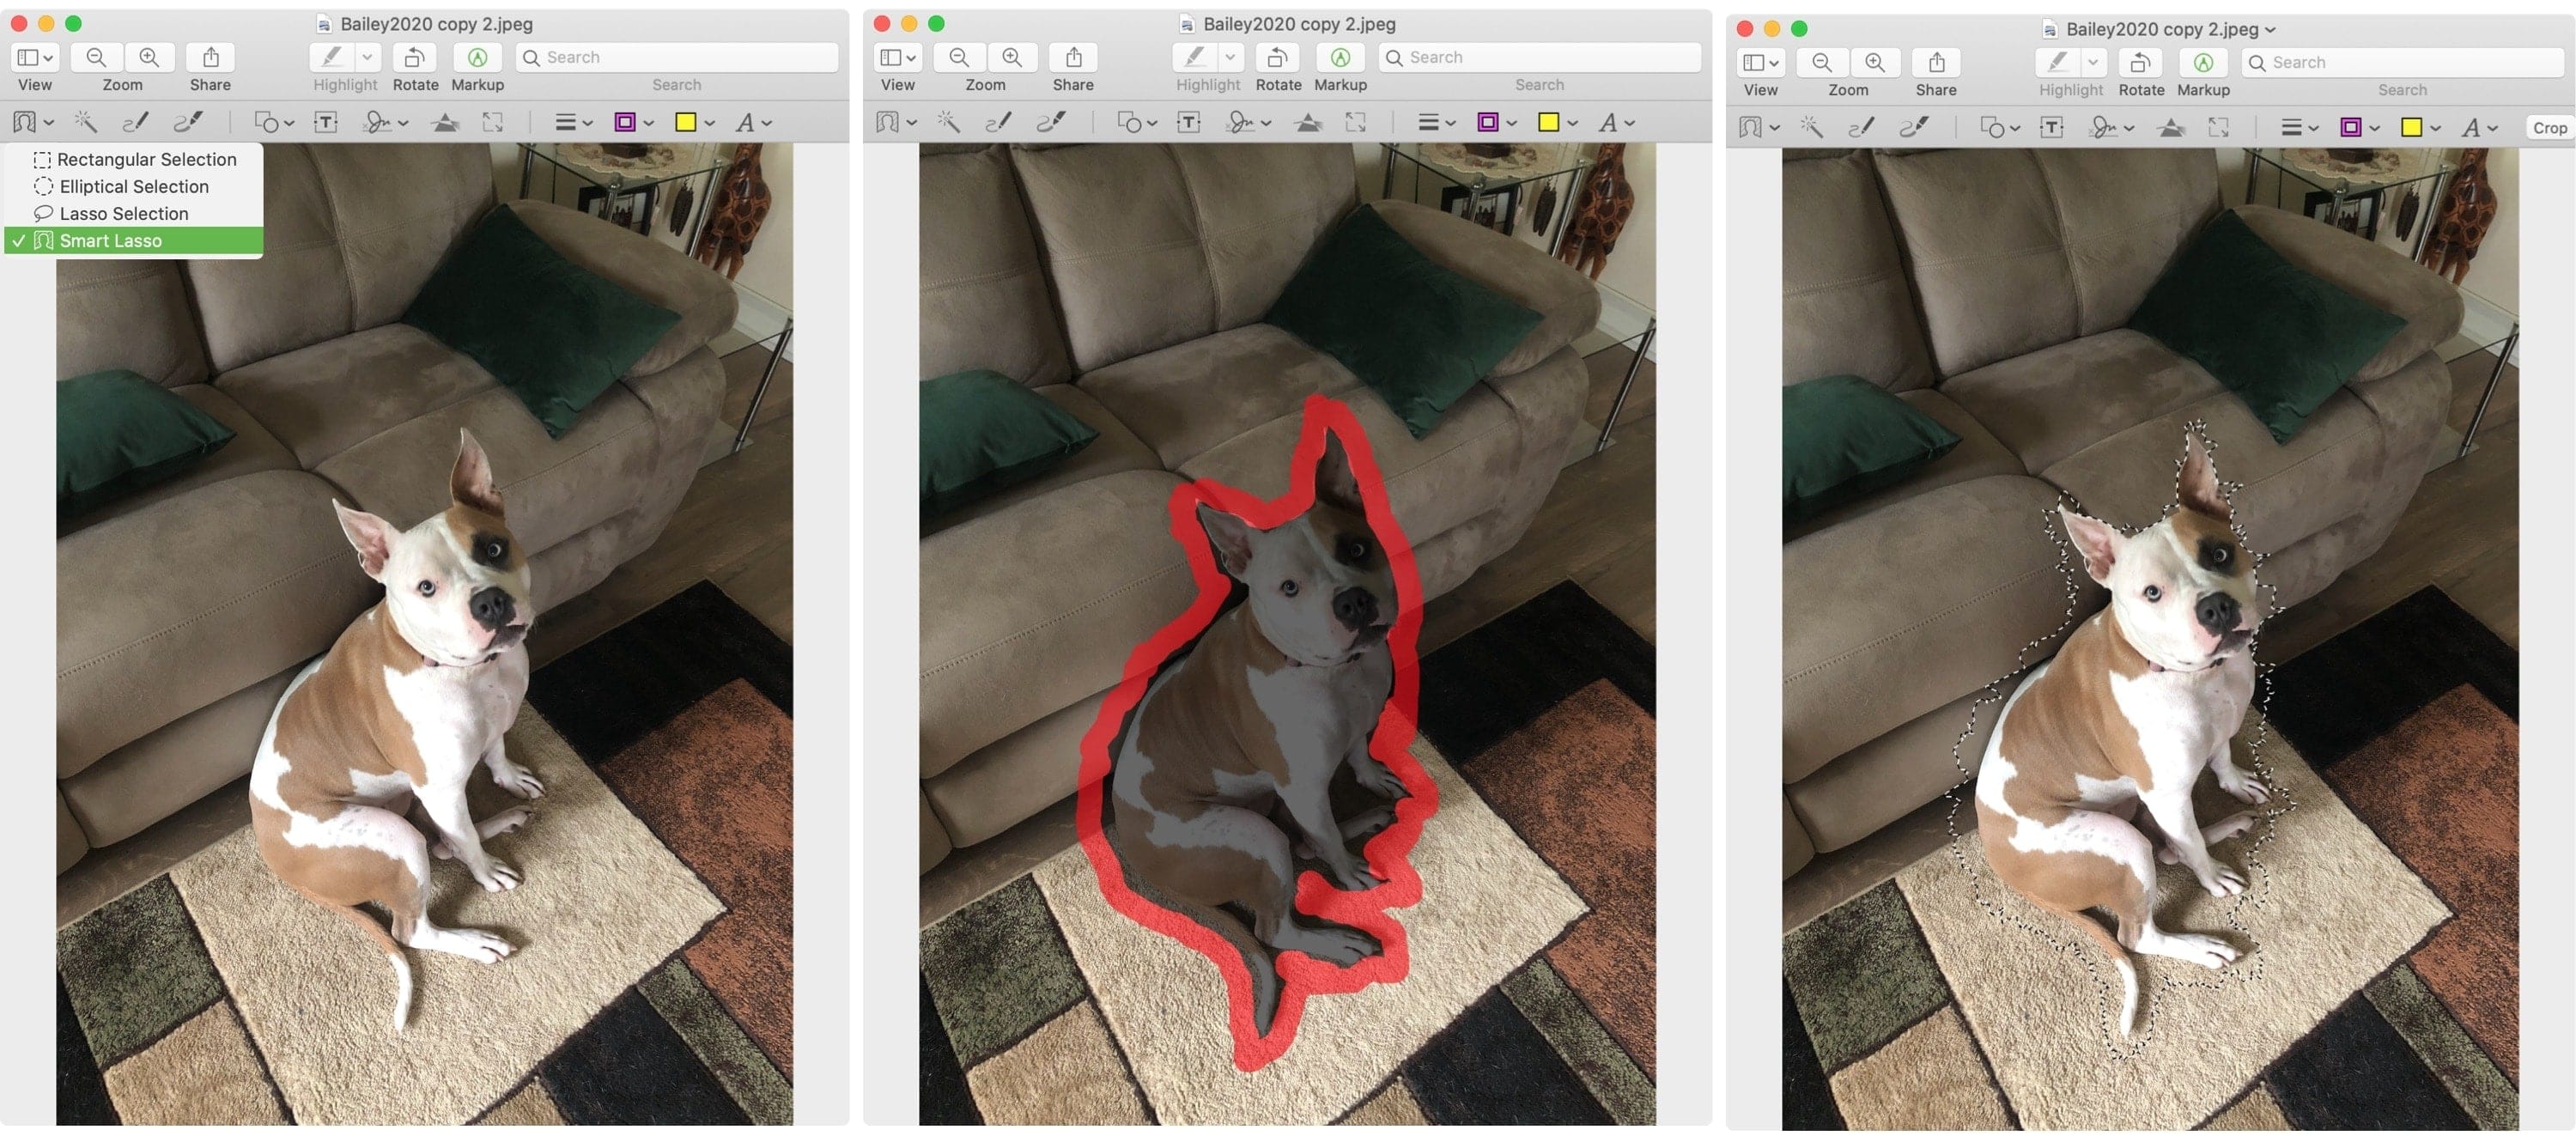
Photos with similar background and foreground colors don’t work well with the techniques above. In that case, it’s easier to select the section you want to keep and isolate it from the background.
- Start marking up an image in Preview, click the Selection Tools menu on the far left, and choose Smart Lasso.
- Now trace the image section to keep, then finish the selection by connecting the start and end points.
- When the selection outline appears, click Edit > Invert Selection in the menu and press the delete key to remove the background, or click Edit > Copy to copy the selection to the clipboard for pasting in other apps.
Tips for background removal in Preview
Here are a few tips for the Preview method:
- Unhappy with your selection? Refine it by dragging it in the opposite direction or clicking another spot.
- Use the Zoom tool to capture tiny gaps in the selection more accurately. To zoom in, click the Window > Zoom menu or use a trackpad gesture.
- To keep the original photo intact, create a copy before you start editing by right-clicking the file and choosing Duplicate.
Remember that you can always revert changes in Preview by clicking the Edit > Undo menu or pressing the Command + Z keys.
Preview may not be the most robust image editor, but any of these methods will help you remove backgrounds from your photos.
3. Online tools
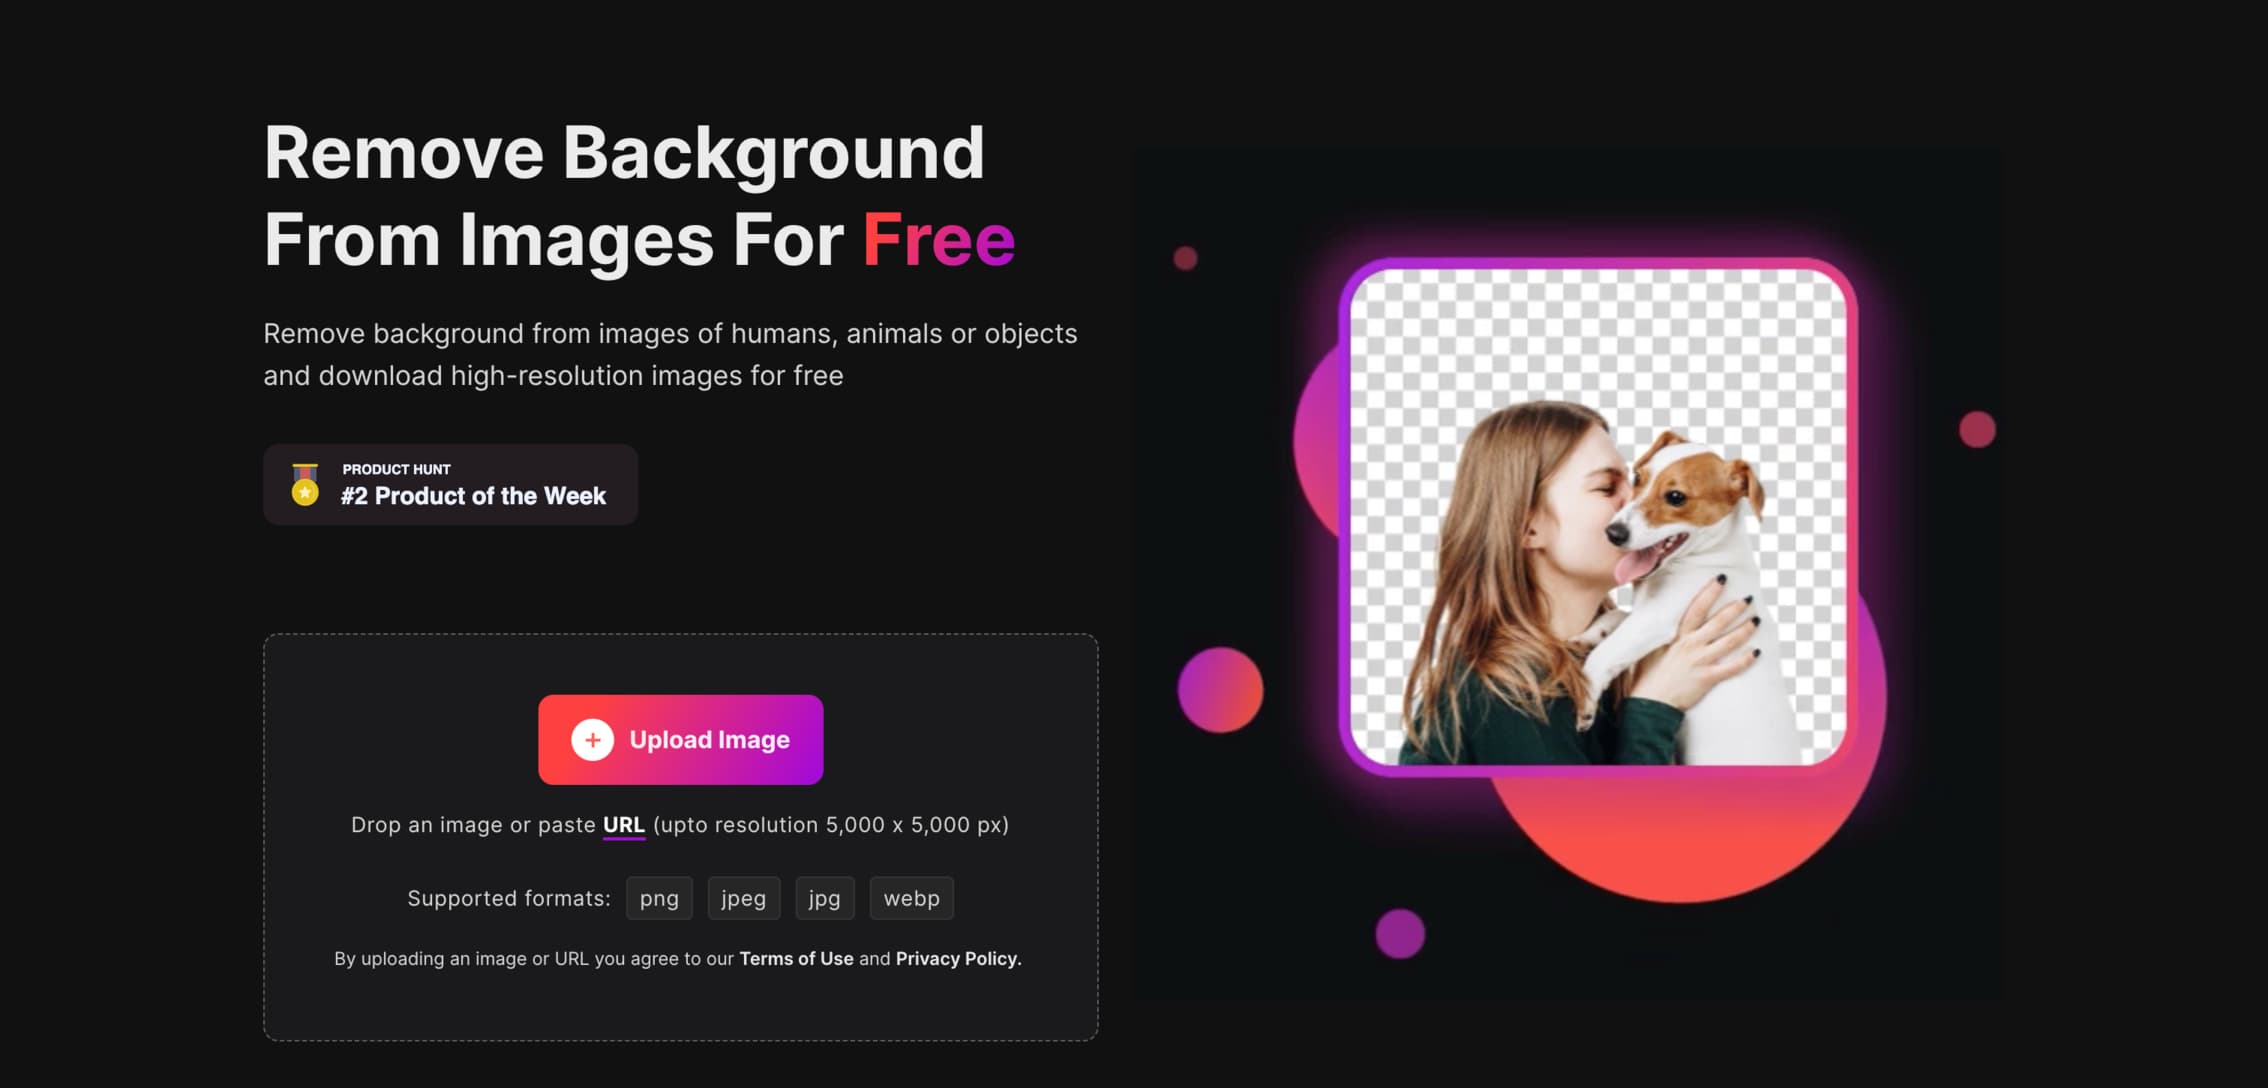
You can remove an image’s background using online tools in your browser, without installing anything. From a privacy standpoint, some people may be unwilling to upload their personal photographs to some server. That said, here are the three best free sites I use regularly.
- Canva.com: Premium subscribers can select an image and choose the BG Remover option from the toolbar.
- Remove.bg: You can remove the background and download the final file in “good quality” for free, but full resolution export requires upgrading to a paid version. If you don’t like how the site has removed the background, click Edit and restore or erase the background. Remove.bg also offers a computer app that you can try.
- Erase.bg: This site also removes backgrounds from your images, but it doesn’t offer erase or restore tools. In my personal opinion, Remove.bg does a better job, though Erase.bg can be just as good for most images. Best of all, Erase.bg lets you download the full-resolution image for free.
Also, check out: