Learn how to fill shapes with specific colors, nifty gradients, or photos in the Pages, Numbers, and Keynote apps on Mac, iPhone, and iPad to make them more meaningful or beautify their appearance.
Working with shapes in your documents, spreadsheets, and slideshows can be helpful. You might add basic shapes like squares and circles, or meaningful shapes for education and transportation. The nice thing about using these kinds of shapes is that you can customize them. So they don’t just have to be blue on white.
With the flexibility of filling shapes in Pages, Numbers, and Keynote, you can use colors, gradients, or images. Each option can serve a great purpose or provide a terrific appearance.
Type of shape fills in Pages, Numbers, and Keynote
You have a handful of fill options for shapes on Mac, iPhone, and iPad. Note that some features described below are currently only available on Mac.
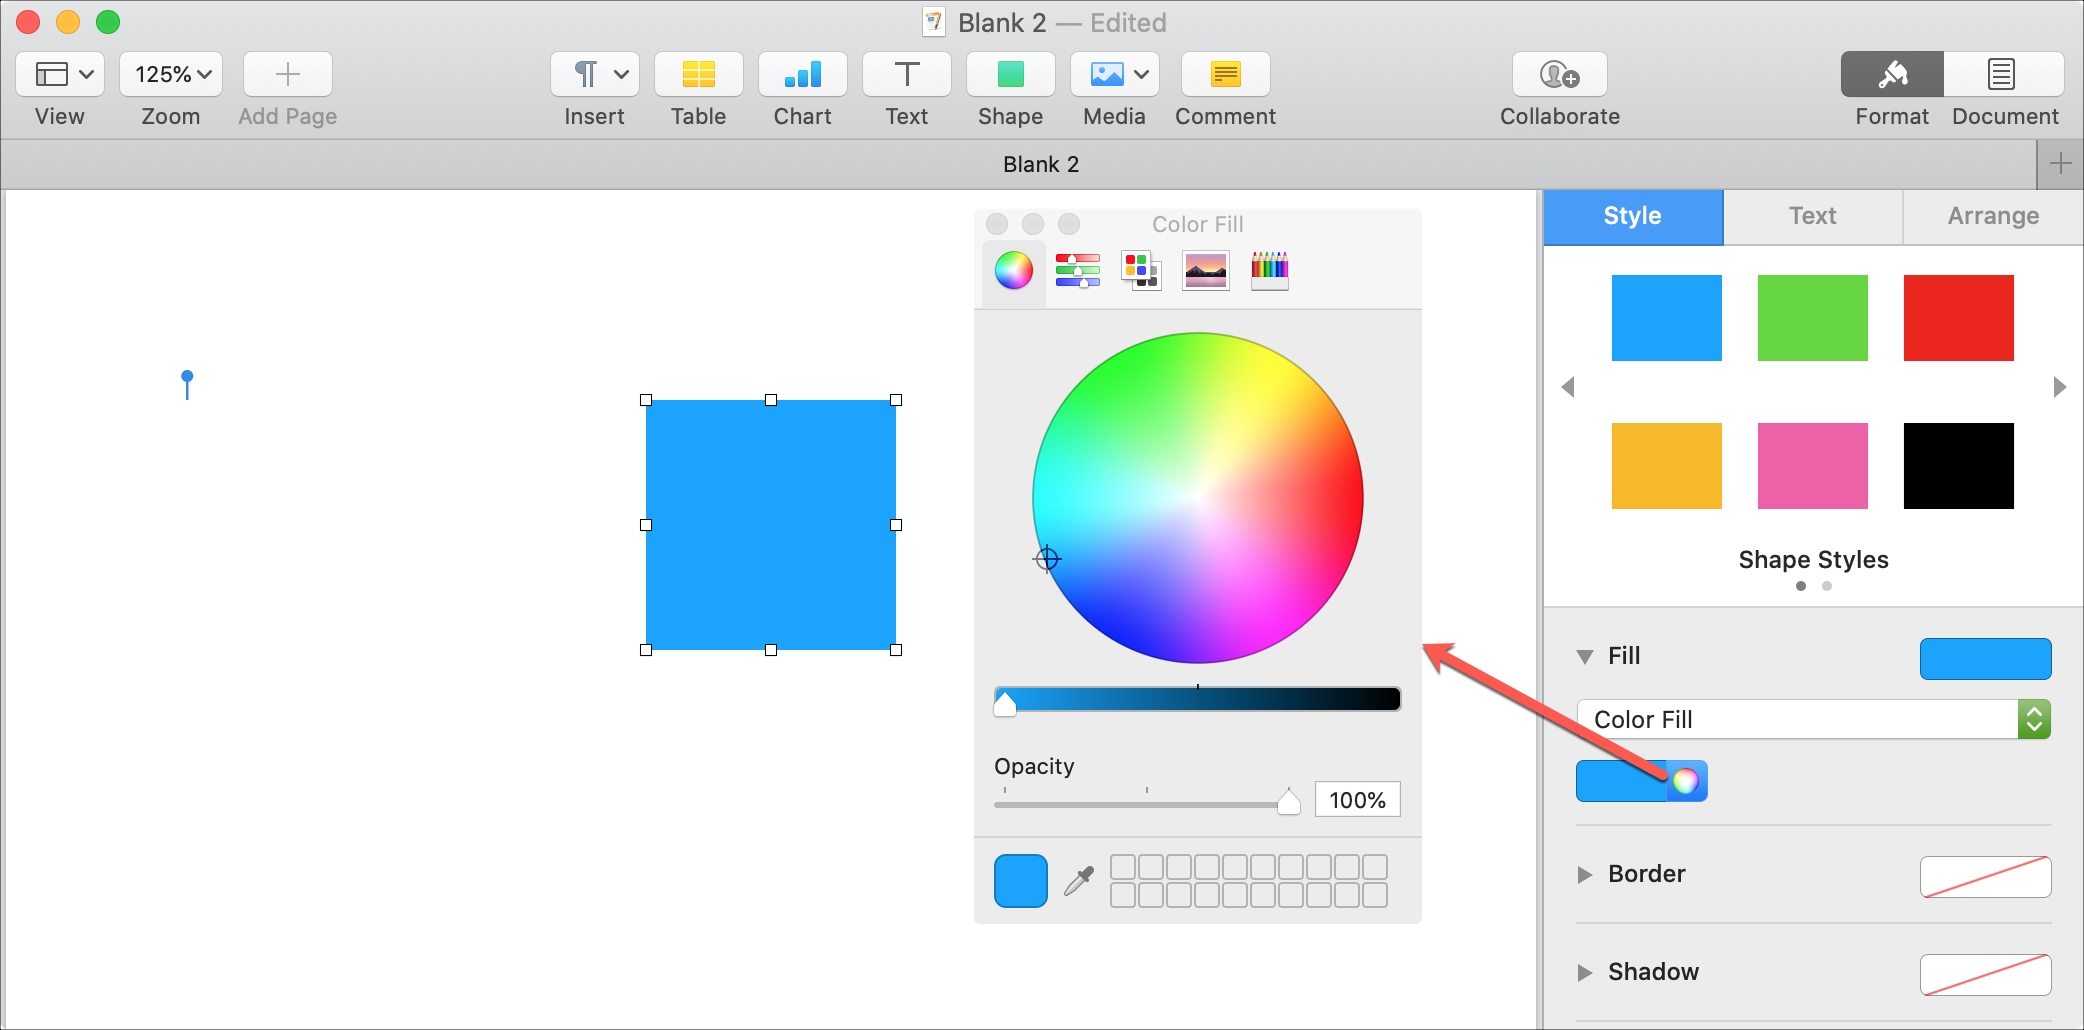
Color Fill: Lets you pick a preset color. On Mac, click the palette button to choose just the right shade. Select an option from the top of the pop-up window to use the color wheel, sliders, palettes, image palettes, or pencils.
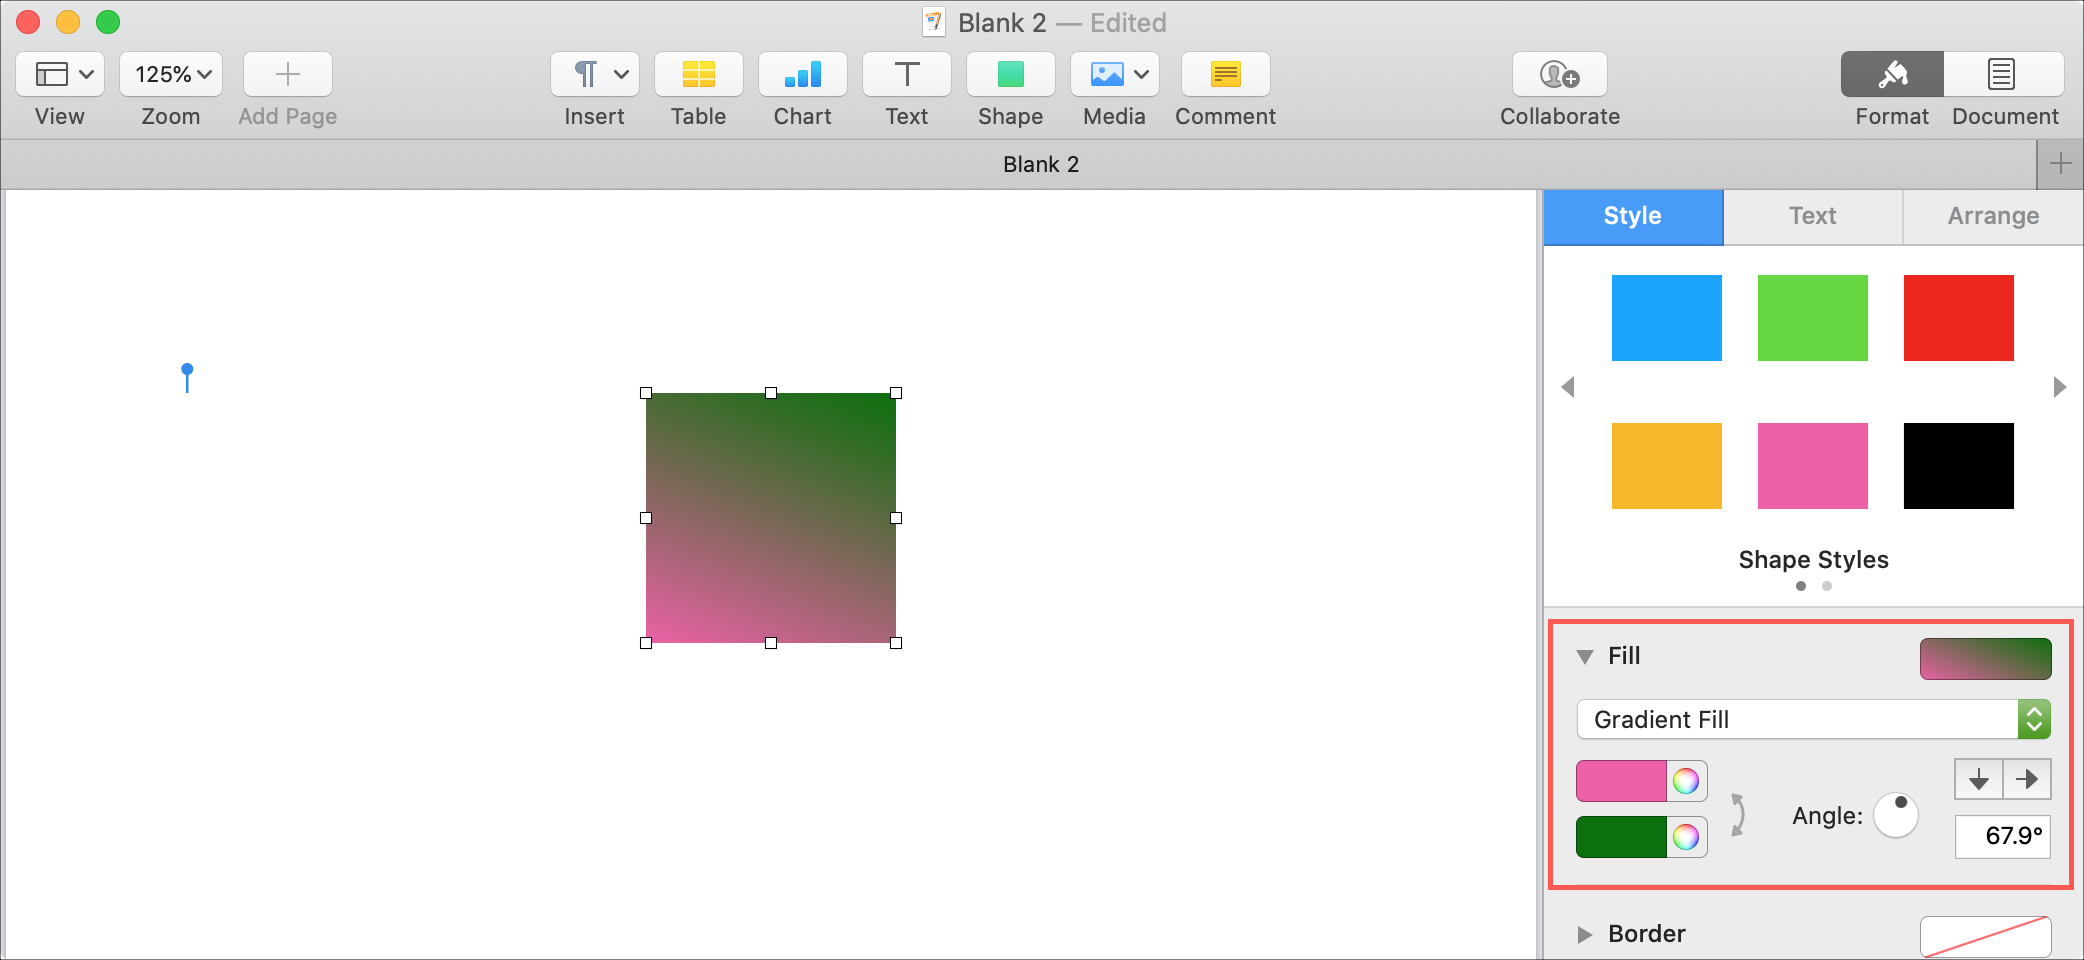
Gradient Fill: Gives you a quick way to add that to your shape. Pick the colors, angle, direction, and degrees.
Advanced Gradient Fill: This Mac-only option lets you get into more detail with the gradient you want to use. You can choose from a linear or radial gradient and reverse the direction.

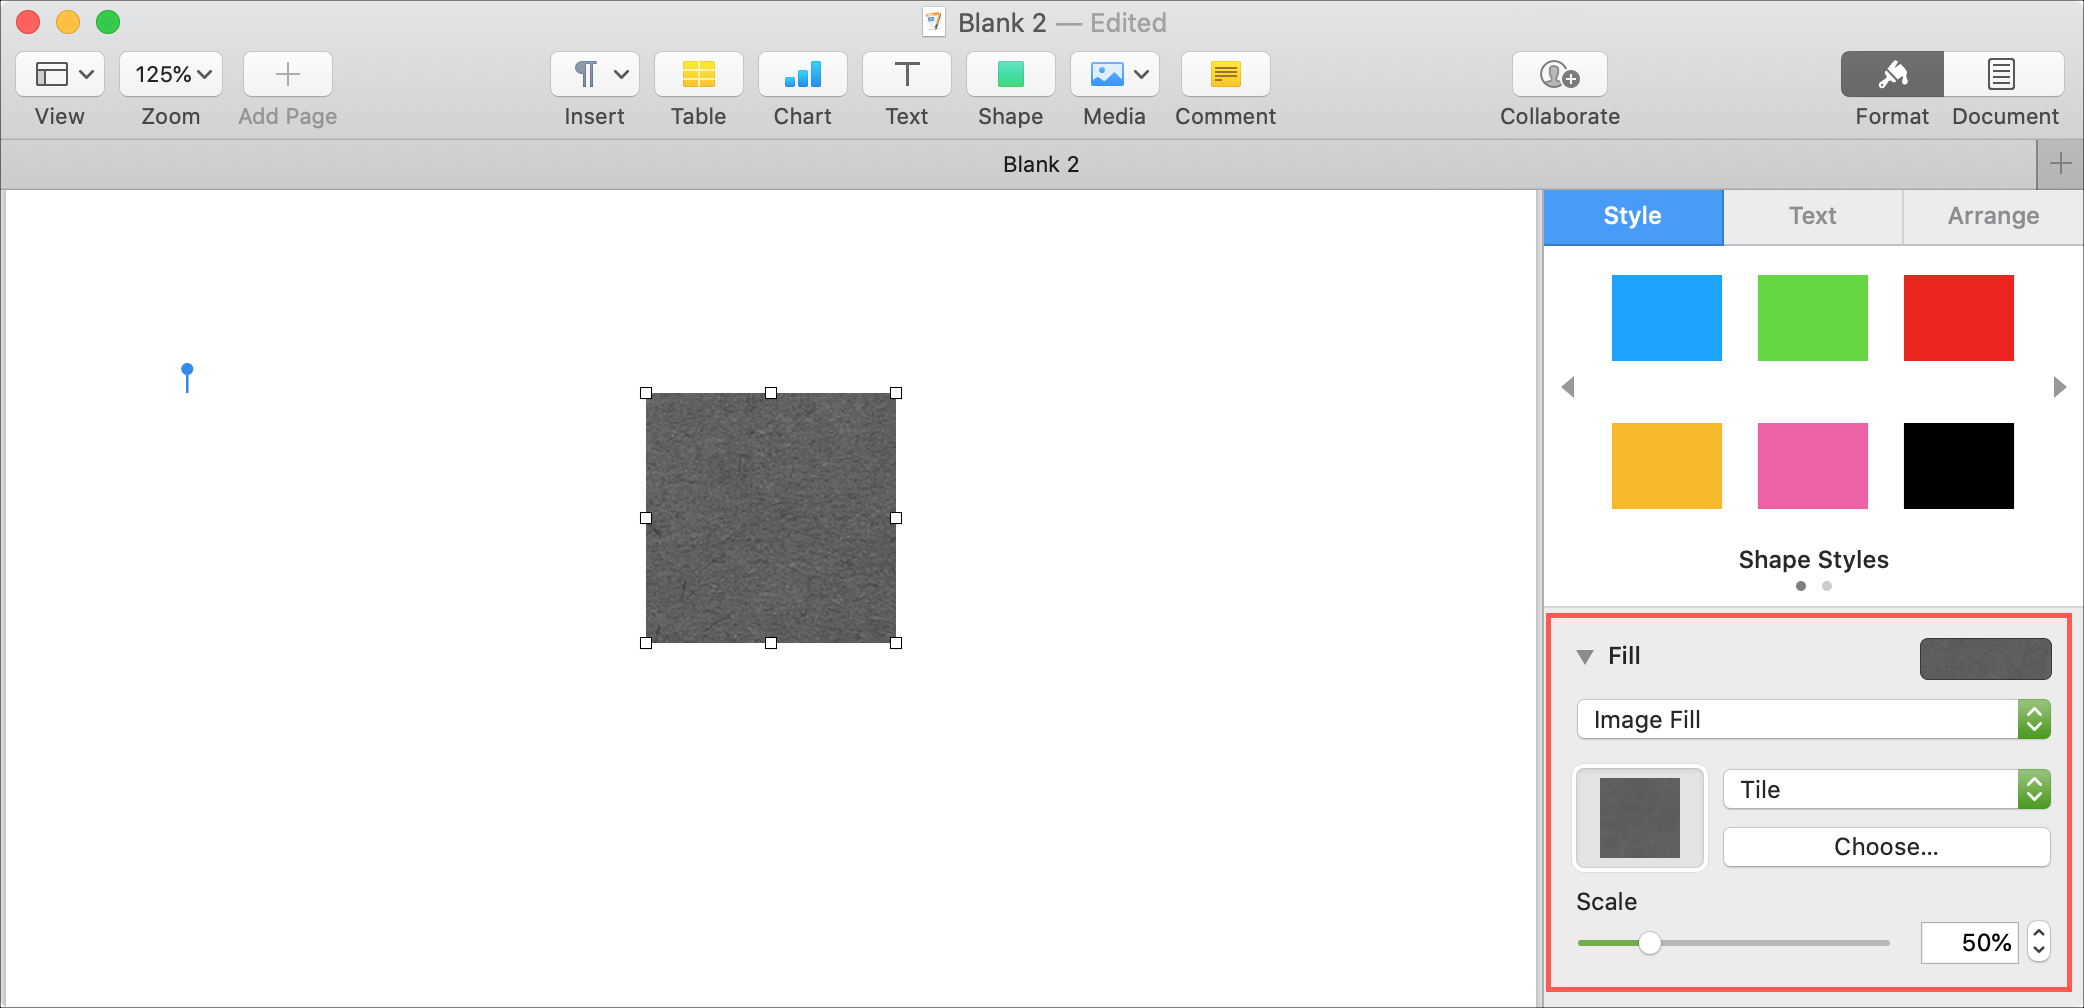
Image Fill: Lets you choose how to display the image, such as scale or stretch. If you pick an original image or tile, the scale settings will be enabled for you. Click or tap Choose to select your photo or image.
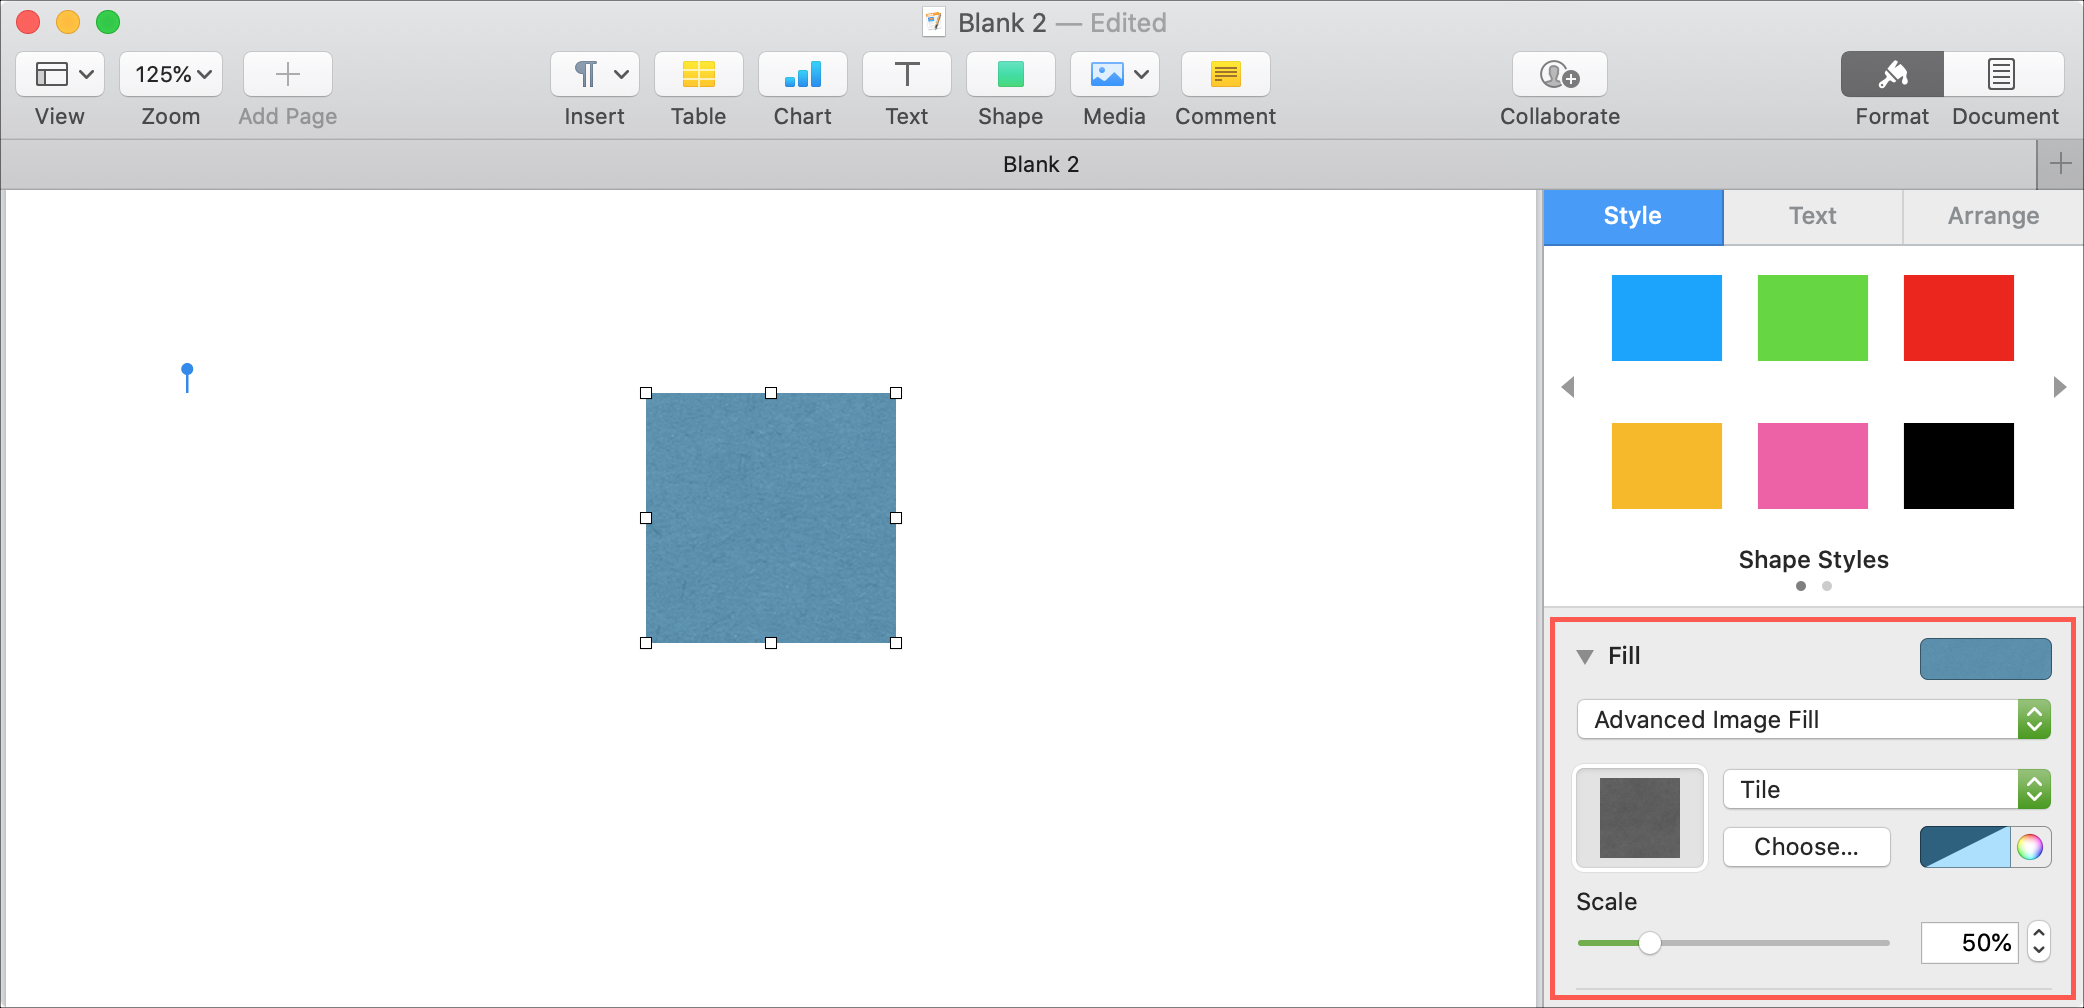
Advanced Image Fill: This is also exclusive to Mac and lets you pick colors as the background for your image.
Fill shapes in Pages, Numbers, and Keynote document
When you want to fill a shape in one of these three apps on your Mac, the process is the same. So open your document in the app you want to use and follow along. We’ll use the Pages app to illustrate these steps.
On Mac
1) To add a shape, click the Shape button in the toolbar or Insert > Shape from the menu bar.
2) With your shape selected, click the Format button to open the sidebar and pick the Style tab.
3) Click the arrow/triangle next to Fill to expand and view all of your options.
4) In the drop-down box, you can choose a color, gradient, or image. The gradient and image fills give you the advanced options mentioned above.

With each adjustment you make to the type of fill or settings for it, you’ll see your changes immediately. This makes it convenient to get the exact look you want.
On iPhone and iPad
1) Open the document, tap the plus sign (+) at the top, and choose the Shape icon. Then, pick a shape category and tap to select the shape you want to use.
2) With your shape selected, tap the Style button (brush icon) and go to the Style tab.
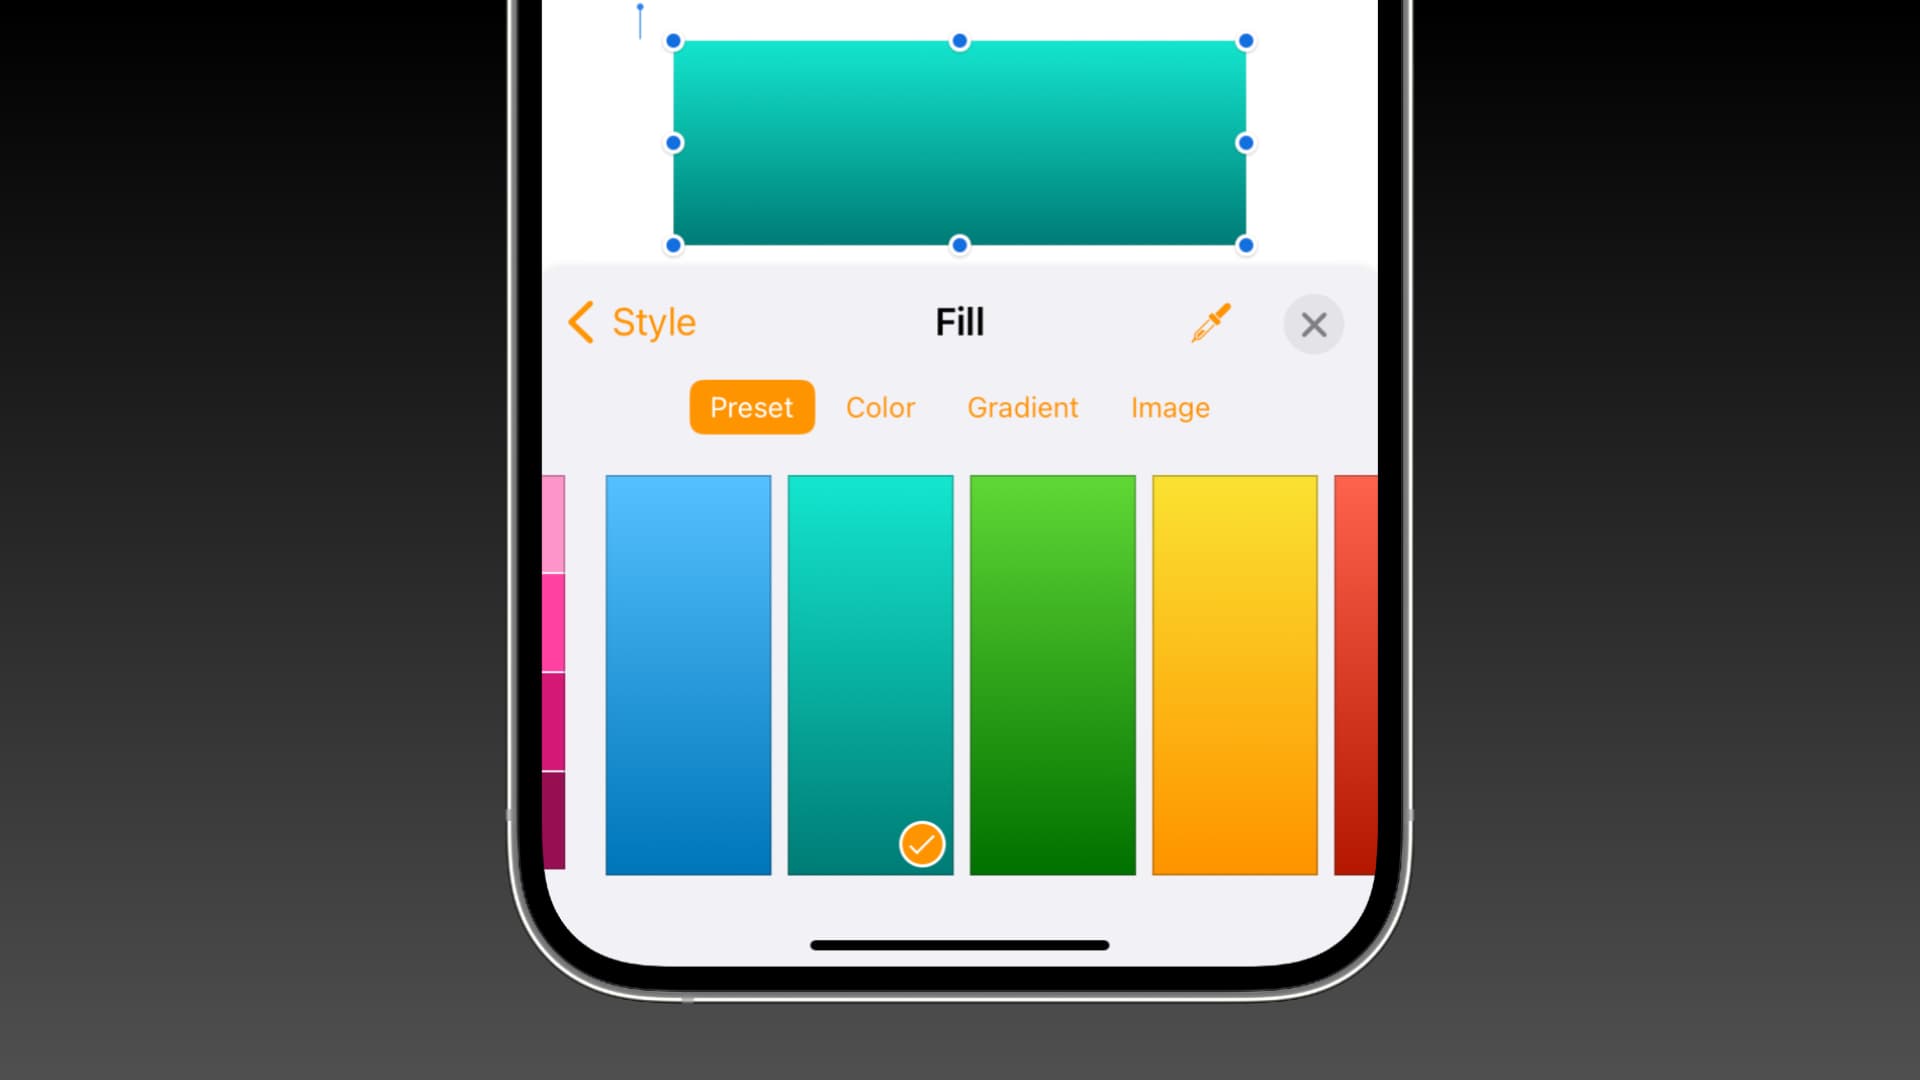
3) Tap Fill and then pick your fill style from the top: Preset (quick color selections), Color, Gradient, or Image. Again, you’ll see any changes you make to the fill you pick immediately. So you can continue adjusting as necessary.

When you want to fill a shape in Pages, Numbers, or Keynote, you definitely have some flexibility. There are times when a simple, solid color gets the job done, a gradient looks nicer, or an image is there for a reason. So, keep this tutorial in mind the next time you want to fill a shape in one of those three apps.
On a related note: