Learn how to edit, annotate, and markup a photo in the Apple Messages app on your iPhone or iPad before sending it to the recipient.
Apple’s expressive Messages application includes features that help you annotate image attachments with the Markup tools and touch them up with just a few taps using built-in Photos filters, all without ever leaving the Messages app.
Note that annotation tools are available in both Mail and Messages, with one crucial distinction. In Messages, you can only annotate photos. In Mail, you can also edit PDFs attached to emails, draw over them (for instance, to sign legal documents), and then respond with the newly marked file.
Annotate a photo in the Messages app before sending
Annotating an existing photo will limit the edits to the Messages attachment without rewriting the original image in your Photos library. So you don’t have to worry about duplicating the image before editing or reverting the edits.
1) Open the Messages app on your iPhone or iPad and tap a conversation or create a new one.
2) Tap the plus button and select Photos.
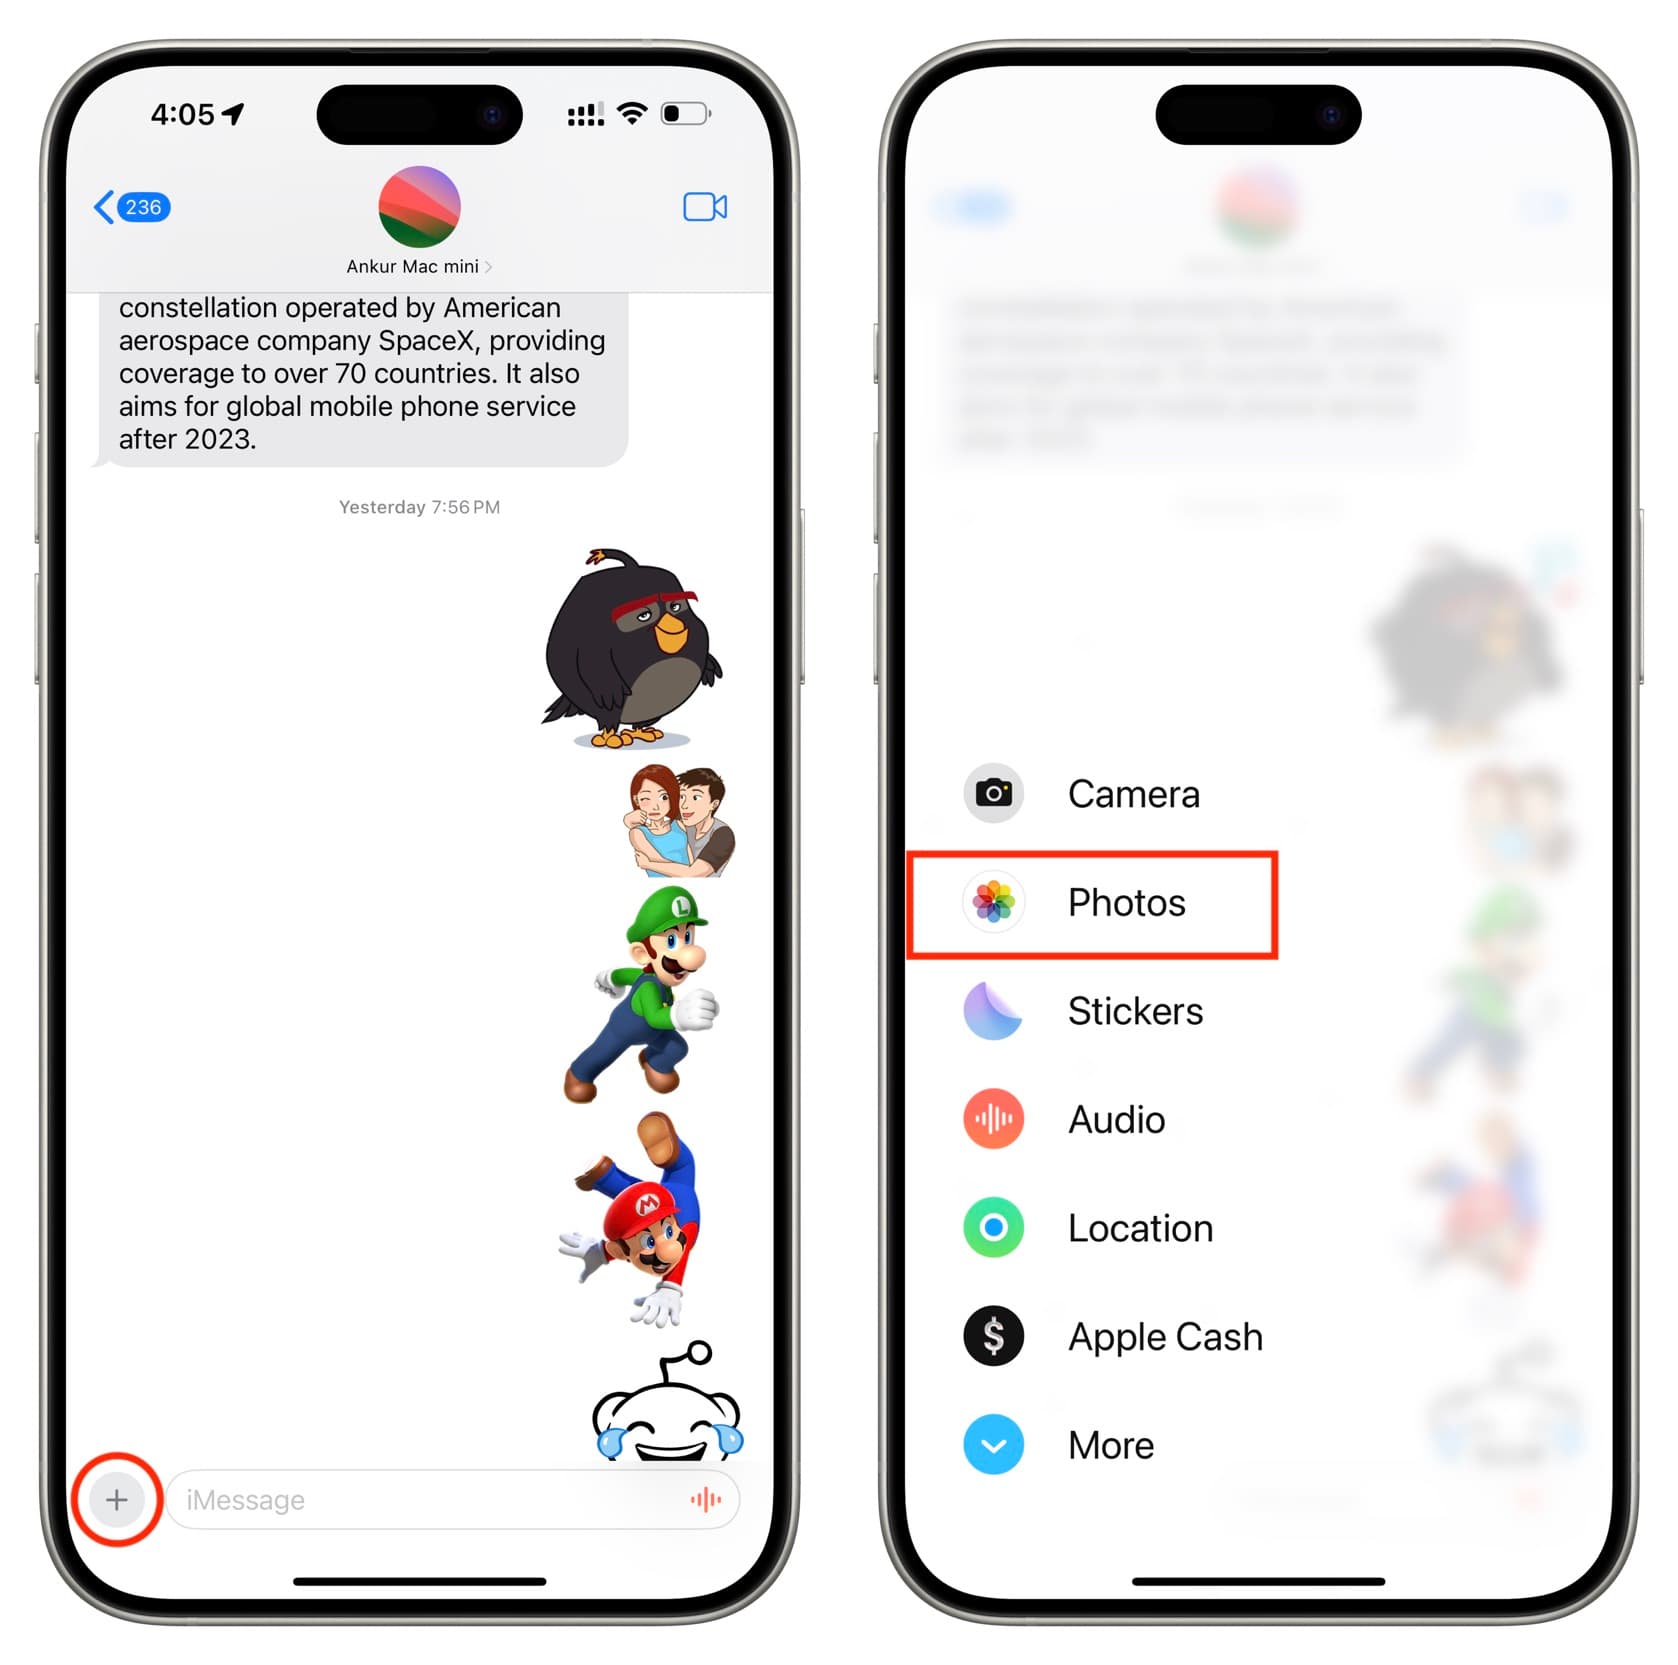
3) Now, choose the picture from the little window or swipe up to see the Photos app interface on the full screen. From here, select a picture from one of your albums, and tap the checkmark icon.
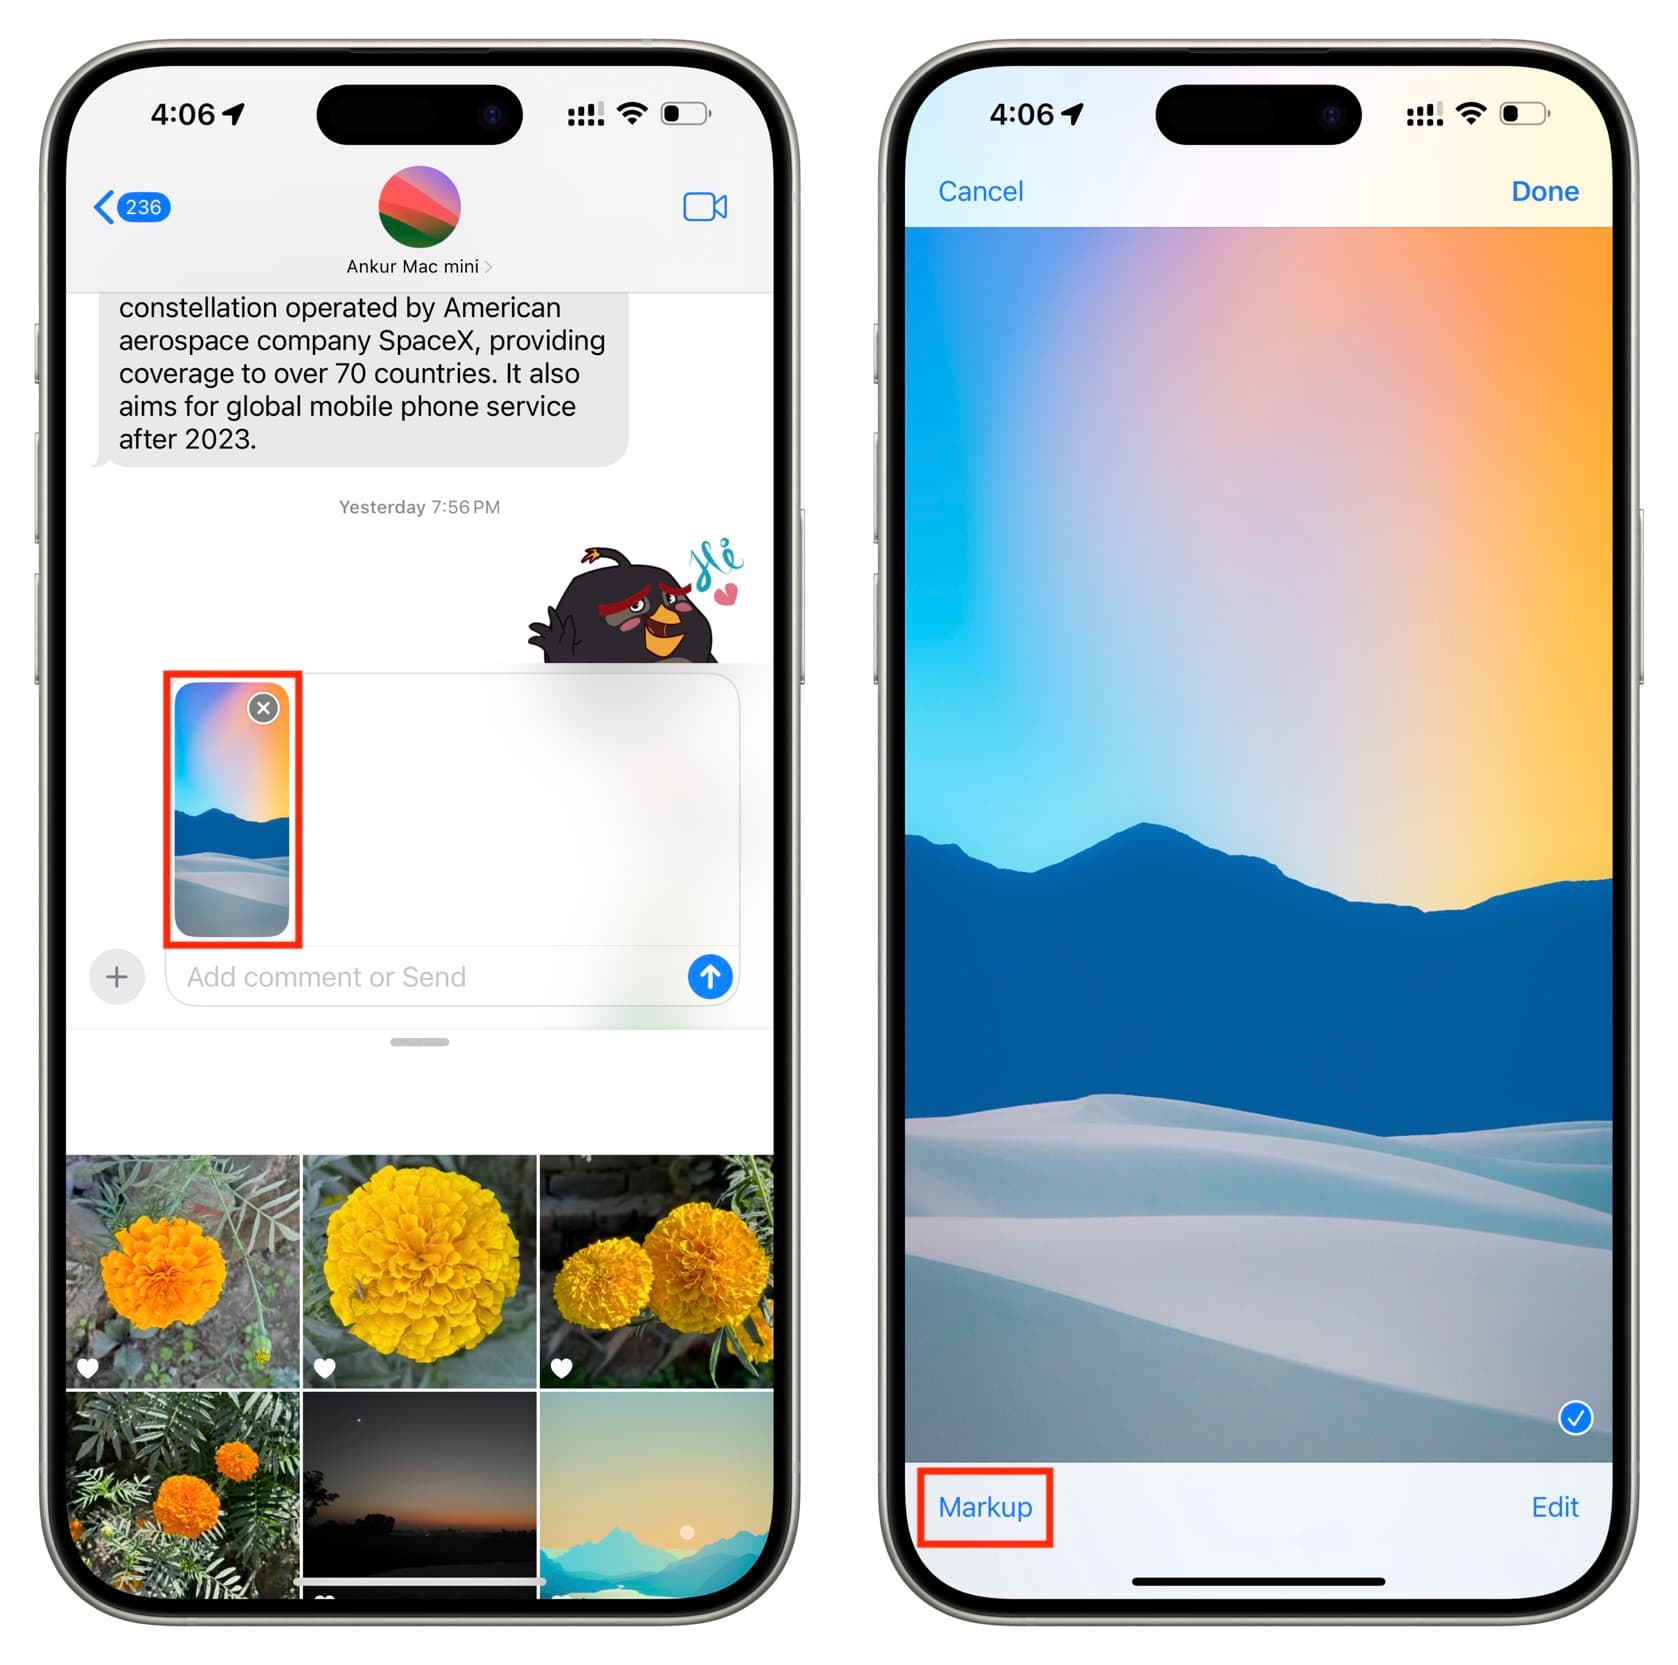
4) Now tap the picture that’s inside the message typing box, and hit Markup to annotate it to your liking.
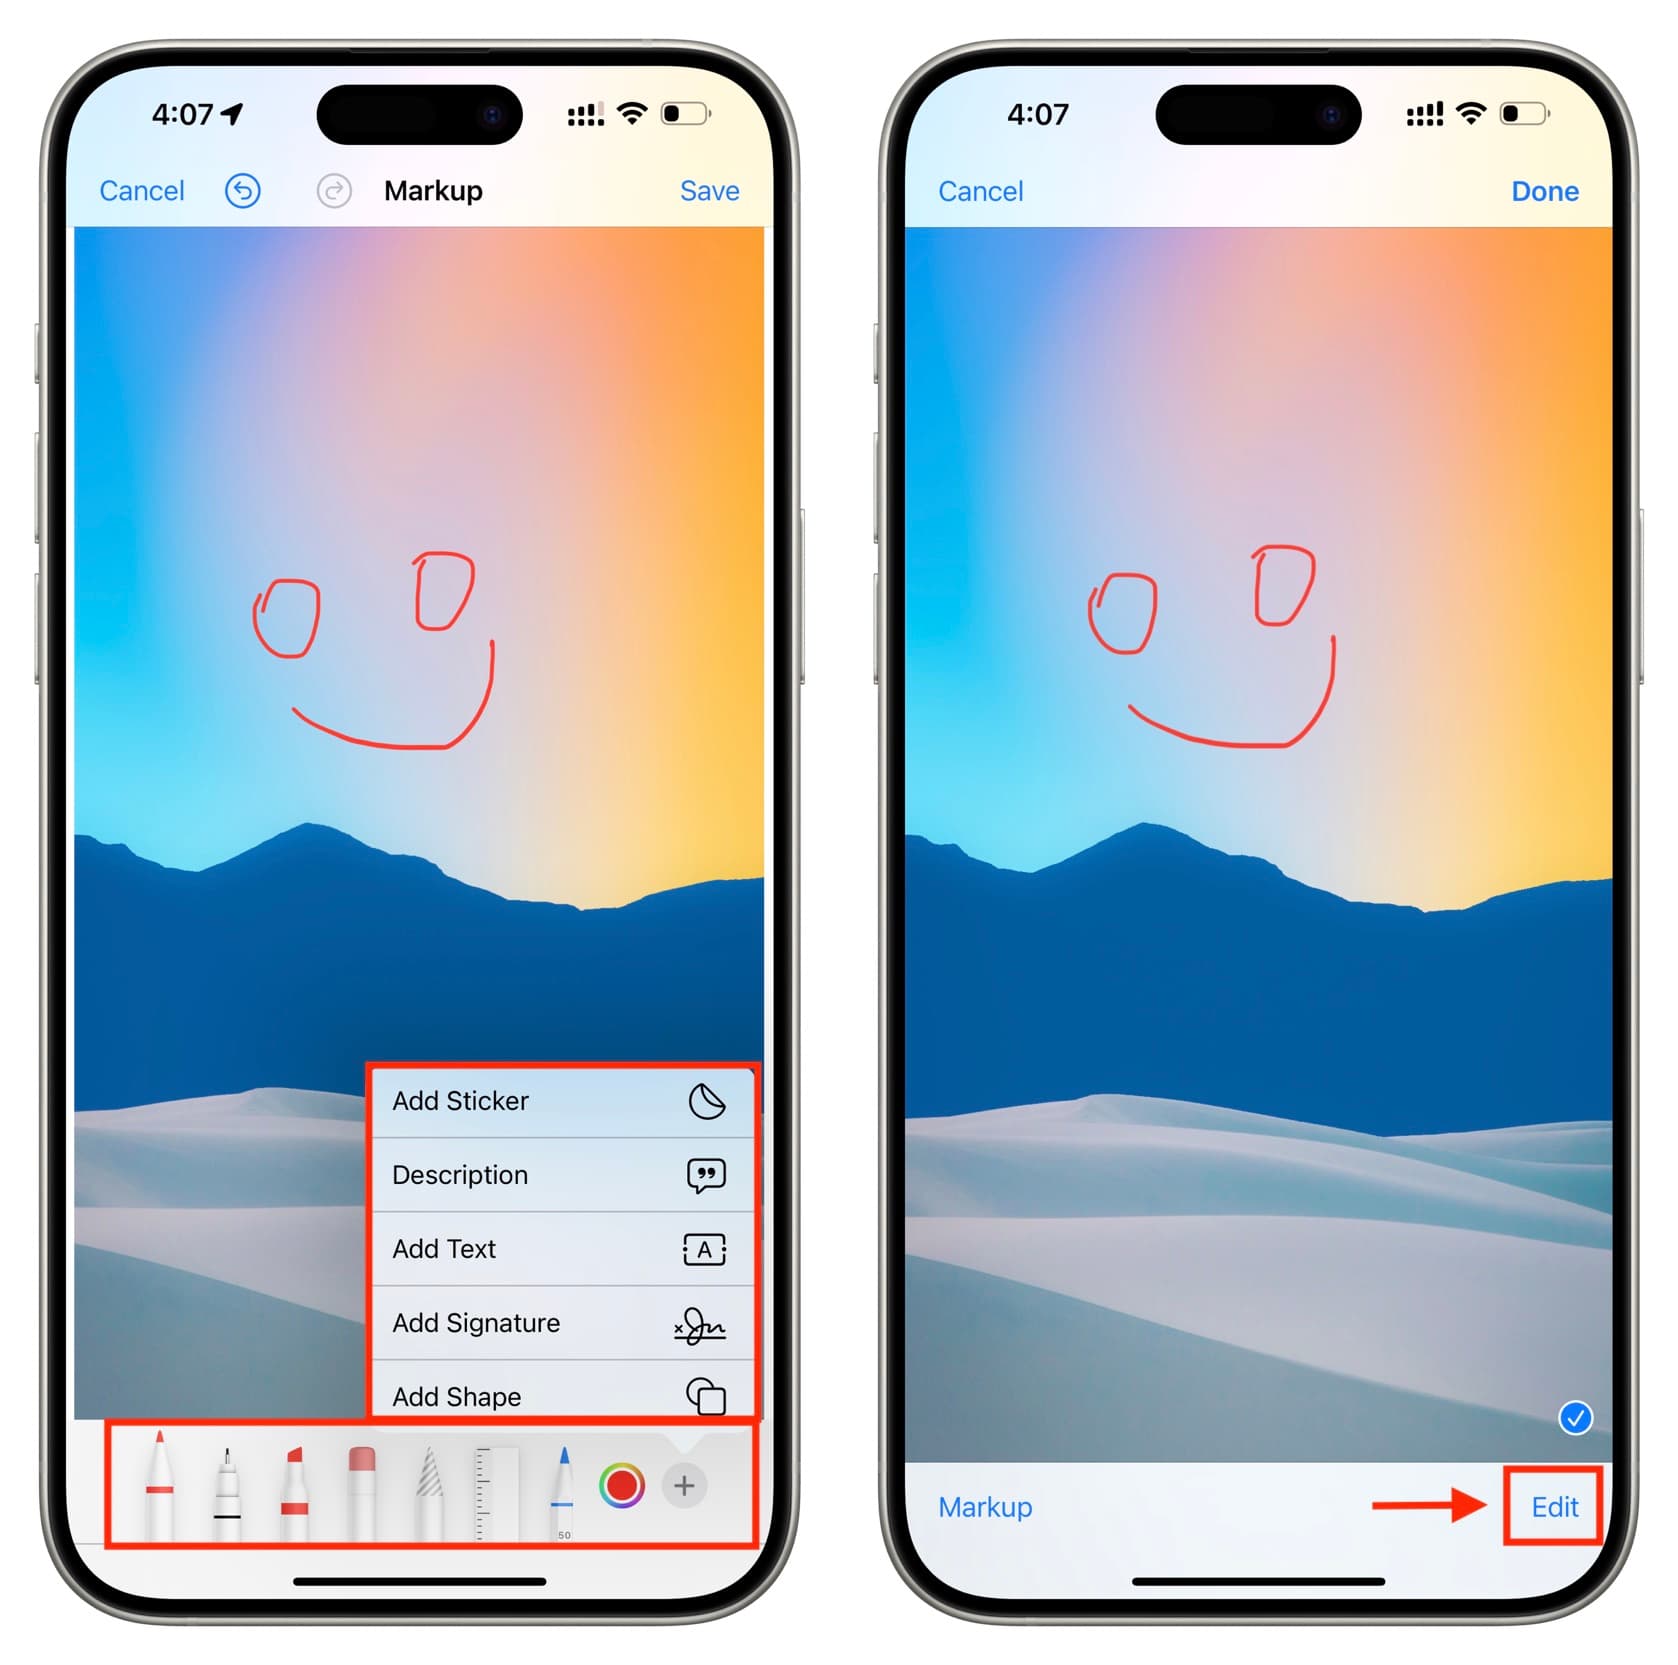
5) The Markups tools let you draw over the image and add stickers, text, signature, and shapes. Tap Save to remember the edits.
6) Next, you can go to step 8 to send the annotated image. However, before that, you should know about the editing options. So, tap Edit.
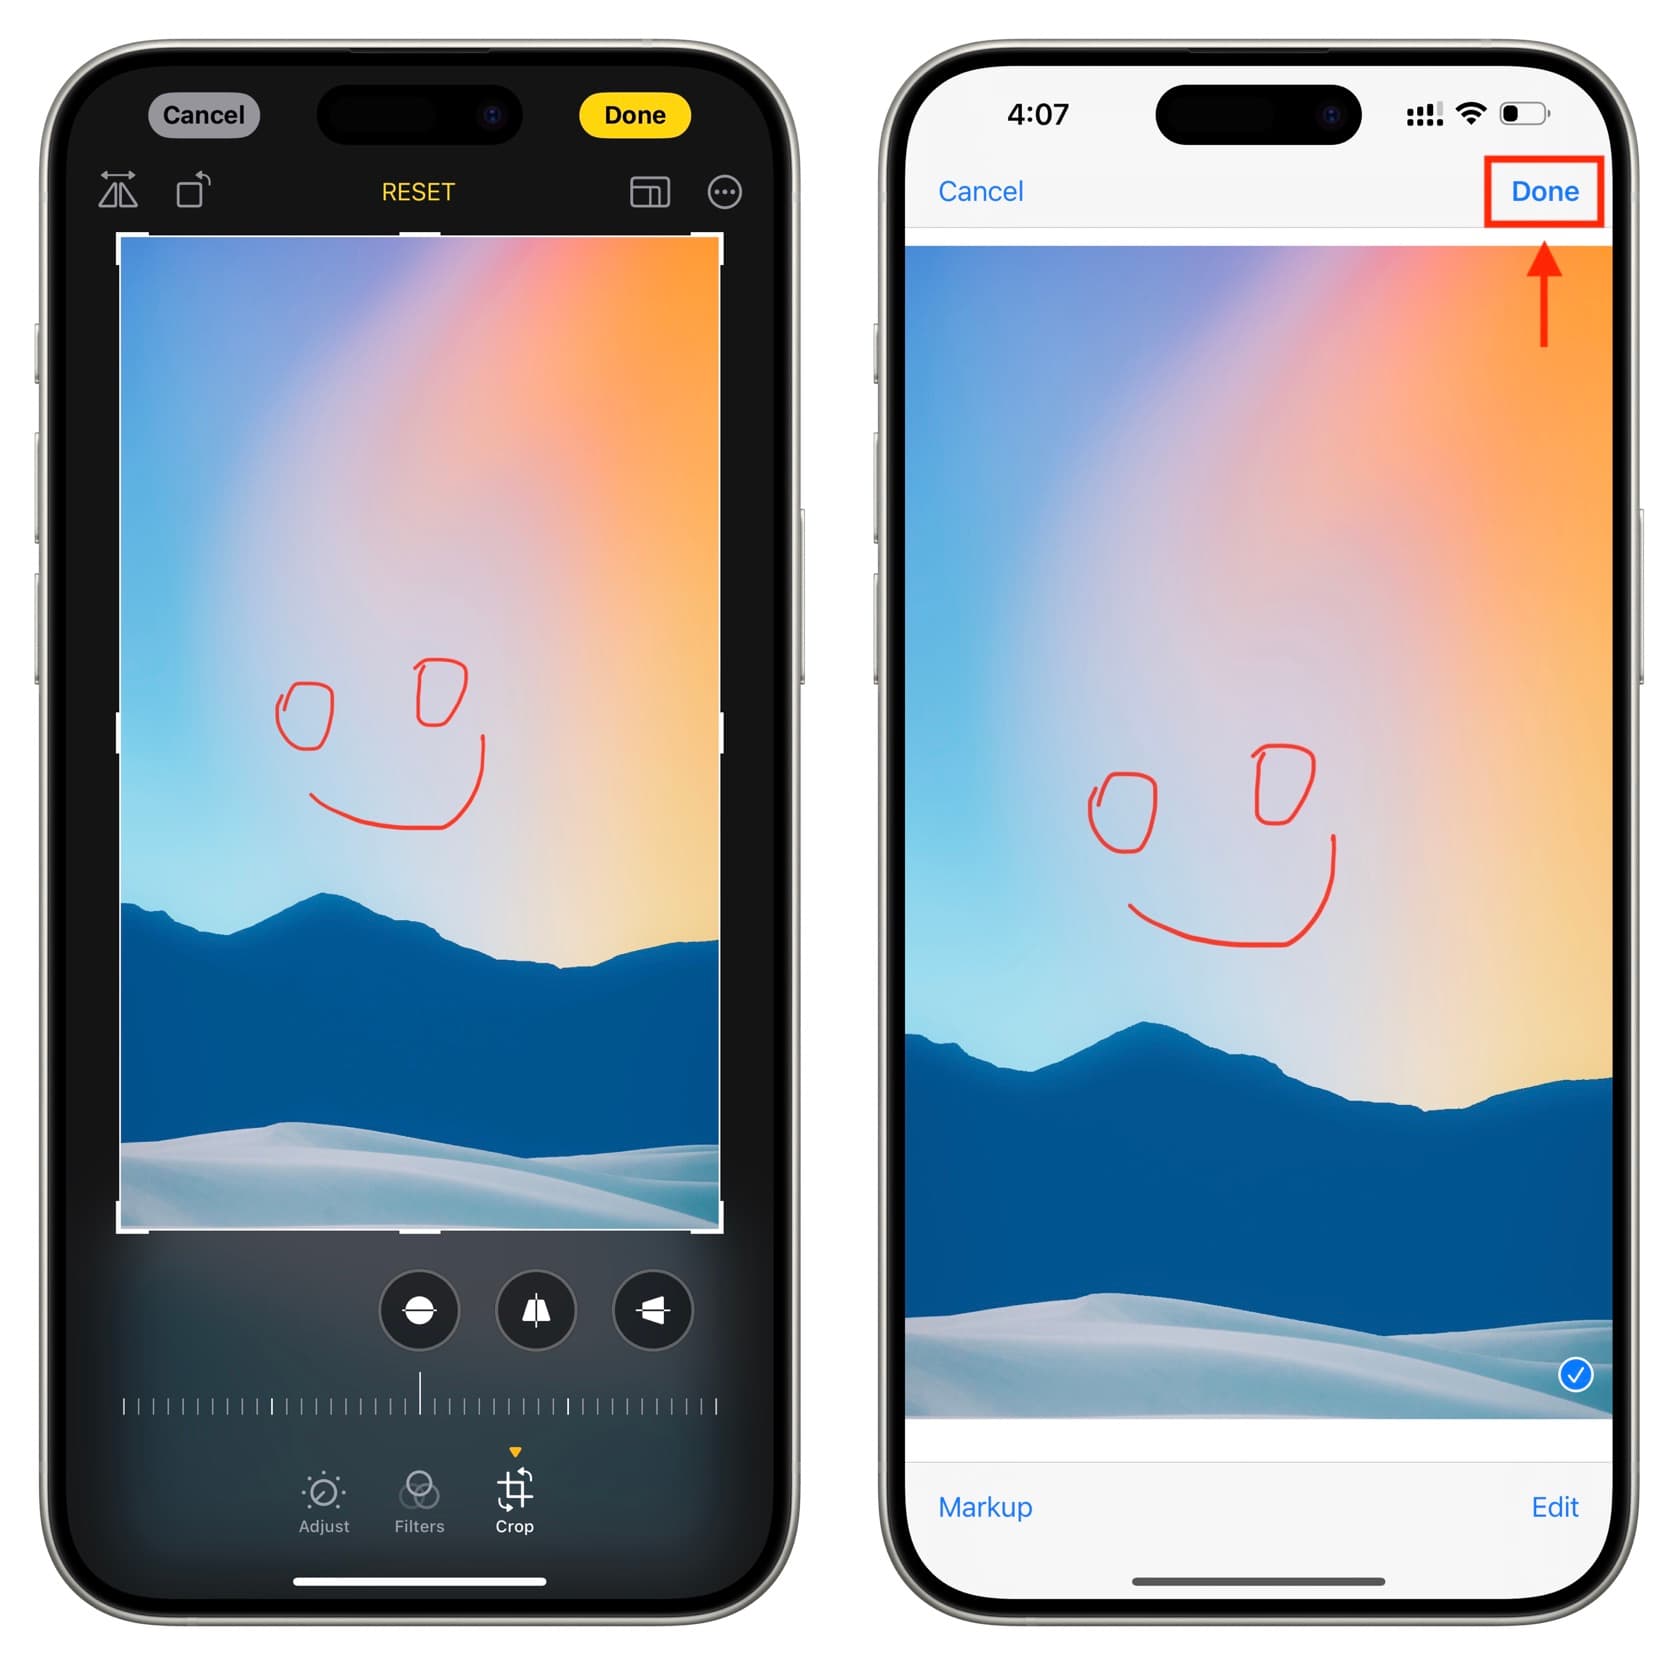
7) Now, you can use the regular editing tools to adjust the exposure, shadows, contrast, brightness, saturation, warmth, etc. You can also add filters or hit the crop icon to cut, rotate, or flip the image. Once you have made the edits, tap the yellow Done button. This will take you to the preview screen, from where you have to tap the checkmark/Done to go back to the conversation.
8) Type an optional message below the attachment and hit the send arrow button to shoot the message along with your marked-up attachment.

Take a picture in the Messages app and edit it
If you don’t already have the picture saved in your photo library, you can capture one on the spot, edit it, and send it out.
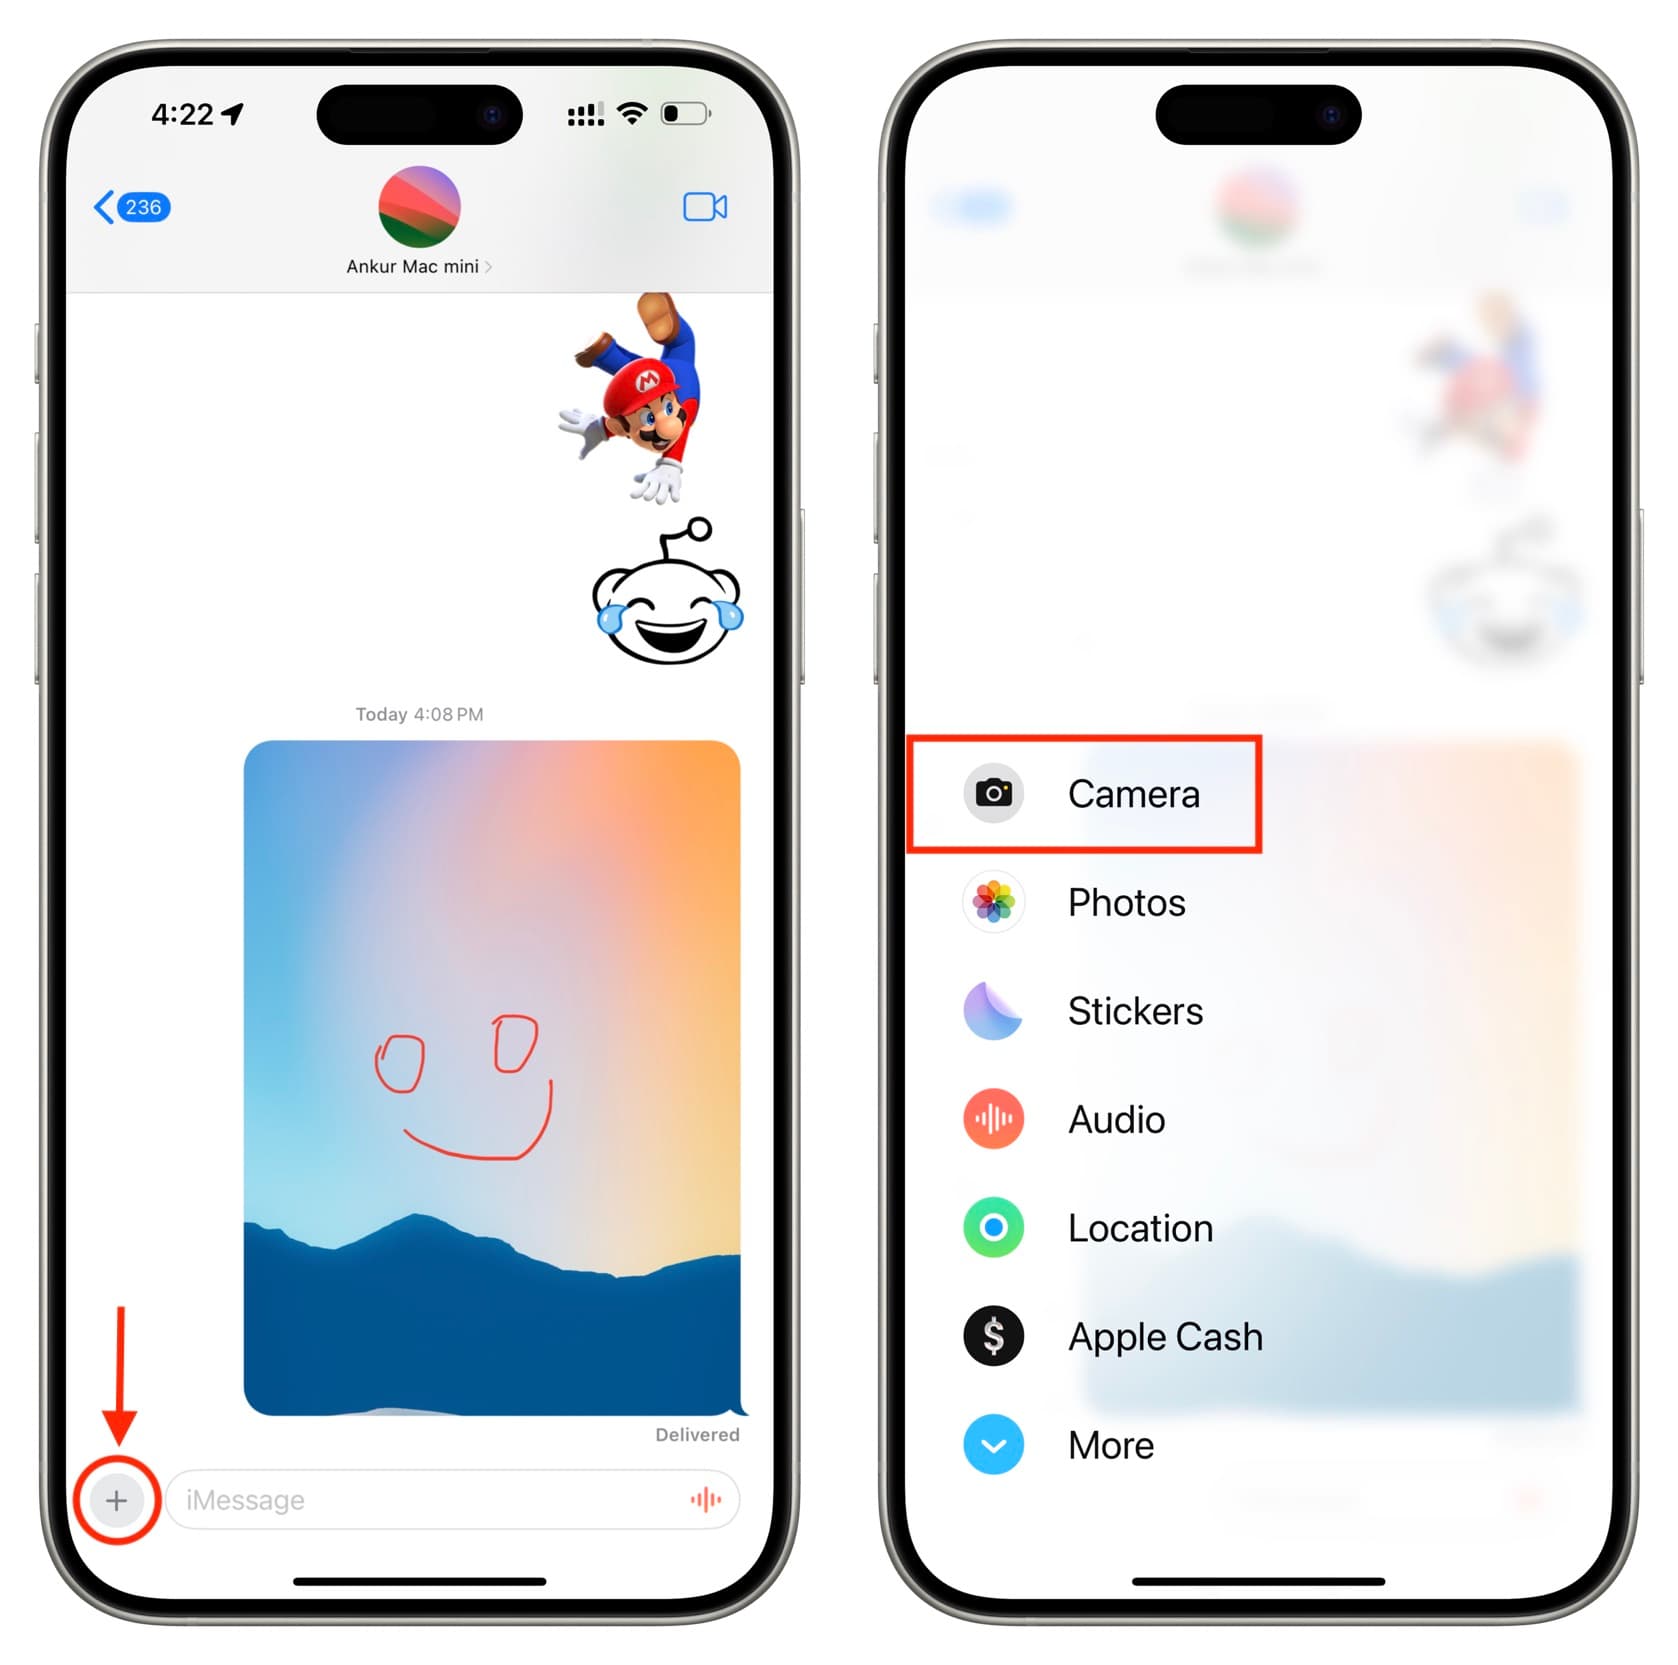
1) Tap the plus button from the conversation screen in the iPhone or iPad Messages app and select Camera.
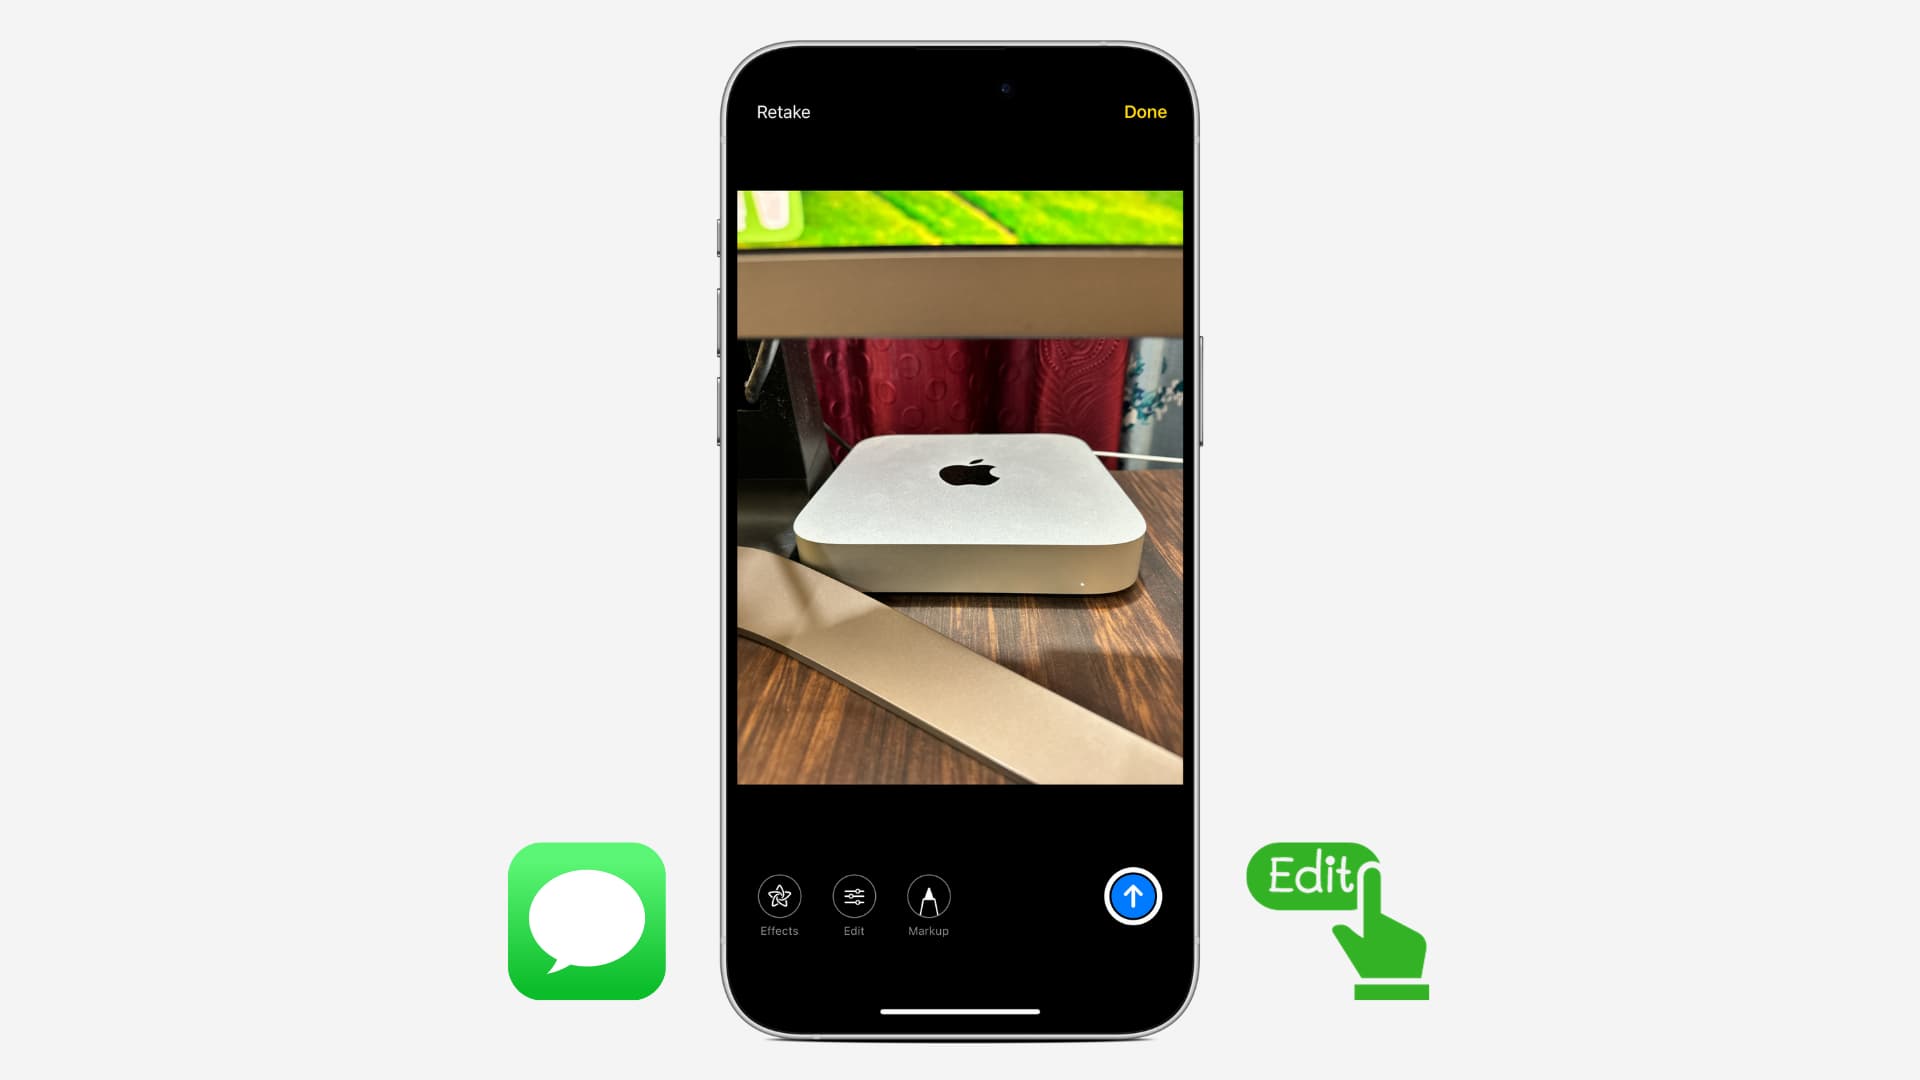
2) You’ll find all the regular camera controls like flash, Night Mode, zoom, and the rest. Additionally, if you’re on an older version of iOS, you’ll see a star-like Effects icon that lets you add stickers and other effects when you take a selfie. Once you have made yourself comfortable on this camera interface, hit the shutter button to snap a picture.
3) Use the Edit and Markup options to annotate your photo. Everything here is similar to what we have explained in the previous section. After editing or annotating, write an accompanying message and hit the send button.

On a related note: