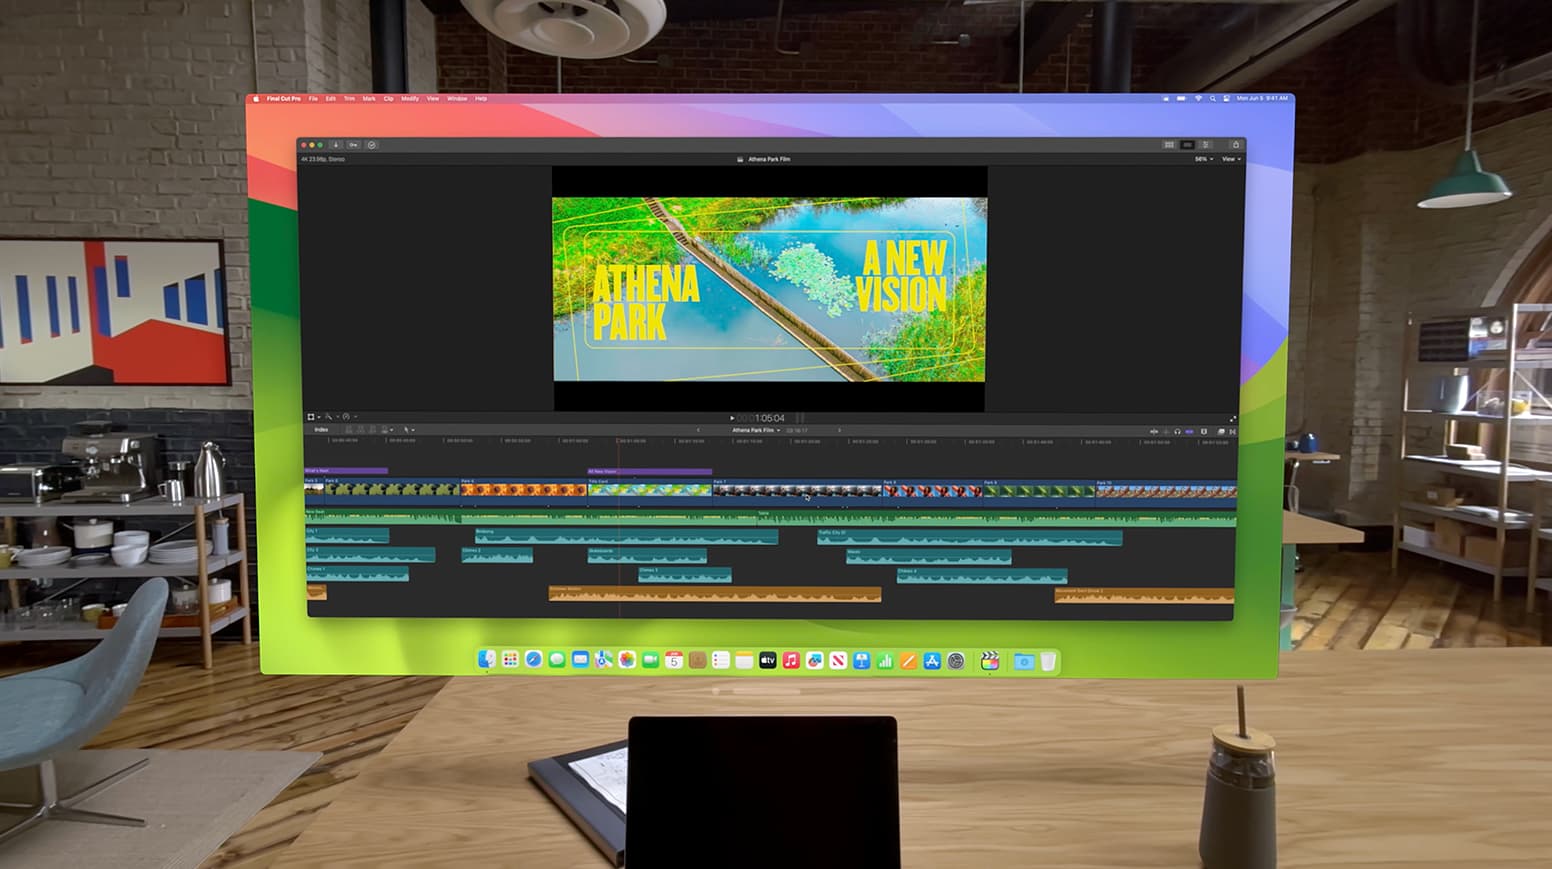
Learn how to take advantage of the Virtual Display feature that lets you use your Apple Vision Pro as a portable and wireless monitor for your Mac.

Vision Pro has its own set of apps that run natively on it. In addition, it can also work as a display for your Mac. When you do that, your Mac’s screen will go black, and everything you do on it will only be visible to you in your virtual space.
Even when you’re using your Vision Pro headset as the Mac’s monitor, you can open other native visionOS apps and place them around your Mac’s window in the virtual view.
What’s even more thoughtful is that once you start using your Vision Pro as your Mac’s display, your MacBook’s built-in trackpad & keyboard or some other keyboard & trackpad connected to your Mac laptop/desktop can now work as the input and pointer devices for your Vision Pro. This is possible thanks to the wonderful Universal Control feature that also lets you use your Mac’s keyboard and trackpad on your iPad.
Note that Vision Pro does not support Magic Mouse or third-party mice.
Requirements
Here’s what you need to do to use your Apple Vision Pro as your Mac’s display:
1) Get macOS Sonoma: Update your Apple silicon or Intel Mac to macOS Sonoma or later.
2) Use the same Apple ID: Your Mac and Vision Pro must be signed in using the same Apple ID. Note that Managed Apple IDs are not supported.
3) Wi-Fi and Bluetooth: Turn on Wi-Fi and Bluetooth on your Mac and Vision Pro.
4) Keep them close: Make sure your Mac and Vision Pro are within 30 feet (10 meters) of each other.
5) Turn on iCloud Keychain: You can do this from Mac’s System Settings/Vision Pro Settings > your Apple ID name > iCloud > Passwords & Keychain. Now, turn on Sync this Mac or Sync this Apple Vision Pro.
6) Turn on Handoff: Handoff must be activated if you want to use your Mac’s keyboard and trackpad on Vision Pro. To check this:
- Go to Mac’s System Settings > General > AirDrop & Handoff and make sure “Allow Handoff between this Mac and your iCloud devices” is turned on.
- Next, go to Vision Pro Settings > General > Handoff, and make sure it’s on.
7) Allow pointer and keyboard access: Ensure the Mac can share its keyboard and trackpad with your other devices. To check this, go to Mac’s System Settings > Displays > Advanced, and turn on “Allow your pointer and keyboard to move between any nearby Mac or iPad.”
Use Vision Pro as your MacBook’s display
- Open your MacBook’s lid and make sure the screen is on.
- With Apple Vision Pro strapped to your face, simply look at your MacBook.
- You will now see a Connect button above your MacBook. Tap it to start using your Vision Pro as MacBook’s monitor. Note that the actual MacBook’s screen will go all black to ensure privacy.

You can resize, move, and rearrange your Mac’s virtual monitor like you do with other Vision Pro app windows.
Use Vision Pro as your Mac’s display
Follow these steps to use your Apple Vision Pro as the wireless display for your Mac mini, Mac Studio, Mac Pro, and other Mac desktop computers. This method will also work if you do not automatically see the Connect button above your MacBook.
- While wearing your Vision Pro headset, look up and tap the downward arrow icon from the top to open the visionOS Control Center.
- Tap the Control Center icon.
- Now, tap the Mac Virtual Display button, which is basically a MacBook with a Vision Pro icon in the bottom right corner.
- Select your Mac to start the Virtual Display session.
Change the display resolution
Apple silicon Mac can appear on Vision Pro at up to 4K resolution. But Macs with Intel processors can only appear at up to 3K resolution.
If you want to change the output resolution, go to Mac’s System Settings > Displays and select a resolution. You can also click Advanced, turn on the switch for ‘Show resolutions as list,’ and then select one.
Stop using your Vision Pro as Mac’s display
If you no longer want to continue using your Vision Pro as your Mac’s monitor, tap the X close button that appears under Mac’s virtual window.
If you use more than one physical monitor
Even if you’re using multiple displays with your Mac, you can only see and use one of them in Vision Pro. This would be the one that you’ve set as the main display.
Fix Vision Pro not working as Mac’s display
- Ensure you’ve followed everything mentioned under the Requirements heading.
- Go to Vision Pro Control Center and make sure Guest Mode is turned off.
- Restart your Vision Pro and your Mac.
- Restart your wireless Wi-Fi router.
- If the problem continues, update your Mac to the latest version of macOS Sonoma and Vision Pro to the latest build of visionOS. You can do these from System Settings/Settings > General > Software Update.
Check out next: