Learn how to protect private documents on your iPhone, iPad, or Mac from prying eyes by locking them with Face ID, Touch ID, or device passcode.
Sharing your device with other people is always risky. They might go through your personal stuff or stumble upon something they shouldn’t see. In this post, we show you how to lock and secure confidential documents on an iPhone, iPad, and Mac. It covers both free solutions and paid apps to password-protect your PDFs, Word documents, PowerPoint presentations, Excel sheets, ZIP archives, as well as Pages, Keynote, and Numbers documents, or any files for that matter.
Related: 5 ways to lock photos and videos with a password or Face ID on iPhone and iPad
1. Secure your device with a passcode
Securing nearly everything on your iPhone or Mac is among the most important measures you can take. With a device passcode or login password set, no one can loiter around your private documents. If you don’t have a passcode or login password, follow these step to create it:
- iPhone or iPad: Go to Settings > Face ID & Passcode.
- Mac: The login and Lock Screen passwords are managed in the Users & Groups, Touch ID & Password, and Lock Screen sections of the System Settings app.
2. Lock or hide iPhone apps
iOS 18 lets you lock or hide apps on your iPhone and iPad. Use this feature to stop anyone from opening apps in which you store private files: Touch and hold an app icon on the Home Screen and select Require Face ID > Require Face ID to lock the app or Hide and Require Face ID to both lock and hide the app.

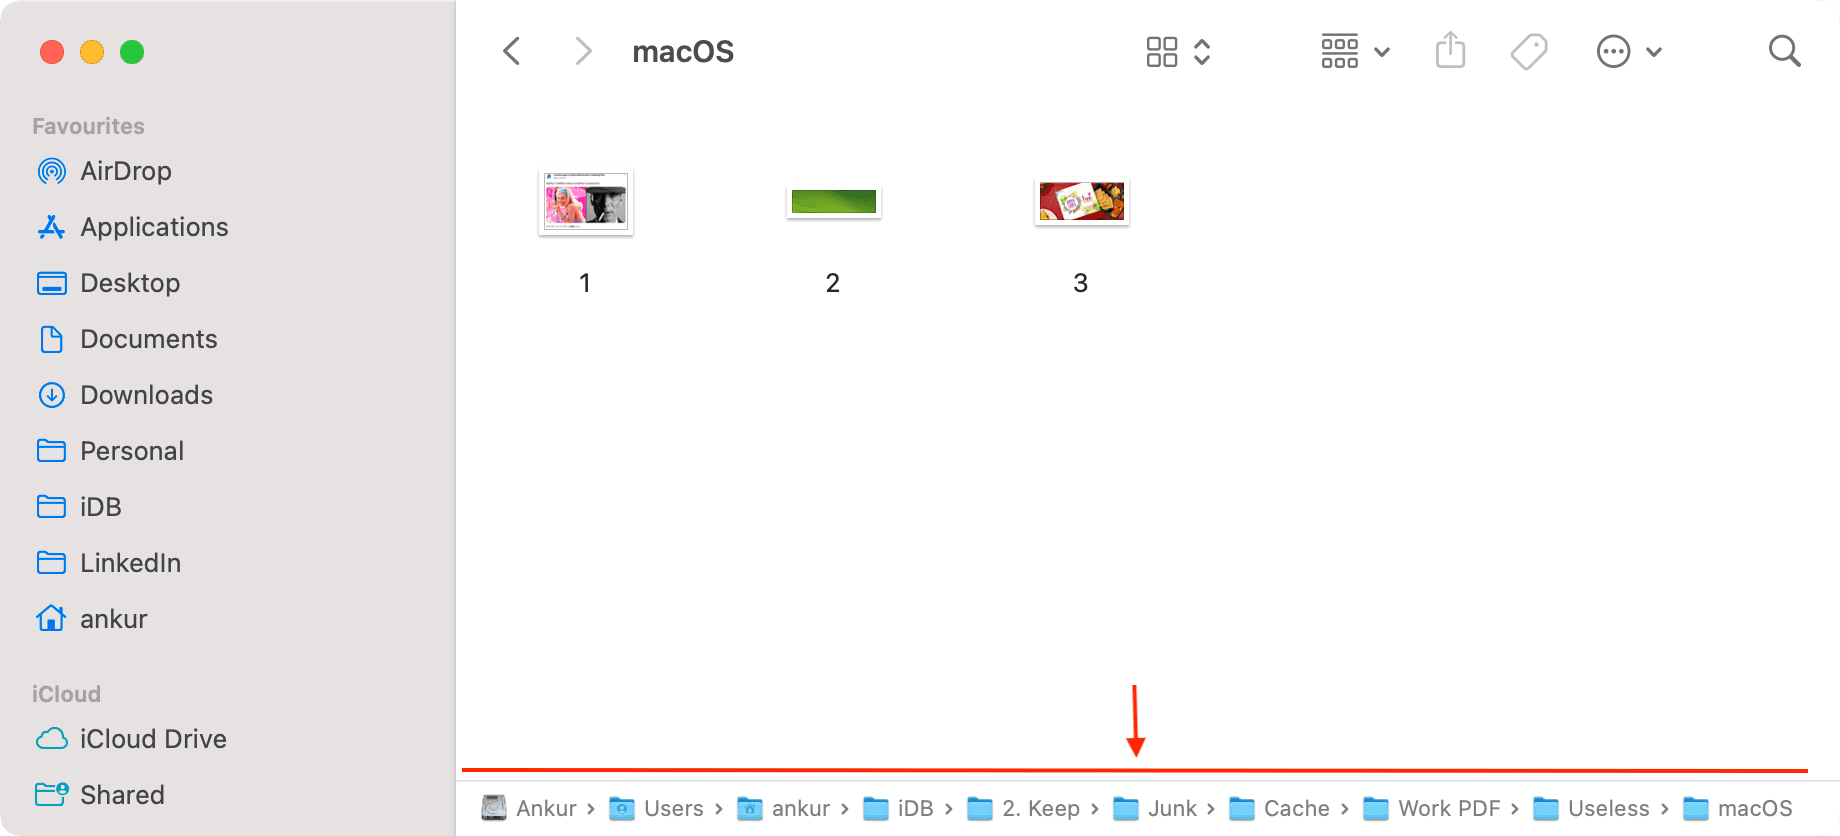
3. Tuck away private files in sub-folders
This age-old trick isn’t very secure and will break your file organization. But if you create several sub-folders a few levels deep in the Files app on your iPhone or the Finder on your Mac, you’ll at least hide your private documents from plain sight. Also, choose unrelated folder names. As an example, hiding private PDFs in a folder named Cache or System Files won’t raise curiosity. Just be sure to remember the full path so you can find your private files when needed.
4. Exclude apps and folders from Spotlight Search
Spotlight Search lets you find almost anything by swiping down on the iPhone’s Home Screen or pressing Command + Space Bar on your Mac and entering keywords. Luckily, you can exclude sensitive folders and apps from Spotlight Search so they won’t surface in search results.
- iPhone: Prevent documents that are stored in apps like the built-in Files app from showing up in Spotlight Search.
- Mac: Stop certain folders from showing in Spotlight.
5. Password-protect sensitive documents
Setting a custom password for sensitive documents prevents others from opening them. Our tutorials shows you how to password-protect PDF files, ZIP archive, and iWork documents.
6. Secure private folders with a password on macOS
Securing a folder on your Mac ensures no one can open it without knowing the password. You can then move all your private stuff into this folder. If necessary, delete the files from their original locations.
7. Create a dedicated macOS user for private docs
Create a new user account on your Mac and secure it with a strong password, then transfer any confidential files into this account for safekeeping.
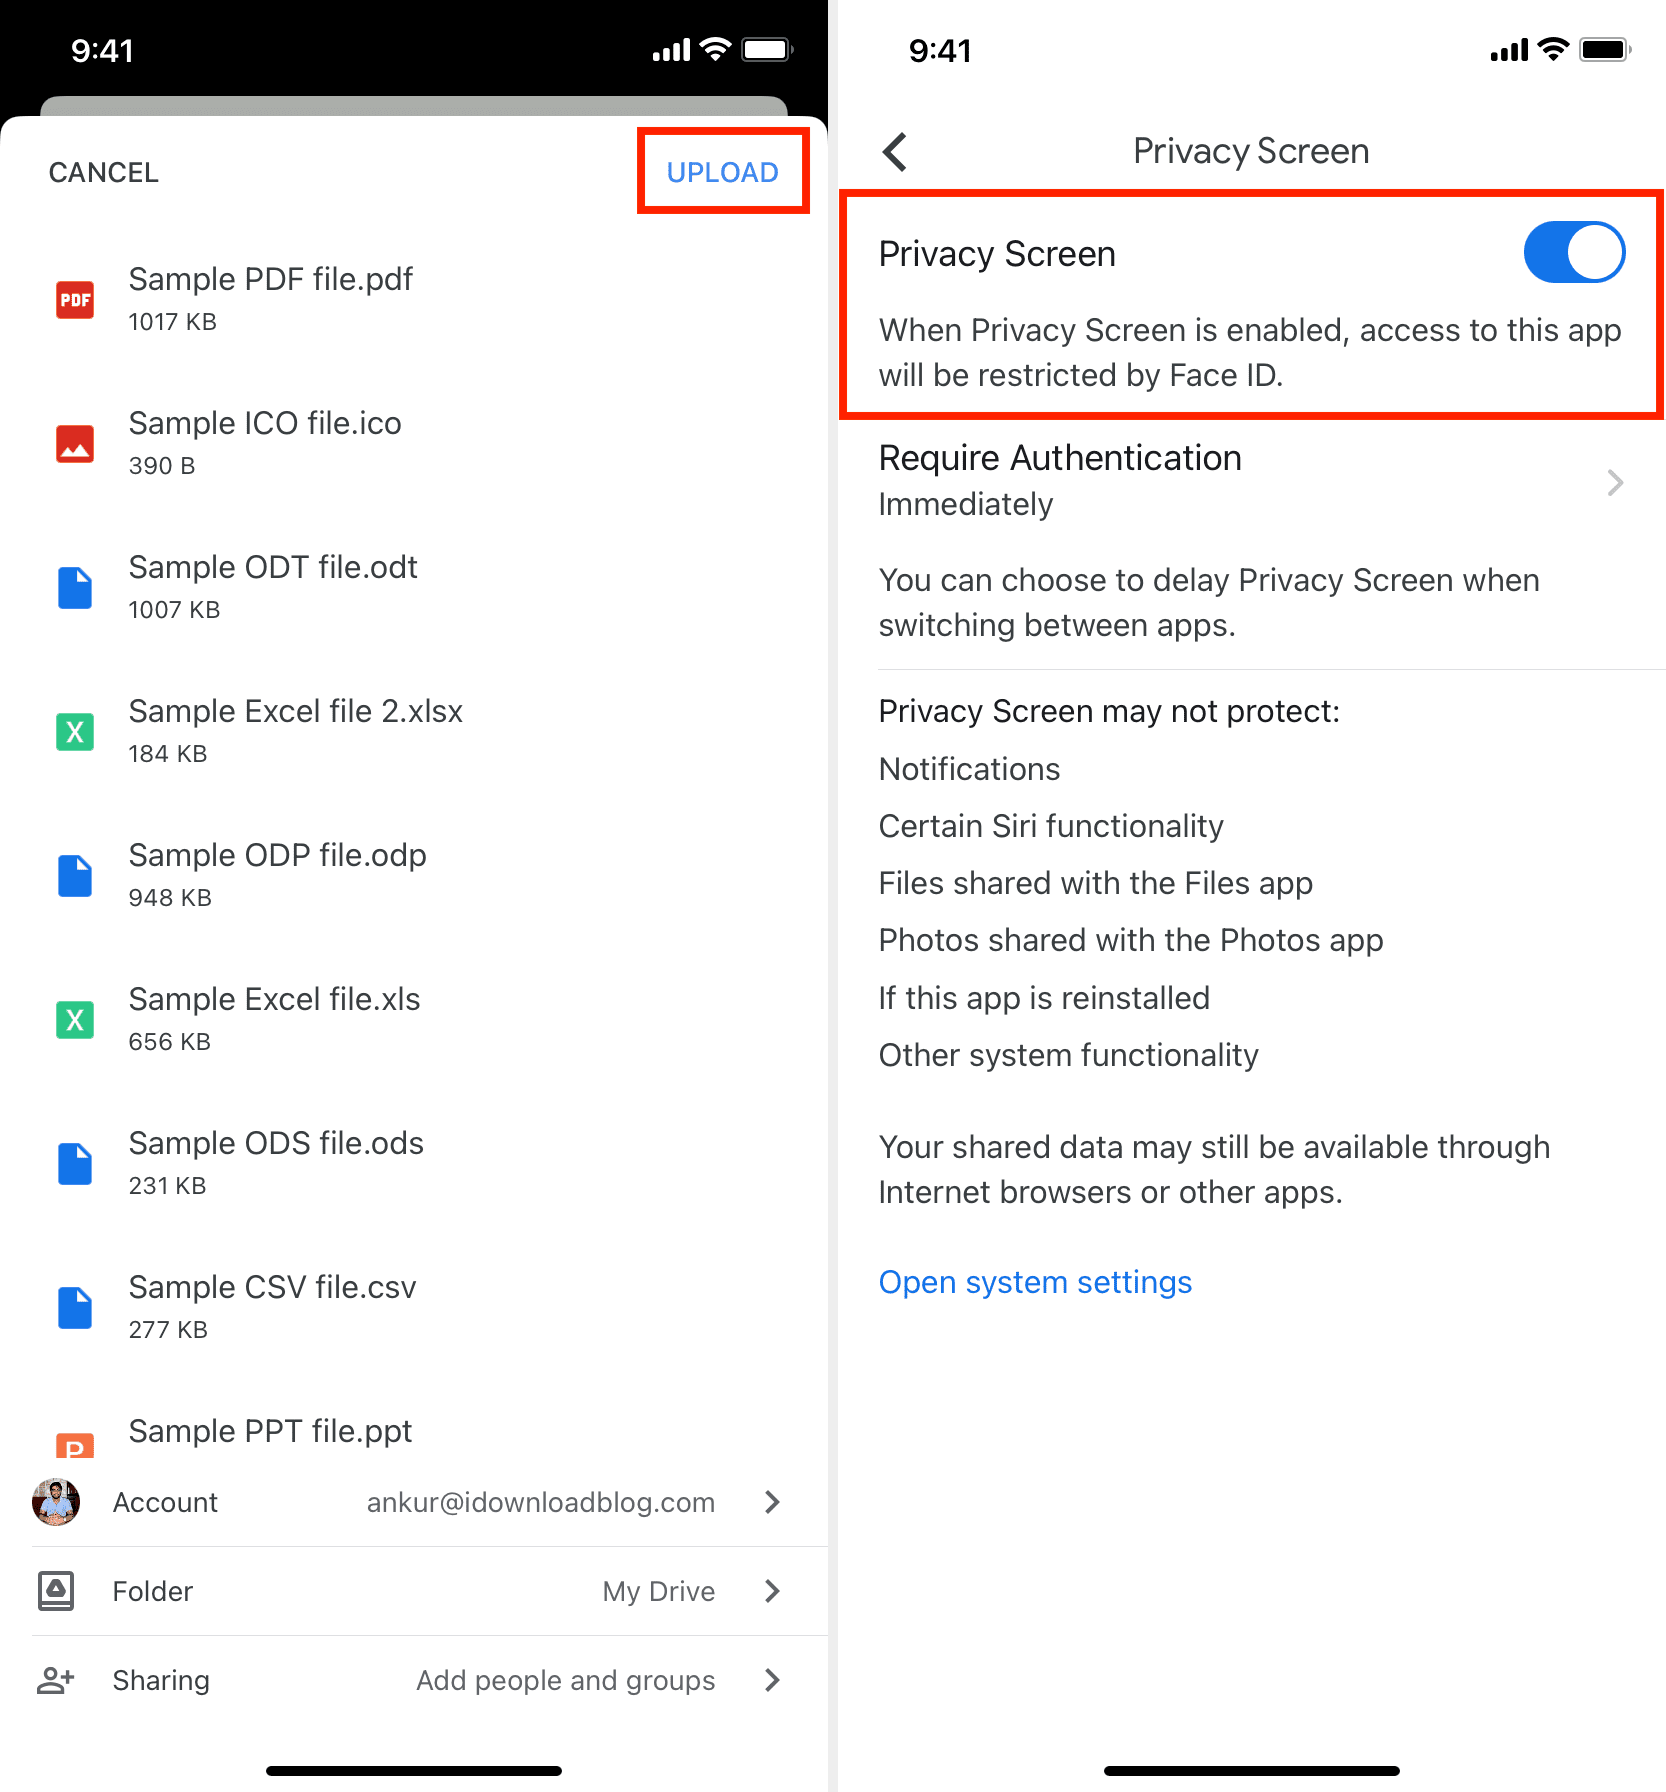
8. Save your stuff to Google Drive
Instead of using the built-in locking feature to protect Google Drive, use the app’s own privacy lock feature. Save any sensitive items in your Google Drive, then hit the profile icon and navigate to Drive Settings > Privacy Screen > Privacy Screen to restrict access to the app with Face ID. For those wondering, Dropbox has a similar feature.
9. Use third-party apps to protect documents
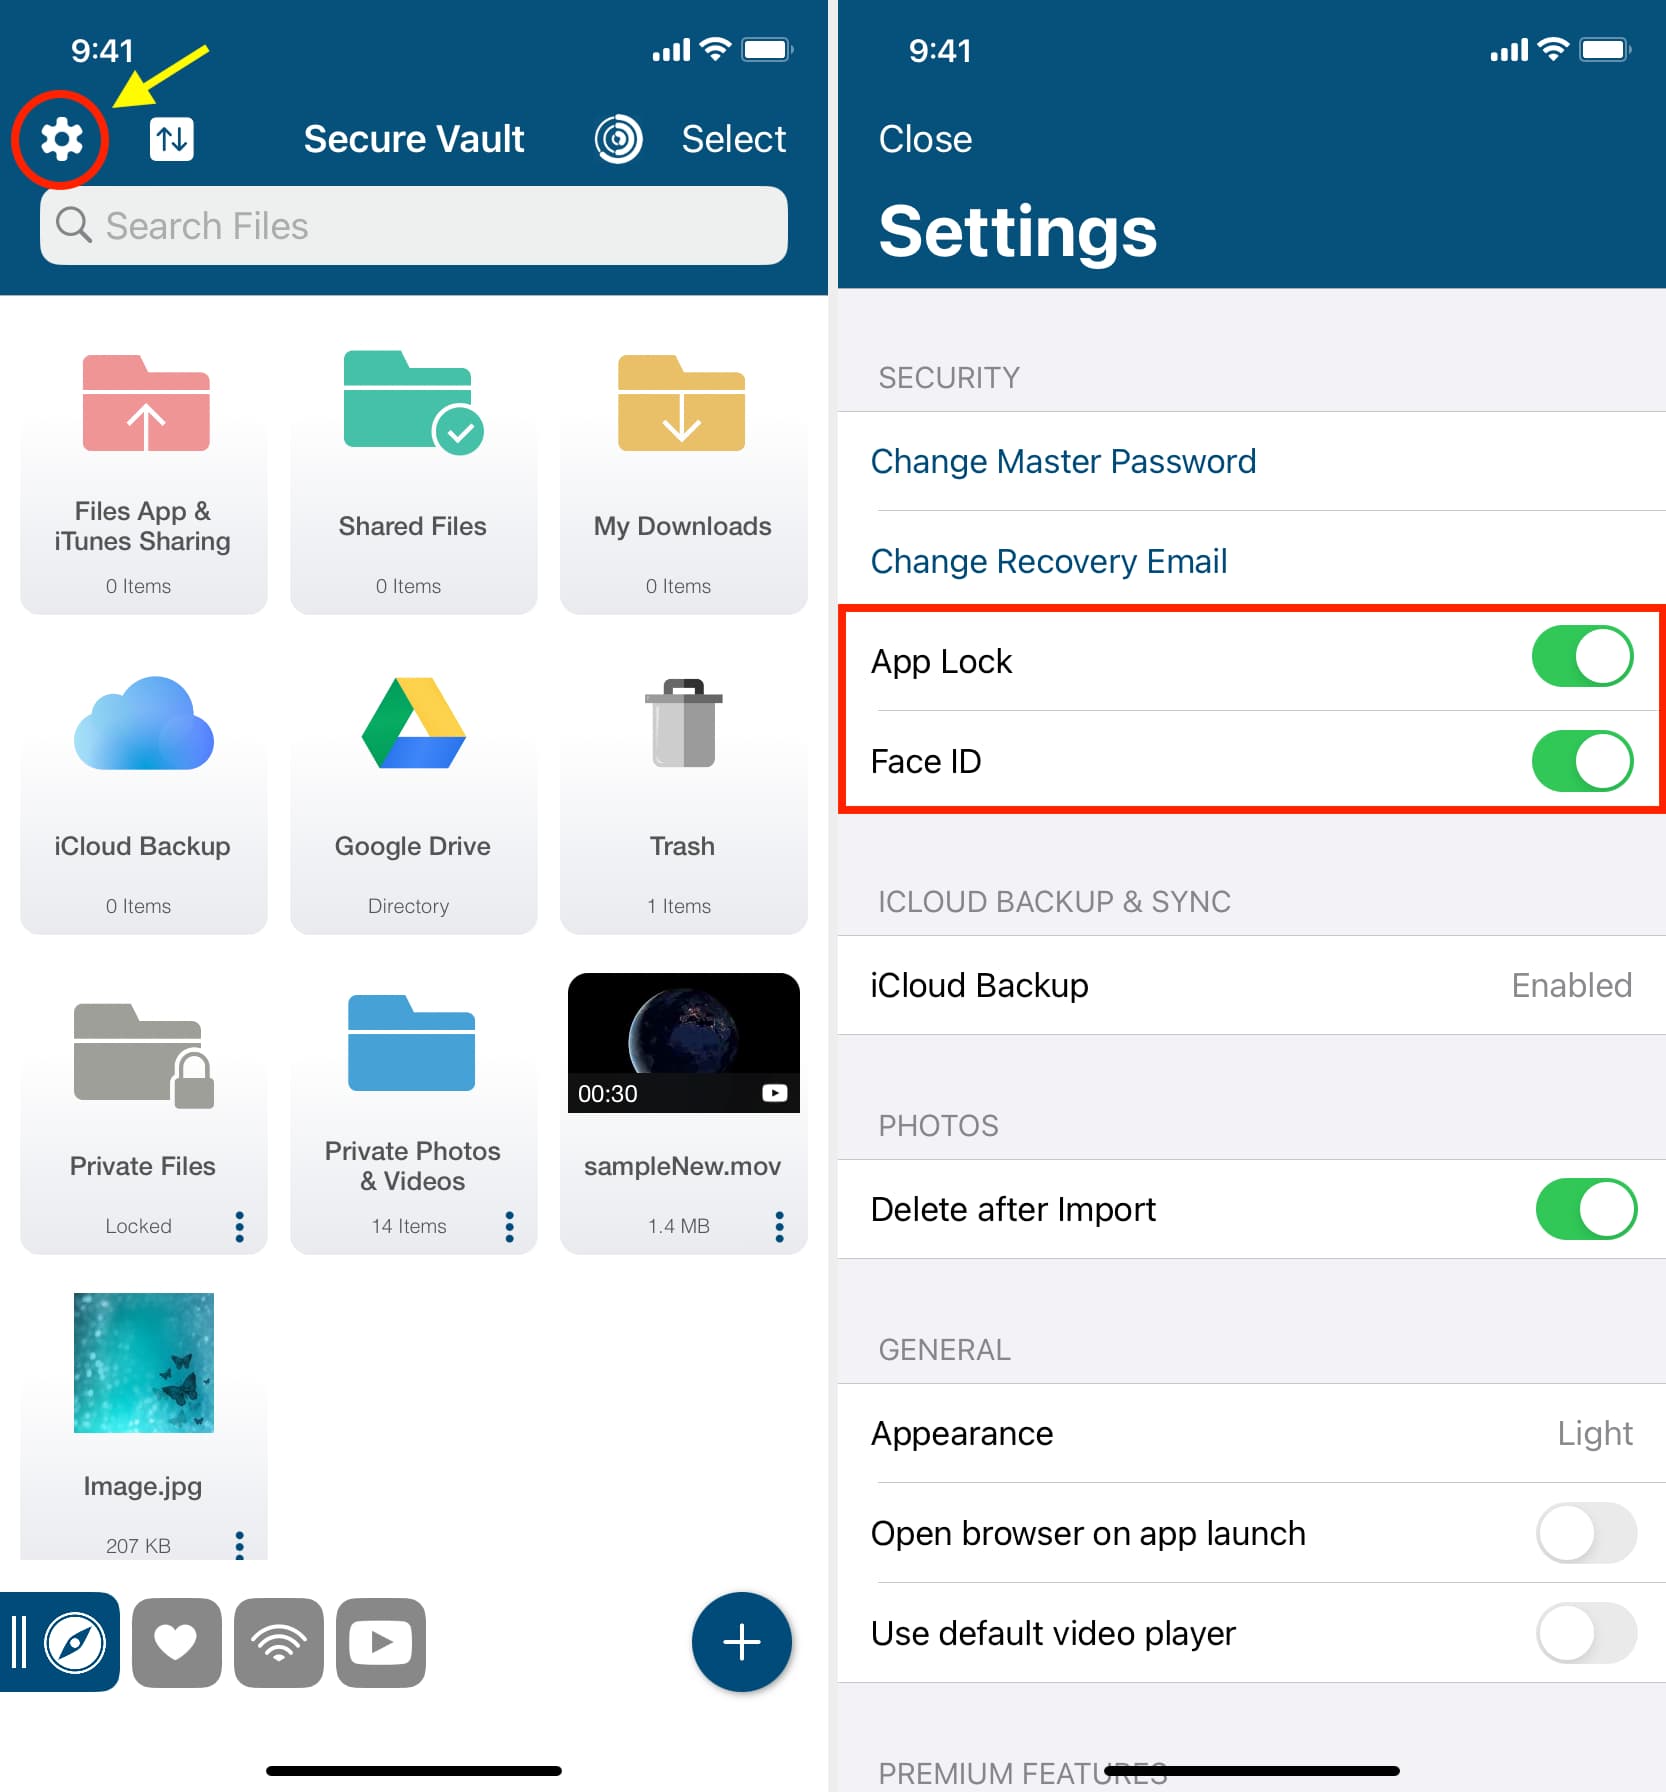
The App Store has many useful apps which enable you to both store and lock documents with a custom passcode (different from your iPhone passcode). I mention this method last as some folks may be uncomfortable storing private files in lesser known apps. In my opinion, both Secure Vault and UPDF do a good job of locking files with biometrics or a passcode.
Secure Vault (SV)
Here’s how to password-protect your Word documents, PDFs and other files with the Secure Vault app on an iPhone or iPad.
1) Download the free Secure Vault app from the App Store, launch it, and skip past introductory screens.
2) Tap the Private Photos & Videos, hit the plus button (+), and choose the New Folder option to create a new folder and open it.
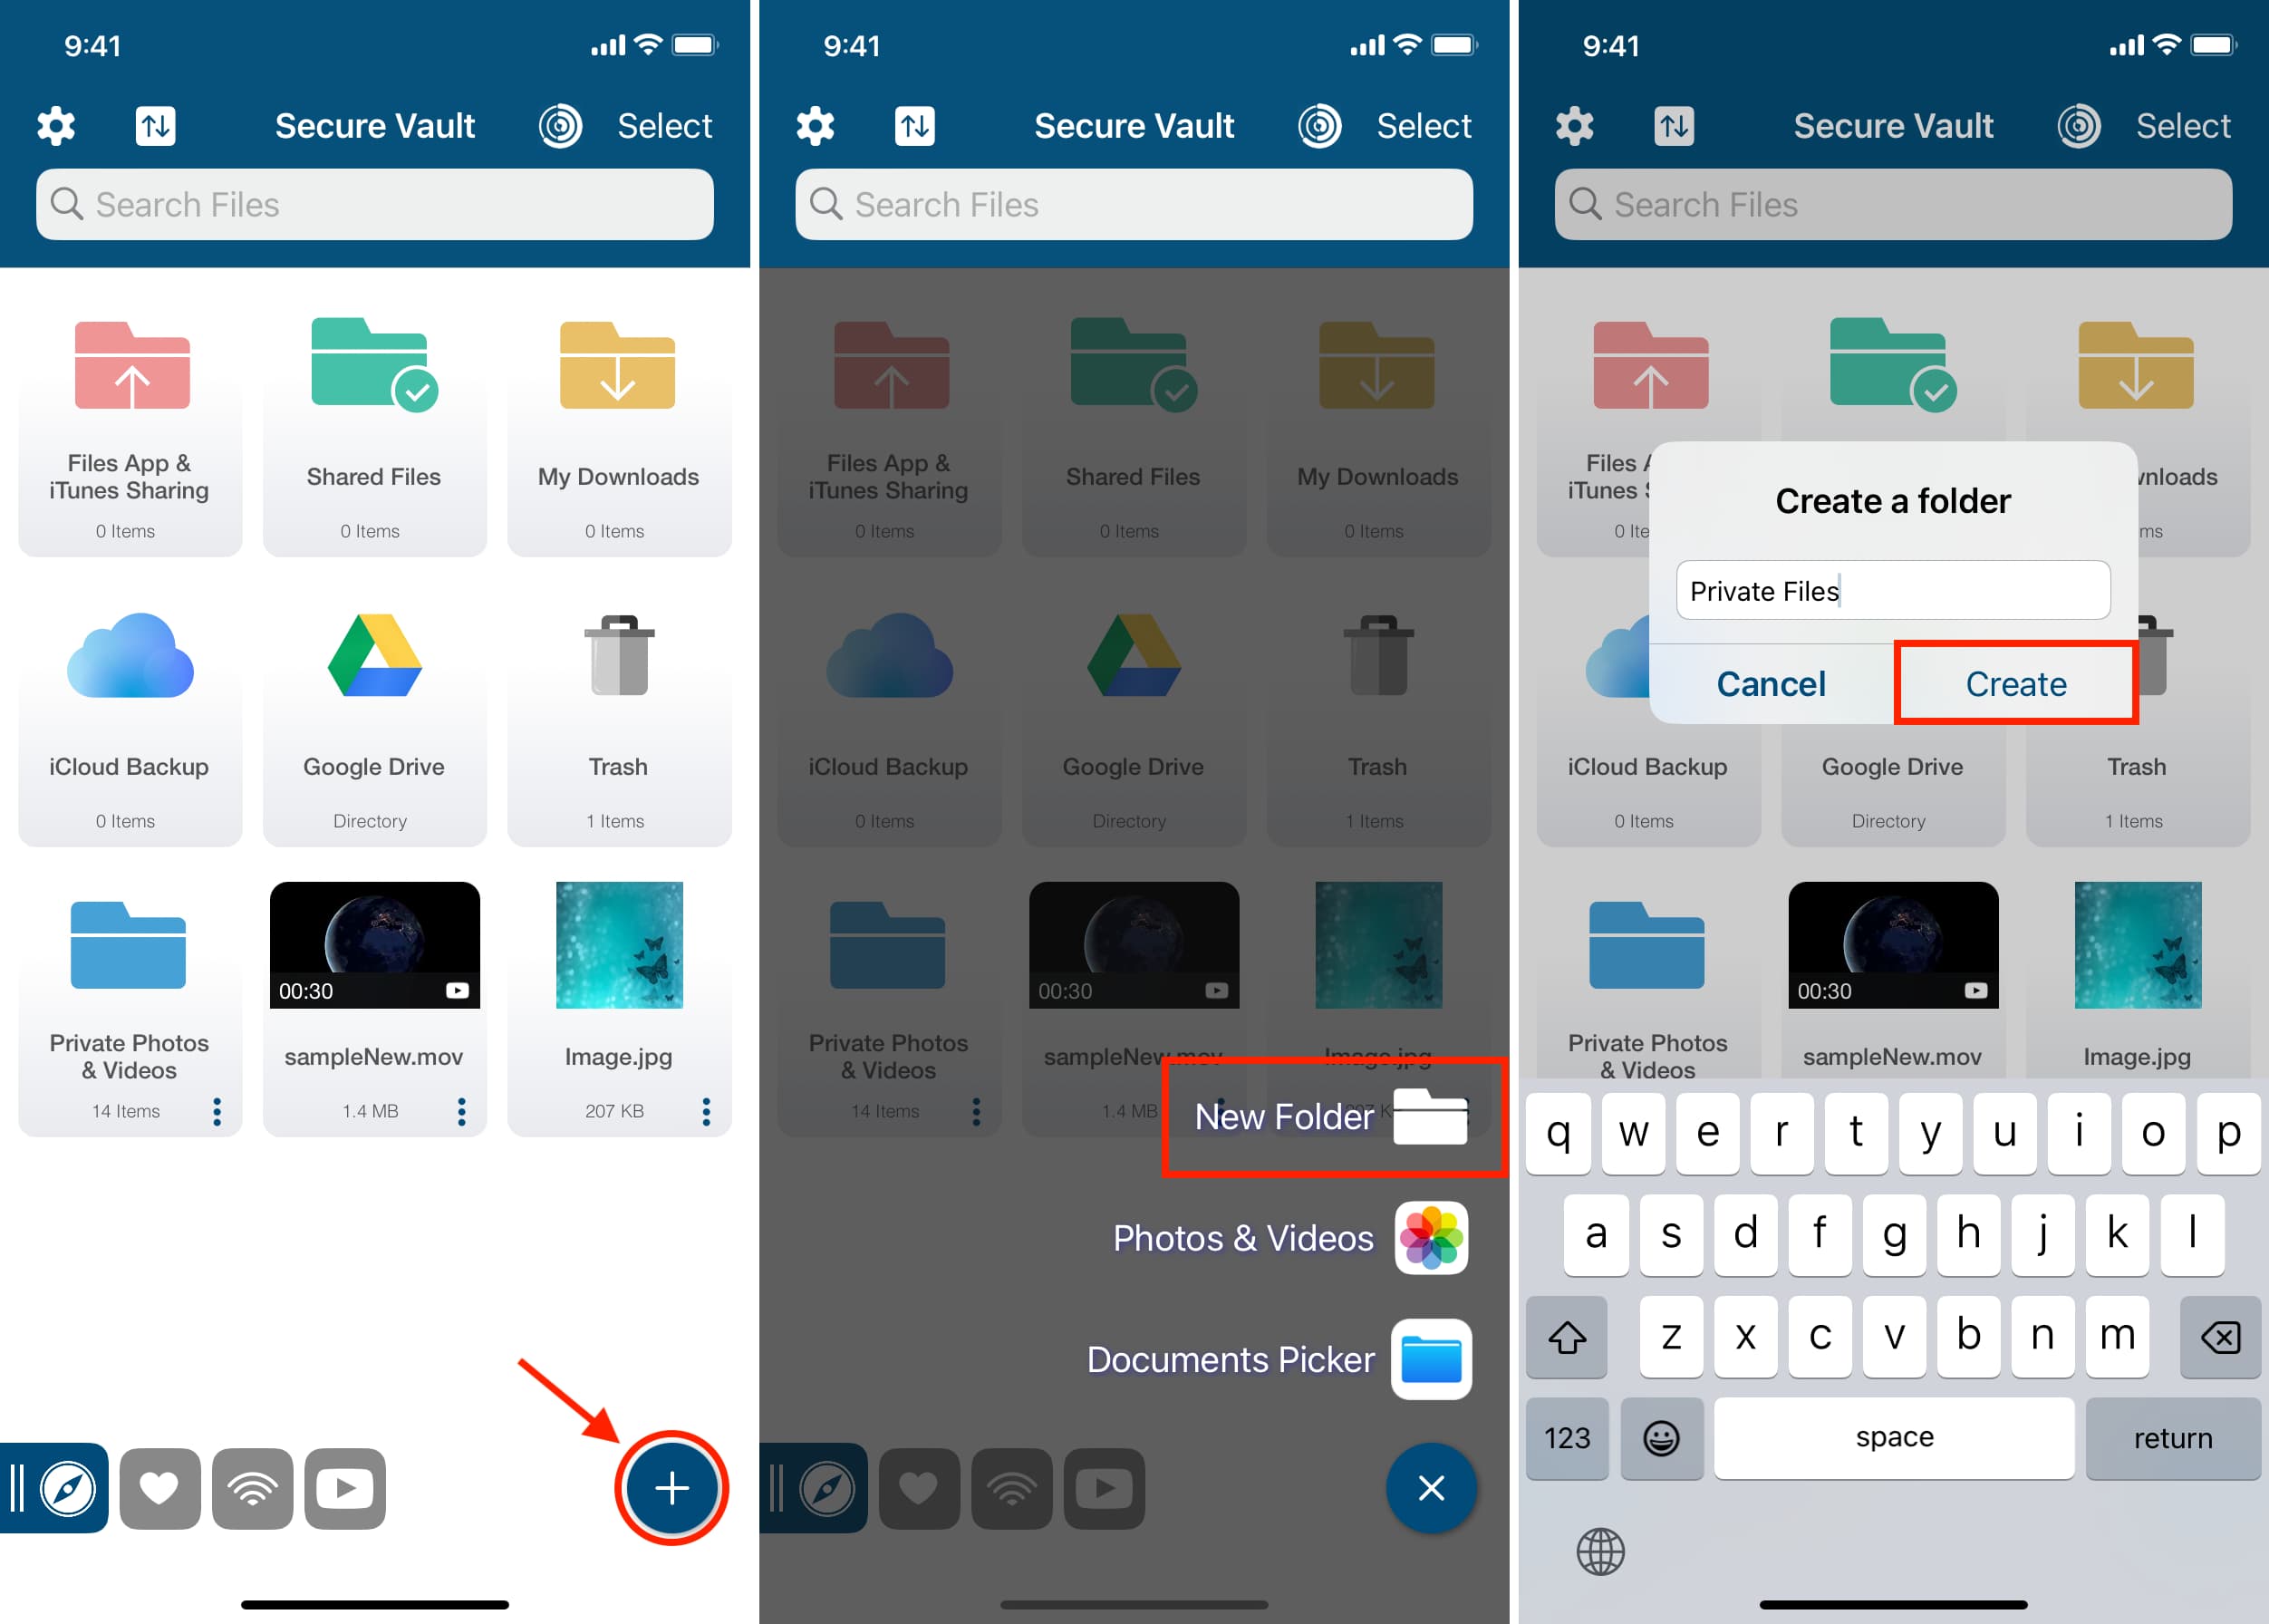
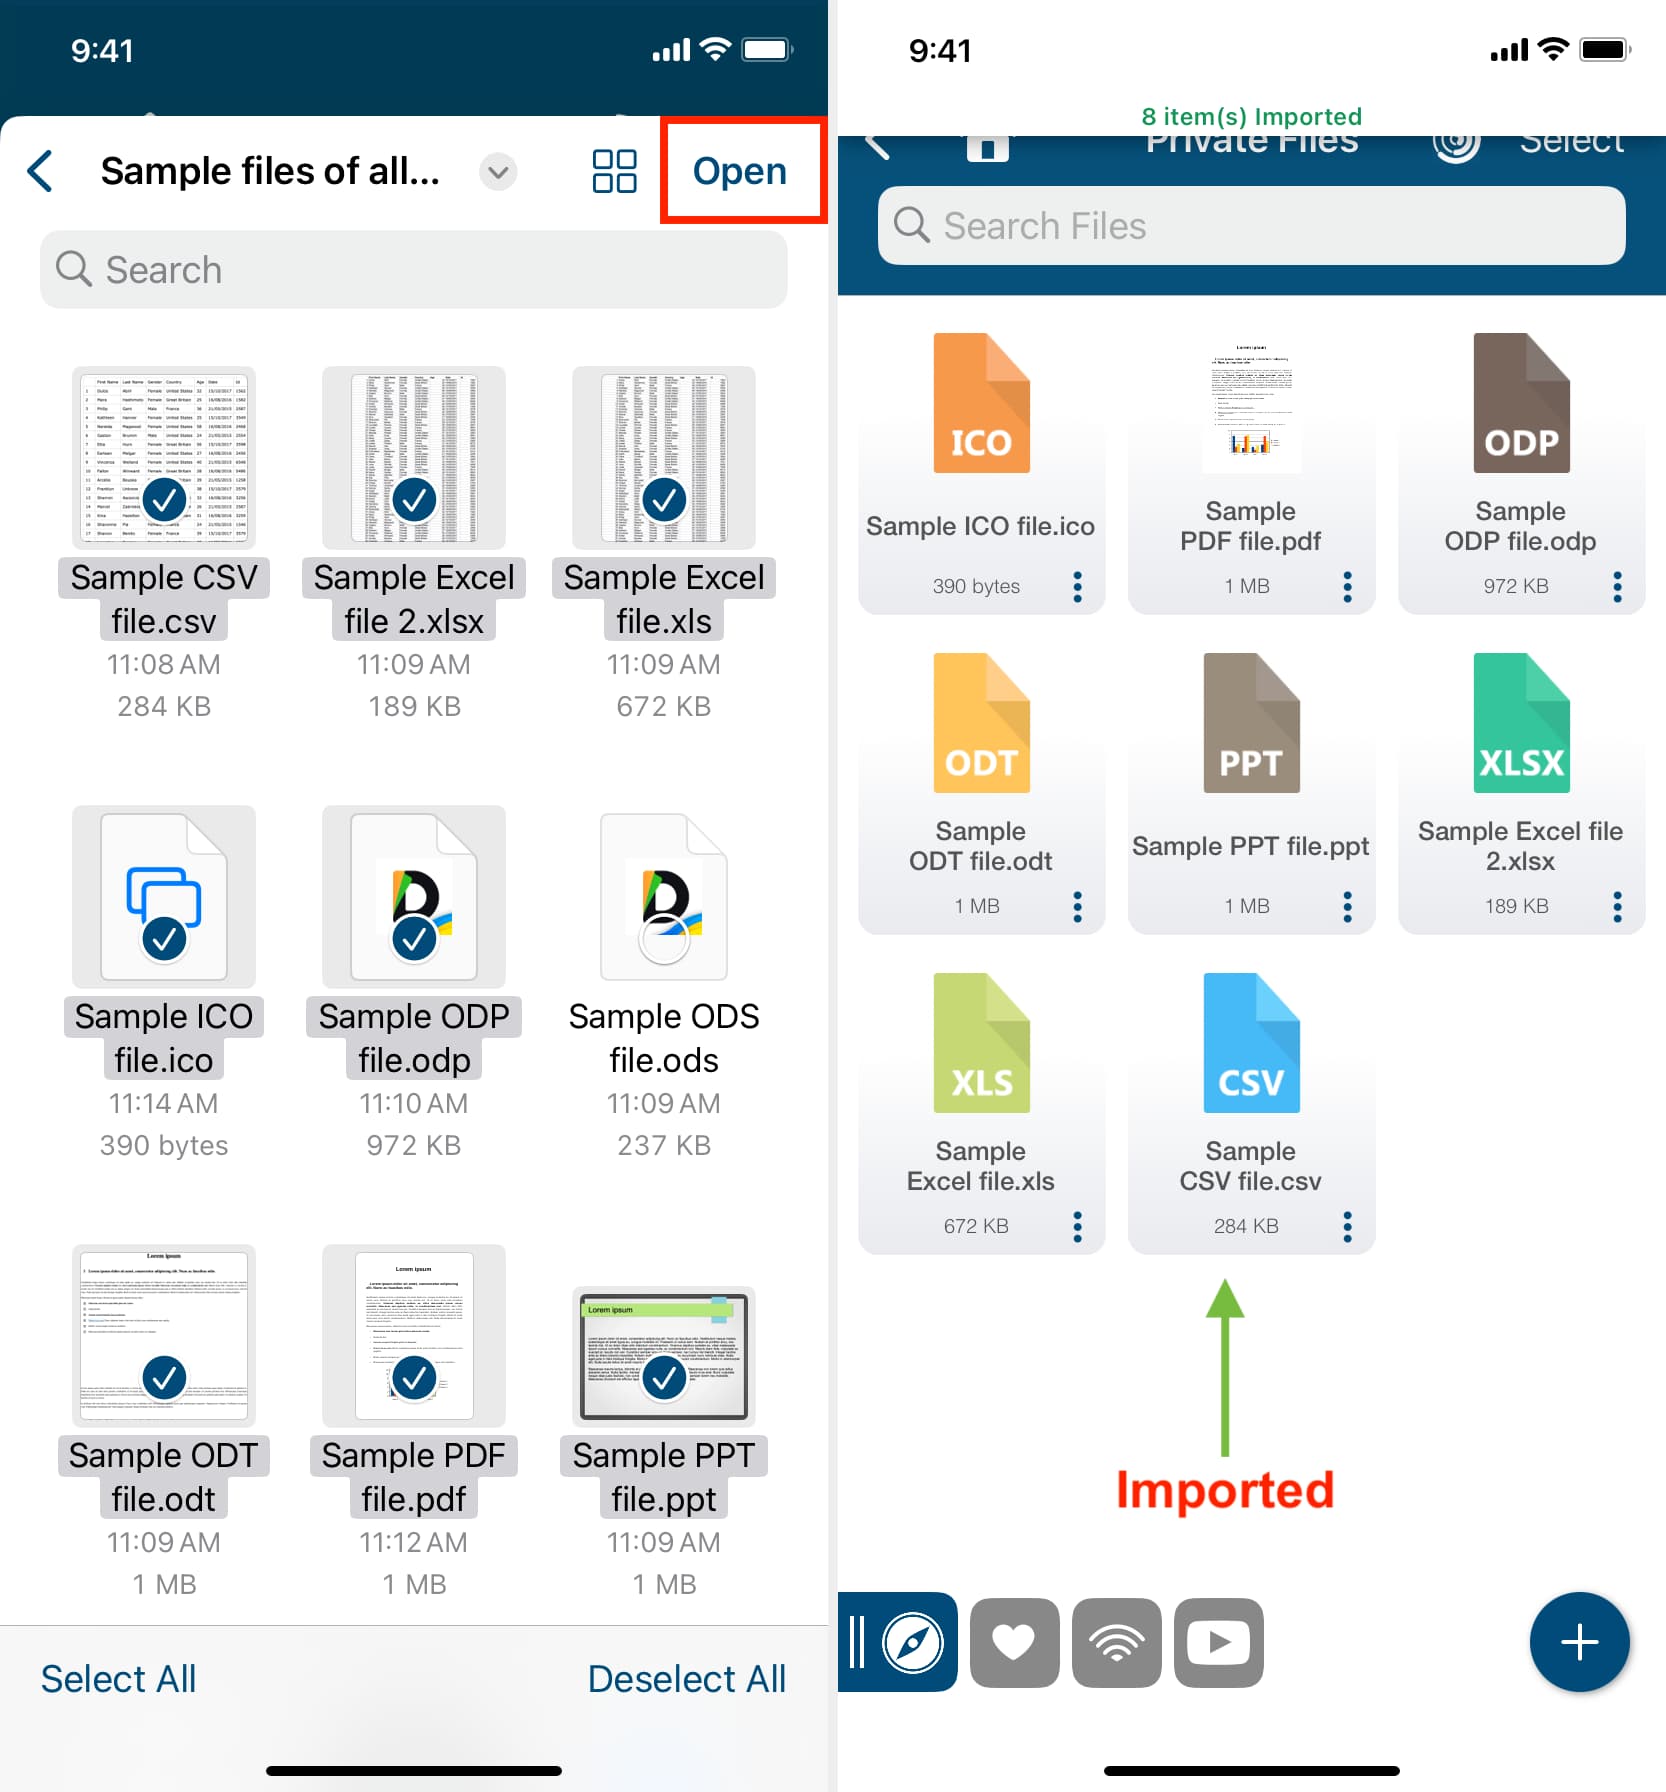
3) Inside the folder, tap the plus button (+) and choose Documents Picker.

4) Up pops the Files picker. Navigate to the folder containing private documents, select the files you’d like to hide, and choose Open to import them into the Secure Vault app.
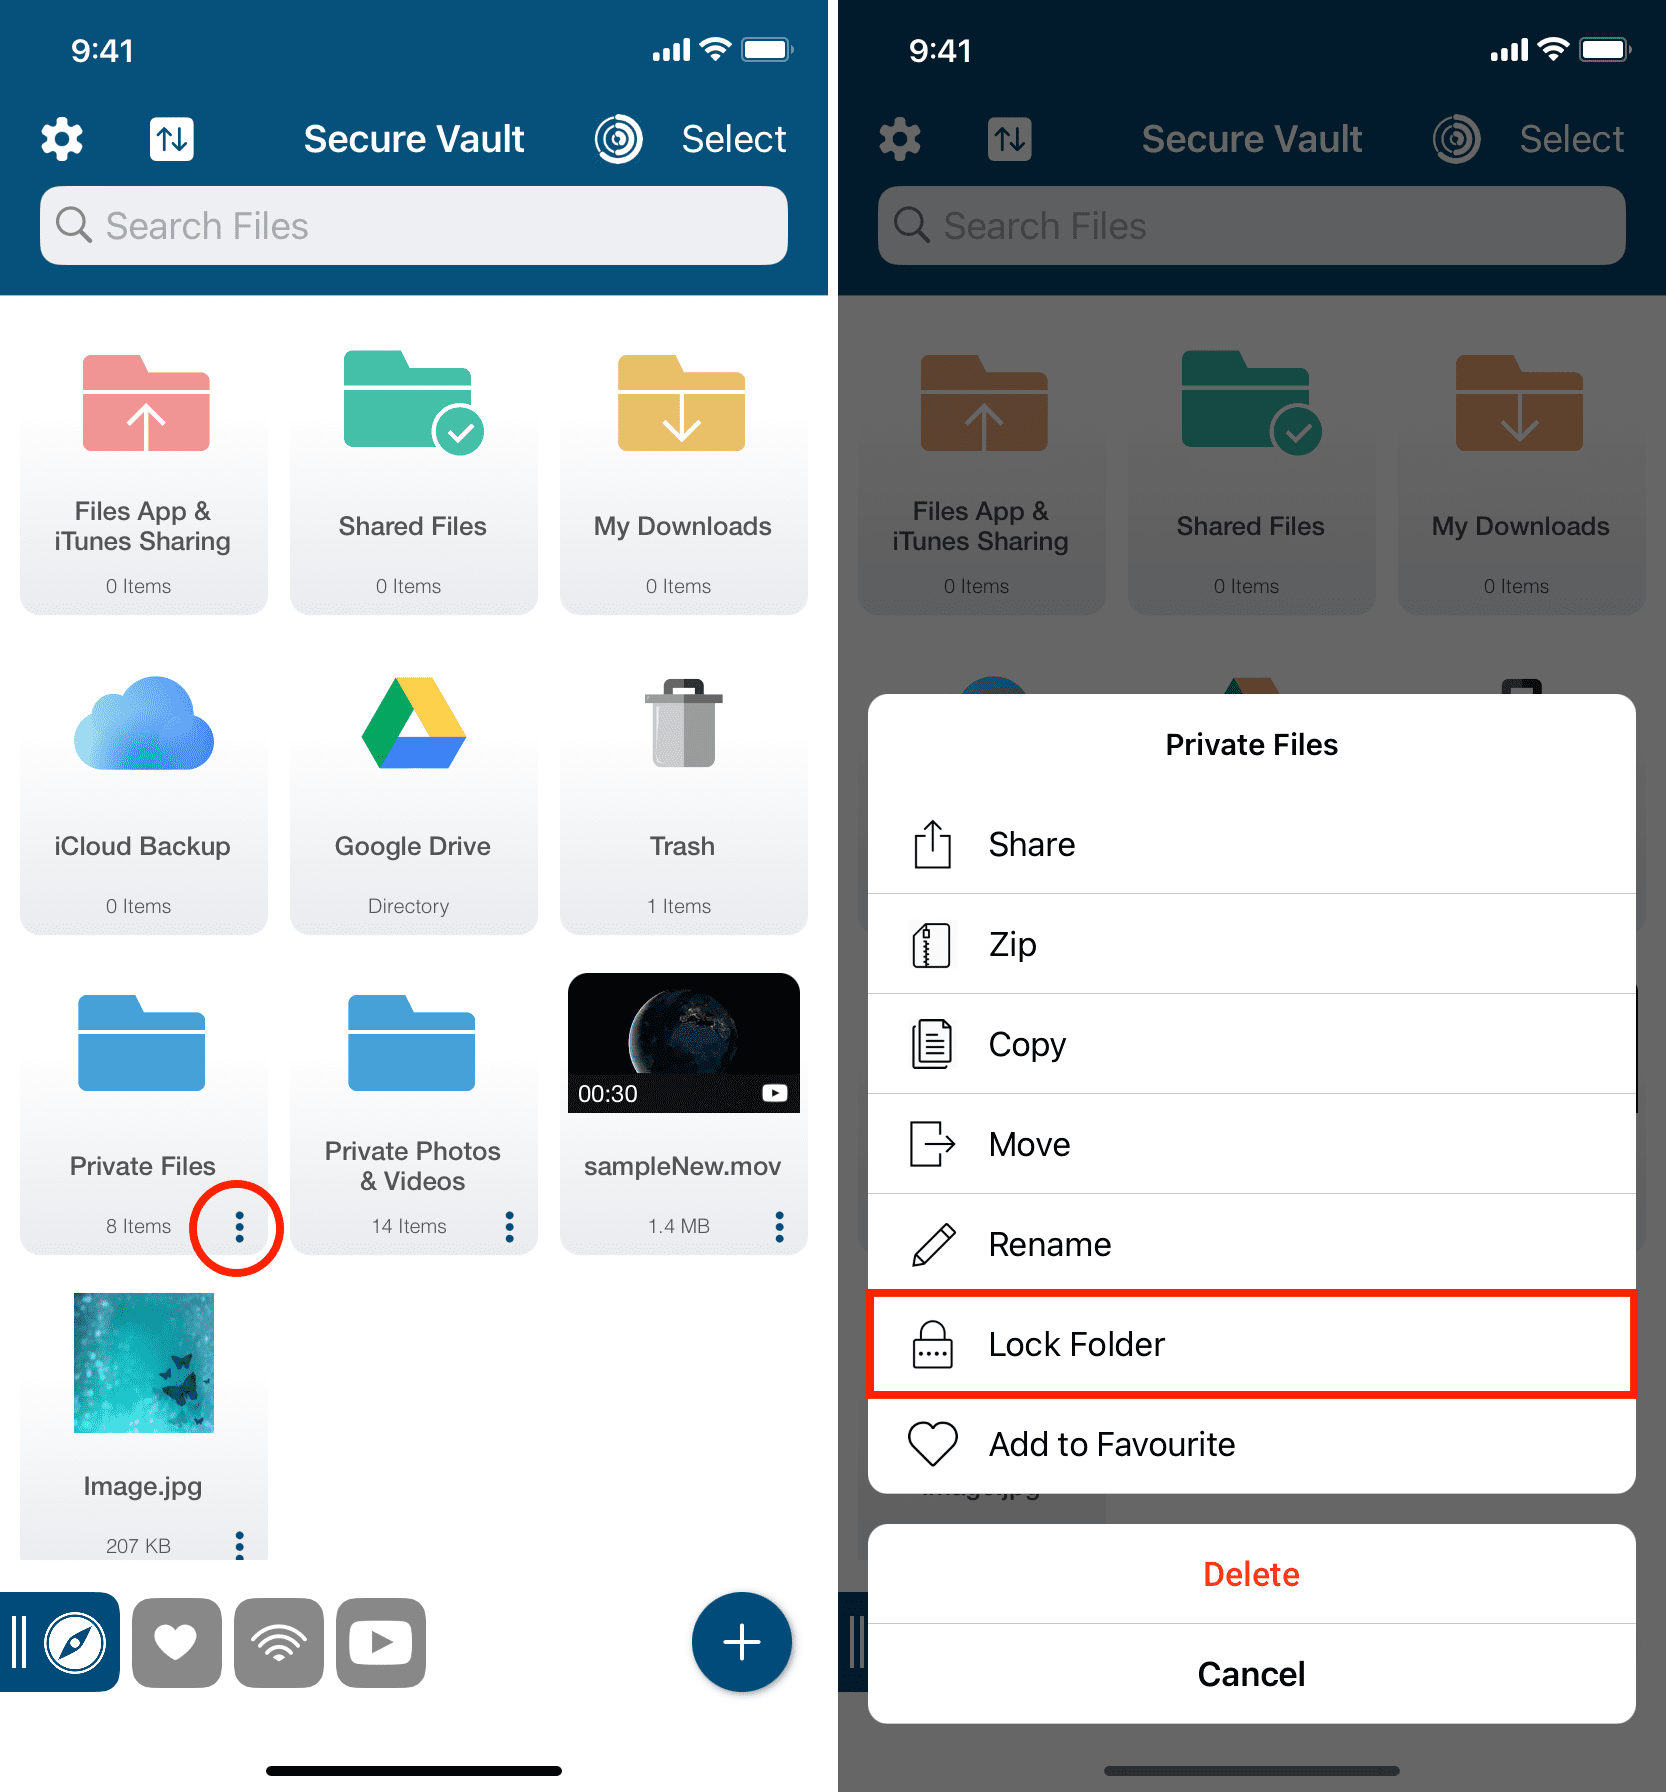
5) Hit the back button in the top-left corner to return to the previous screen, then touch the three-dotted menu and choose Lock Folder.
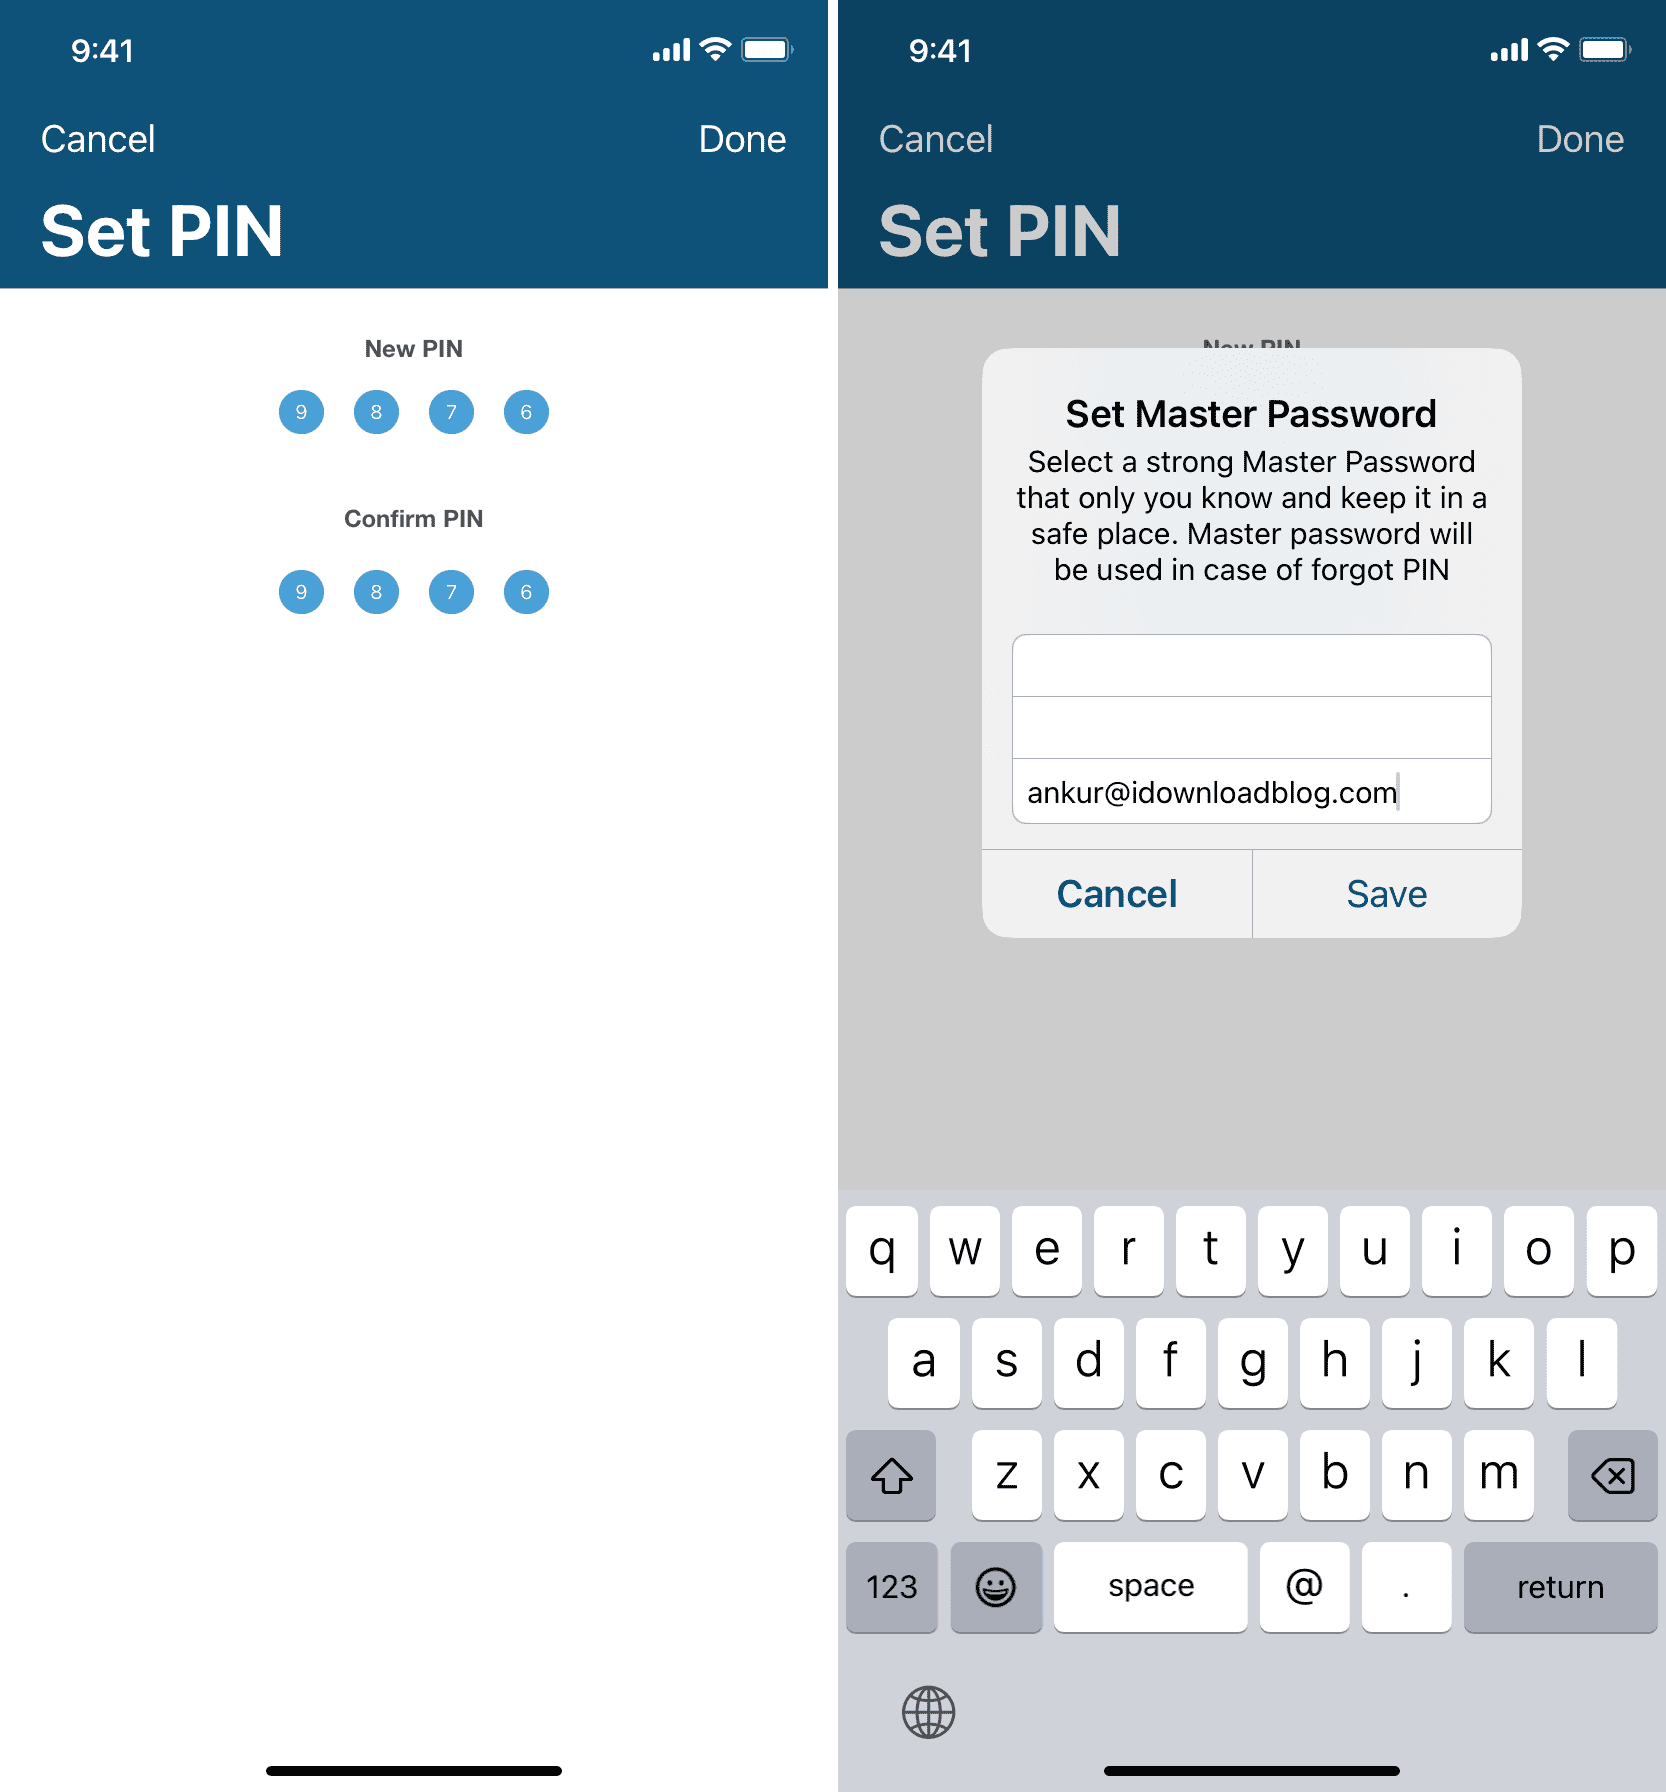
6) Set a PIN for this folder and tap Done, then set a master password, enter your recovery email, and choose Save.
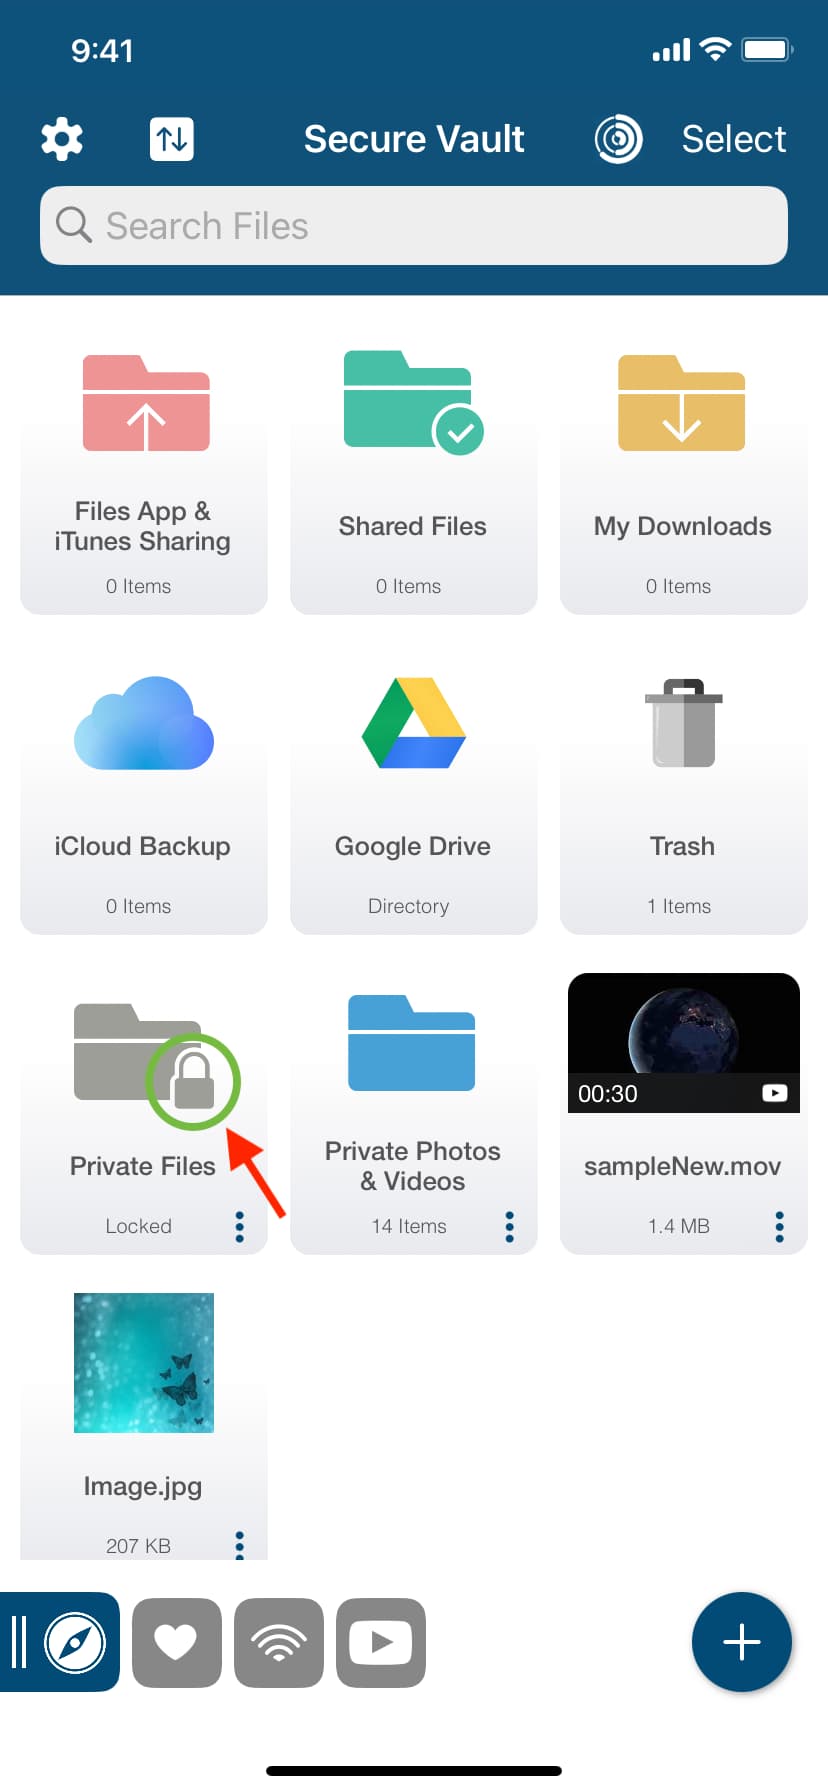
A locked folder has a padlock icon. To open it, you’ll need to enter the passcode you just set.
For added protection, hit the settings gear cog icon in the top-left corner and choose App Lock & Face ID. Doing so will double-secure your private files with the app password, which is the first line of defense, and then with the folder pin. Keep in mind that the app backs up your documents to iCloud by default. However, you can turn this off in the settings.
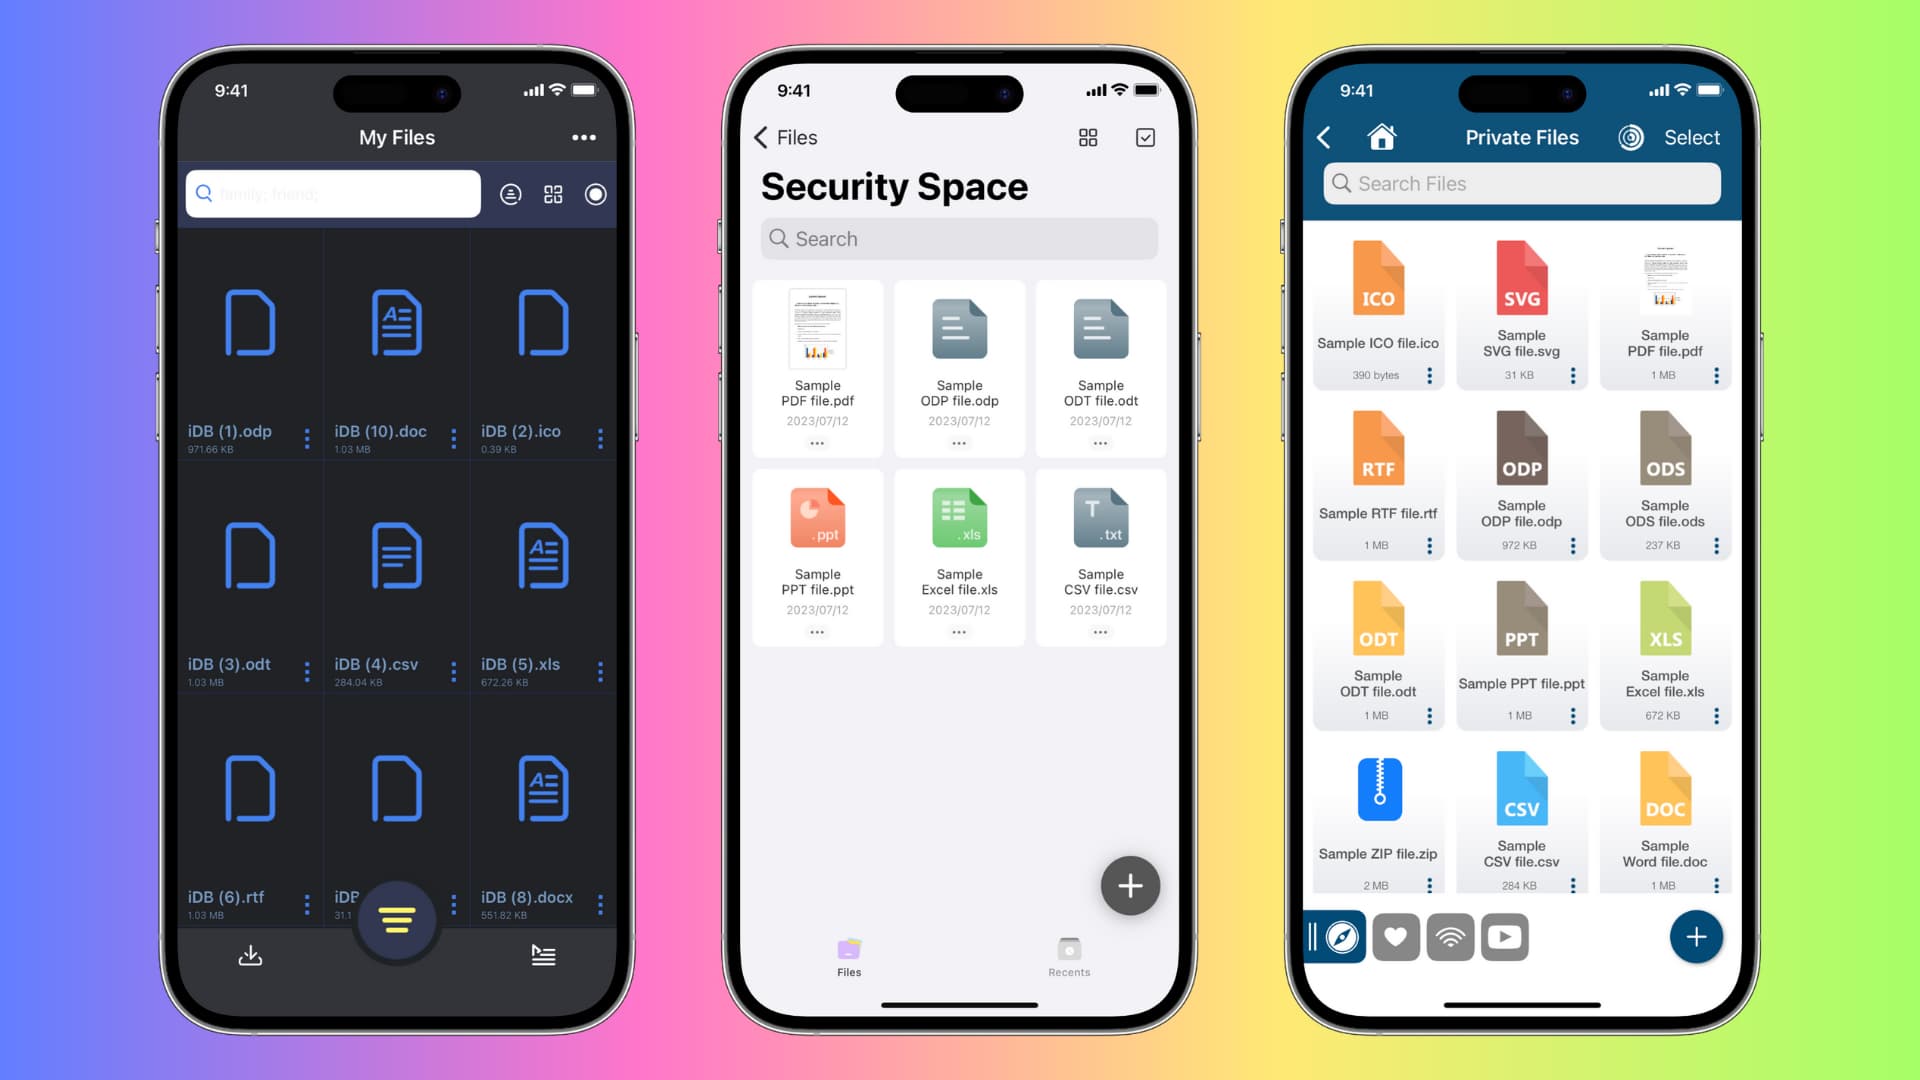
UPDF
UPDF is another robust app for saving and locking files and documents. Unlike Secure Vault, you can only store ten locked files using the free version.
1) Download and open the UPDF app on your iPhone or iPad.
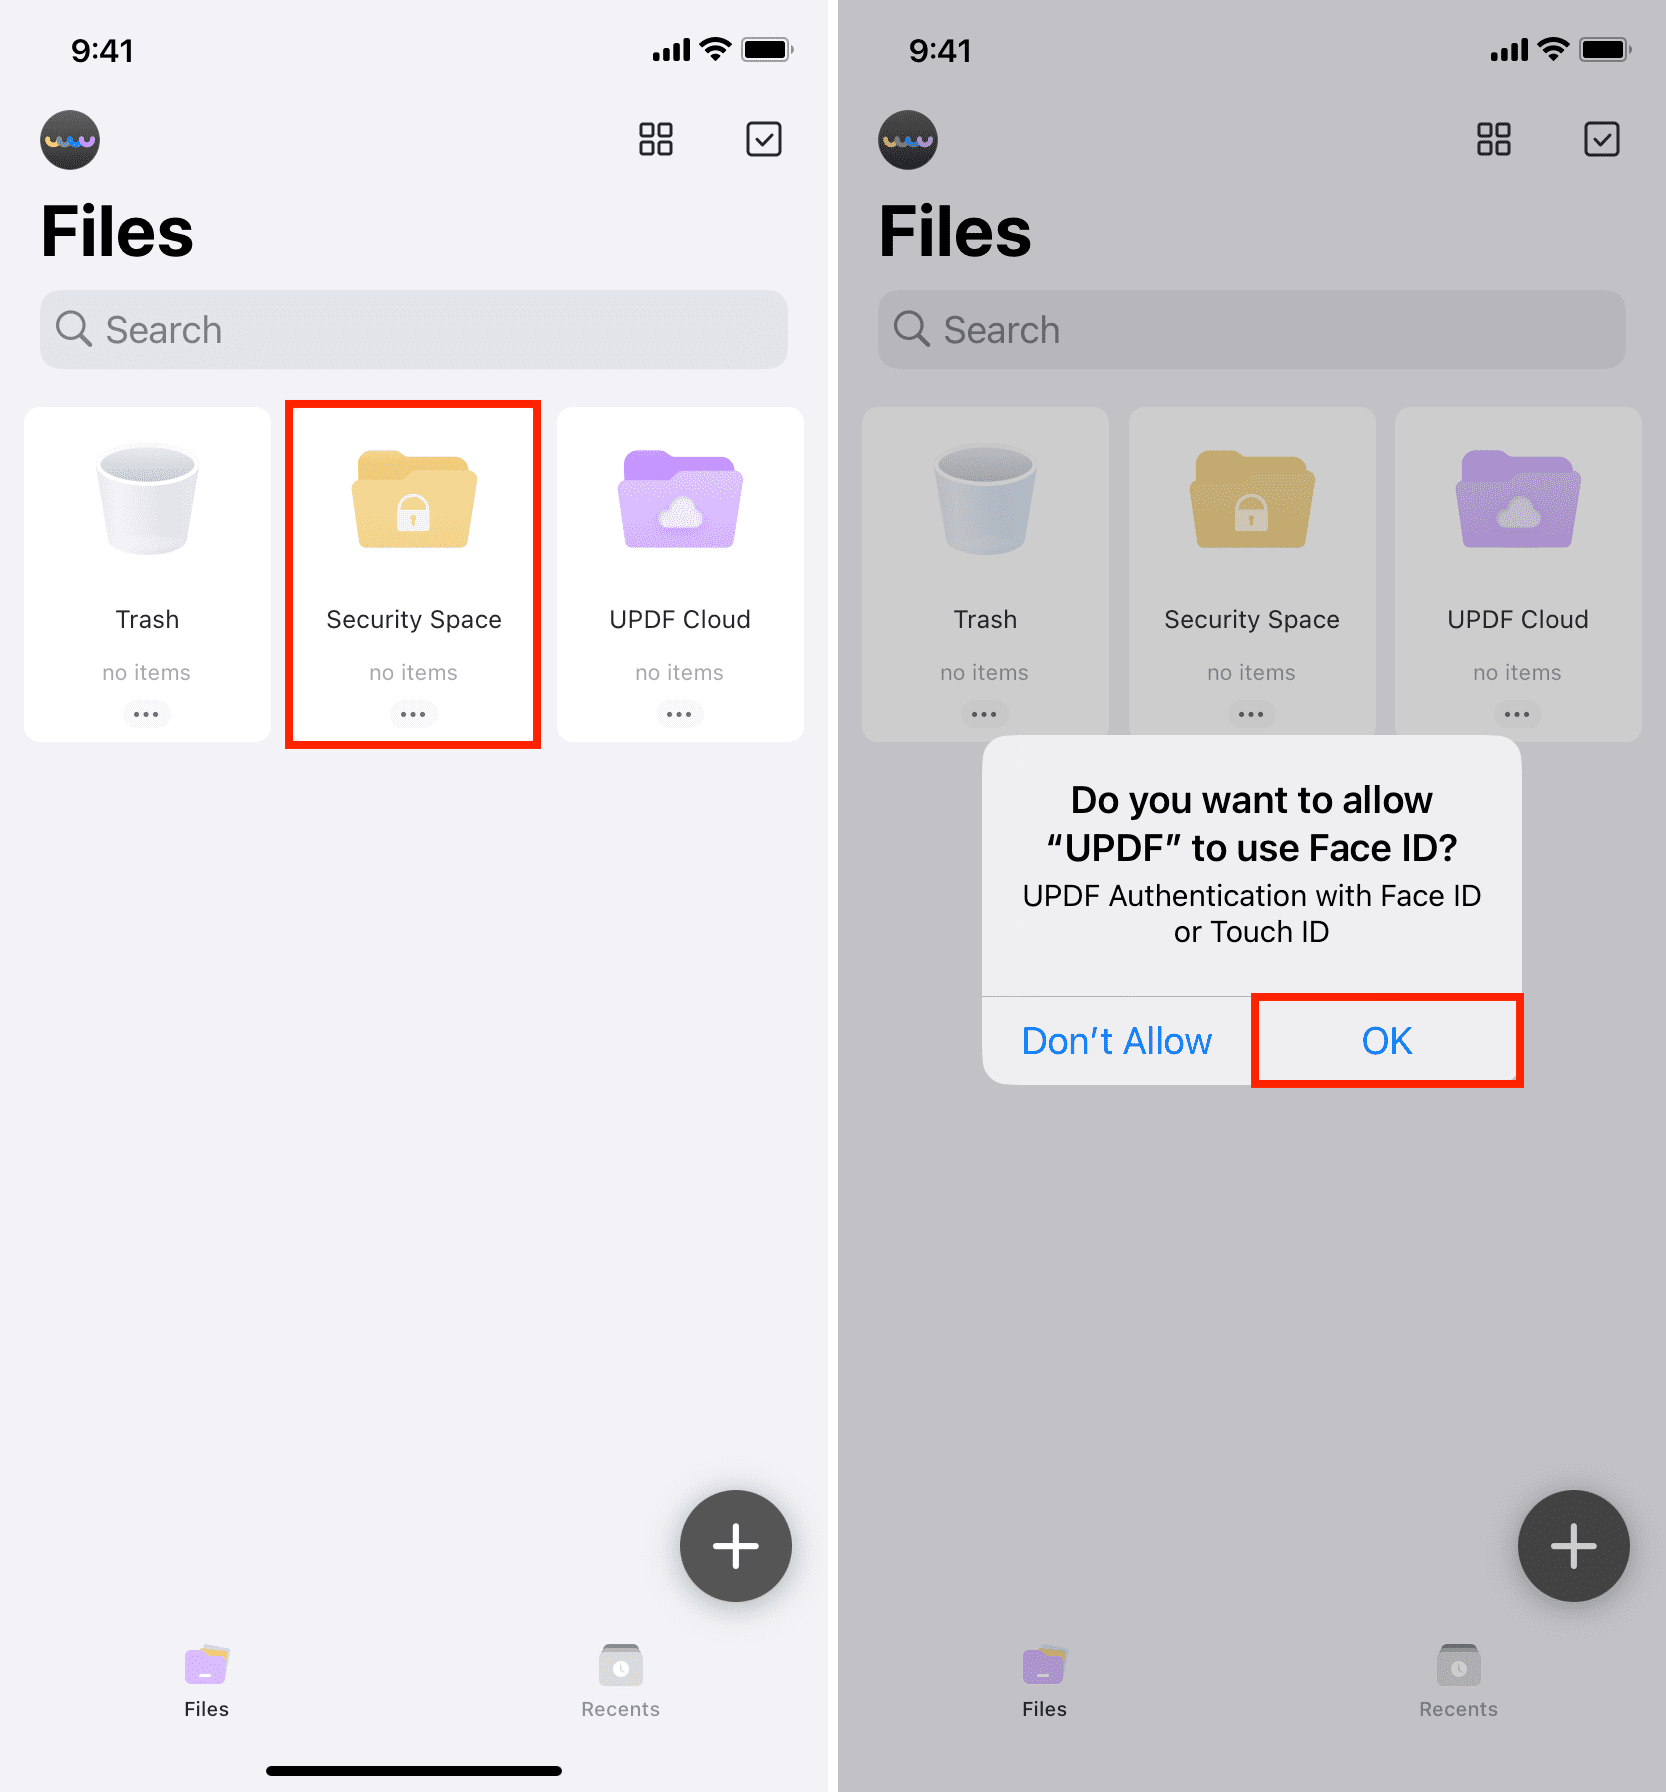
2) Select the Files tab, choose Security Space, give the app permission to use Face ID when asked, and hit OK.
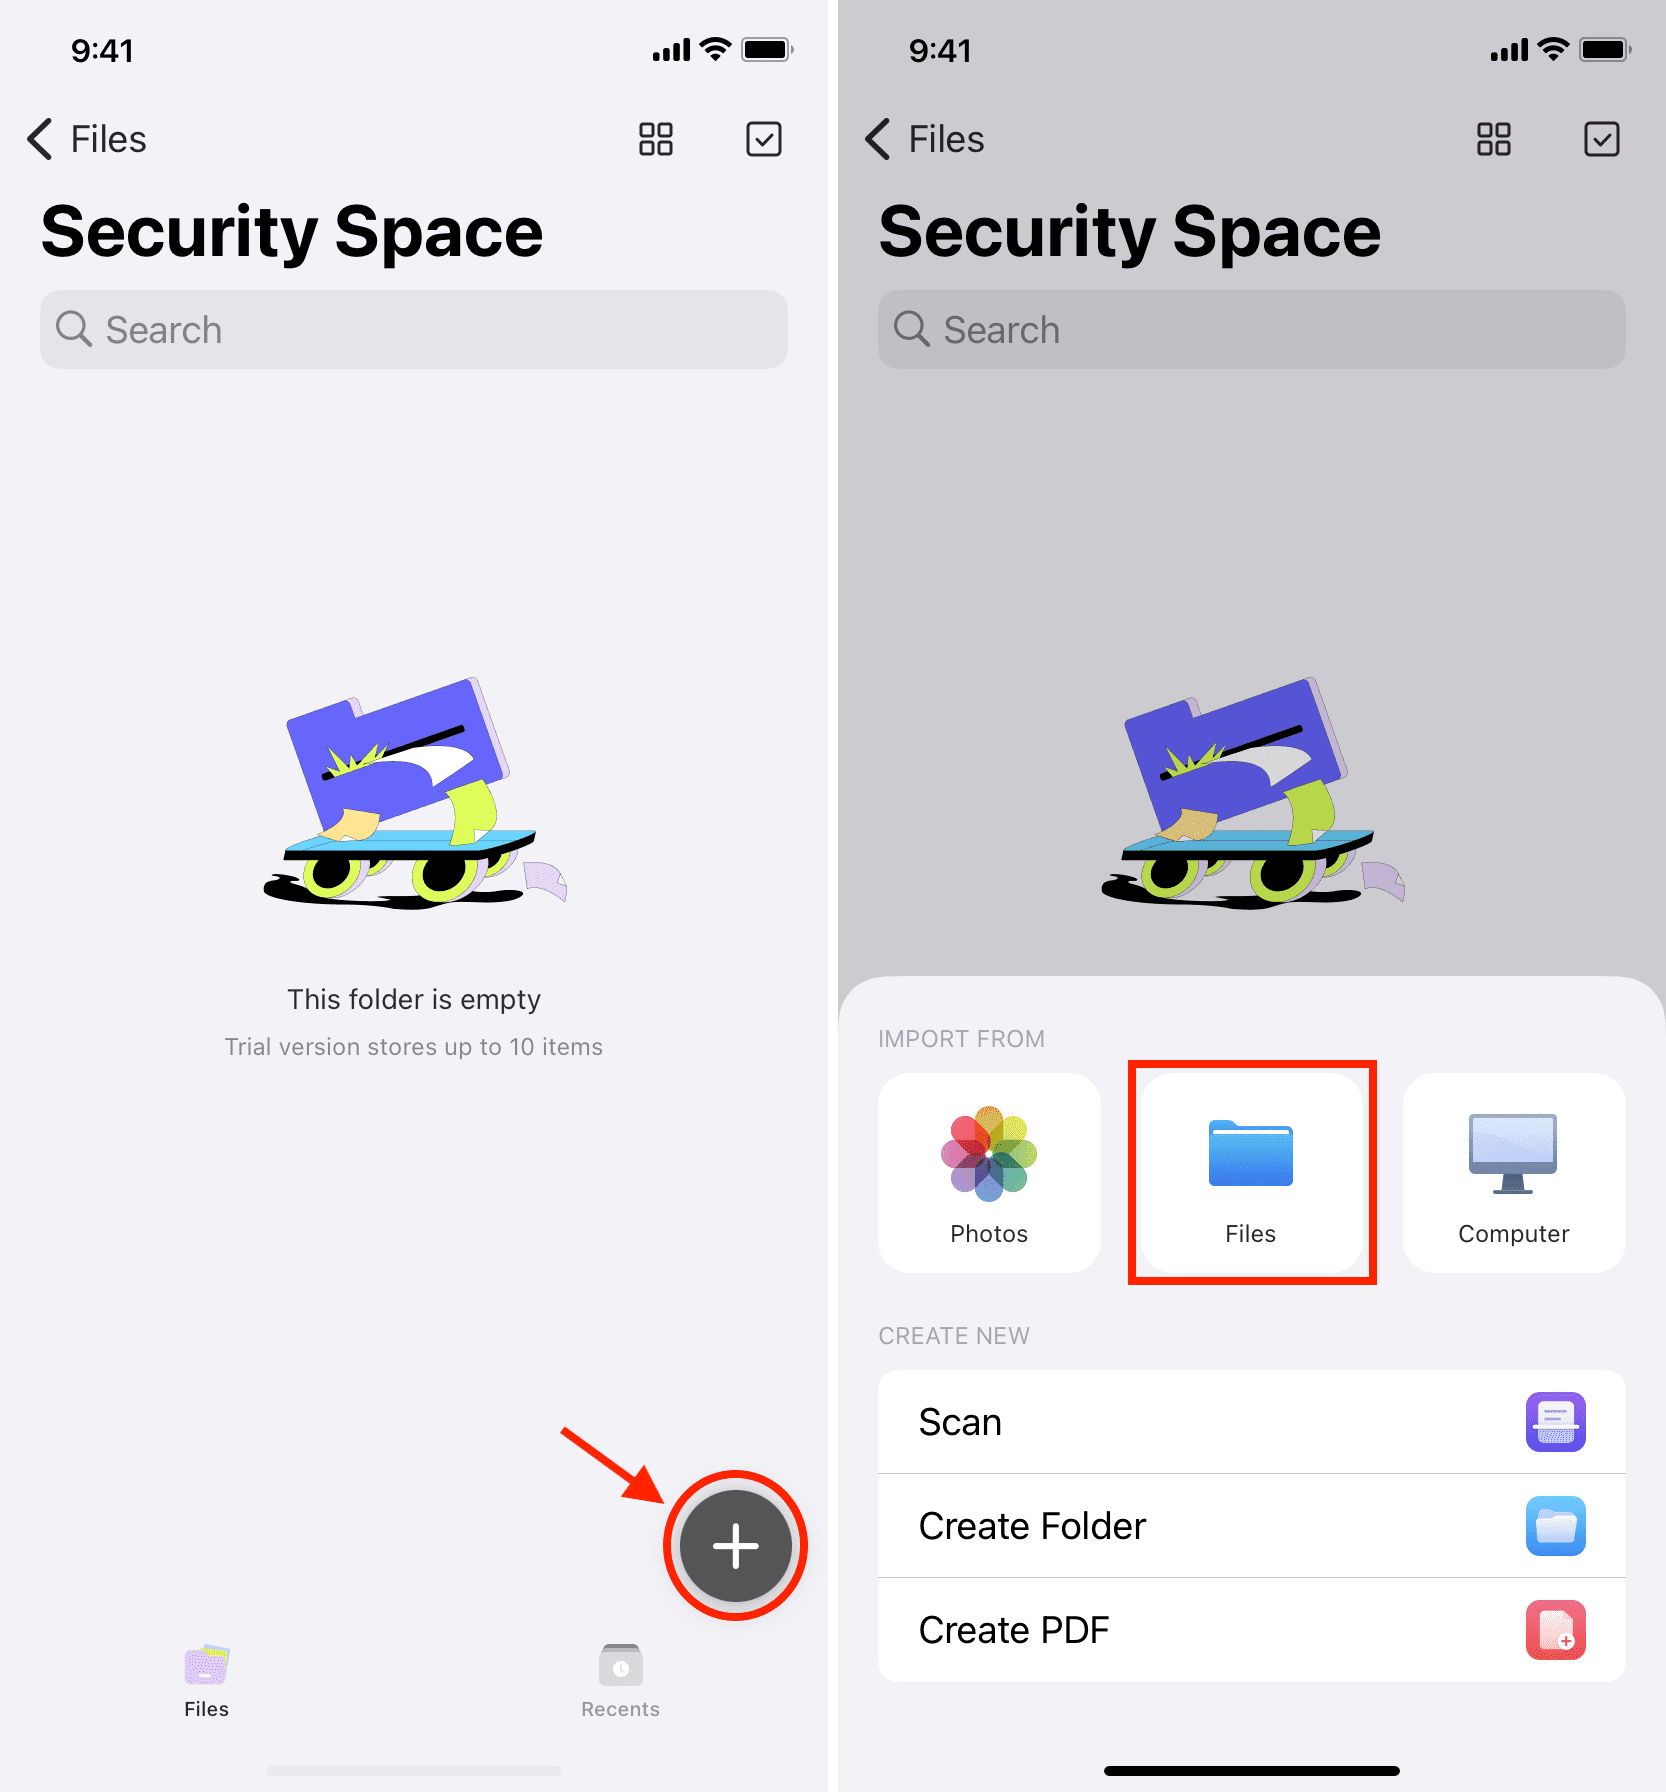
3) Tap the plus button. If you see a popup asking to create an account, tap Later to dismiss it, then hit the plus button again. This time, you’ll see the option to import files.
4) Tap the Files option (you can also choose Computer to download files from your Mac or PC).
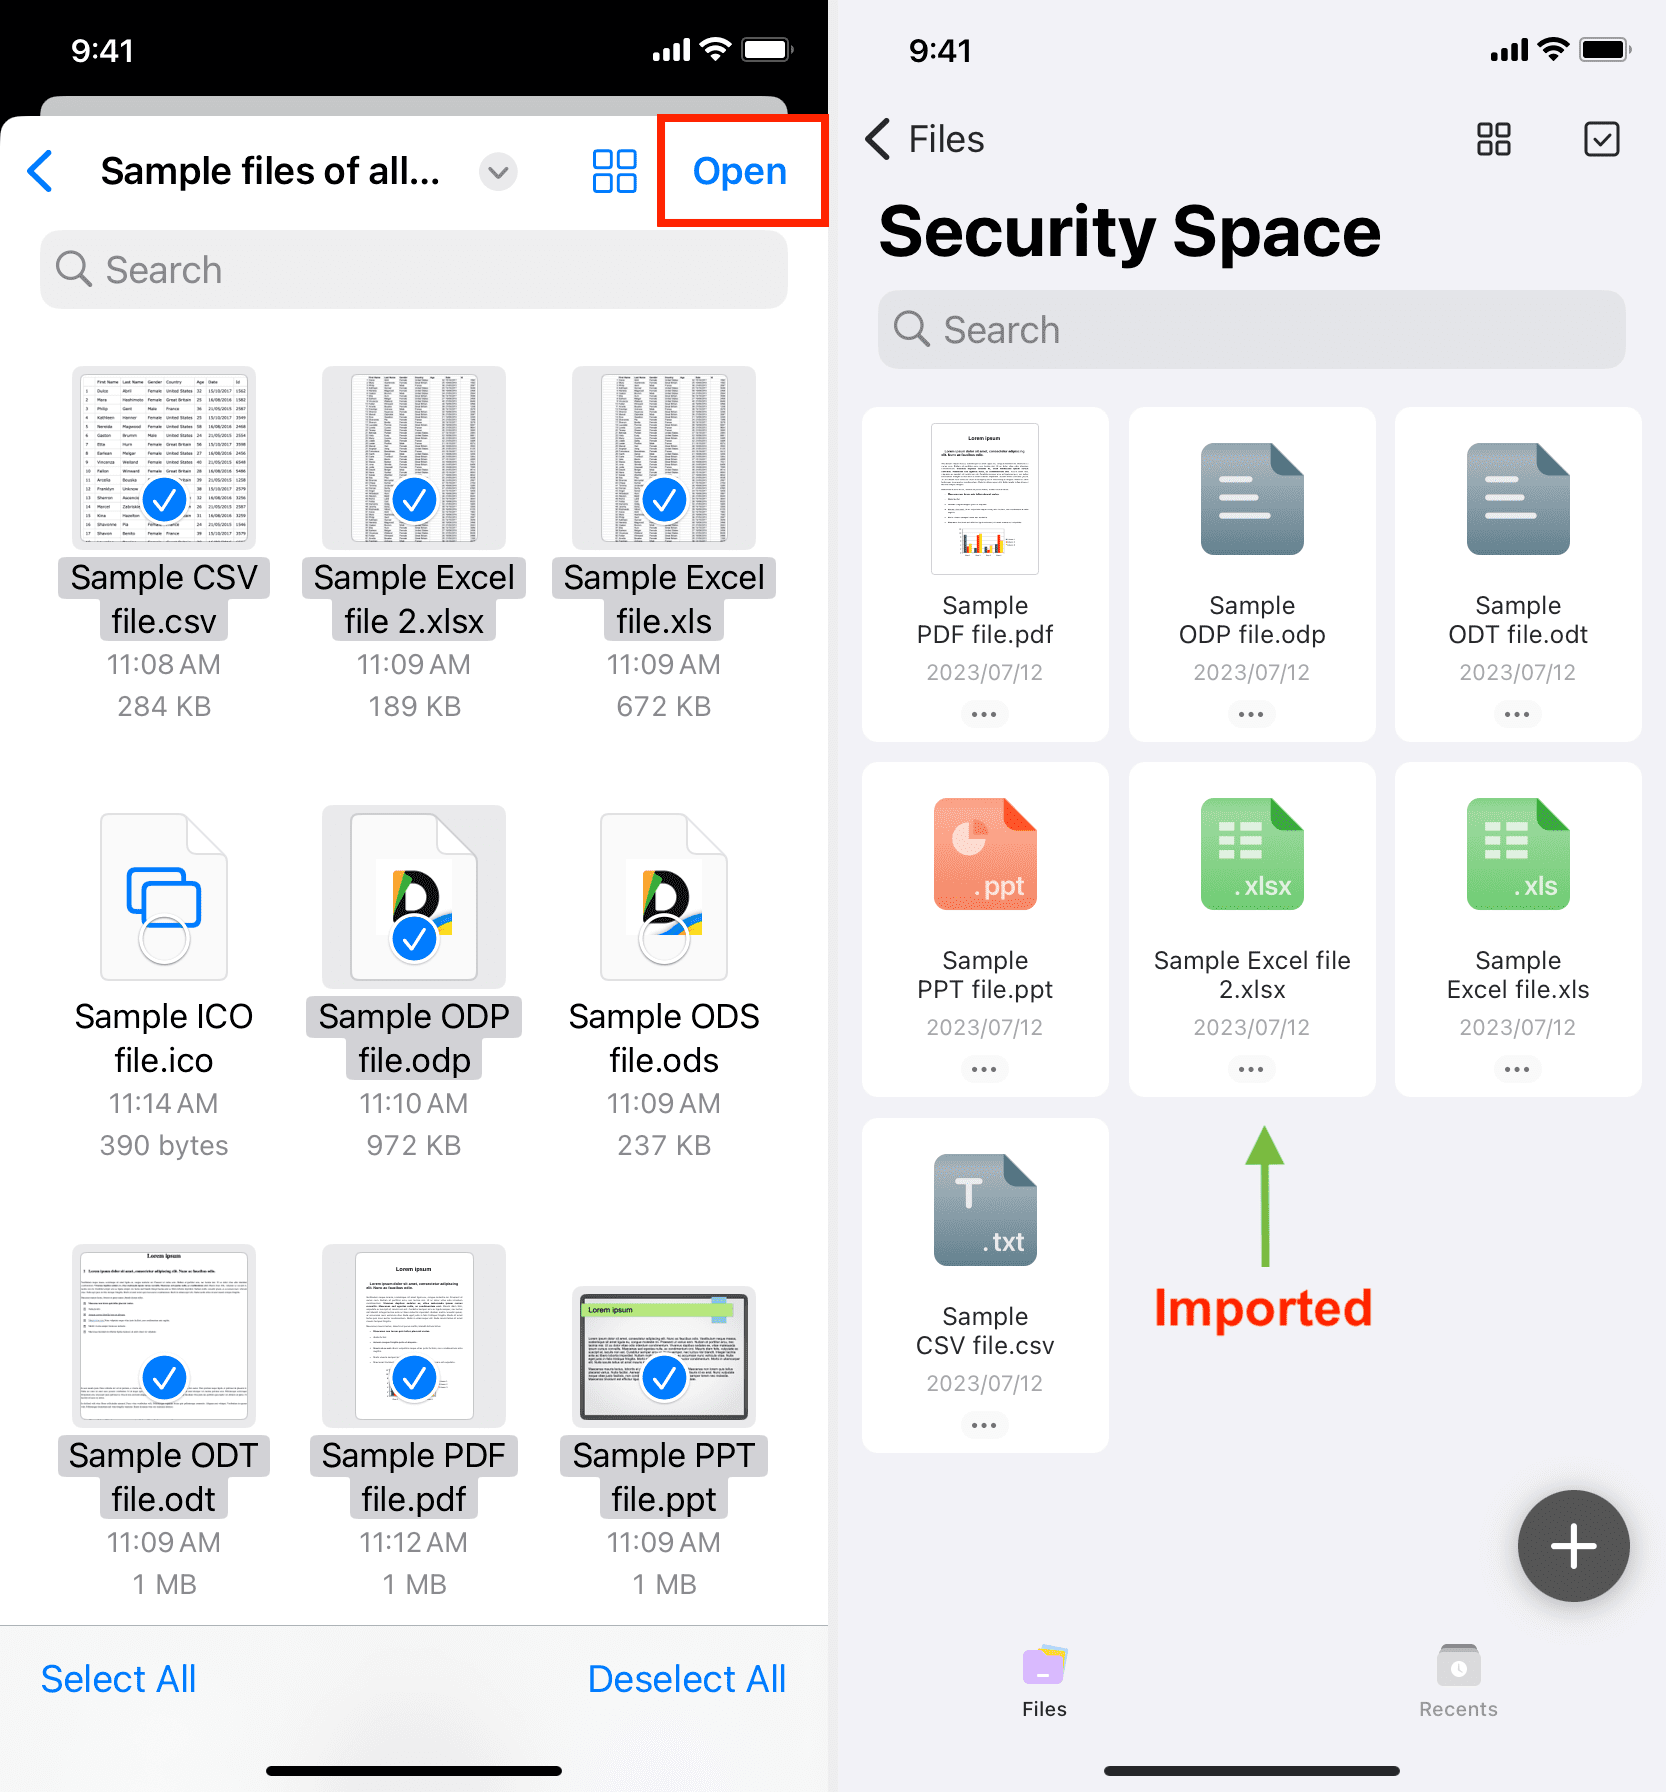
5) Select private items in the Files picker and hit Open to import them into the app’s Security Space folder (protected with Face ID or Touch ID). You can now delete the originals from the Files app.
You can also use the Secret Vault Calculator app to password-protect private files.
Also, check out: How to lock notes on iPhone and iPad (6 free ways)