A virtual private network, commonly referred to as a VPN, is a type of connection you can use over the internet that helps to secure your identity as you surf the web.
Often times, they’re used to improve your security and privacy on public Wi-Fi networks, but they’re also used for a wide variety of other reasons. If you’ve been considering using a VPN on your iOS device(s) or Mac(s), then you’ve come to the right place. We’re going to tell you all about why you should consider using one and how to use a VPN on iPhone, iPad, or Mac to your advantage.
Why using a VPN is a good idea
A VPN is important because it’s a line of defense between you and other users of the internet. VPNs have many different uses, but some of the most important are privacy and security.
Some VPNs are free, and some are paid, but all VPNs have terms and conditions that you need to abide by, unless you create your own and you can set your own rules. Typically, paid VPNs are of higher quality and security than free ones, but some free VPNs are just as good depending on what you’ll be using it for.
VPNs help secure you on insecure networks
A VPN helps protect you from hackers and snoopers who want to know what kind of information you’re sending back and forth between yourself and another internet server.
Often times when you’re using free and unsecured Wi-Fi at McDonald’s or a hotel, you’re leaving your information wide open for someone with good packet-sniffing software to tap into your login credentials for websites, and even to snoop on what you may be saying to people or doing while you use the internet.
Even Wi-Fi networks with weak WEP encryption keys, or other weaker forms of encryption can be broken by a good hacker, so you really need to be careful what kinds of Wi-Fi networks you’re logging onto without using at least a VPN to help protect yourself and your information.
VPNs can spoof your location
Moreover, when you’re worried about a website tracking information about you, such as logging an IP address, or telling you that you can’t use the website because of the location you’re in, then a VPN is a good way to get around this because it can often make it appear as if you’re a user from a different location.
A VPN is essentially a server located in a remote location that you’re sending data to and from, and it acts a middleman between you and the website you’re using. Because of this, the location of the VPN server is the location that is reported to the website you’re using, rather than the actual location of your personal computer.
This is why you may have heard of people who have problems viewing YouTube videos based on their location, or have issues using other kinds of internet services, using a VPN to make it appear to the website that they’re a user from a completely different location than they really are.
VPNs can encrypt your data
VPNs can also encrypt and secure the data that’s sent between you and another internet server. When you’re worried about a man-in-the-middle attack of some sort, a VPN may not be a bad way to help protect yourself. They often come with added encryption, some stronger than others, which can prevent the information between you and the server from being understood by a third party.
Levels of encryption vary, and this is something you have to take up with the VPN service you choose to use. Typically, paid VPNs offer higher levels of security than free ones, simply because security is expensive. Many free VPNs cut corners by using a cheaper form of security.
Encrypting your data is a good thing, because it’s much better that a hacker intercepts a bunch of “useless” encrypted information that they can’t understand than if they were to intercept a bunch of information in plain text that they could easily read and understand. If they can’t understand it, or make sense of it, then it’s of no use to them.
VPNs can get you around institutional blocks
Certain VPNs can even get you around annoying website blocks and censorship while at school or at work. Often times, these institutions block certain web domains to prevent unwanted traffic from occurring on the network so that bandwidth usage is kept as low as possible for everyone, but this can be a major intrusion when you need to get something done online.
Since a VPN is sending and receiving information to and from a different server online, one can help get you around these blocks because the institution you’re at won’t actually know you’re visiting a website that’s blocked in the first place.
Just don’t get caught on websites you shouldn’t be on while you’re in school or at work, because although you’ve demonstrated great skills at getting around a block, you’ve probably just broken a rule that could get you in trouble or fired.
How to use a VPN on your iOS device or Mac
Using a VPN on your iOS device and your Mac is a good idea in most scenarios where you want additional privacy and security, but the process of using a VPN on each is different in many ways. We’ll go over how you can use a VPN for both below.
How to use a VPN on iPhone or iPad
VPNs can be had on your iOS device by downloading VPN apps from the App Store or by configuring your own VPN configuration profile in the device’s Settings app. Most of the time, downloading a VPN service from the App Store is the easiest route to take.
TunnelBear, which is the VPN we’ve used in our example, provides a free VPN service for its users with limited data usage every month. After installing the app from the App Store and following the on-screen instructions, all you need to do is turn the VPN on from your Settings app, which is done with the toggle switch from the main Settings app screen.

After toggling this on, you should see “Connecting…” for a few seconds until the VPN finally establishes a connection. You’ll know you have established a connection when you see a “VPN” icon in your Status Bar.
How to use a VPN on Mac
VPNs for your Mac can get a little bit more complicated. Most VPN apps require you to toggle the VPN on from the app itself, and the only way you toggle them from your System Preferences app is if you added them there yourself to begin with. They can be had from the Mac App Store, as well as all around the internet on the webpages of VPN companies.
Once again, we’ll just use TunnelBear for our example, which is a free VPN you can use on your Mac with a limited data cap each month. Once installed by following the on-screen instructions, all you do is click on the TunnelBear app icon in your Menu Bar to open the VPN’s toggle interface, and you turn the VPN to the on position.
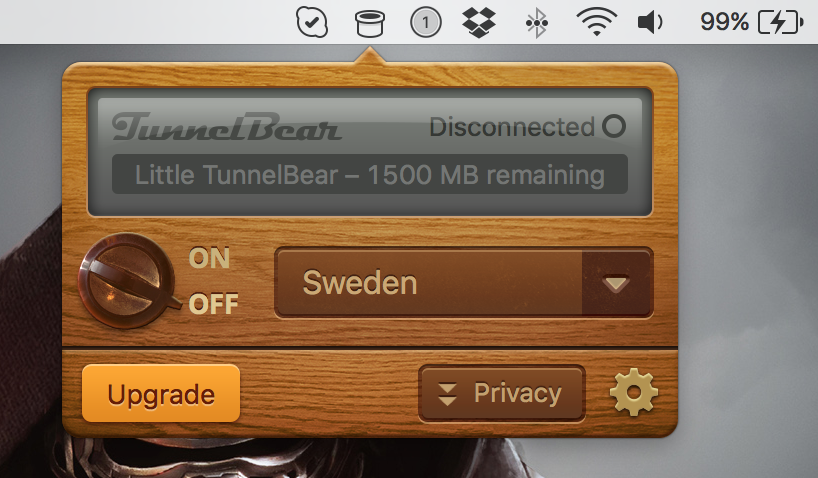
Just like in iOS, you’ll see it attempt to connect for several seconds, and then it’ll let you know when it’s connected. Unfortunately, unlike iOS, macOS doesn’t show a “VPN” icon in the Menu Bar to let you know when you’re protected, but you can always check the status of your VPN from the VPN interface itself, depending on the app you use – for TunnelBear, it does.
Conclusion
Using a VPN isn’t all that hard, and the privacy and security benefits are well worth the money you might pay to get a good-quality VPN service running on your iOS device or Mac. Although there are a few good free VPNs out there, they’re typically free because they come with caveats, and this is something to keep in mind.
Related:
Do you use a VPN? If so, why? Share in the comments!