Check out these tips to make the most of the Apple Notes app on your iPhone, iPad, or Mac and take your note-taking to the next level.

We’ve used an iPhone to demo most of the steps, but they also work on iPad and Mac.
1. Add more than just text
The Notes app is not limited to just text-based entries. You can use it to insert the following:
- Checklist
- Table
- Attach a file from the Files app
- Record audio and even see its transcription
- Insert photo and video
If you are on an iPhone, use the toolbar above the keyboard to do all of the above.

And if you’re on an iPad or Mac, you will find the tools to add a checklist and insert files at the top of the Notes app.

2. Use it as a document scanner
Similar to Apple Files and third-party apps like Google Drive, you can scan physical documents, cards, pamphlets, and more directly in the Notes app. These scans are saved to iCloud and become available on all your devices.

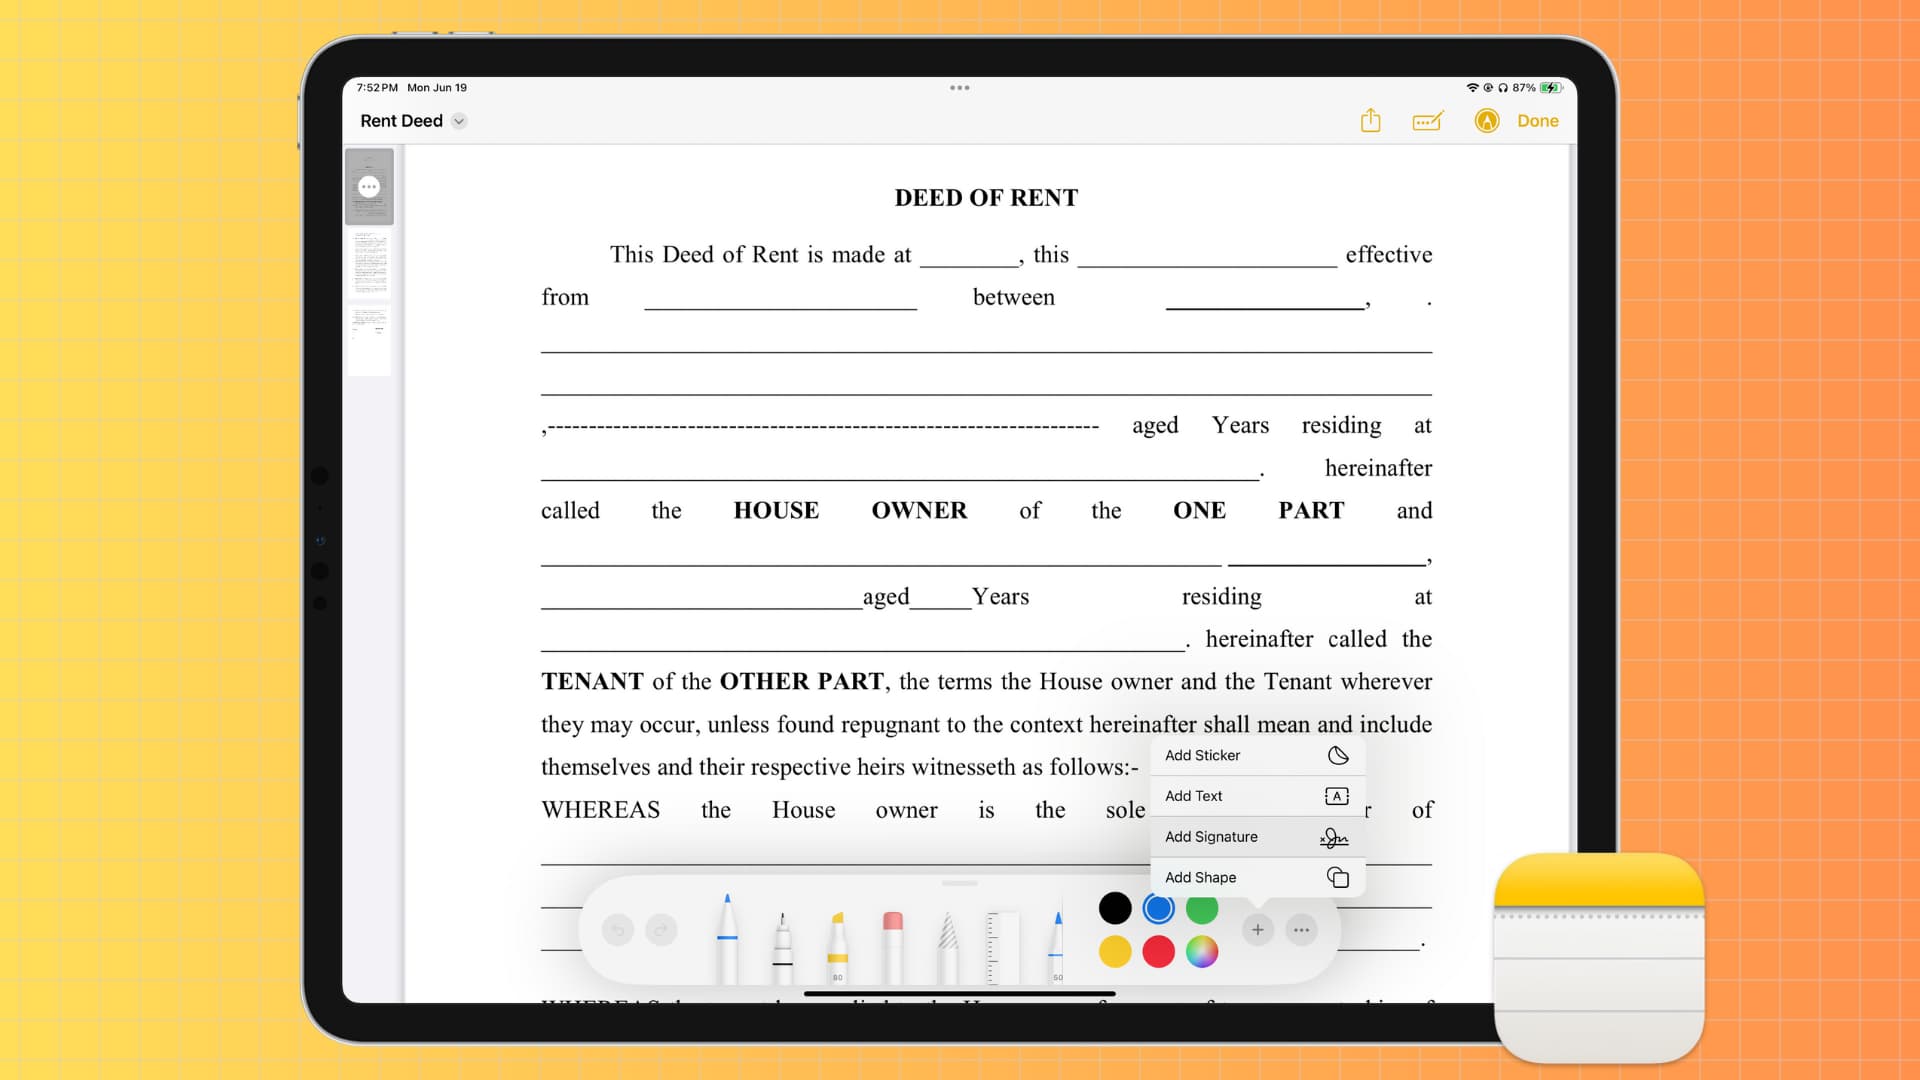
3. Mark up scanned documents
The Notes app does not limit you to just scanning the document. You can tap the markup button and sketch over it or add shapes and signature.
4. Scan text in the physical world and insert it into your note
Scanning a document adds it to your note as a PDF. But what if you wanted to get the text from a document in your note body?
In this case, you can tap the paperclip icon over the keyboard, choose Scan Text, and then point your phone over the document. Now, wait for your iPhone to recognize the text and hit the Insert button to add it to your note.

5. Draw, sketch, or handwrite in Notes
Tap the pencil icon in a note on your iPhone or iPad and then use your finger or Apple Pencil to draw and handwrite. You will find all the basic tools you need to sketch, fill color, erase, and more.

6. Show Lines and Grids
You can choose to display lines and grids in an empty note body so it’s easy to handwrite or draw. Just remember that your final sketch will not have those lines and grids when you save it as an image or print it.

7. Format text
The Notes app offers a few handy ways to format your text. Simply select the text, tap the Aa button, and then you can use the Title, Heading, Subheading, Monostyled, bold, italic, underlined, or strikethrough effects. Additionally, you can highlight it with color, turn it into a list, add indentation to move the text to the left or right sides, and use block quotes.

If you’re on a Mac, select the text and use the Format option in the top menu bar.
8. Add colored notes
A lesser-known feature of the Notes app is that it allows you to change the text color. You can use it for fun or to improve the presentation of your note.

9. Have it do calculations
If you do budgeting or other similar work in the Notes app, you can simply type the numbers along with mathematical expressions and then enter the equal to sign (=) to get the result.

10. Add links
You can add a hyperlink in a note, just like a web page. Simply select the text and tap the Add Link option from the thin menu strip.

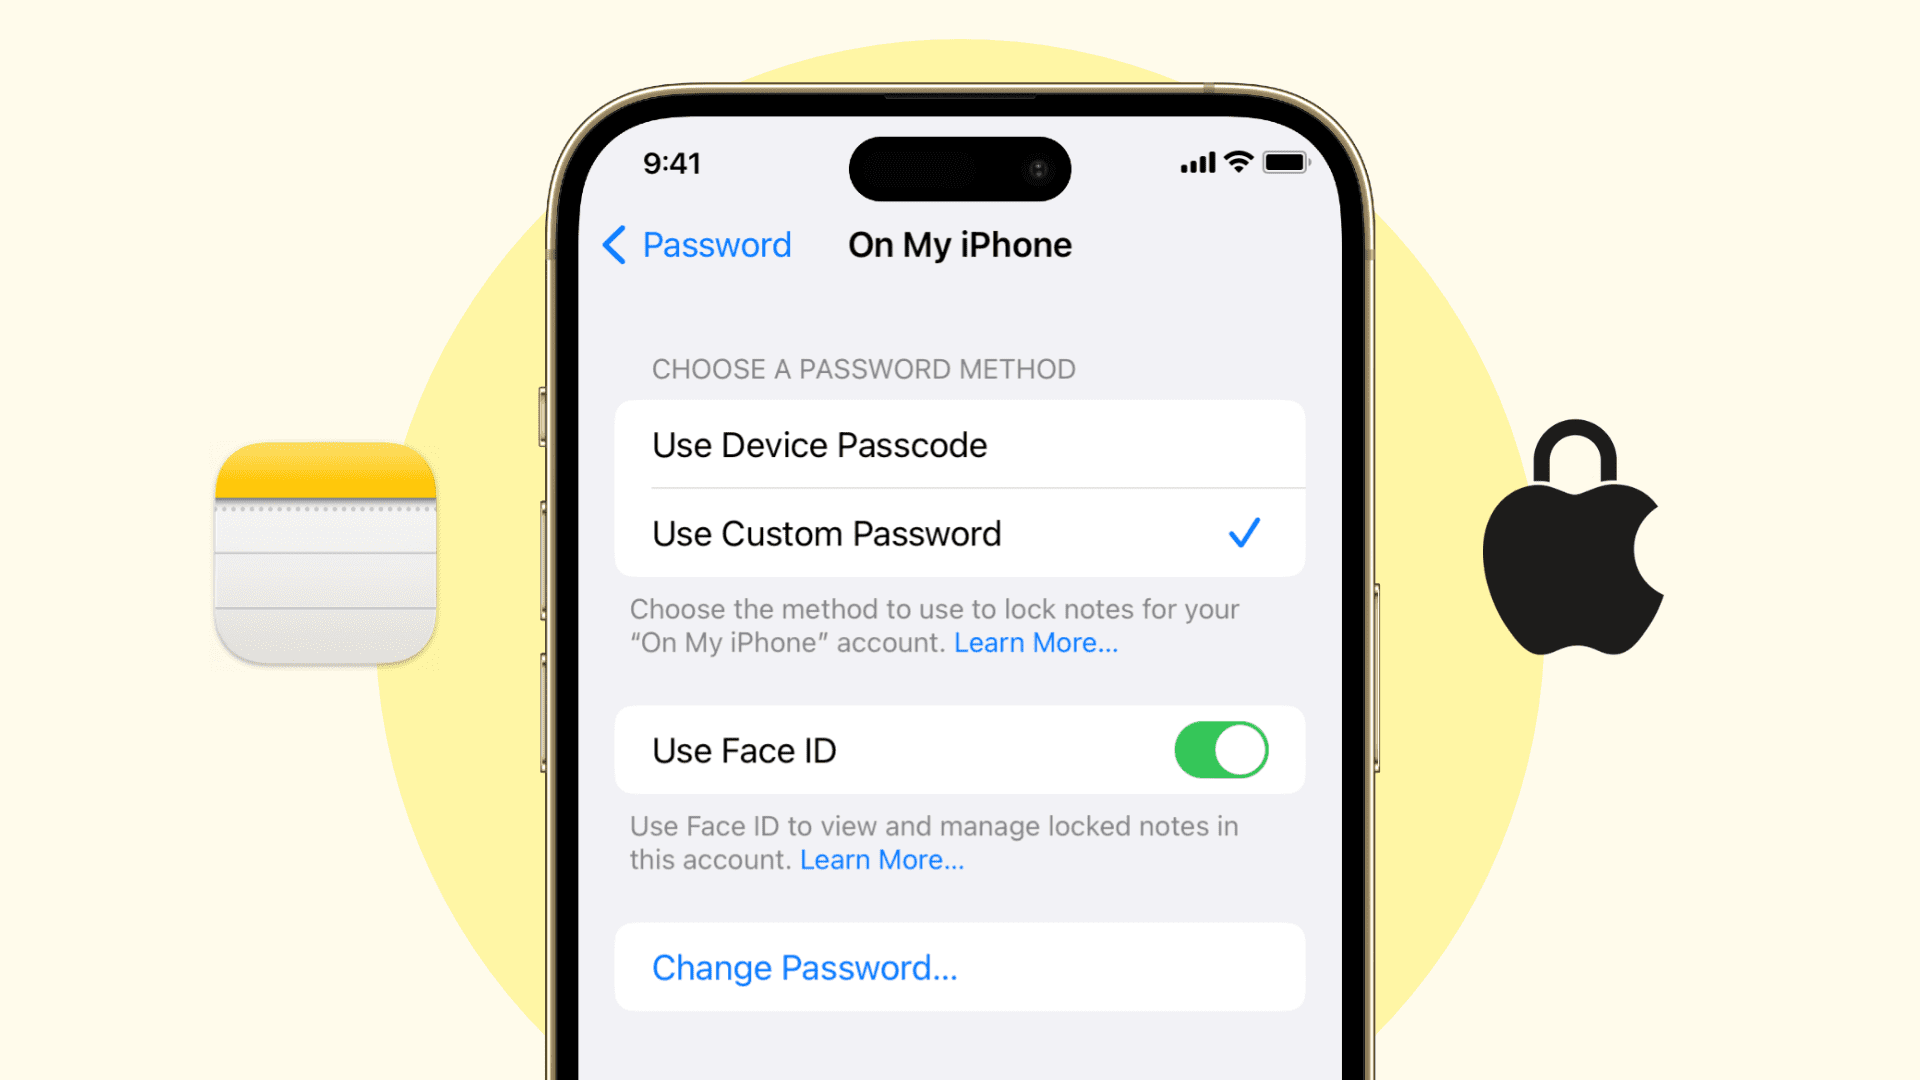
11. Lock your notes
You can add an additional layer of security to your sensitive notes by locking them with the device passcode or a custom code.
Can you keep locked notes unlocked for longer?
After you unlock a locked note, it stays unlocked for 3 minutes on iOS and 8 minutes on Mac, even if you switch to another app. However, the unlocked notes will lock instantly if you tap the padlock icon or lock your device. There is no way to change the 3 or 8-minute secure session to something else.
12. Start new notes with title, heading, or subheading
If you like to keep each of your notes extra organized, you can have the app start every new note with the title or heading. When you go to create a new note, you will see the option to fill in a title or heading, followed by the usual note body.

Go to iPhone or iPad Settings > Apps > Notes and set New Notes Start With to Title, Heading, or Subheading.
On Mac, open the app and click Notes > Settings from the top menu bar. Now, choose an option for New notes start with.

13. Collapse notes sections
If you have added at least two titles to a lengthy note, you can click the arrow for each one to collapse the section. Hit the same arrow to see the contents under that title again.

14. Use Quick Notes
The Quick Notes feature allows you to jot down a thought, link, or draw something without going inside the Notes app. You can learn all about it in our dedicated tutorial.
15. Change the default note size on Mac
While this feature is unavailable on iPhone or iPad, you can set a default text size for your notes’ body on Mac. Simply head to Notes app Settings and pick an option for Default text size.
16. Use your iPhone or iPad to insert media on Mac
Thanks to Apple’s incredible Continuity features, you can use your iPhone or iPad to scan a document and add it directly to the Notes app on your Mac. You can also use it to take a picture or draw a sketch and add it to notes on Mac.
Simply right-click in a note body on Mac and select Insert from iPhone or iPad.
17. Change how notes are sorted and grouped
You can go to a note folder and tap the ellipsis icon (three dots inside a circle) to sort and group your notes based on the preferred parameter. If you’re on Mac, click the View option in the menu bar and use the Sort By or Group By Date options.
In addition to making this change from inside the Notes app, you can also go to iOS Settings > Apps > Notes and explore the sort options under the Viewing section.

18. Create folders
You can better organize your notes by creating folders. This way, you can keep your work, personal, and other notes properly categorized, making it easier to locate and see all related entities in one spot.
19. Nest sub-folders under a main folder
If you have several folders, you can add one under another just by dragging it below the main folder’s name.

20. Use Smart Folders
In addition to creating folders manually, you can set up Smart Folder in Notes, which will automatically add relevant notes that fit the set criteria. As an example, you can create a Smart Folder that will bundle all notes with a specific tag in one spot.
21. Open a note in a new window
If you’re on an iPad or Mac, you can choose to open a note in a new window for improved multitasking.
- Mac: Right-click over a note and choose Open in New Window.
- iPad: Touch and hold a note and select Open in New Window.
22. Pin important notes to the top
If you have an important note that you frequently reference, touch and hold it, and then select the Pin Note option. From now on, this note will stay pinned above your other notes.

23. See notes in the gallery view
By default, all notes are shown in list view, but you can tap the ellipses button and choose to view them as a gallery.

24. View all attachments in one place
You can tap the Search bar and choose to view just the notes with attachments. Additionally, you can go inside a folder and then tap the ellipses icon to view all attachments in the notes. Attachments include photos, videos, scans, websites, audio files, documents, and so forth.

25. Access your phone call recordings
iOS 18 adds phone call recording to iPhones, and if you use that, you will find all your call recording files in the Notes app.

You can add a word after the pound (#) sign to convert it into a tag. As an example, I can add the #iDB tag to my work notes. After that, I can tap this tag from the bottom of the folder’s screen and see all notes with this tag.

Conversely, if you do not like this feature, you can go to iOS Settings > Apps > Notes and turn off Auto Convert to Tag.
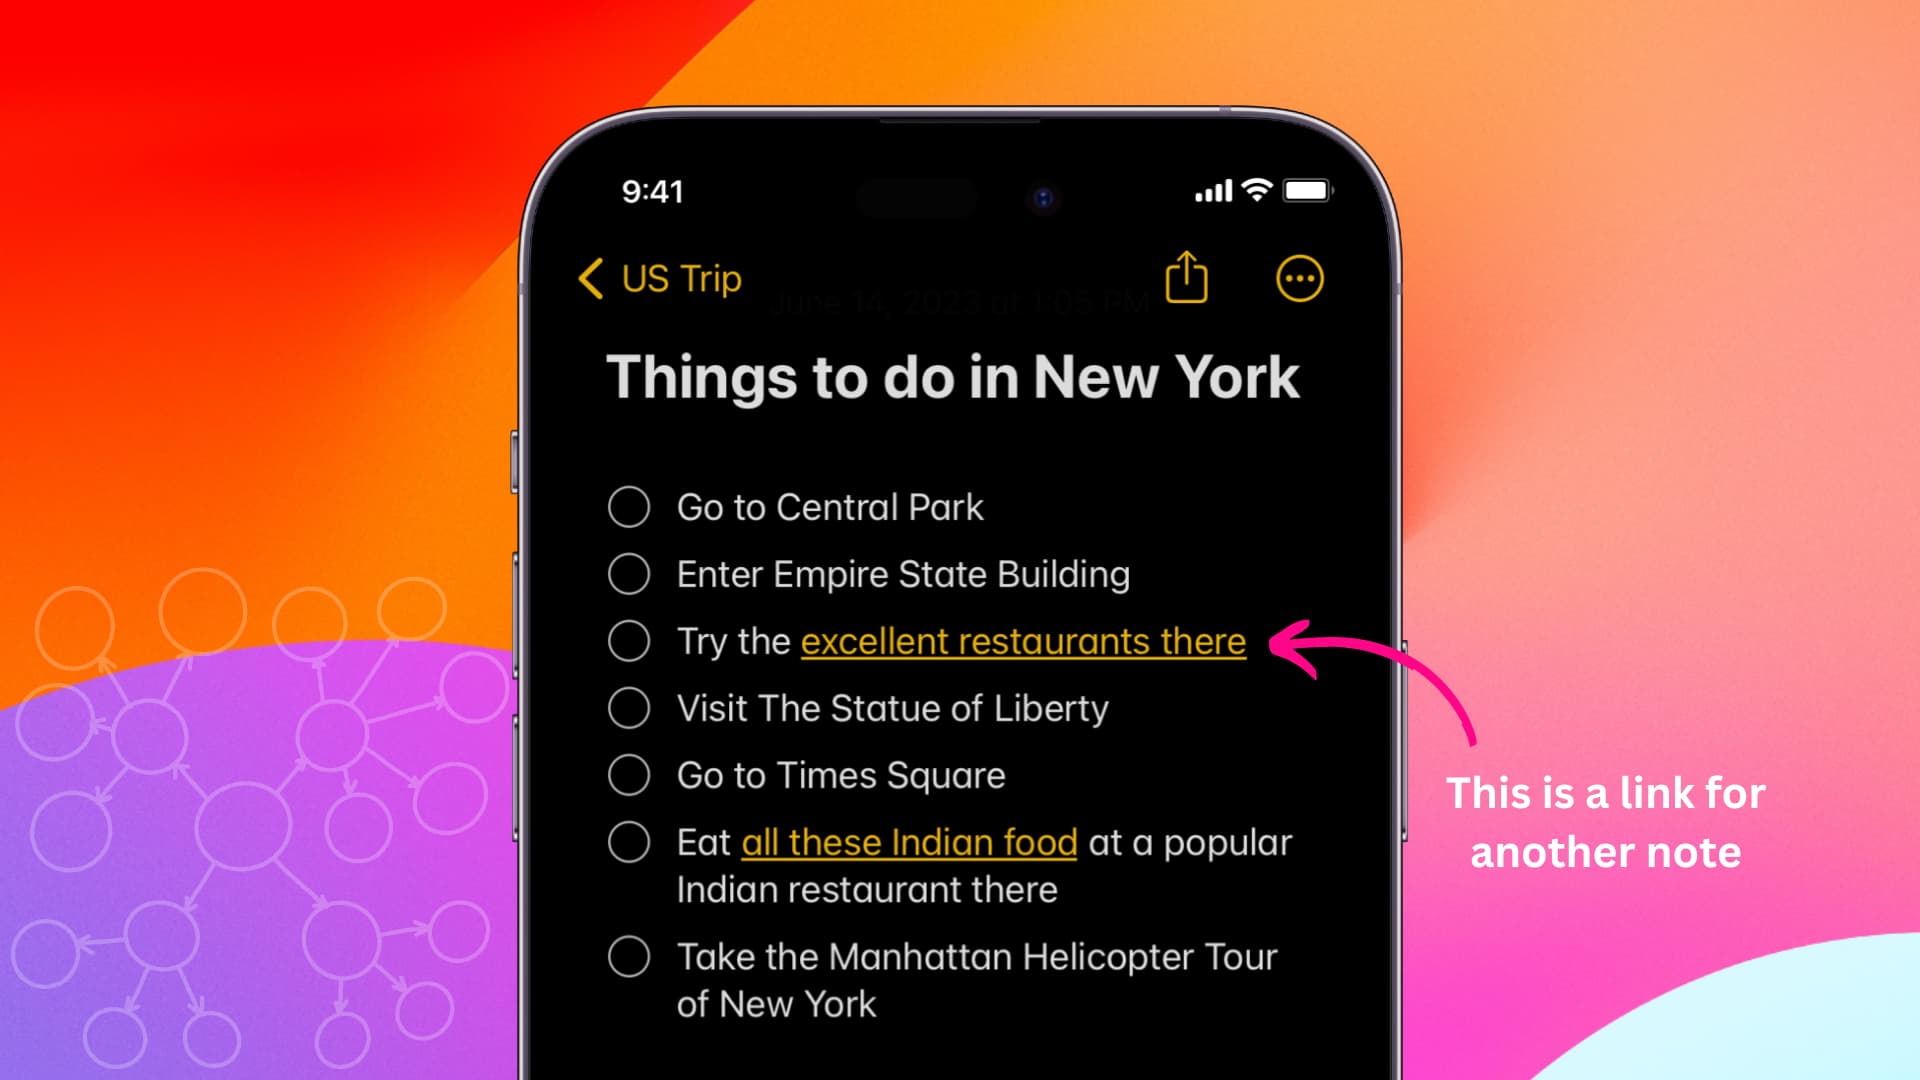
27. Links notes together
The Apple Notes app has the unique feature of linking related notes with one another. For instance, if you’re creating a note talking about things to do in New York, you can link it to another existing note that covers the best restaurants there.
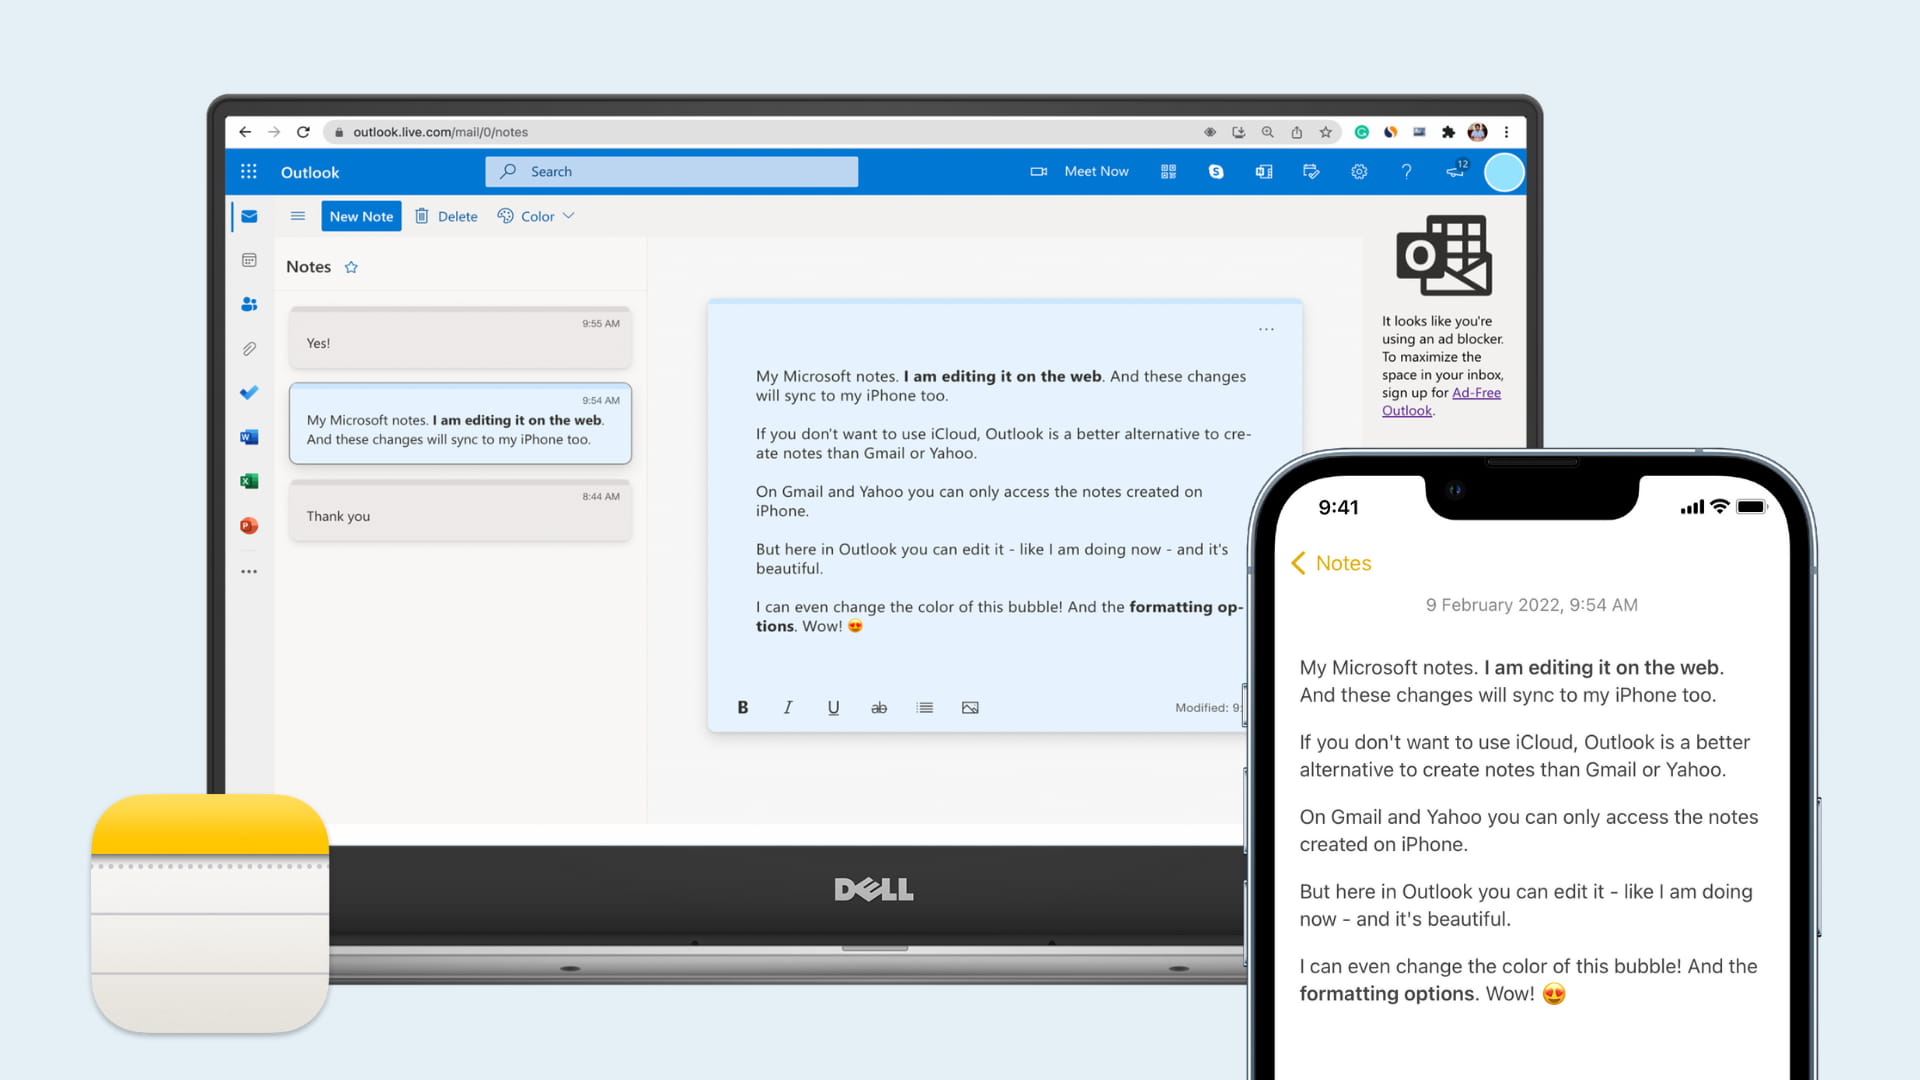
28. Save notes to Gmail or Outlook
If you do not want to save notes to Apple’s iCloud, you have the option to add your Yahoo, Gmail, Outlook, or other accounts to your iPhone, iPad, or Mac and save notes to it.
But remember that several features, such as locking the note with a passcode, adding files, and more, won’t work if you save them to a non-Apple service.

29. Save your notes offline
If you do not want to store your notes in the cloud, you have the option to save them locally on your iPhone, iPad, or Mac. These offline notes stay on the device and do not sync to other devices.
You can share a note or note folder with others and collaborate together on it. This is also useful if you rely on Notes for family checklists instead of creating something like a shared Reminders list.

31. Save a copy of a note to another service
If you want to export a note elsewhere, just tap the share button and pick an option from the iOS Share Sheet. Remember to tap the Collaborate button and set it to Send Copy.

32. Access it on non-Apple devices
Lastly, if you have non-Apple devices in your mix, you should know that you can access your iOS and Mac notes there.
Do you have some tips for Notes that you’d like to add? Mention them in the comments below.
Check out next: