Learn how to create, use, and manage smart folders in Apple Notes on iPhone, iPad, and Mac to automatically organize your thoughts.
You can easily file your to-dos, sketches, thoughts, and other notes into folders in Apple’s built-in Notes app. In addition to regular folders, the Smart Folders feature lets you create special folders that automatically collate notes based on conditions you specify.
You can organize smart folders efficiently with tags, mentions, checklists, attachments, various notes (including pinned and locked notes), and more, as well as sort them by date created, edited, shared, etc.
Create a Smart Folder in Apple Notes on iPhone or iPad
1) Open the Notes app on your iPhone or iPad and swipe right until you get to the folder selection screen.
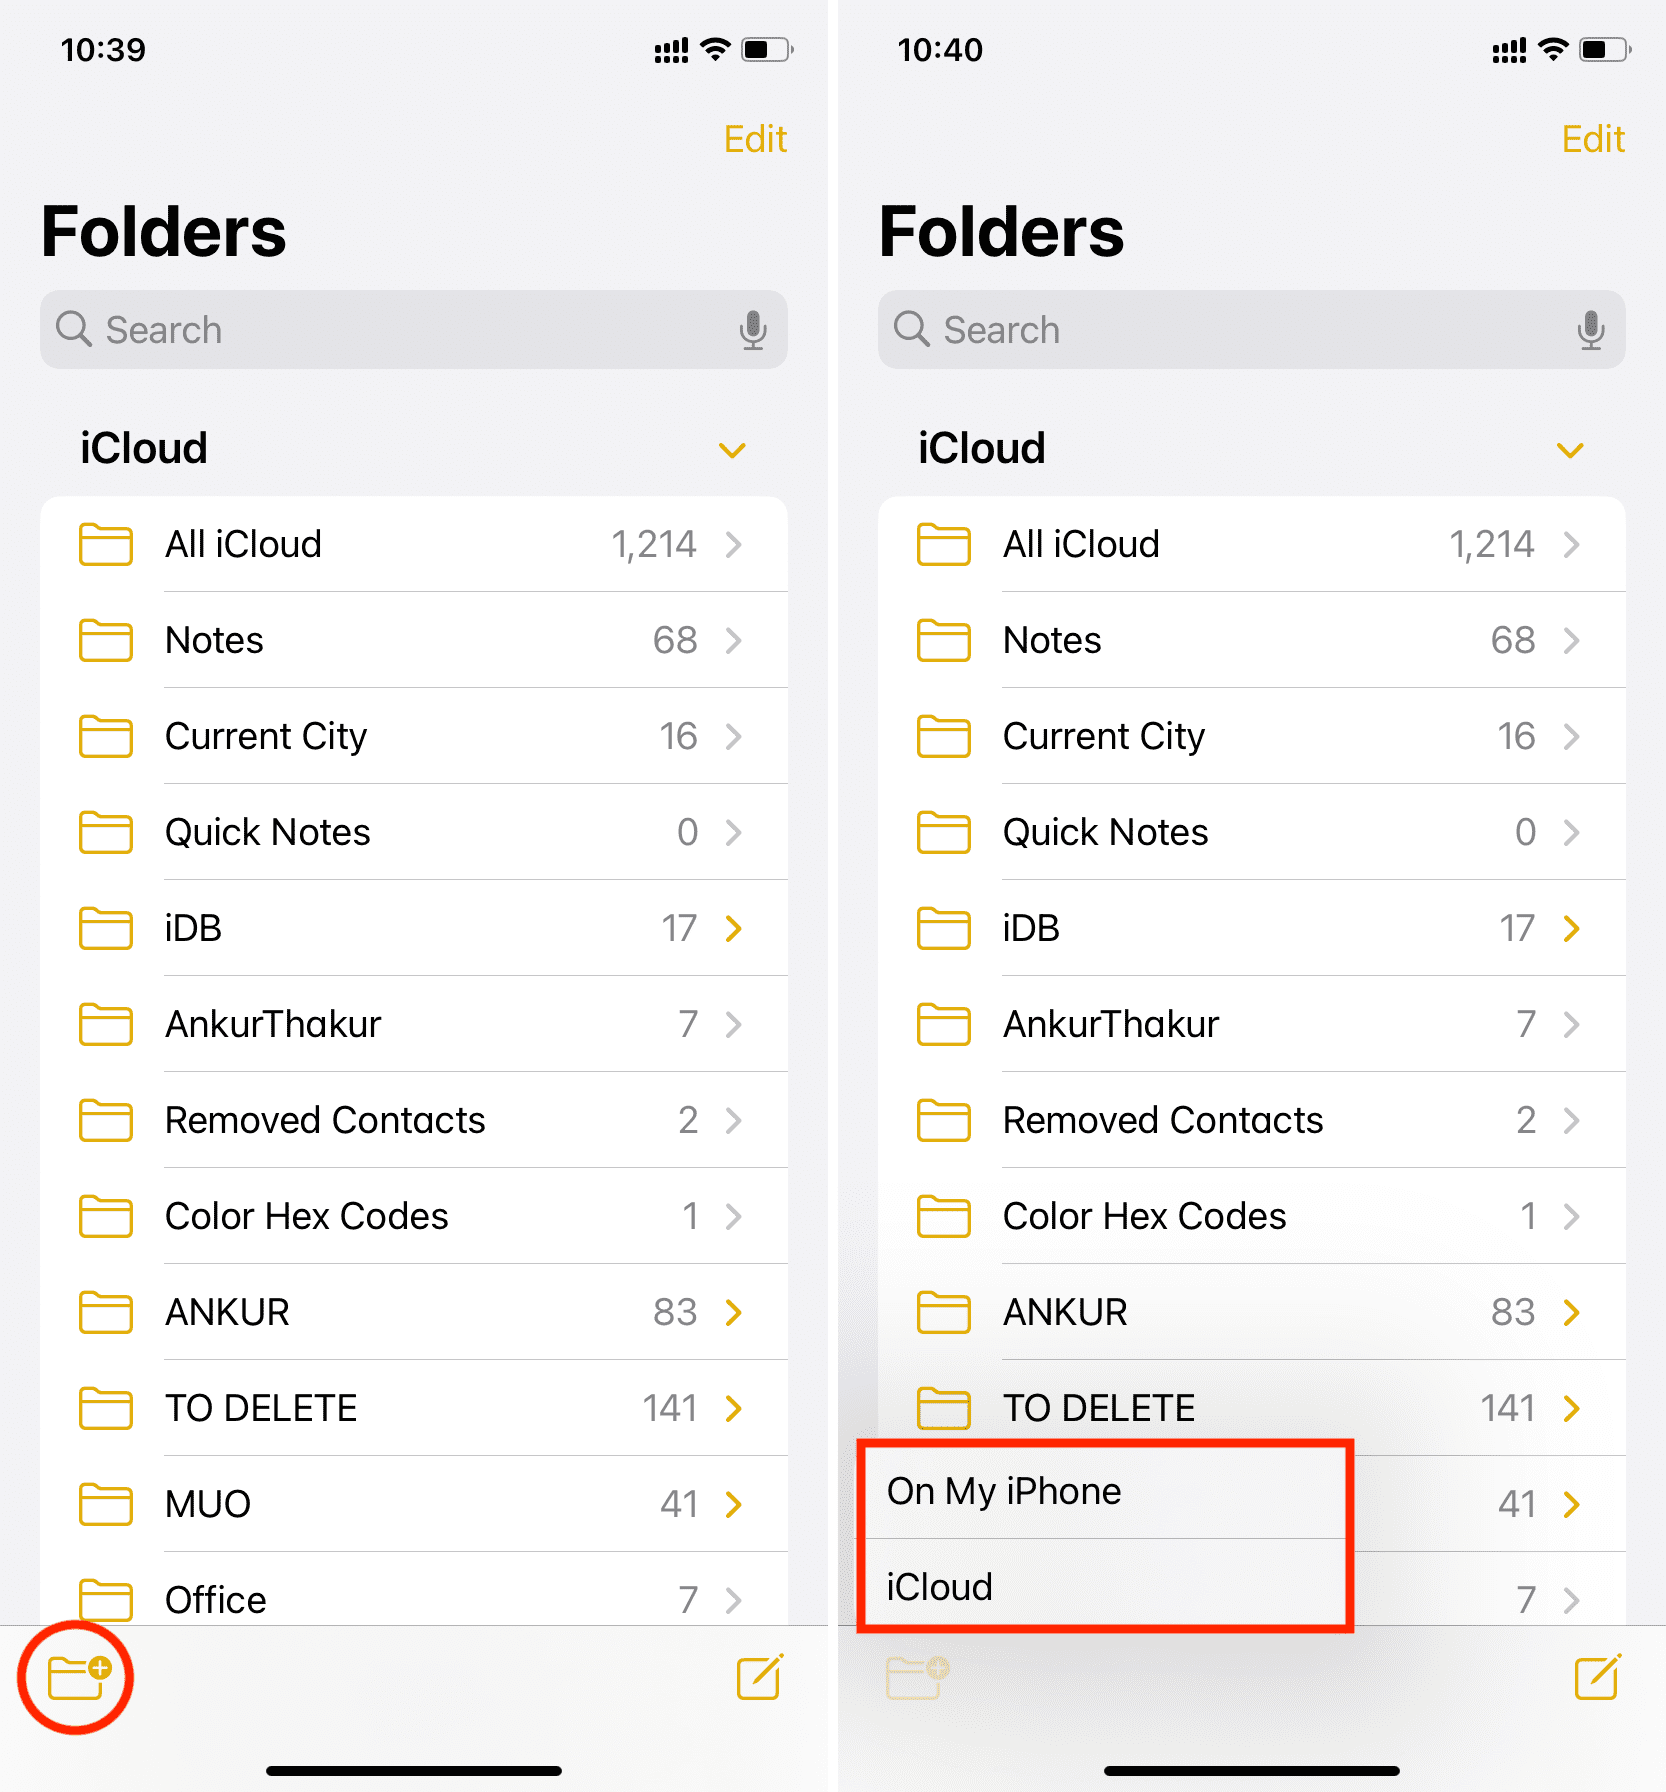
2) Tap the New Folder in the bottom-left corner to create a new folder. If you have multiple accounts in Notes, choose the account such as iCloud or “On My iPhone” to create your folder in.
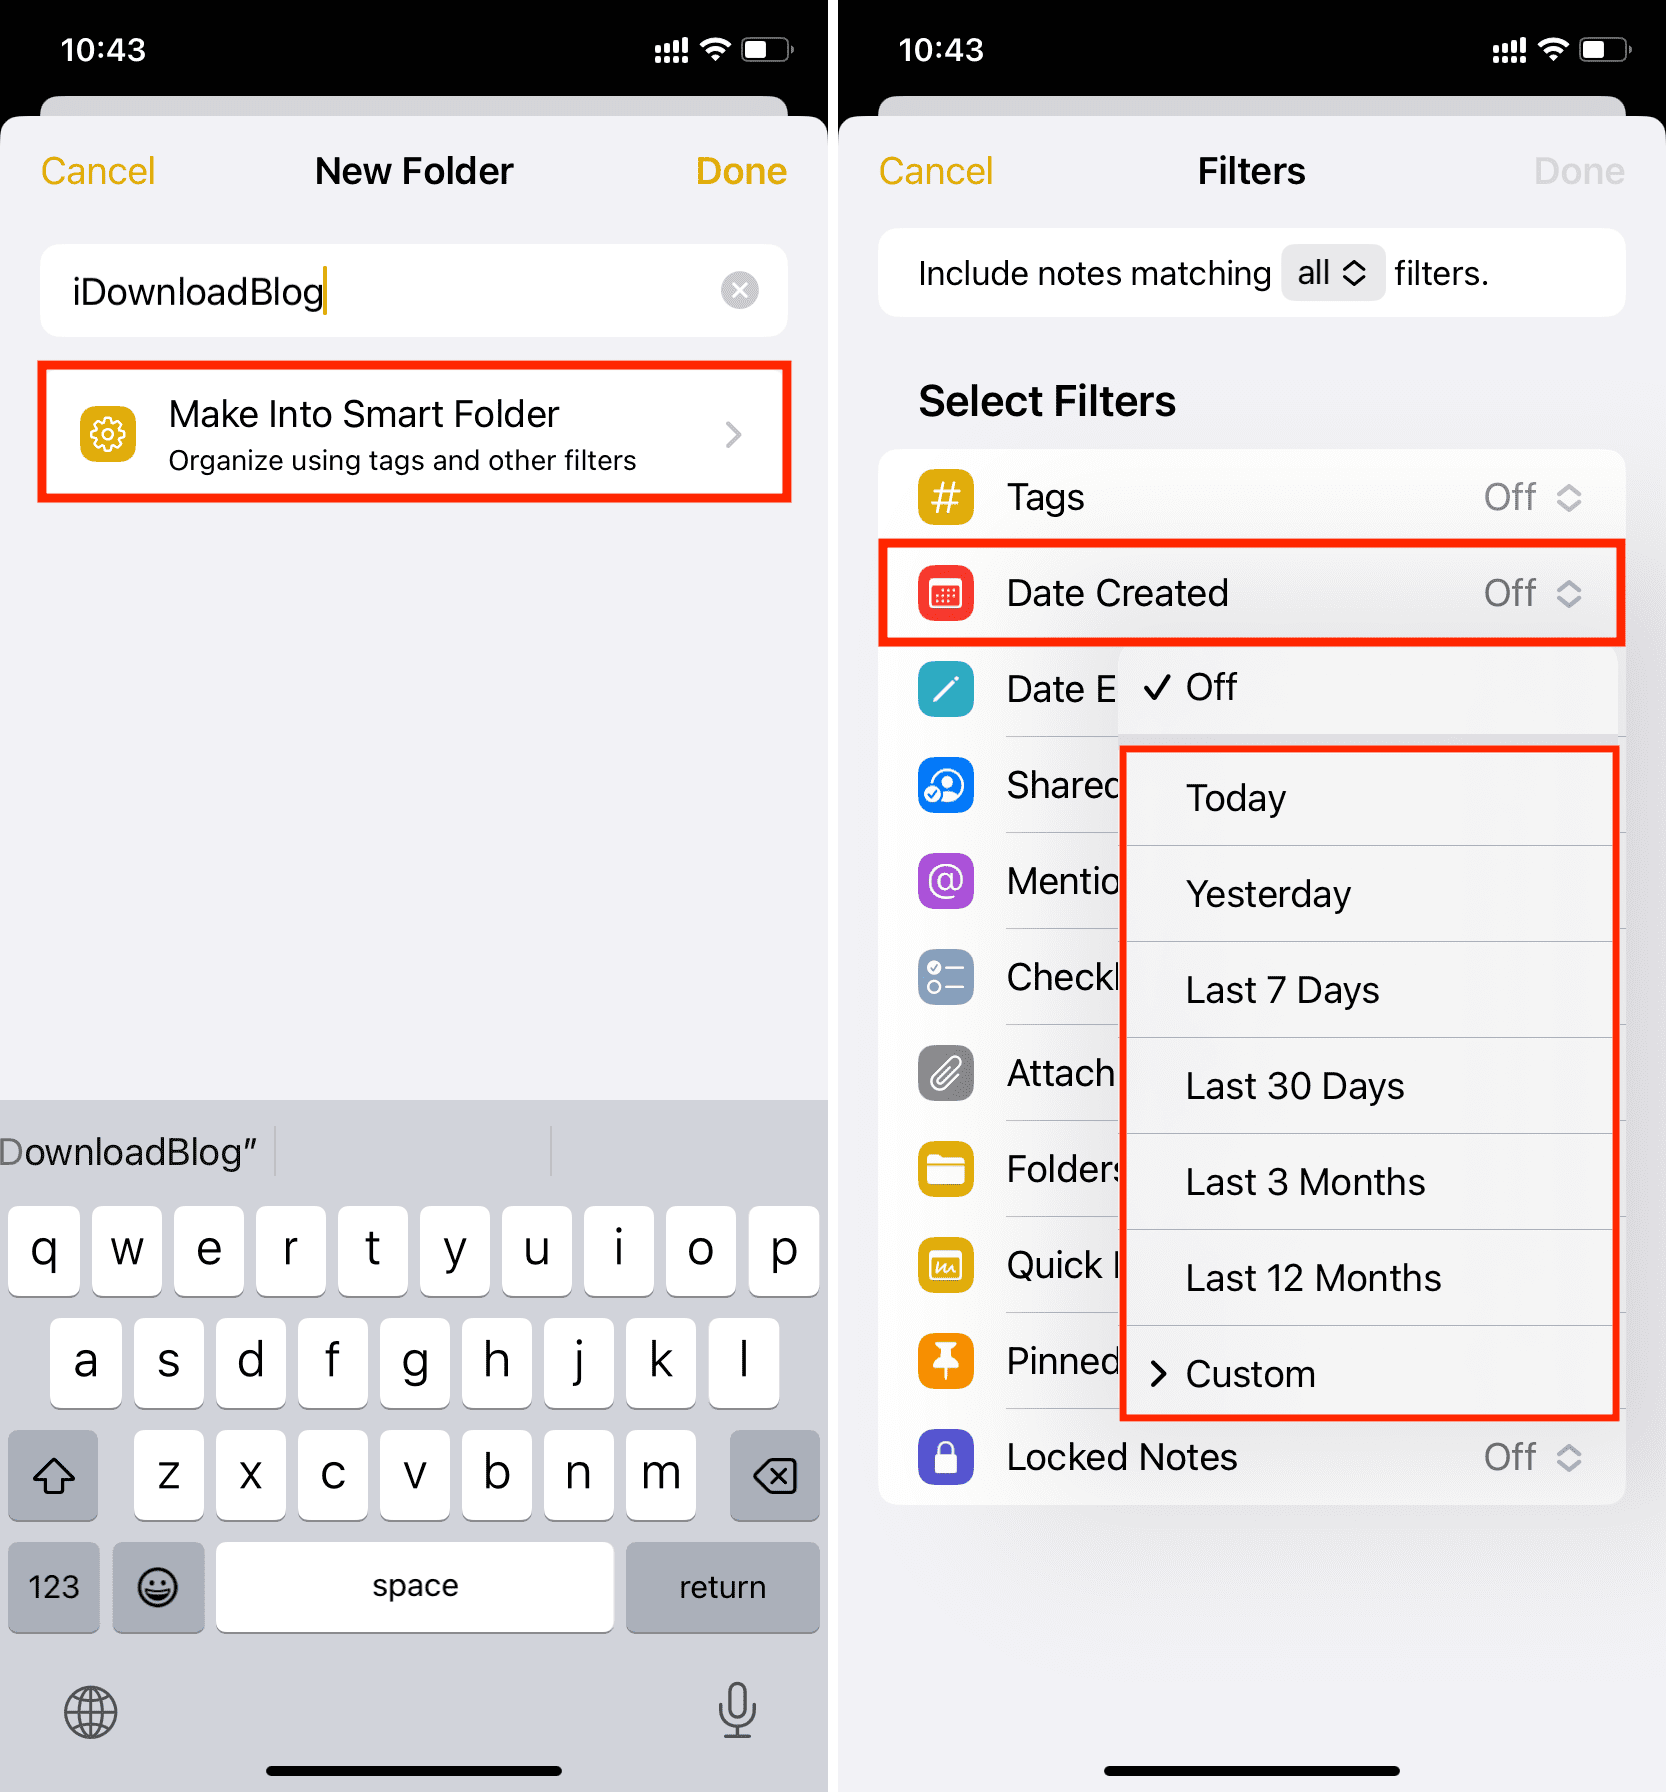
3) Give the folder a custom name reflecting its contents, then choose Make Into Smart Folder.
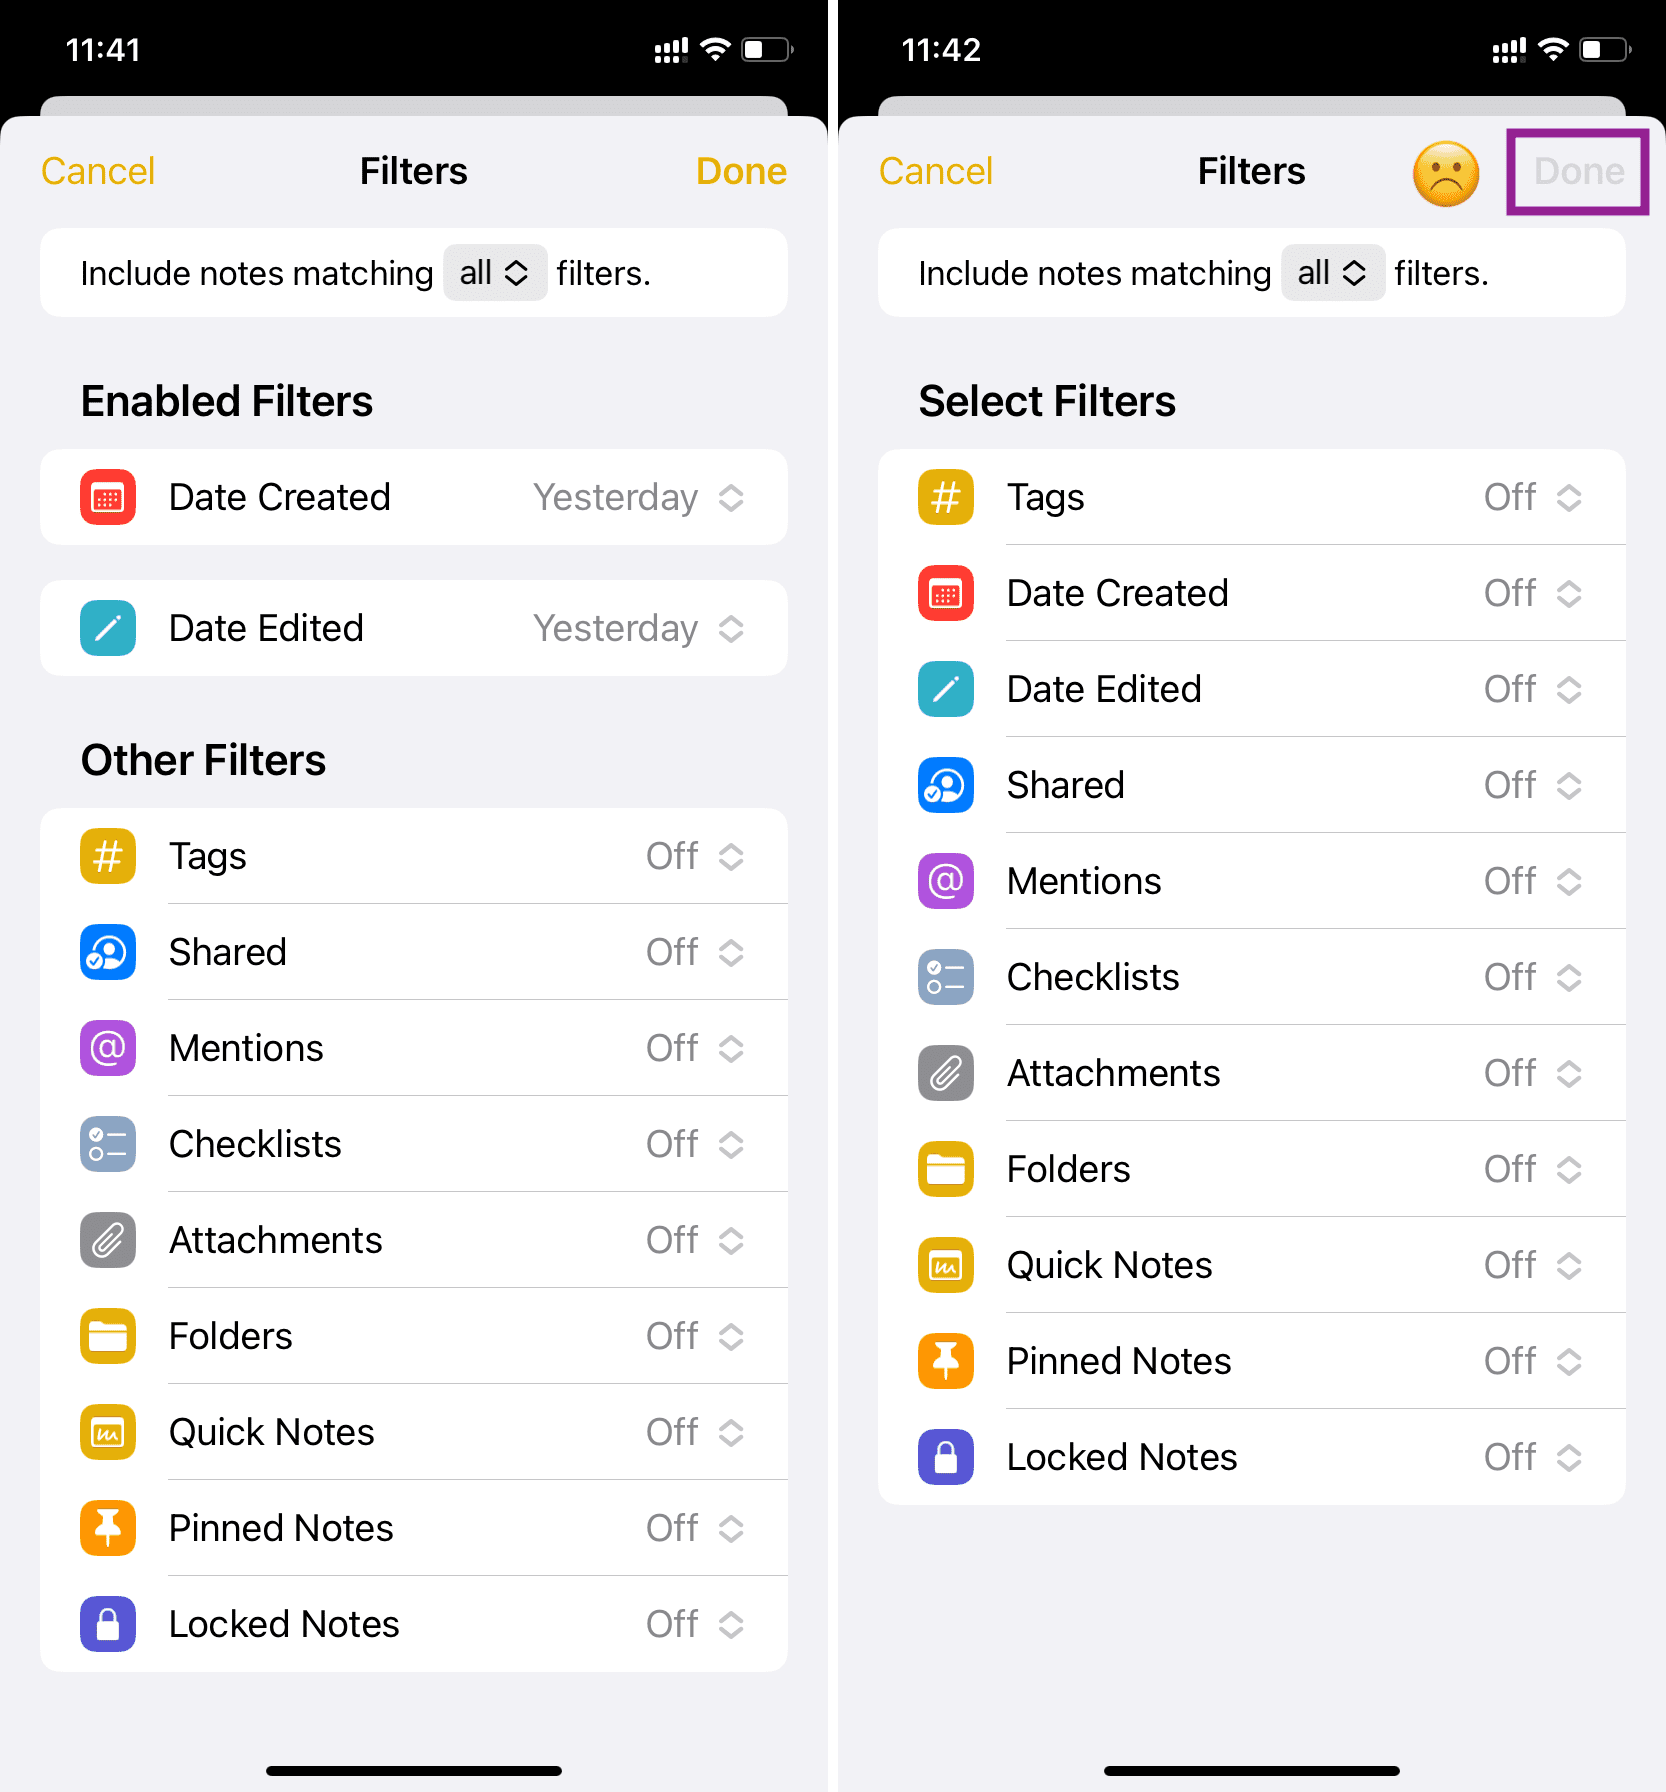
4) On the Filters screen, select a filter and choose a condition that triggers it. You can customize your smart folder with condition filters such as Tags, Date Created, Date Edited, Shared, Mentions, Checklists, Attachments, Folders, Quick Notes, Pinned Notes, and Locked.
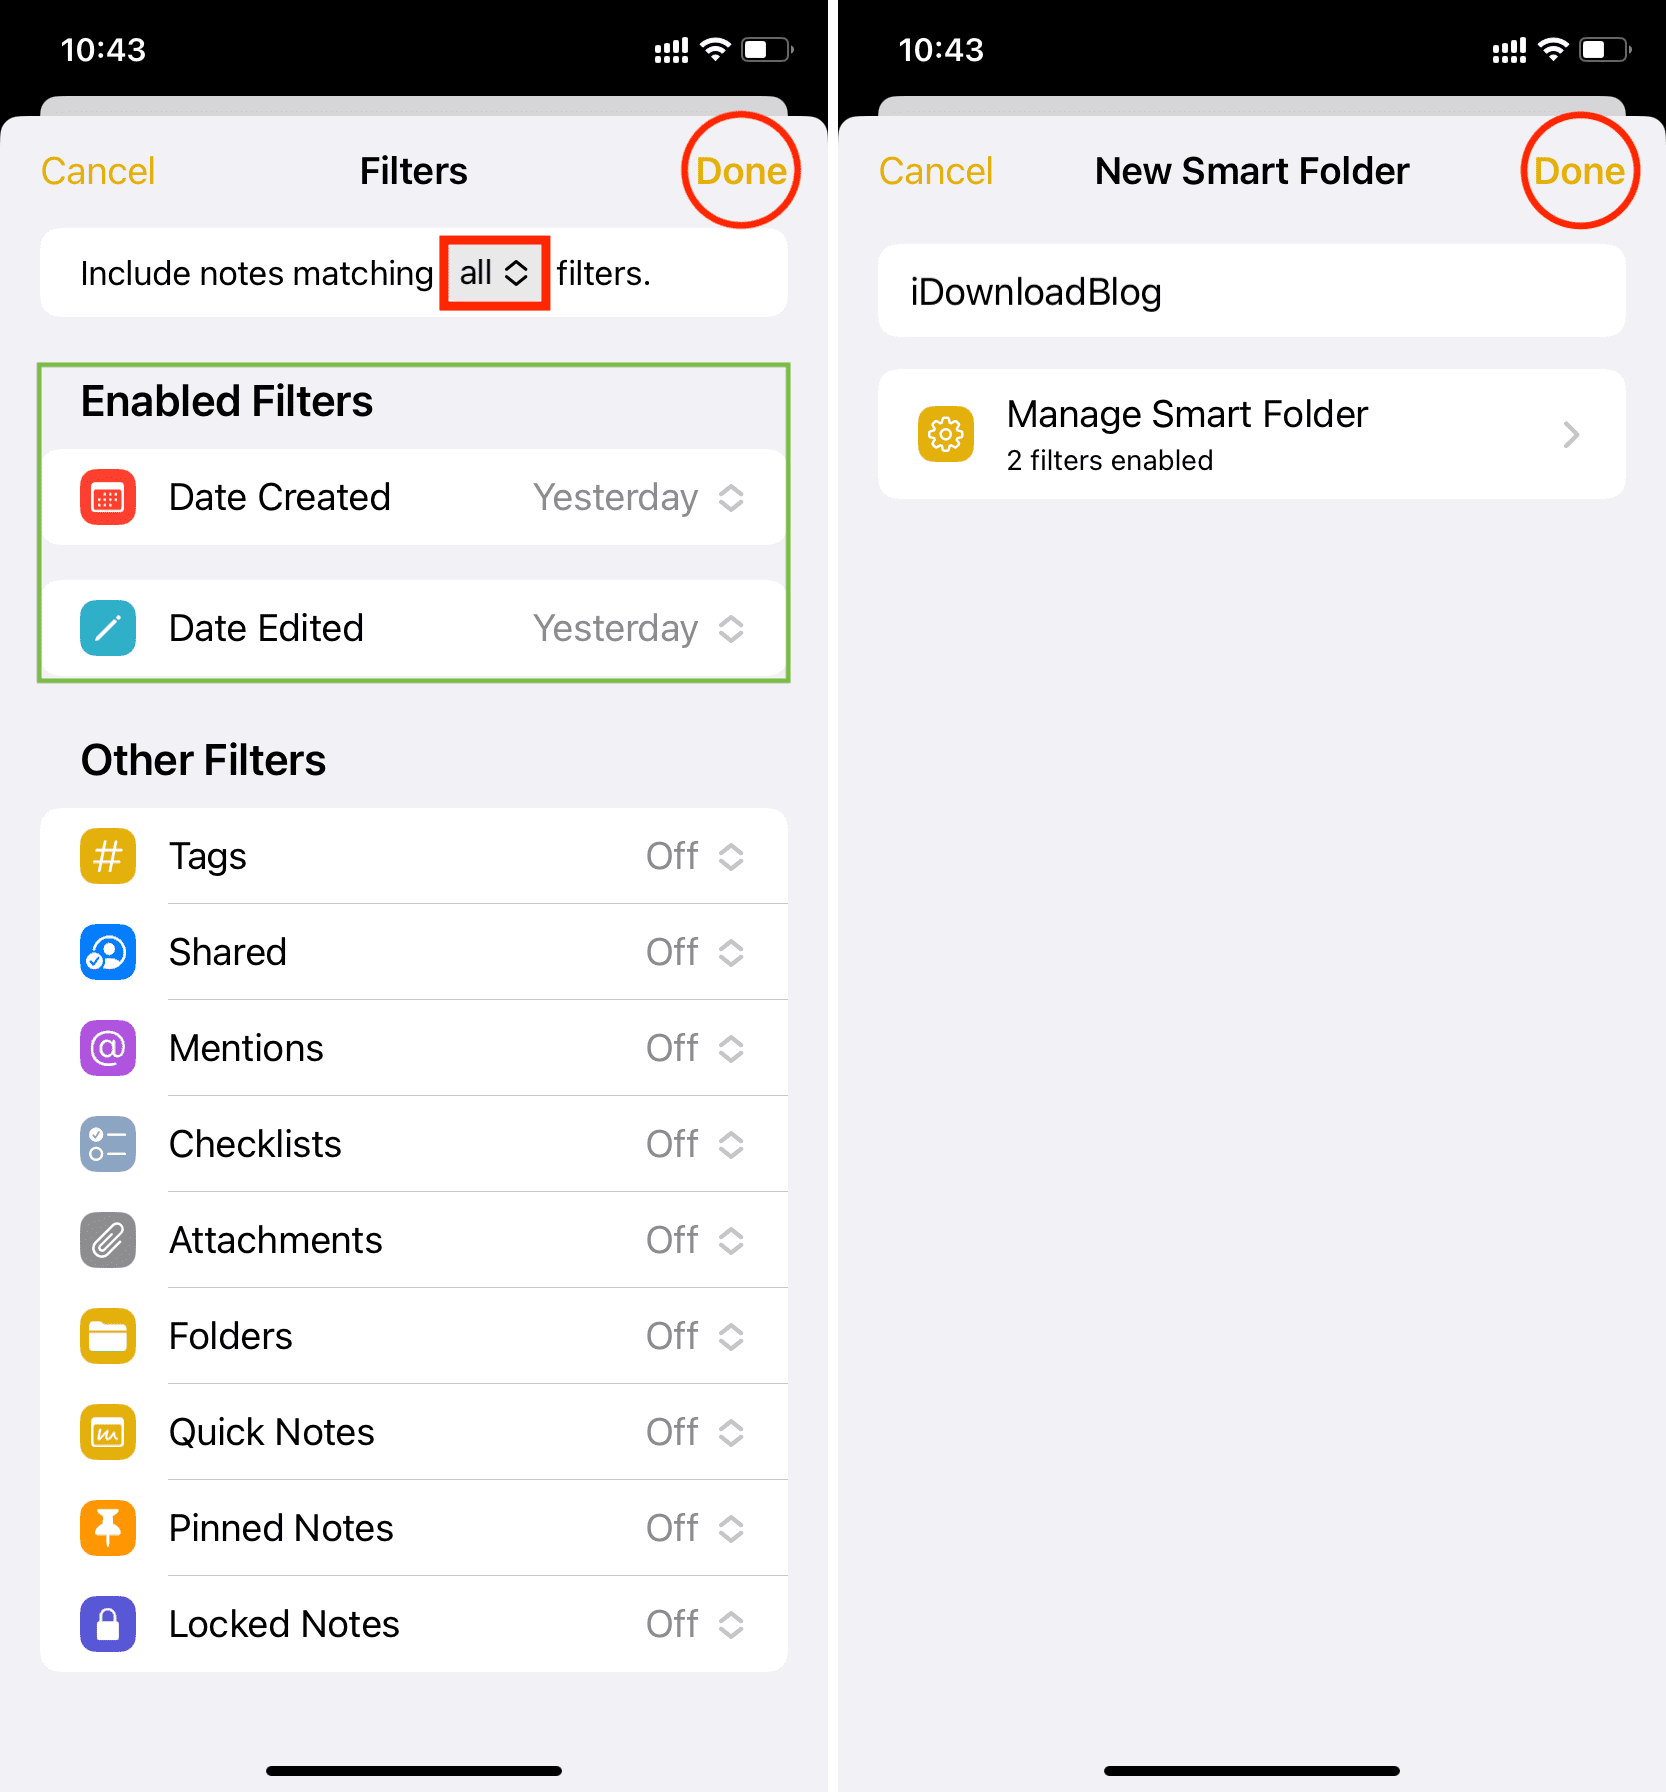
5) Once you’ve configured a filter to your liking, it appears underneath the Enabled Filters heading. You can tap Done to create a smart folder from that single filter or continue adding more filters. Hit the menu at the top of the Filters screen to choose if the smart folder collates notes matching all the selected filters or any single filter.
6) Tap Done to create a new smart folder based on the specified conditions.
Any notes matching these conditions appear inside your smart folder automagically. If you later change a specific note included in your smart folder to the point where it no longer fits a filter, it will automatically disappear from there.
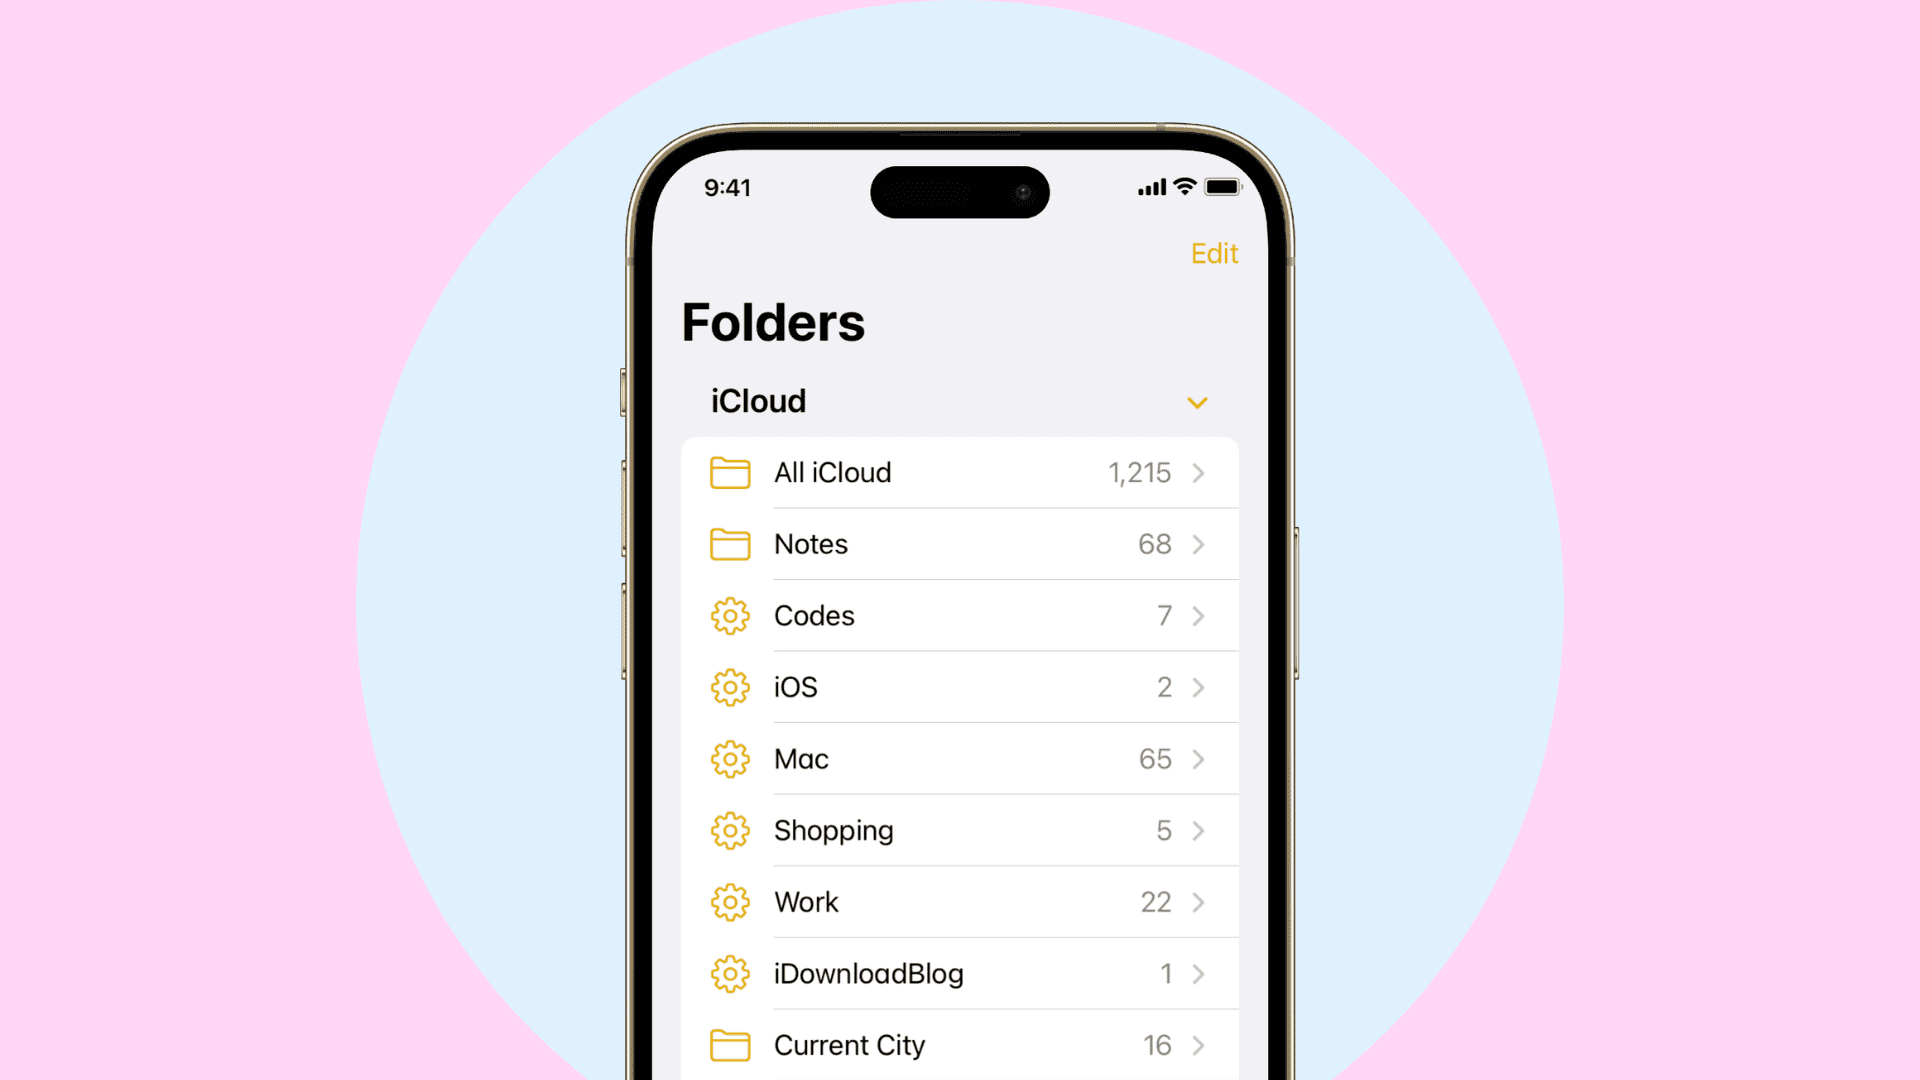
Smart folders are listed on the Folders screen alongside your Notes accounts and regular folders, with one distinction — Smart Folders show a cog wheel icon.

Can I manually add notes to a Smart Folder?
The Notes app automatically manages notes in smart folder based on your filters. You cannot add or remove notes manually from a Smart Folder. The only way to change what notes appear in a Smart Folder is to edit the folder and add, remove, or change its filters.
For instance, I have a Smart Folder that automatically lists all notes that have the #iDB tag. If I want to remove a note from this Smart Folder, I will have to edit that note and remove the #iDB tag from there. Once that’s done, that note will no longer be a part of the Smart Folder.
Edit a Smart Folder
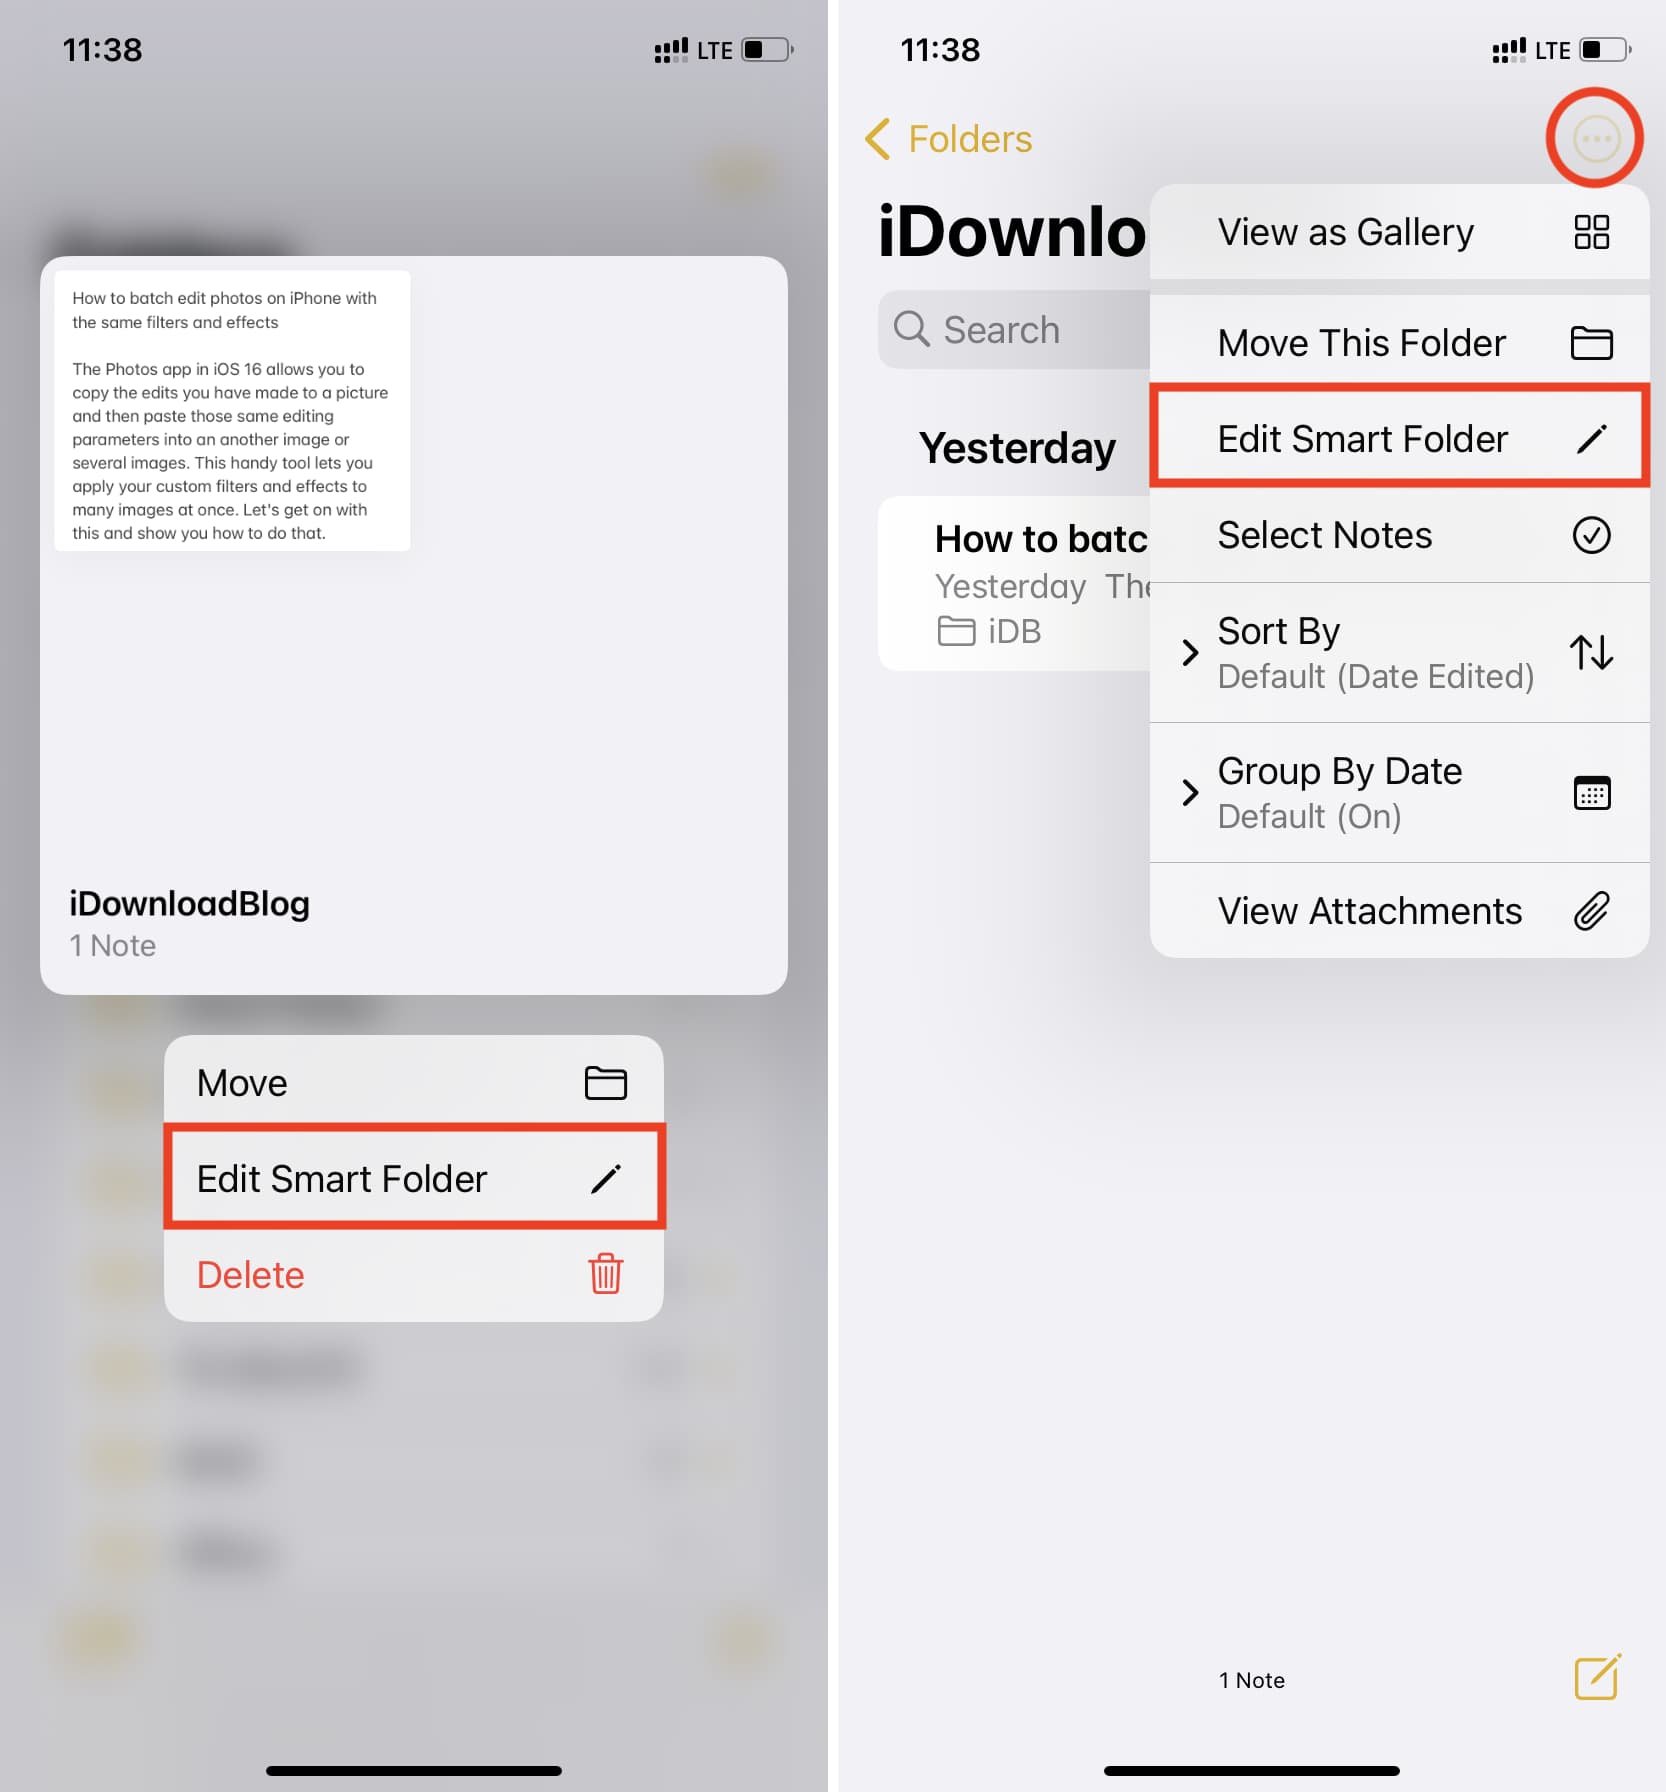
If you’d like to rename a smart folder or change its filters, simply touch and hold it and choose Edit Smart Folder from the menu. You can also open a smart folder, hit the three-dotted button in the top-right corner, and choose Edit Smart Folder from the menu.
Move a Smart Folder
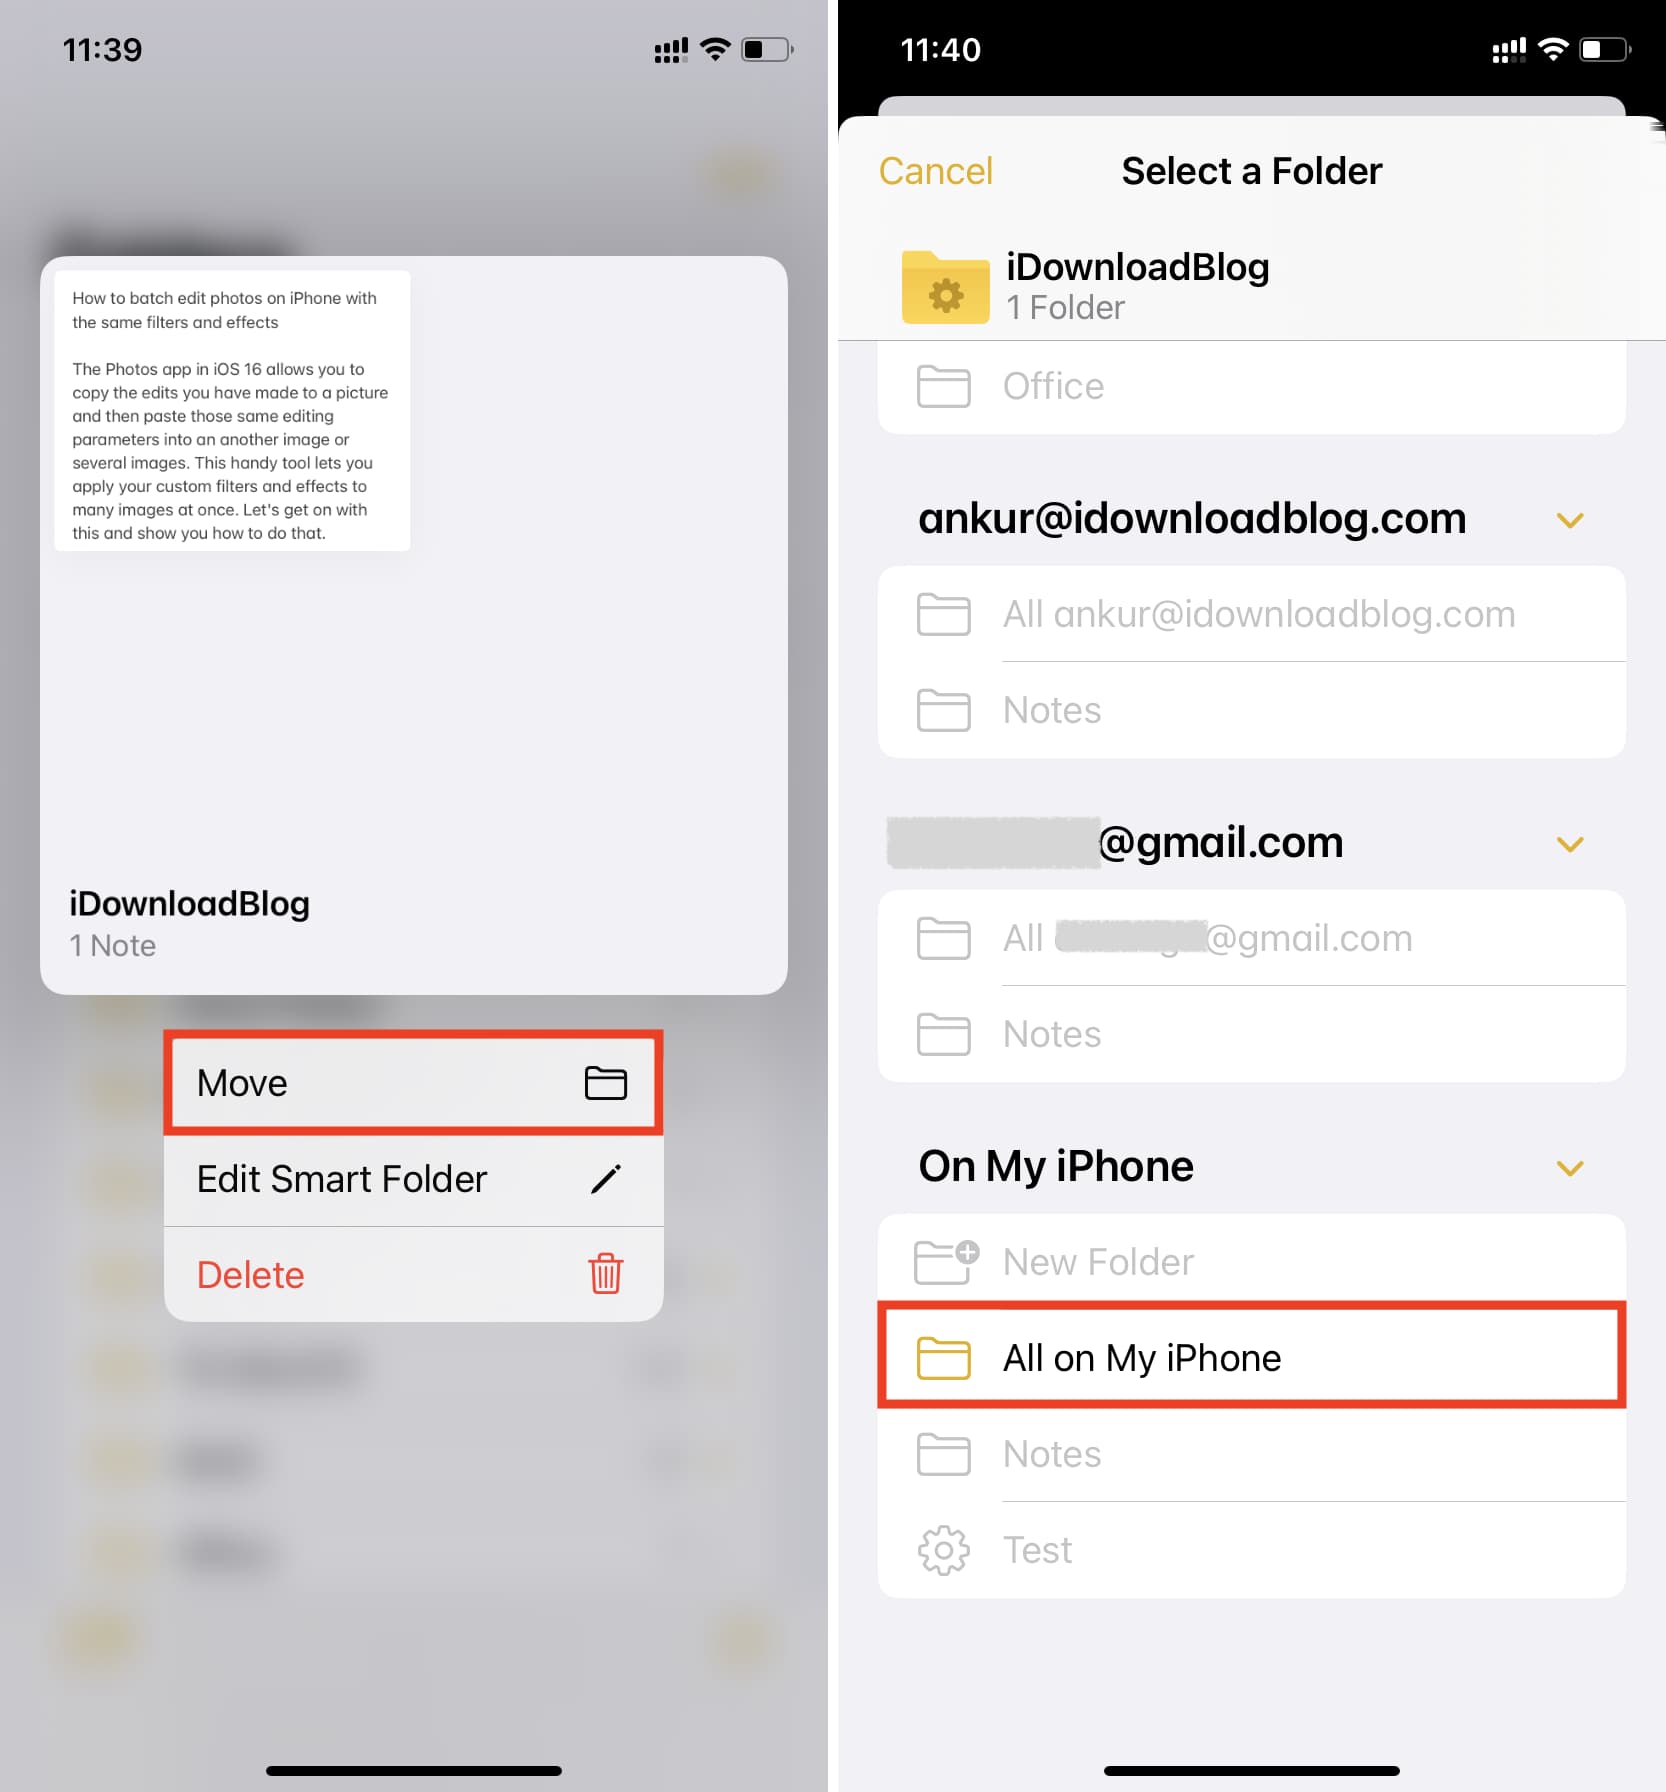
Like with normal folders, you can move smart folders in and out of your iCloud and “On My iPhone” account (but not your Google and Microsoft accounts). Touch and hold a smart folder, select Move from the menu, then choose either All on My iPhone or All iCloud.
Note that only the empty folder is moved — the underlying notes remain in place. One reason to move a smart folder could be to re-use your painstakingly created filters.
Delete a Smart Folder
Swipe right in the built-in Notes app until you get to the Folders screen, then swipe left over the smart folder you’d like to clear and hit the red Trash can icon. Alternatively, touch and hold the smart folder and select Delete from the menu.

Can I convert a Smart Folder into a normal one?
Once you’ve created a smart folder in Apple Notes, you cannot convert it into a normal folder. If you remove all of the folder’s filters, the Done button gets grayed out to indicate you can’t save this change. What you can do instead is delete your smart folder and create a standard one instead.
Create a Smart Folder in Apple Notes on a Mac
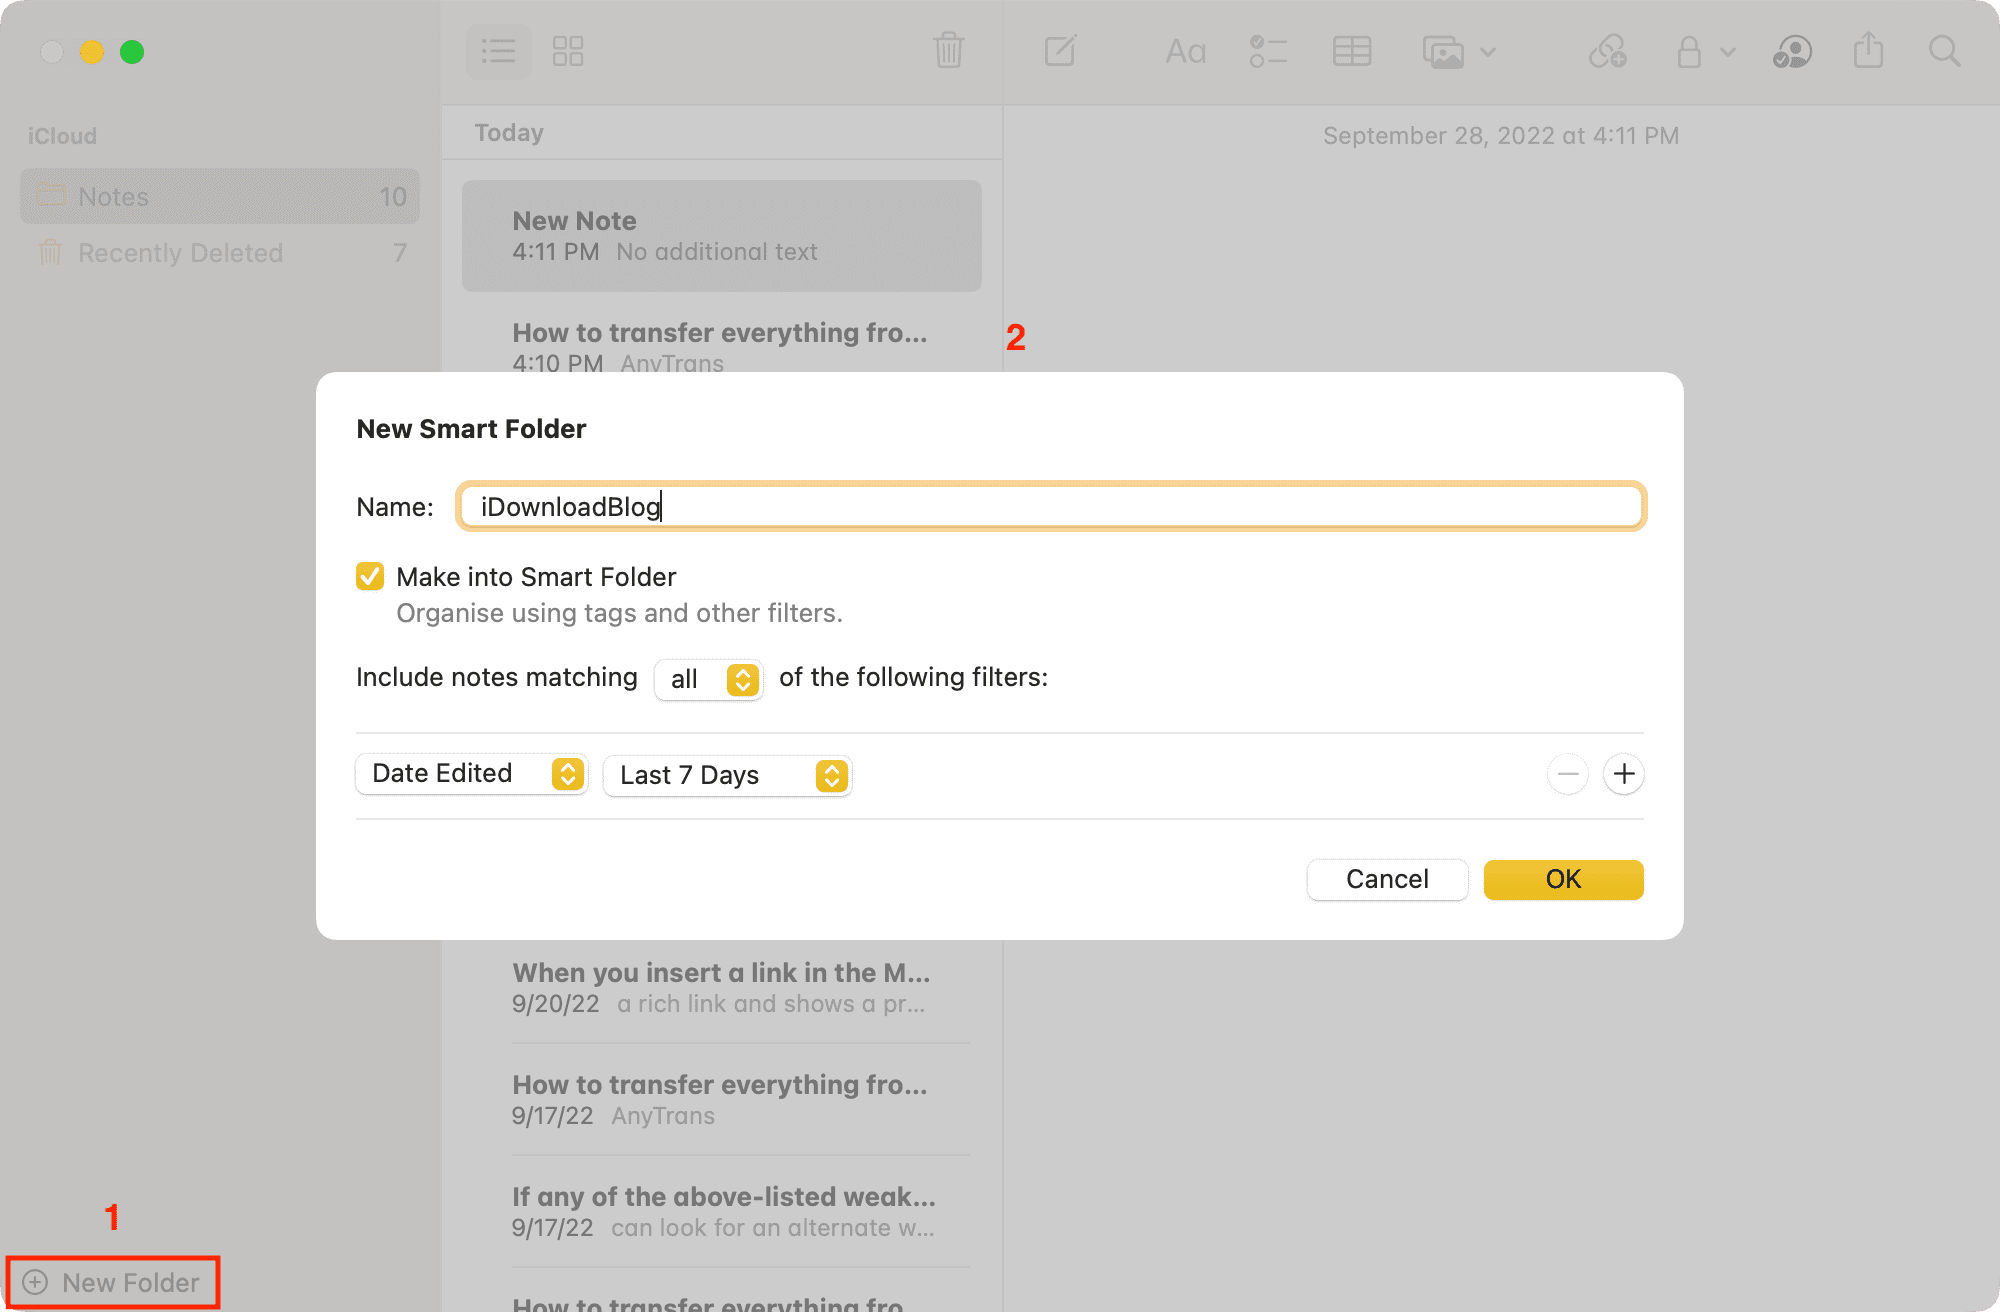
1) Open the built-in Notes app on your Mac and click New Folder in the bottom-left corner.
2) Name your smart folder, then tick the box labeled Make into Smart Folder.
3) Use the remaining options to customize your smart folder with one or more condition filters, and be sure to configure them to your liking.
4) Click the OK button to create your smart folder based on the above filters.
Manage Smart Folders on a Mac
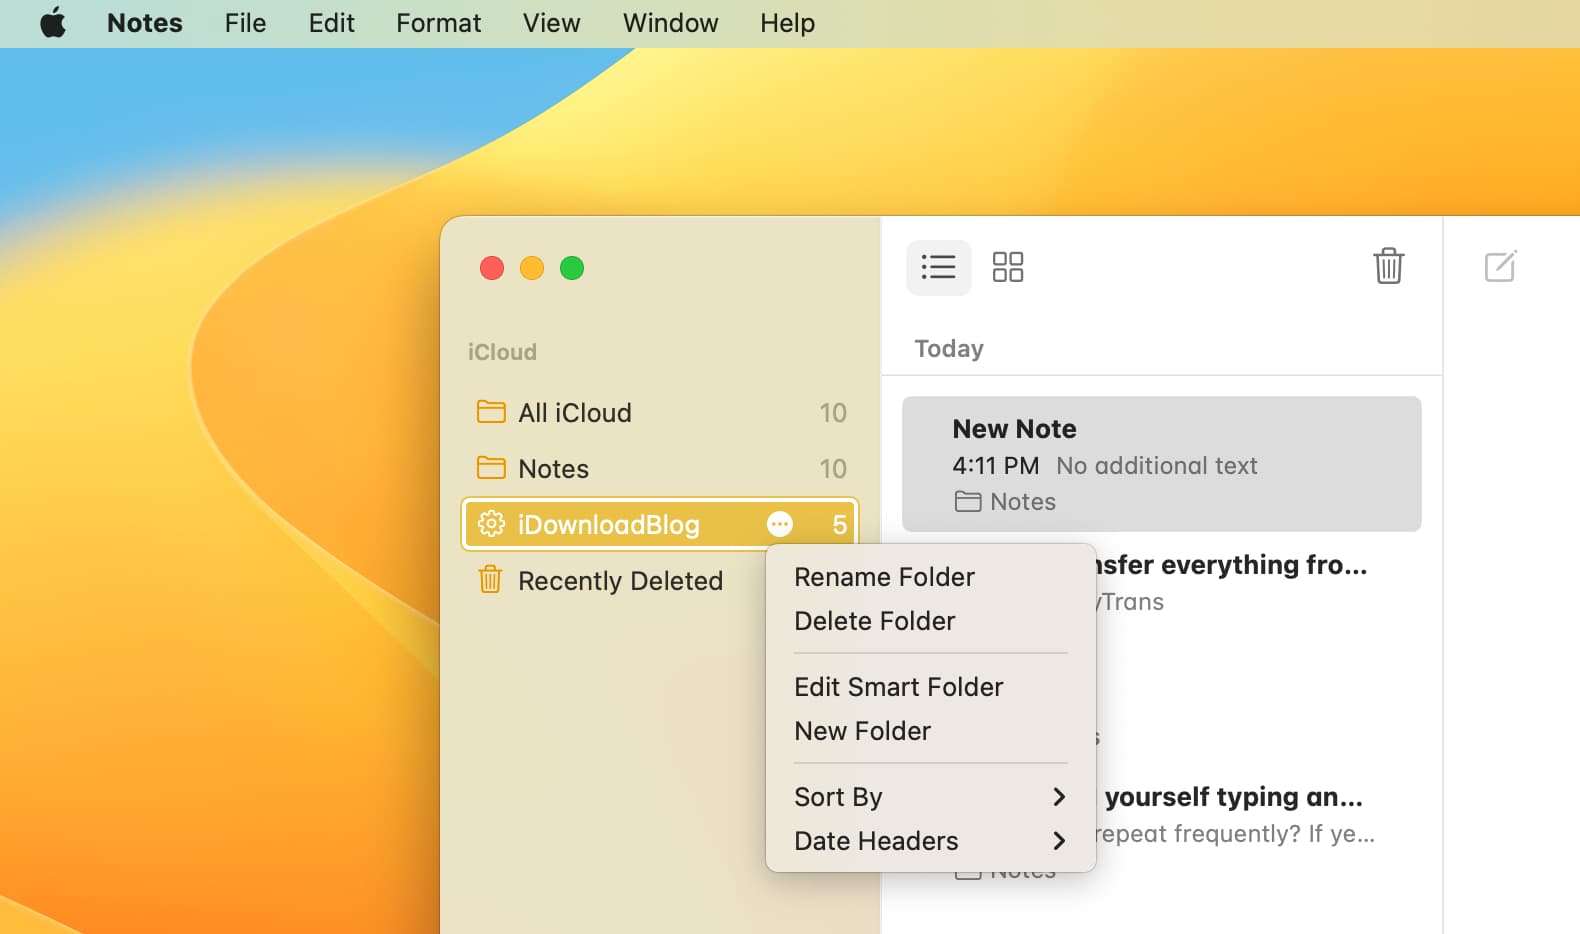
Mouse over a smart folder in the built-in Notes app on your Mac and click the hidden three-dotted icon that will bring up the menu. Alternatively, right-click or Control-click the smart folder to show the menu with the Rename Folder, Delete Folder, and Edit Folder commands, then click a desired one.
Using Search and Smart Folders in the Notes app
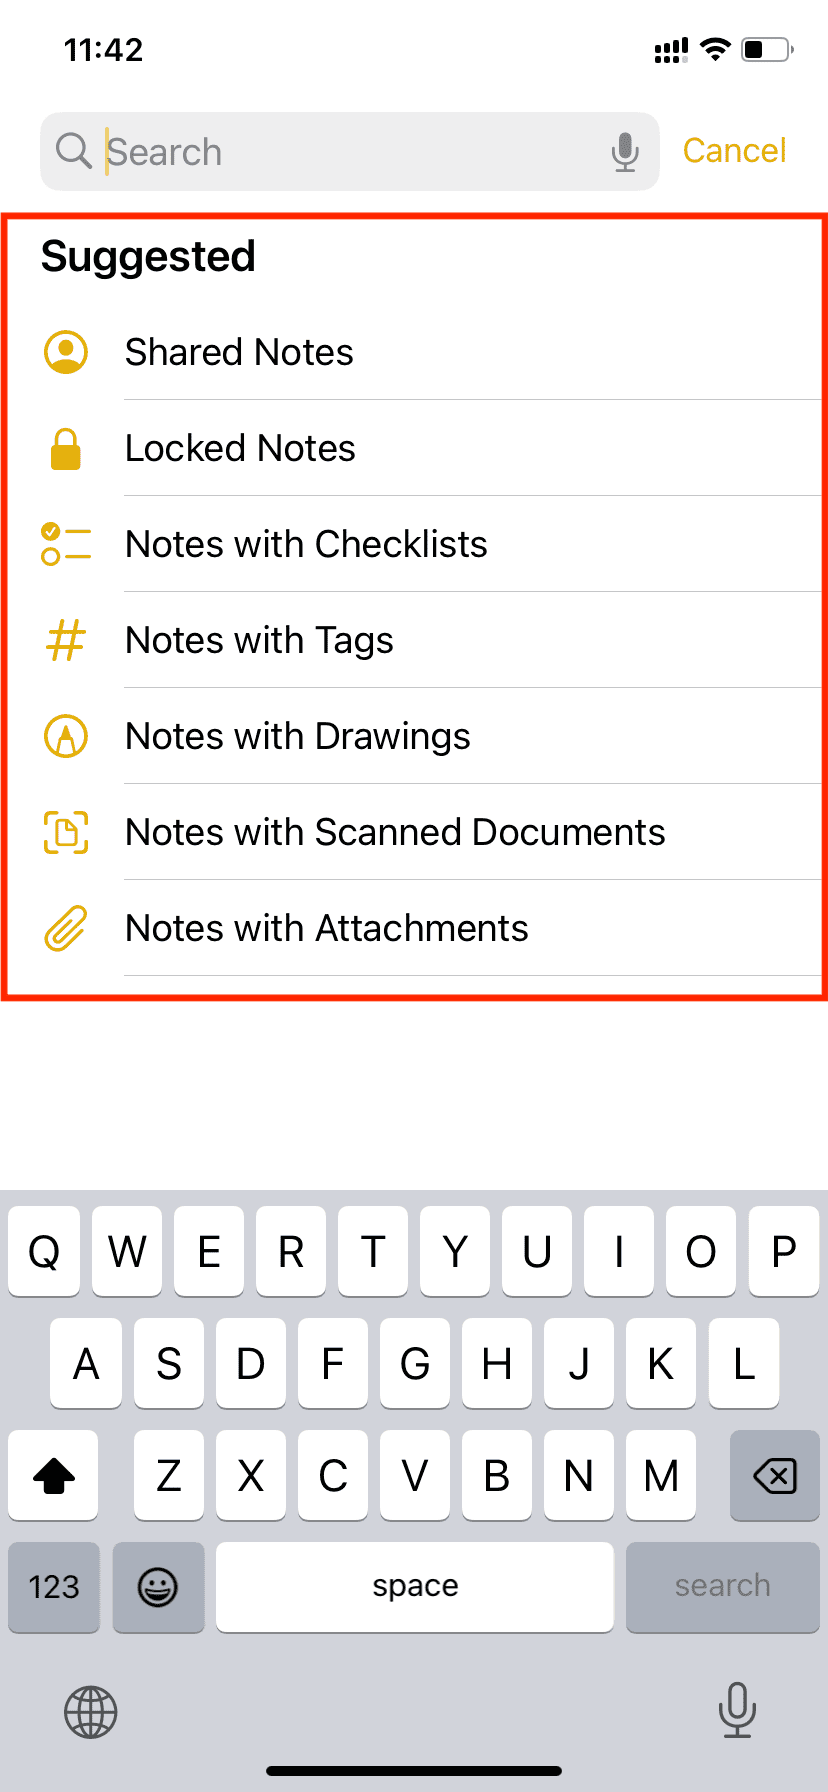
Apple Notes has a powerful search feature that you haven’t been using enough. Simply click the search bar at the top to reveal suggested searches like shared notes, locked notes, notes with checklists, notes with drawings, and similar. That’s one way to quickly find notes matching specific criteria. Or, use the above steps to create a smart folder to make all such notes available in one place.
Also, check out: