Learn how to use the Presenter Overlay feature to show your face during screen sharing to participants on Mac video calls like FaceTime, Zoom, and others.
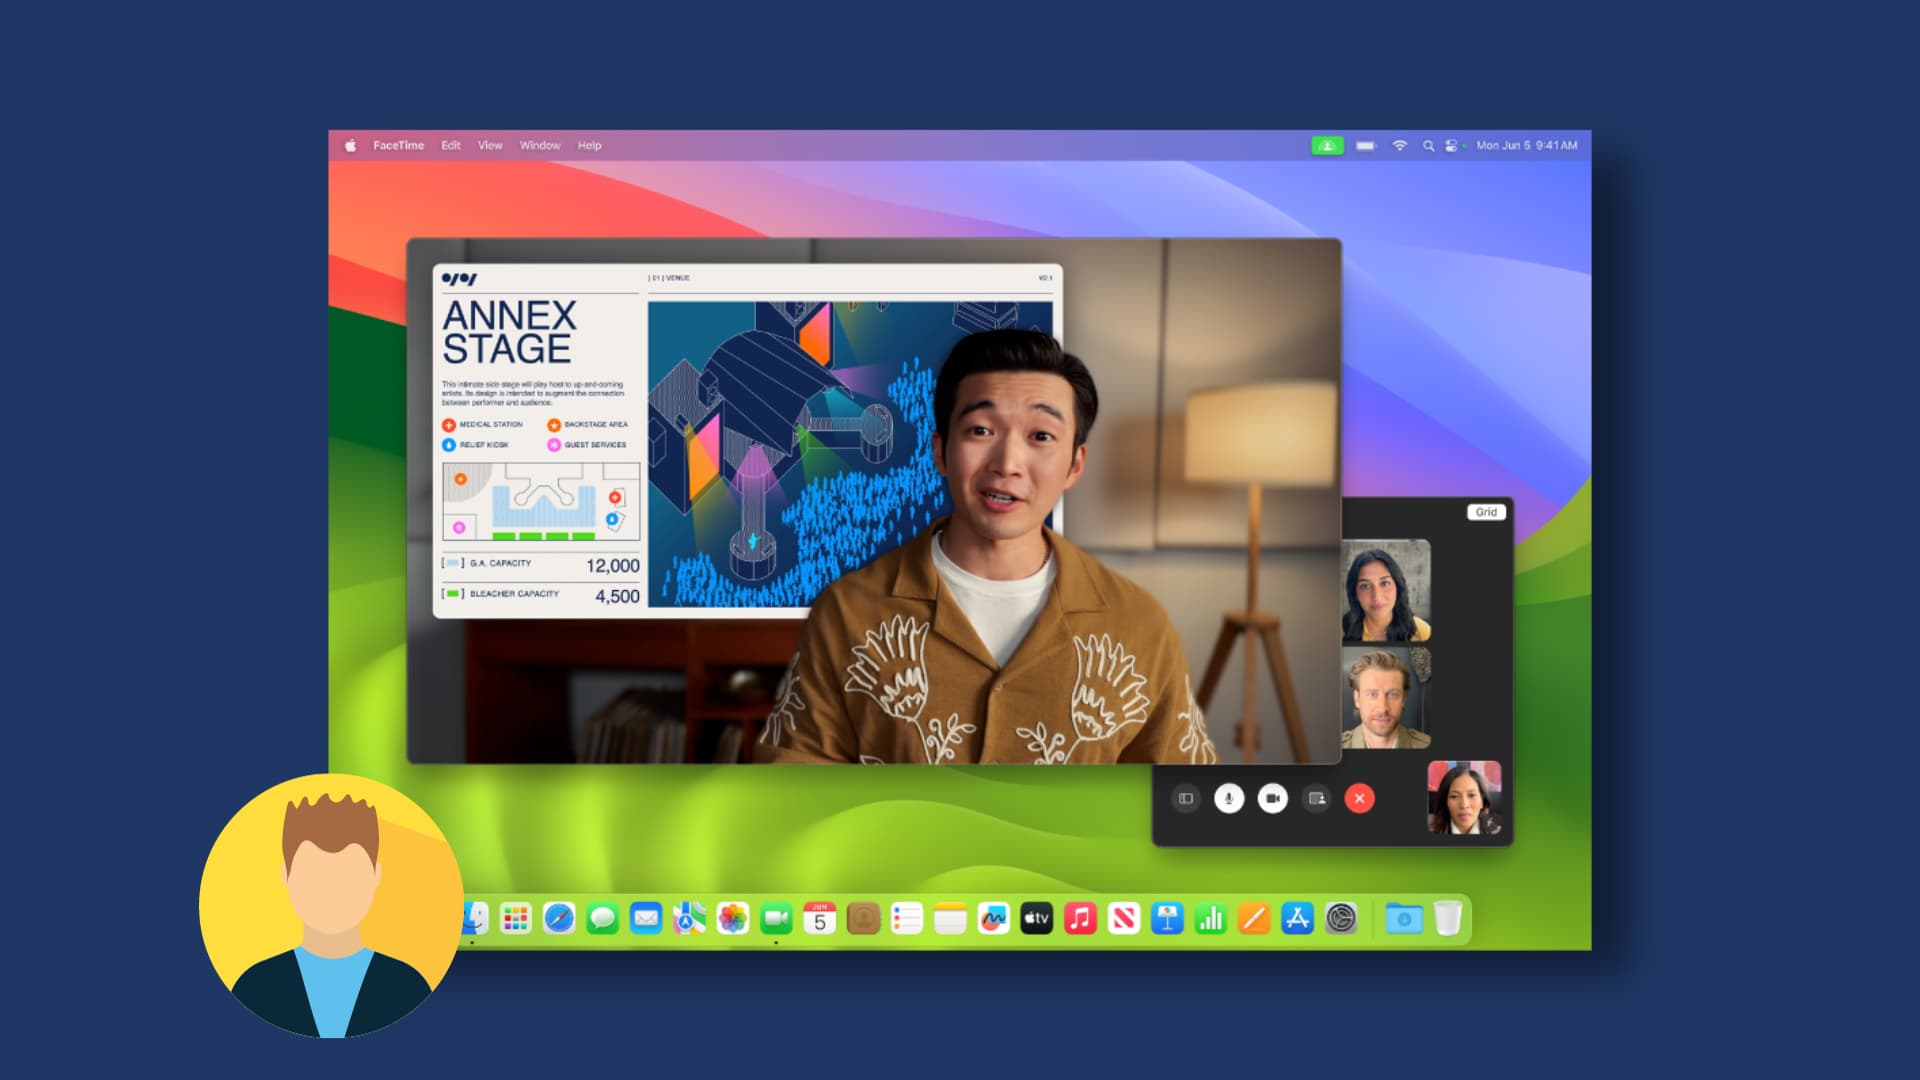
Screen Sharing in FaceTime has been available for years. And with macOS Sonoma and later, you can use the Presenter Overlay feature to show your face in an overlay when sharing your screen on video calls. Participants see both the screen being sharing and you speaking—great for education and tutorials.
Presenter Overlay is available in compatible apps like FaceTime and Zoom. If an app supports this feature, you’ll see an appropriate option within the video menu in the macOS menu bar. We’re using FaceTime to illustrate the steps below.
Use Presenter Overlay to show your face during Screen Sharing on Mac
1) Open a compatible videoconferencing app like FaceTime or Zoom, and make a call.
2) With the call connected, click the screen sharing button in the app or hit the video call button in the menu bar and click the screen sharing icon.

3) Click the Presenter Overlay button, as shown in the screenshot below, and select either Small or Large size for the overlay.

4) Choose whether to share a particular app window, a whole app, or the entire screen, then click the screen to start sharing.

5) The Small option will show your face inside a small circular overlay that you can drag anywhere on the screen.

For a larger overlay that can fit half your body, hit the purple screen sharing button in the menu bar and select the Large option instead.

Use video effects and reactions
Click the screen sharing button in the menu bar during a Presenter Overlay session and select the FaceTime HD Camera or any other connected webcam. Here, you can select video effects like Portrait, Studio Light, and Centre Stage, use hand gestures to trigger animated reactions, and even replace your messy background with a virtual one. Below these video effects are additional options to fine-tune your audio in the Mic Mode section.

Stop using Presenter Overlay
Click the purple screen sharing button in the menu bar to open the screen sharing menu, then do one of the following:
- Expand the Presenter Overlay option, and choose Off.
- If you no longer need to share your screen, click Stop Sharing (also ends Presenter Overlay).
- Click the camera button to turn off the camera feed, which disables Presenter Overlay.
- Hang up the call by clicking the red X button.

Will you be using Presenter Overlay for your office or personal project works? Let us know in the commenting section down below.