Learn how to use FaceTime Live Captions on your iPhone, iPad, and Mac to view real-time transcriptions of your conversations.
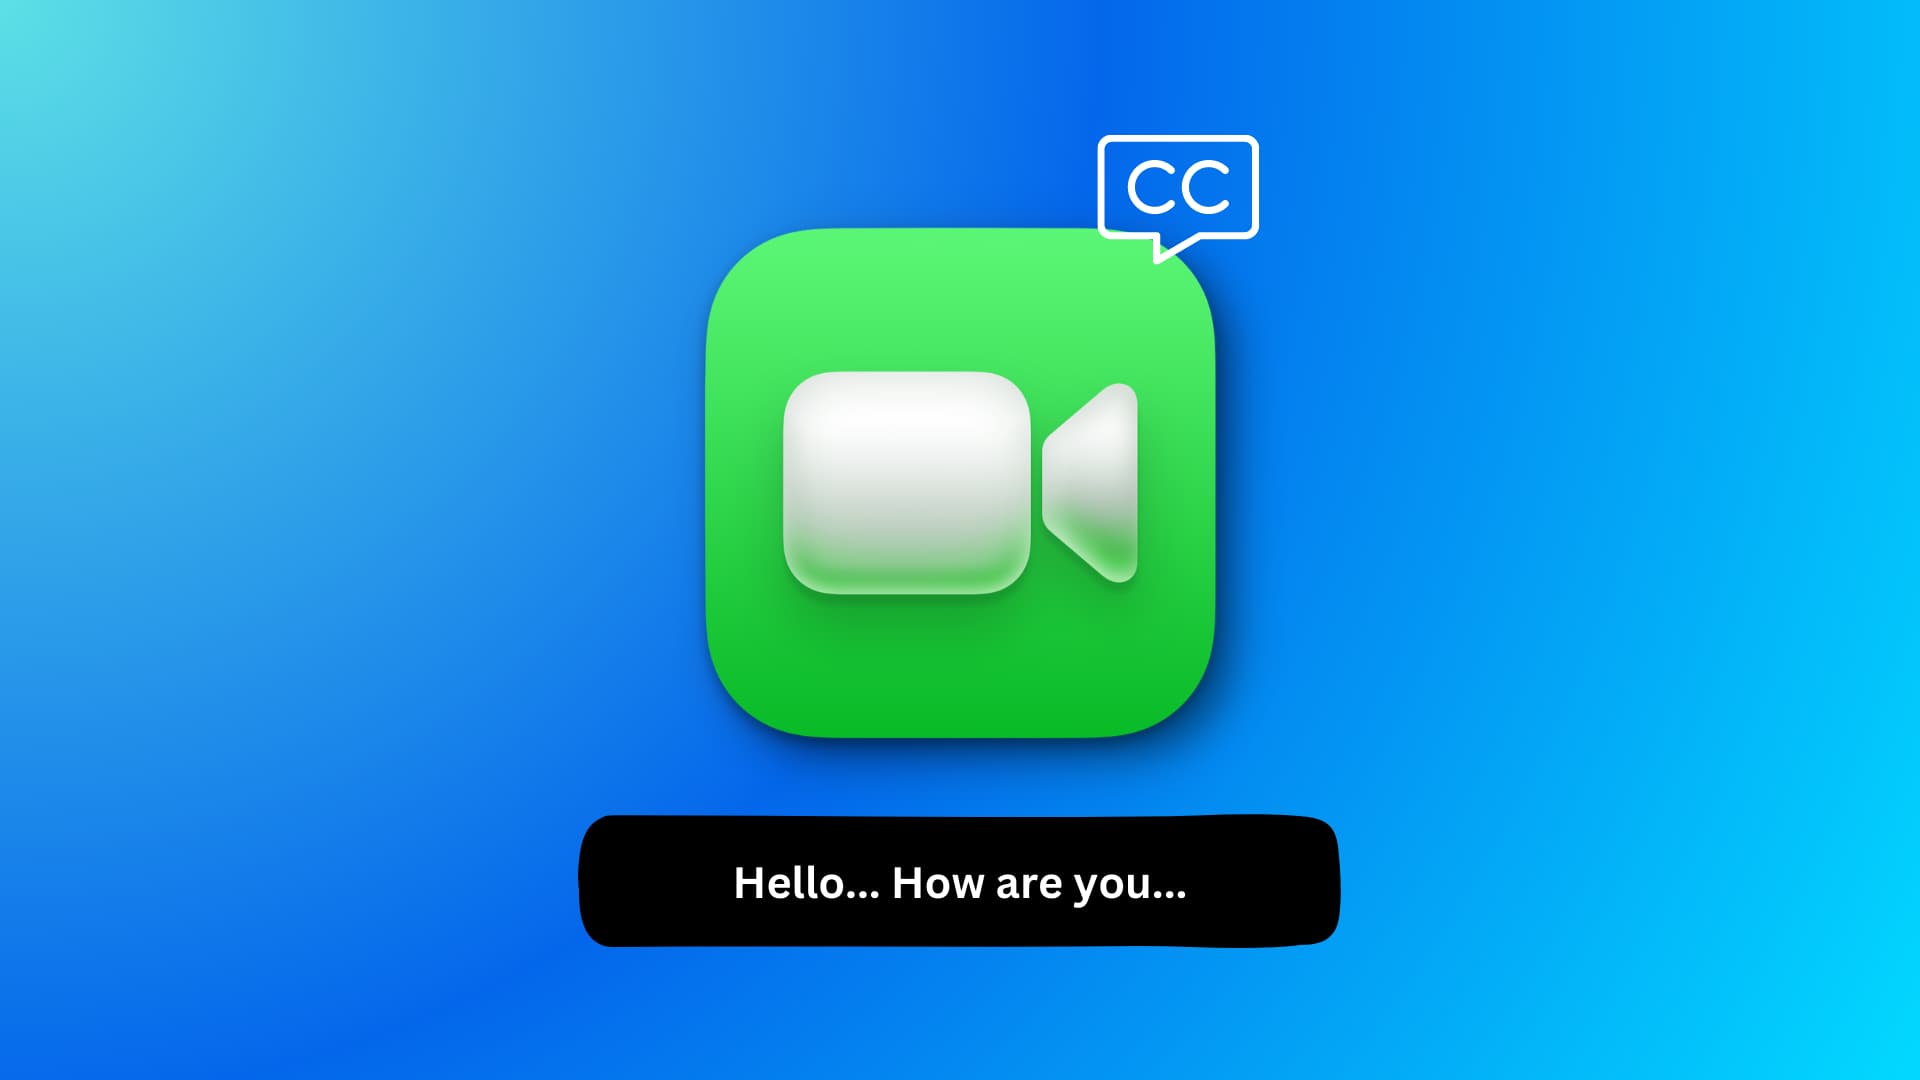
Live Captions is an accessibility feature designed for individuals with hearing loss or difficulty hearing. During a FaceTime call, it converts the other participant’s speech into text, displaying it on the screen like subtitles in a movie or TV show.
Additionally, in noisy environments like a crowded stadium or public place, Live Captions can help by displaying what the other person said on the FaceTime call, ensuring you don’t miss anything important.
Supported devices
FaceTime Live Captions works on:
- iPhone 11 and newer
- iPad mini (5th generation and later), iPad (8th generation and later), iPad Air (3rd generation and later), all generations of iPad Pro 11-inch, and iPad Pro 12.9-inch (3rd generation and later)
- MacBook or Mac desktop with Apple silicon (M1, M2, M3, M4, M5, and newer) running macOS Ventura or later. Note that FaceTime Live Caption is not available on Macs with an Intel processor.
Note: If this is the first time using this feature, your device may download a language model, which can take some time.
Supported languages
You can only use FaceTime Live Captions if your device language is set to one of these languages:
- Cantonese (China mainland and Hong Kong)
- English (Australia, Canada, India, Singapore, the United Kingdom, and the United States)
- French (Canada, France)
- German (Germany)
- Japanese
- Korean
- Mandarin Chinese (Mainland China)
- Spanish (Mexico, Spain, and the United States)
If your current device language is unsupported, we show you how to change it below.
Use Live Captions in FaceTime
- Make a FaceTime call or pick up an incoming call on your iPhone, iPad, or Mac running iOS 26, iPadOS 26, or macOS Tahoe 26.
- Once the call connects, tap the three dots menu button on the call screen and select Live Captions.

You’ll now see a Live Captions box on the screen, which shows the spoken conversation transcribed in real time.
You can also go to iOS 26 Settings > Apps > FaceTime and turn on Live Captions to keep it always on your FaceTime call screen (no need to go through the steps above).

Note: You can customize the look of Live Captions text, background, etc., in iOS 26 Settings > Accessibility > Live Captions > Appearance, but this won’t apply to Live Captions in FaceTime. It only applies to Live Captions in other apps.
On older versions of iOS and macOS
If you’re on an older version of iOS or macOS, go to Settings/System Settings > Accessibility > Live Captions and turn on Live Captions in FaceTime. If you want to use Live Captions in other apps, turn on the switch for Live Captions at the top.
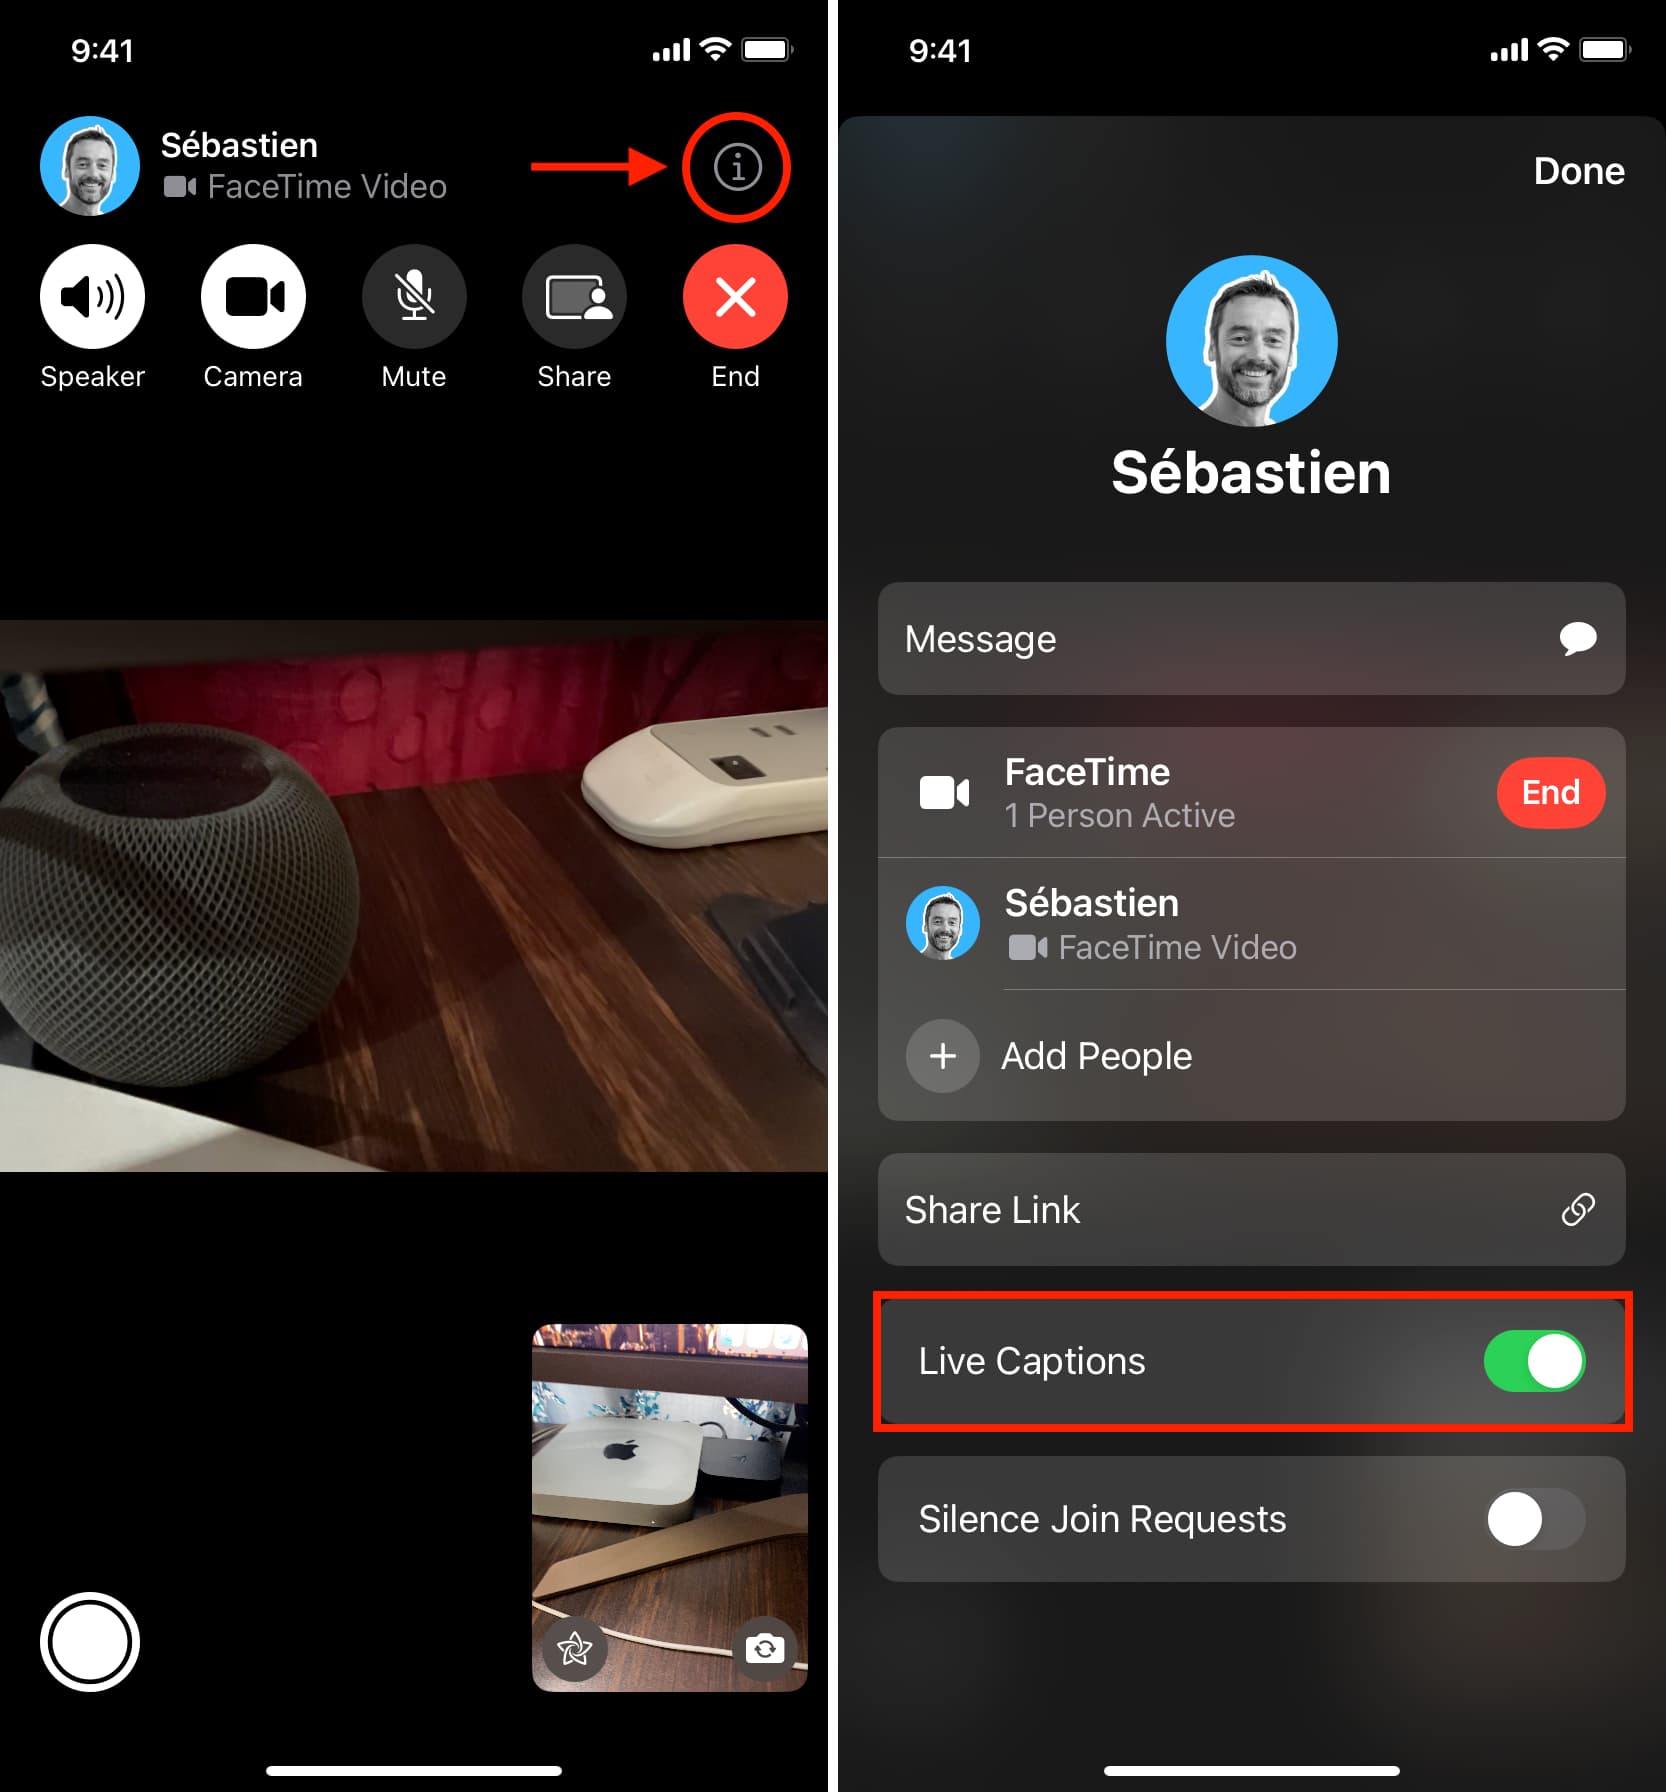
In case you don’t see the Live Captions box during FaceTime, tap the info button ⓘ next to the person’s name, turn on Live Captions, and tap Done.
On Mac, you should see the Live Captions box automatically in FaceTime, provided you enabled this feature in macOS System Settings. When the person on the other end of the call speaks, you’ll see their spoken words in a transcribed form on the right sidebar. However, if you don’t see the captions, click the sidebar button in FaceTime and turn on Live Captions.

Live Captions in FaceTime group call
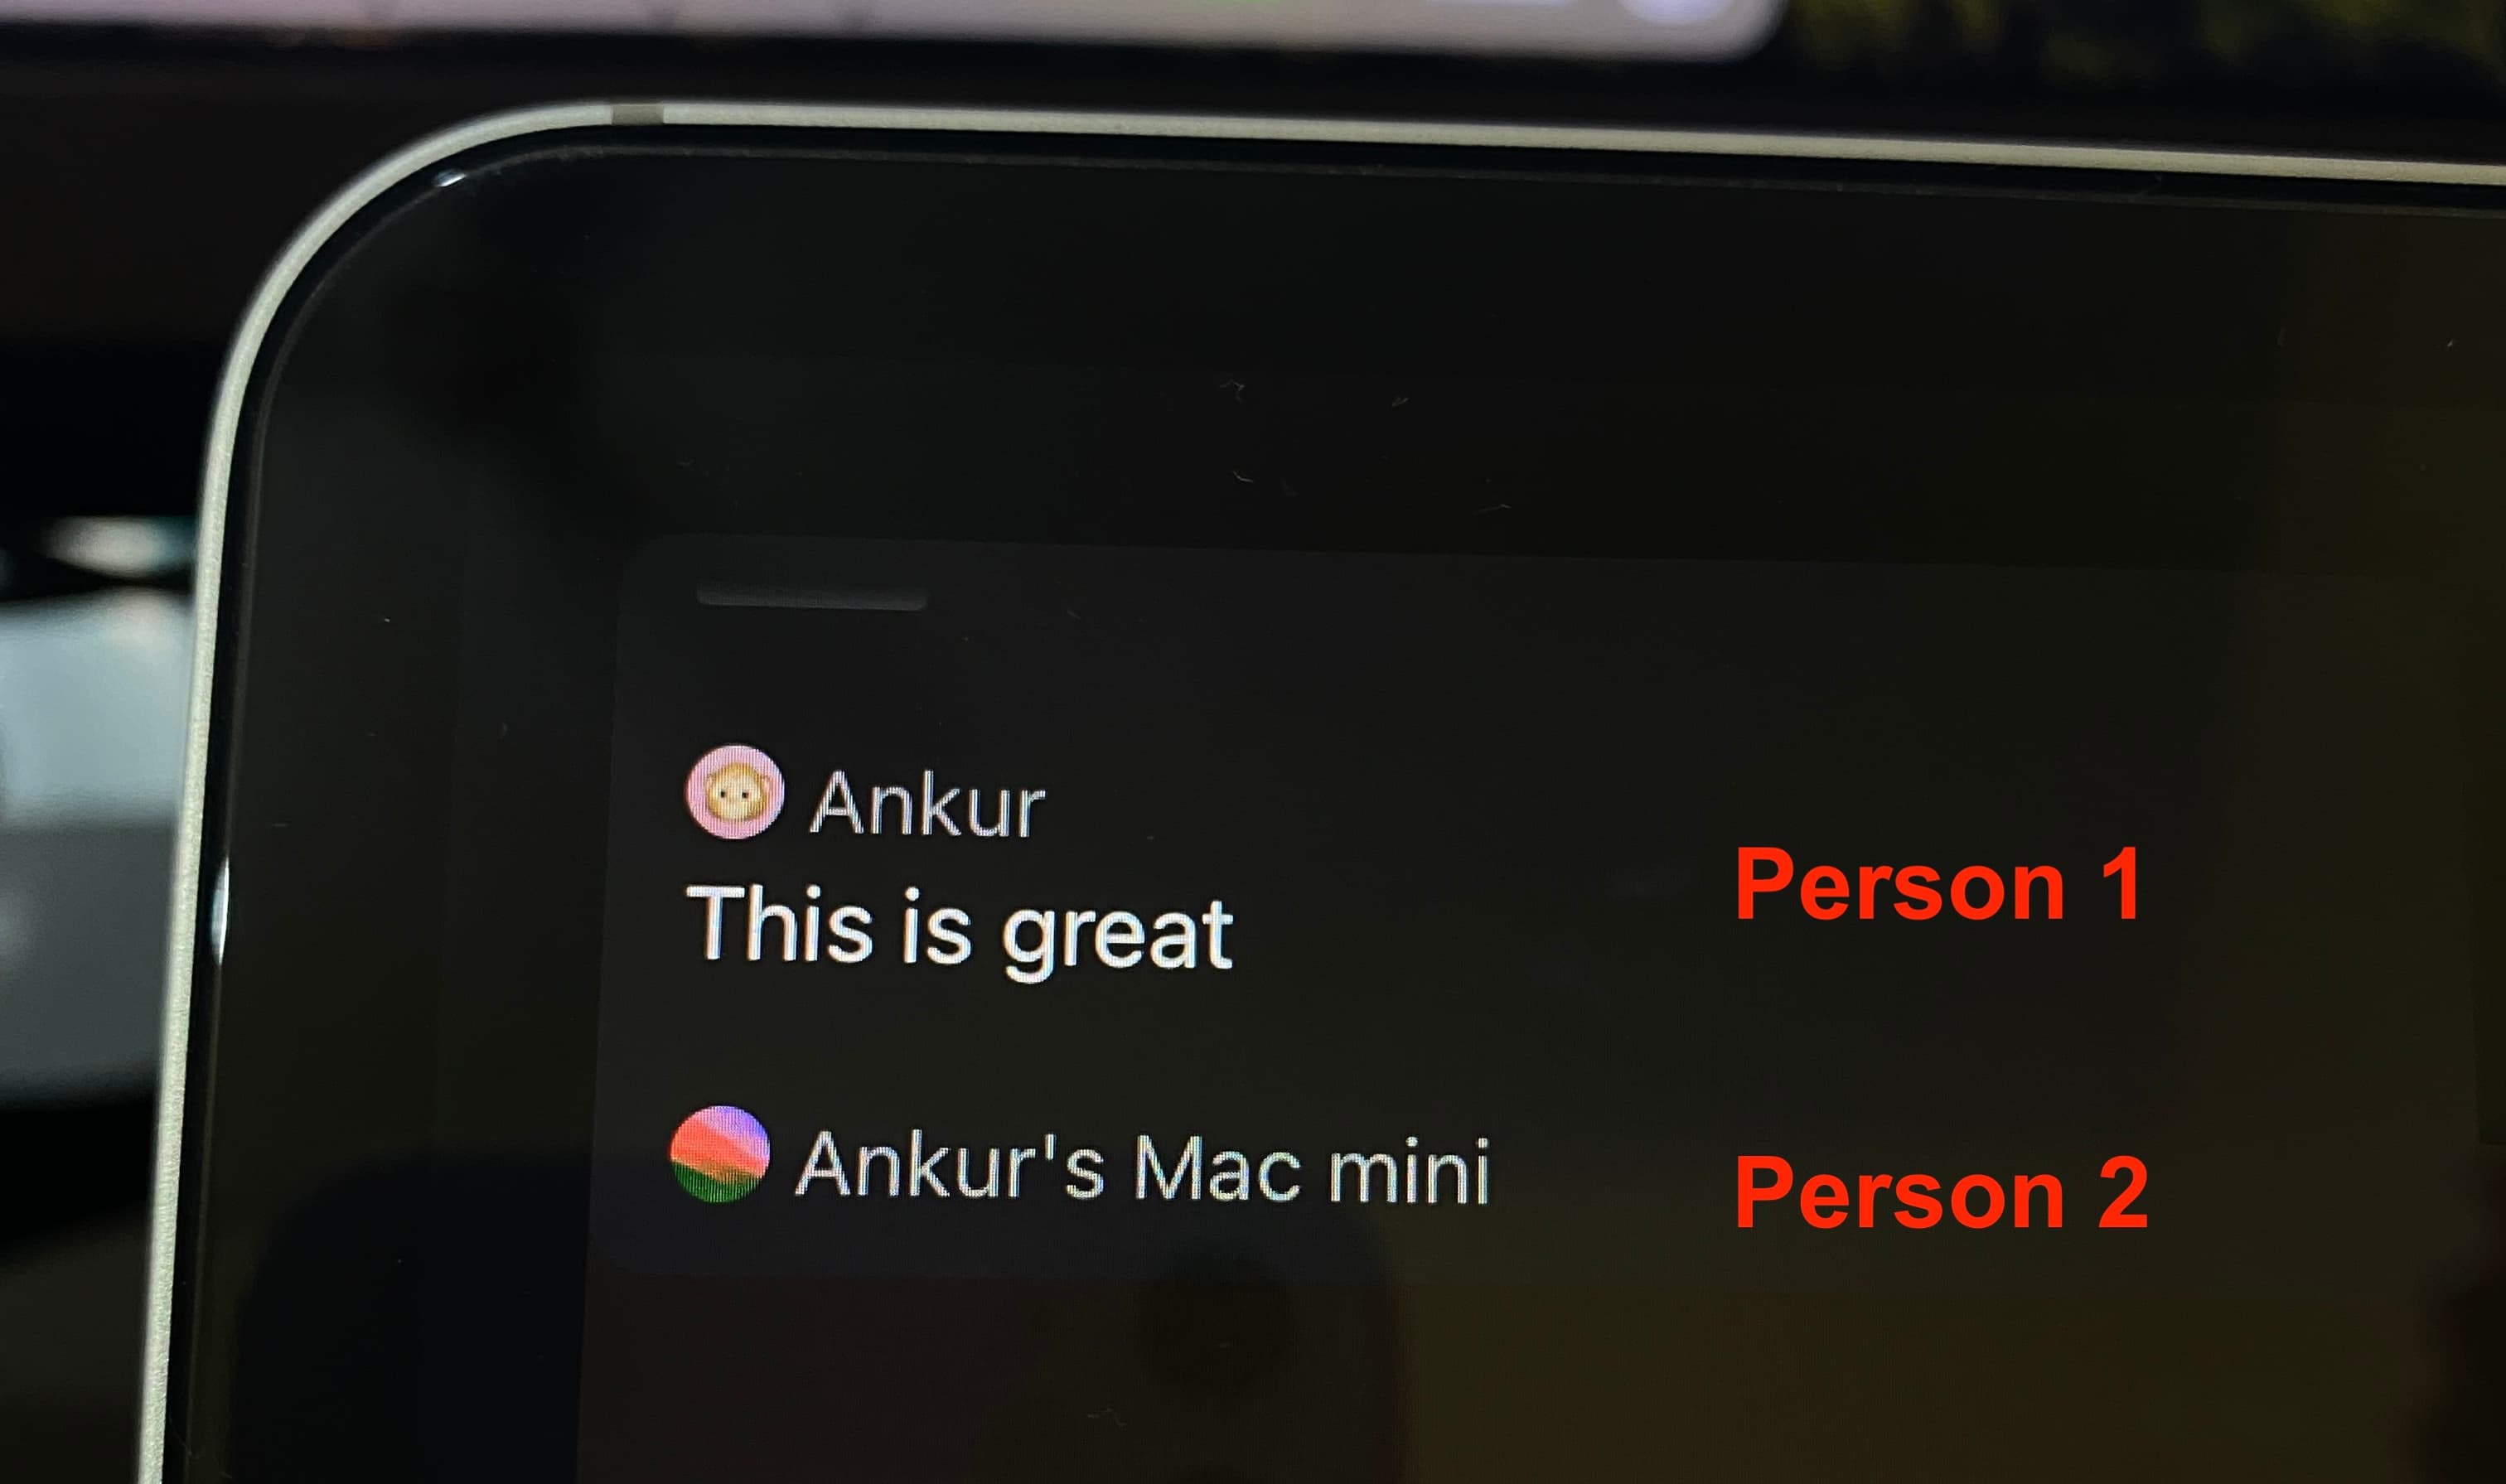
Live Caption works during a group FaceTime video call. It will show the individual names of the participants and what they said.
Does it work for FaceTime audio calls?
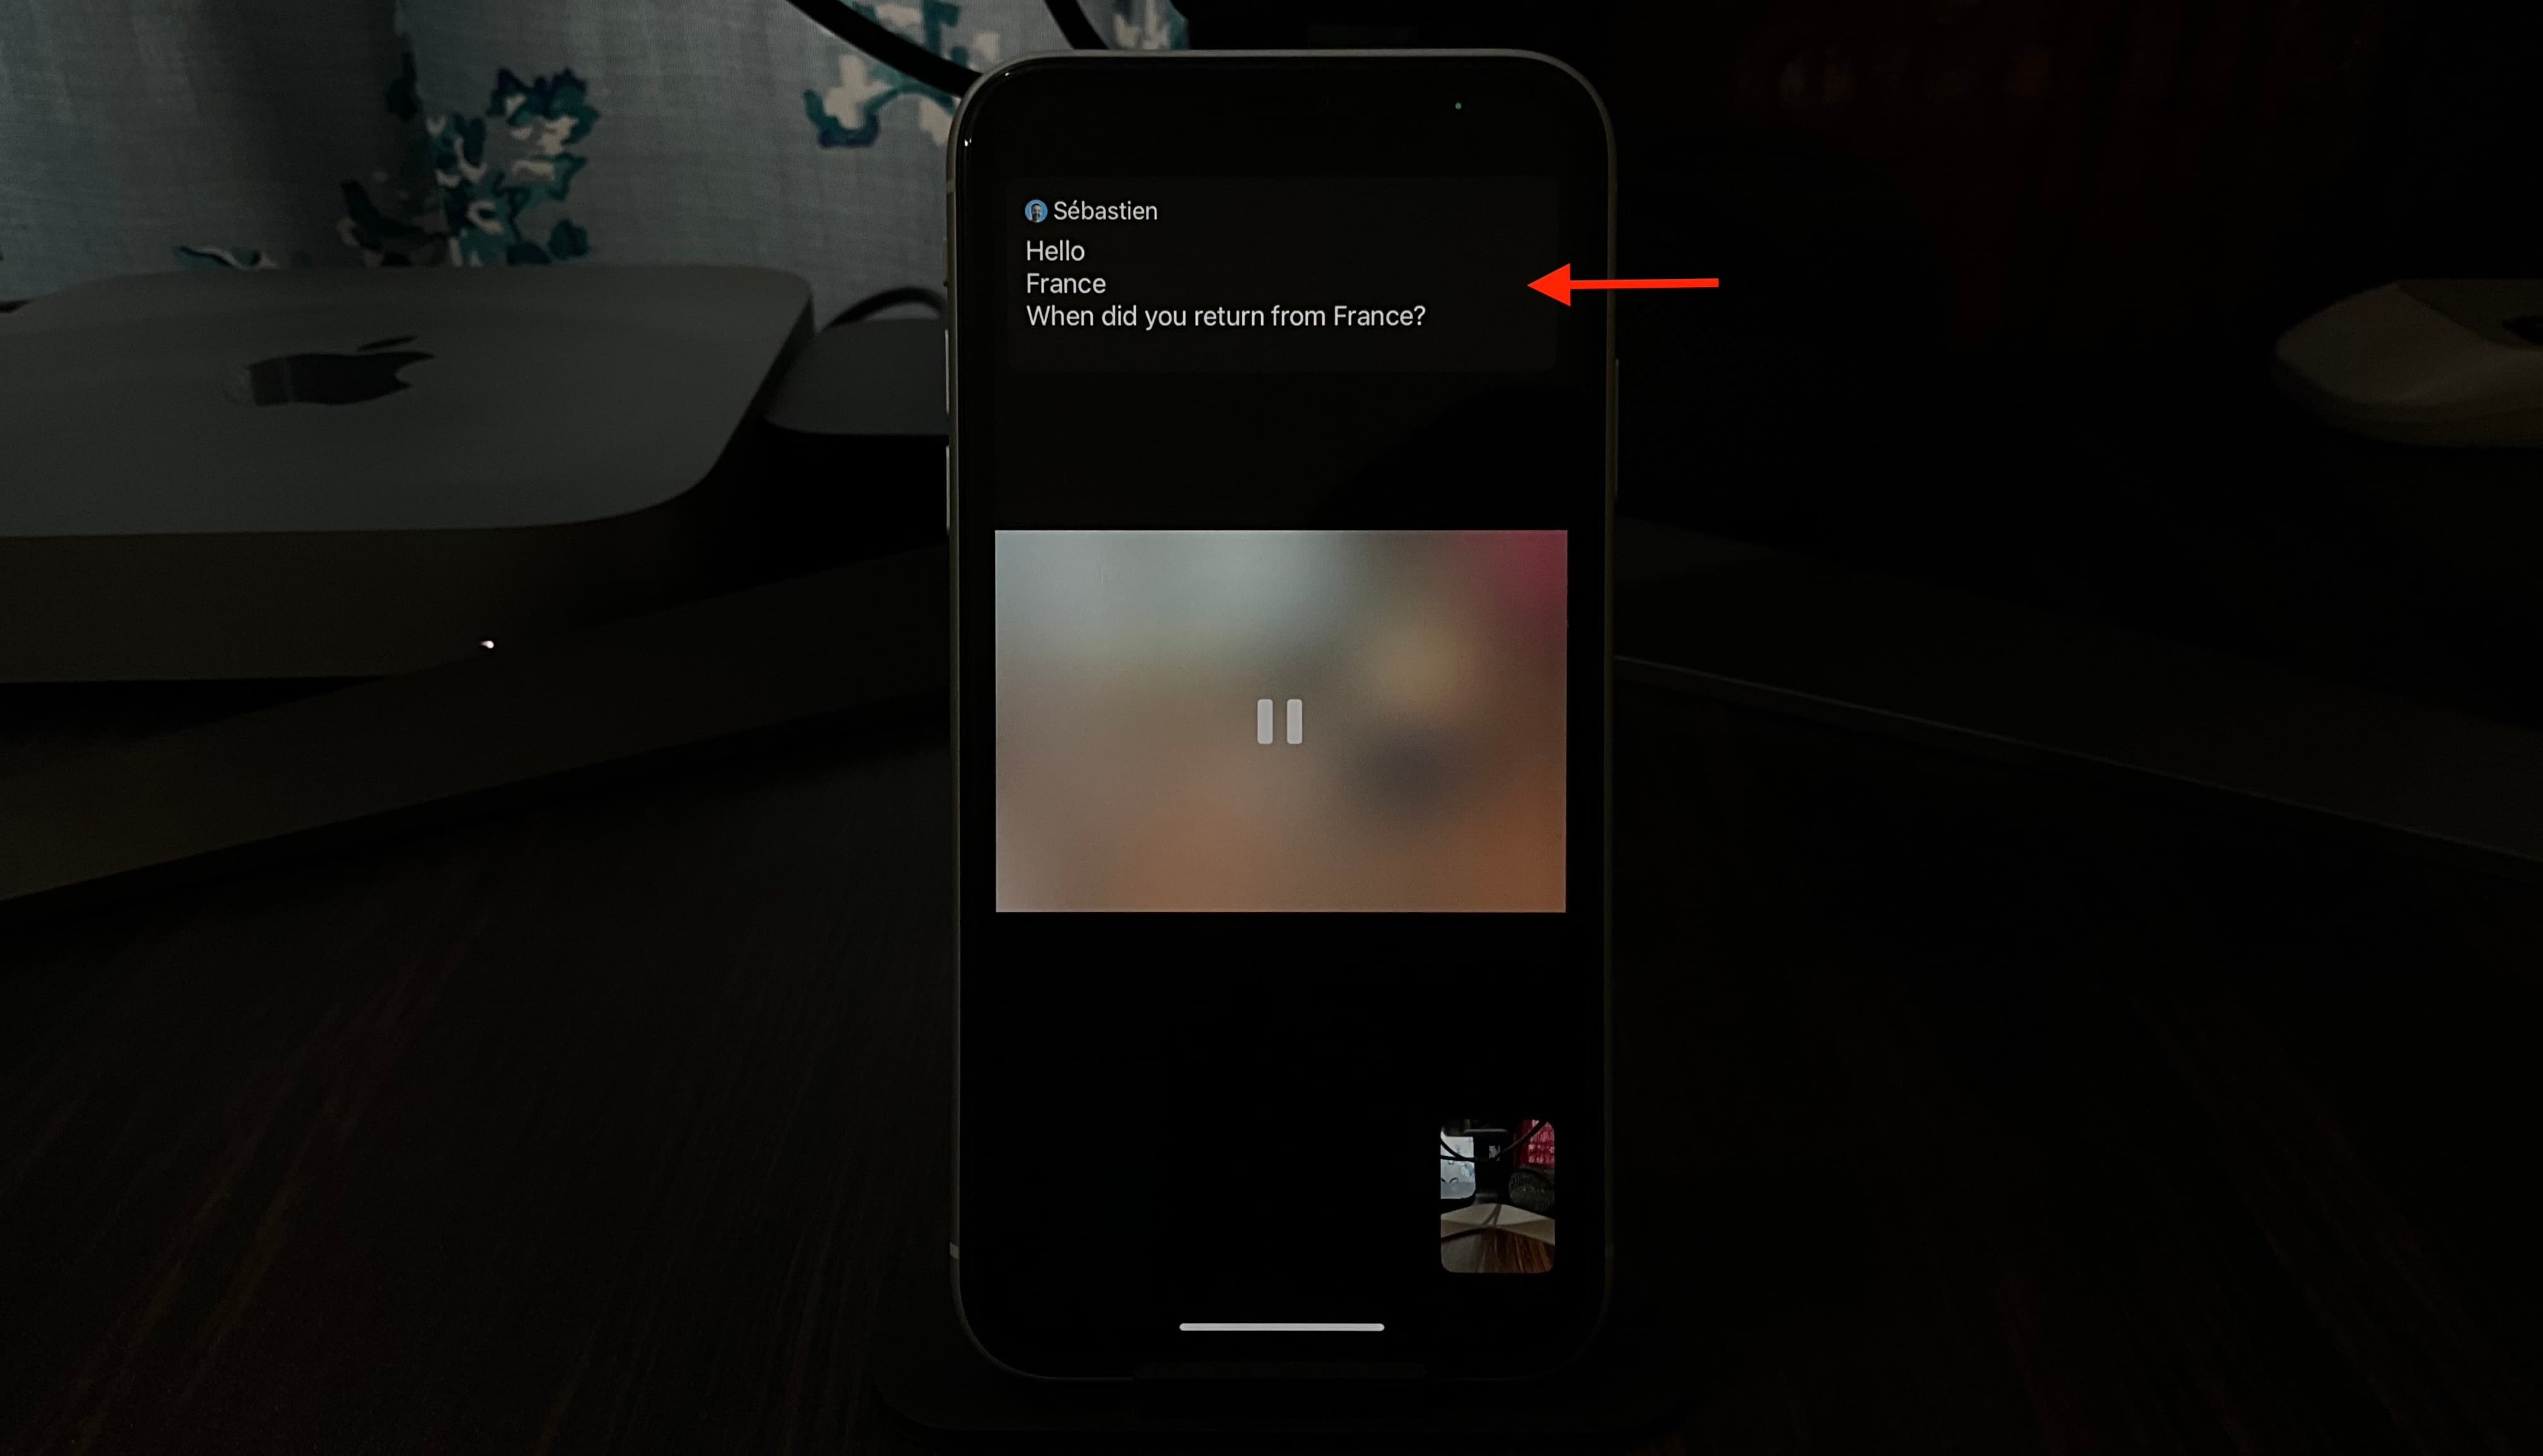
Live Captions only work during one-on-one or group FaceTime video calls, but not during FaceTime audio calls. However, you can enable system-wide Live Captions, and then even your audio calls should be transcribed, as shown in the image below.
Don’t use it for emergencies
Live Captions’ accuracy may vary based on situations like the speaker’s voice, ambient noise, choice of words, and more. Thus, Apple asks you not to rely on FaceTime Live Captions for high-risk or emergency situations.
Ask the other person to speak clearly
FaceTime Live Caption may not show what’s spoken on the screen if the person on the other end of the call doesn’t speak clearly or if there is a lot of background noise (fans, appliances, and so on) on their end. So, ask them to use AirPods or speak close to the device’s microphone for Live Captions to work better on your end. They can also turn on Voice Isolation to reduce ambient noise.
Note that this audio-to-text feature may struggle with certain unknown or lesser-known names of people, places, streets, dishes, etc., so keep this in mind while using it.
Live Captions uses more battery
When you use Live Caption, it uses more battery than a normal FaceTime call. This is because your device performs additional processing and requires more power to convert spoken words into text in near real-time.
What happens with Picture in Picture?
You can continue your FaceTime video call in Picture-in-Picture, but Live Captions won’t appear; you must be in the FaceTime app to see a transcribed feed of what the other person is saying.
You can’t take screenshots of Live Captions
Just as Apple doesn’t allow native recording of a FaceTime video call (but allows recording phone and FaceTime audio calls), you can’t take a screenshot or record a screen of FaceTime Live Captions on an iPhone, iPad, or Mac. You can’t even use a third-party screenshot app like CleanShot X on Mac to capture Live Captions text!
Other tips related to voice and text: