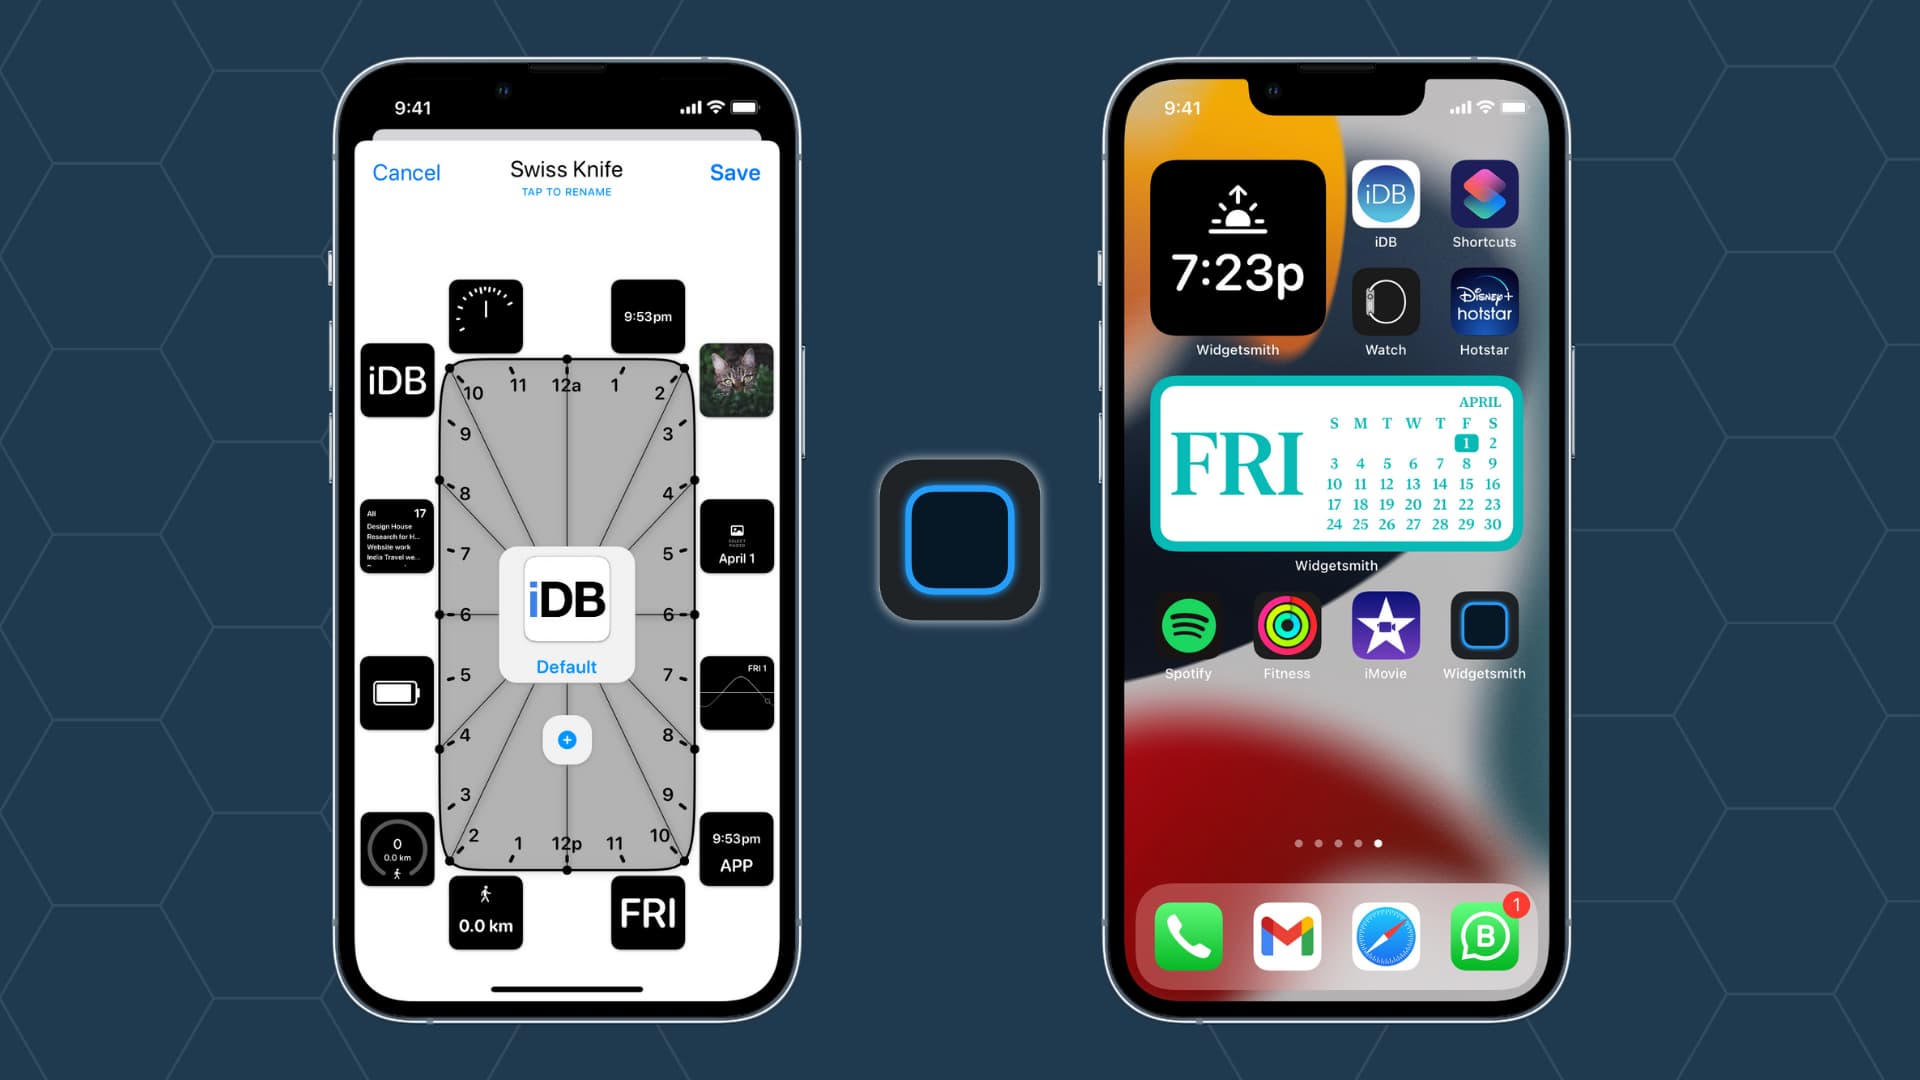
Starting with iOS 14, Apple allowed users to put widgets on the iPhone Home Screen. One of the widget apps that went viral around that time is Widgetsmith, and it quickly grew into one of the fan favorites.
It lets you add several kinds of widgets like time, date, photos, calendar, weather, astronomy, health, tides, reminders, custom text, and even blank space on the Home Screen. In this tutorial, we show you how to use Widgetsmith on iPhone running iOS 14, iOS 15, or later.
How to use Widgetsmith
Download Widgetsmith for free from the App Store and follow these steps:
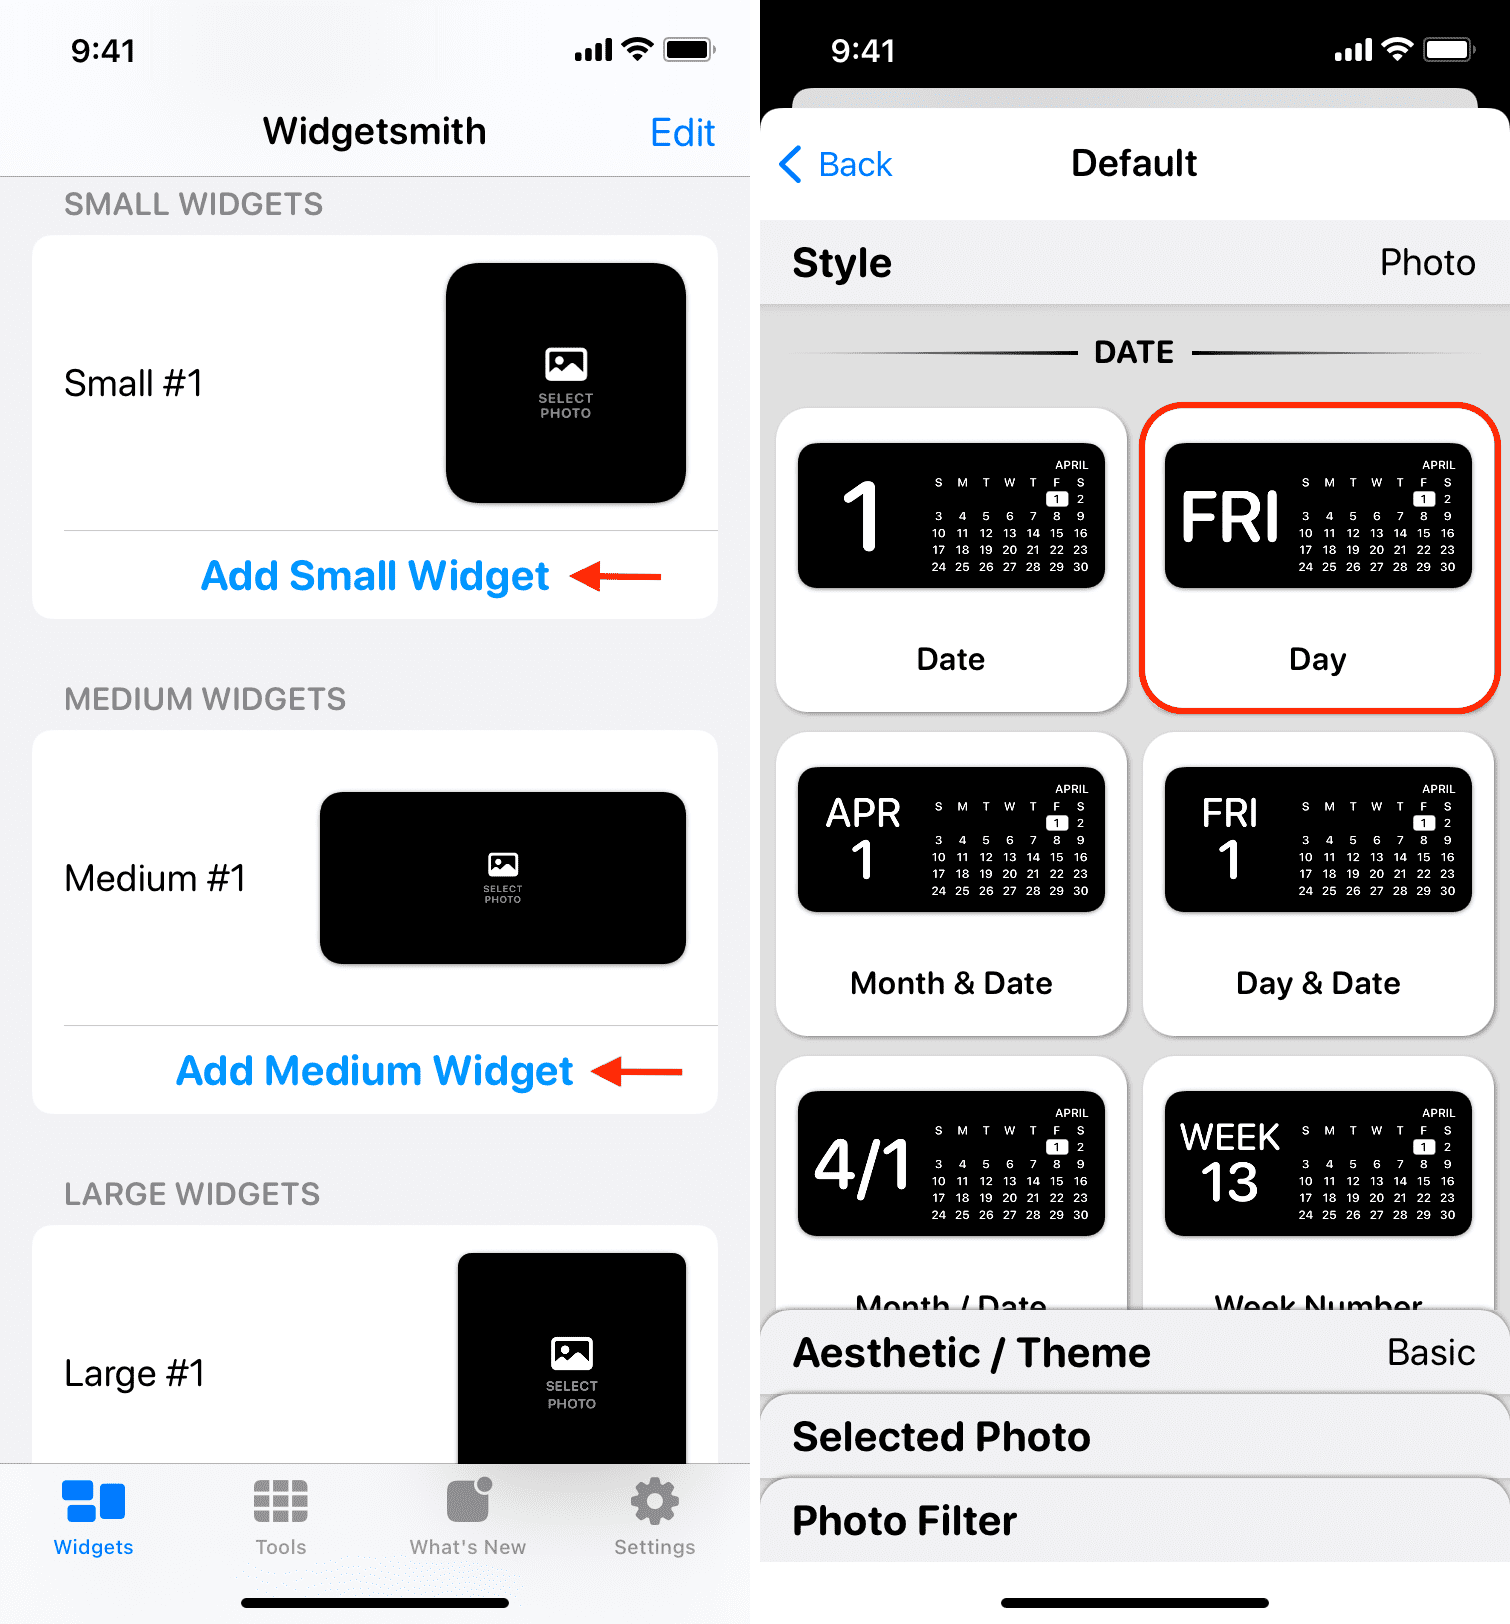
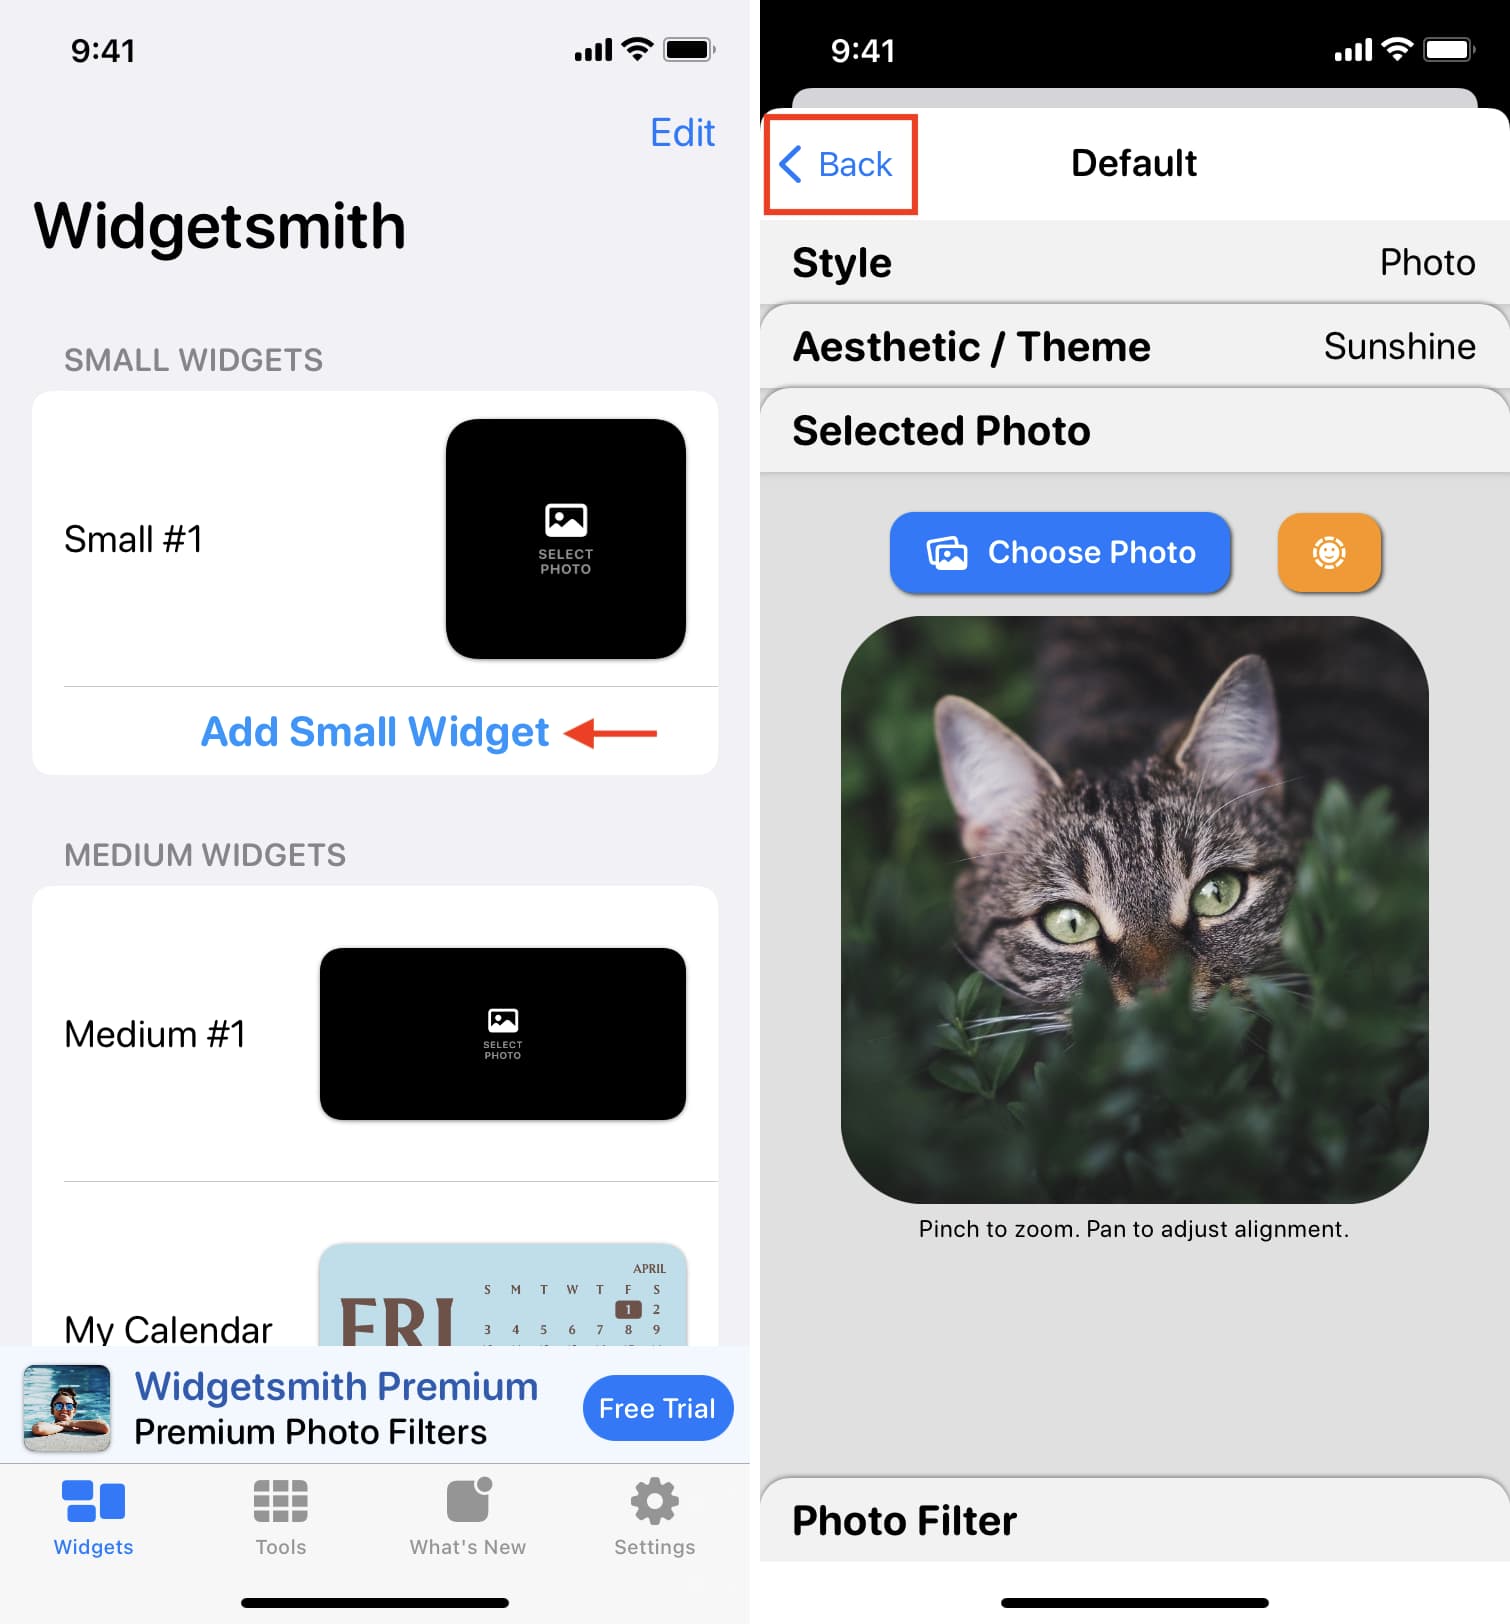
1) Open Widgetsmith, and you’ll see:
- Small Widgets: Square, which takes the space of 4 app icons.
- Medium Widgets: Rectangular and takes the space of 8 app icons.
- Large Widgets: Square, which takes the space of 16 app icons.
Choose the widget size of your choice.
2) This will open the Style screen. Here you have categories like Photos, Time, Date, Weather, Step Counting, Health & Activity, Battery, Calendar, Reminders, Tides, and Astronomy. Under the categories, you have several widget options. Choose any that you like.
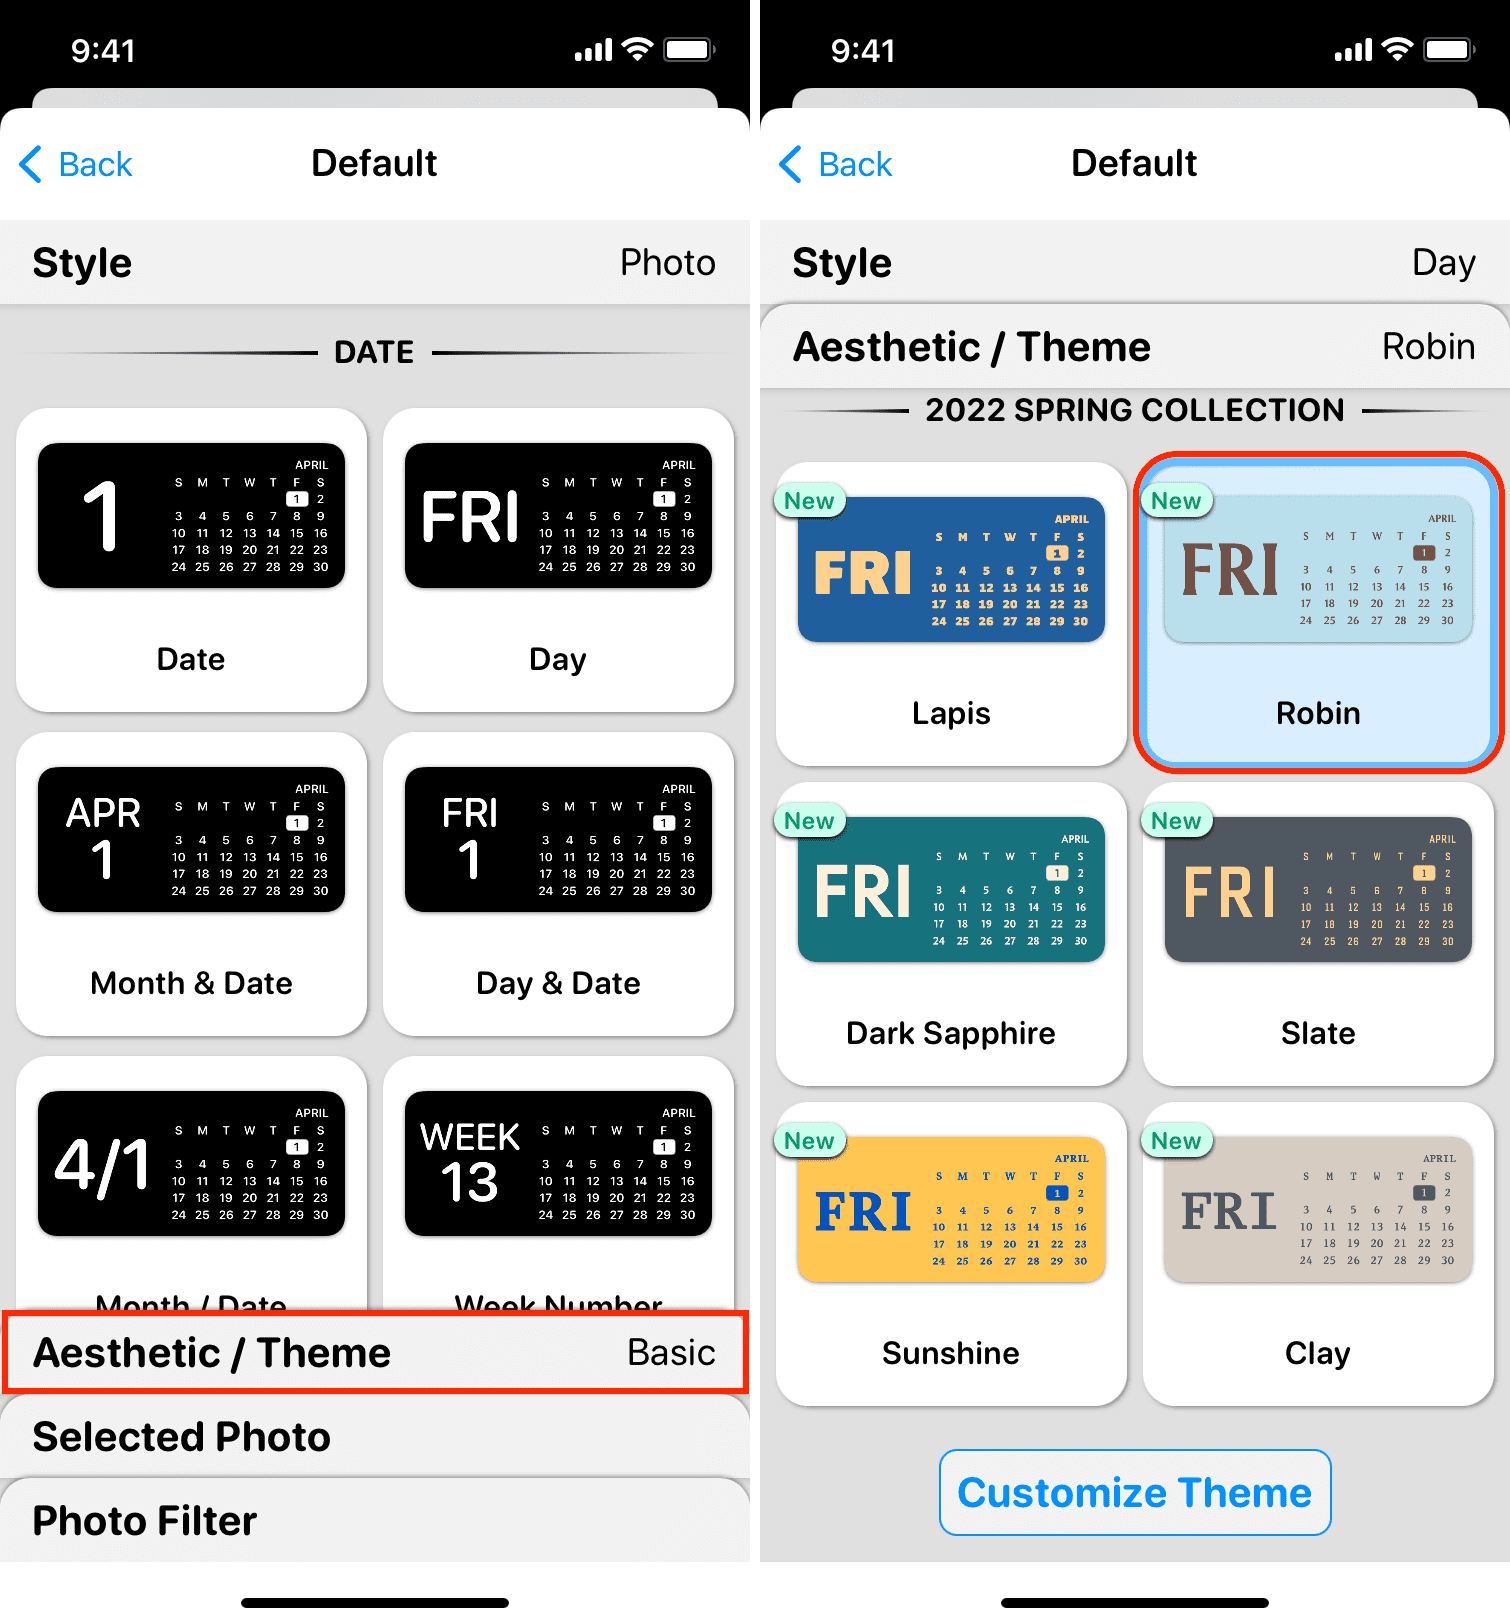
3) After choosing the widget style, tap Aesthetic/Theme to set the widget’s appearance. Choose one of the options. Tap Customize Theme to personalize it further.
4) Depending on the widget style, there may be additional customization options. For example, if you selected Photos in Album style, you can set the desired album or photo filter. If you selected Sun Rise/Set widget, you can set the location and time format.
If you selected something simpler like a monthly calendar, there are no other options after setting the theme.
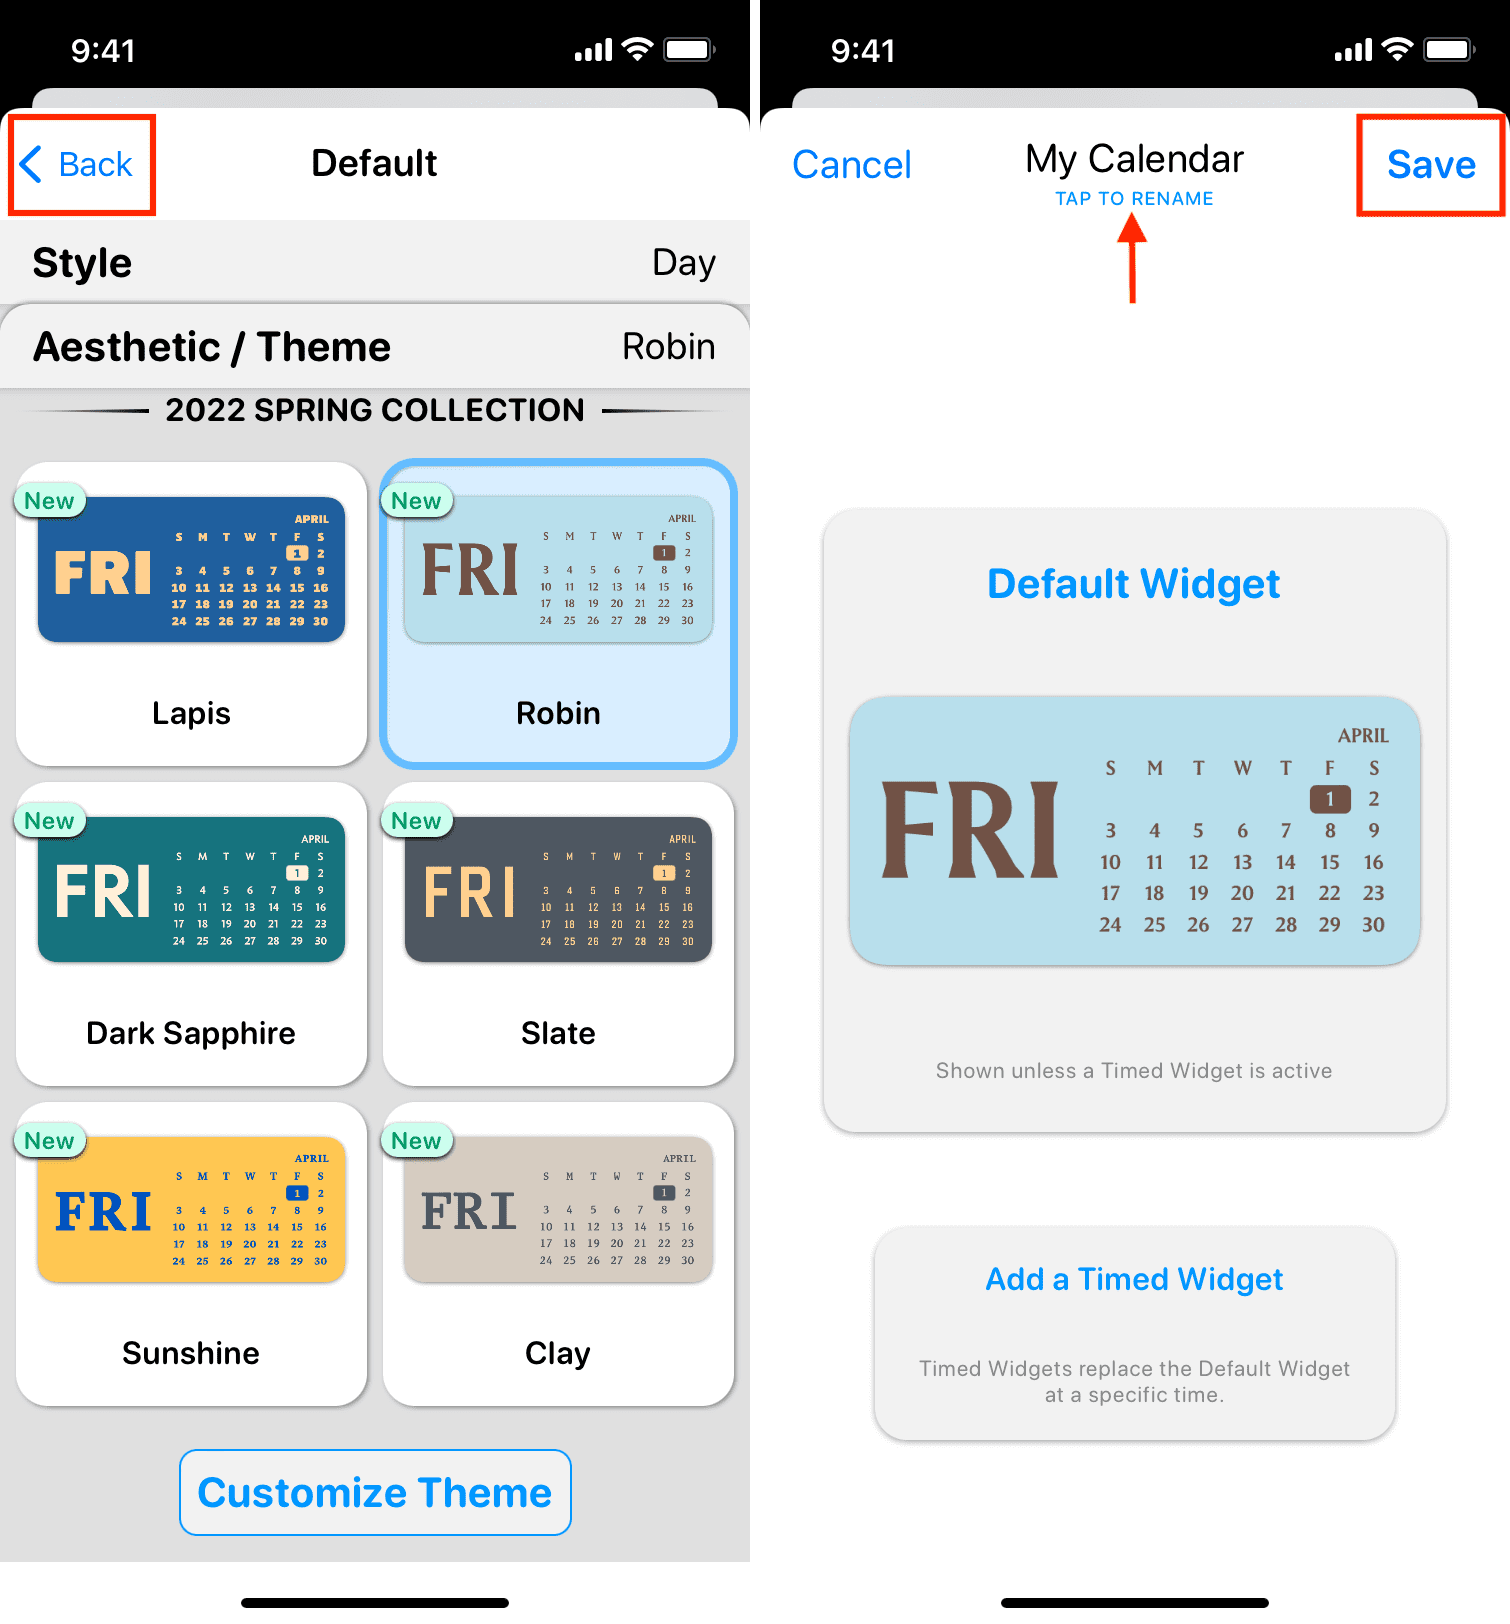
5) When you’re done setting up your widget, tap Back in the top left of the screen.
6) You will see a preview of your widget. From the top, tap to rename it. This name will help you identify the widget while setting it on the Home Screen.
7) Add a Timed Widget in Widgetsmith lets you add widgets that change automatically. Read more about it below. But if you’re looking to have a widget that does just one job, you don’t need to use timed widgets.
8) Tap Save.
Now, our first leg is done. You have successfully created a widget. All that’s left now is to set and display it on the Home Screen.
How to set Widgetsmith widget to iPhone Home Screen
Follow these steps once you have created and personalized a small, medium, or large widget inside the Widgetsmith app:
1) Go to an iPhone Home Screen where you want to place the widget. If the Home Screen has free space, that’s great. If app icons occupy it, adding the widget will force some apps to move to the next Home Screen.
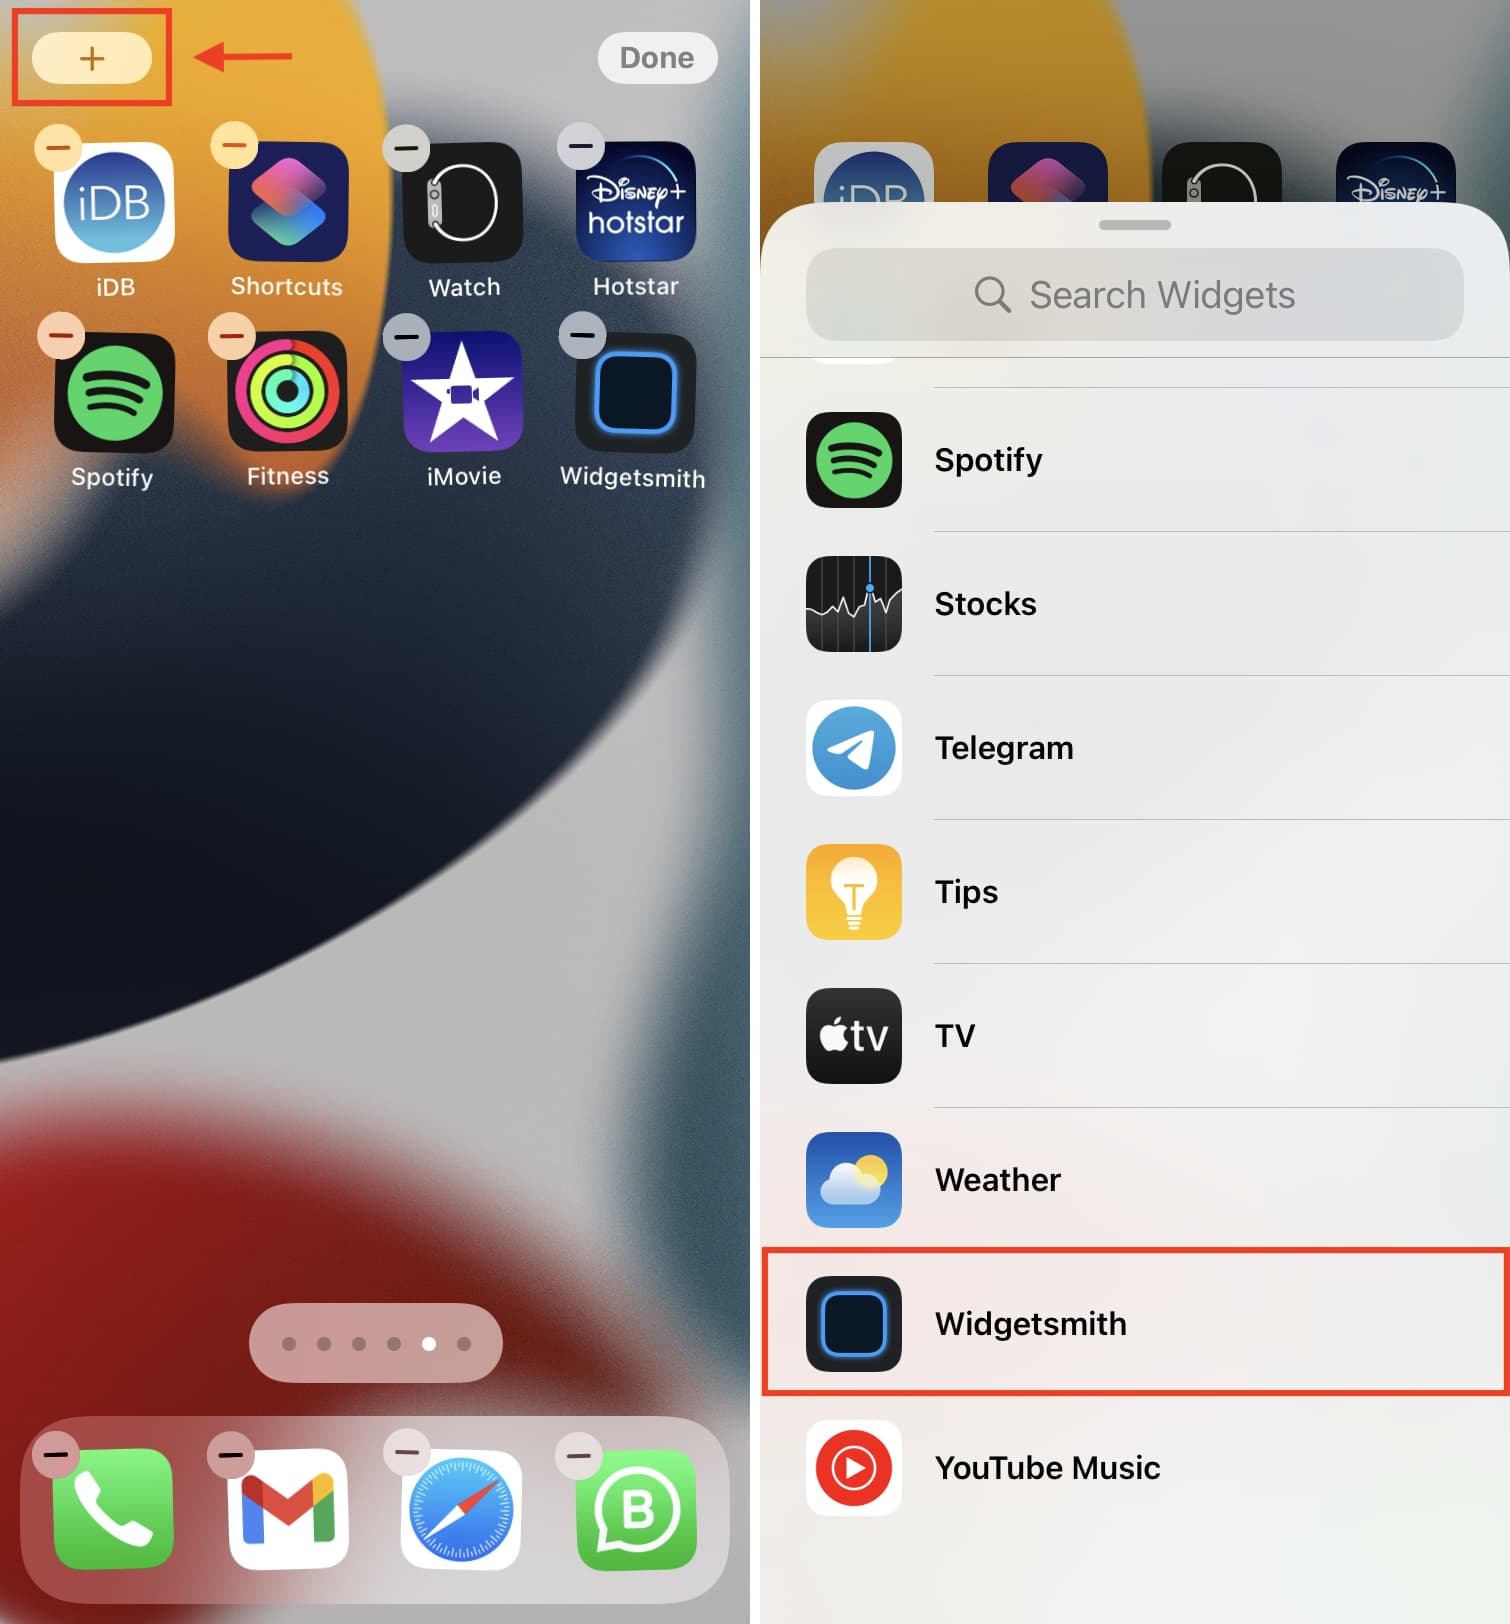
2) On the Home Screen, press any empty area. Once all apps start shaking, tap the plus icon from the top left.
3) Scroll to the bottom of all the listed widgets and tap Widgetsmith.
4) Depending on the widget you created earlier in the app, choose a widget size: Small, Medium, or Large, then tap Add Widget.
5) Once the Widgetsmith widget is on the Home Screen, tap Done.

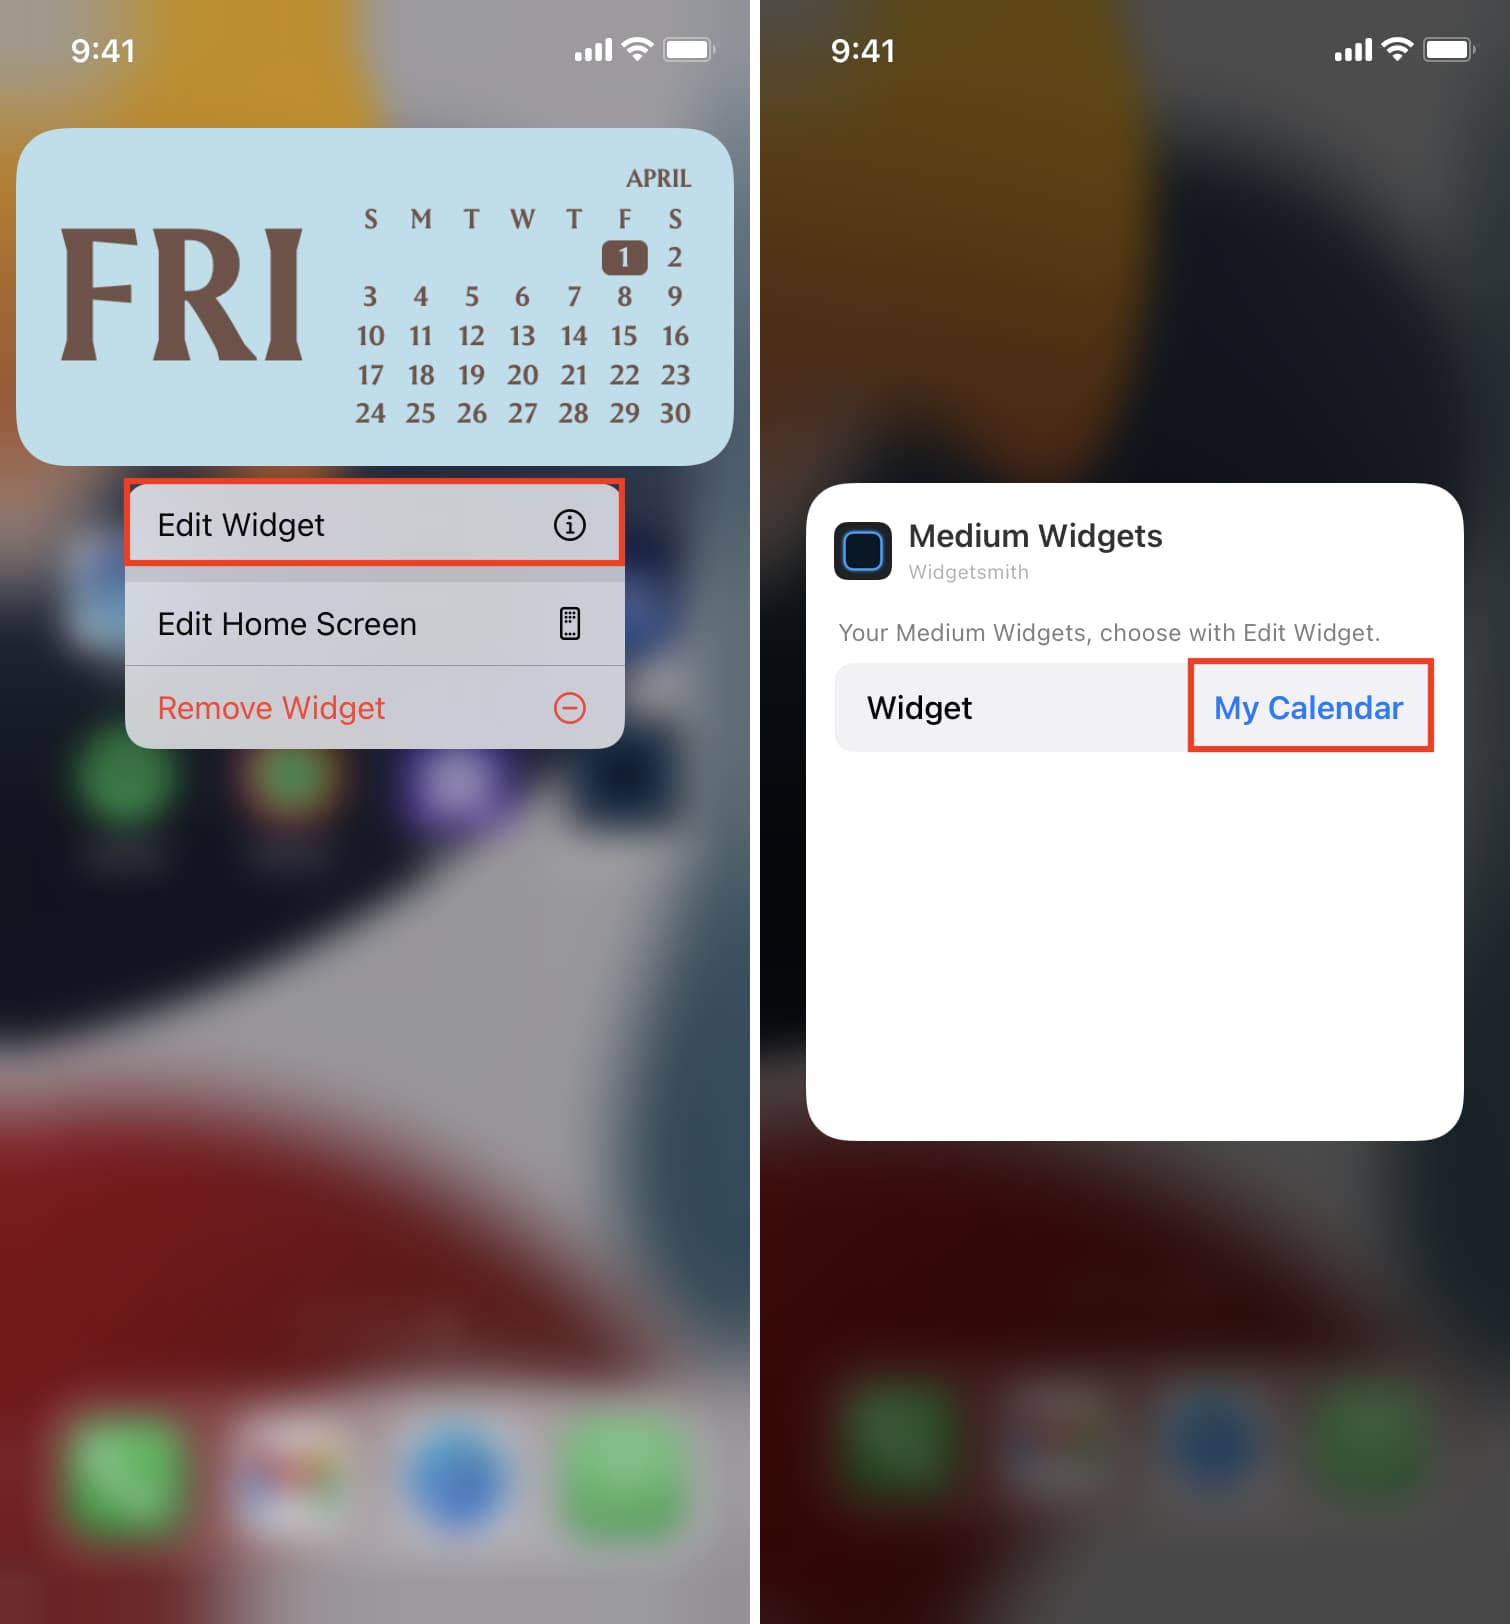
6) You should see your widget. If not, press (not tap) the Widgetsmith widget and choose Edit Widget.
7) Tap Small #number or your widget name next to Widget. Choose the widget you had created inside Widgetsmith.
8) Tap anywhere outside the widget to return to the Home Screen.
You now have the Widgetsmith widget beautifully displaying the set widget on the iPhone Home Screen. Like any iOS widget, you can move it around to a different location.
Edit Widgetsmith widgets
You can edit the widget you created inside the Widgetsmith app and change its information or aesthetics. To do this, open the Widgetsmith app > tap the widget name > tap the widget preview > edit it as desired > tap Back > tap Save.
Once you have created two or more widgets inside the Widgetsmith app, you can set them as different widgets on the Home Screen or edit the existing widget and choose a different one.
To edit Widgetsmith widgets on the Home Screen, press the Widgetsmith widget > Edit Widget > tap the blue widget name > choose one of your different widgets > tap outside the widget area to return to the Home Screen with this new widget in action.
What are timed widgets in Widgetsmith and how to use them
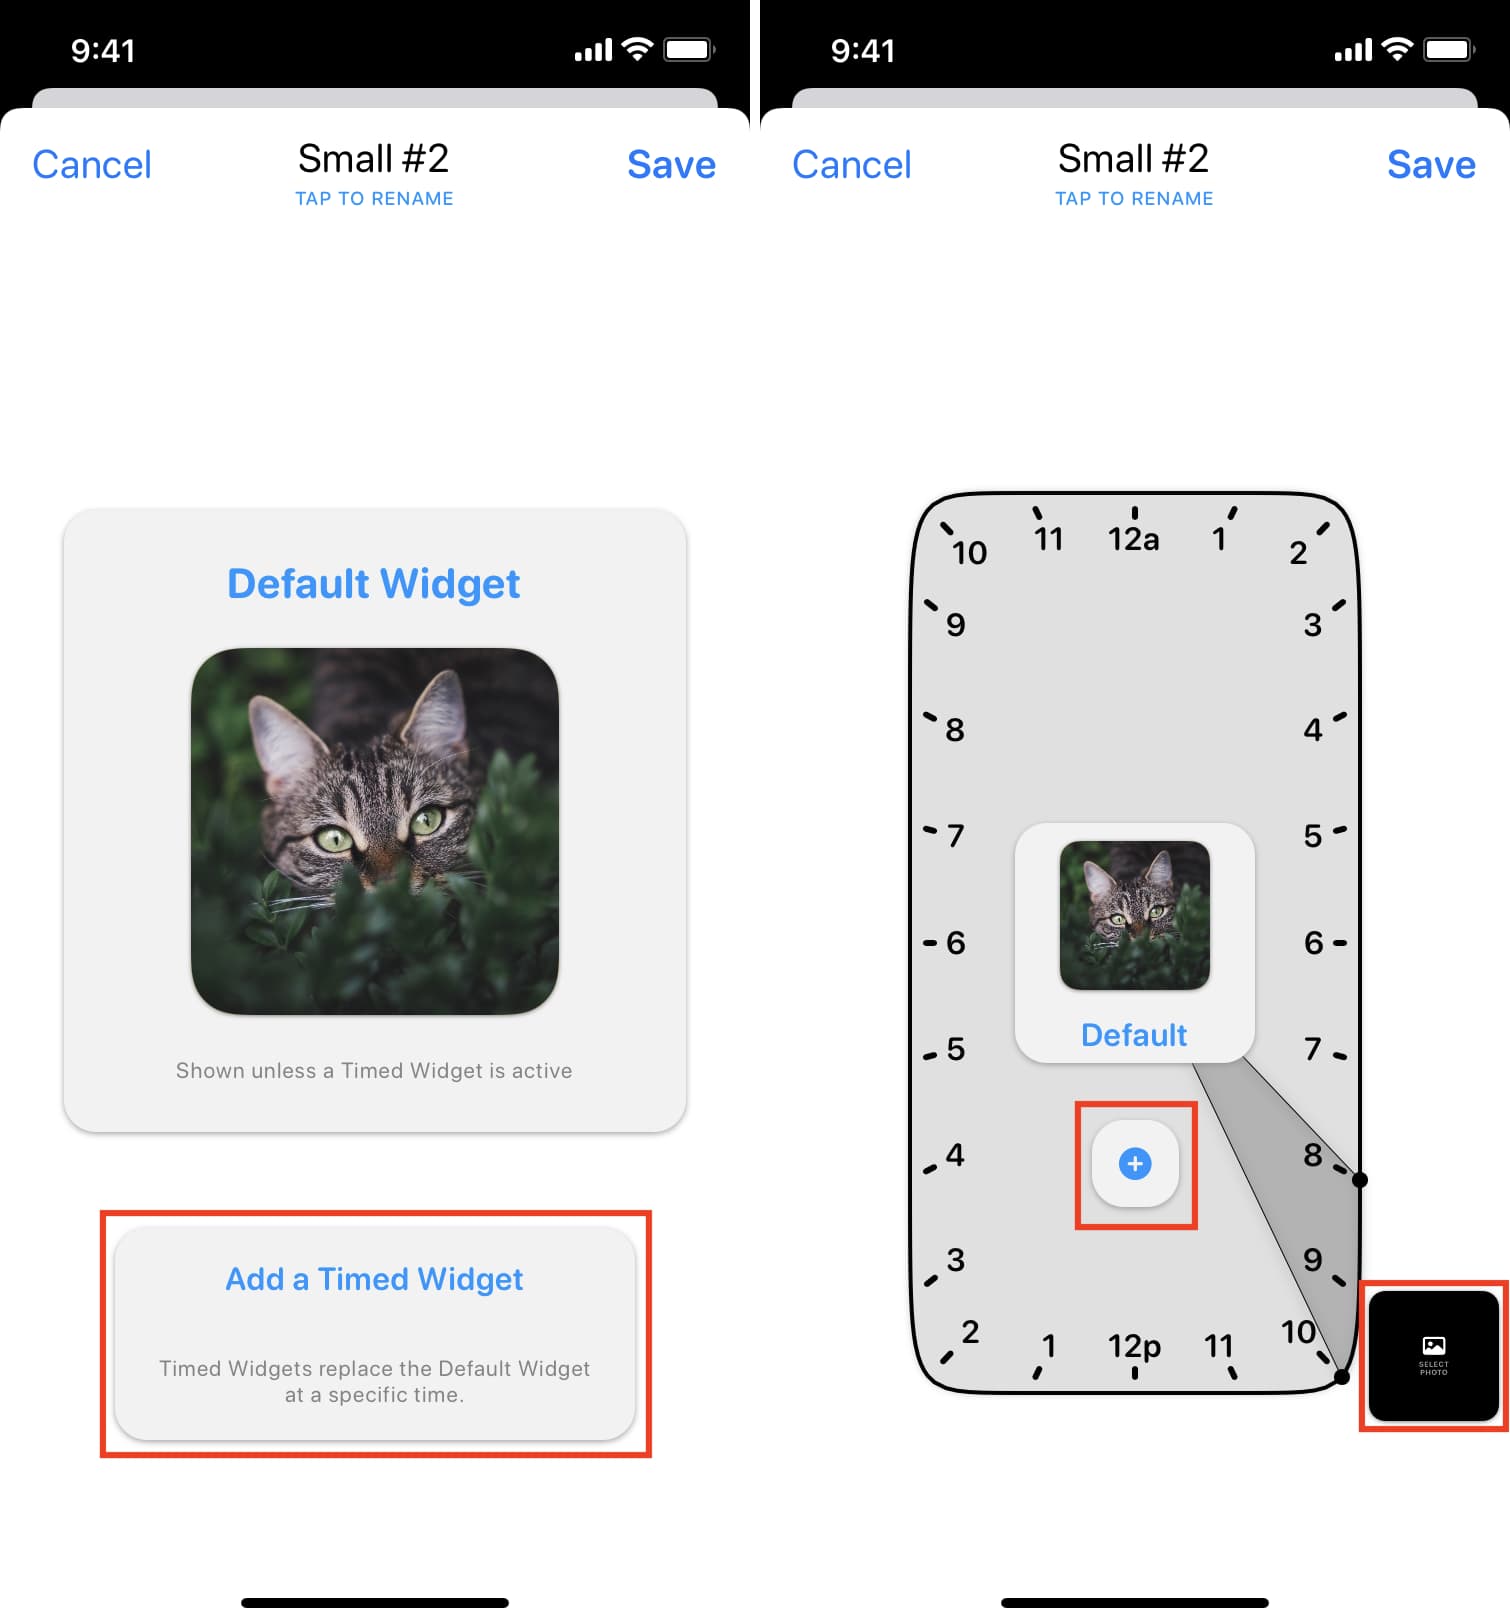
After you follow steps 1 to 5, you will see the widget preview screen. Here, you have an option called Add a Timed Widget in Widgetsmith.
Timed widgets let you add up to 12 different widgets, which change automatically throughout the day. For example, from 6 AM to 8 AM, you can have it display your step count; from 8 AM to 10 AM, you can have the same widget automatically change and display your upcoming calendar events; from 10 AM to 12 noon, it can show you reminders, and so on. You get the idea.
Timed Widget in Widgetsmith is a genius concept if you implement it right. Instead of populating your Home Screen with multiple widgets, you need just one that can cycle various widgets throughout the day, showing you relevant information. You can consider Widgetsmith’s Timed Widget as the brother of Apple’s built-in Smart Stack widget that automatically changes widgets to show the most relevant information throughout the day.
Here’s how to set up and use Timed Widgets in Widgetsmith:
1) Inside Widgetsmith, tap Add Small, Medium, or Large Widget and set a widget. Tap Back when you’re done styling it.
2) Tap Add a Timed Widget.
3) Tap the tiny blue plus icon inside the clock to add a timed widget.
4) Now, tap that widget to style and customize it. When done, tap Back. You can repeat steps 2 and 3 to add more widgets.
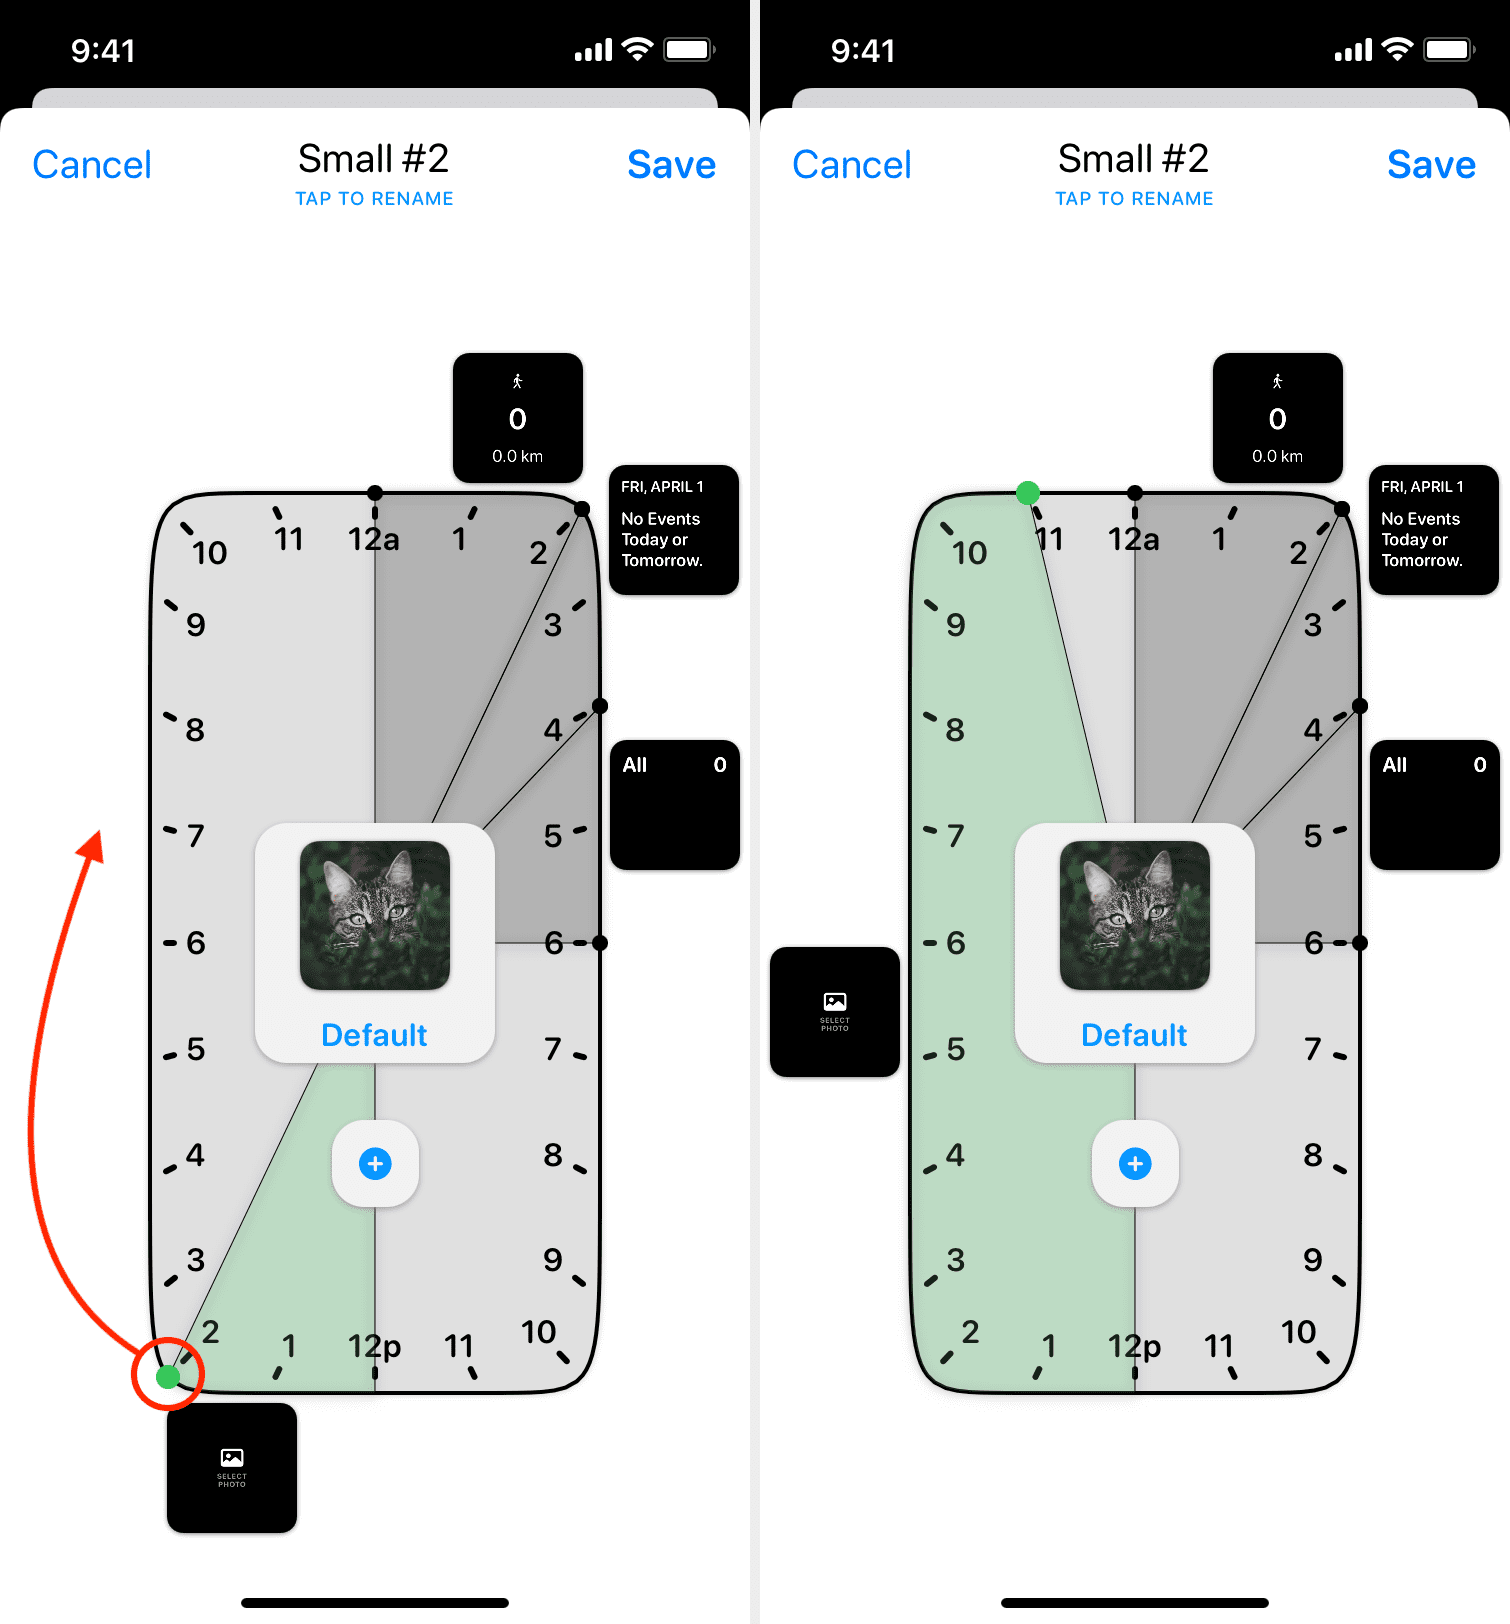
5) To move this time slot, press the dark gray area and drag it.
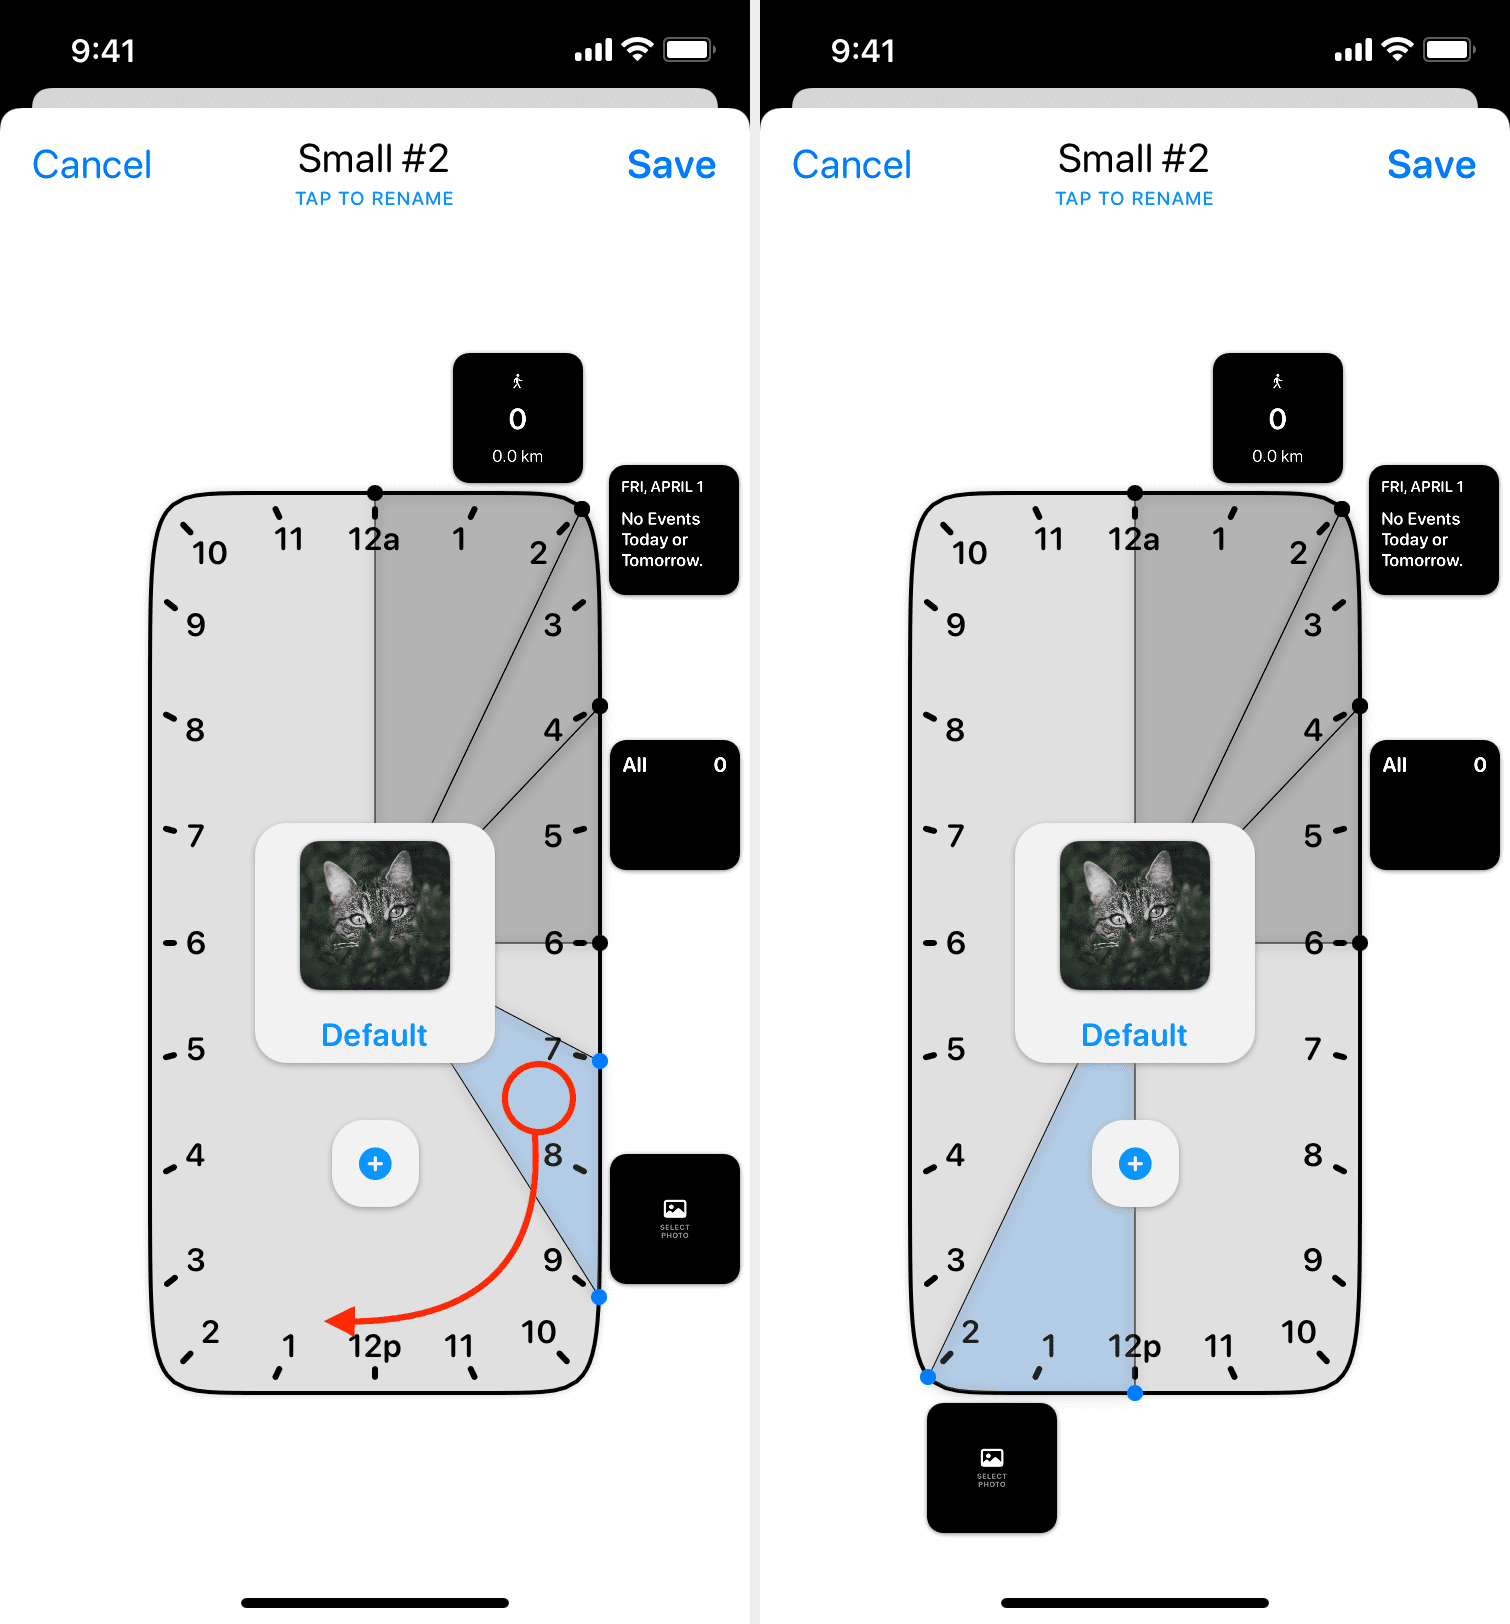
6) By default, a timed widget shows for 2 hours. To change the time duration that widget is visible for, drag one of the lines to increase (maximum 23 hours) or decrease (minimum 1 hour) the time.
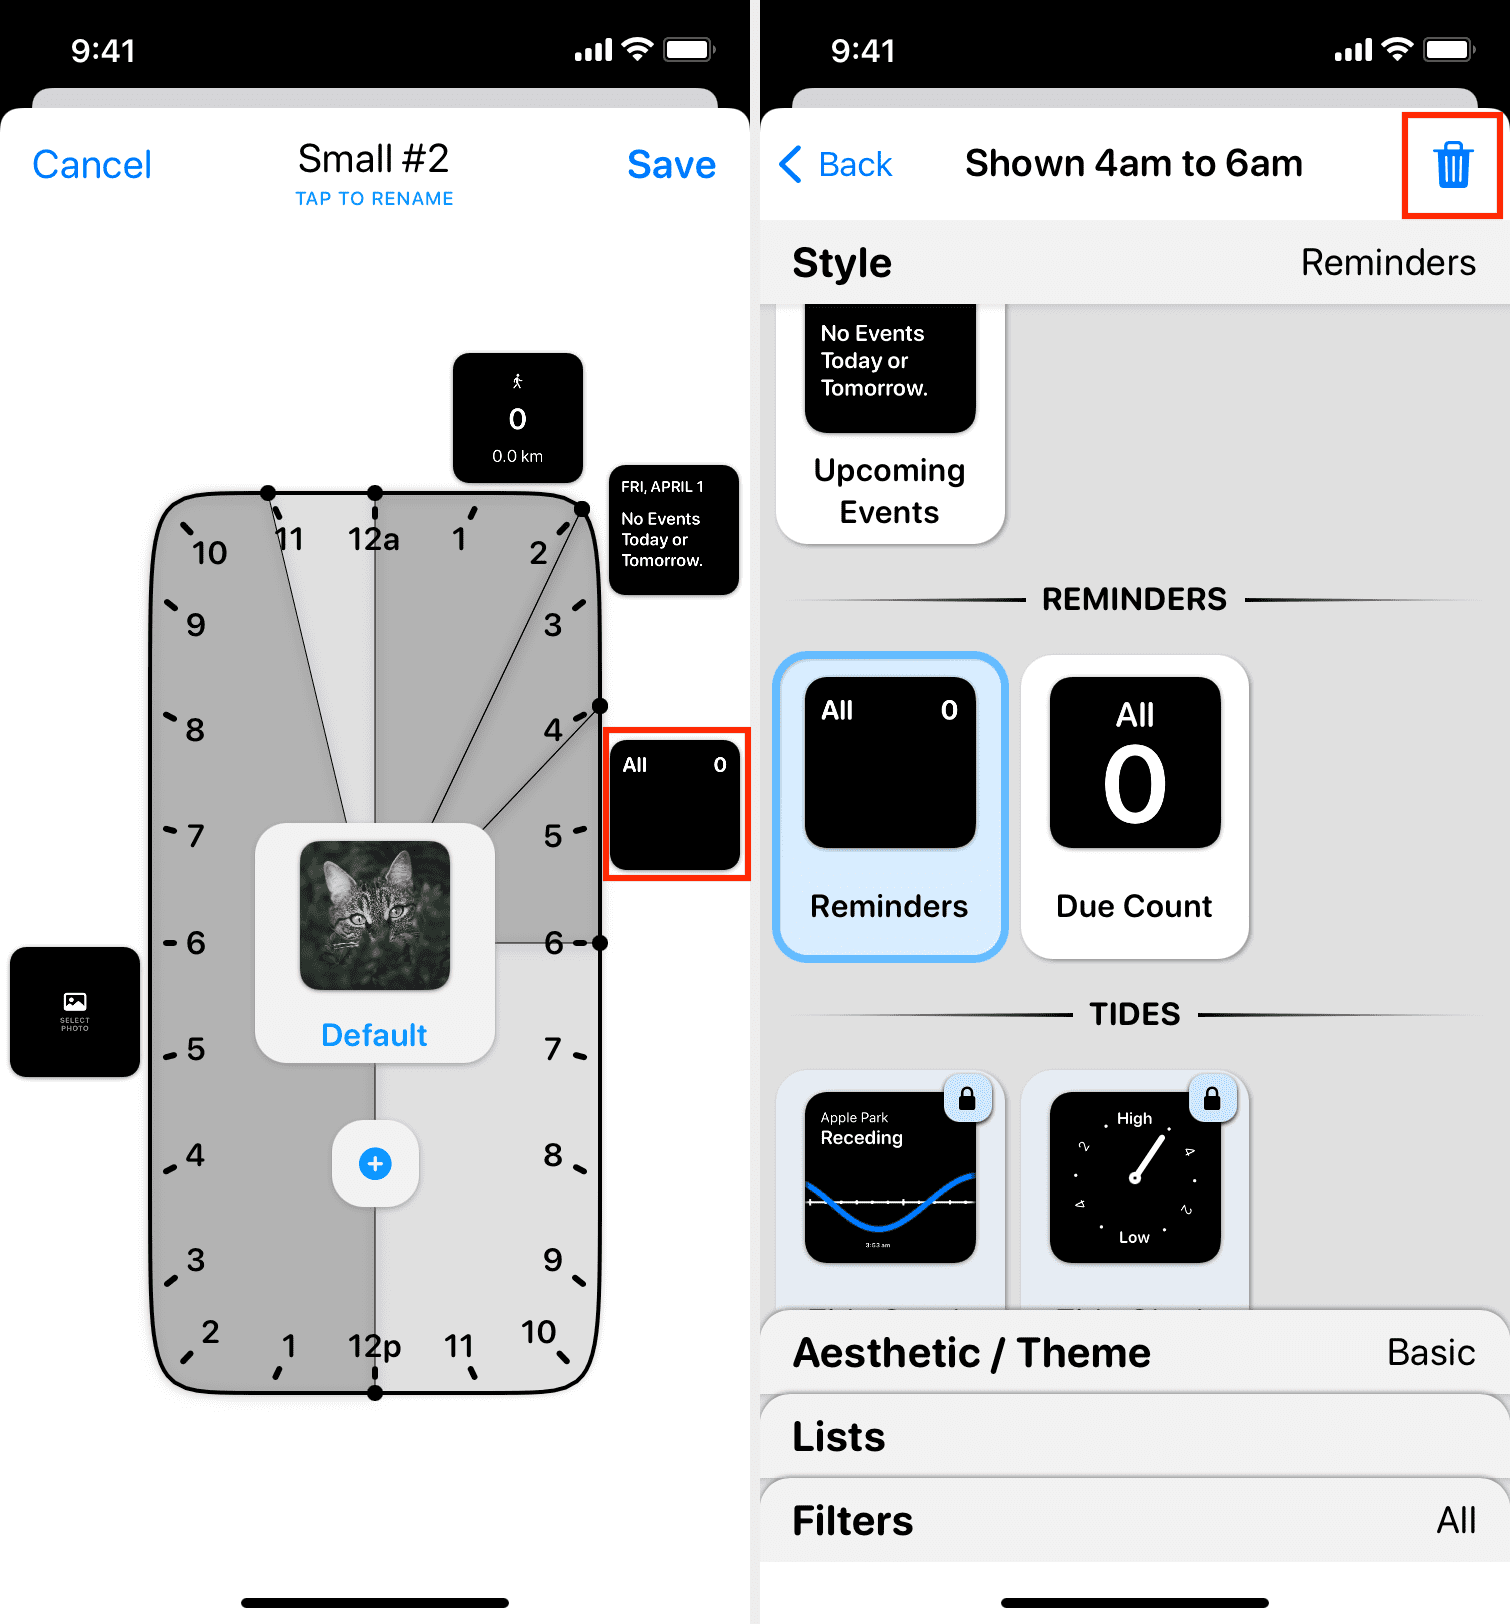
7) To remove a widget from the timed widget, tap it and then tap the trash icon.
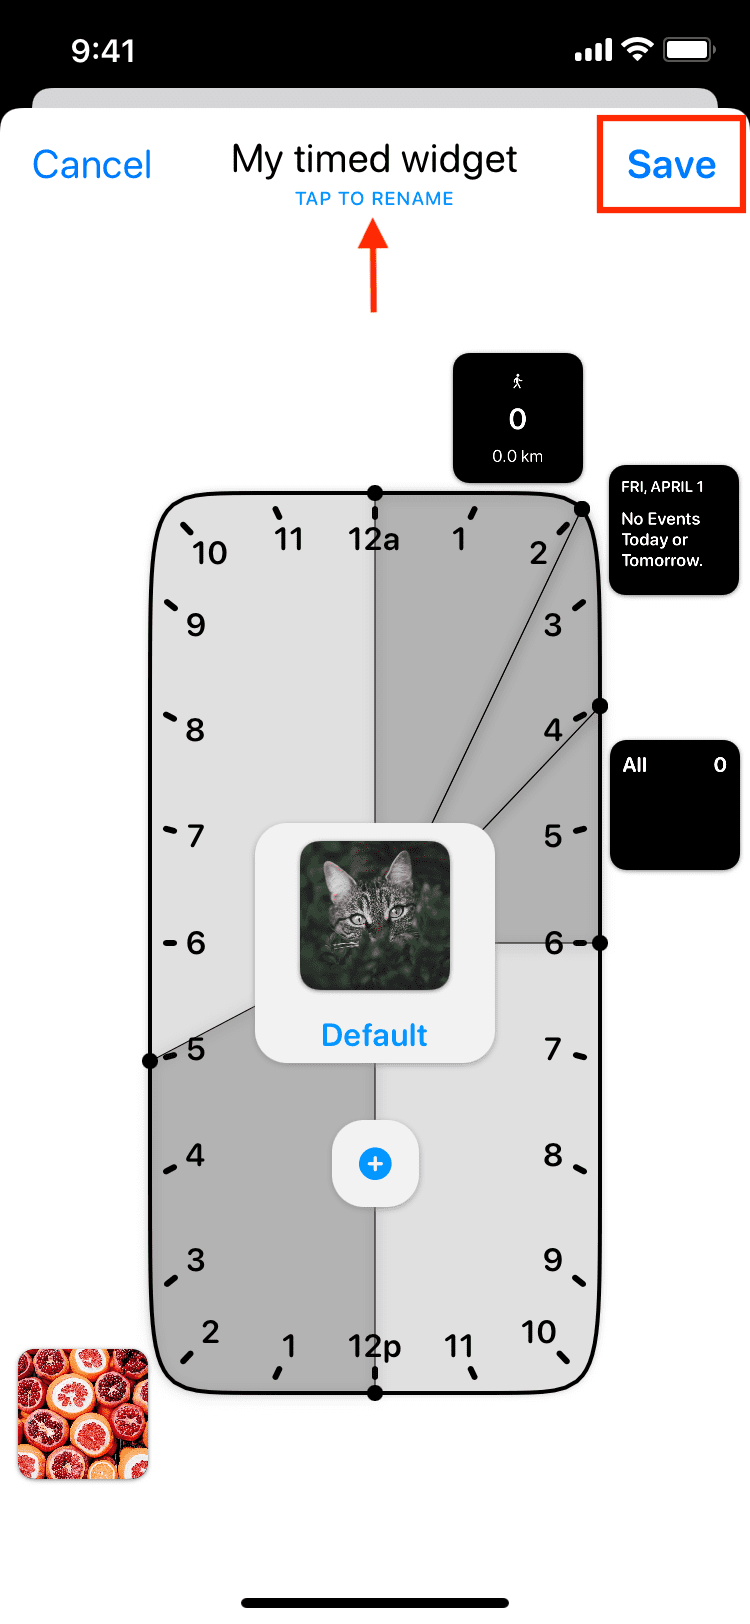
8) Finally, when you’re done editing, tap Save to save the timed widget.
After this, follow the regular steps to add it to the iPhone Home Screen.
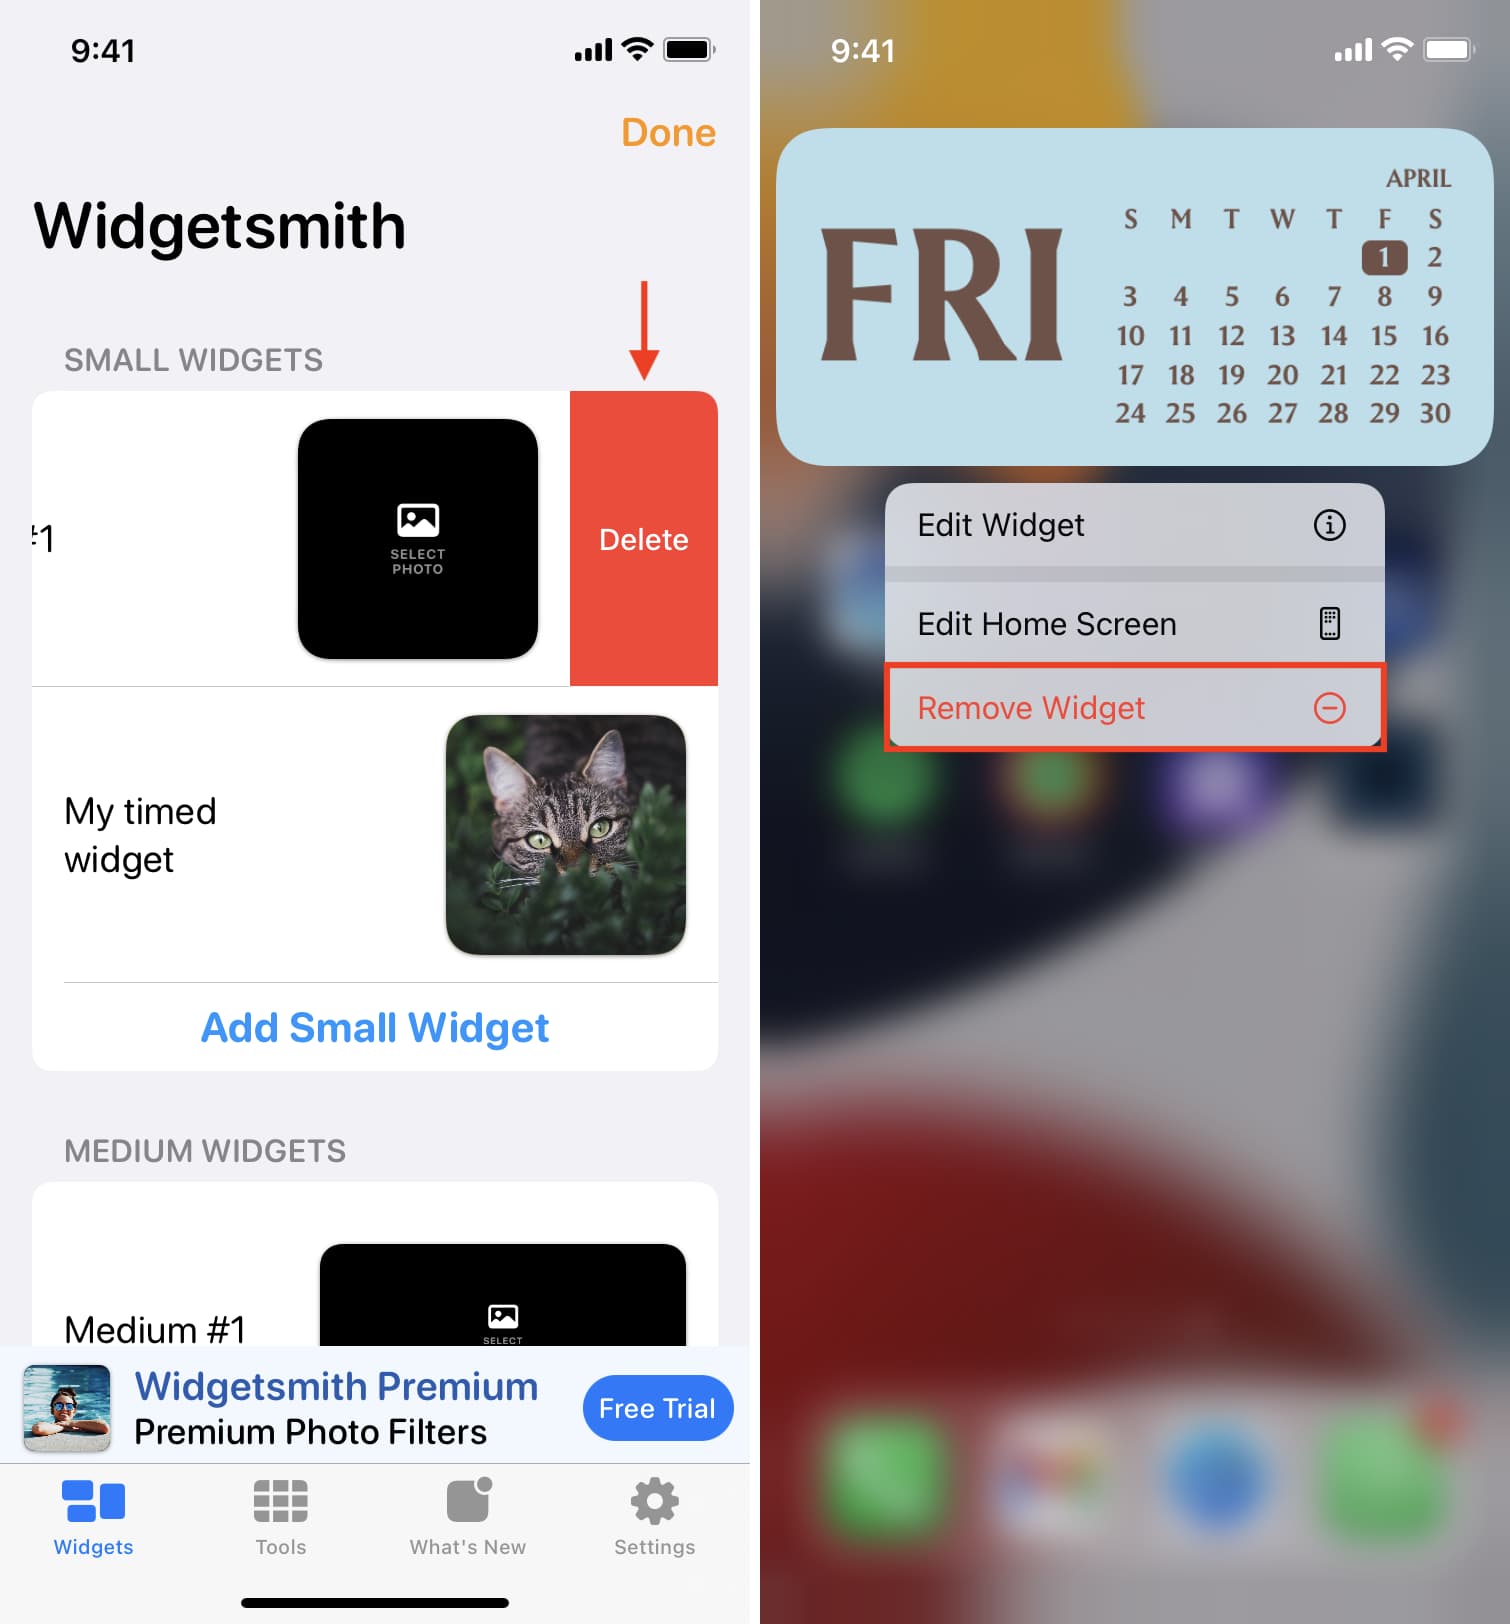
How to delete a Widgetsmith widget
To delete one of the widgets you created, open the Widgetsmith app, swipe left on a widget, and tap Delete. You can also tap Edit > red minus button > Delete.
To remove Widgetsmith widget from your iPhone Home Screen, press the Widgetsmith widget and tap Remove Widget > Remove.
Using Widgetsmith on iPhone
These are all the essentials you need to know about using Widgetsmith on iPhone. The app is straightforward, but it needs some time to customize and set up. Once you do that, your Home Screen will stay informative and helpful.
You can explore the other options inside the app to learn more about it. For example, the Wallpaper Generator option inside the Tools section is a handy addition! You can upgrade to premium to unlock all the options.
Tip: Do you have small hands and a big iPhone? Add the blank medium rectangle Widgetsmith widget at the top of your Home Screen, and it will push the app icons down, making them easier to reach.
Related: Use Watchsmith to create custom Apple Watch faces to match your style
How to fix Widgetsmith not working on iPhone
Follow these fixes if Widgetsmith isn’t working on your iPhone and showing a black screen instead of a widget:
- Make sure you press the Widgetsmith widget > Edit Widget and add a widget.
- Open the Widgetsmith app and make sure you haven’t deleted the widgets.
- Ensure you have not edited the widget to stop showing the photo, text, or other set widget information.
- Make sure you haven’t deleted the actual widget file (like the specific photo or calendar event) from the main Photos or Calendar app.
- Make sure you have allowed Widgetsmith the required permissions like accessing your Health data, Location, Photos, etc. It will show a popup to access these only when you try to use one of the widgets that requires these. To check the permissions, open iPhone Settings > scroll to the bottom and tap Widgetsmith > and ensure you have given it the required permissions.
- Enable Background App Refresh for Widgetsmith. Go to iPhone Settings > General > Background App Refresh to do that.
- Restart your iPhone.
- Open App Store and update the Widgetsmith app.
- If nothing helps, uninstall the Widgetsmith app and reinstall it. This will delete all your widgets, and you will have to set them again.
Check out next: