If you do a lot of reading on your Kindle Paperwhite and download books often, then you know how quickly your library can grow. And while this is good because it gives you options to read what you’re in the mood for, it can also make finding what you want to read difficult.
You can organize your books by using Collections on Kindle. This lets you categorize your books so that you can find a book you want much faster. And the nice thing is that these Collections are yours. So create as many as you want, for whatever you want, to help you organize your books.
To help you out, we’ll show you how to create and manage Collections on your Kindle Paperwhite.
Create a Collection on Kindle
Amazon makes it super easy to create a Collection on your Kindle. You’ll tap the Menu button and then name your Collection. From there, you can add books right away.
1) Tap the Menu button (three dots) on the top right.
2) Select Create New Collection.
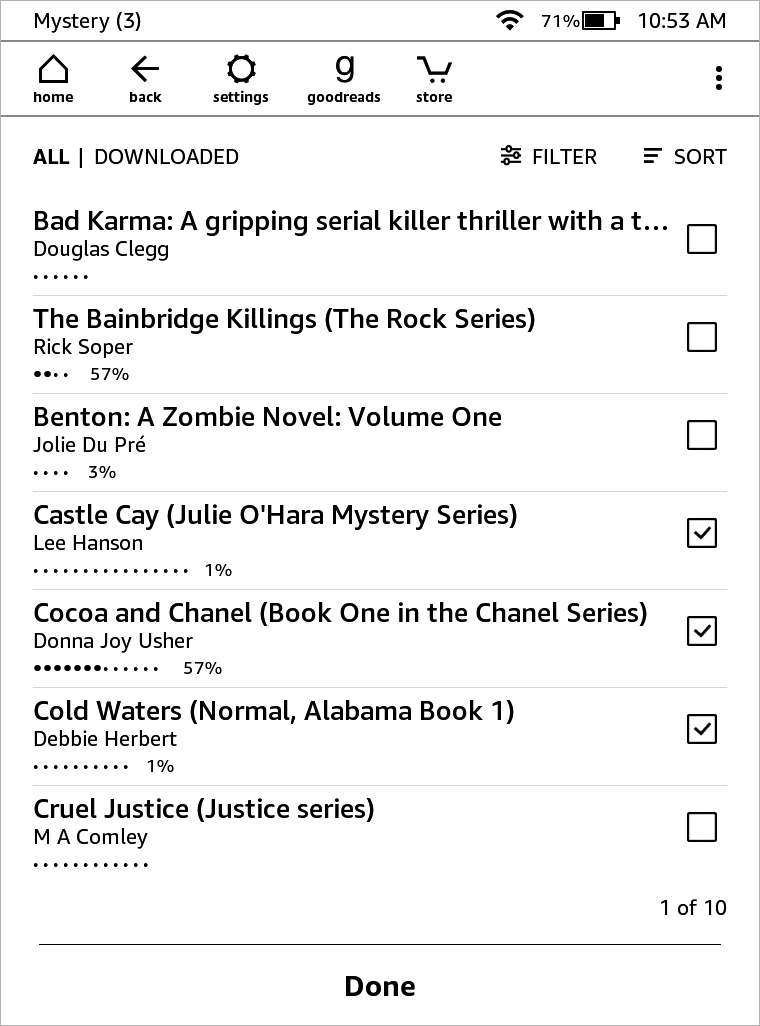
3) Give your Collection a name and tap OK.
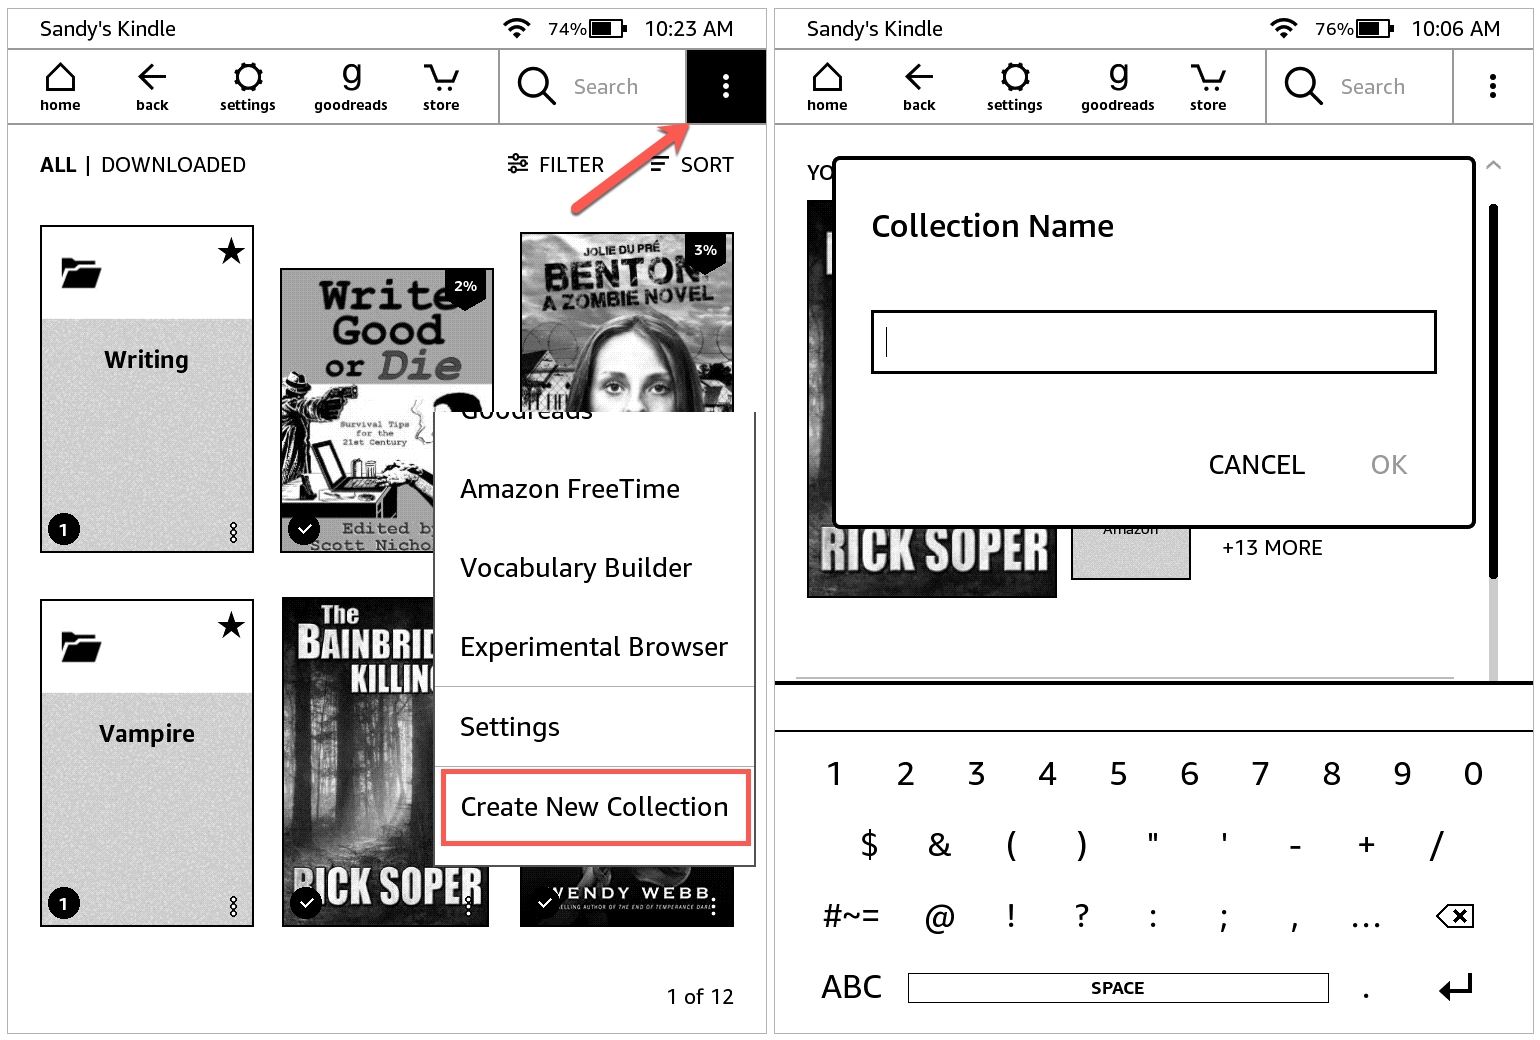
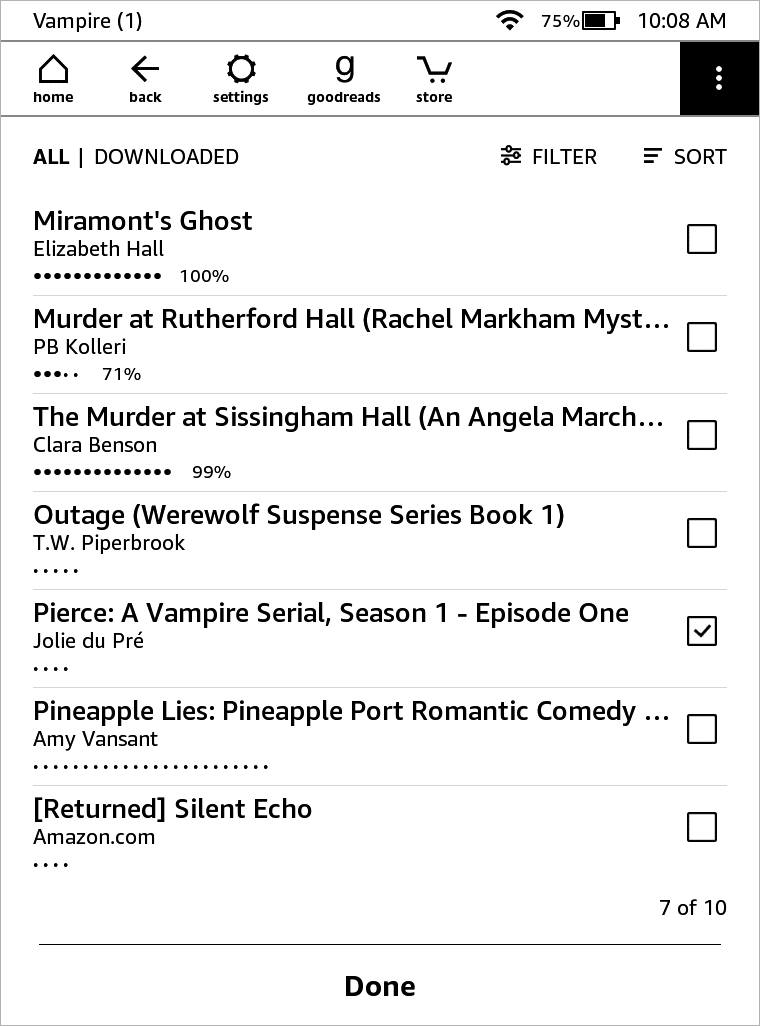
You’ll then be directed to add books to your new Collection immediately. Although not required, it’s a great way to start organizing your library. Check the boxes for the books you want to add to your new Collection and tap Done when you finish.
Add a book to a Collection
As you download more books to your Kindle, you can pop them right into a Collection. This is also a good way to stay organized moving forward. You can add a book to a Collection from Your Library by tapping the More icon for the book.
1) In your library, tap the More icon (three dots) on the bottom right corner of a book.
2) Select Add to Collection.
3) Check the box for the Collection and tap Done.
Tip: If you want to create a new Collection based off that book, tap the Menu button and choose Create New Collection on this screen. The Collection will be added to the list and checked by default. Then tap Done to add the book to it.
Add books in bulk
You can also add several books to a Collection at once, similar to when you first created the Collection.
1) Tap the More icon on the bottom right corner of the Collection.
2) Select Add/Remove Items.
3) Check the boxes next to the books you want to add.
4) Tap Done.
View your Collections on Kindle Paperwhite
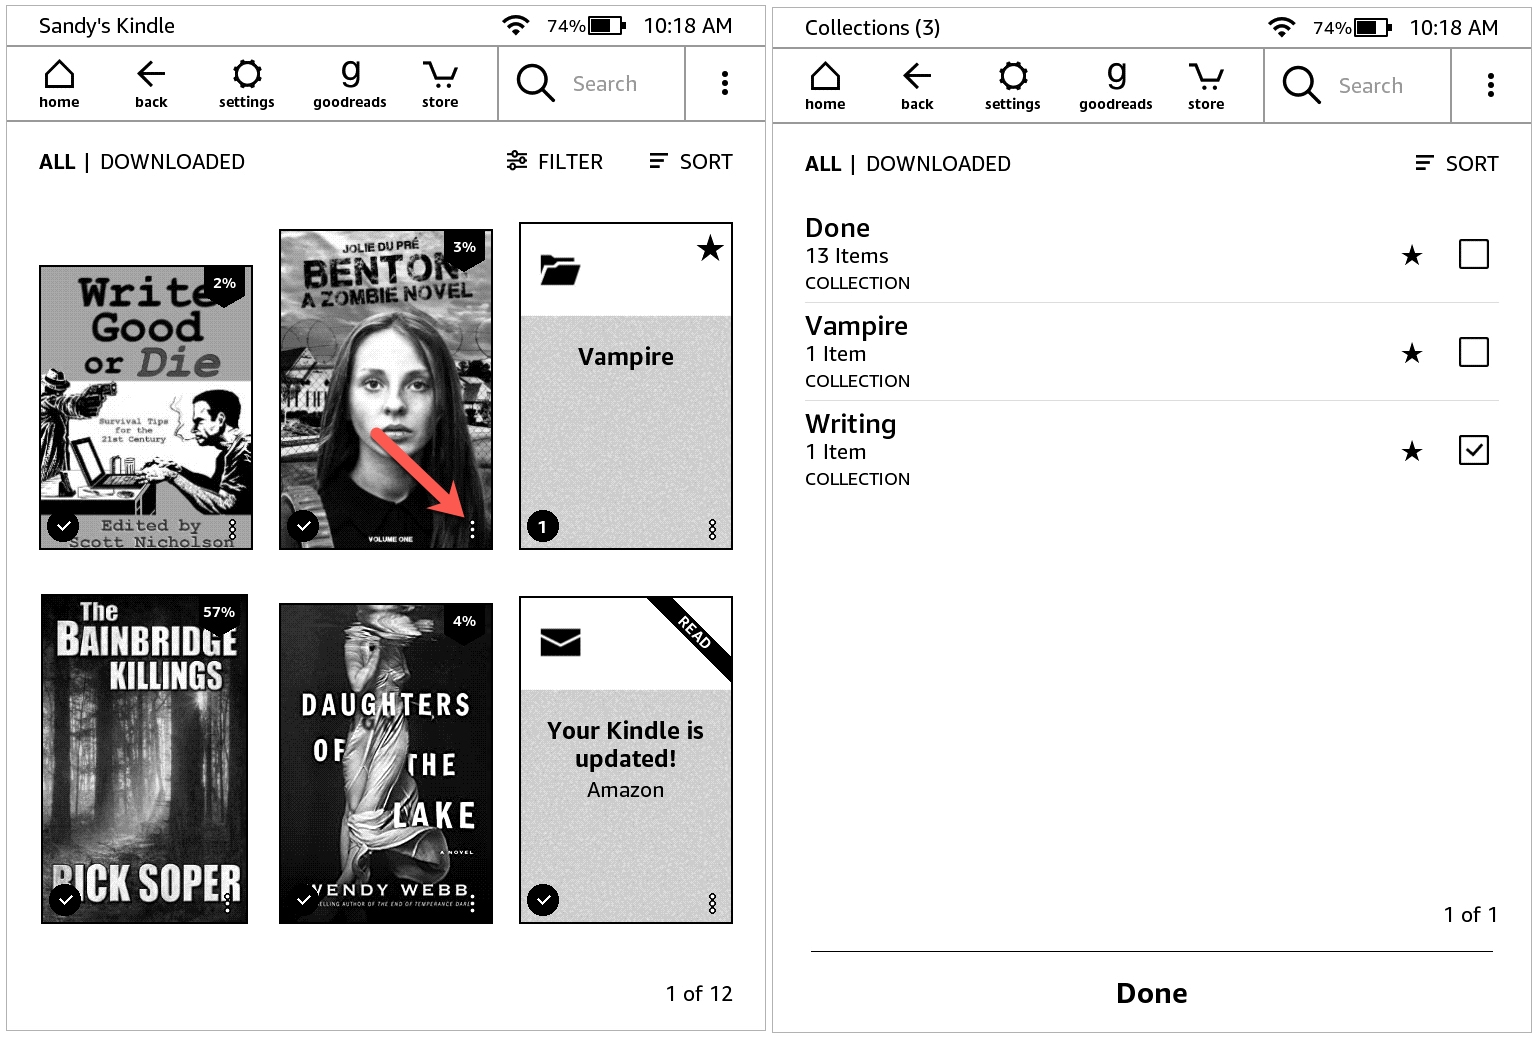
Once you have a Collection or two that you’re ready to browse, it’s simple. You’ll go to Your Library and use the Filter at the top to see your Collections.
1) Tap Your Library at the top of the Home screen or the Menu > Your Library from the toolbar.
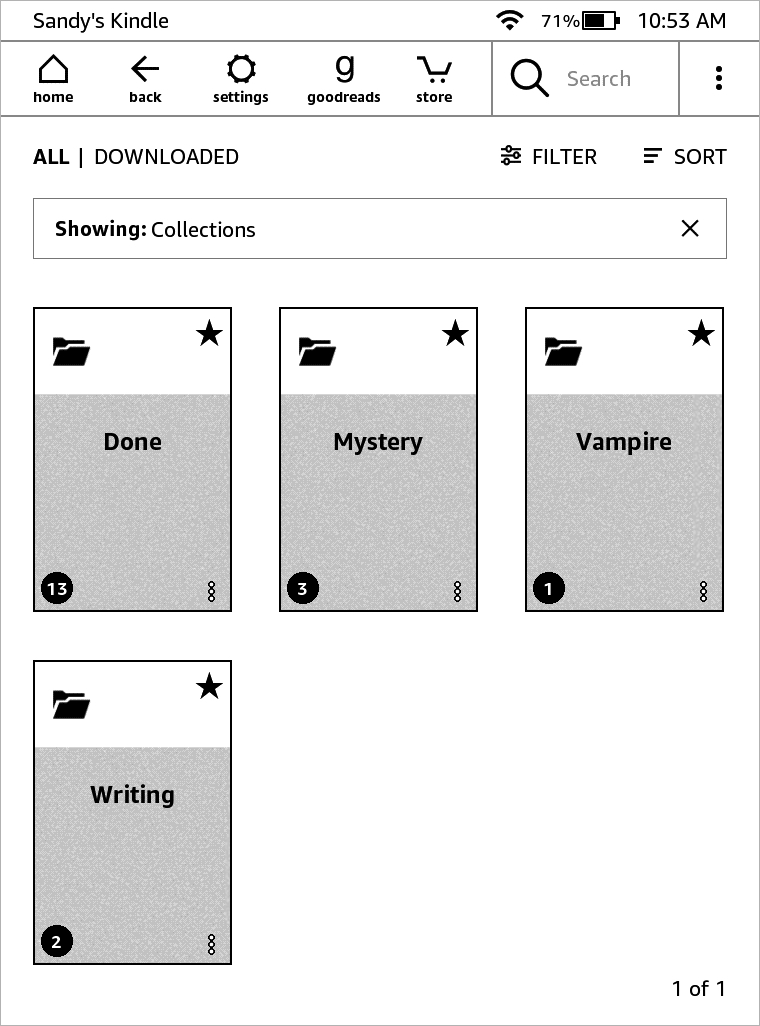
2) Choose Collections.
3) You’ll then see all of the Collections you’ve created. Tap a Collection to view the books in it.
Tips when viewing Collections
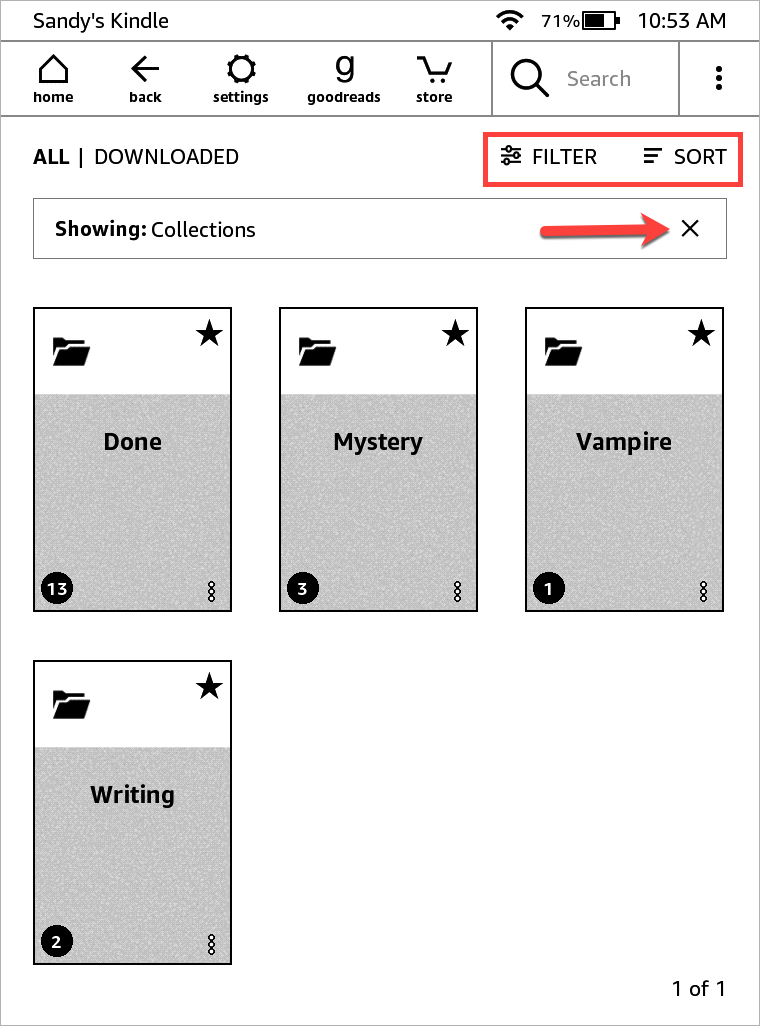
While you’re viewing your screen of Collections, you can use the Filter and Sort options at the top. The Filter will apply to your entire library, but the Sort will sort your Collections by Recent or Title.
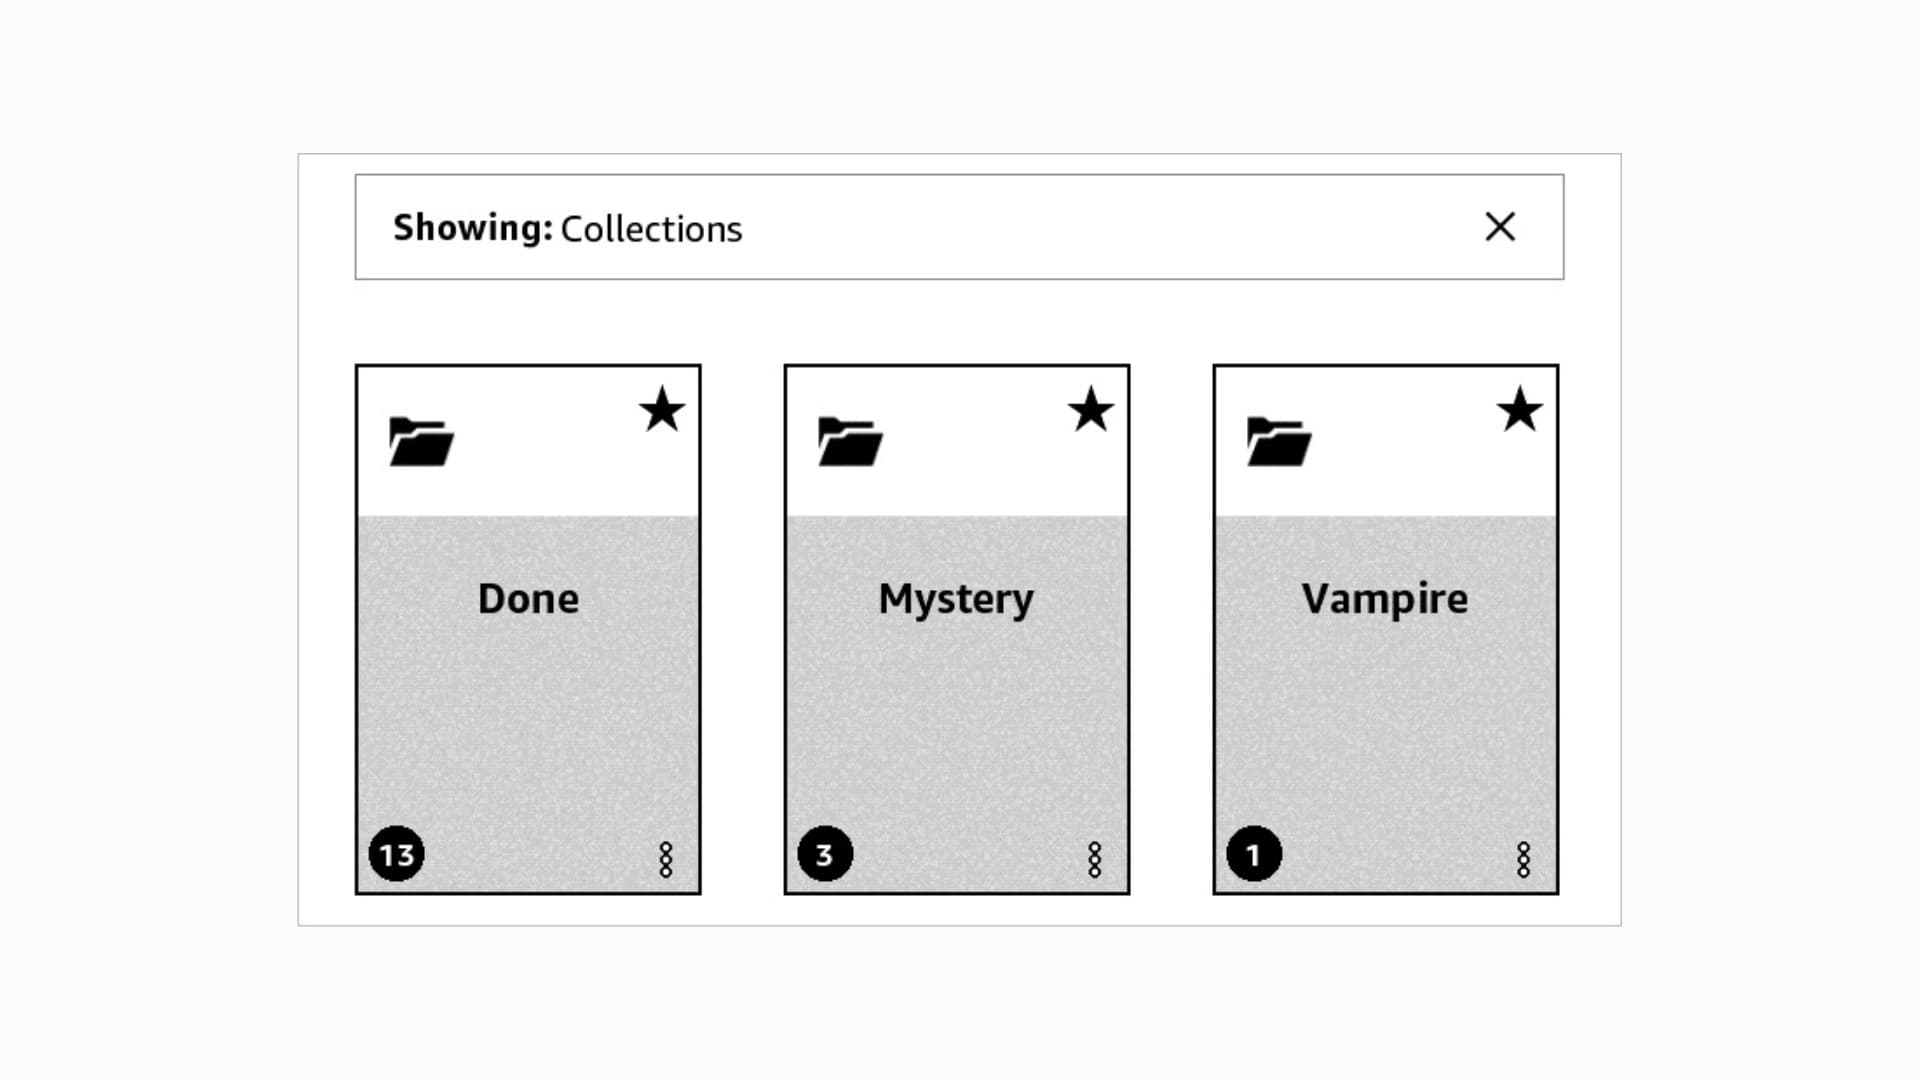
If you use the Filter to see your Collections and want to go back to viewing Your Library, just tap the X in the Showing: Collections box.
When you are inside of a Collection, you can use the Filter and Sort tools as well. The Sort is handy for sorting books by Recent, Title, or Author.
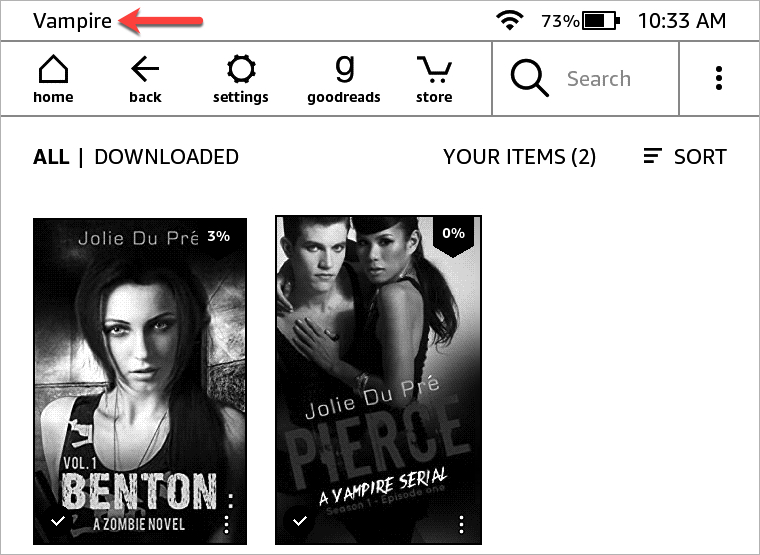
You can always tell which Collection you’re viewing. On the top left of your Kindle screen, you’ll see the name of the Collection.
Remove a book from a Collection
If you want to remove a book that you placed in a Collection, just access the book’s More menu and remove it.
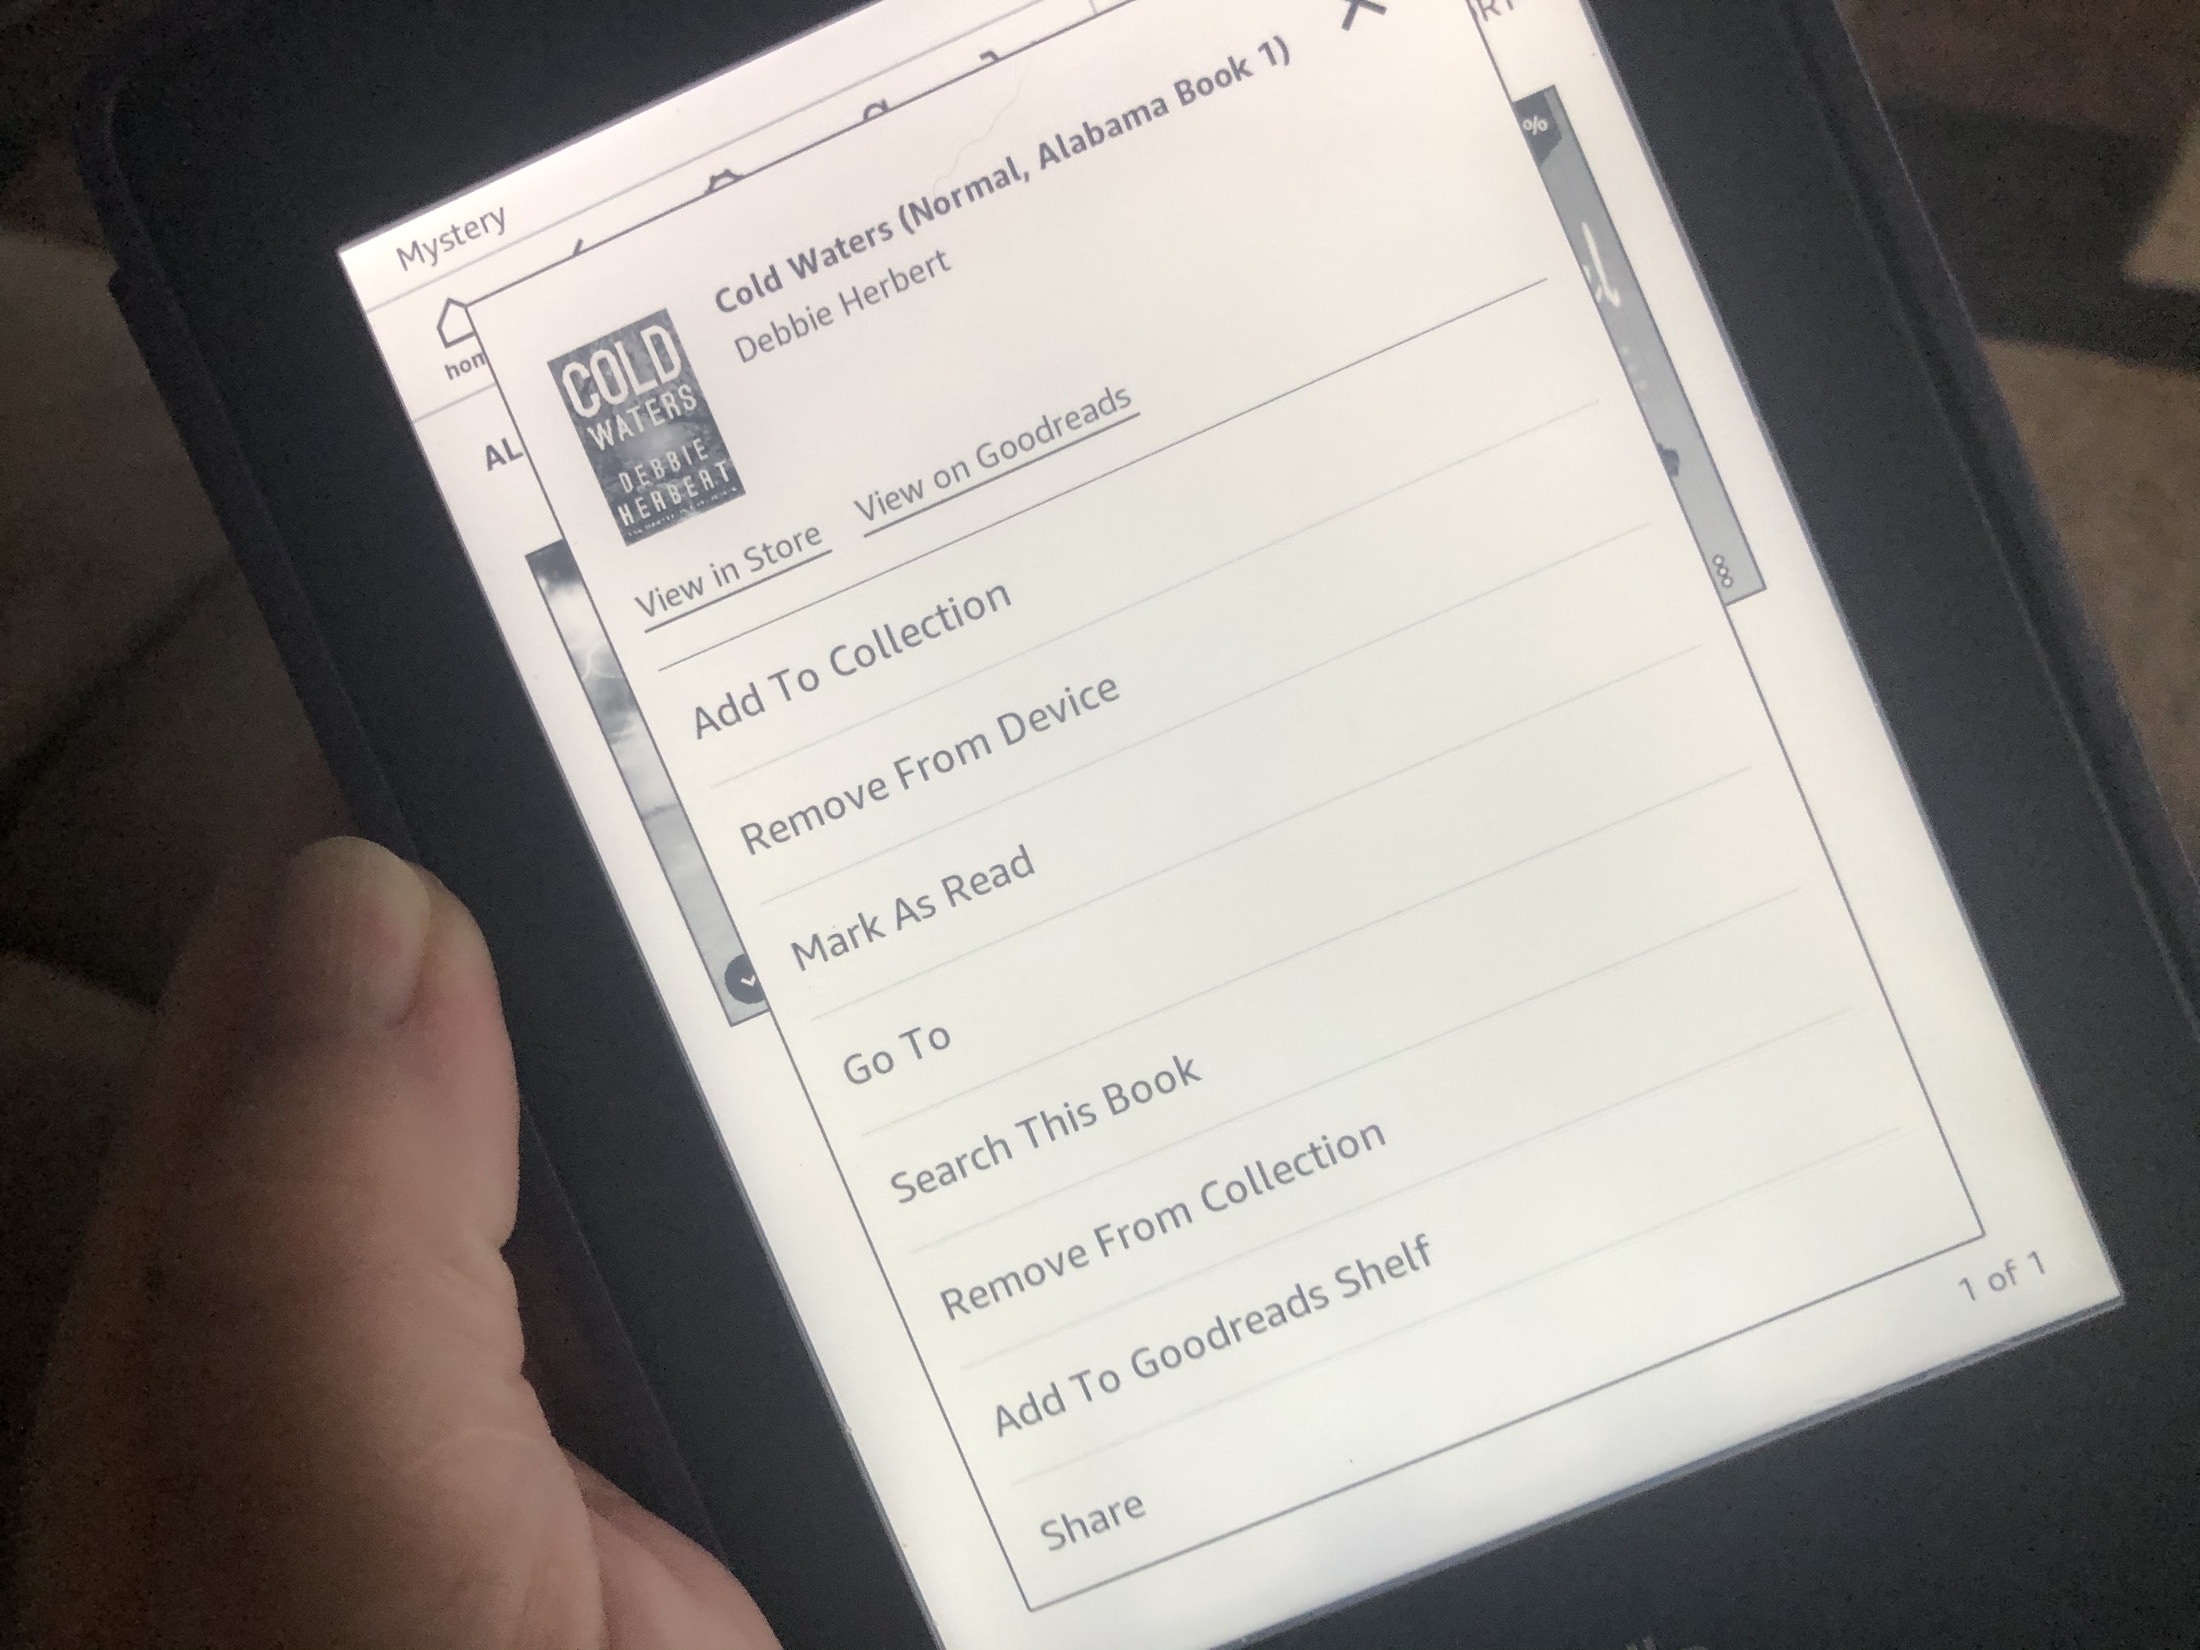
1) While in a Collection, tap the More button on the bottom right corner of the book.
2) Choose Remove From Collection.
3) You won’t see the book disappear from the Collection when you do this. But the next time you open that Collection, the book will not be in it.
Remove books in bulk
Like adding many books to a Collection at once, you can remove several at a time too.
1) Tap the More icon on the bottom right corner of the Collection.
2) Select Add/Remove Items.
3) Uncheck the boxes next to the books you want to remove.
4) Tap Done.
Remember, removing a book from a Collection does not remove it from Your Library.
Rename or remove a Collection
Once you create a Collection, you may want to rename or remove it.
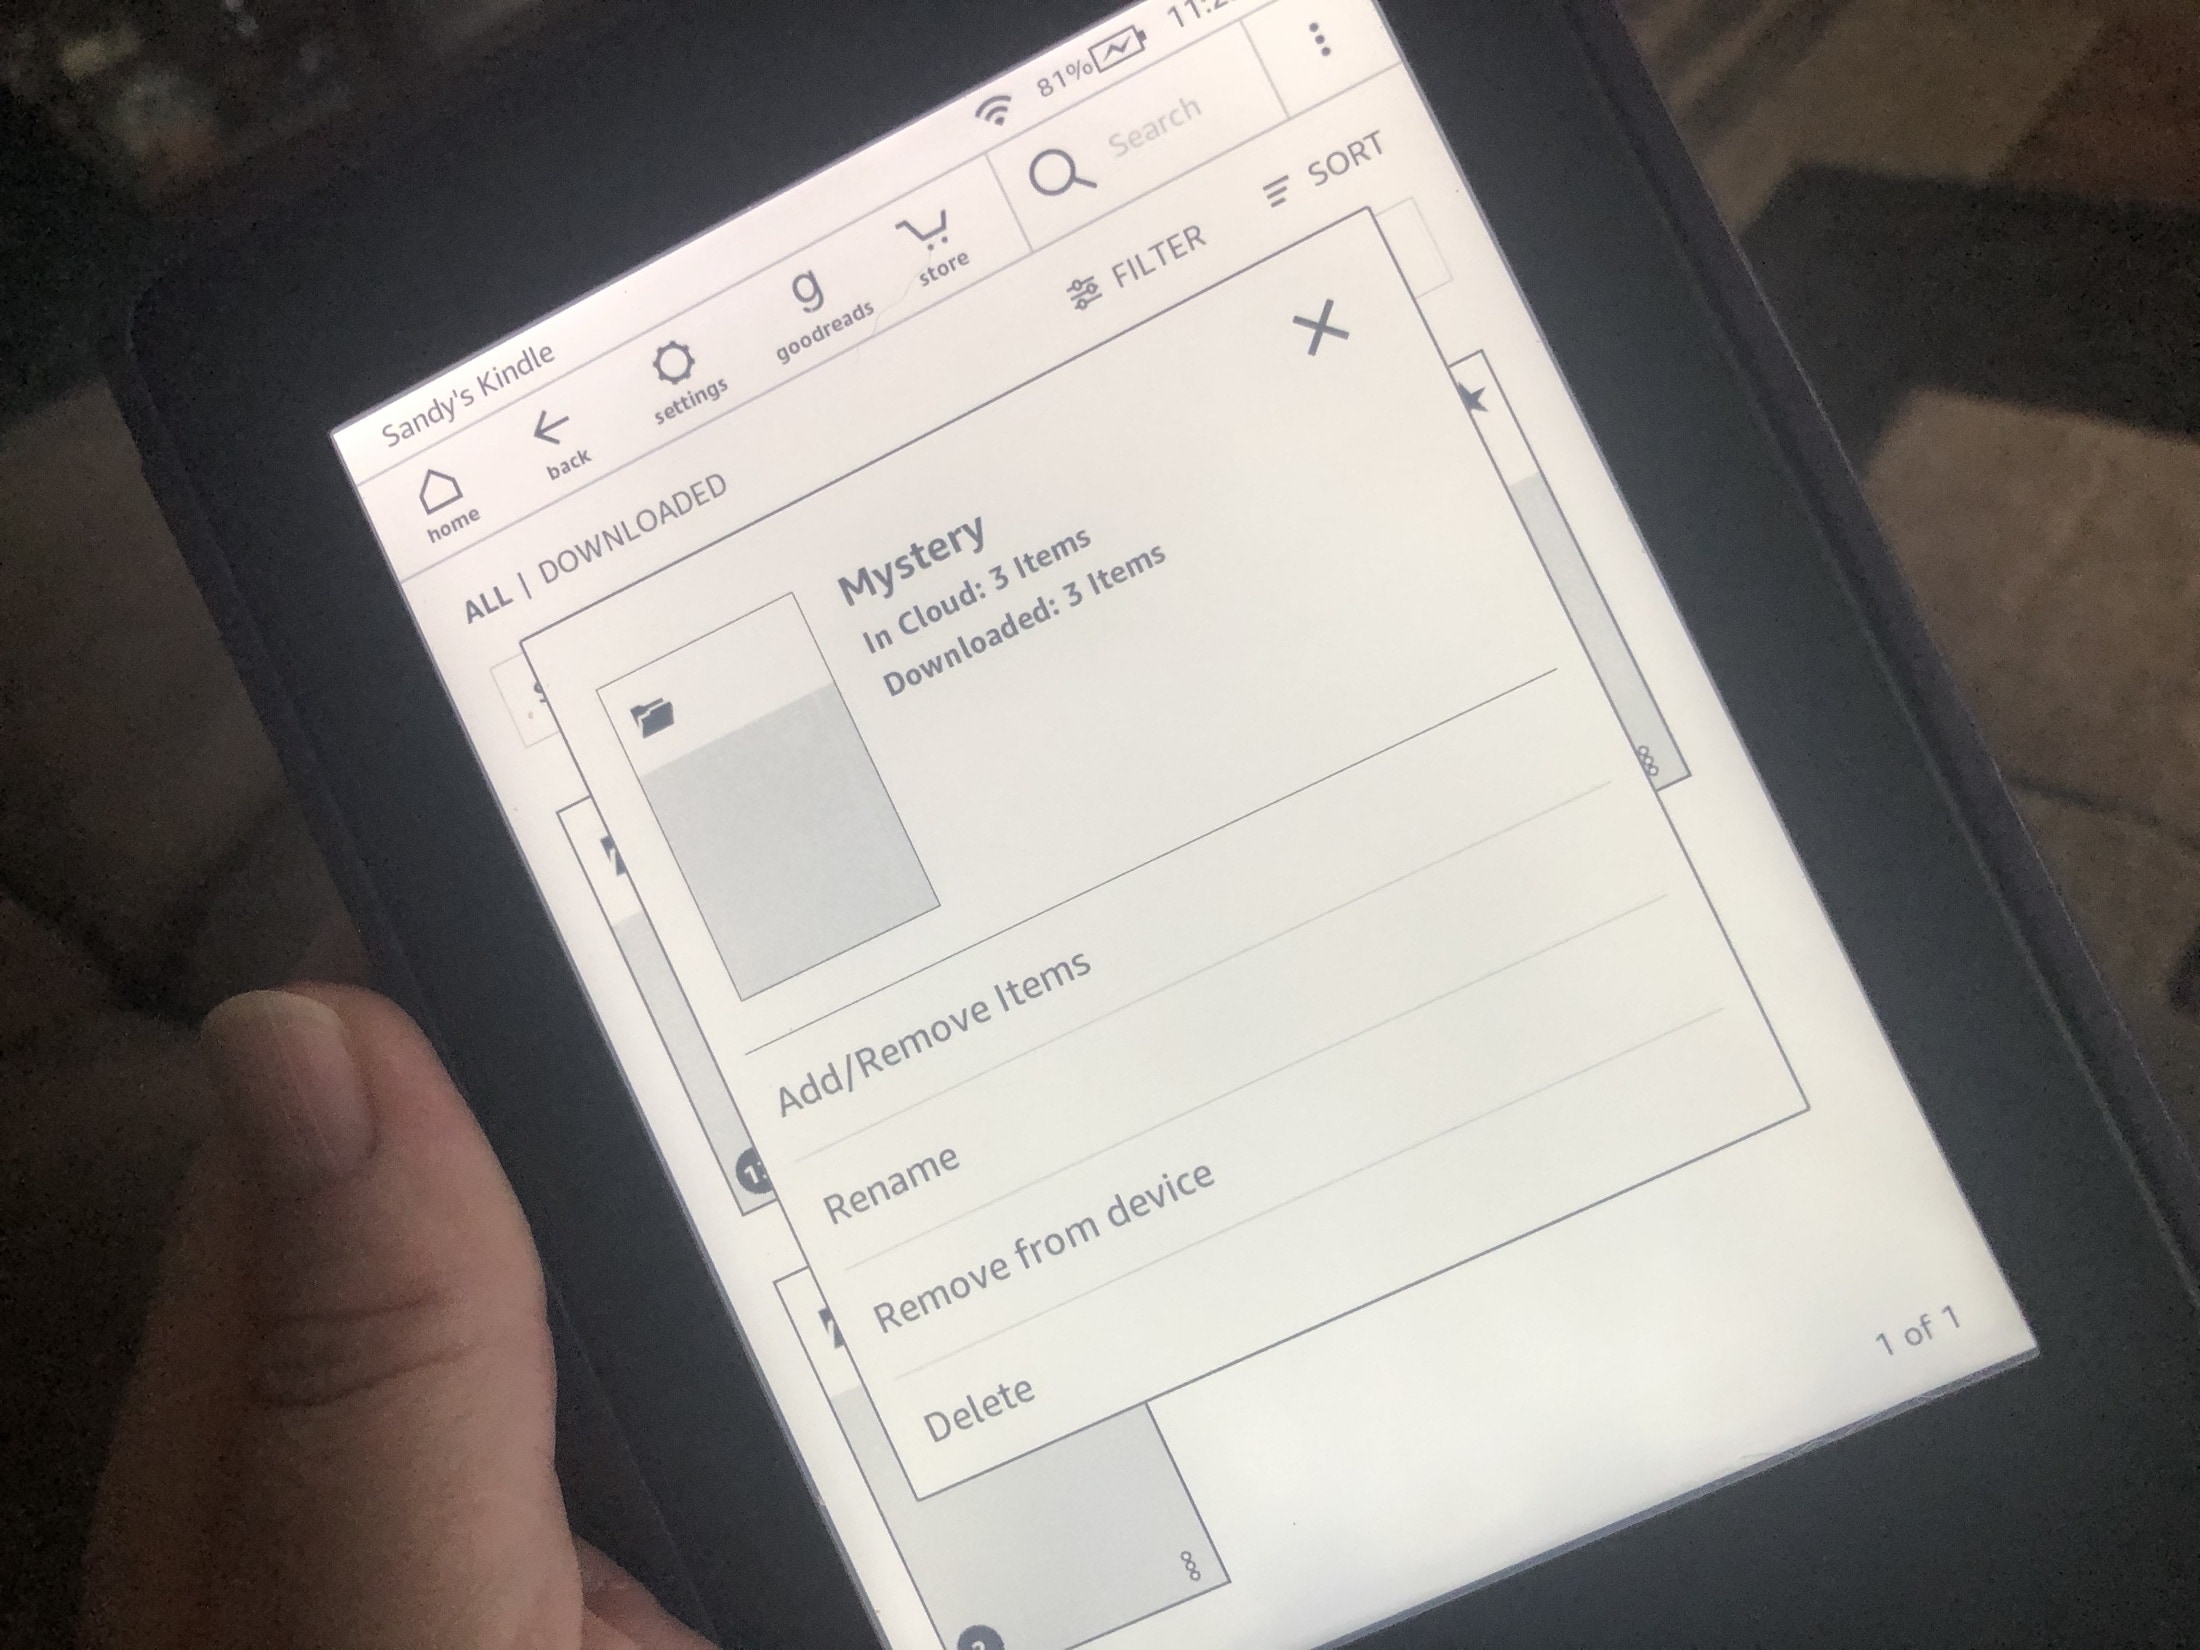
You can rename a Collection from any screen where you see it. Tap the More icon on the bottom right corner. Choose the option to Rename, enter a new name, and tap OK.
If you no longer want a Collection that you created, you can simply remove it. From any screen where you see the Collection, tap the More button on the bottom right corner. Choose an option to Remove From Device or Delete.
The difference between Remove From Device and Delete is that the first will remove the Collection from Your Library but will remain in the cloud for you to redownload if you like. The second, for Delete, will get rid of the Collection completely.
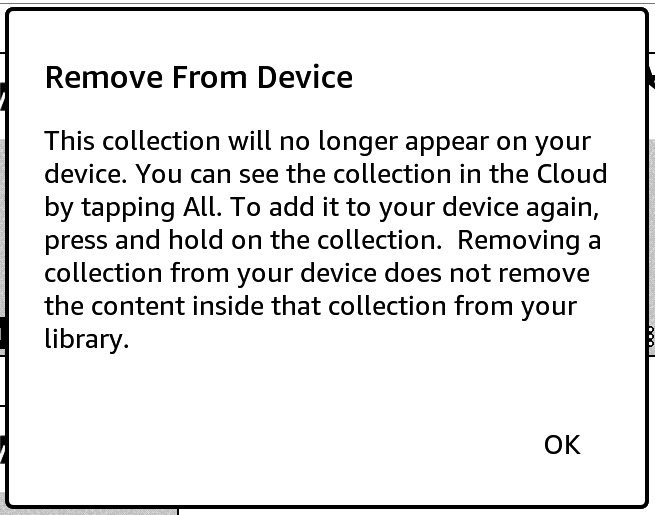
Neither option removes the content placed inside the Collection. These actions apply only to the Collection itself.
Just like organizing files using folders on your computer, you can do this with books using Collections on your Kindle Paperwhite. Whether you have Collections for romance and mystery or novels and short stories, take advantage of this built-in feature to find your books more easily.
Are you going to give Collections a try on your Kindle? If so, please share any tips you discover along the way in the comments below!
Other Kindle tips: