Like taking a screenshot on your iPhone, you may have plenty of reasons for doing it on Kindle. We here at iDB take screenshots to show you how to do things on your devices. But you might take one to get support from the maker or help show a friend how to navigate.
If taking a screenshot on your Kindle Paperwhite is something you’re interested in doing, then this is your how-to. We’ll show you how to take a screenshot on the eReader and how to view it once you do.

Capturing a screenshot on Kindle
It’s actually quite easy to capture a screenshot on your Kindle Paperwhite. And unlike your iPhone, you don’t need any buttons to do it.
To take a screenshot on your Kindle Paperwhite, hold your fingers on either the top left and bottom right corners or the top right and bottom left corners. You’ll see the screen flash briefly, similar to taking a screenshot on iPhone and iPad.
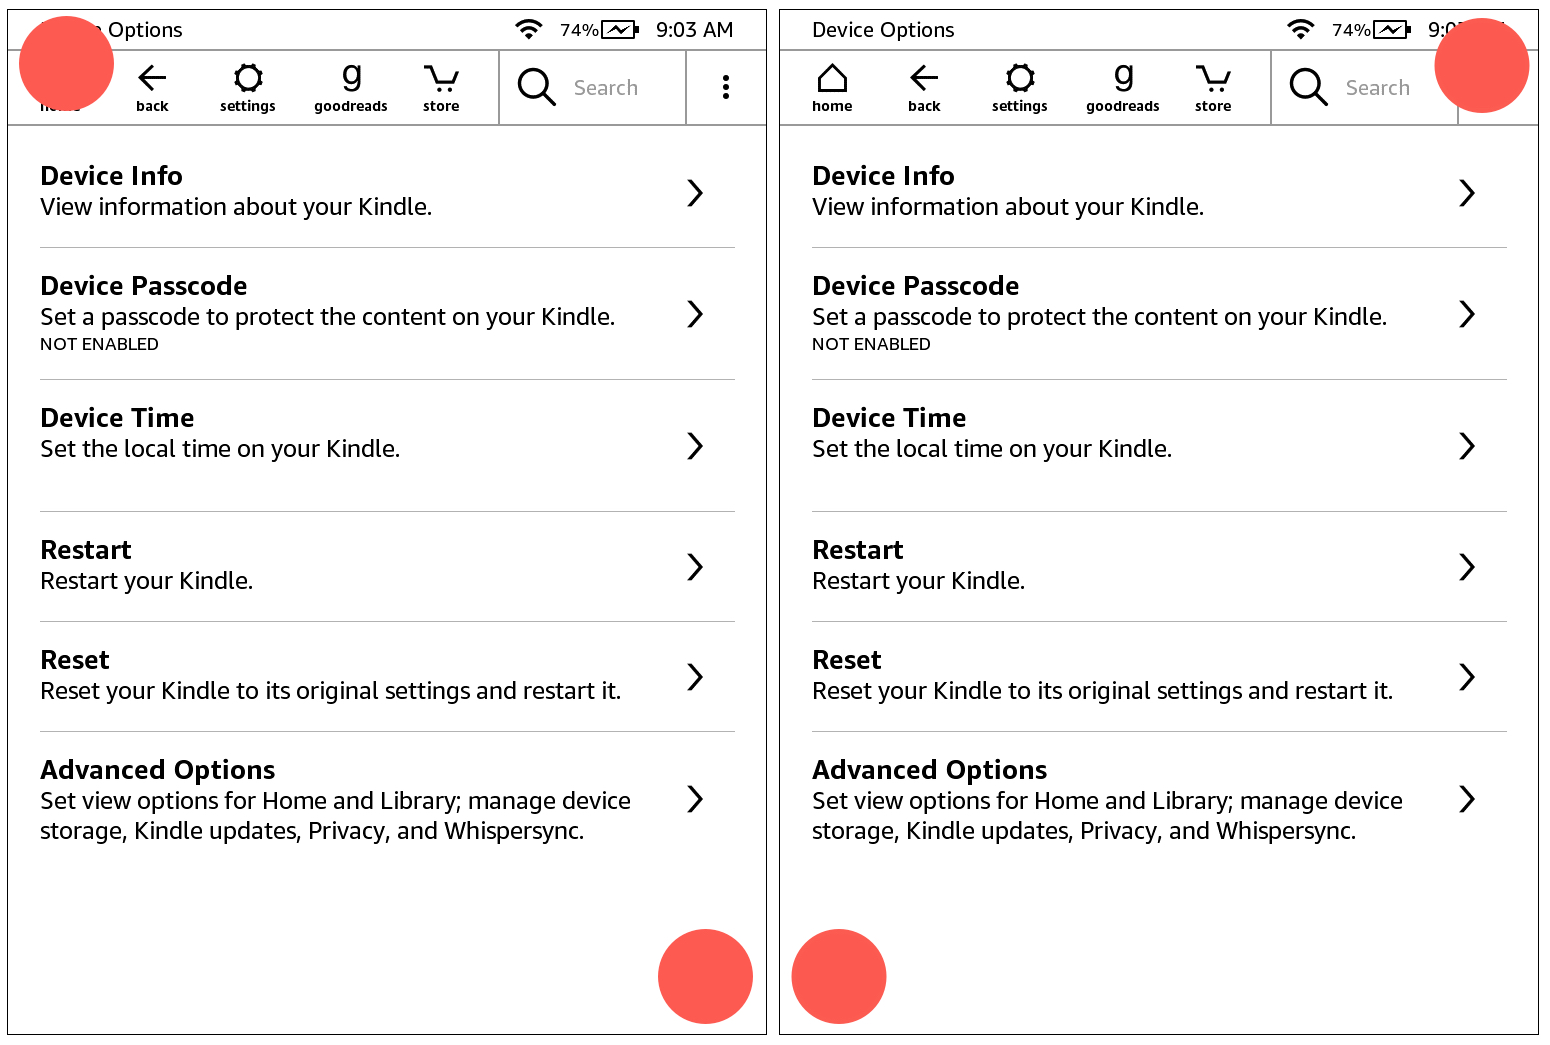
And that’s all there is to it!
Viewing a Kindle screenshot
Once you take the screenshot, you obviously want to do something with it. You might want to send it to someone or simply save it. For this part, you’ll need your computer because you cannot currently view a screenshot of your Kindle on your Kindle.
Connect your Kindle to your computer using your USB cable. If you’re using a Mac, try using the cable that shipped with your Kindle if you can. Why you ask? It seems that not all USB cables that fit the Kindle will allow you to see your Kindle files on Mac. If you can’t locate the official cable for your Kindle, you can certainly try another that you have.
Connecting Kindle to Mac
If you connect your Kindle to Mac, open Finder and select your user location in the sidebar. You should see a folder for Kindle. Expand the folder if necessary, and you will see your screenshot(s).
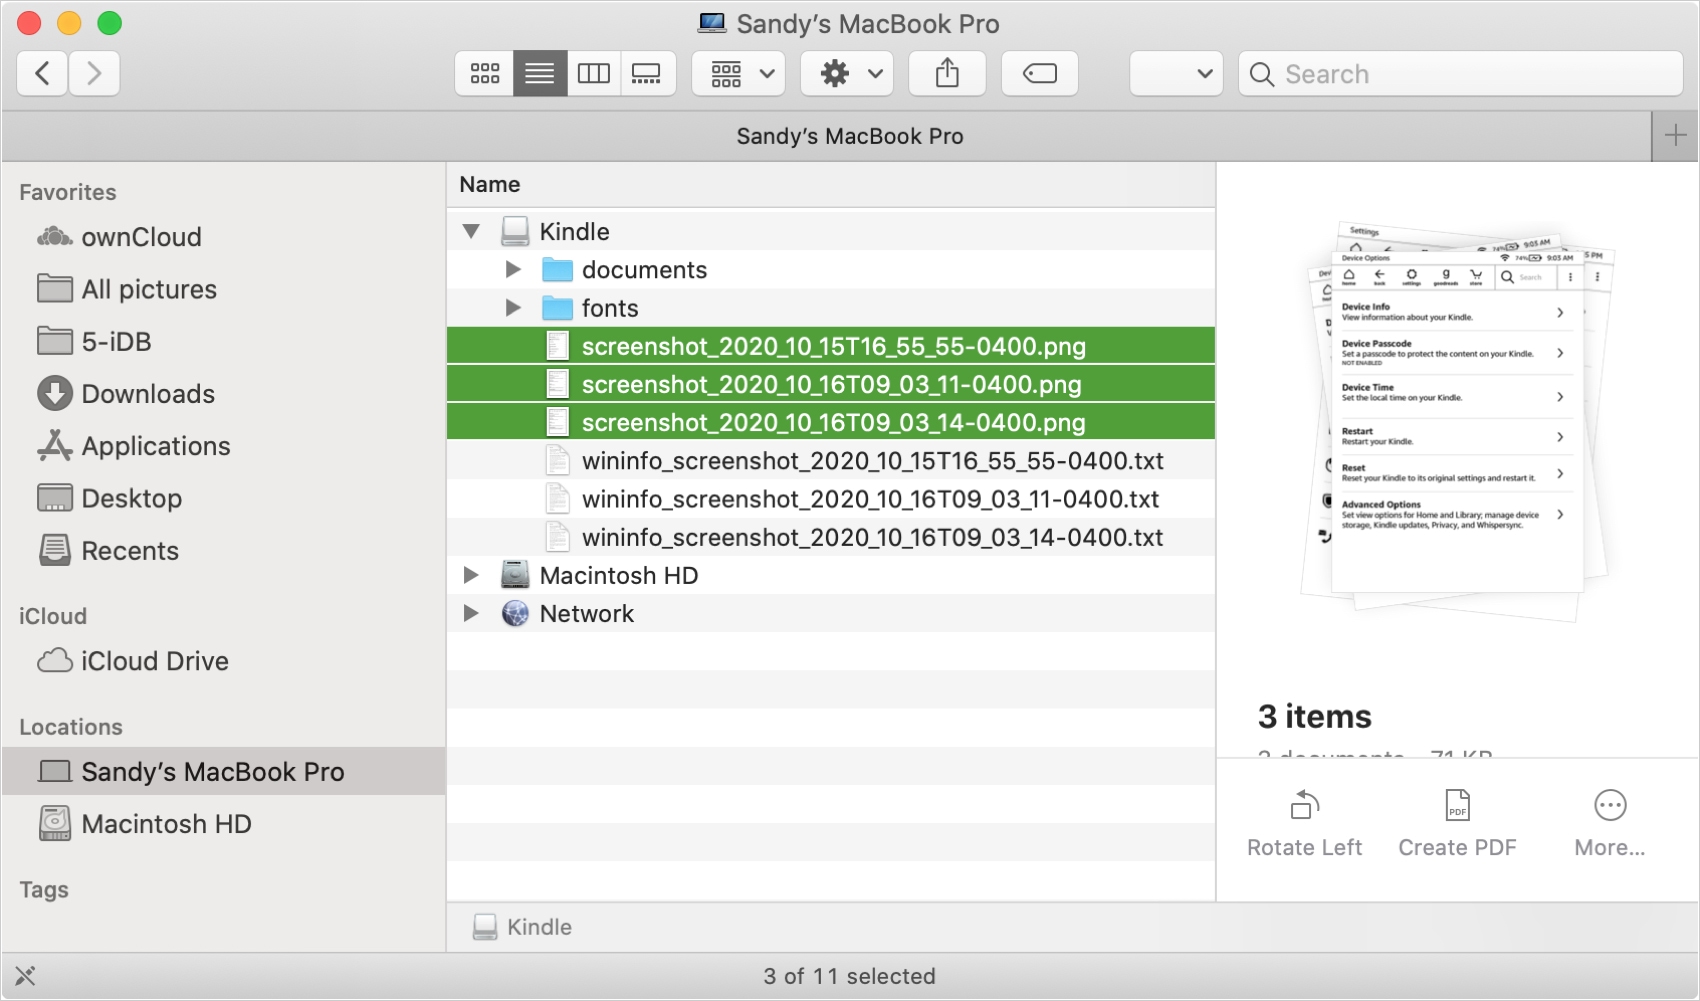
You can then drag them to a location on your Mac. Or, you can open them right up in Preview or your favorite photo editing tool by right-clicking and choosing Open With > (Application name).
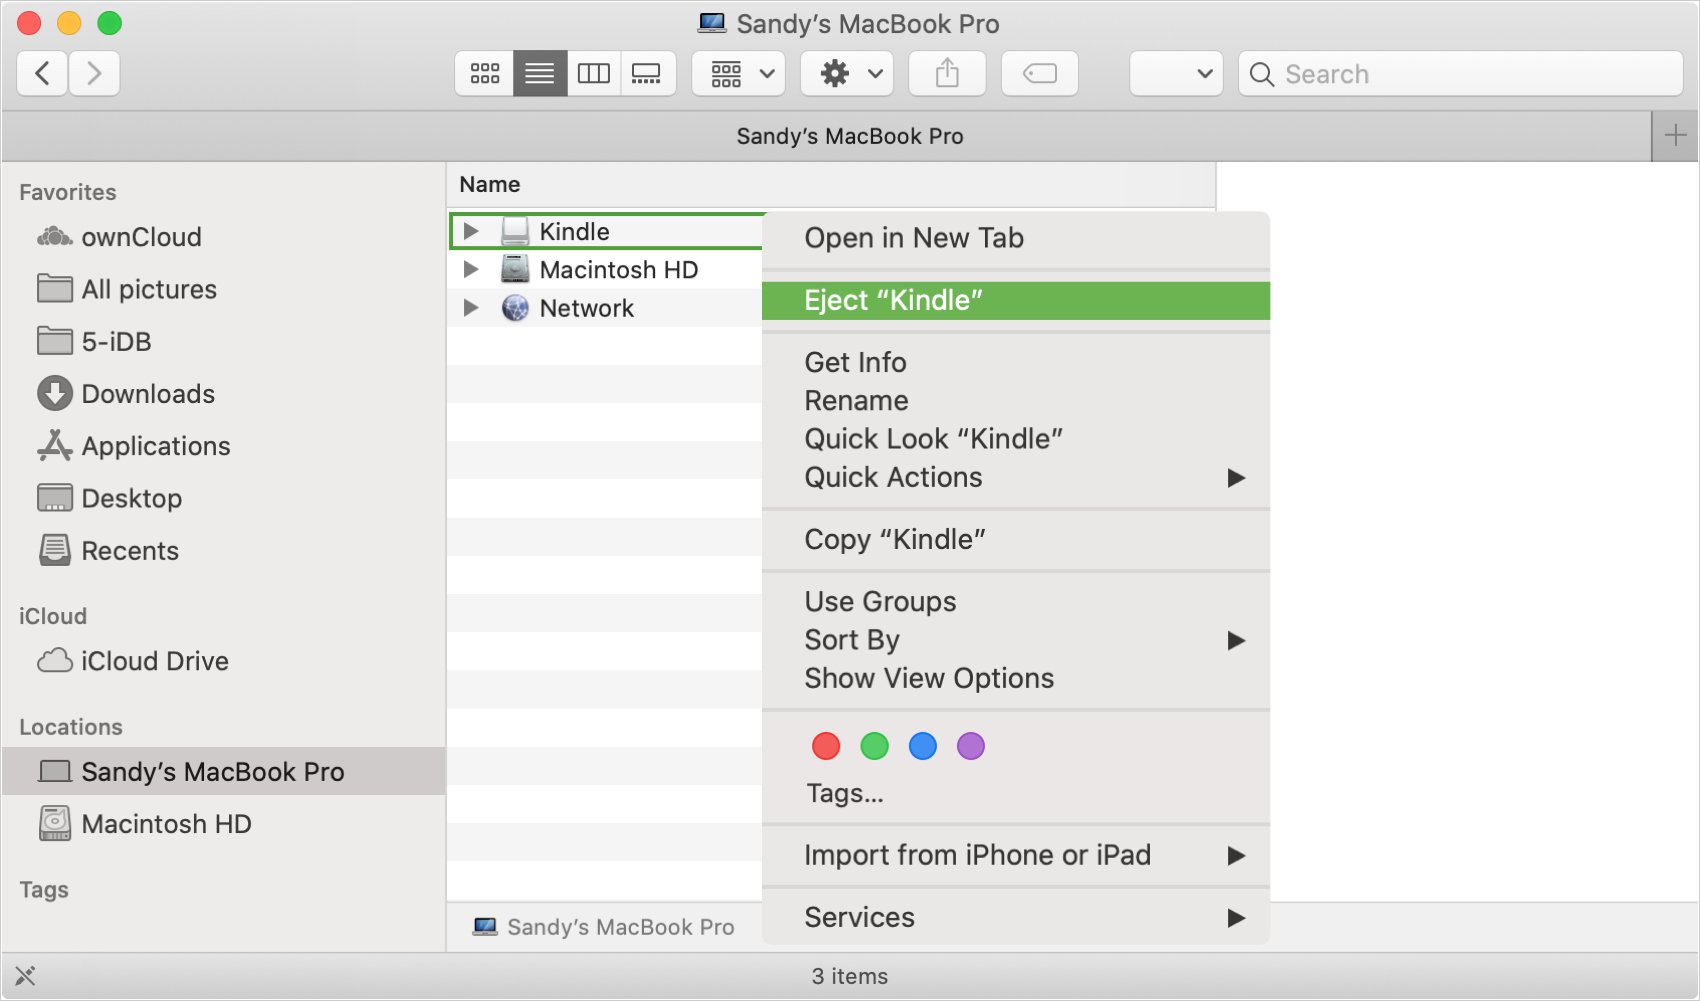
When you finish and want to disconnect your Kindle from Mac, be sure to Eject it. Right-click either the Kindle folder in Finder or the Kindle icon that popped onto your Desktop and select Eject Kindle.
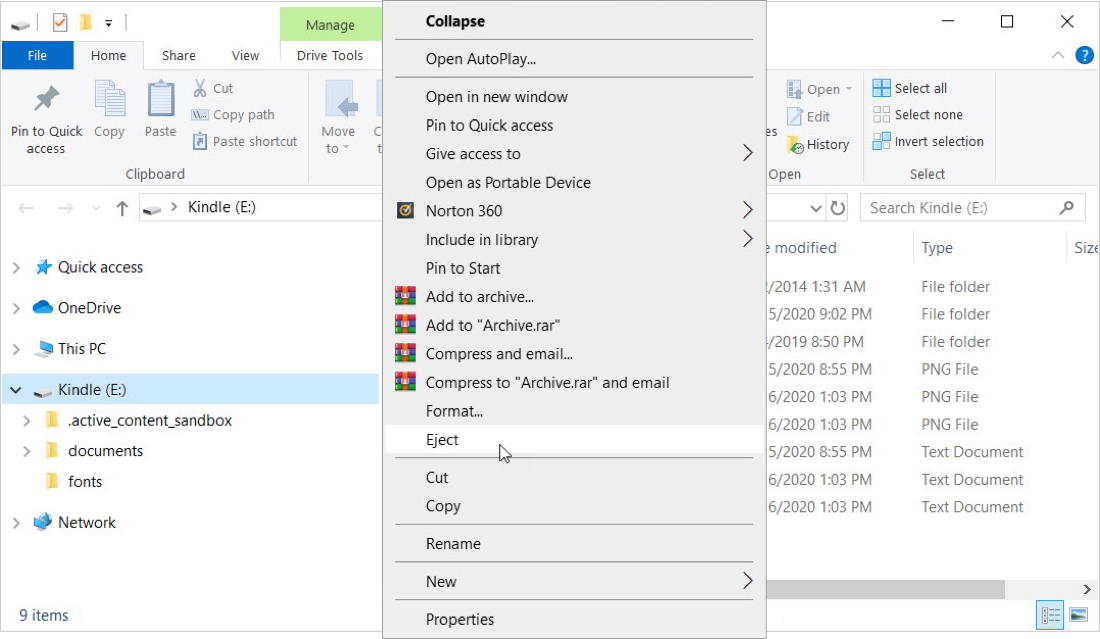
Connecting Kindle to Windows
If you connect your Kindle to a Windows computer, open File Explorer and select the Kindle labeled drive in the sidebar. You should see your screenshot(s) in the root Kindle folder.
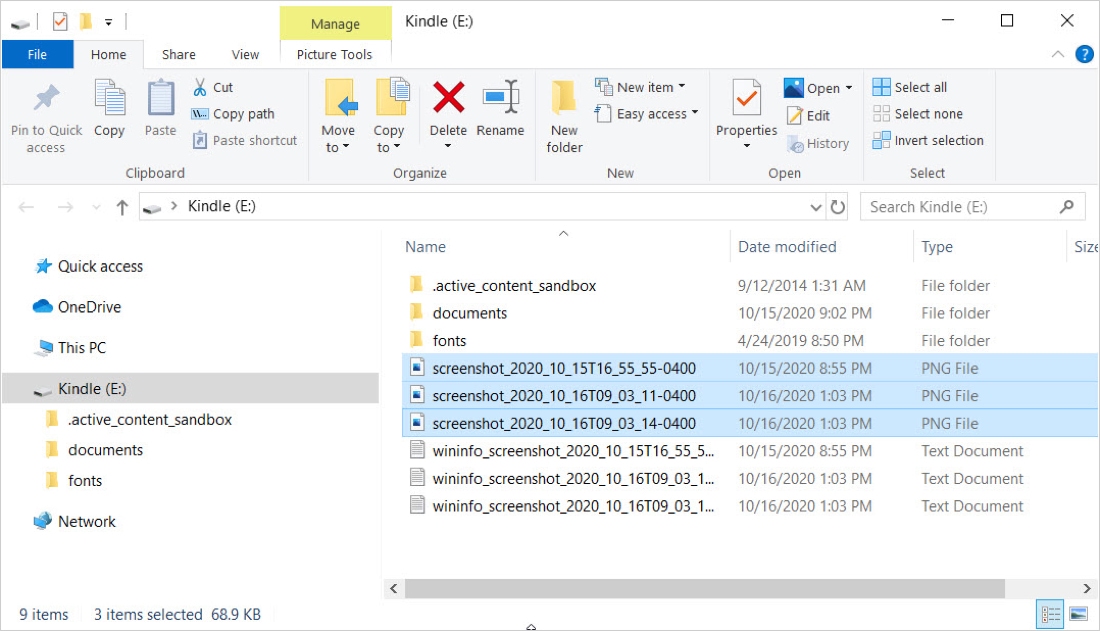
Like on Mac, you can then drag them to a spot on your computer. Or, right-click and Edit with Photos, Share, or Send to the location you want.
Again, you should properly eject the Kindle before unplugging it from your computer. Right-click Kindle in the sidebar and select Eject. You’ll briefly see a message telling you it’s safe to disconnect the Kindle (cable) from your computer.
Capturing a screenshot on Kindle Paperwhite couldn’t be easier. It’s connecting it to your computer to view and take action on the screenshots that takes the longest. But it’s not likely something you’ll often do; right?
Have you run into a situation where you needed to take a screenshot on your Kindle Paperwhite? Make sure you bookmark this tutorial in case another need arises!
Do more with your Kindle: