Have a PDF in the Mail app that you want to sign before sending? In this tutorial, we’ll show you how to sign an email attachment on your Mac using your iPhone or iPad.
There are plenty of times when we need to sign and return documents via email. Contracts, agreements, acknowledgments, and the like are often sent electronically these days. And while you can create a signature in Preview on Mac, you might not be able to if you have an iMac without a trackpad, or you simply can’t make your signature look the way you want it with a mouse.
But if you use an Apple Pencil with your iPad or have an easier time signing with your finger on your iPhone, you can use one of those devices instead.
Get your attachment ready
The first step in signing an attachment you’re sending is to put it in your email. You can do this in a few ways:
- Drag and drop the document from its location into the email.
- Click the Attach button (paperclip) in the Mail toolbar.
- Select File > Attach Files from the menu bar.
You can compose your email before or after signing your document, per your preference. So now let’s get to signing that document.
Sign your Mac email attachment using iPhone or iPad
1) Put your cursor over the attachment in Mac’s Mail app, and you’ll see the Action arrow appear on the top right of it.
2) Click the Action arrow and select Markup.
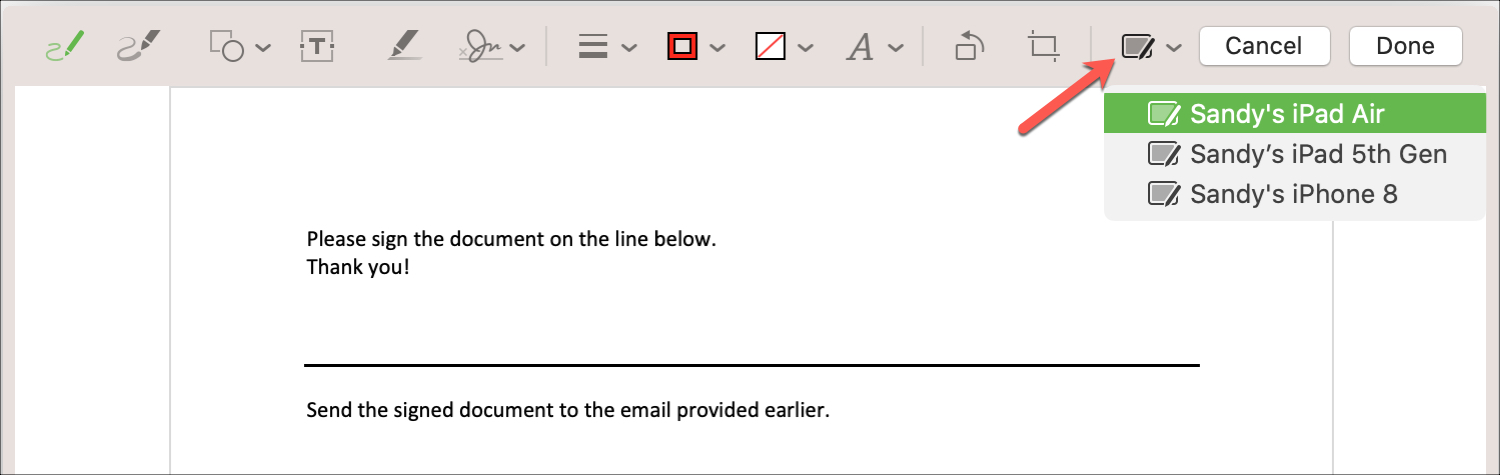
3) When the document appears in the Markup window, click the button all the way to the right on the toolbar for Annotate on iOS Device. If you have more than one device, select the one you want to use from the list.
4) The document should then automatically appear in Markup on your iOS device, ready for your signature.
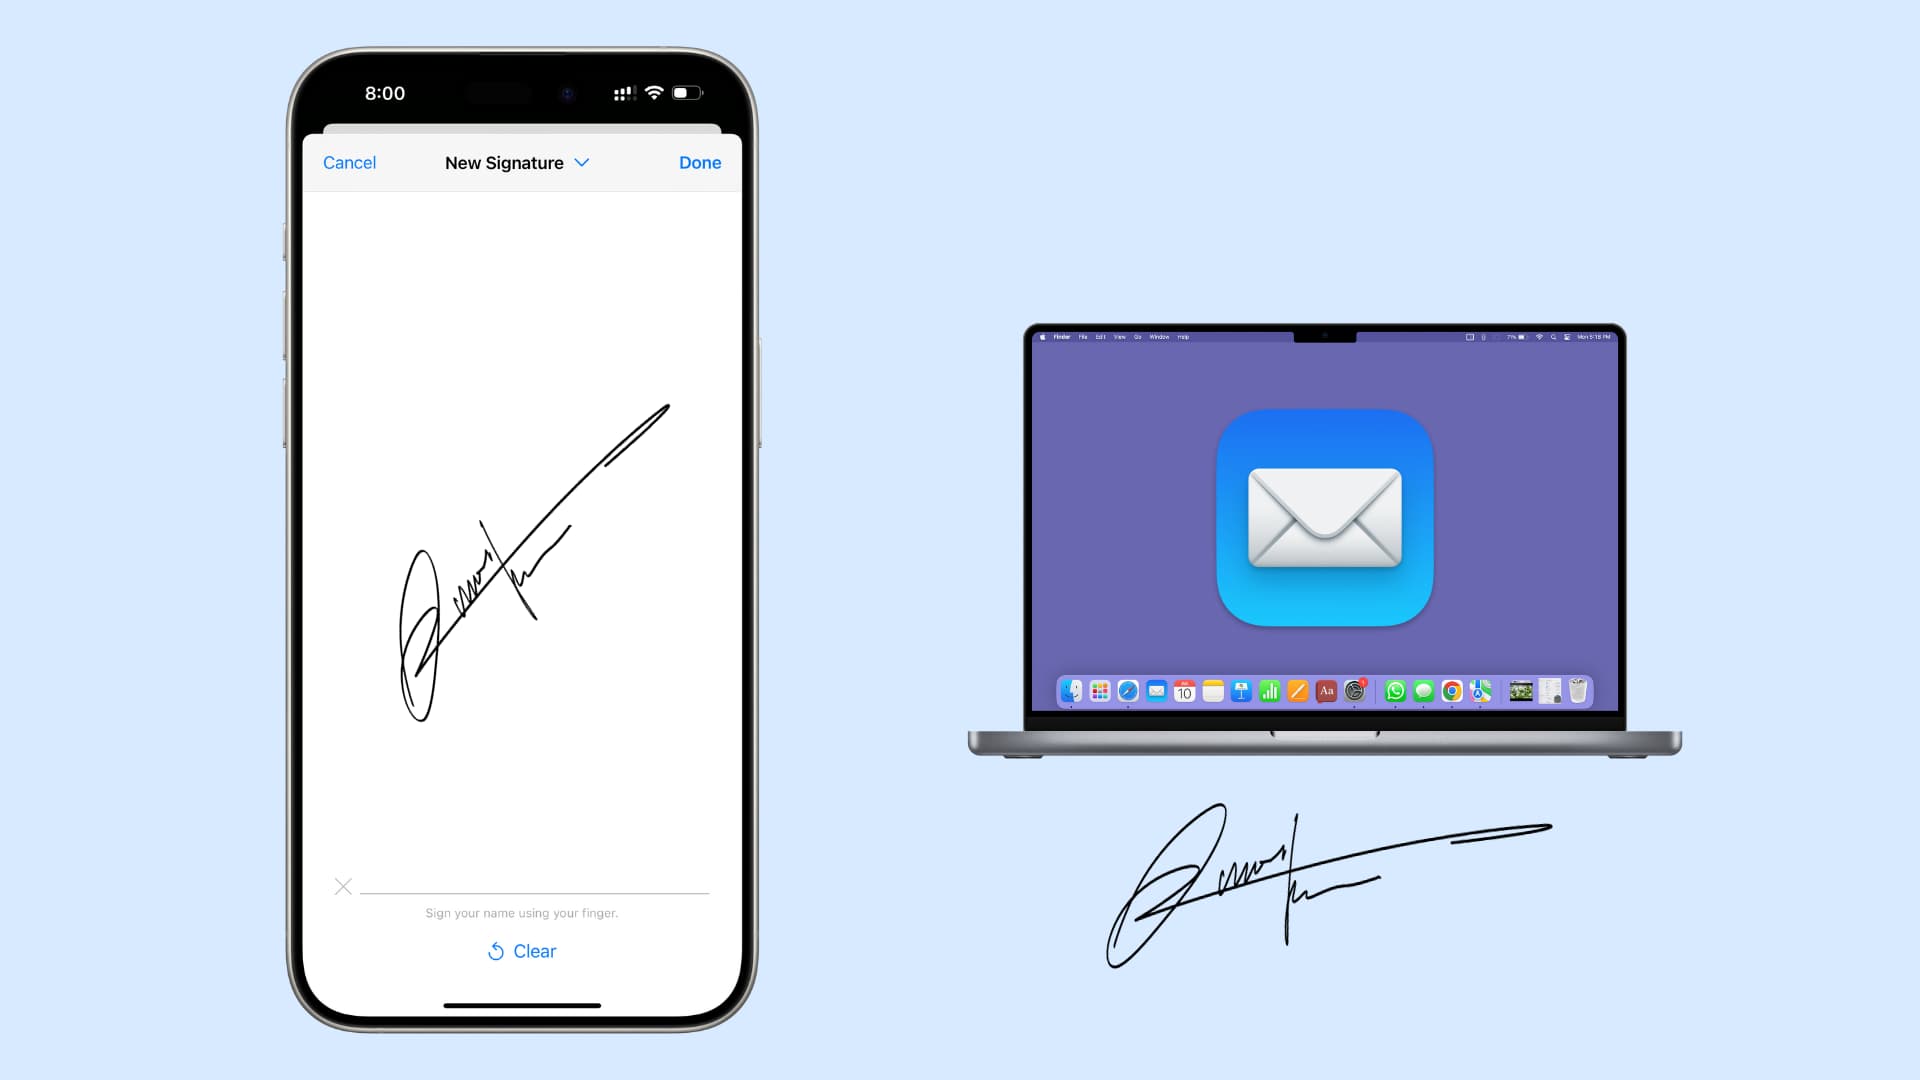
5) Tap the plus sign at the bottom and select Signature. You’ll see the Signature option only if your iPhone or iPad is unlocked.
6) Sign your name in the pop-up window. If you’re not happy with it, tap Clear and sign again.
7) When you like the signature, tap the checkmark icon or Done to insert it.

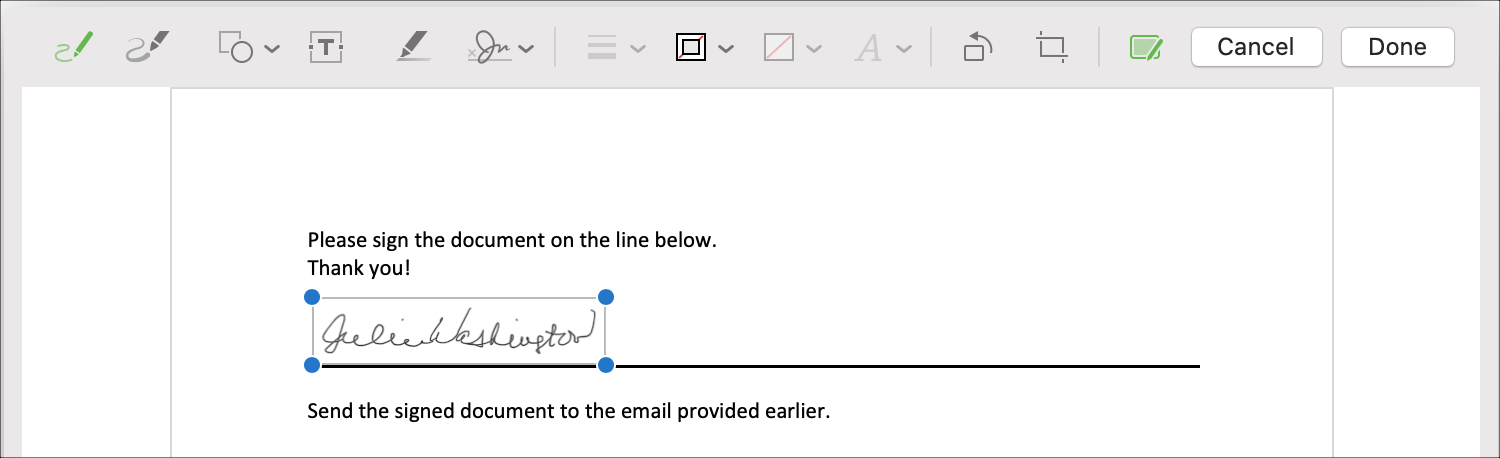
8) You can drag the signature box where you want to place it in the document. When you finish, tap the checkmark icon, and the Markup window will close on your iOS device.
You should see the signature from your iPhone or iPad in the document in Markup on your Mac. If you’re ready to send it, click Done.
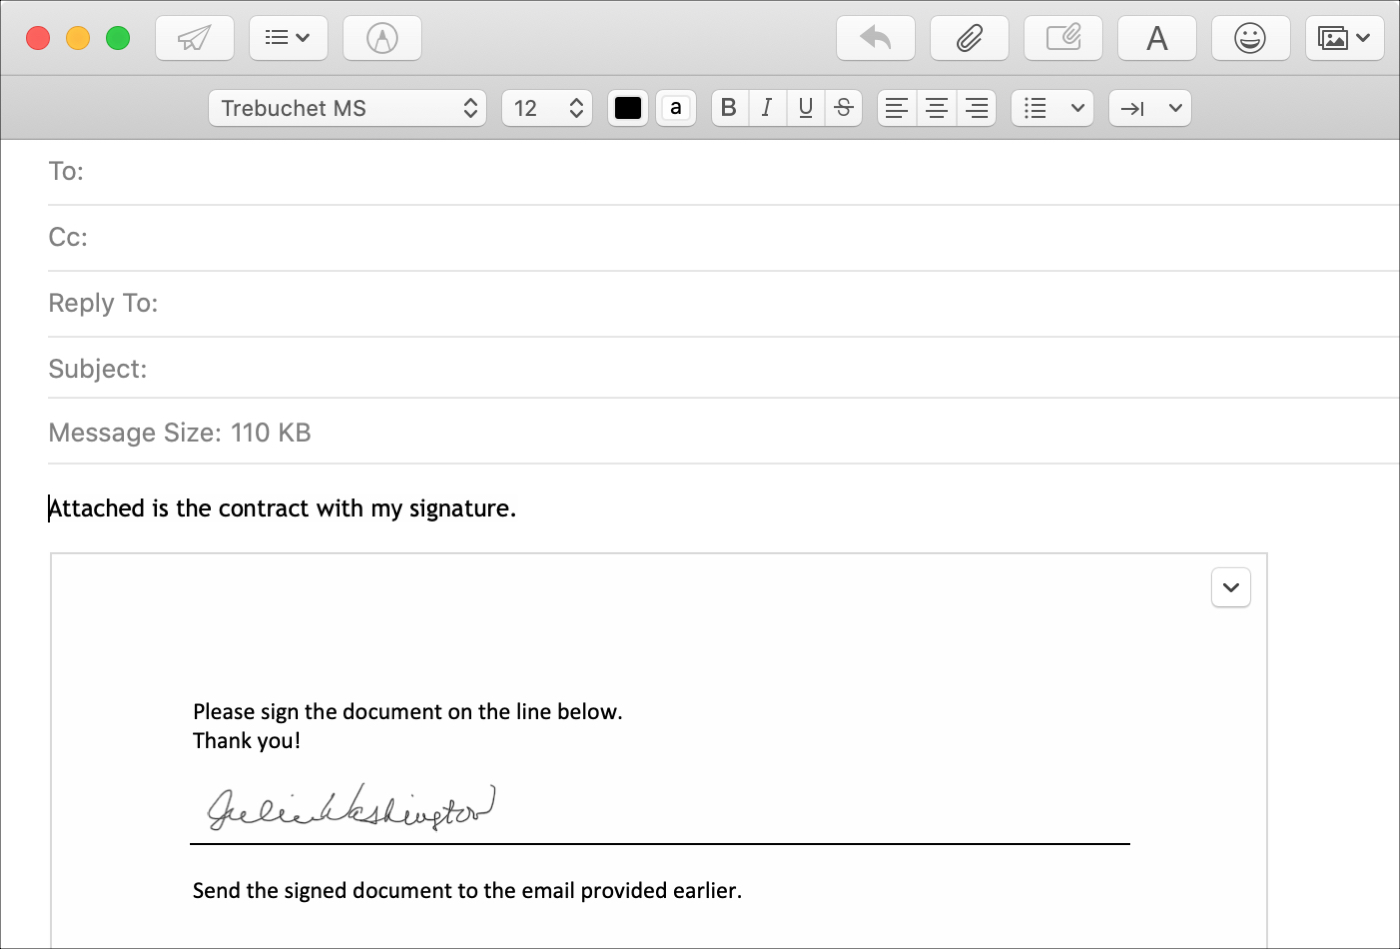
You’ll then see the document in your email with your signature. Complete your email and send it as you normally would.
There are situations when signing a document you must send via email is difficult to do on your Mac. So, if you find yourself in a scenario like this and own an iPhone or iPad, sign it on iOS instead!
Has this ever happened to you, but you didn’t realize you could pop the document on your iPhone or iPad for an easier way to sign it? Bookmark this article in case it happens to you!
On a related note: