I was not always such an Apple fanatic, but using my early 2008 15-inch MacBook Pro was a first-time conversion experience. In honor of that, I could not convince myself to ship off the device to e-waste. Holding a special place in my tech heart, I wanted a way to immortalize my shift to Apple fanboy status, which ultimately lead both my personal and professional career in a different direction.
Taking the LCD panel out of the monitor shell and unhinging the keyboard allowed for a permanent ambient glowing Apple logo for my office, which is HomeKit controlled. I call it the MacBook Lamp.
How to turn your glowing MacBook logo into a lamp
The following guide will walk you through the steps to turn your MacBook Apple logo into a permanent fixture for your home or office! When you are done, you will have your own MacBook Lamp!
An important disclaimer, completing this project will prevent your laptop from operation. Back up all files to another computer or external hard drive before proceeding.
Find your MacBook Lamp inspiration
Back 12 years ago, almost to the date, I received the 2008 MacBook Pro as my first Apple computer as a gift from my parents. This may seem dramatic, but I remember when I got it, chasing the UPS truck down to get it as fast as possible. Sitting in my living room pouring over the Aqua style interface. Learning how to use iTunes on OS X. Uploading some pictures. Just enjoying how much of a change the computer was from my previous Toshiba Satellite P25, which had two hard drives fail me in the previous two years.
I was in love with the form factor and the UI. The feeling left such a strong impression, I consider it my conversion experience to the Apple world. Now, an Apple tech blogger and holding a job in the tech industry, it was a pivotal moment in my tech past. Some six or seven machines later, I still look back at that 2008 MacBook Pro and assume it was the transition point.
Consequently, I did not want to recycle it, but it was just collecting dust in a closet. There was no celebration of its impact on my conversation experience. As I looked to spruce up my home office for an extended work-from-home period due to COVID-19, I came across my closeted 2008 MacBook Pro and had the bright idea to make it into a permanent ambient glowing lamp. After all, I did the same conversion to a working iPhone 6, in 2016!
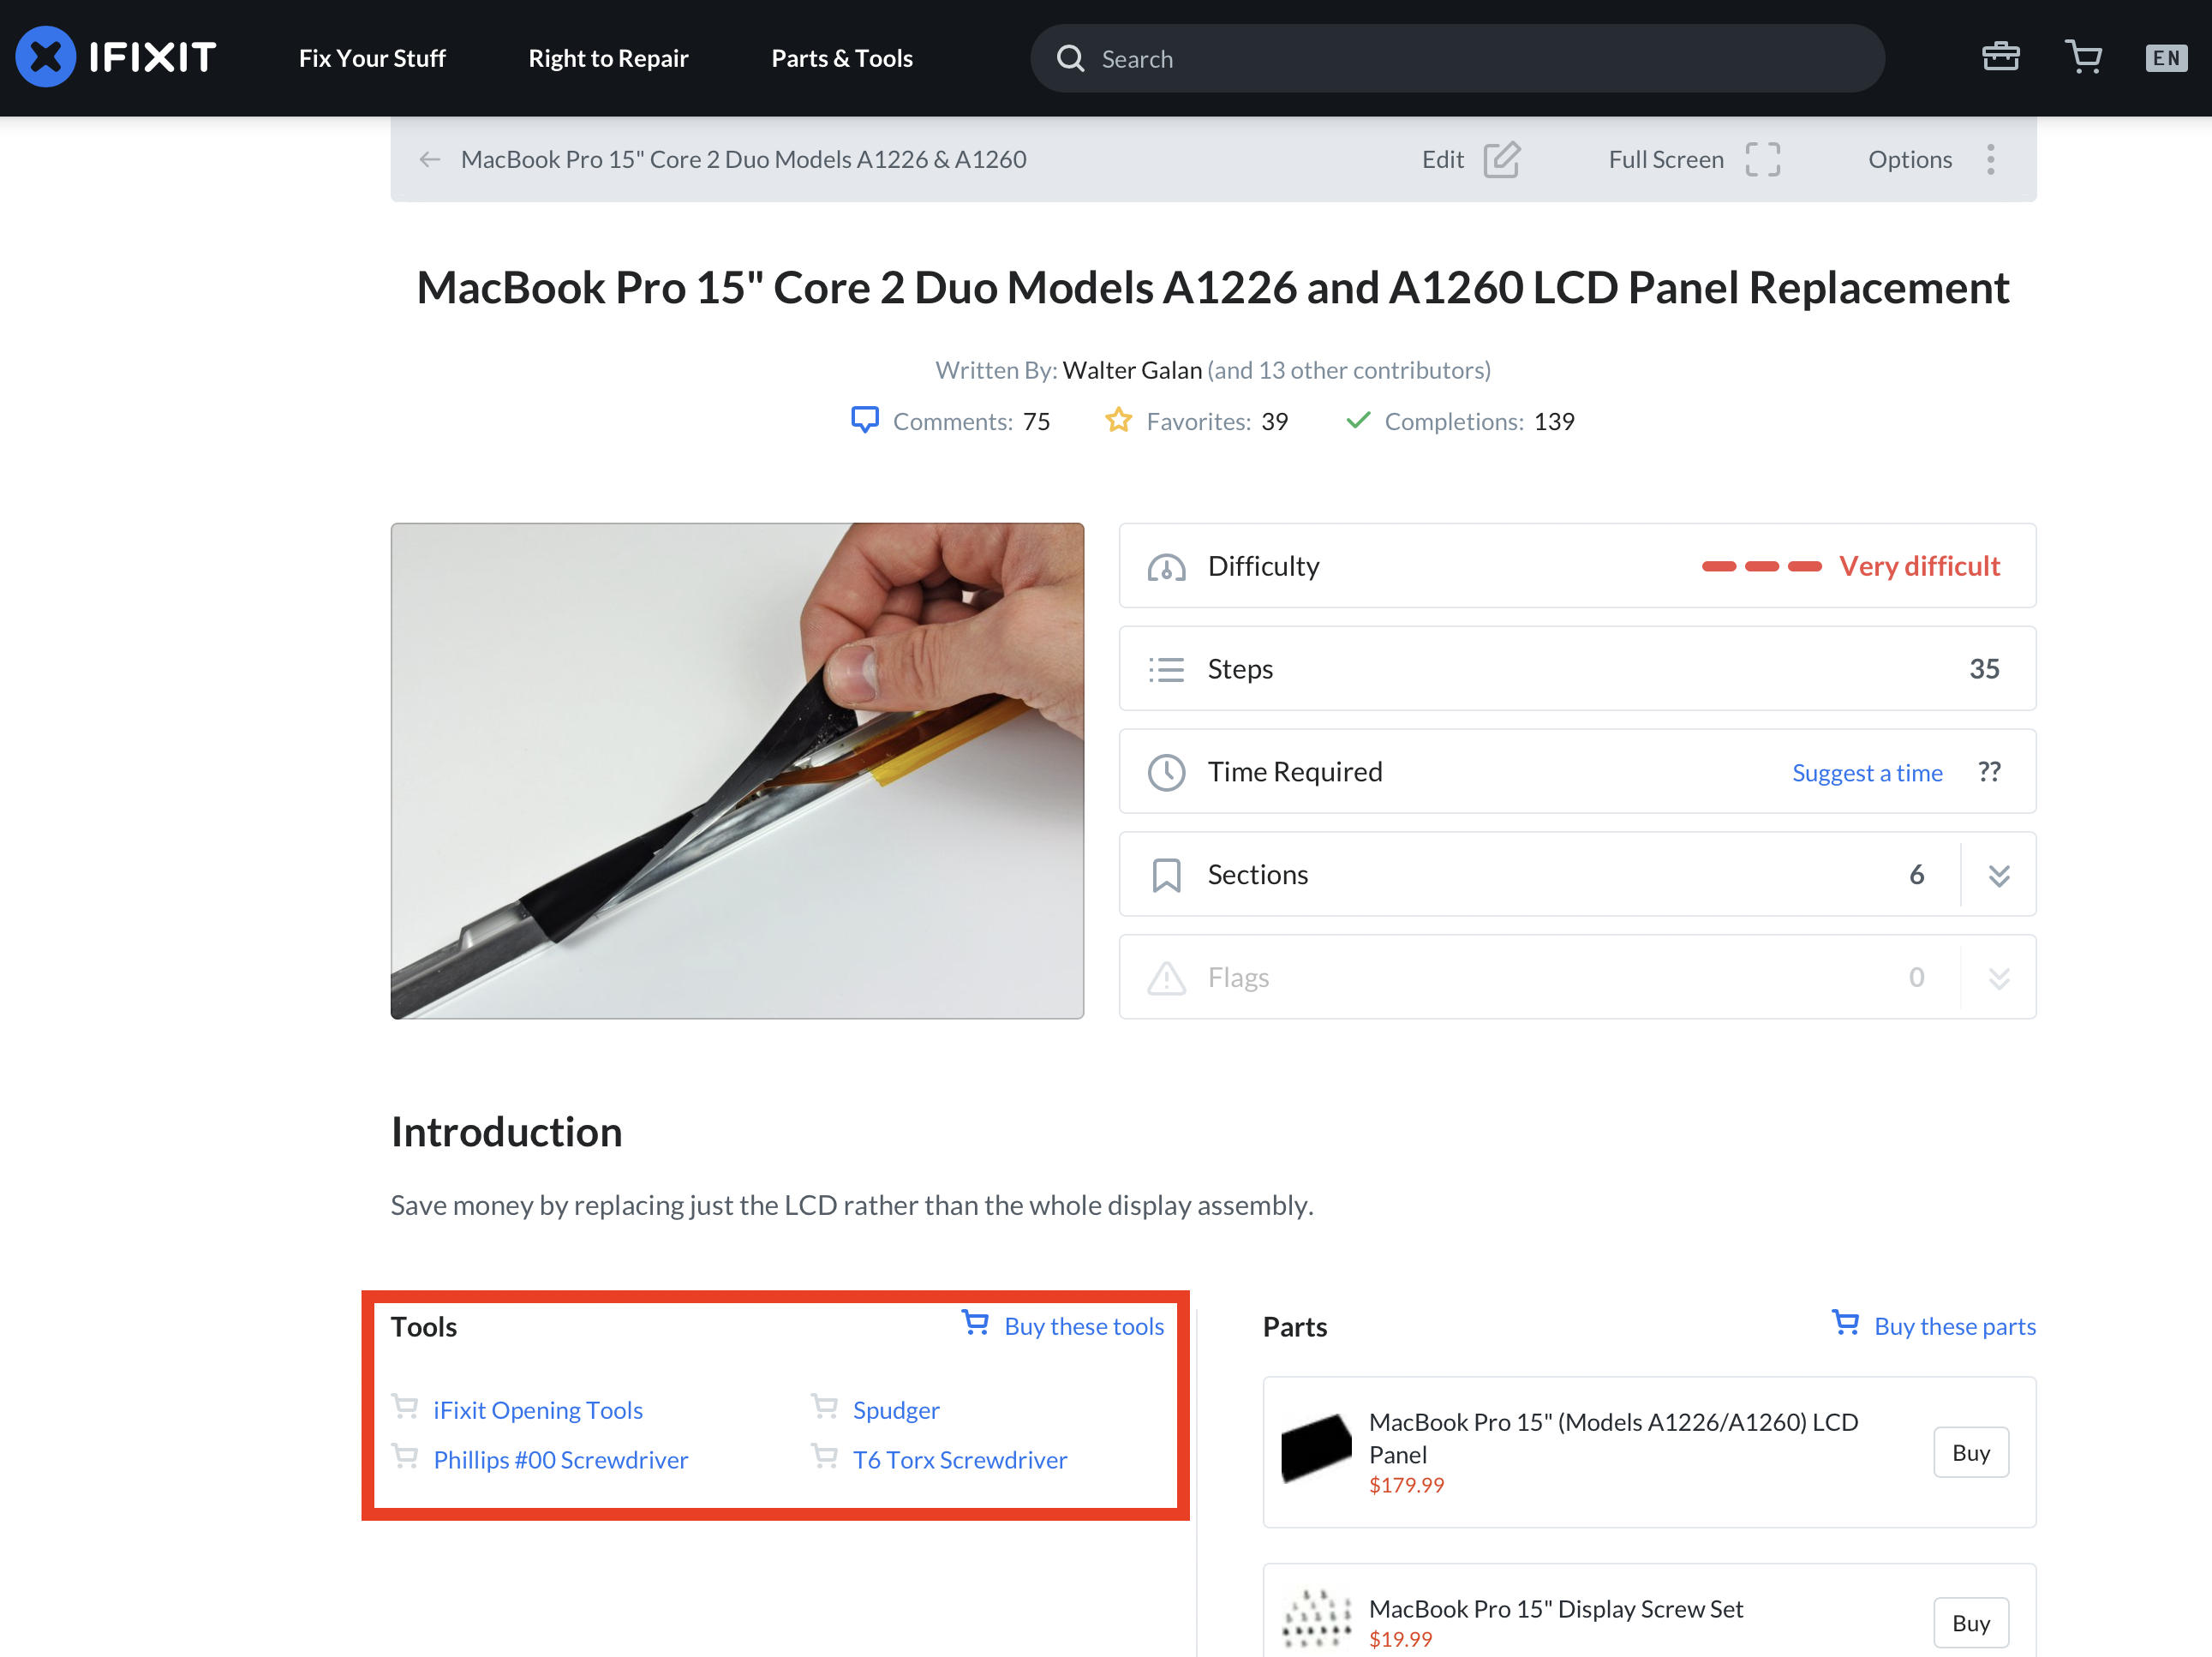
1) Order the necessary supplies. Assuming you have an older MacBook that has a glowing Apple logo, you will need the proper tools to get the outer shell disassembled. Start by visiting ifixit.com. Enter your device name and find a repair guide for the LCD panel replacement. Within the article header, there is a listing of the tools required to get the LCD panel pulled out of your MacBook. Mine required a spudger ($3.99), Philips head screwdriver (already had one), and proprietary T-6 Torx screwdriver ($9.99) + shipping. Order some tape as well, if you do not have any sitting around. I’m using painters tape, the blue stuff. Scotch tape would work too, but might leave a residue on the aluminum if you need to move and replace the LED puck for placement.
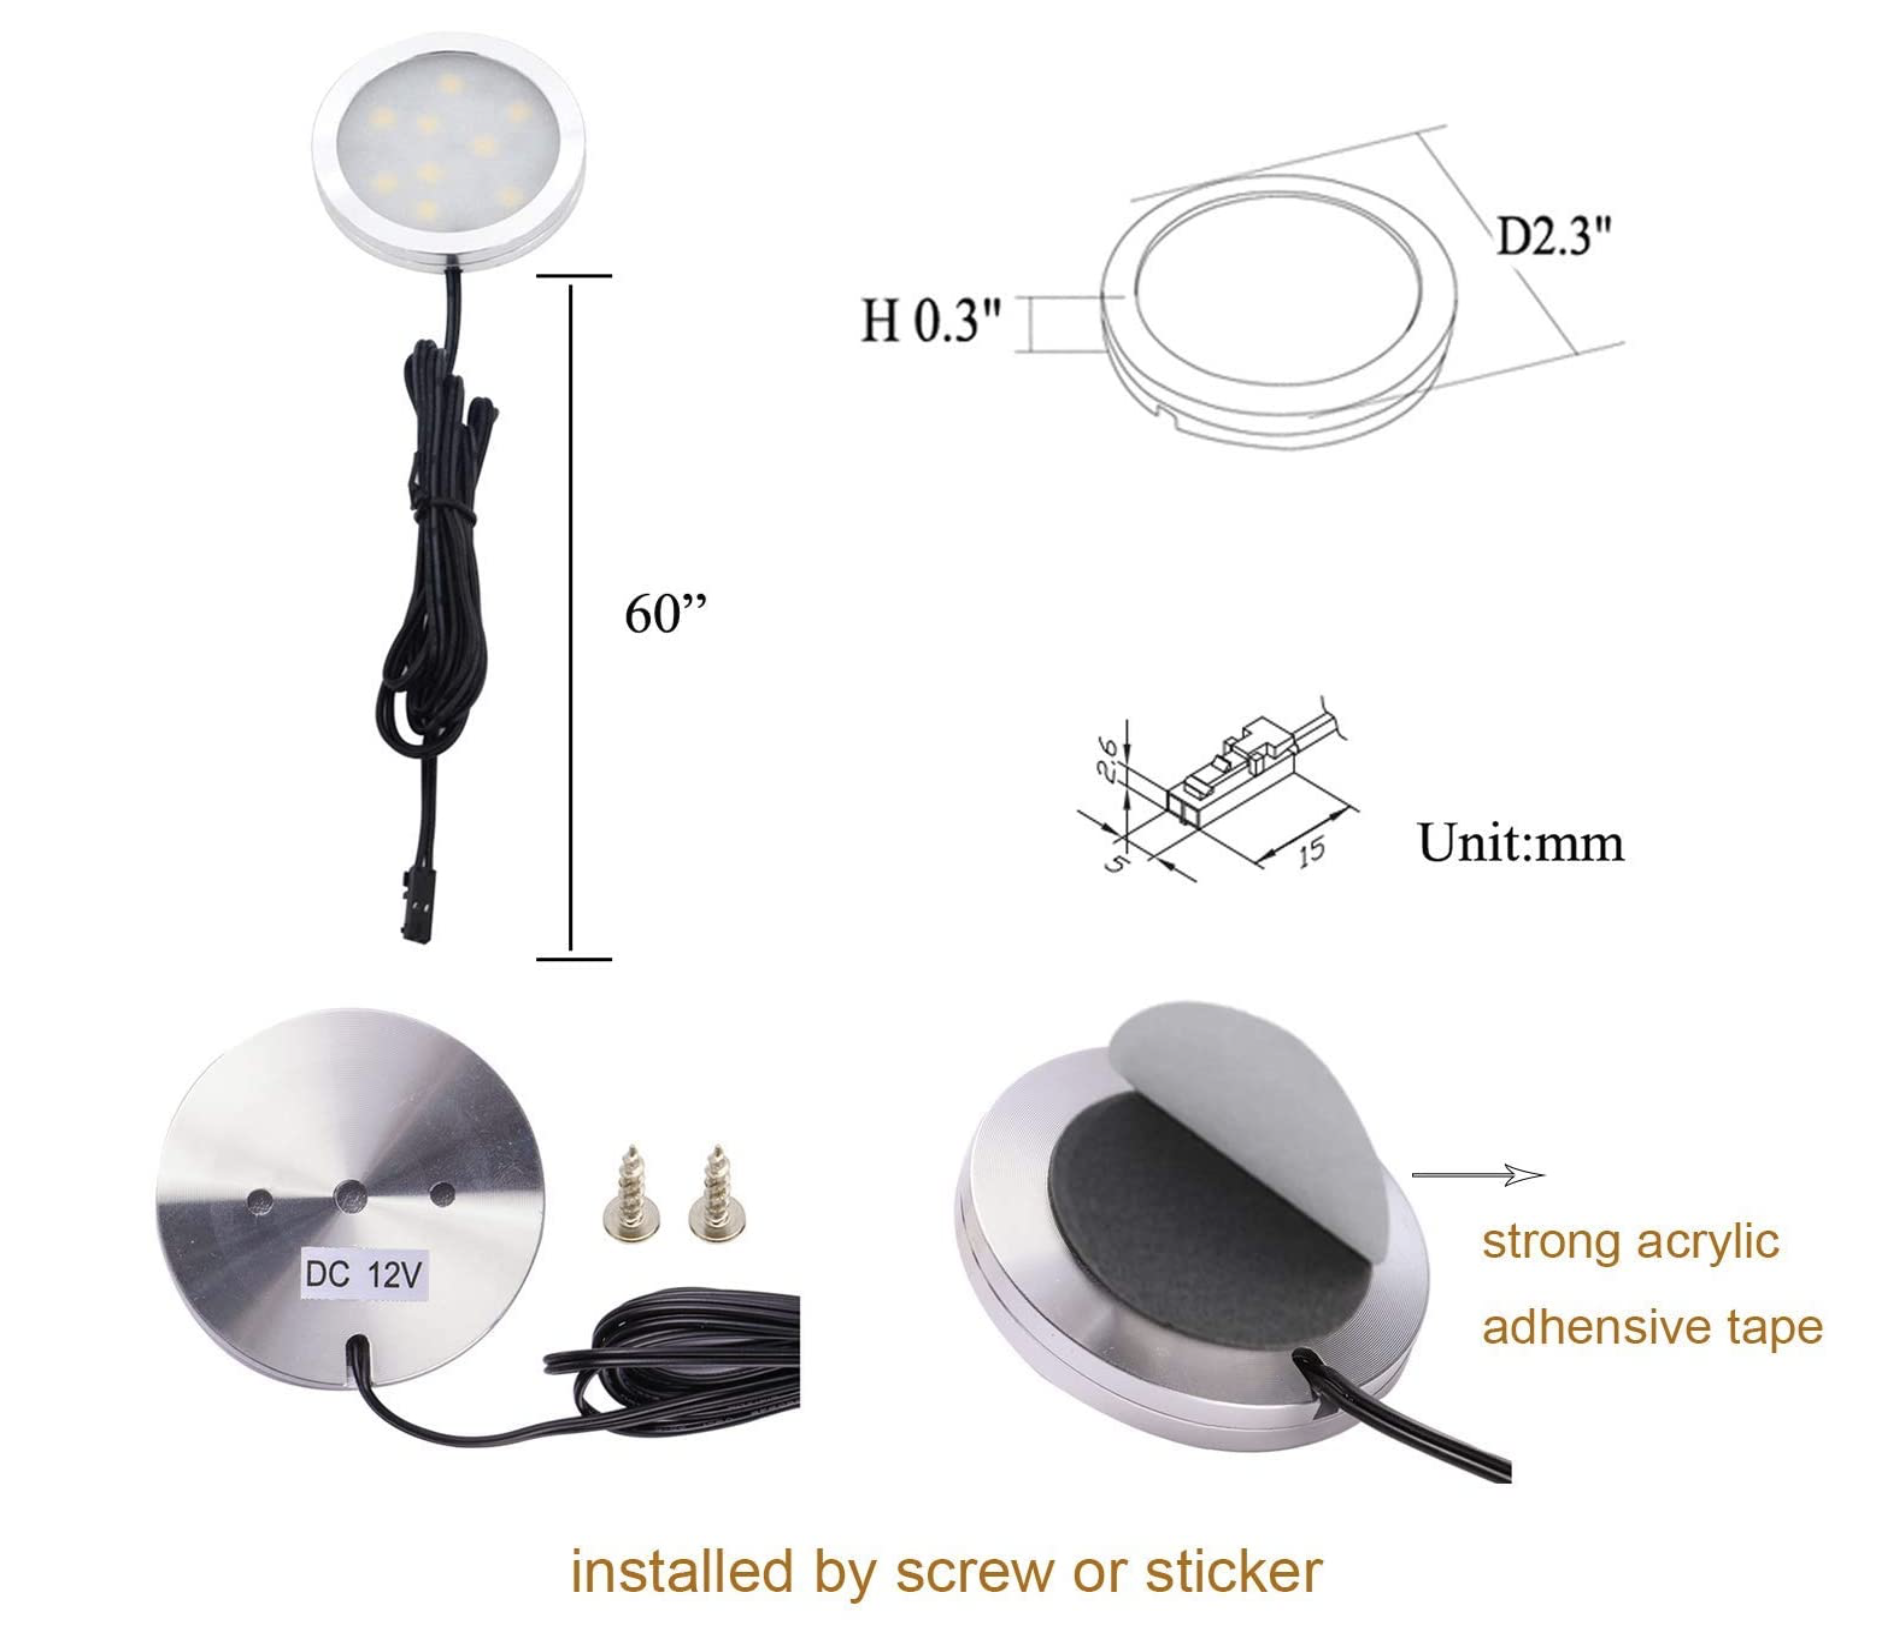
2) Make a decision about light sources. I spent the most time, although hastily, researching a light. It was important the light I chose could be diffused enough to look like the actual glowing logo on a stock MacBook. I also preferred the least amount of light bleed as possible. After doing a lot of research on the various Philips Hue solutions, I ended up going with a cheap under-the-counter LED light puck from Amazon. I wasn’t interested in the cost of Hue, even though I own several of their products. Also, there is not a good Hue device that would prevent light bleed behind the MacBook display shell. You may also want to consider things like: do you want to change the color? The light temperature? Dimming capabilities? Does HomeKit compatibility really matter?
I chose the AIBOO LED under cabinet light from Amazon for $17.99. It comes with three LED pucks and is still low cost. The temperature is a very close match to the OEM Apple logo glow. Also, it was cheap enough that I could justify buying another if I wanted to upgrade at a later time. There are seemingly infinite choices on Amazon for this type of product, feel free to roll the dice.
3) Choose a smart outlet that is HomeKit compatible. Personally, I’m a big fan of Belkin’s WEMO products and have several other WEMO smart items in my home. The WEMO smart outlets are HomeKit compatible, which allowed me to add it to an existing smart home setup, assign it to scenes, my office, set a on/off schedule, and control it with Siri. It was also a good pick, because it was and is still on sale via Amazon for 43% off at $19.99. While you are shopping, you may need an extension cord or surge protector. I used the Bluelounge Portiko, only $6.57, because it offered extra outlets and USB charging ports, to which I connected the Twelve South Fermata charging headphone stand.

4) Back up your hard drive. Doing this project will effectively destroy your MacBook. You will not be able to put everything back together in working condition when this project is complete. Backup your entire drive or selected files to the external drive of your choosing. You will no longer be able to use the MacBook if you complete this tutorial.
5) Find a well lit, flat area to work on. Lay down a soft surface like a towel or felt pad to prevent you from scratching the aluminum. You will have the MacBook in a lot of different positions as you remove about 30 screws and cables, on your way to a MacBook Lamp.
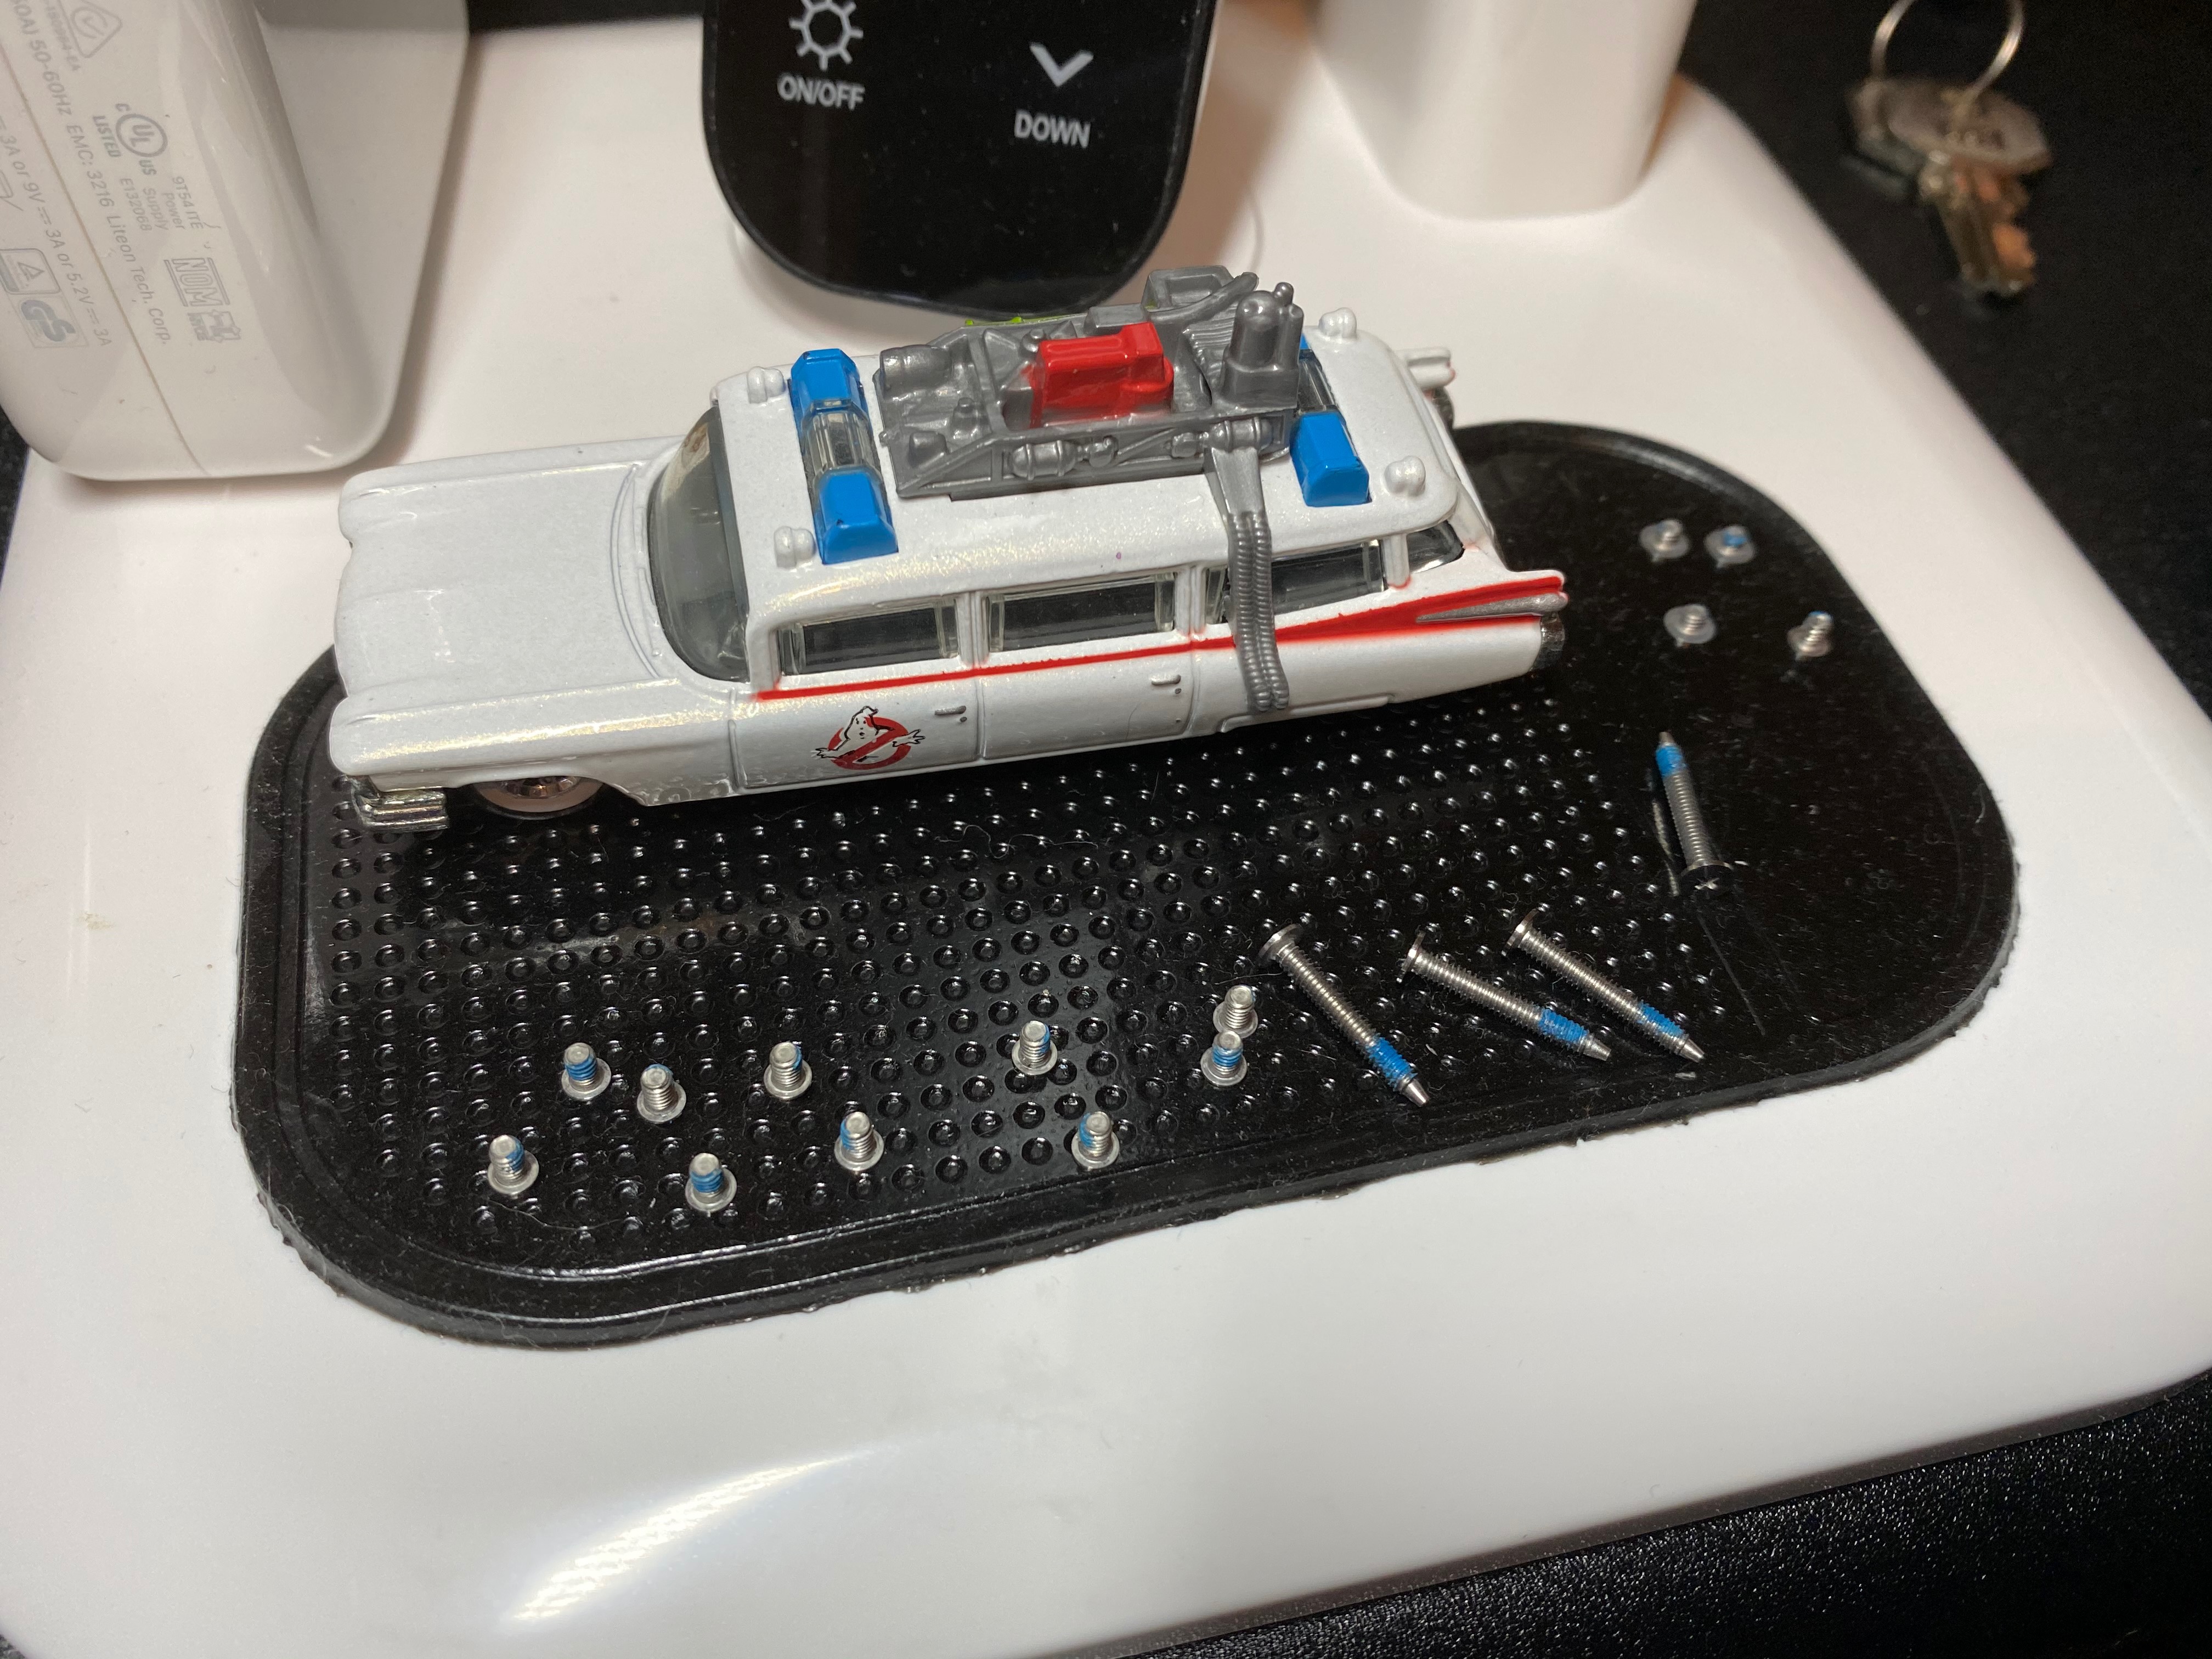
6) Open the iFixit.com LCD replacement article for your specific MacBook. For my MacBook Pro 2008 (early), the directions were incredibly detailed, with images of each step. Follow all steps required to pull the LCD panel from the screen bezel and back shell, exposing the Apple logo and plastic light diffuser sheet. Pro tip: when you take the RAM cover off, if your model has one, save it for later. When you take off the screen bezel, be gentle as to not bend it, and set it aside as well.
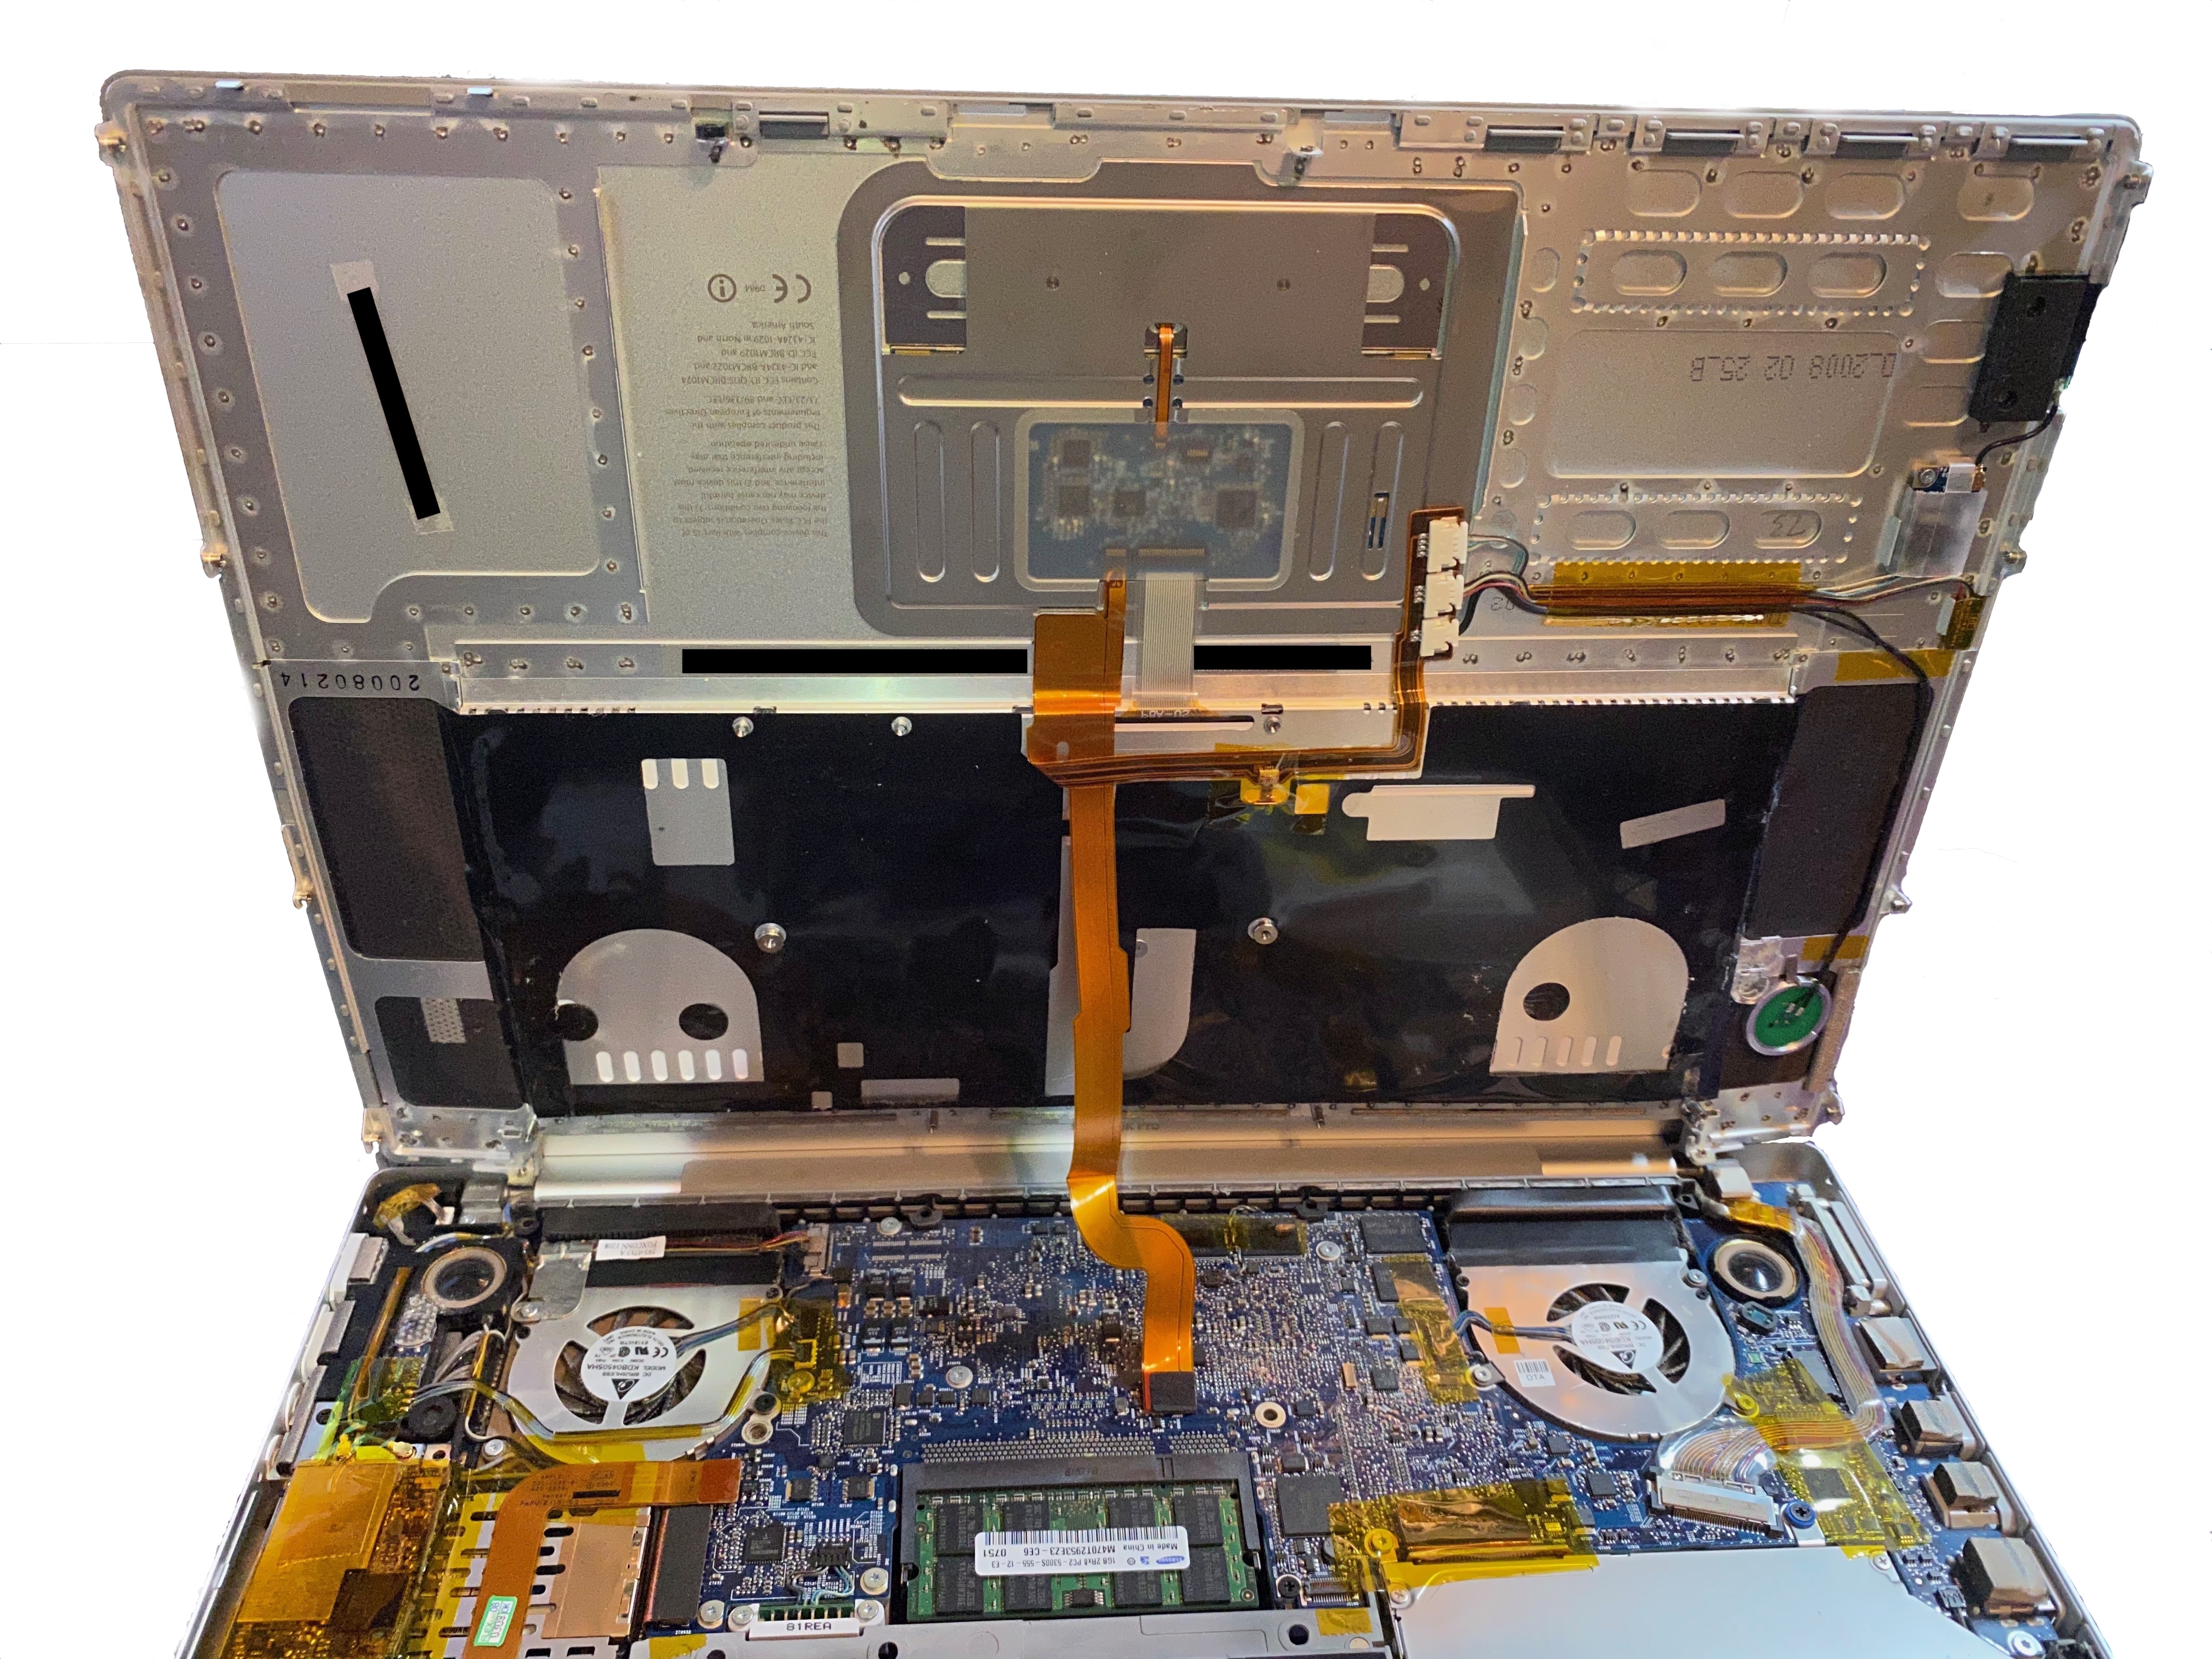
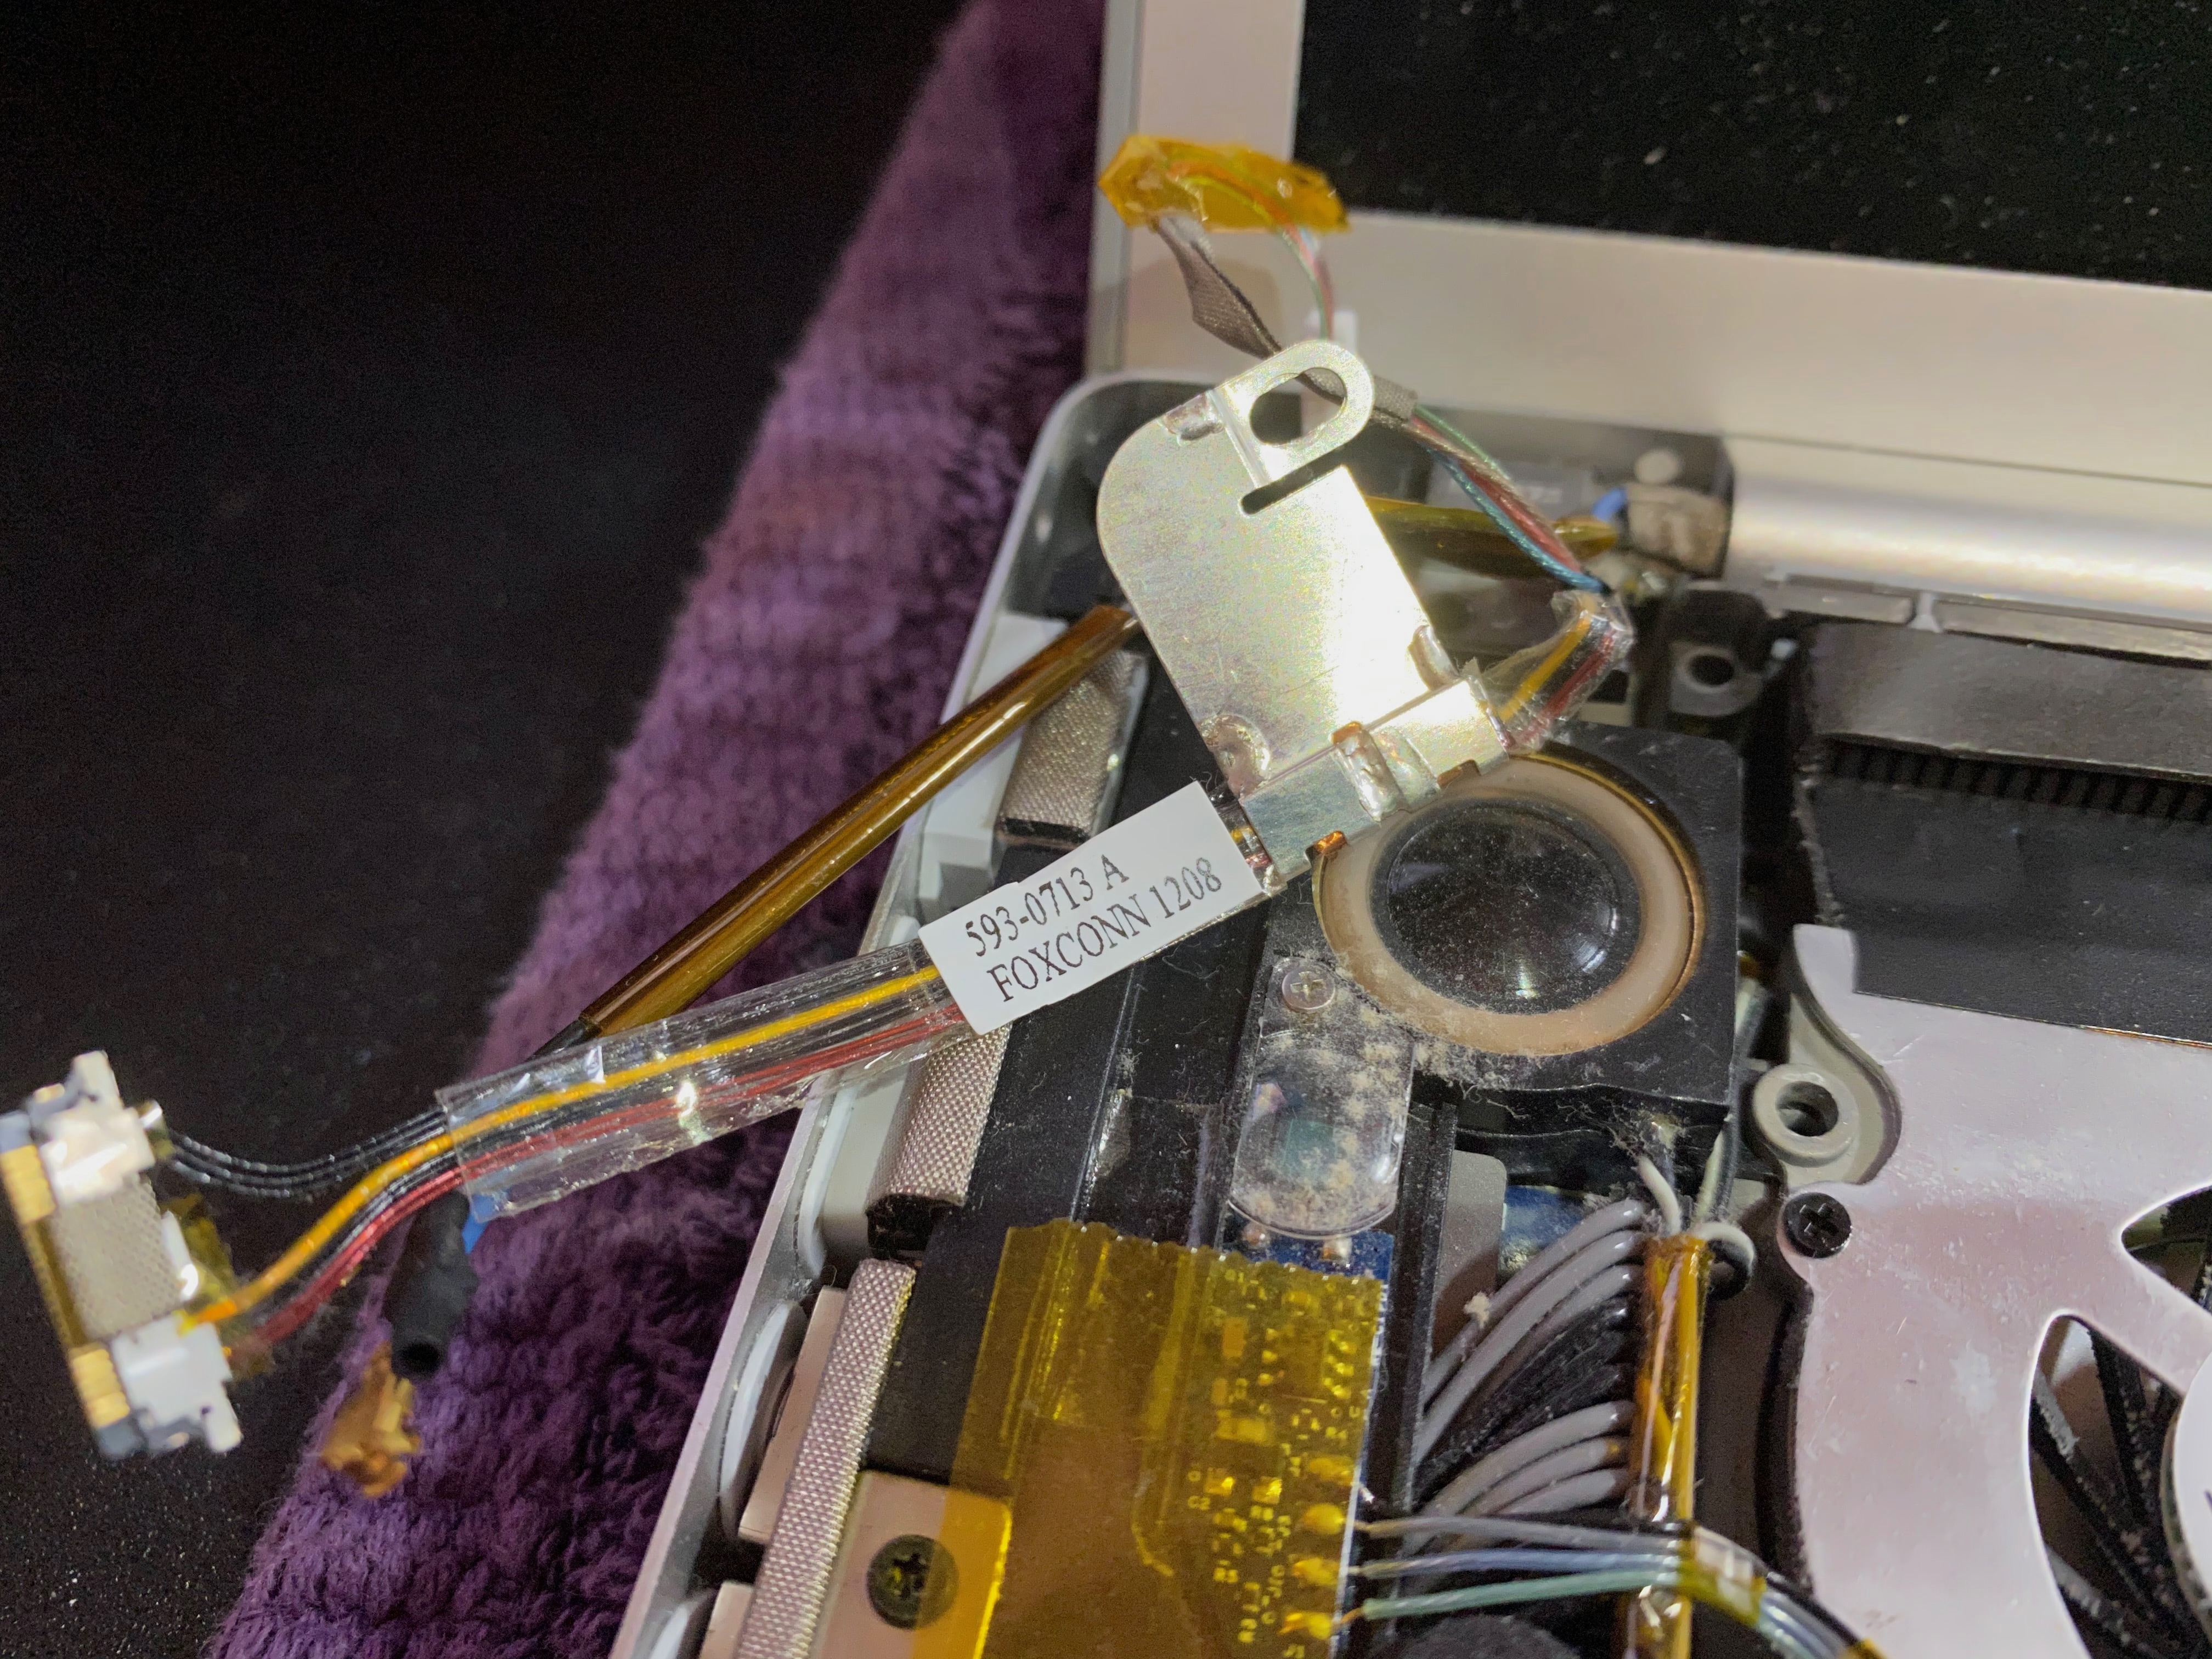
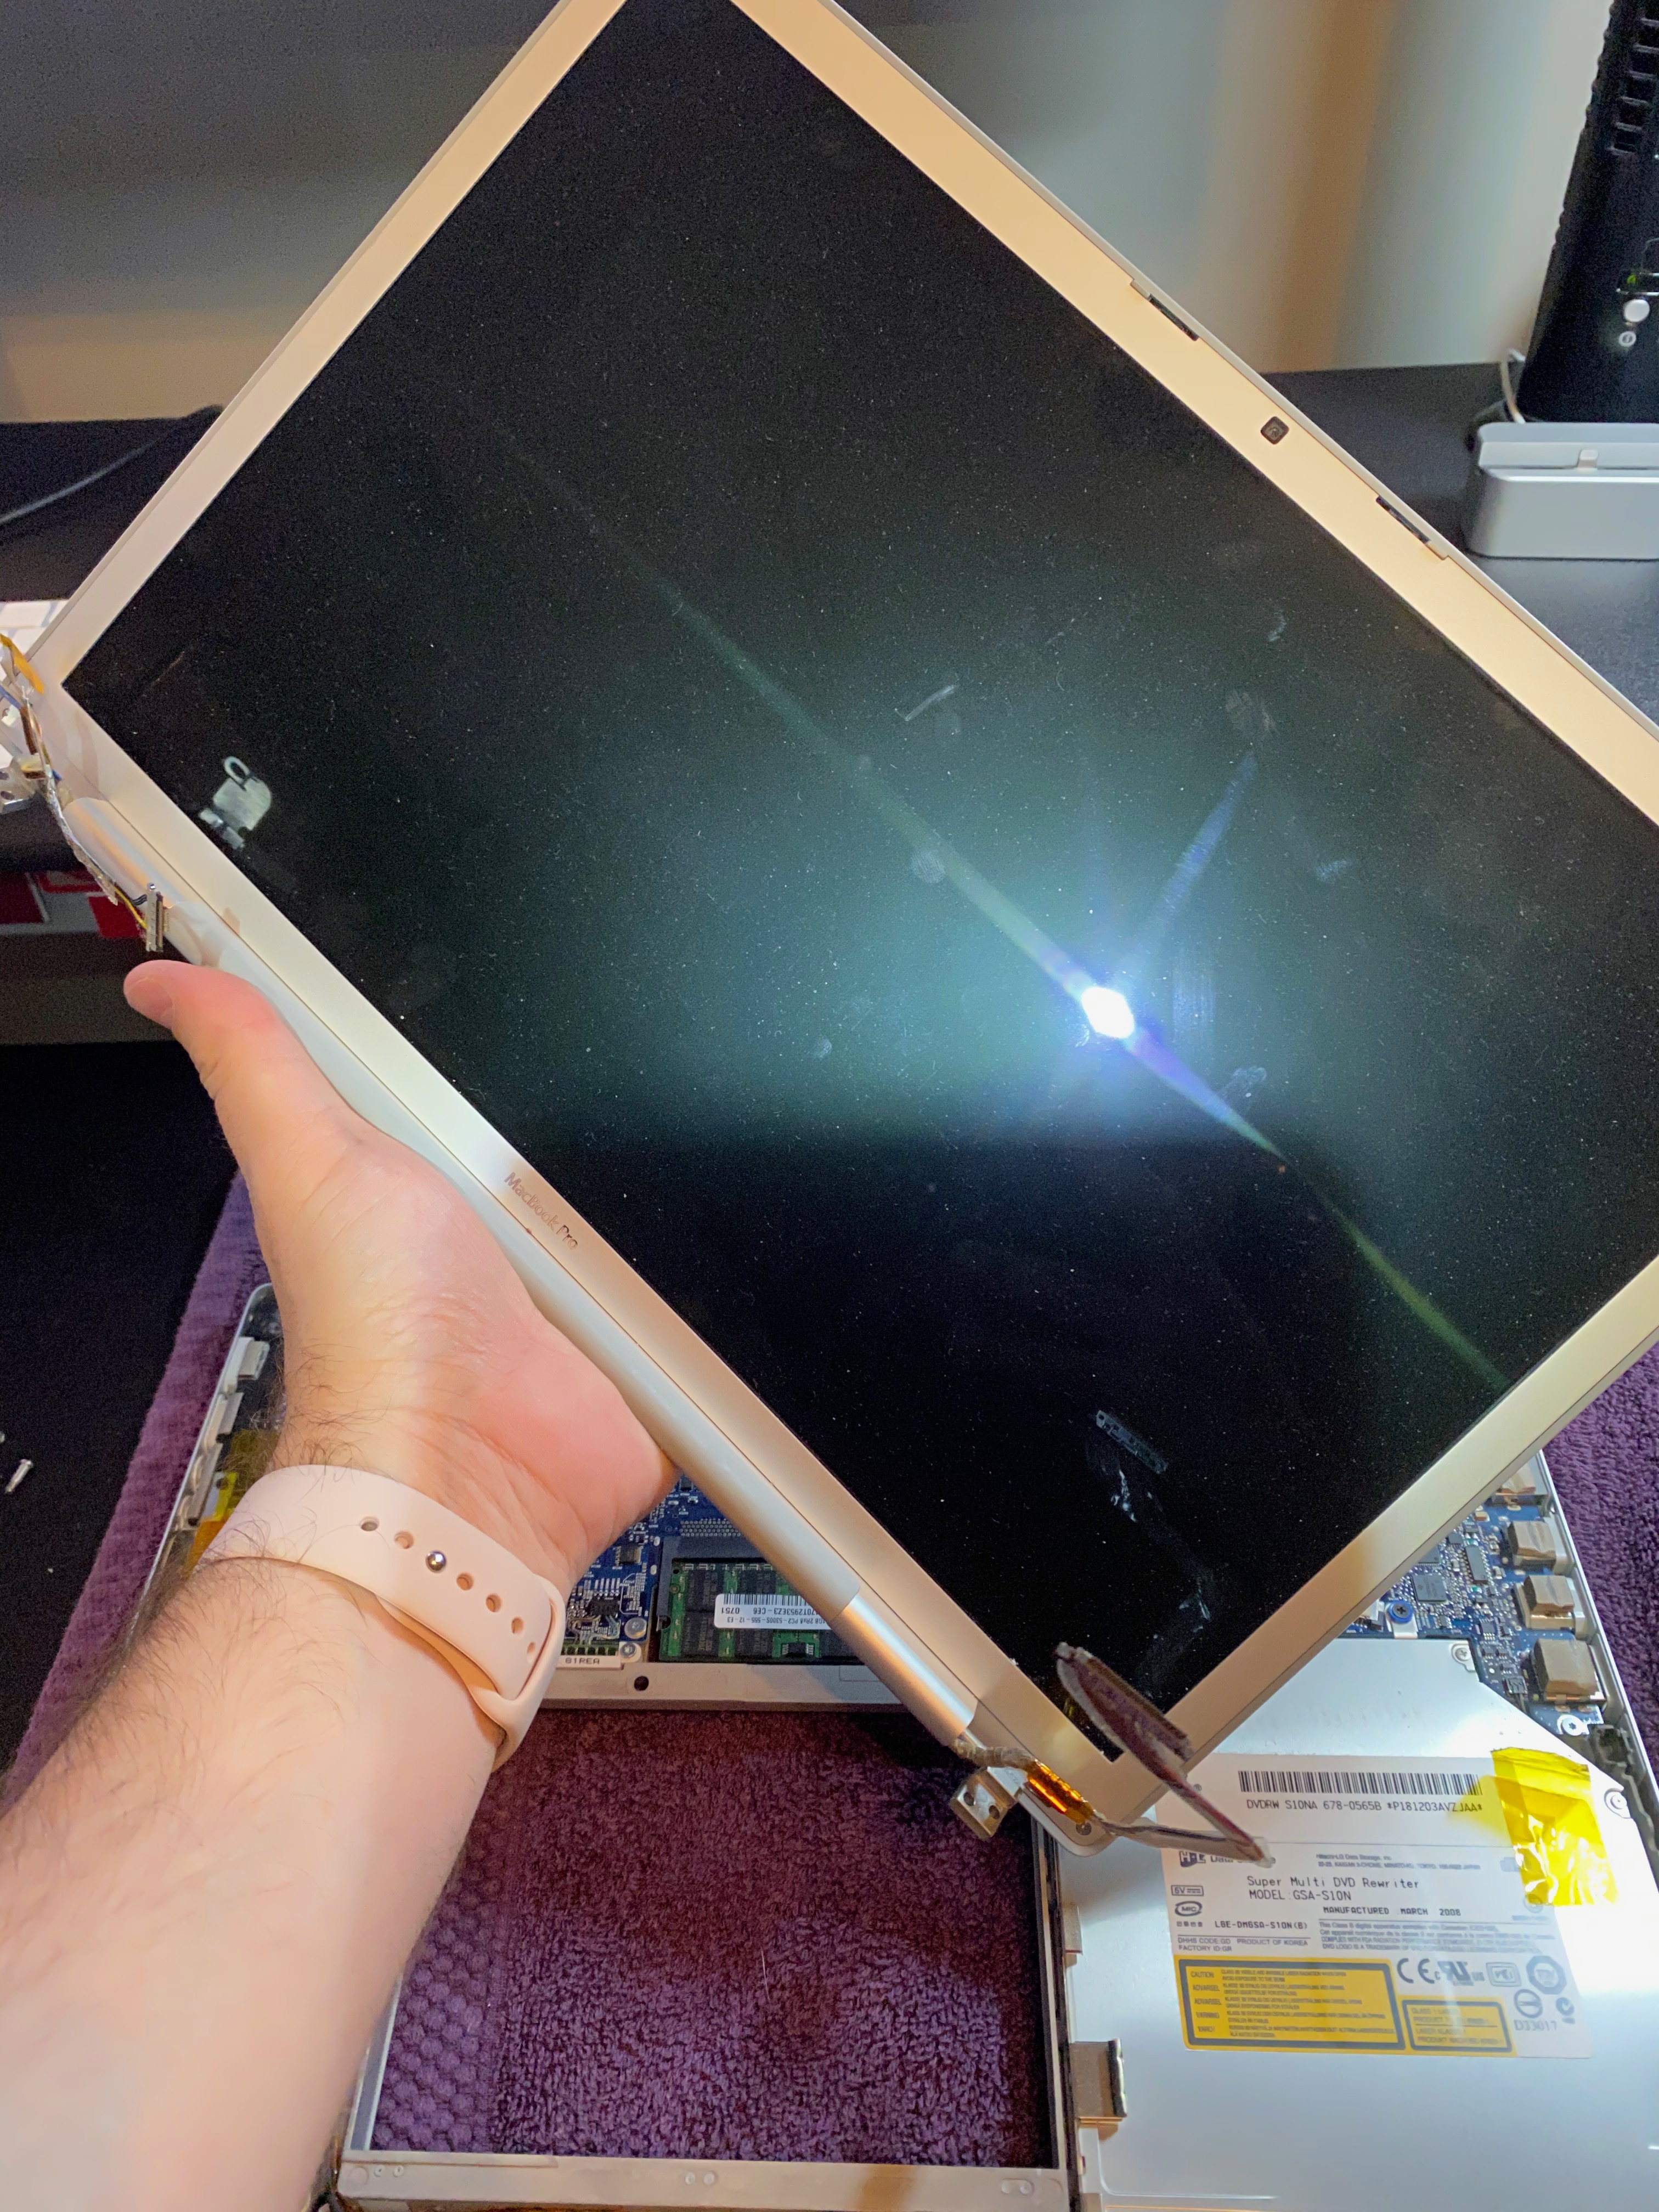
7) Now that you have the LCD panel removed, you are left with the top shell of your MacBook, with the exposed Apple logo and plastic light diffuser sheet. If you ordered the same LED puck lighting, take the plastic light diffuser lens from one of the LED pucks and add it to another. You want a single LED puck to have two diffuser lenses.
8) Power on the LED puck and position it behind the Apple logo. Check to ensure the light is diffusing well and giving you the hue and temperature you prefer. If it doesn’t, back to the drawing board on a light source. Proceed if you like what you see! The LED pucks I recommend are like a half millimeter smaller that I’d prefer, but it was close enough for me to move forward.
9) Take the RAM housing you removed earlier in the process and place it over the LED puck. This helps hold the puck in place and gives you something to run your tape across. See below. While firmly holding the RAM housing over the well positioned LED puck, tape that thing down firmly. Don’t be conservative with the tape. You do not have a lot of margin for error for proper placement with the light source or you will see a shadow through the Apple logo window.
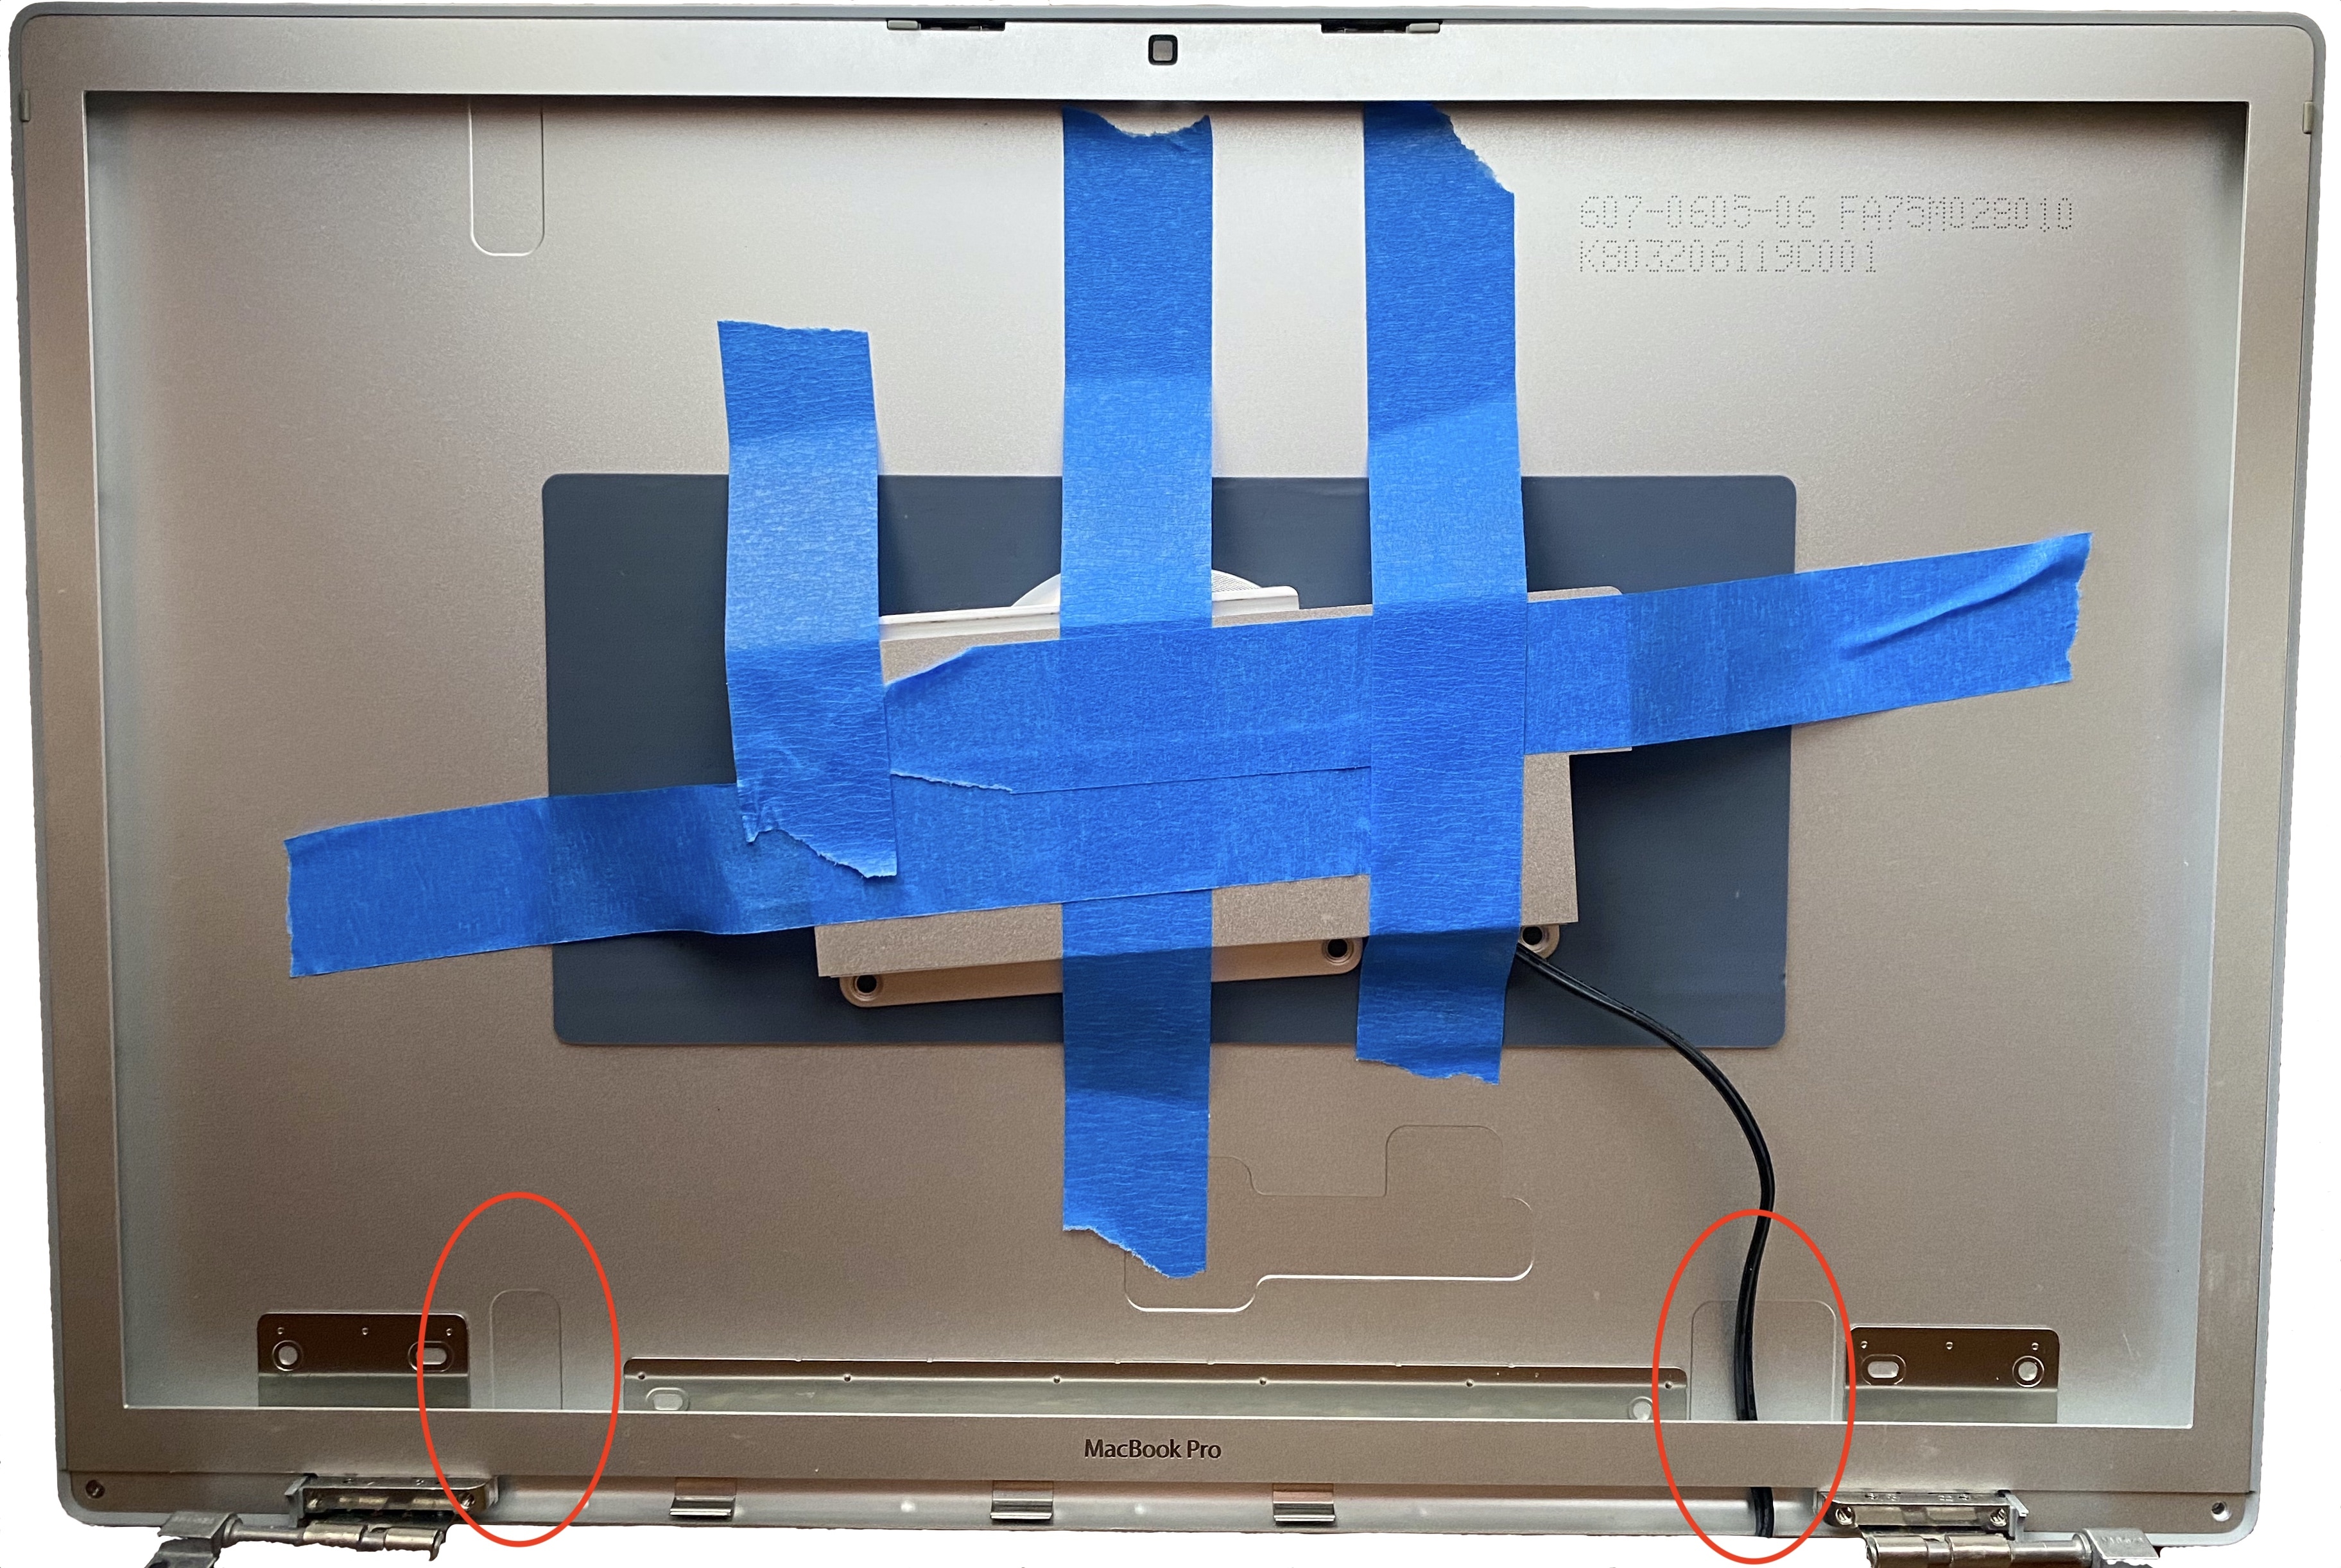
Step 10: Place the LED power wire toward the bottom right or left of the shell. Grab the bezel. Pop the bezel back into the shell, while fishing the LED power wire through the divots that previously held the panel cables, power supply, and iSight camera. There is enough room to pass the wire through, while re-installing the bezel. Re-installing the bezel does two things. It adds the “MacBook” logo back to the assembly and it helps keep your wire wrangled.
11) Place the entire fixture in your desired location and add the smart plug to a nearby outlet. Power up the plug and follow the manufacturer instructions for adding it to HomeKit. Plug in your brand new lamp. Tell Siri to turn on your shining new MacBook Lamp!
Conclusion
I love the MacBook Lamp! It is an awesome addition to my office space and stirs those memories of it being my first Apple computer. It would make a very impressive background for any YouTuber backdrop and give you incredible XP with the fanboy community.
I could easily see upgrading the light source at a later time to something that is more controllable. Something like a Phillips Hue Play or Bloom, but those would also not be immediately attachable to the back of the MacBook shell. Consequently, there would be a backlight behind the shell where most of the light absently leaks. Only minimal light would shine through the Apple logo. If you are looking for that classic, old-school MacBook Apple logo glow, you will need to ensure the light shines directly through the Apple logo with minimal-to-no light leak.
There is room for improvement in the setup. Specifically the LED puck I chose was just slightly too small in my opinion. Choosing one that covers a slightly larger area will prevent the small shadow I’m seeing. I’d also love to change the color just for fun, but the color I’m getting is fairly close to the OEM color on a true MacBook. You can also barely see the individual LEDs inside the puck. But, from a distance, it’s acceptable.
Again, even with these areas for improvements, I love the finished product. For about $55 and a couple hours time, it was a fun project with a minimal investment for the continued enjoyment of my old laptop.
This project is part of an on going series of posts where I’m upgrading my home office while I working from home during the COVID-19 pandemic closure. One major undertaking was finally switching 11,000+ photos across 17 years of digital images to iCloud Photos. I also had time to review a very capable, yet portable USB-C hub, an aluminum shelf attachment for iMac, the headphone charging stand pictured above, and an AirPods Pro case. Several of these were spurred by conversations on Twitter. If you’d like me to check out any other tech or have ideas for ways to upgrade my desk environment, catch up with me via @jim_gresham! As always, keep a look out for my recurring Wallpapers of the Week, every Sunday.