The Apple Notes app offers an easy way to share and collaborate on notes and folders. Whether you’re using an iPhone, iPad, Mac, or accessing iCloud on the web, this tutorial provides a comprehensive guide on how to share, collaborate, and manage permissions for a seamless teamwork and project coordination.
Teamwork is an important aspect of most businesses. So when it comes time to collaborate on a project, whether big or small, you will want input from your team members, coworkers, or staff.
Luckily, the Notes app makes collaboration easy. You can share notes and folders with editing privileges so your collaborators can add their suggestions and make adjustments.
Here’s how to collaborate with the Notes app to help you get back to working together, no matter where you are.
Related: How to export notes from the Notes app as PDF on iPhone, iPad, and Mac
Two types of sharing options
You can share the note or folder, and the other persons can:
- Only view that note, or
- View and also make changes to that note.
Note: You can have up to 100 people collaborate on one note.
From your iPhone or iPad
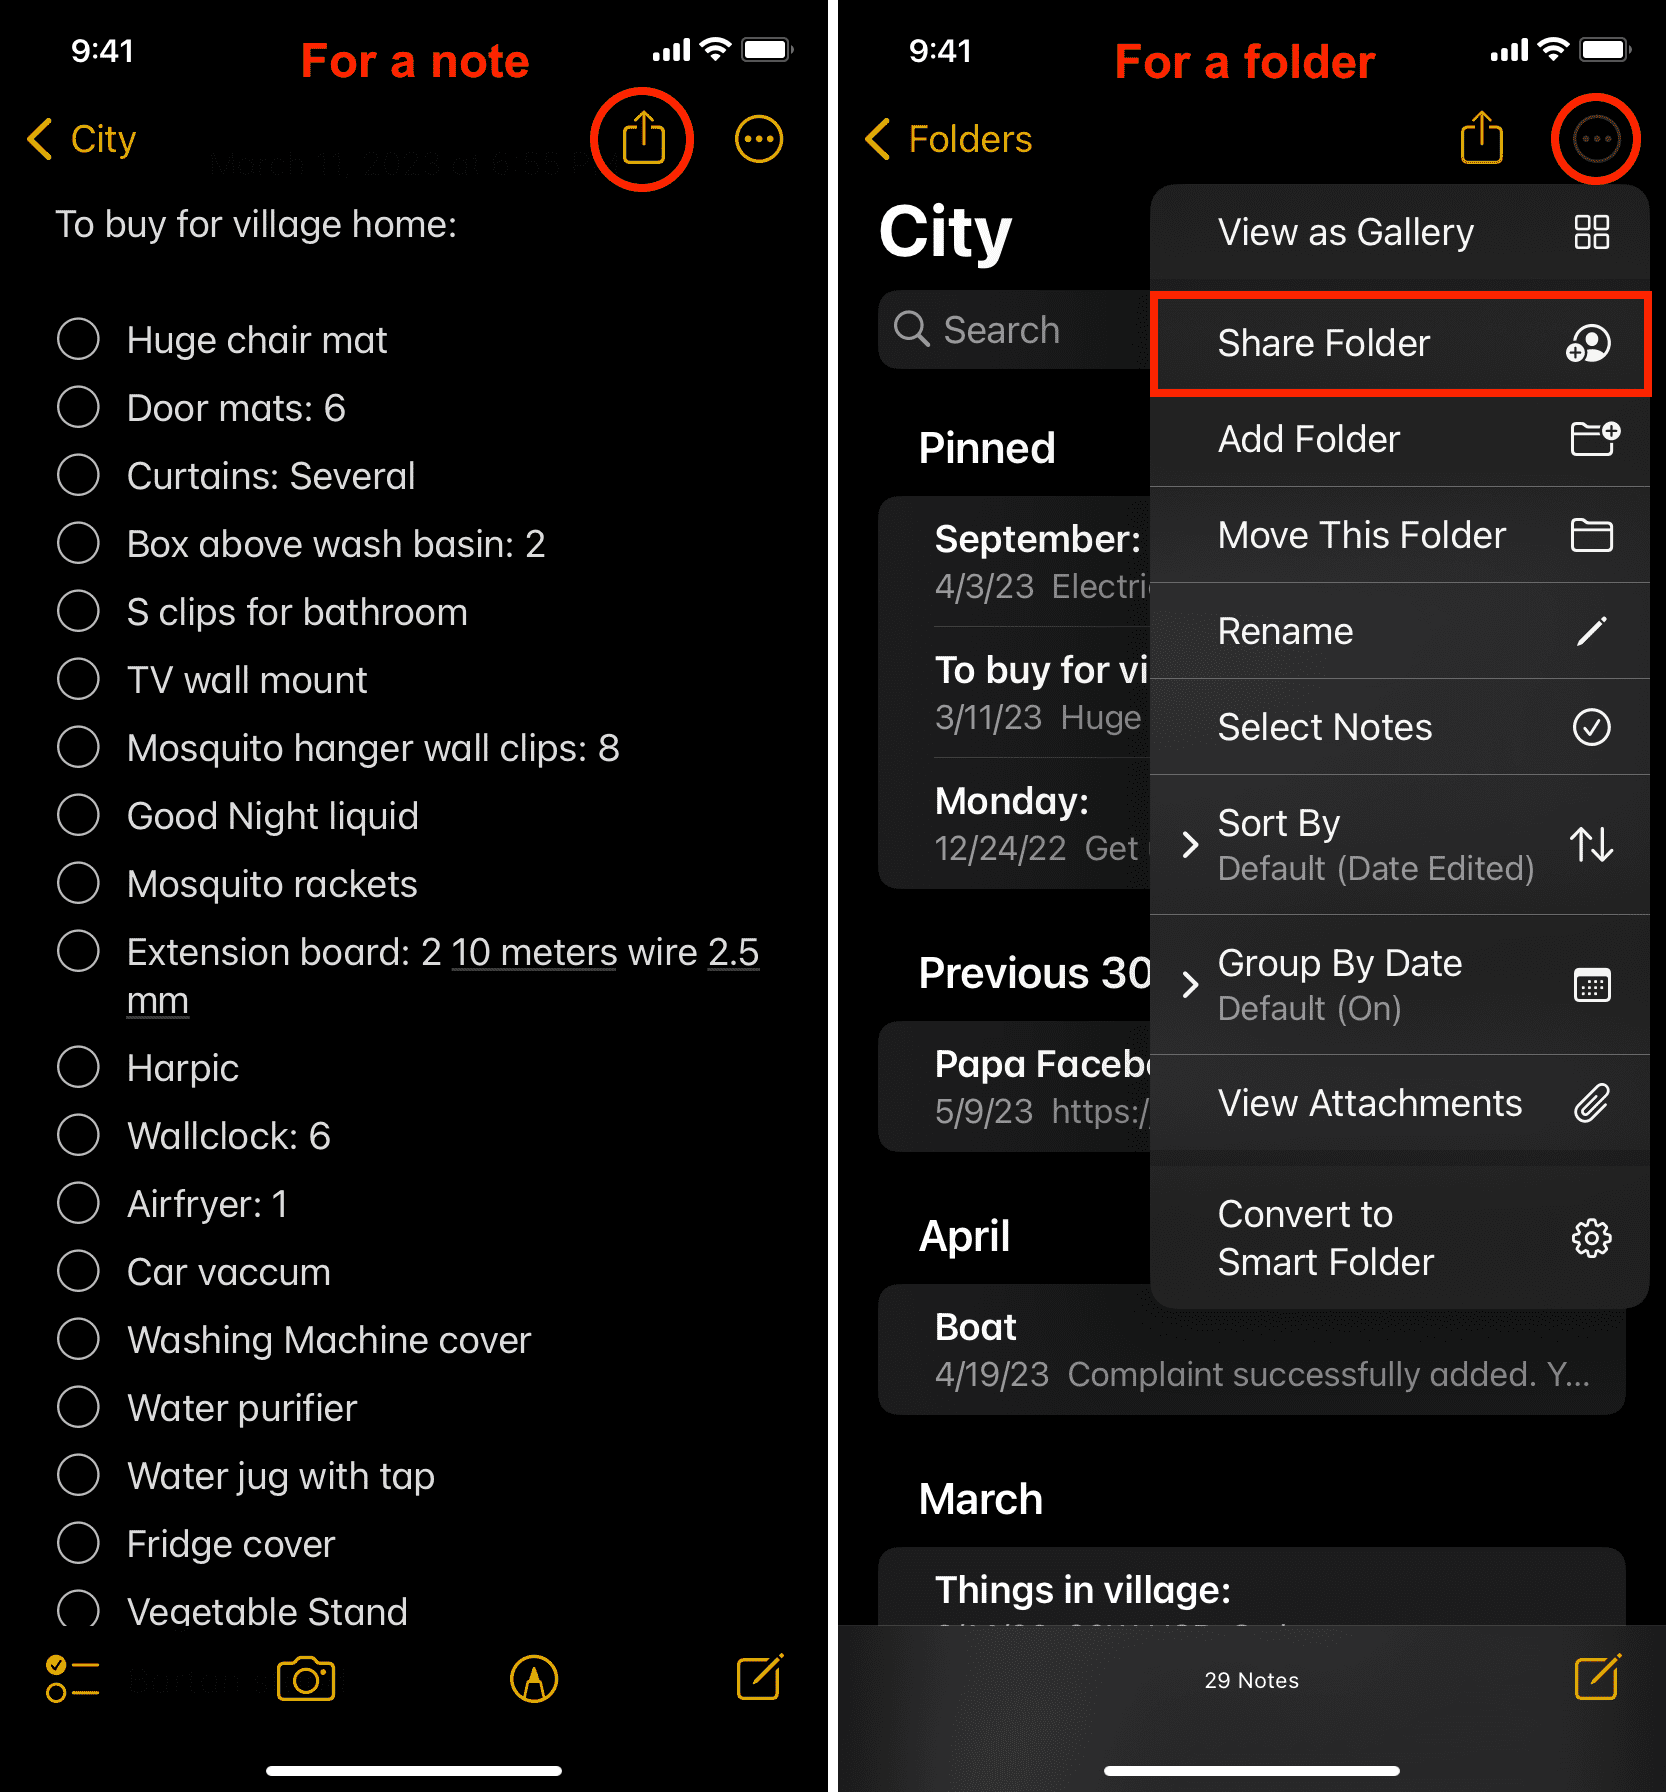
1) Open the Notes app and go inside the iCloud note you want to share. To share a folder, tap to go inside it. Make sure the note is not locked.
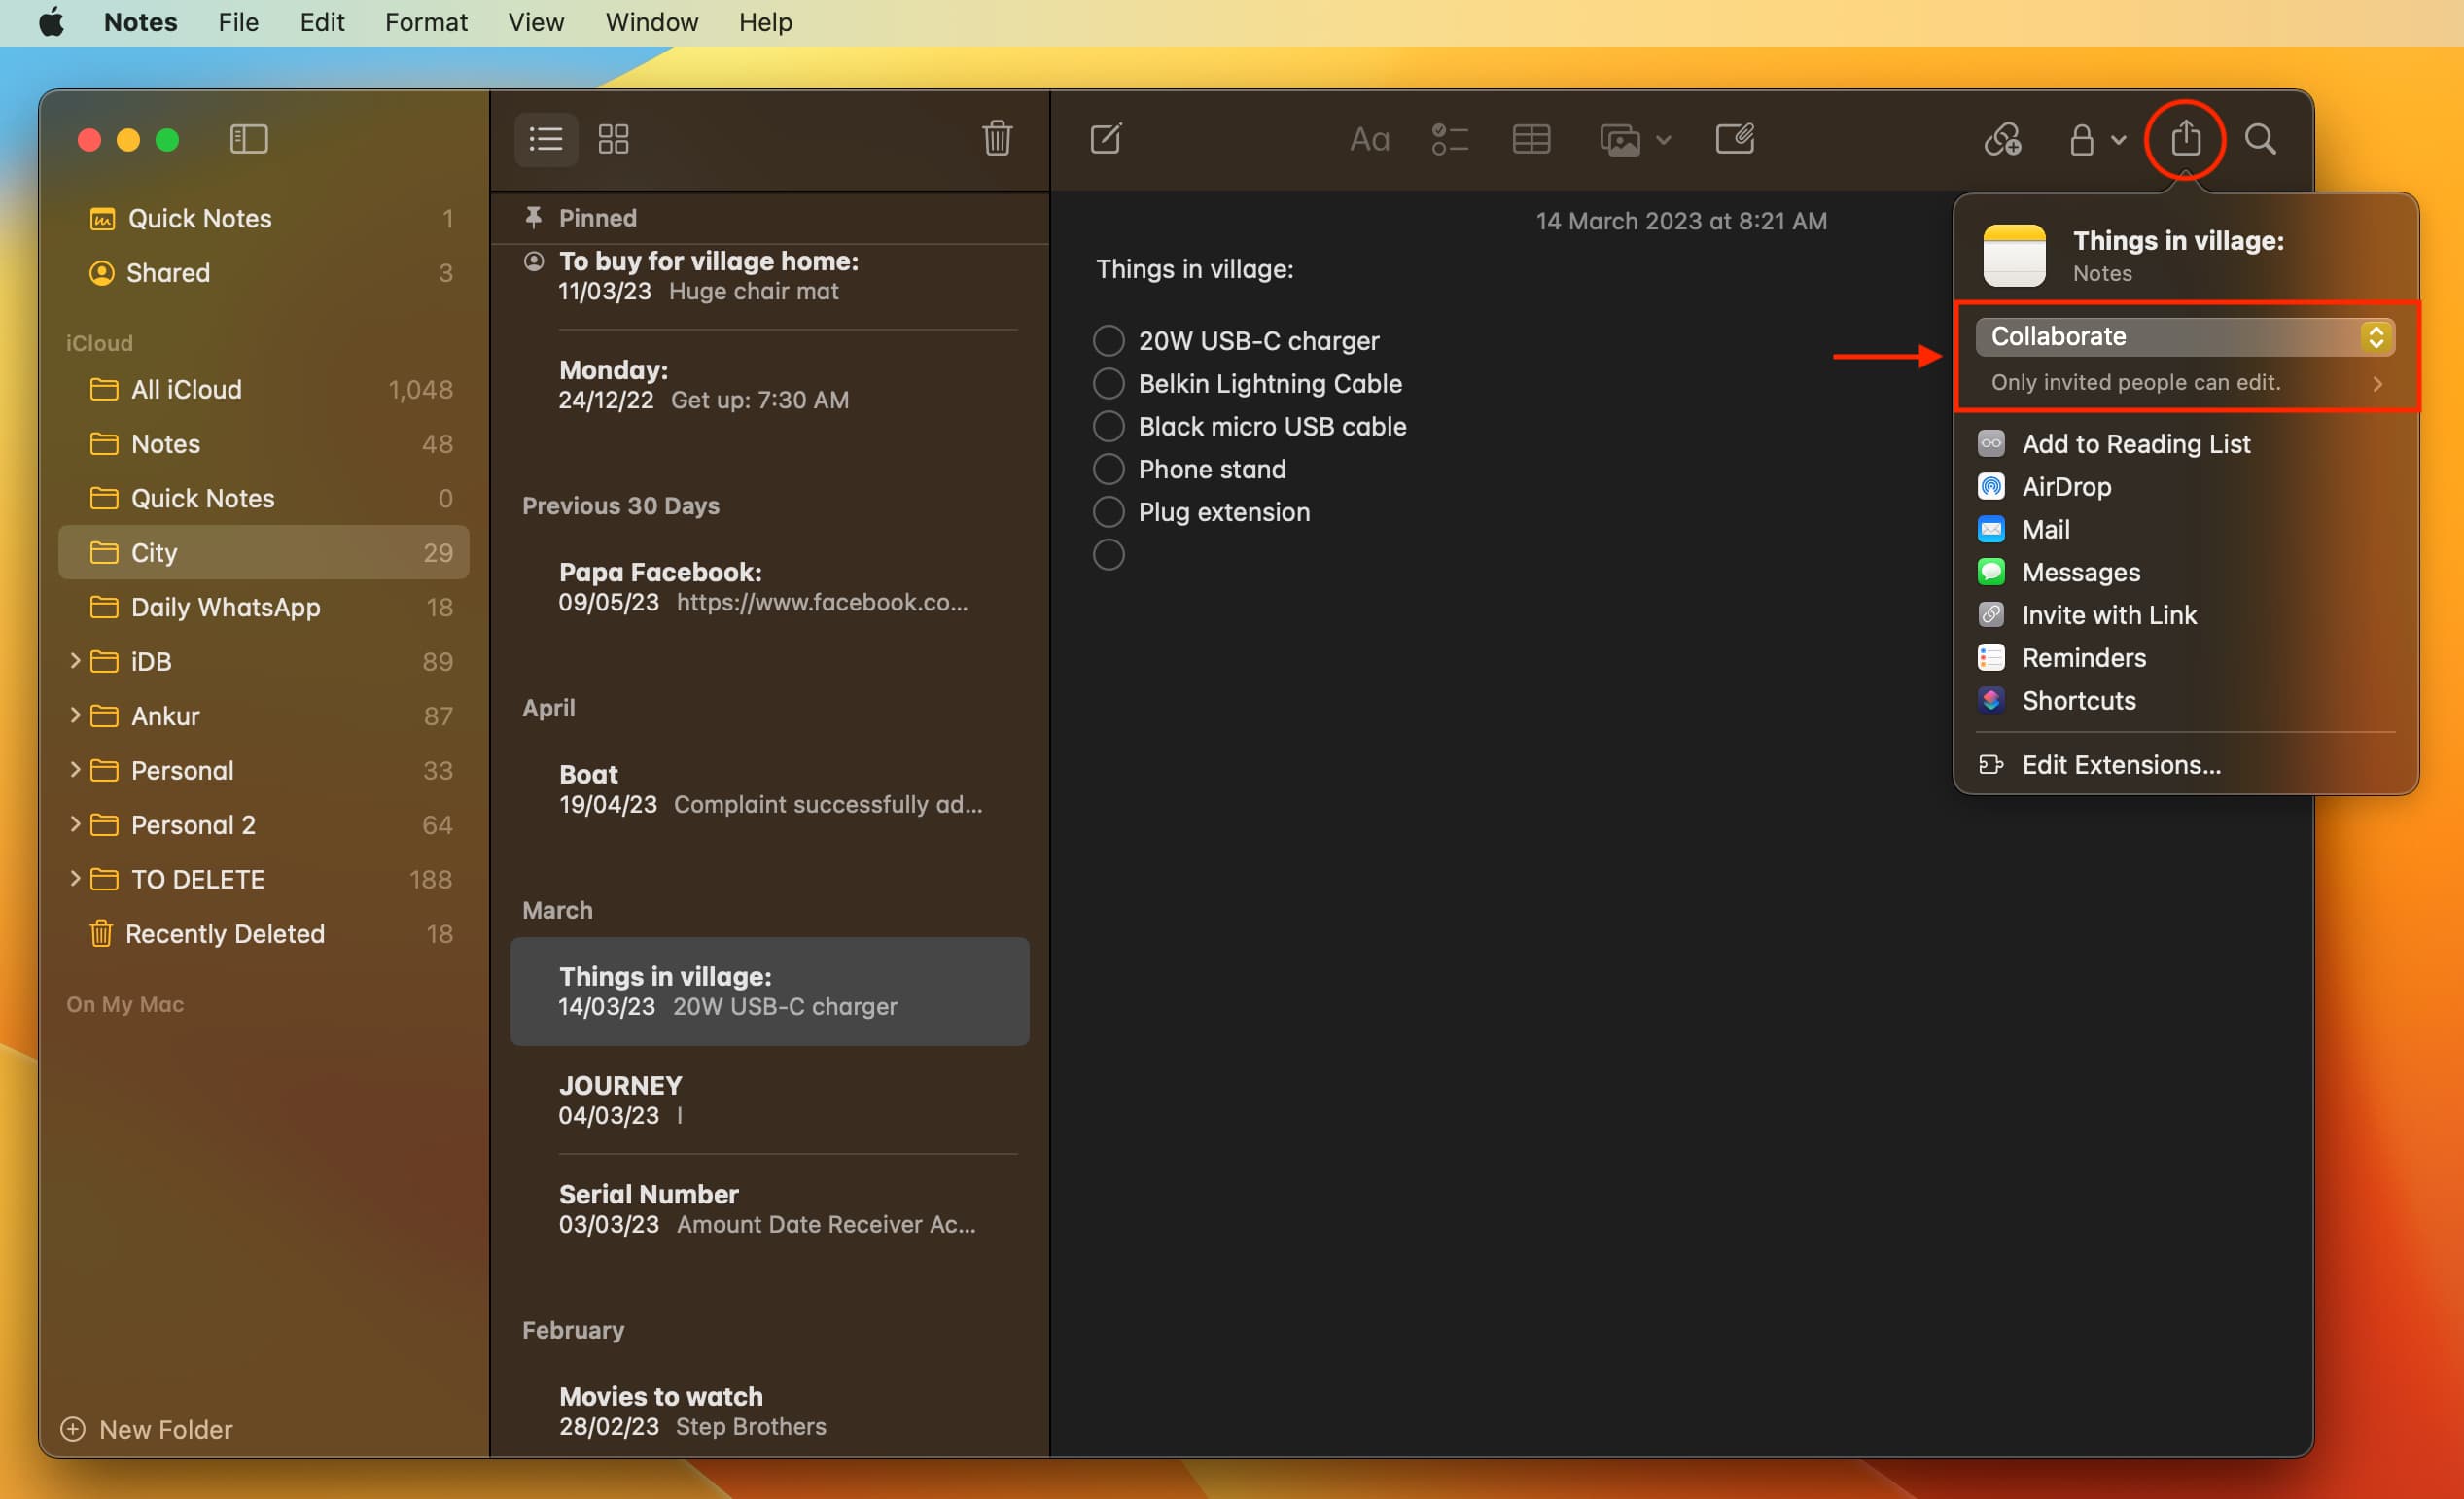
2) To share a note, tap the share button from the top. And to share a folder, tap the More button and choose Share Folder.
3) If you’re sharing a note, tap Send Copy and choose Collaborate. If you’re sharing a notes folder, it should already say Collaboration.
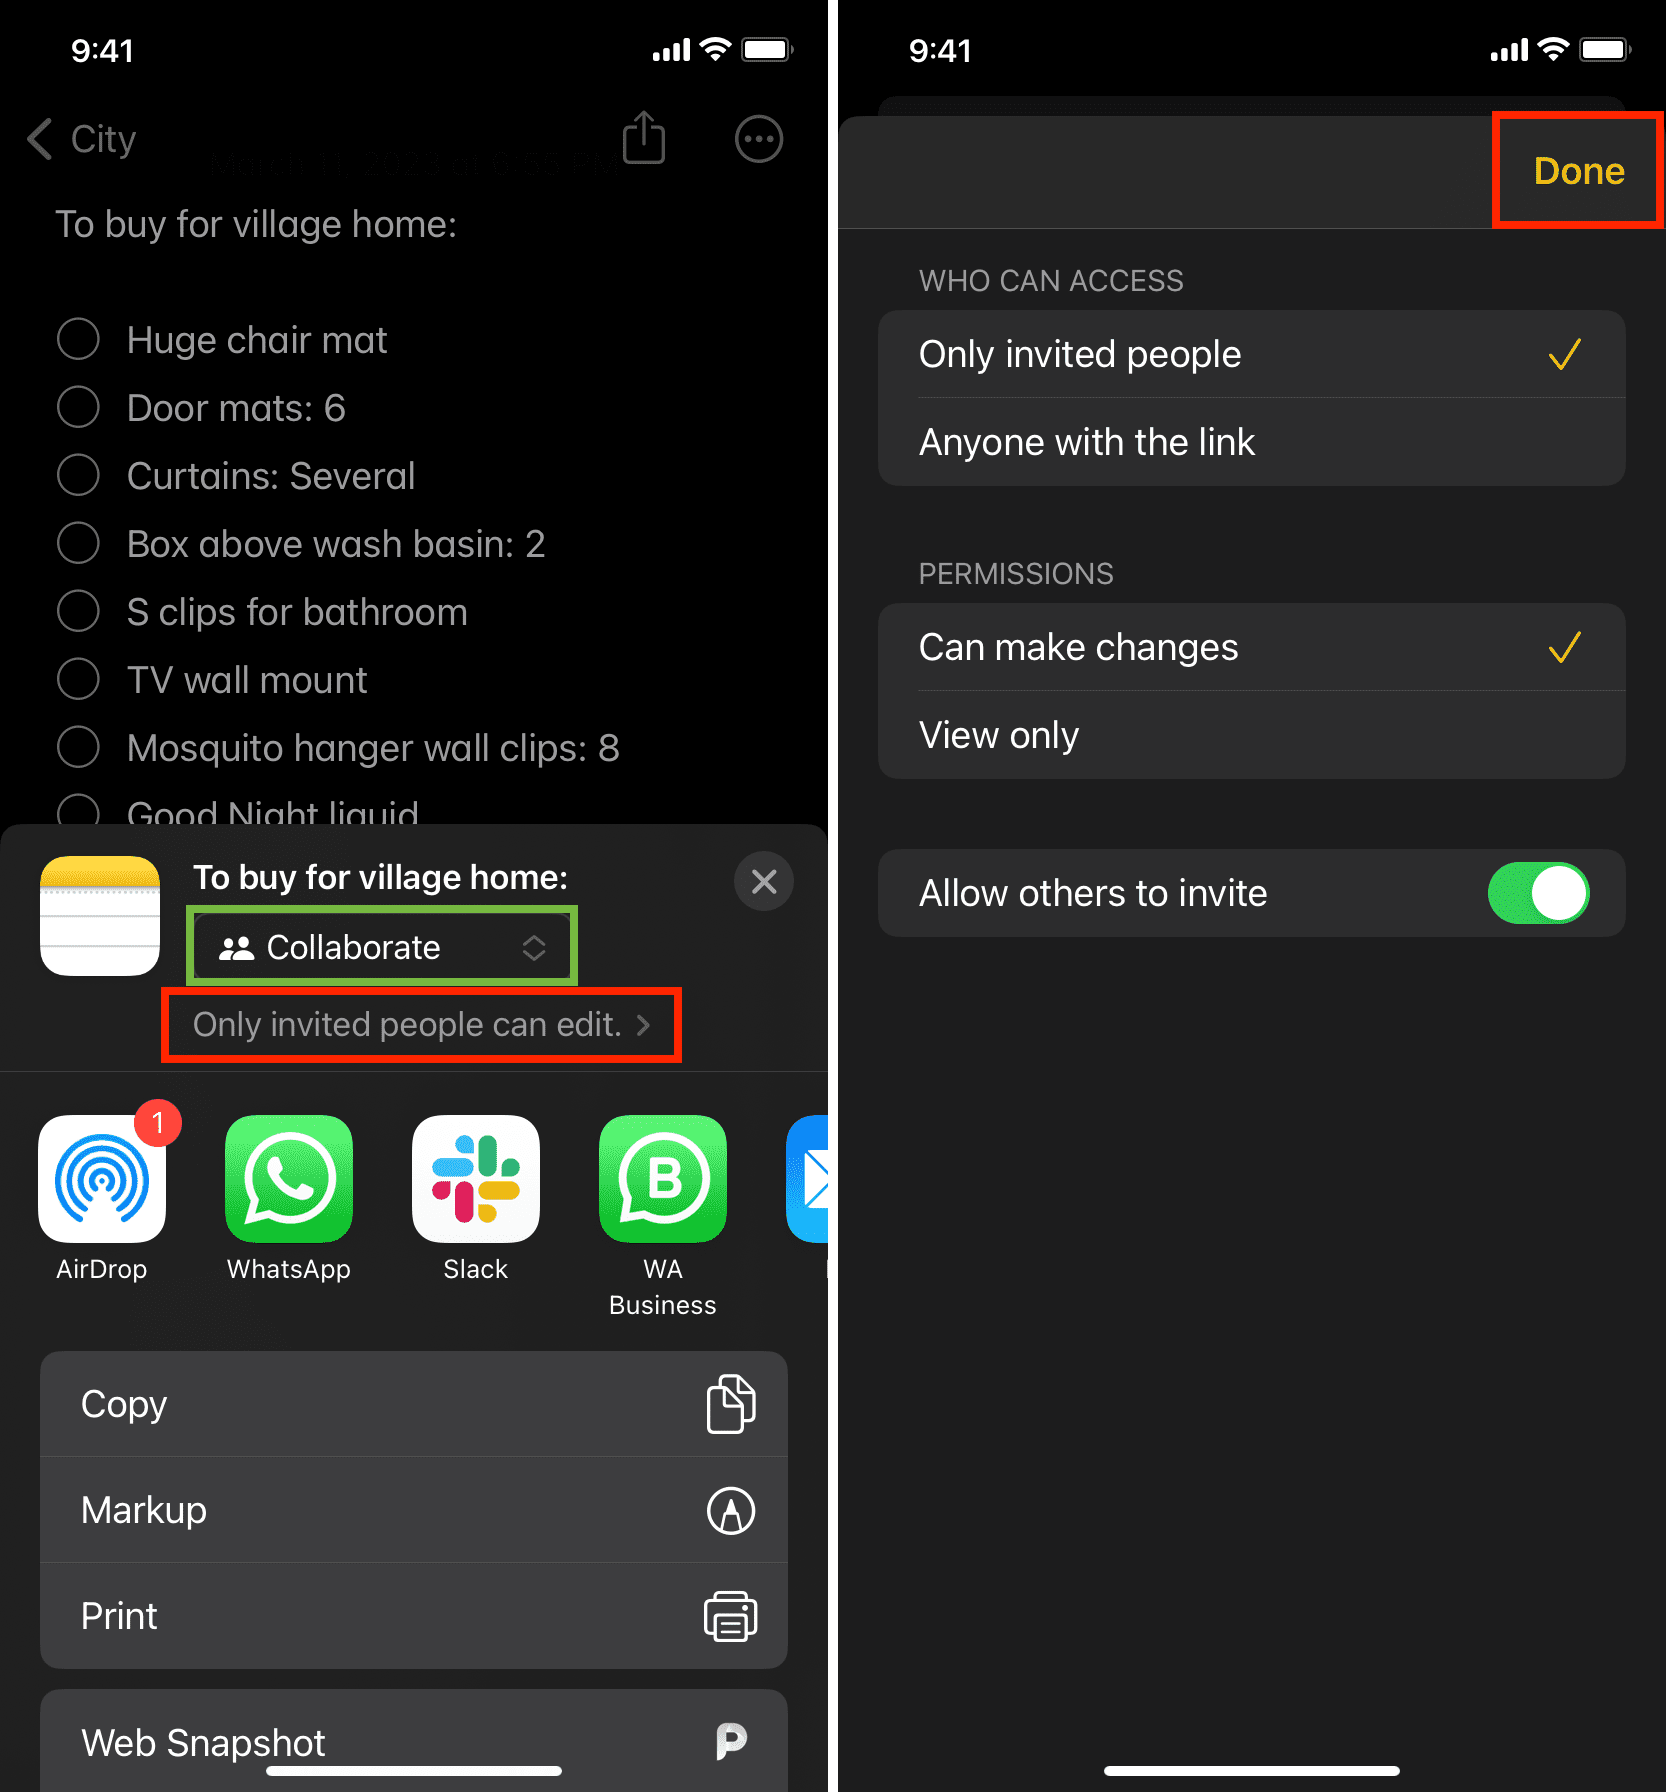
4) Next, tap ‘Only invited people can edit‘ and set the right sharing options as per your need:
- Who can access: You can allow only invited people (the ones you send the invitation to) to access the shared note or permit it to be accessible to anyone who has this shared link.
- Permissions: You can choose to allow the person with whom you share the note to make changes or view it only. The Notes app will let you see all the changes others have made to your note (explained later in this post).
- Allow others to invite: If you pick Can make changes (and Only invited people), you can also choose to allow the original collaborators to invite new collaborators. For example, you (A) share the note with B, and B can invite C.
Tap Done after picking your desired settings.
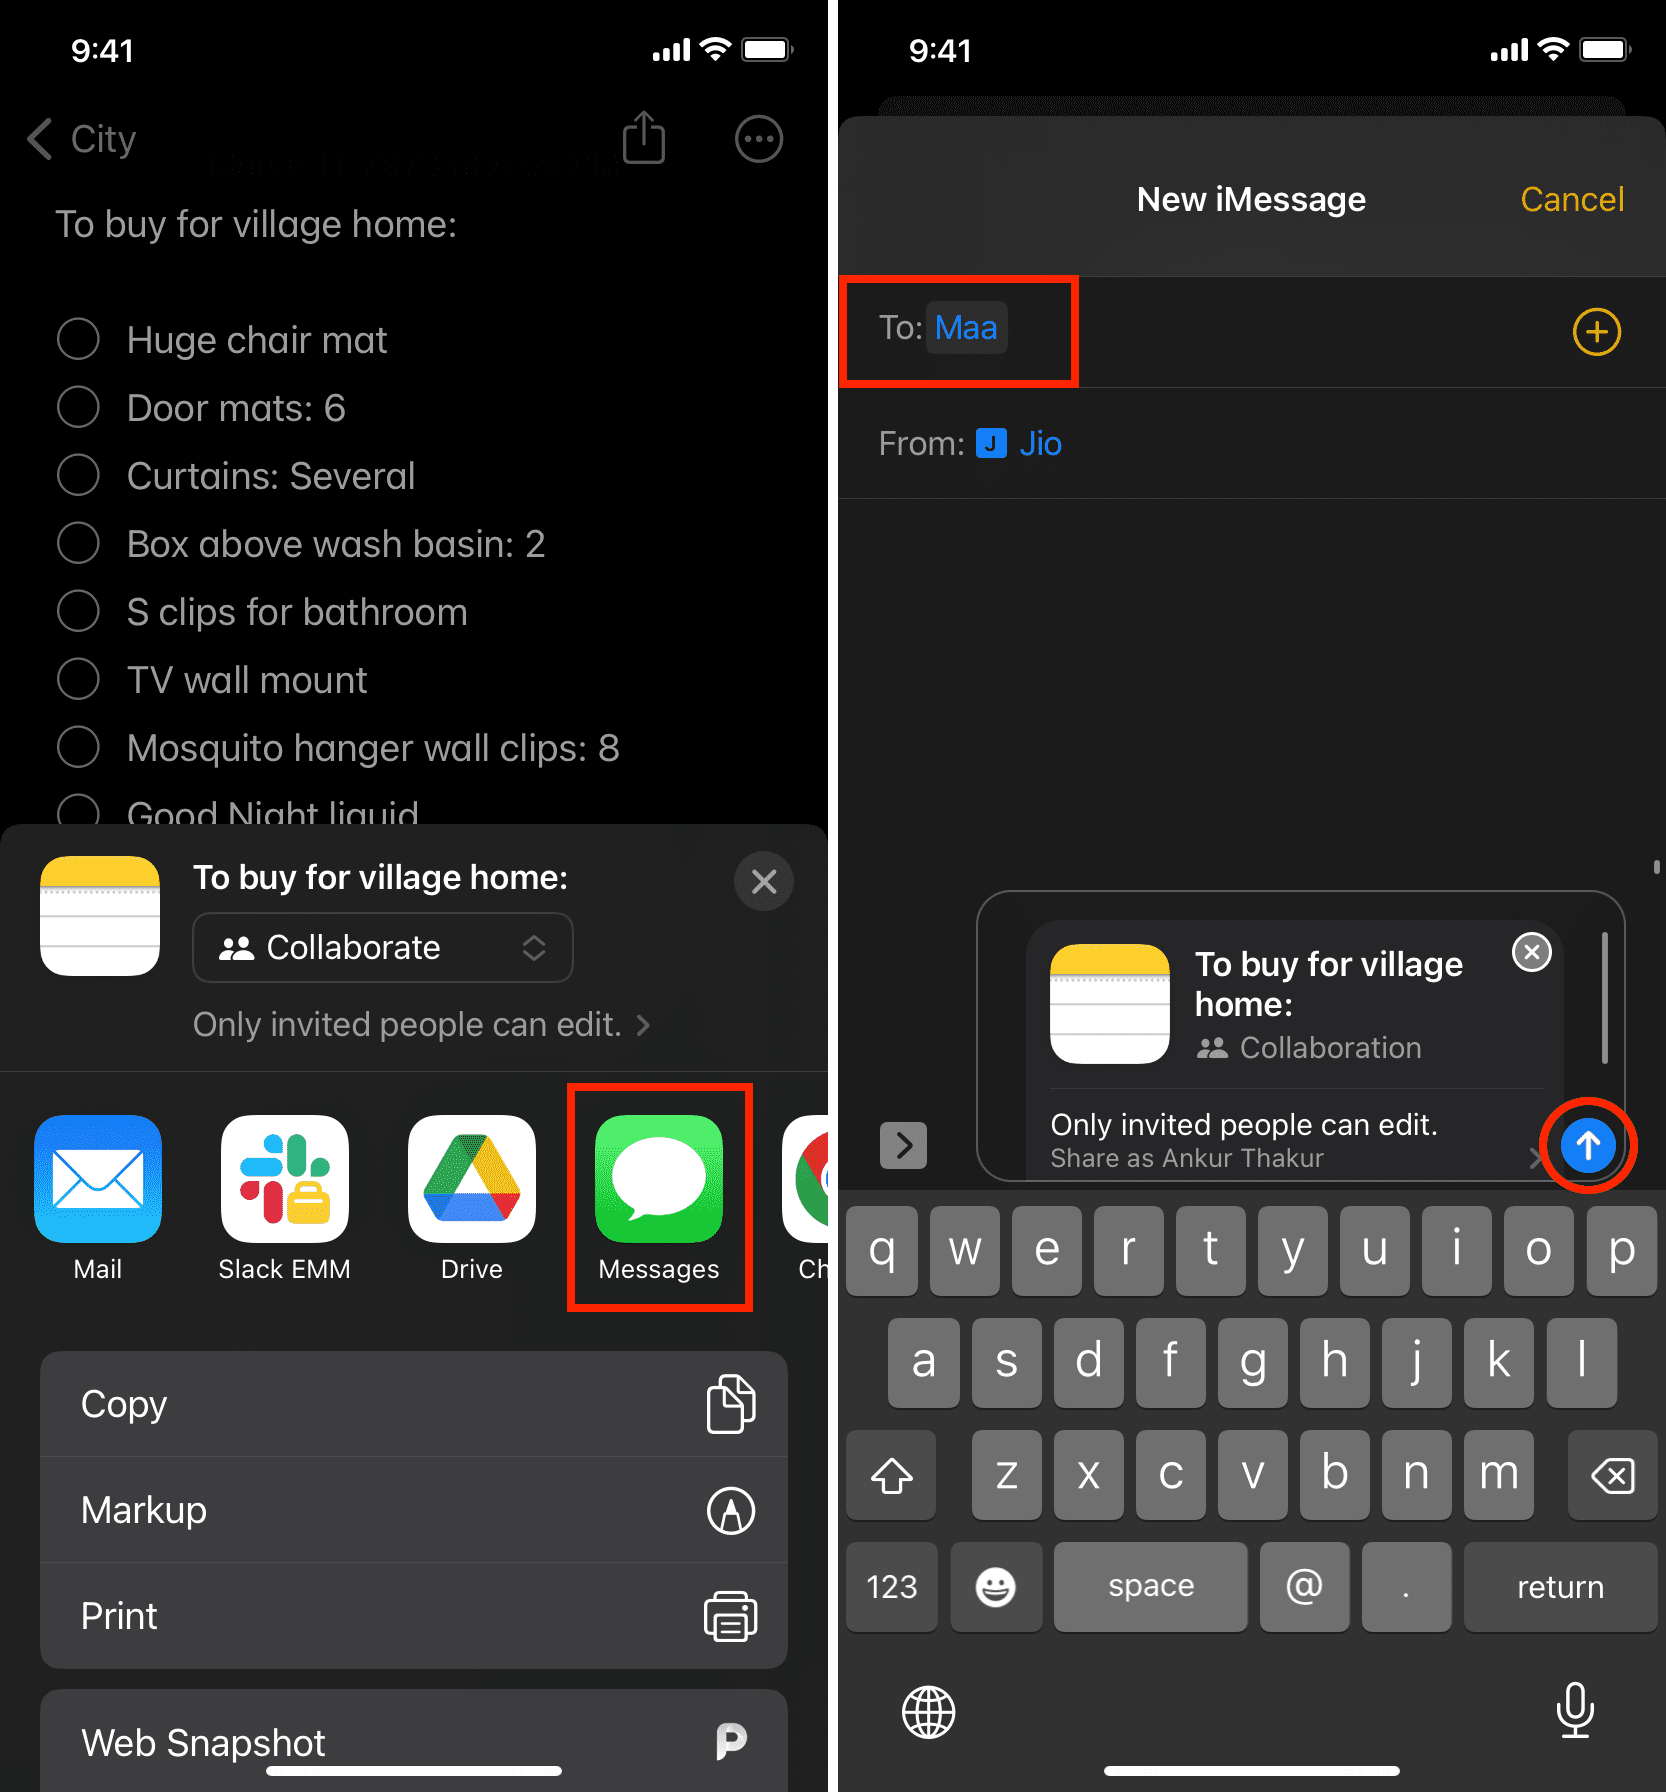
5) Now pick a sharing option such as Messages, Mail, WhatsApp, Slack, or another installed app.
- If you pick Messages or Mail, enter the recipient’s name, select it from contact, and tap the send button.
- If you use apps like WhatsApp and Slack, enter the name of the person and select it from your contacts. After that, tap Share Link and send the link.
From your Mac
1) Open the Notes app and go to the note or folder you want to share.
2) Right-click on a note or folder and choose Share Note or Share Folder. You can also use the share button or click File > Share from the top menu bar and choose to share the selected note or the folder that note is a part of.
3) Make sure it says Collaborate under the note or folder name.
4) Click ‘Only invited people can edit‘ and set the sharing permissions. It’s similar to what we have explained in the above heading.
5) Choose a medium to share, like Messages, enter the recipient’s name, and hit send.
From iCloud.com
You cannot share notes folder from iCloud.com in a web browser, but you can share individual notes by following these steps:
1) Visit iCloud.com, sign in using your Apple ID, and select Notes.
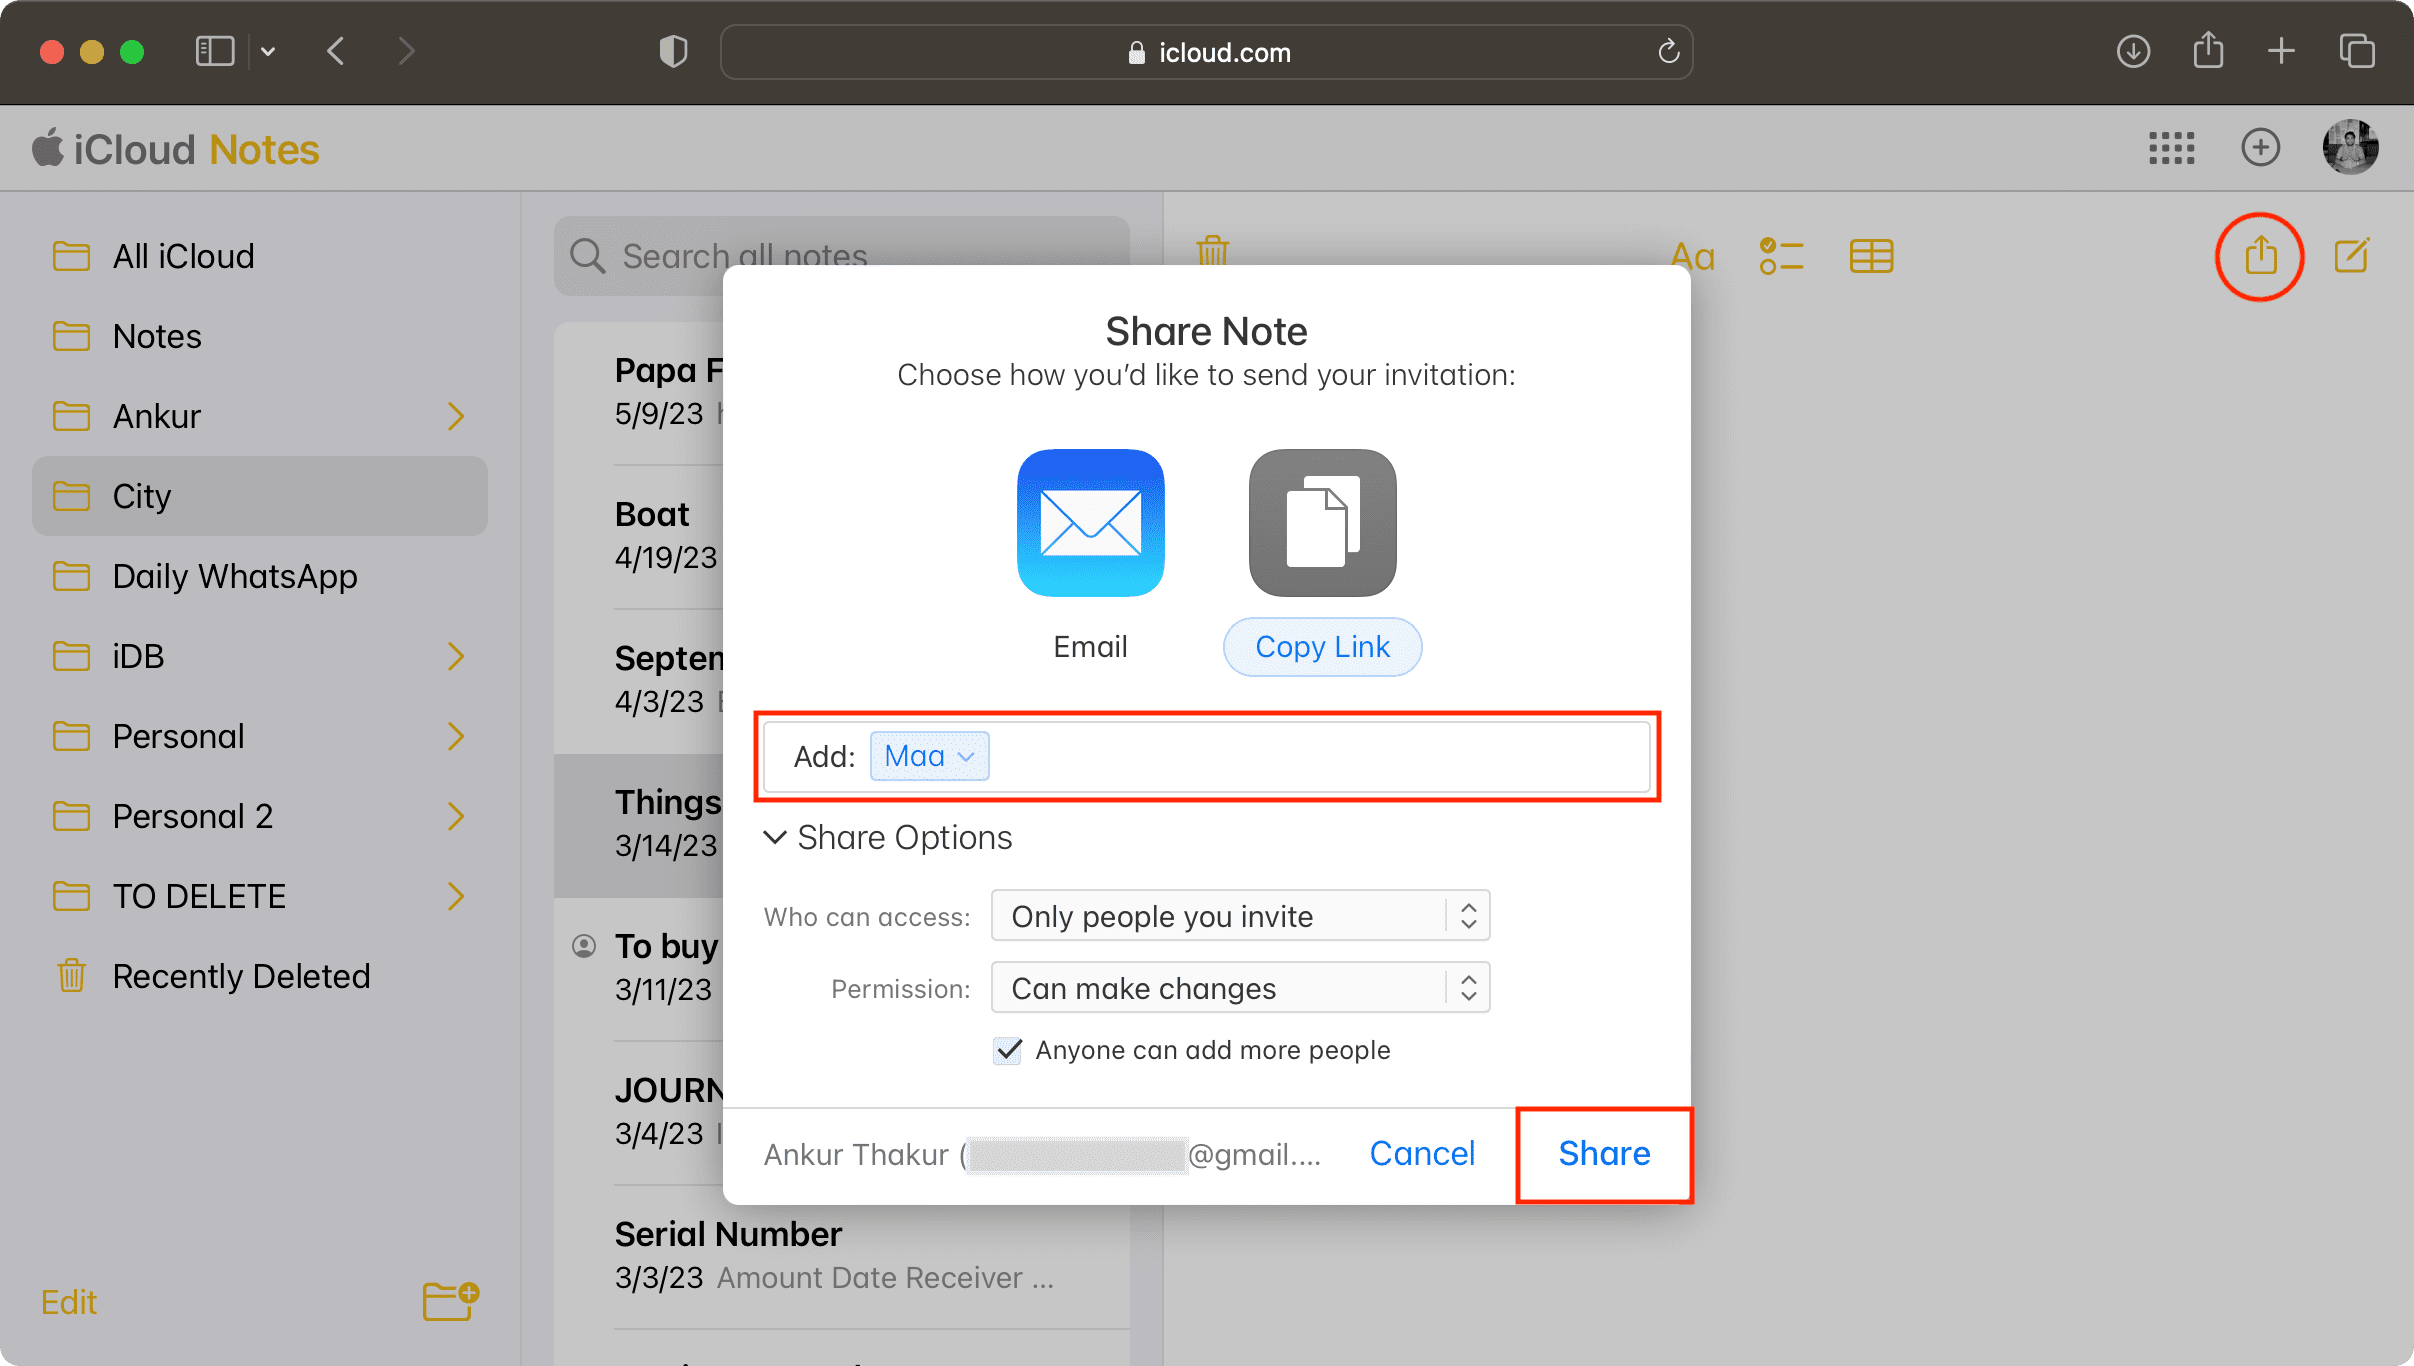
2) Go inside a note and click the share button.
3) Choose Email or Copy Link as the sharing medium.
4) For Email, click Share Options and set it accordingly. After that, click Share and send the shared note link to the collaborator’s email address.
5) For Copy Link, pick a contact from your iCloud contacts by typing their name or enter the collaborator’s email address or phone number. After that, set the Share Options and hit Share. Finally, copy the link and share it via Slack messages, Gmail, or other mediums.
The sender or the original note creator can follow the above steps and share a note or folder.
After that, the collaborator can tap the iCloud note link received via Messages, Mail, Slack, WhatsApp, or another medium and open it in the Notes app on their iPhone or iPad.
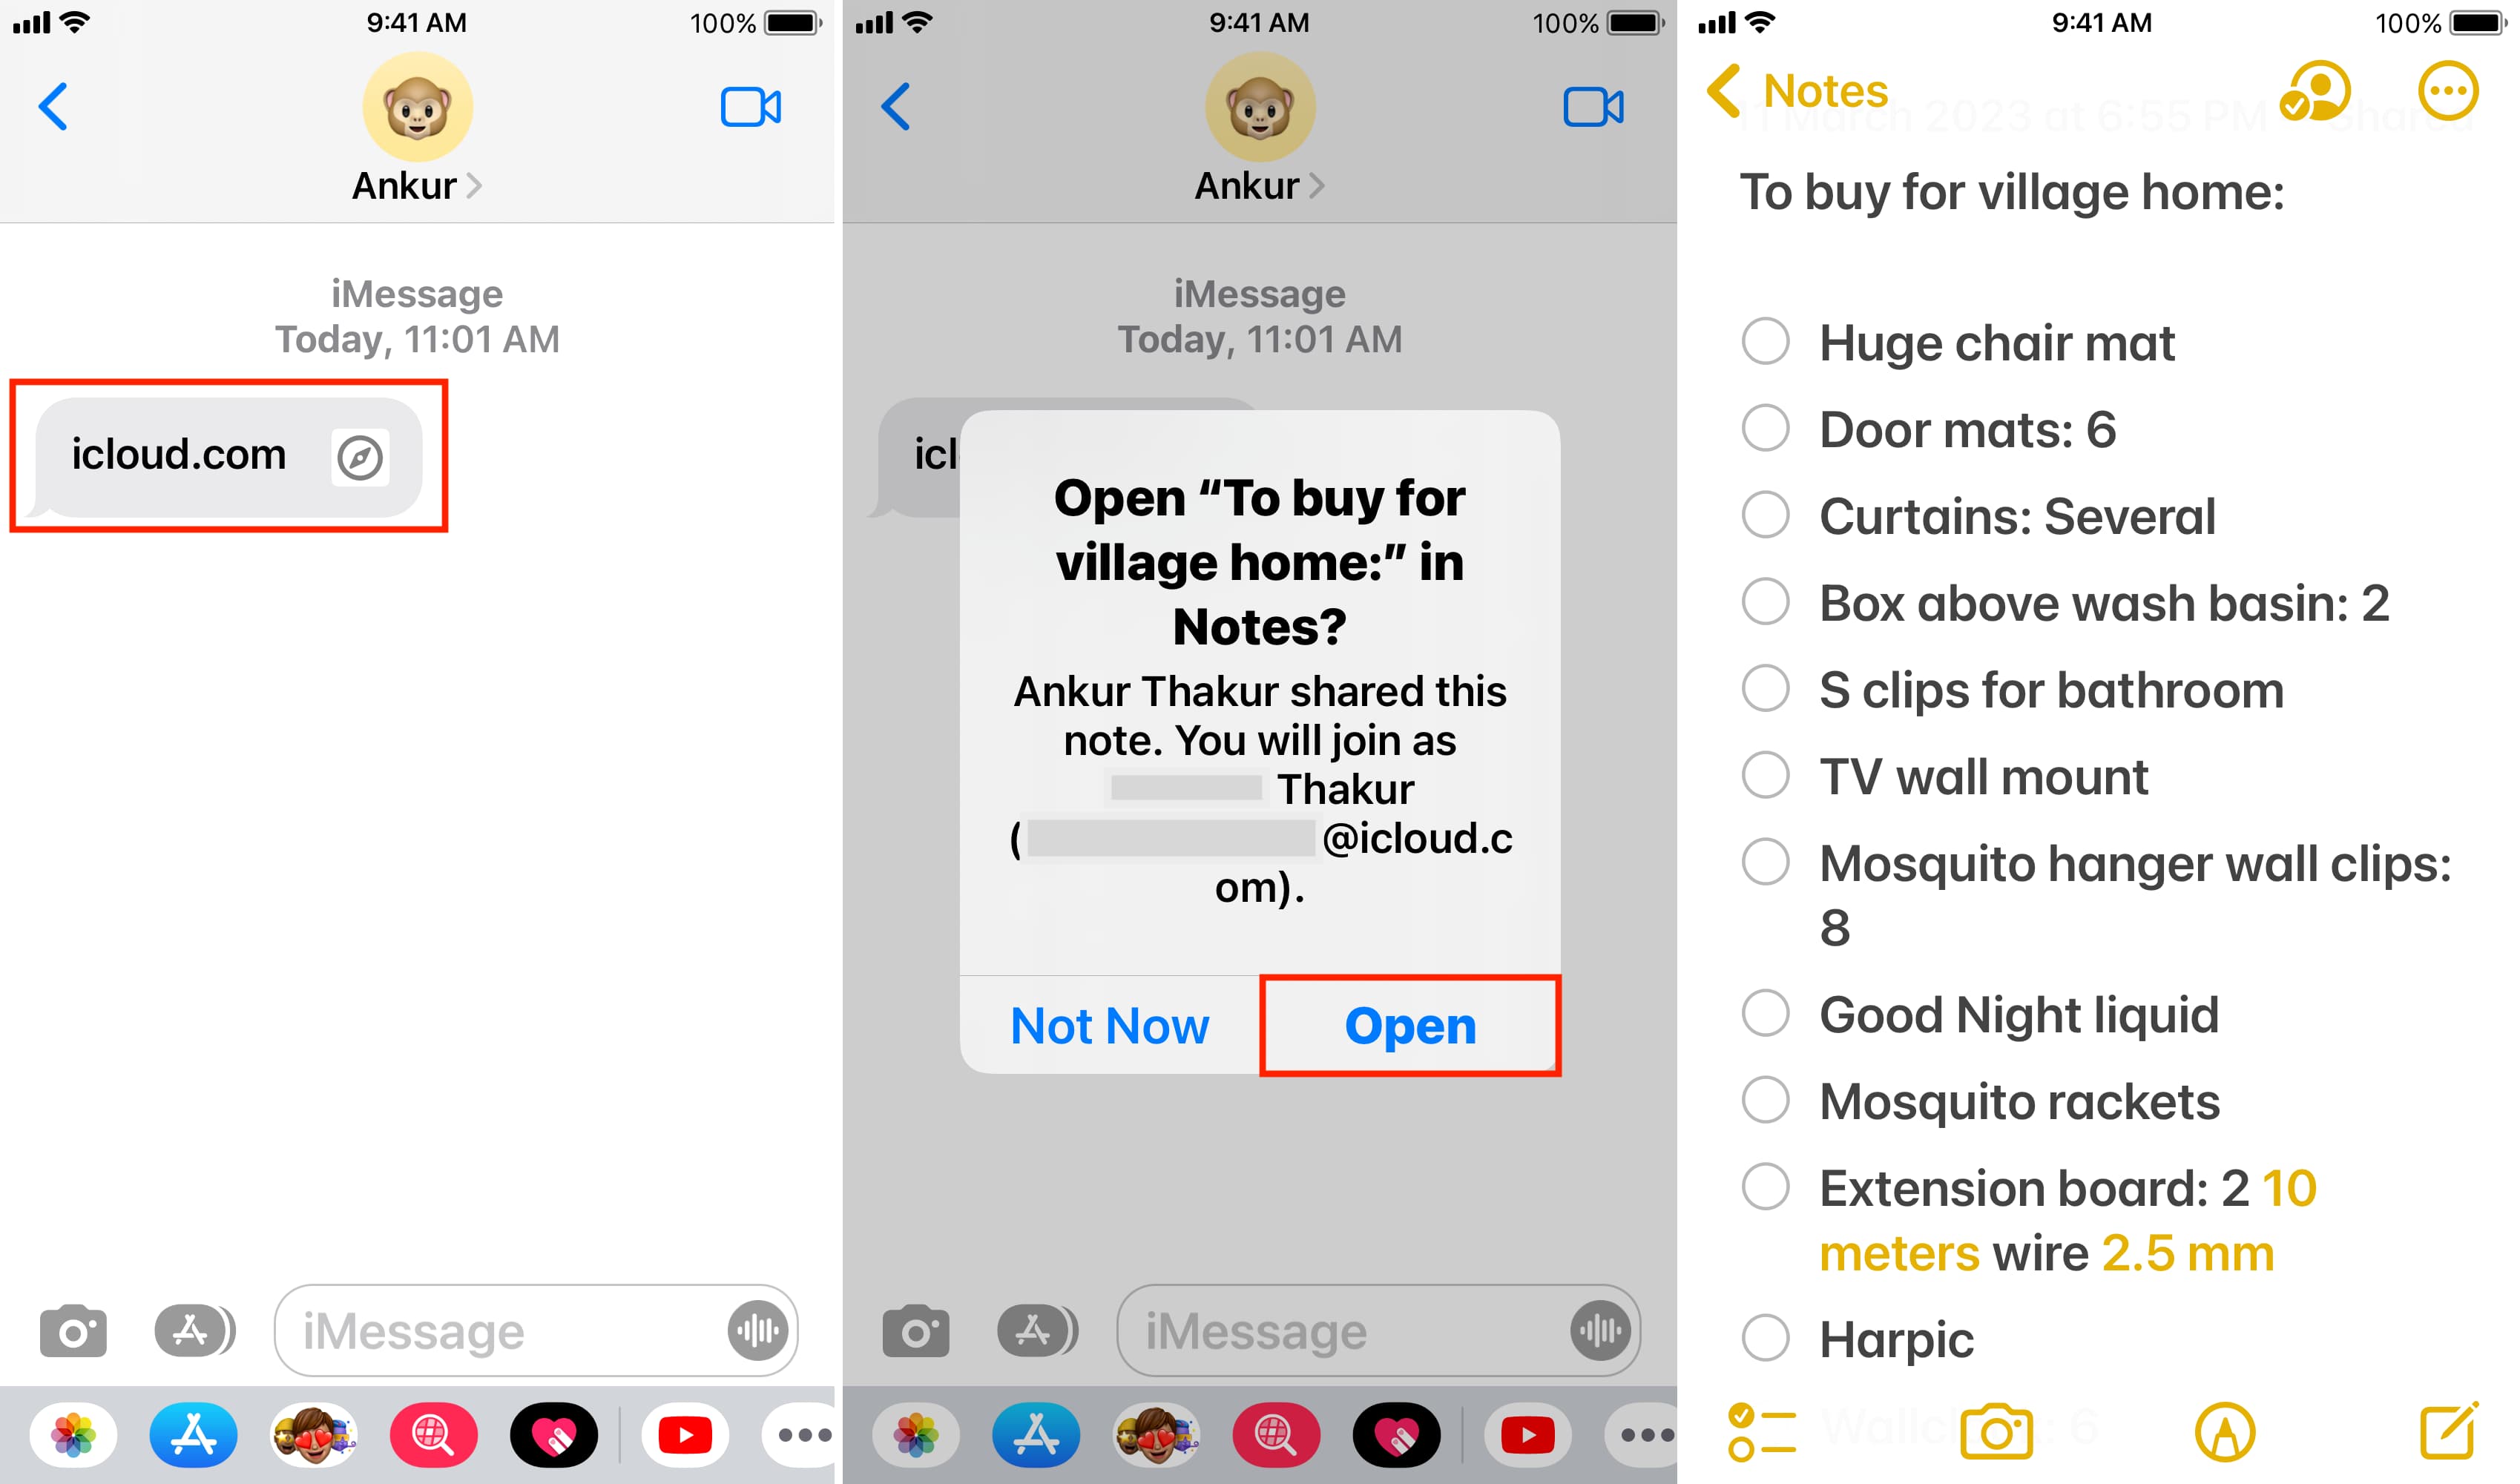
Shared iCloud note link sent via Messages or the Mail app on Mac opens in the Notes app. But if you receive it in other apps, the link may open in a web browser. You can sign in using your Apple ID to view the shared note on iCloud web. And after that, the note should also appear in the Notes app.
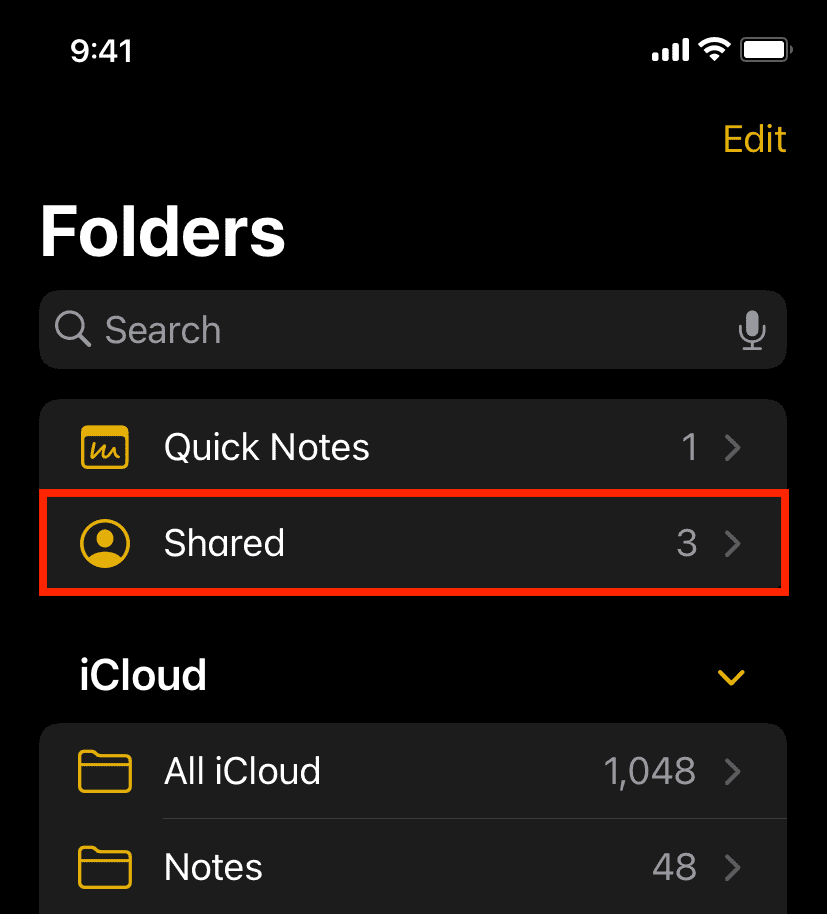
Once you share a note, a new Shared section will appear in the Notes app. Go inside it to see all your shared notes in one convenient location. Additionally, it will show your pending invitations from where you can accept to view a note someone shared with you.
When you see a yellowish-orange dot for a shared note in the notes list, it means there have been changes to it (made by the collaborators) since you last saw this note.
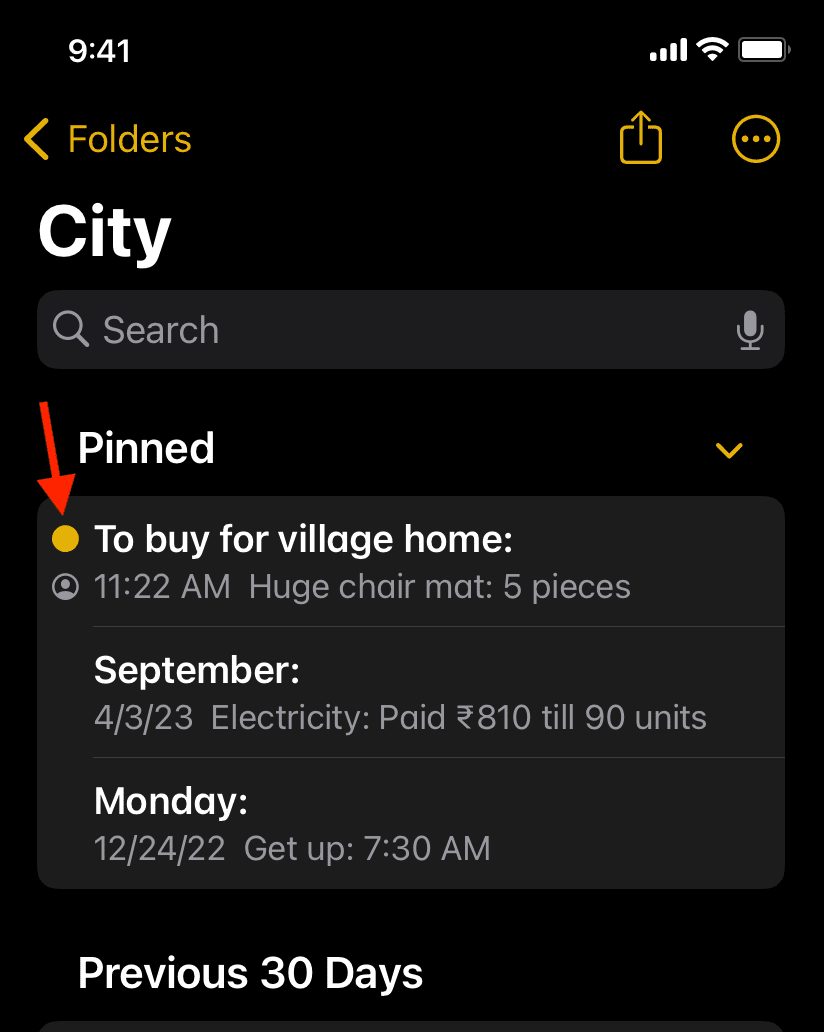
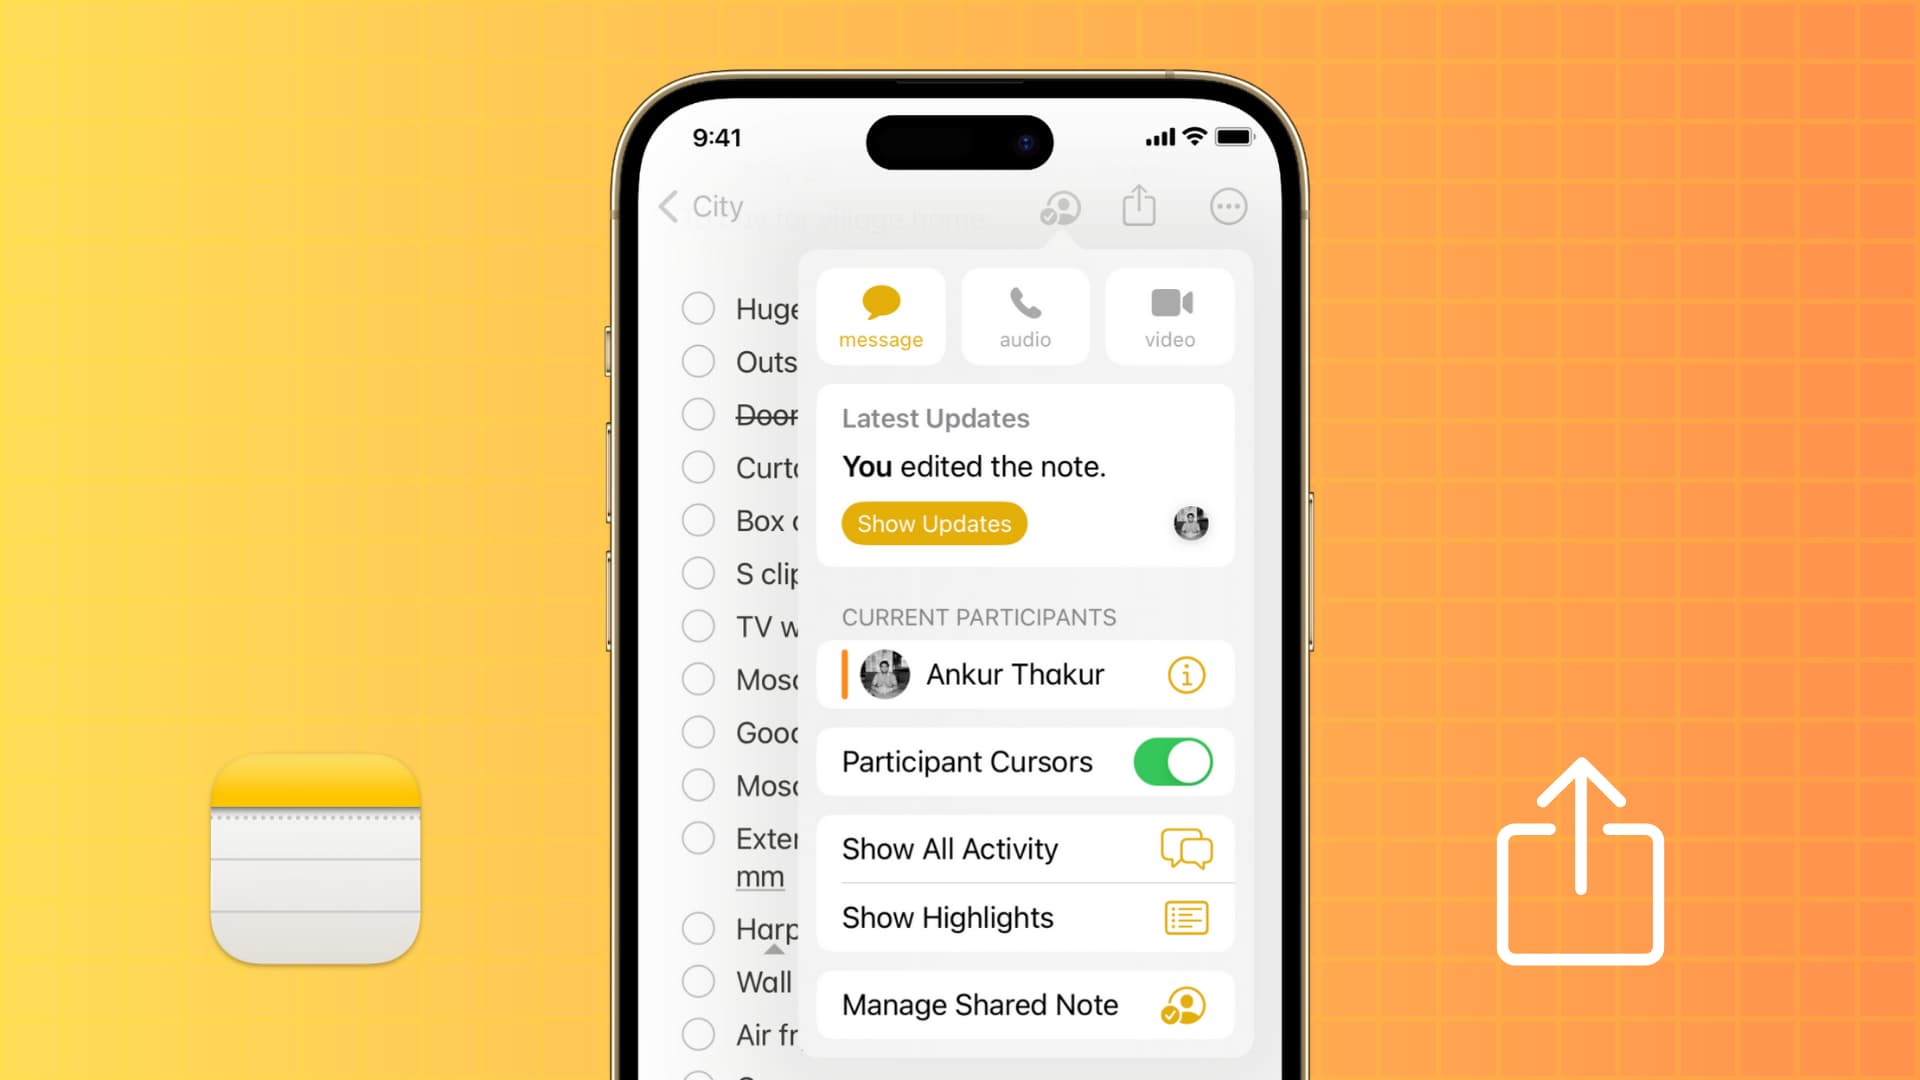
Tap this shared note to go inside. You should see a card at the bottom saying [person] made edits. You can swipe up and tap it to see the changes.
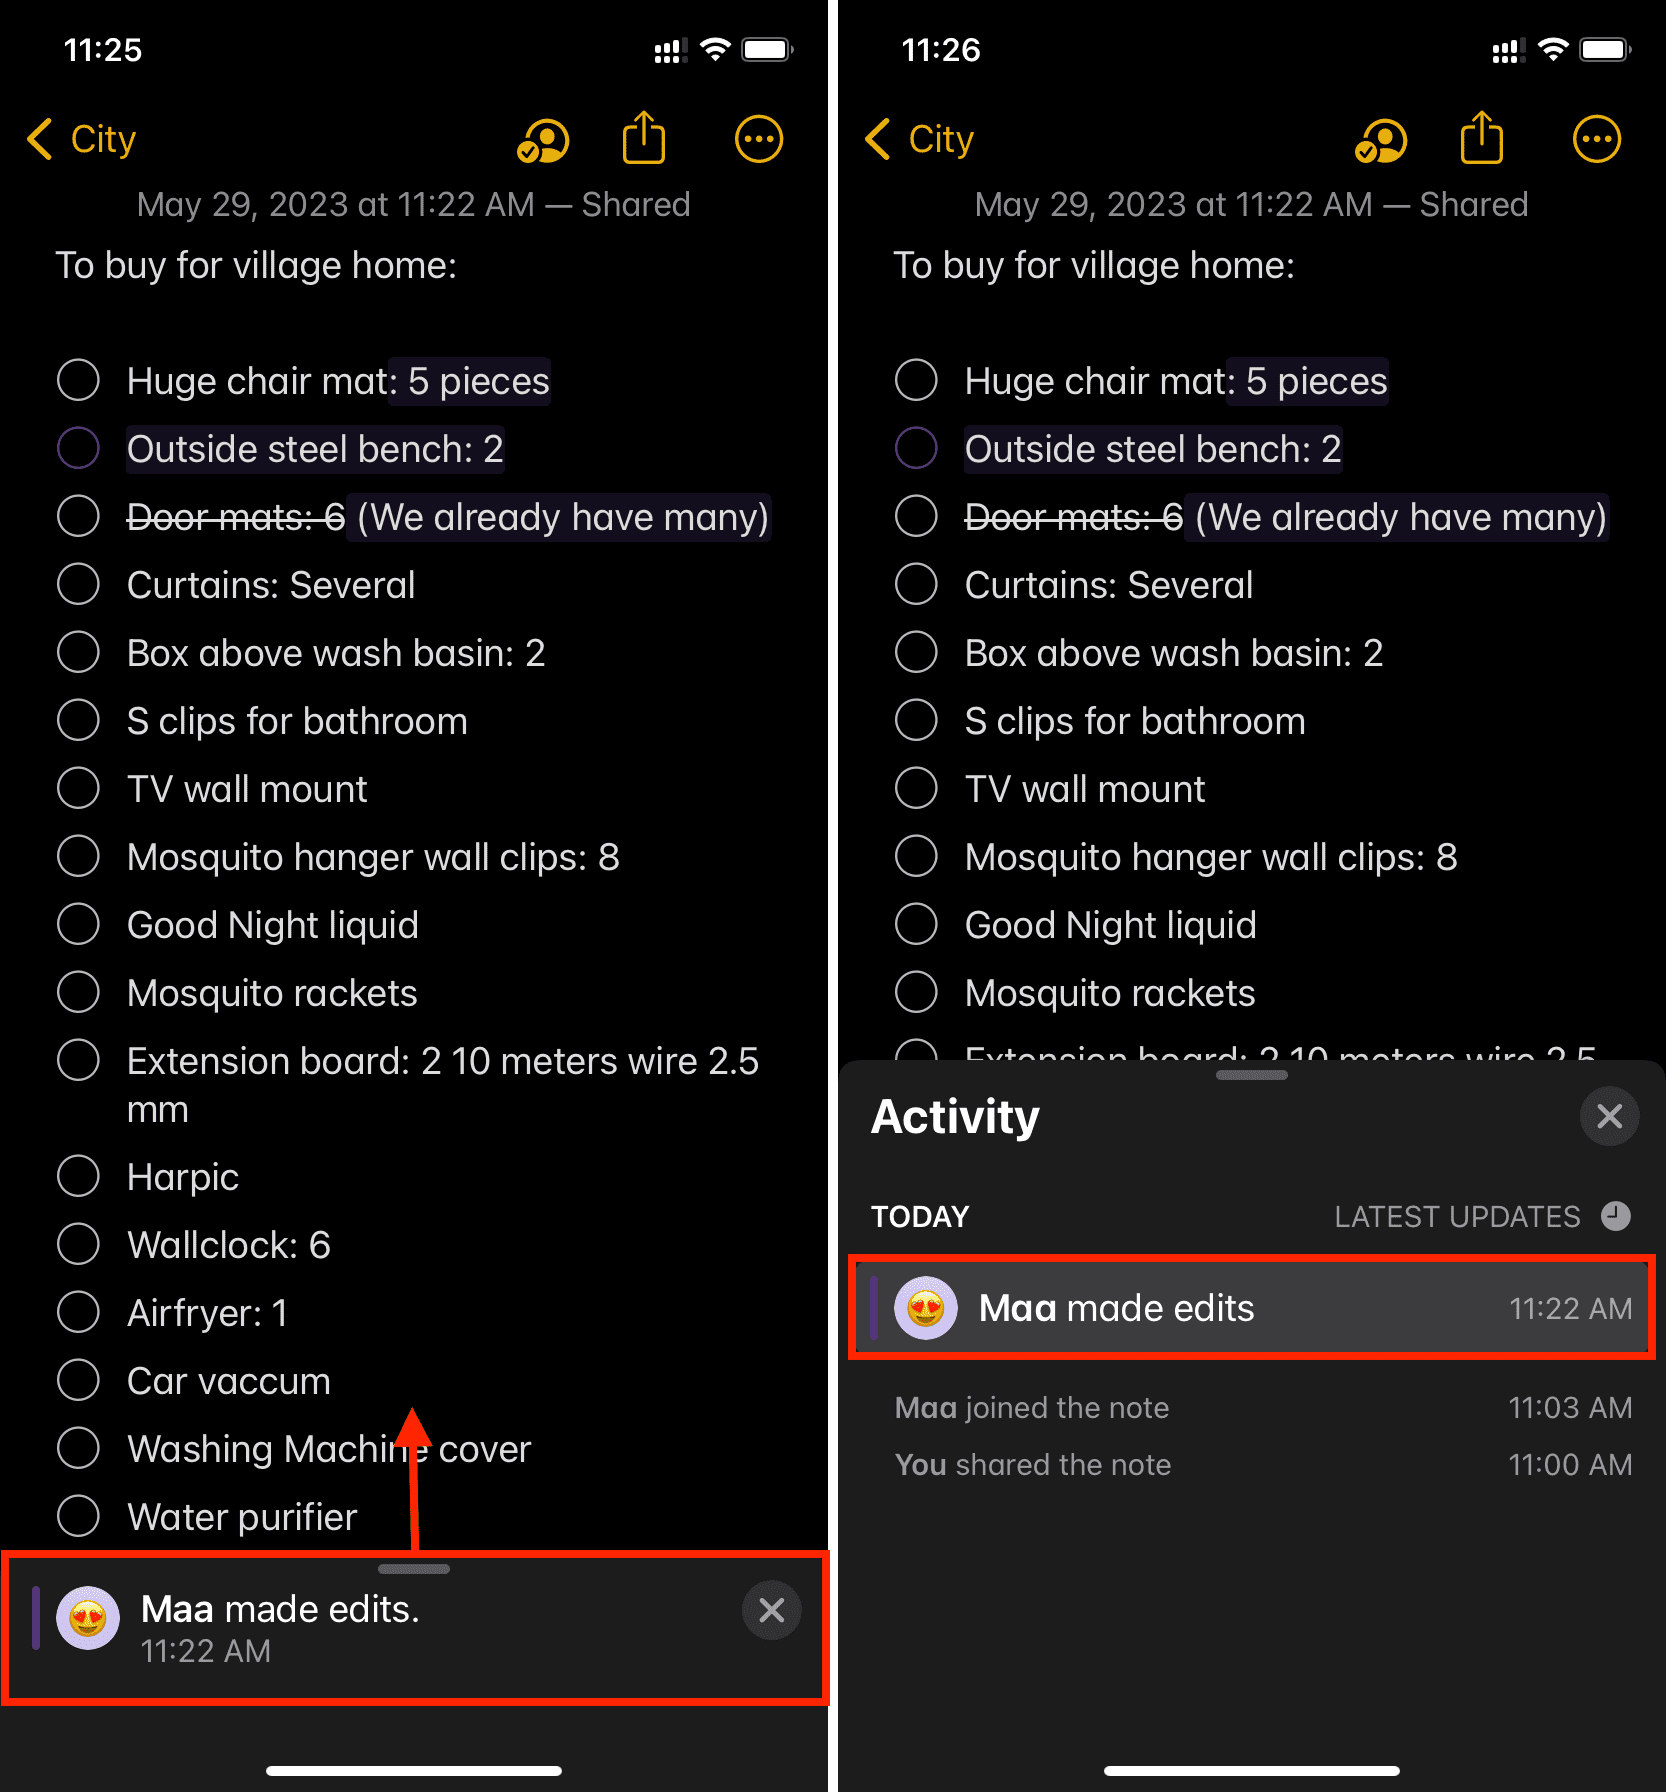
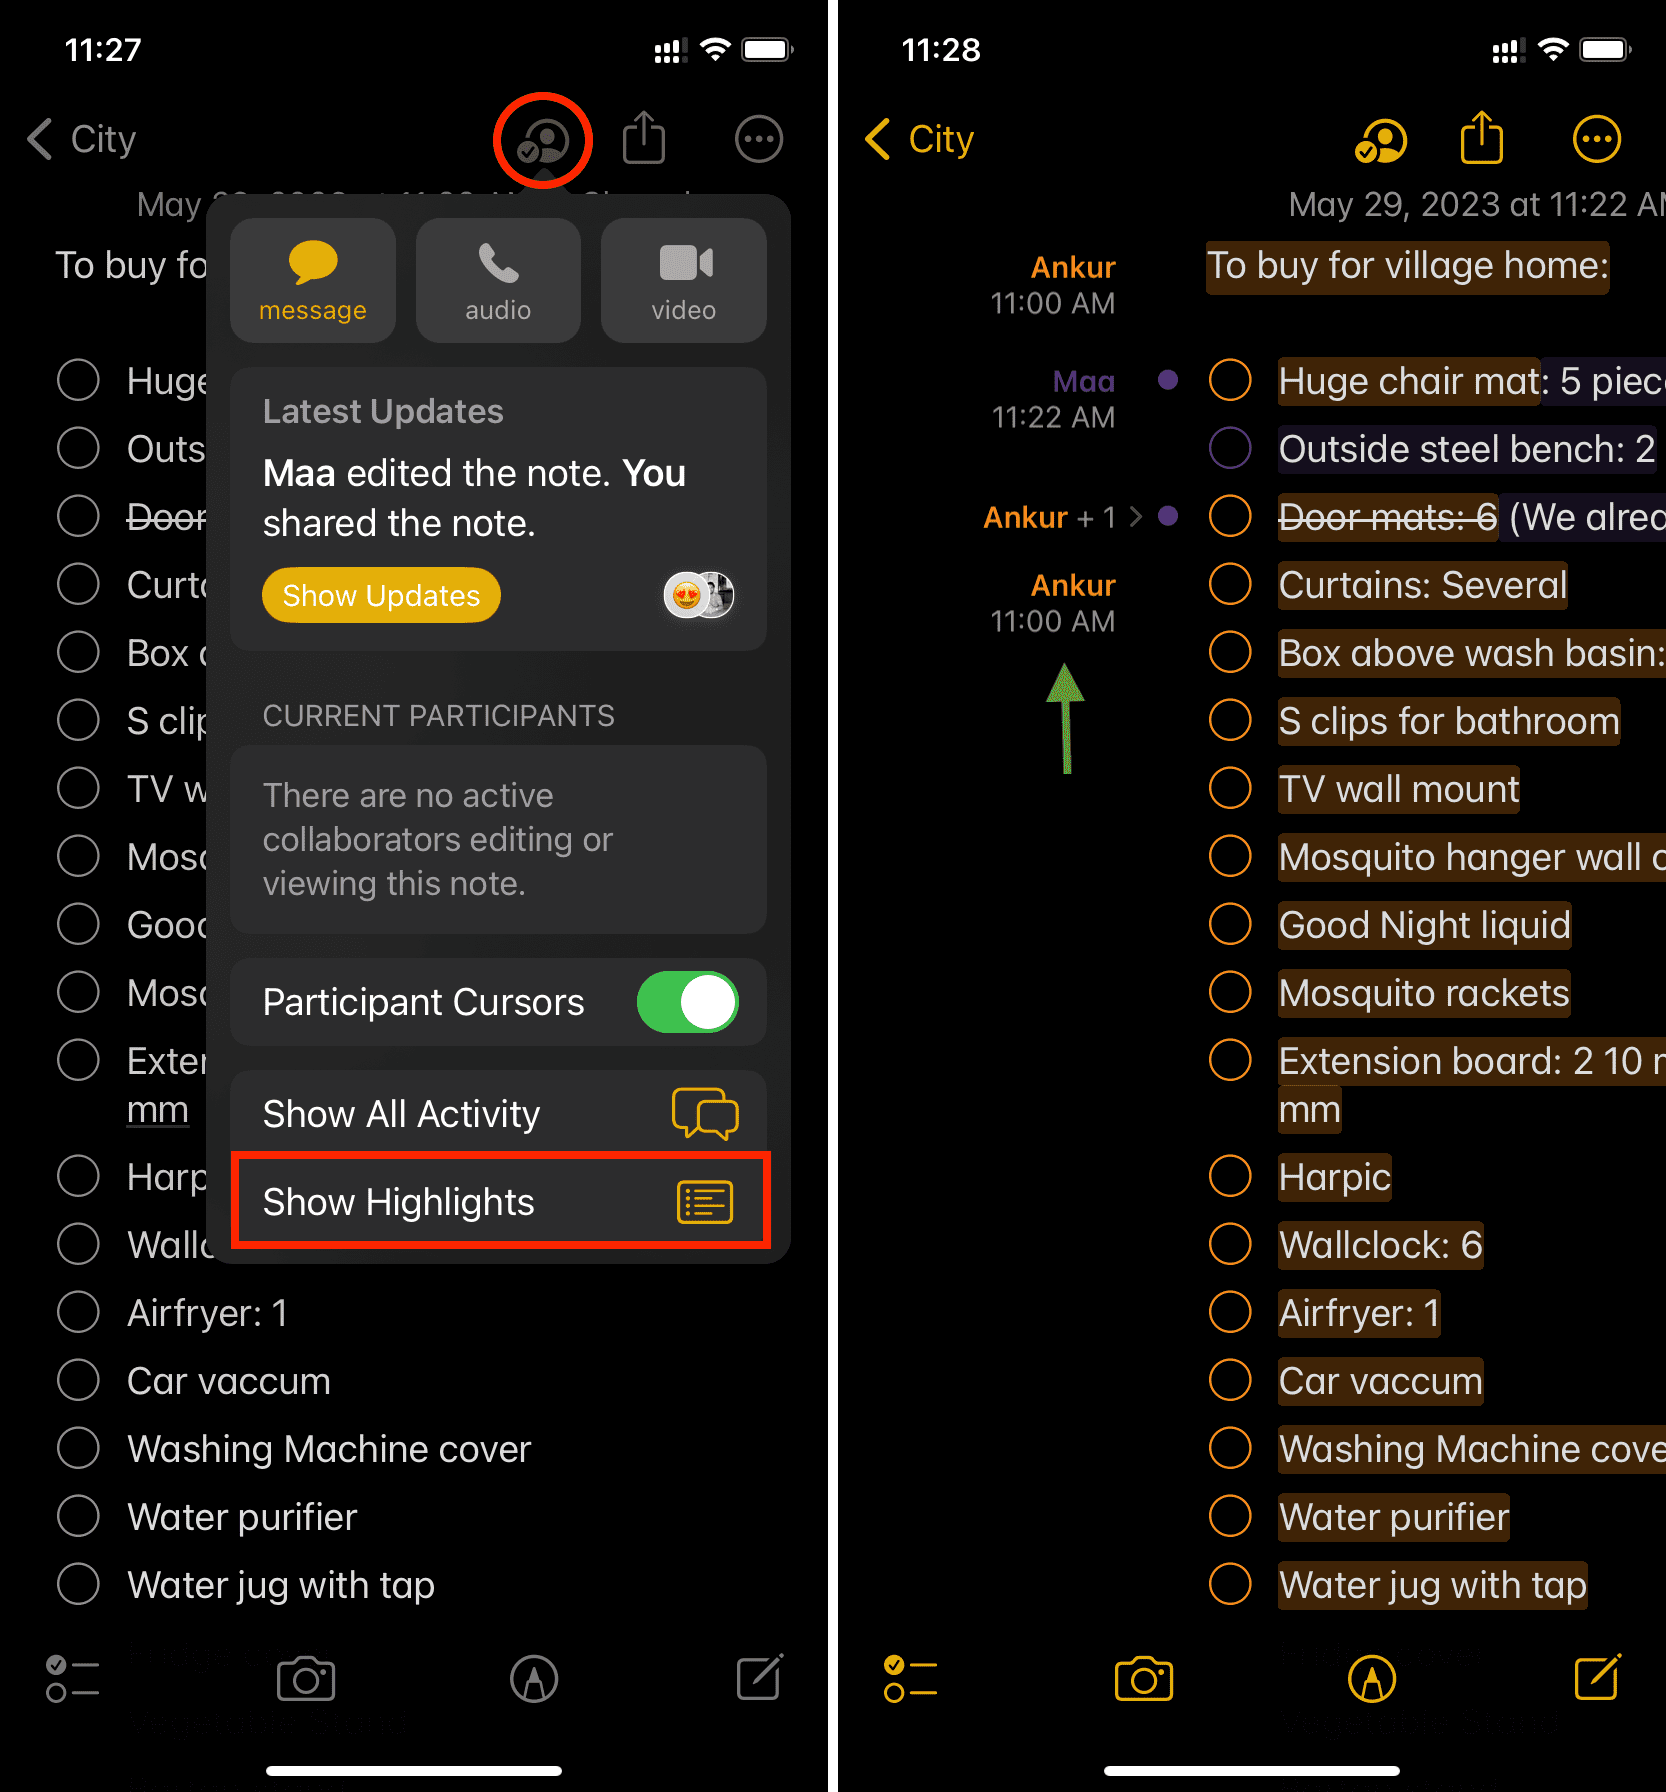
In addition to that, tap the person icon and choose Show Updates under the Latest Updates heading. You can also tap Show All Activity and tap [person] made edits to see the changes they made. And tapping Show Highlights will display the names, dates, and changes made by each collaborator of that shared note.
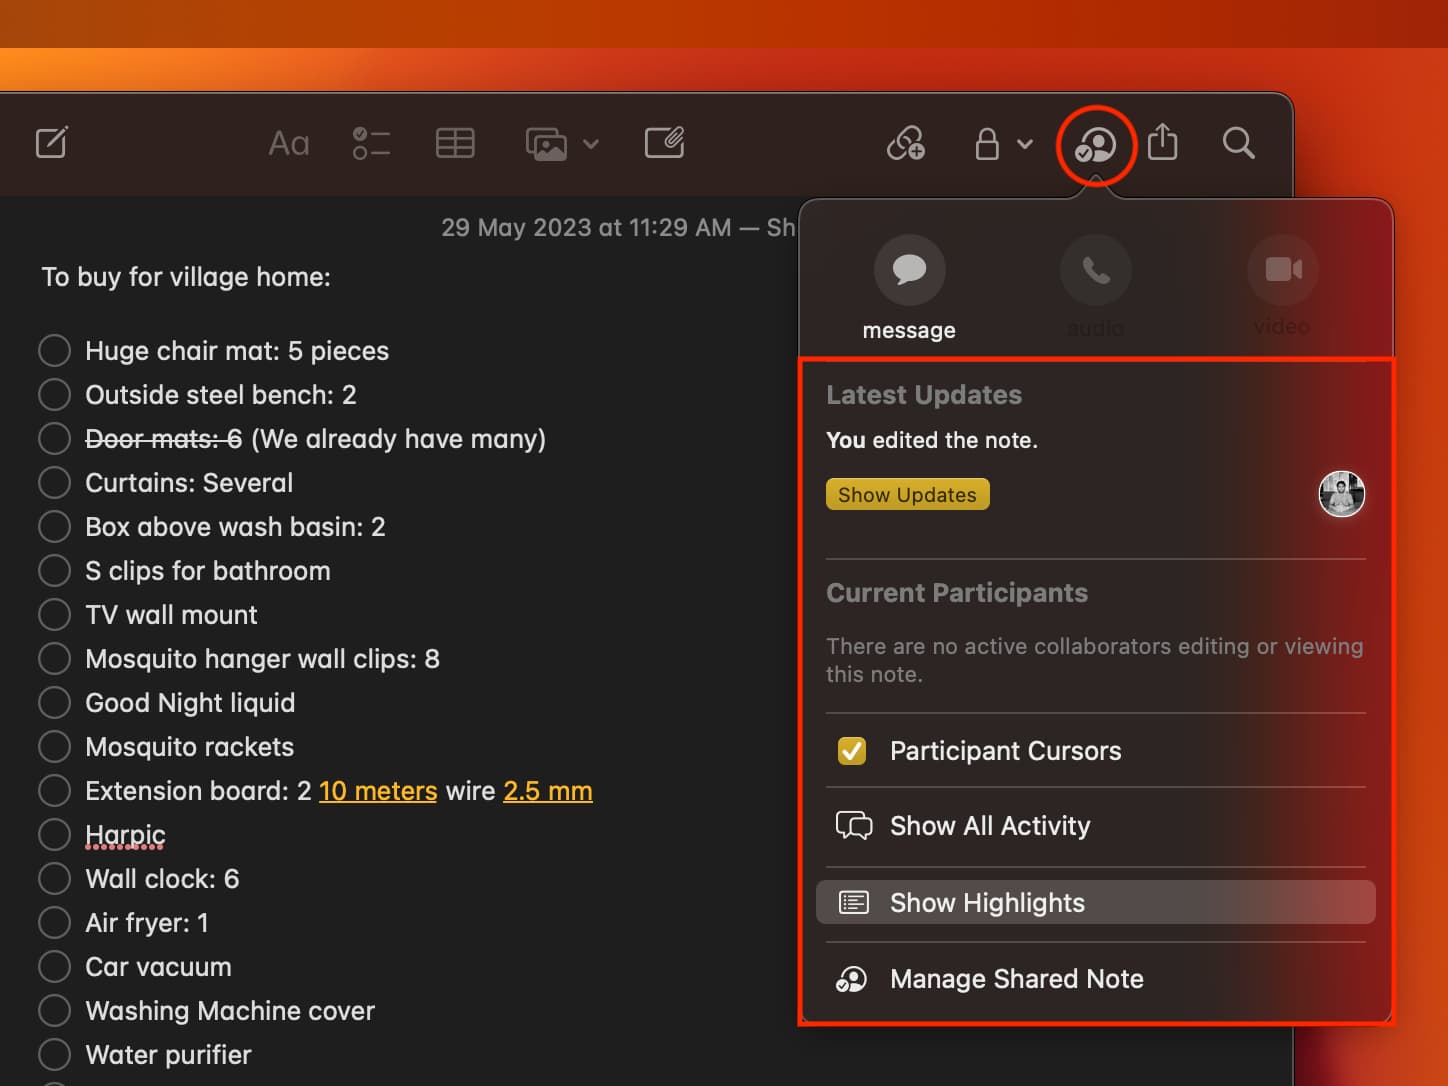
The steps to see new activity in the Notes app on Mac are similar. Simply click the person icon and pick an option.
Note: For a shared folder, touch and hold the folder name and choose Show Folder Activity.
Change sharing settings or stop sharing the note or folder
1) Go inside the note or folder.
2) For note, tap the people icon and select Manage Shared Note. For folder, tap the More icon and choose Manage Shared Folder.
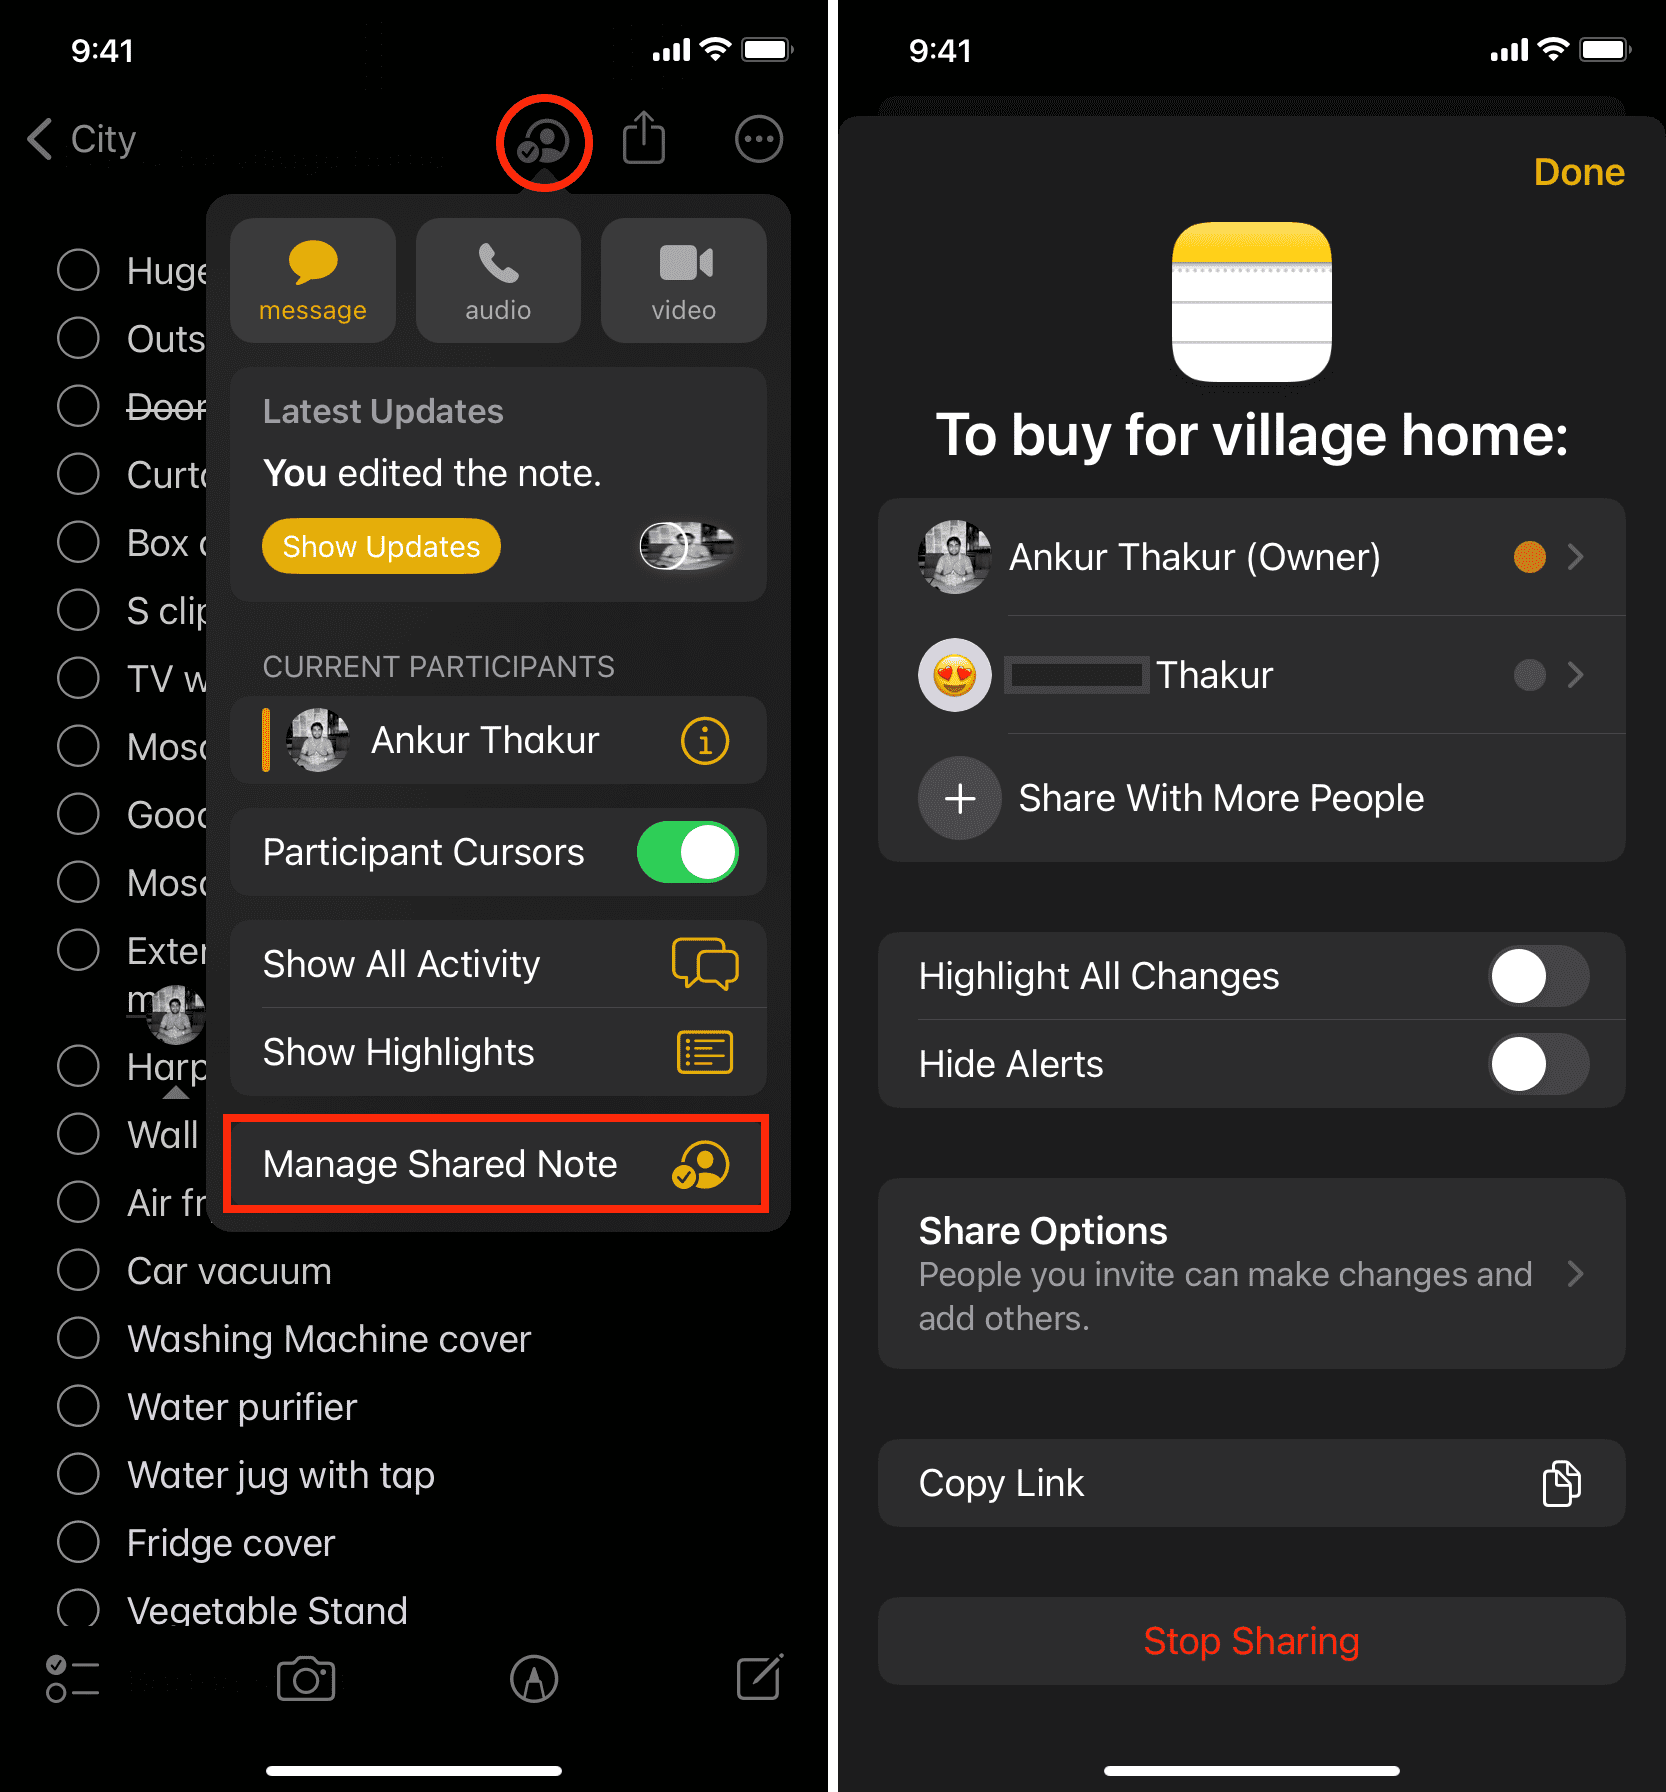
3) Remove a person or change their access: Tap a person’s name and make the desired modifications. You can change their permission, allow/prevent them from adding other people to your note or remove their access.
4) Share Options: Tap it to change the sharing options for this shared note.
5) Stop Sharing: Use this to no longer share this note. Once you stop sharing, this note will disappear from the Notes app of everyone who was earlier allowed to view it or make changes to it. However, it will still stay in your Notes app (but in its original folder only, as it’s now obviously removed from the Shared folder).
Check out next: