Learn how to unlock the full potential of Siri on your Mac with these tips and tricks to help you work more efficiently.
Adjust Siri settings on Mac
By default, you should have the Siri button on the top right of your menu bar. This makes it as easy as a click to invoke Siri. But there are other ways and additional options for Siri. So we’re going to start with those Siri Preferences.
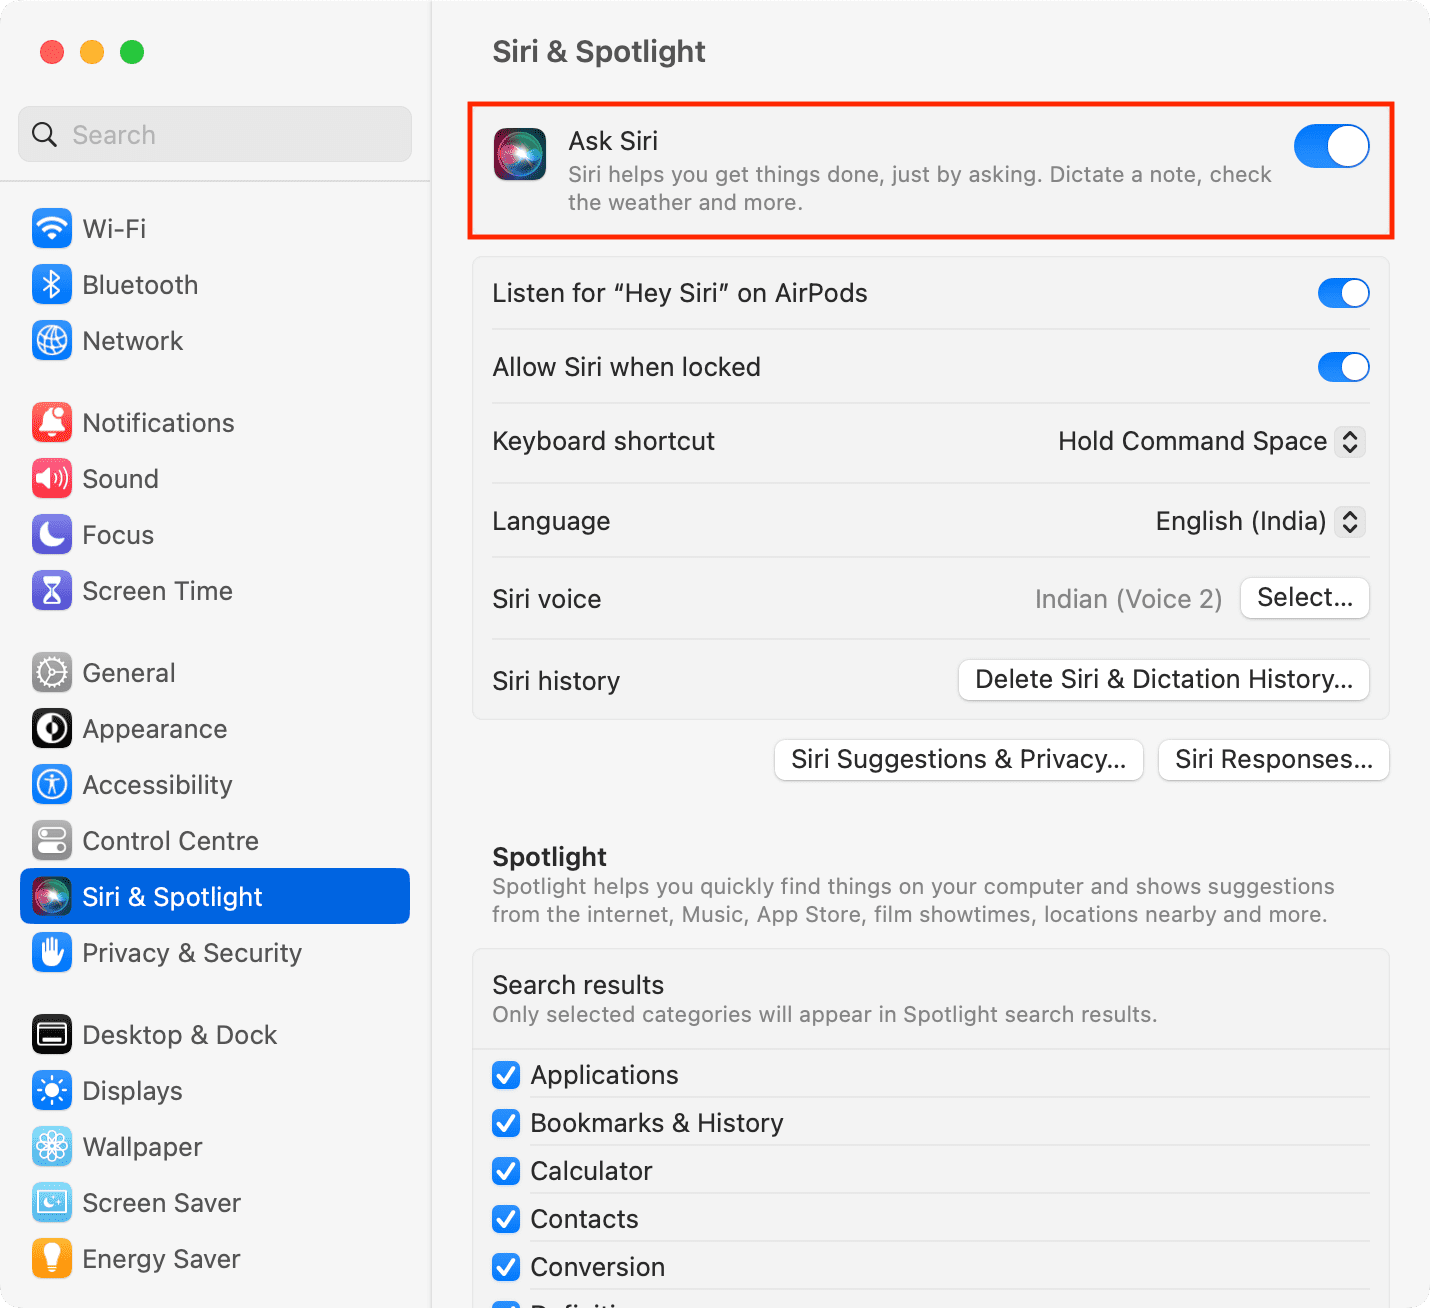
Open System Settings using the button on your Dock or by clicking the Apple icon > System Settings from the menu bar. Choose Siri & Spotlight from the left sidebar.
The most important setting in this box is the ability to use Siri. So make sure that Ask Siri is turned on.
Next, you can make some adjustments to Siri:
- Listen for “Hey Siri”: Simply say the words ‘Hey Siri’ and your Mac will automatically trigger Siri.
- Listen for “Hey Siri” on AirPods/headphones/Studio Display: If your Mac (like Mac mini) does not support ‘Hey Siri’, you can turn on these options, and then when supported AirPods/headphones/or Apple Studio Display are connected to your Mac, and you say the ‘Hey Siri’ words, it will automatically trigger the voice assistant on your computer.
- Allow Siri when locked: Once you enable ‘Listen for Hey Siri,’ you can also enable this option, after which your Mac will trigger Siri even when it’s locked or in sleep.
- Keyboard Shortcut: Choose or customize a keyboard shortcut to invoke Siri.
- Language: Pick your preferred language.
- Siri Voice: Select how you would like Siri to sound using gender and accent.
- Siri Responses: Choose whether or not you would like to receive Siri feedback out loud. Similarly, you can choose to see Siri captions and a transcript of the voice command you gave to Siri.
- Show Siri in menu bar: Uncheck the box if you want to remove the Siri button from the menu bar.
- Siri Suggestions & Privacy: Click this button to choose the apps Siri should learn from and make suggestions for. Click Done to close the window.
There’s one other setting that might be of interest to you, and that’s the ability to type your commands instead of speaking them. If you’d like to use this feature instead, open System Settings and go to Accessibility > Siri, and turn on Type to Siri.

Once you have reviewed and adjusted the settings for Siri, it’s time to put your personal assistant to use!
Invoke Siri using your voice, keyboard shortcut, or the button in your menu bar per your preference and settings.
Things you can ask Siri for on Mac
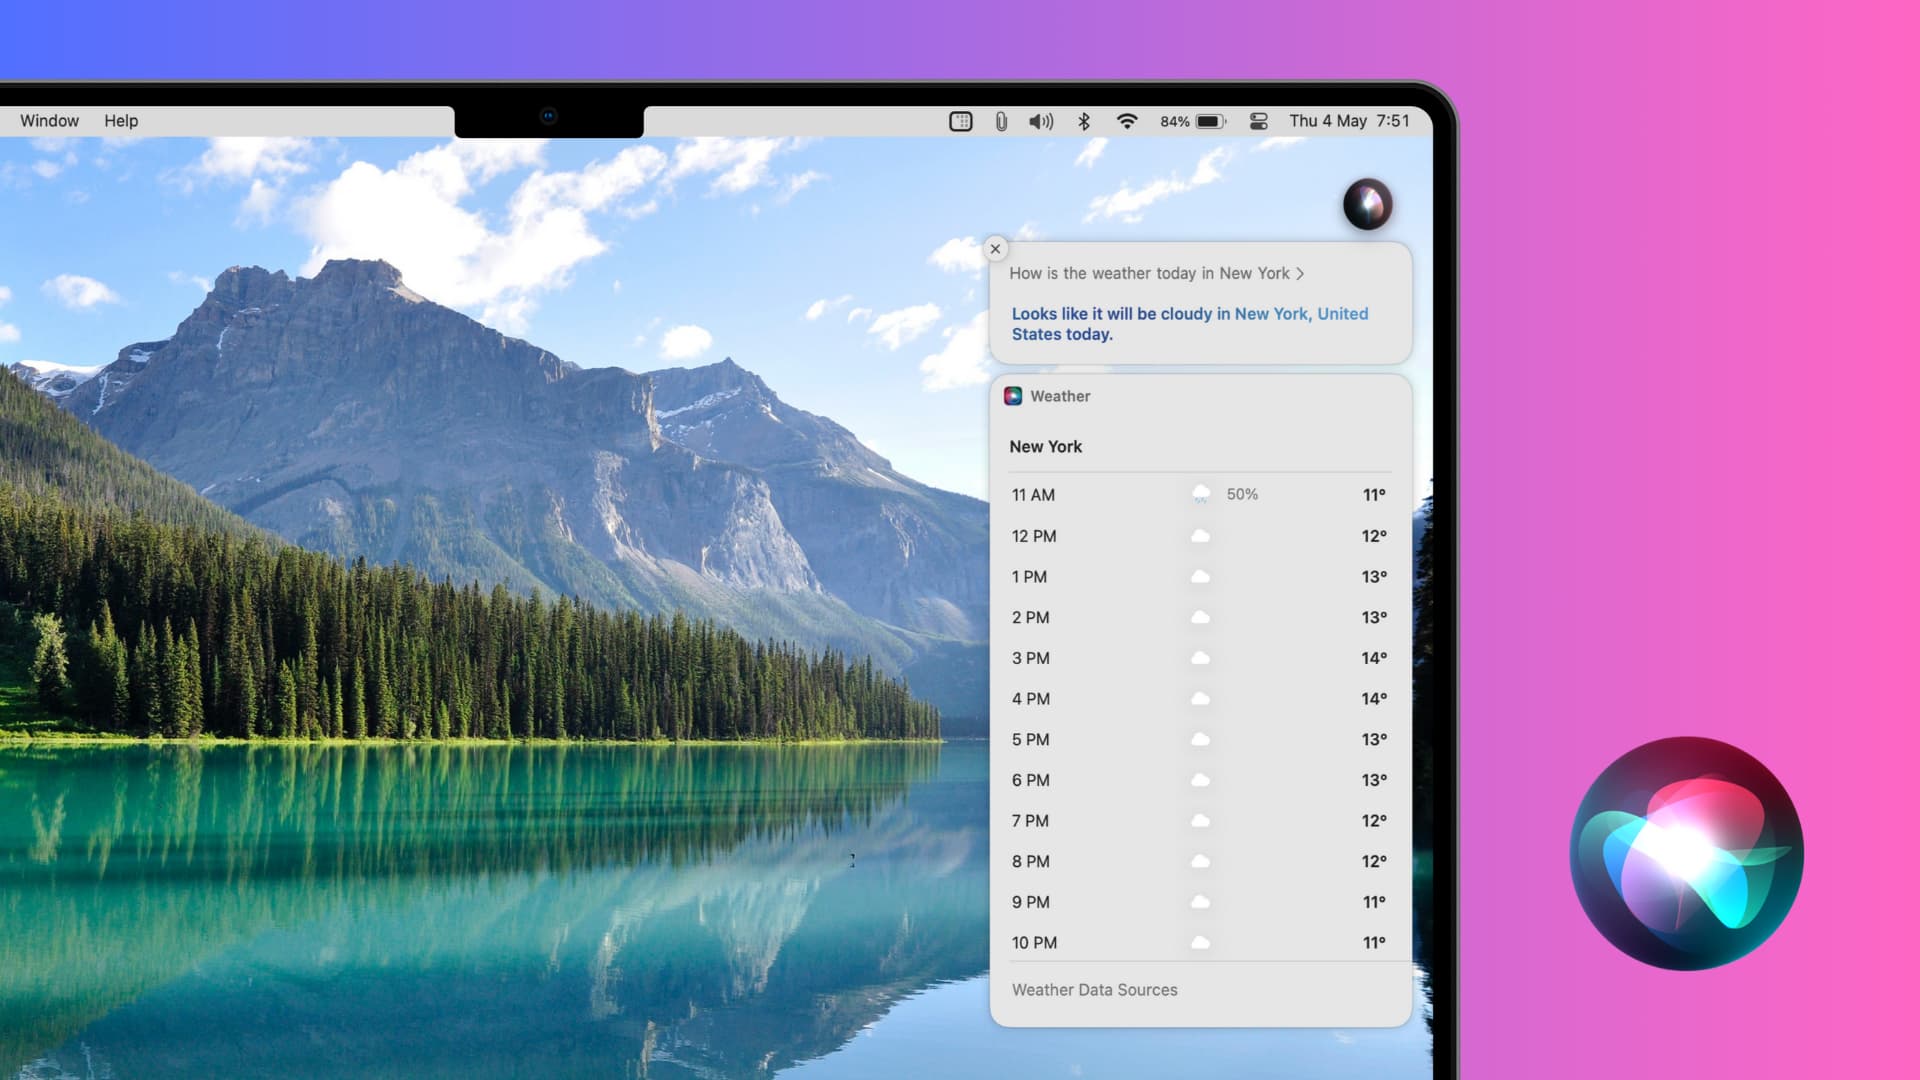
If you’re used to Siri on your iPhone, iPad, Apple TV, or other device, then you already know the types of things you can ask Siri. You can ask Siri for the current weather, where the closest pizza place is, or what time a movie is starting. But on your Mac, Siri can take care of some specific tasks that are quite useful; here are just a handful:
- Find emails from [contact name].
- Send a message to [contact name].
- Compose an email to [contact name].
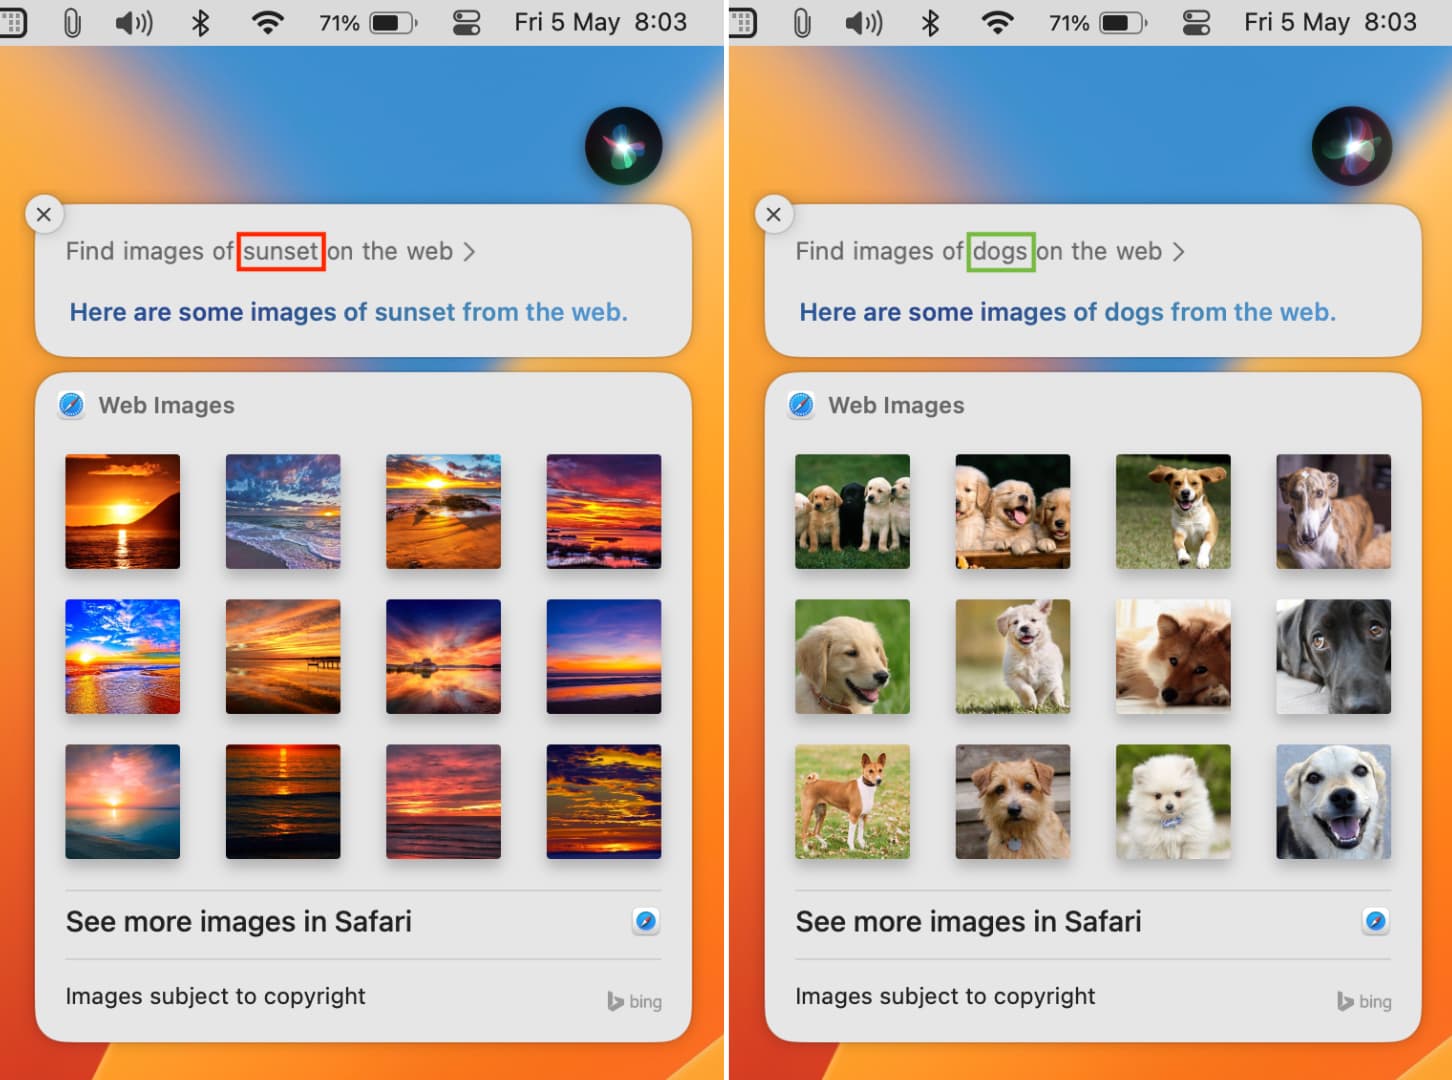
- Find photos of [person or object].
With helpful commands like these, you can quickly locate items and accomplish tasks with Siri on your Mac.
Edit your Siri results
If you use voice commands for Siri on your Mac, you can edit your request without creating a brand new request.
Important: To edit your Siri request on newer versions of macOS, you must first enable a switch that will show the transcription of your voice command on the screen. To do that, go to System Settings > Siri & Spotlight > Siri Responses and toggle on the switch next to Always show speech. Additionally, you can flip the switch for Always show Siri captions to see Siri’s answer on the screen.
To edit a word in your request, just select a word in your request, type a new word, and hit Return. You will then get your updated results.
Save, use, or edit your Siri results
Note: The features below only seem to work on older versions of macOS. They do not work on macOS Ventura.
You can do even more with the results you get from Siri than just view them. You can save the results you get and put them in the Notification Center or drag items from the results list into other apps.
Save your Siri results
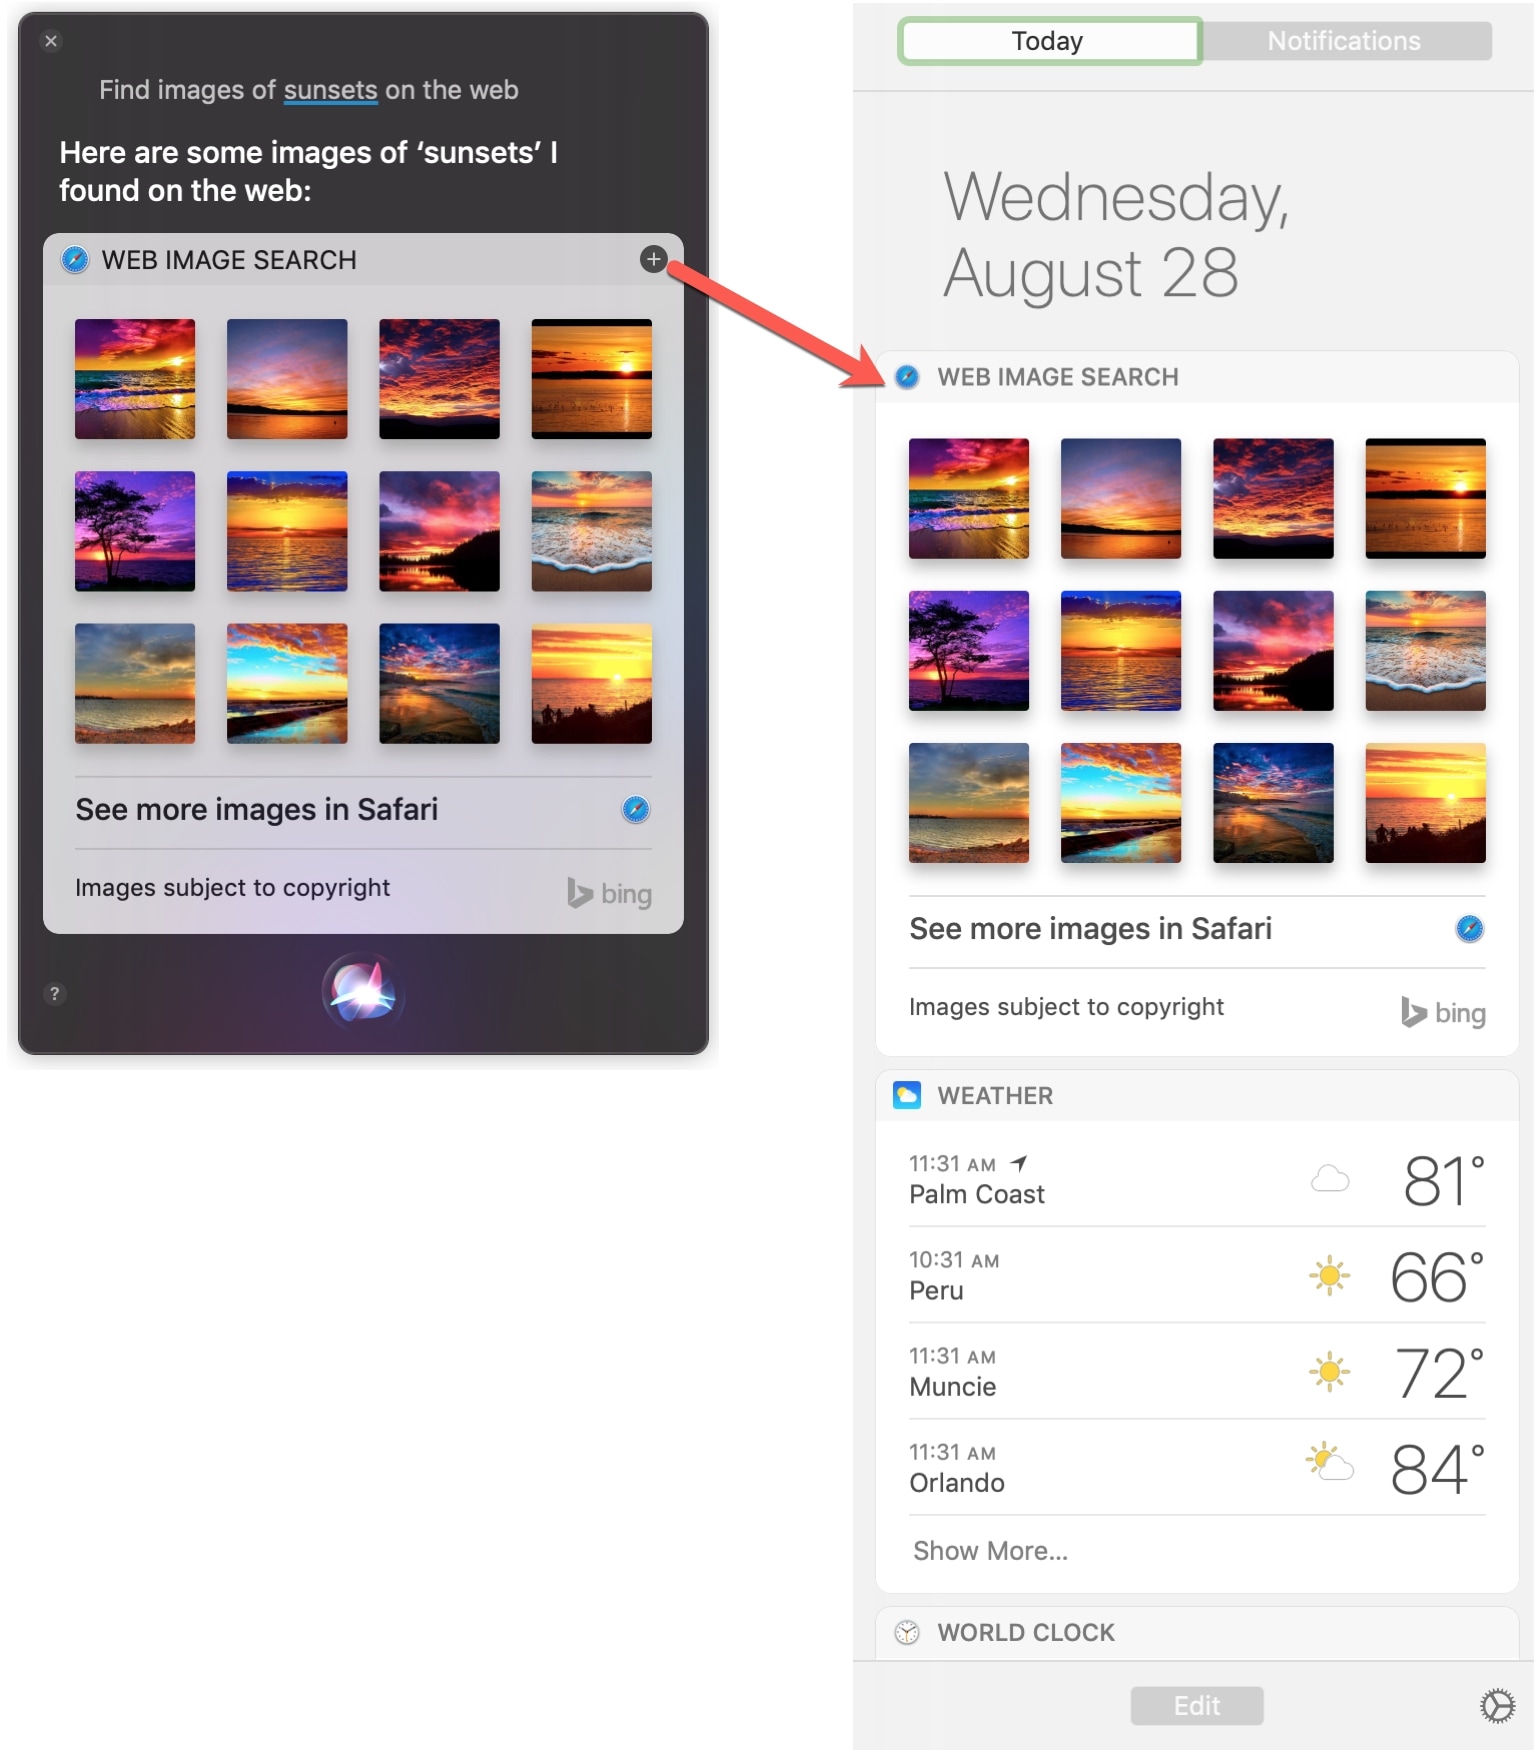
Let’s say you asked Siri to find all of the files on your Mac related to a work project. And you need those results handy in the near future.
Just click the plus sign icon on the top right of the results list. They will then pop right over into your Notification Center at the top.
Whatever you put in the Notification Center from your Siri results will stay there and be accessible on the Today screen. To remove the item(s) when you’re done, just click the X at the top of the item(s) in the Notification Center.
Use your Siri results
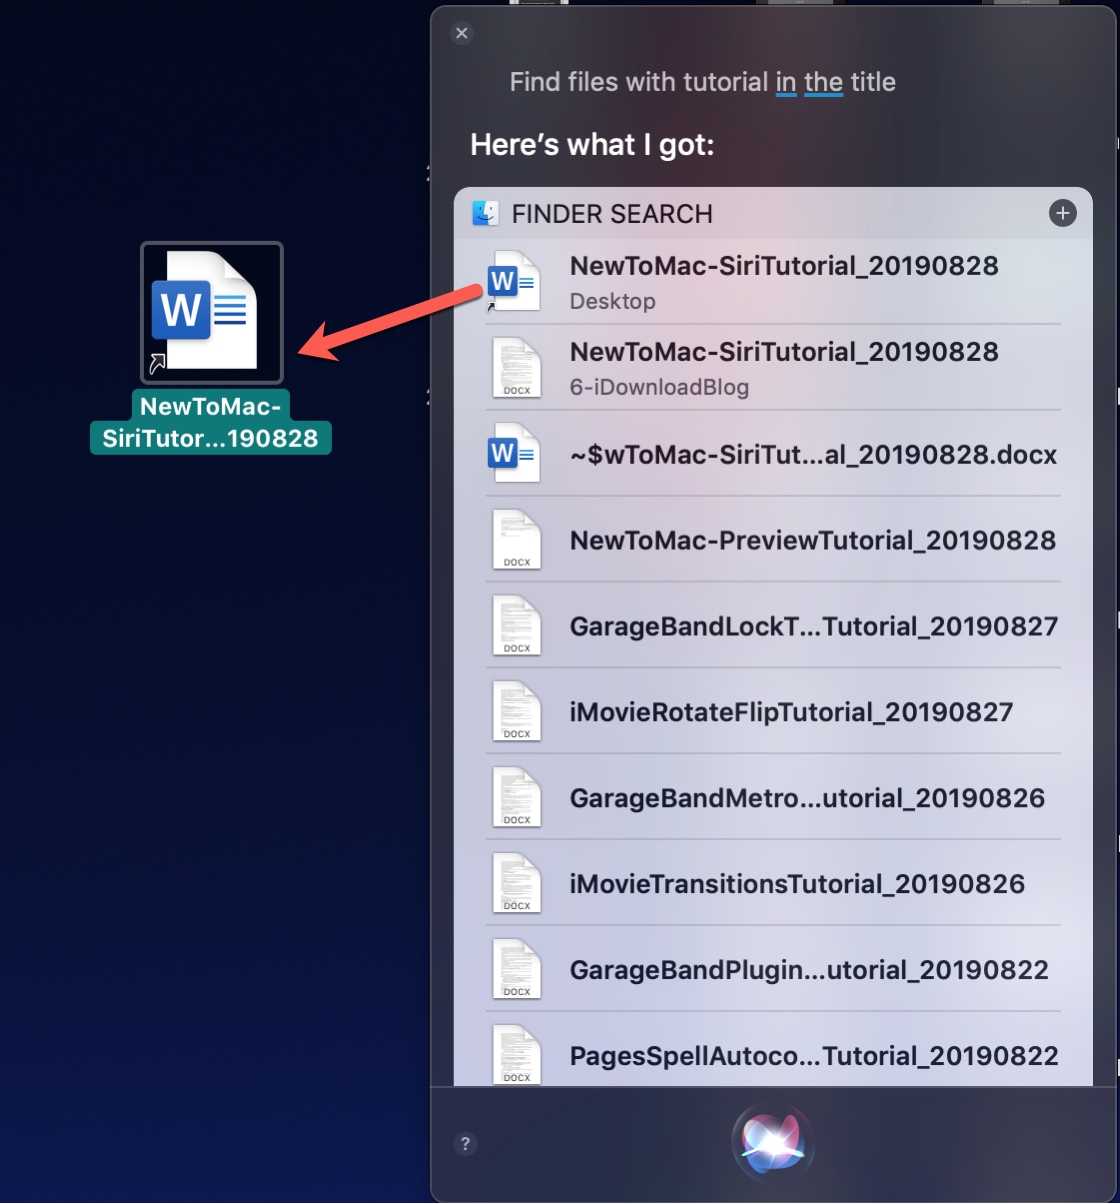
Some types of items that you ask Siri for can be dragged over to use in other apps or even to your desktop. For example, if you ask Siri to find images of something on the web, you can drag one of the results into an email.

Or, if you ask Siri to find files on your Mac, you can drag a file from the results onto your desktop.
Related tips: