If you take screenshots on your Mac, you may want to have access to them on your iPhone. You might be troubleshooting a problem, need the screenshot as a reference, or just want to share it with someone.
Using Universal Clipboard, you can easily pop the shots from your Mac into an app on your iPhone like Notes, Mail, or a social media app. Here’s how to paste Mac screenshots into iPhone apps.
Capture a screenshot on Mac and automatically copy it to the clipboard
Method 1. Use the Screenshot Utility
- Open the Screen Utility by using the keyboard shortcut Command + Shift + 5.
- When the utility opens, click the Options button.
- Under Save to, select Clipboard.
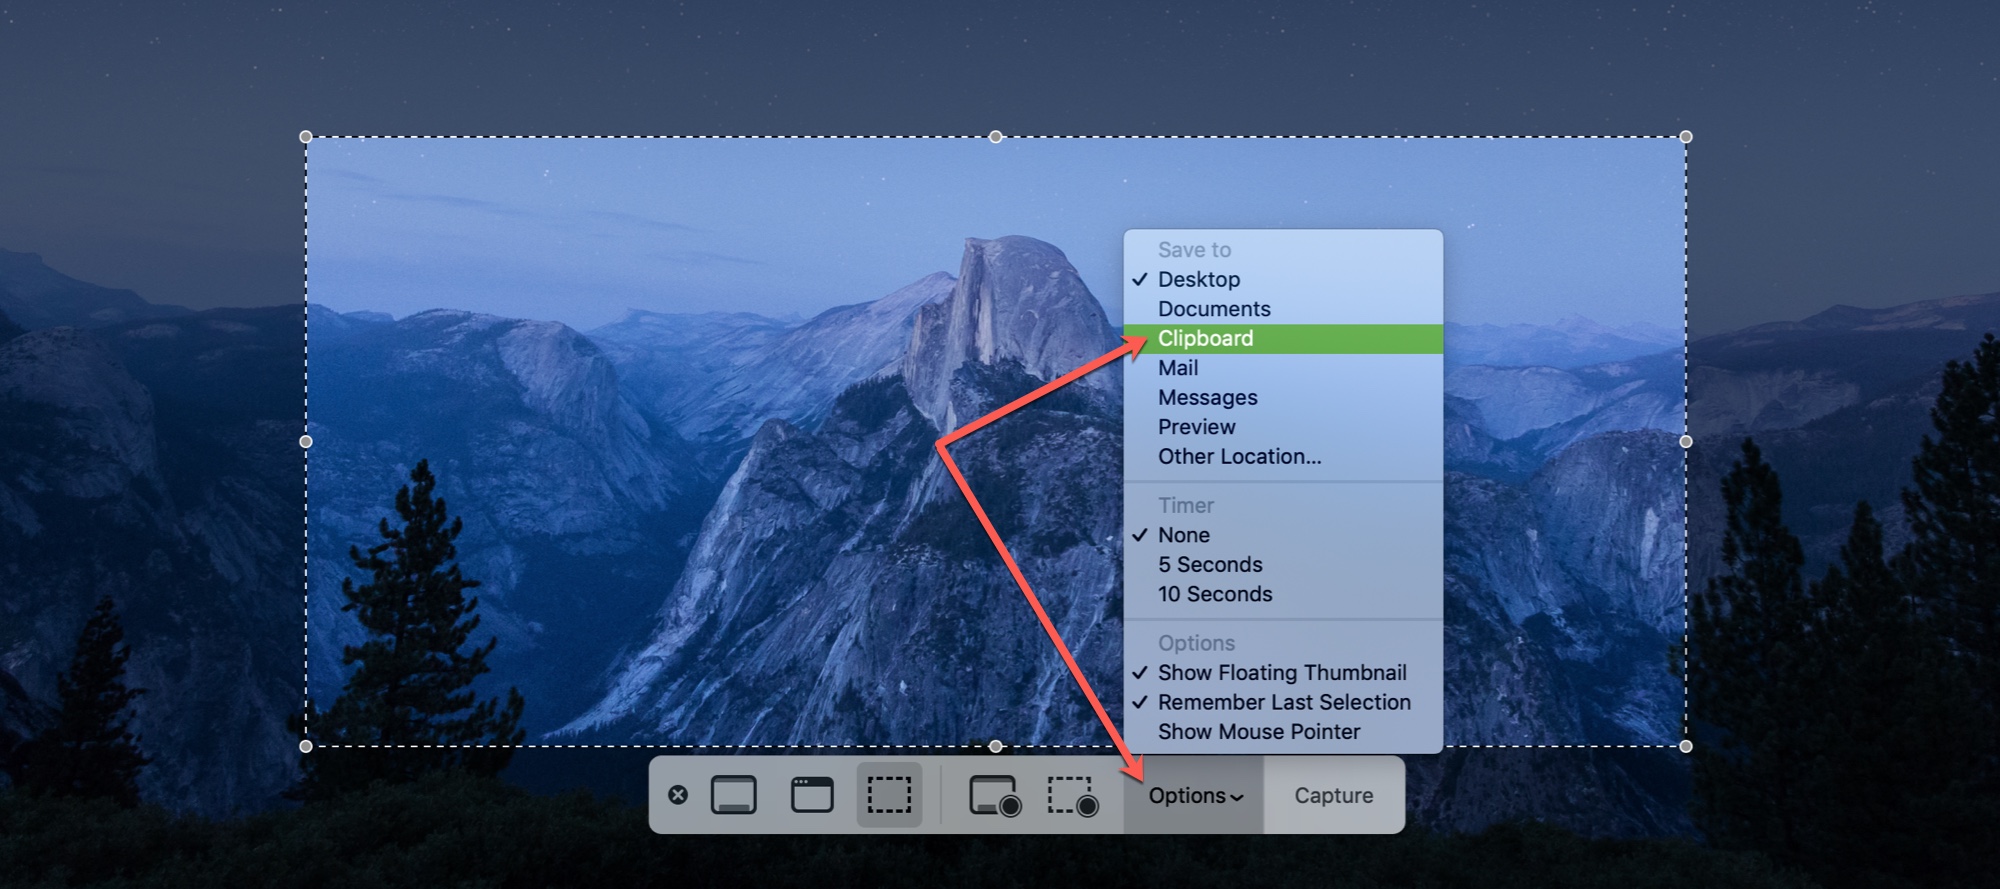
Continue to take your screenshot by clicking Capture. When you finish, it will be on your Universal Clipboard. You can paste it anywhere on your Mac or your iPhone and iPad.
Method 2. Use a keyboard shortcut
Another way you can copy your screenshots to the clipboard is with a keyboard shortcut using the Control key. For instance, say you’re taking a screenshot of your entire Mac screen.
You would normally take the screenshot using Command + Shift + 3. But to copy it right to the Clipboard, use Command + Control + Shift + 3 instead. Basically, you’re just adding the Control key to your keyboard shortcut for the screenshot.
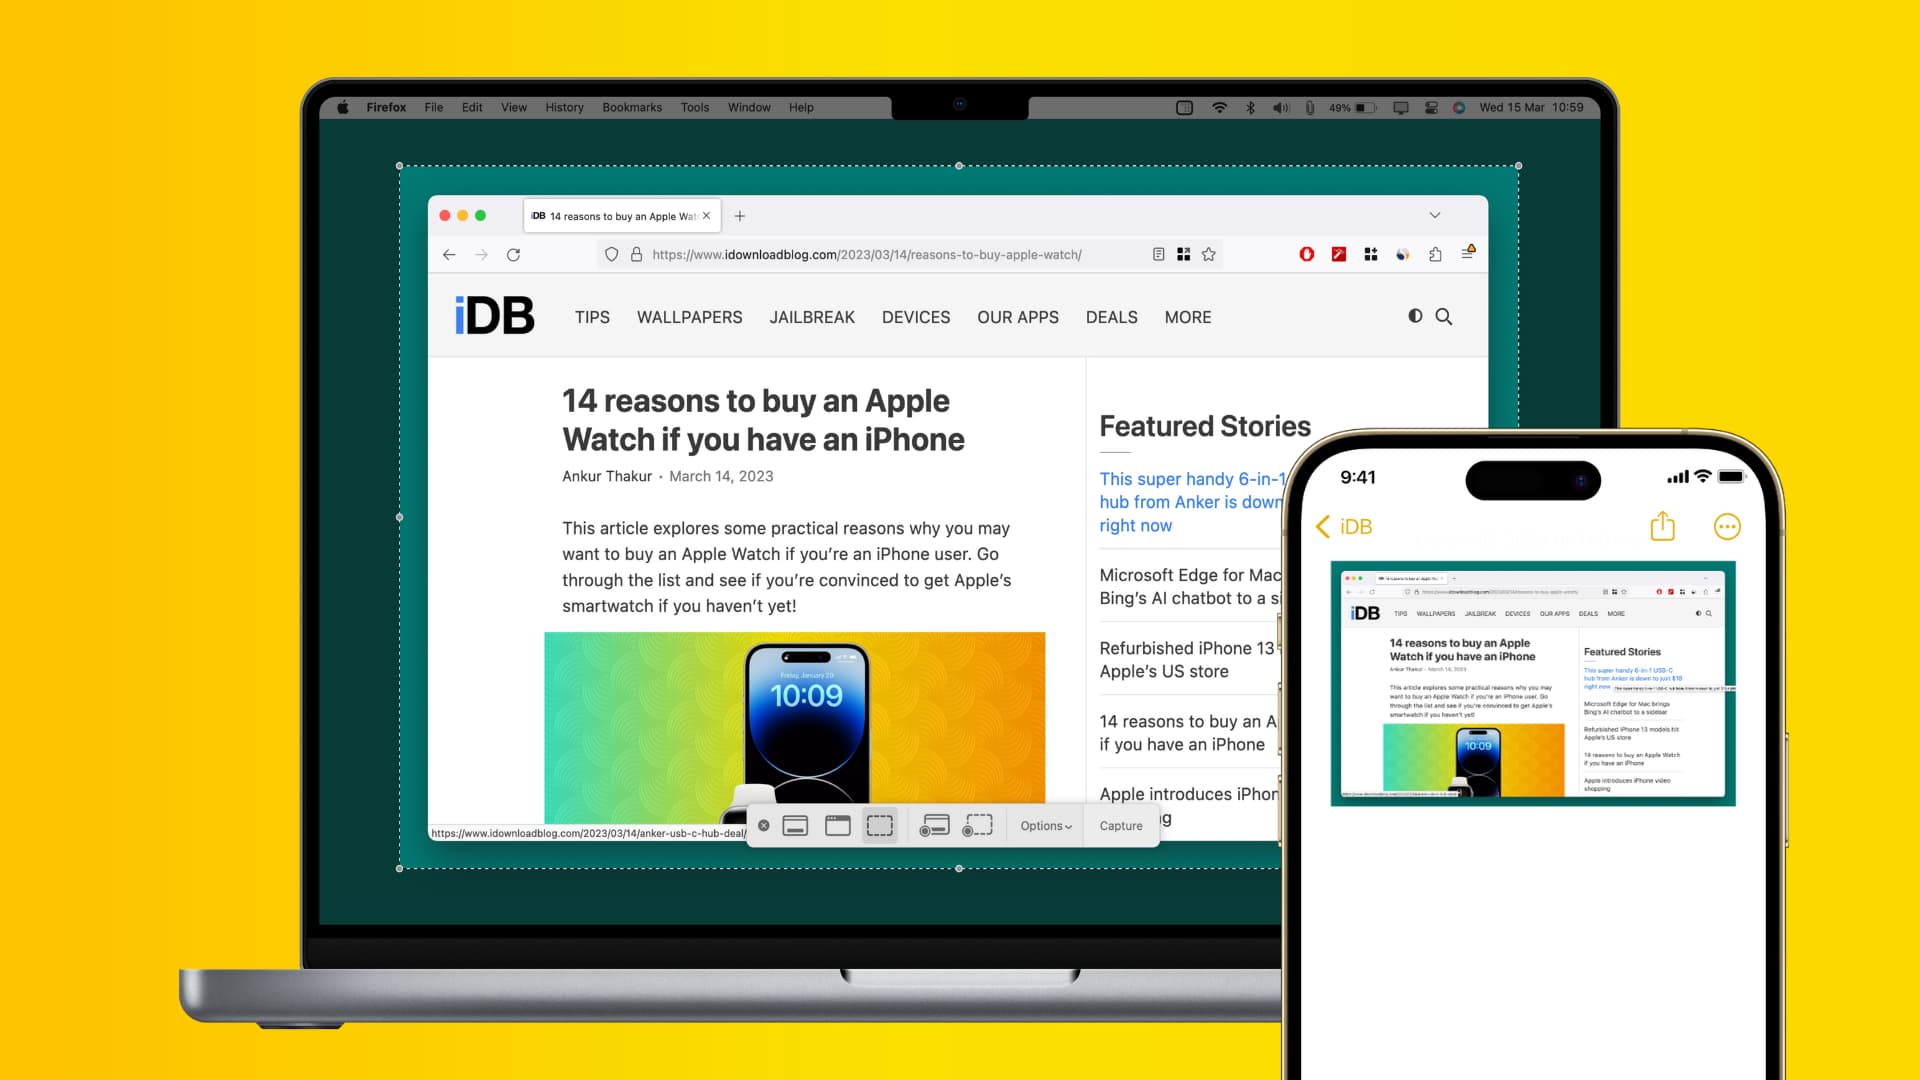
Paste Mac’s screenshot on iPhone or iPad
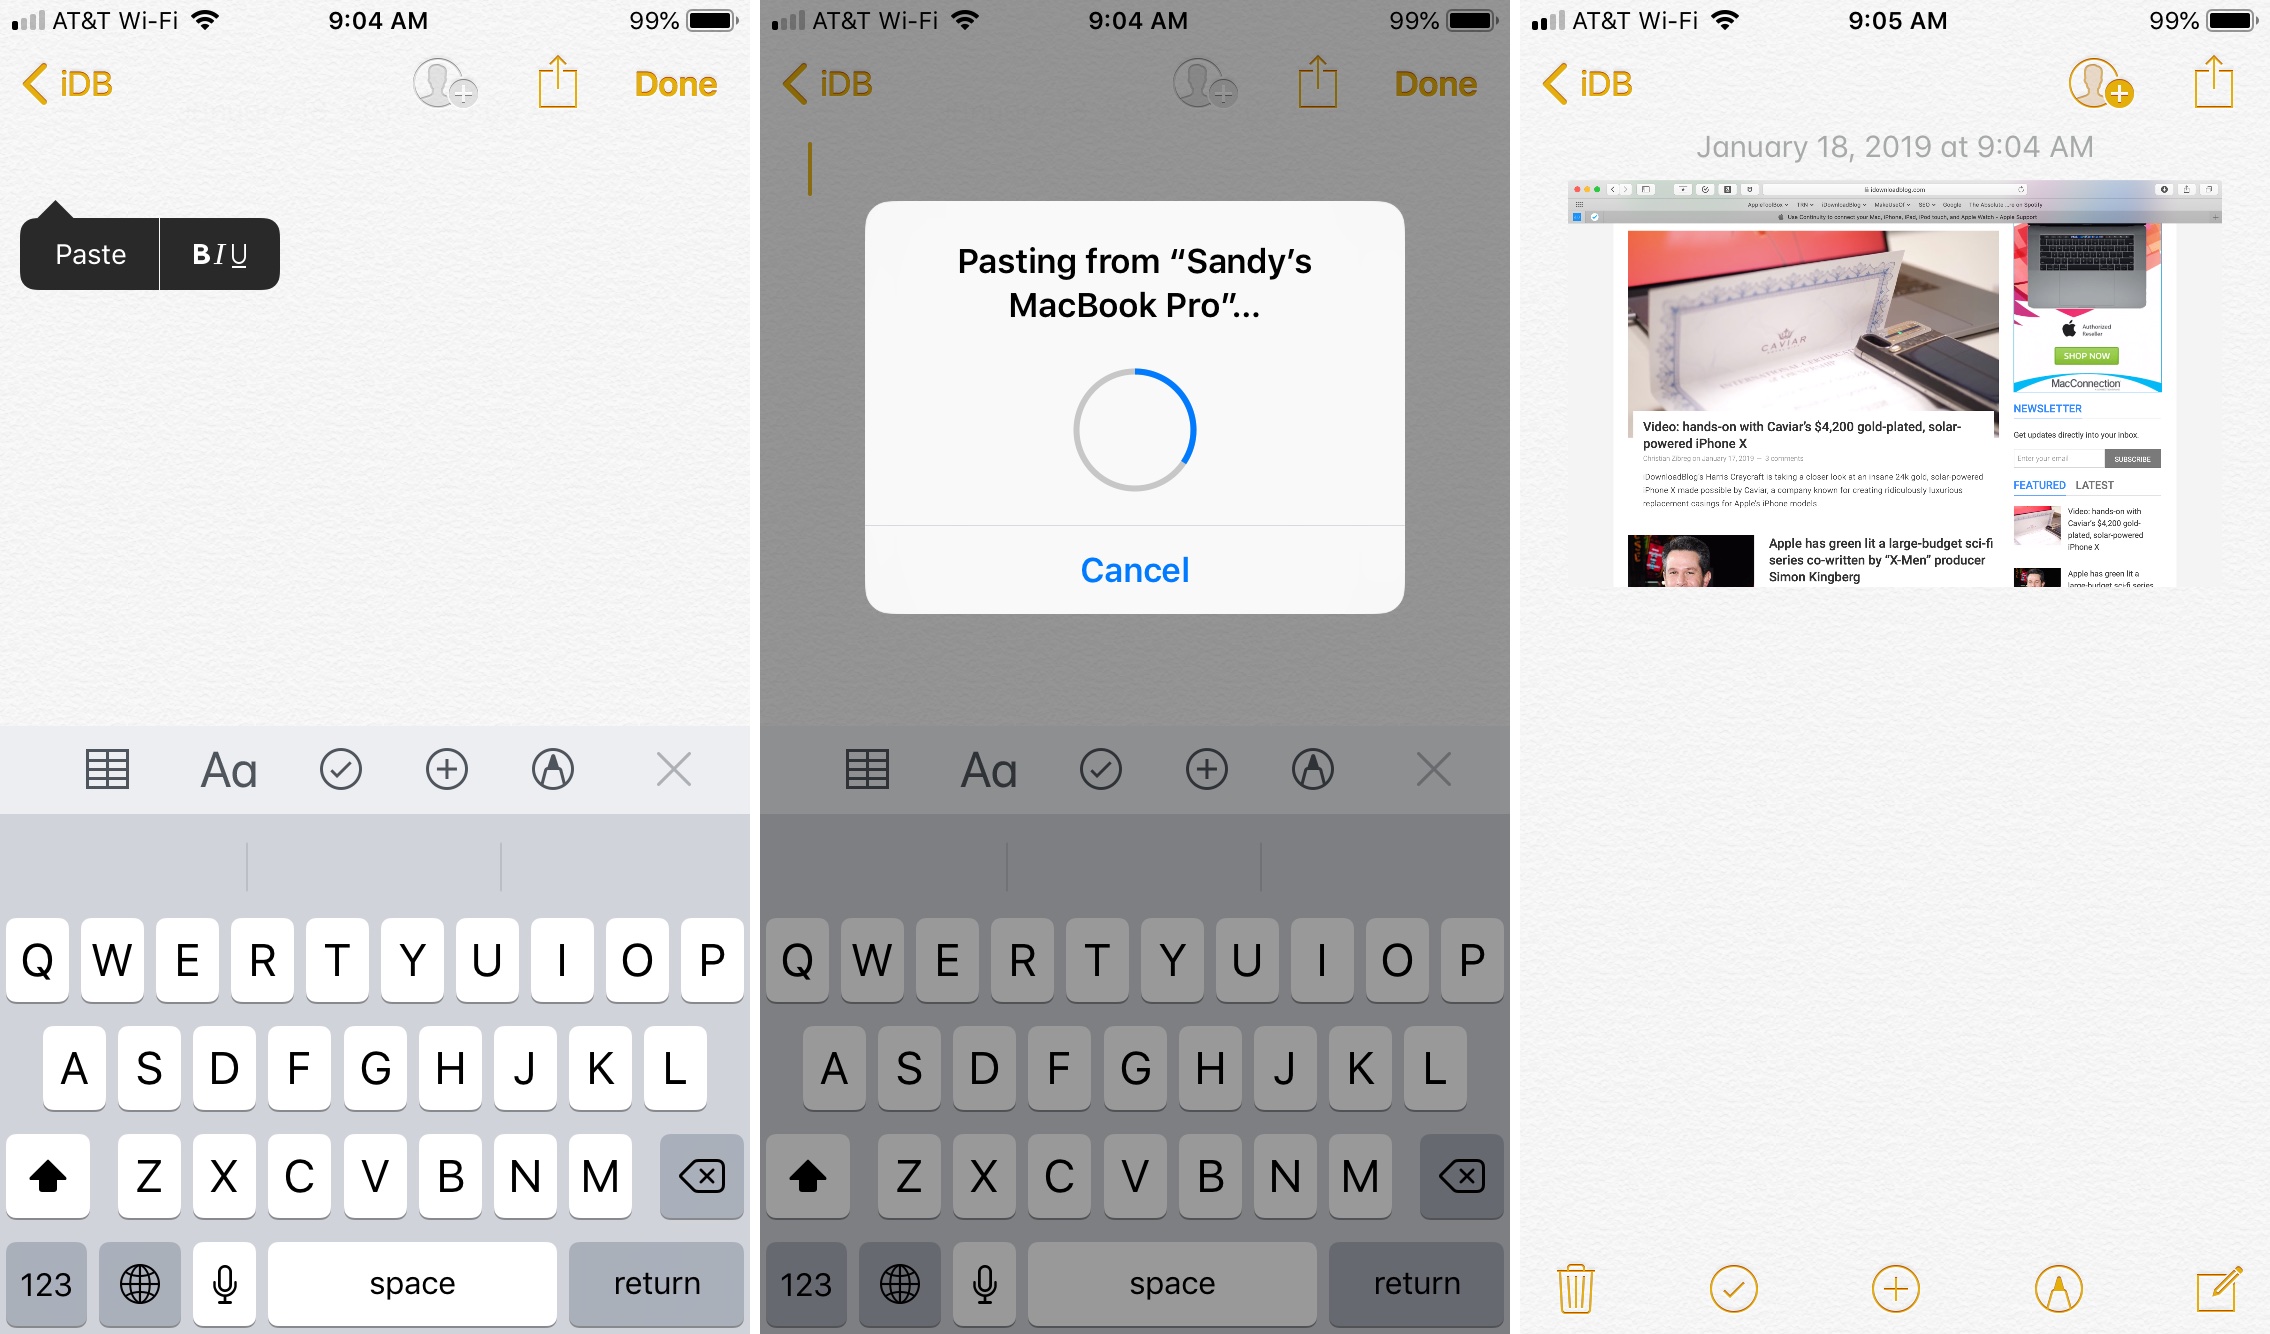
Whichever method you use to copy the screenshot to the Clipboard, pasting it to your iPhone is easy. Open the app you want to paste the screenshot into on your iPhone. For our example, we’ll use the Notes app.
- Tap and hold in the spot of your app where you want the screenshot.
- Select Paste when the small menu opens.
Taking screenshots on your Mac and pasting them into apps on your iPhone is simple and takes little effort. So, be sure to keep this how-to in mind when you need help doing it.
Check out next: