In this brief tutorial, we will share how to create email filtering rules on Gmail, which lets you do all sorts of things with your email inbox to customize your experience and maximize your productivity.
Why create a rule via a filter in Gmail
Creating rules via filters allows certain things to happen in an automated fashion without you needing to babysit your email inbox all the time. For example, you can do all of the following things based on certain filter criteria:
- Automatically archive messages
- Automatically mark messages as read
- Automatically star messages
- Automatically apply labels to messages
- Automatically forward messages
- Automatically delete messages
- Never send similar messages to the spam folder
- Use a Gmail template
- Always mark the email as important, or never do so
- Automatically categorize messages and put them in Primary, Social, Updates, Forums, and Promotions sections
As you can see, the list is quite extensive. One of my favorite reasons to use rules via filters in Gmail is to automatically delete messages from annoying people so I don’t have to do that myself.
If the above functions look appealing to you, then you’re probably itching to know how to do it. Here are the steps.
Create a filter in Gmail
1) Log into Gmail from your favorite web browser and open your inbox.
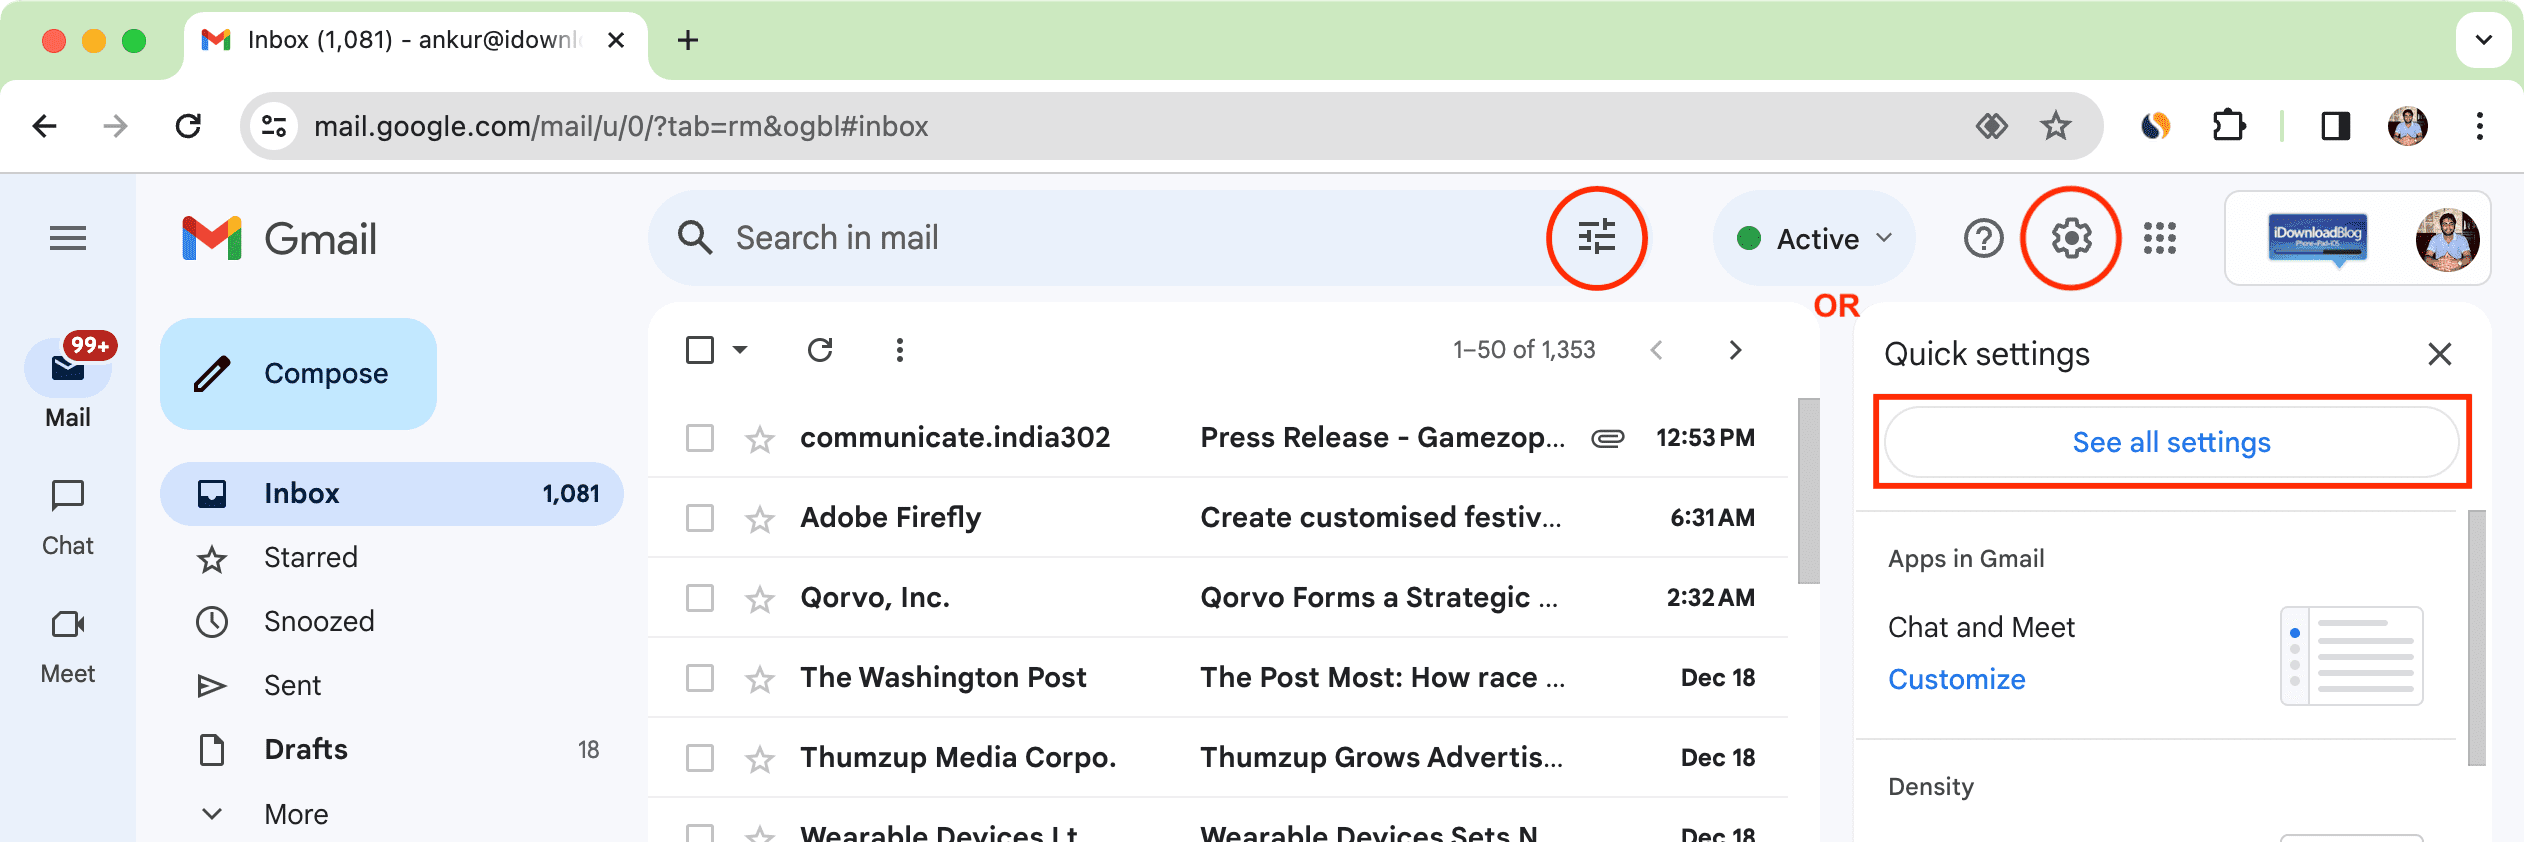
2) In the search bar, click the search options button. You can also click the settings icon and choose See all settings > Filters and Blocked Addresses > Create a new filter.
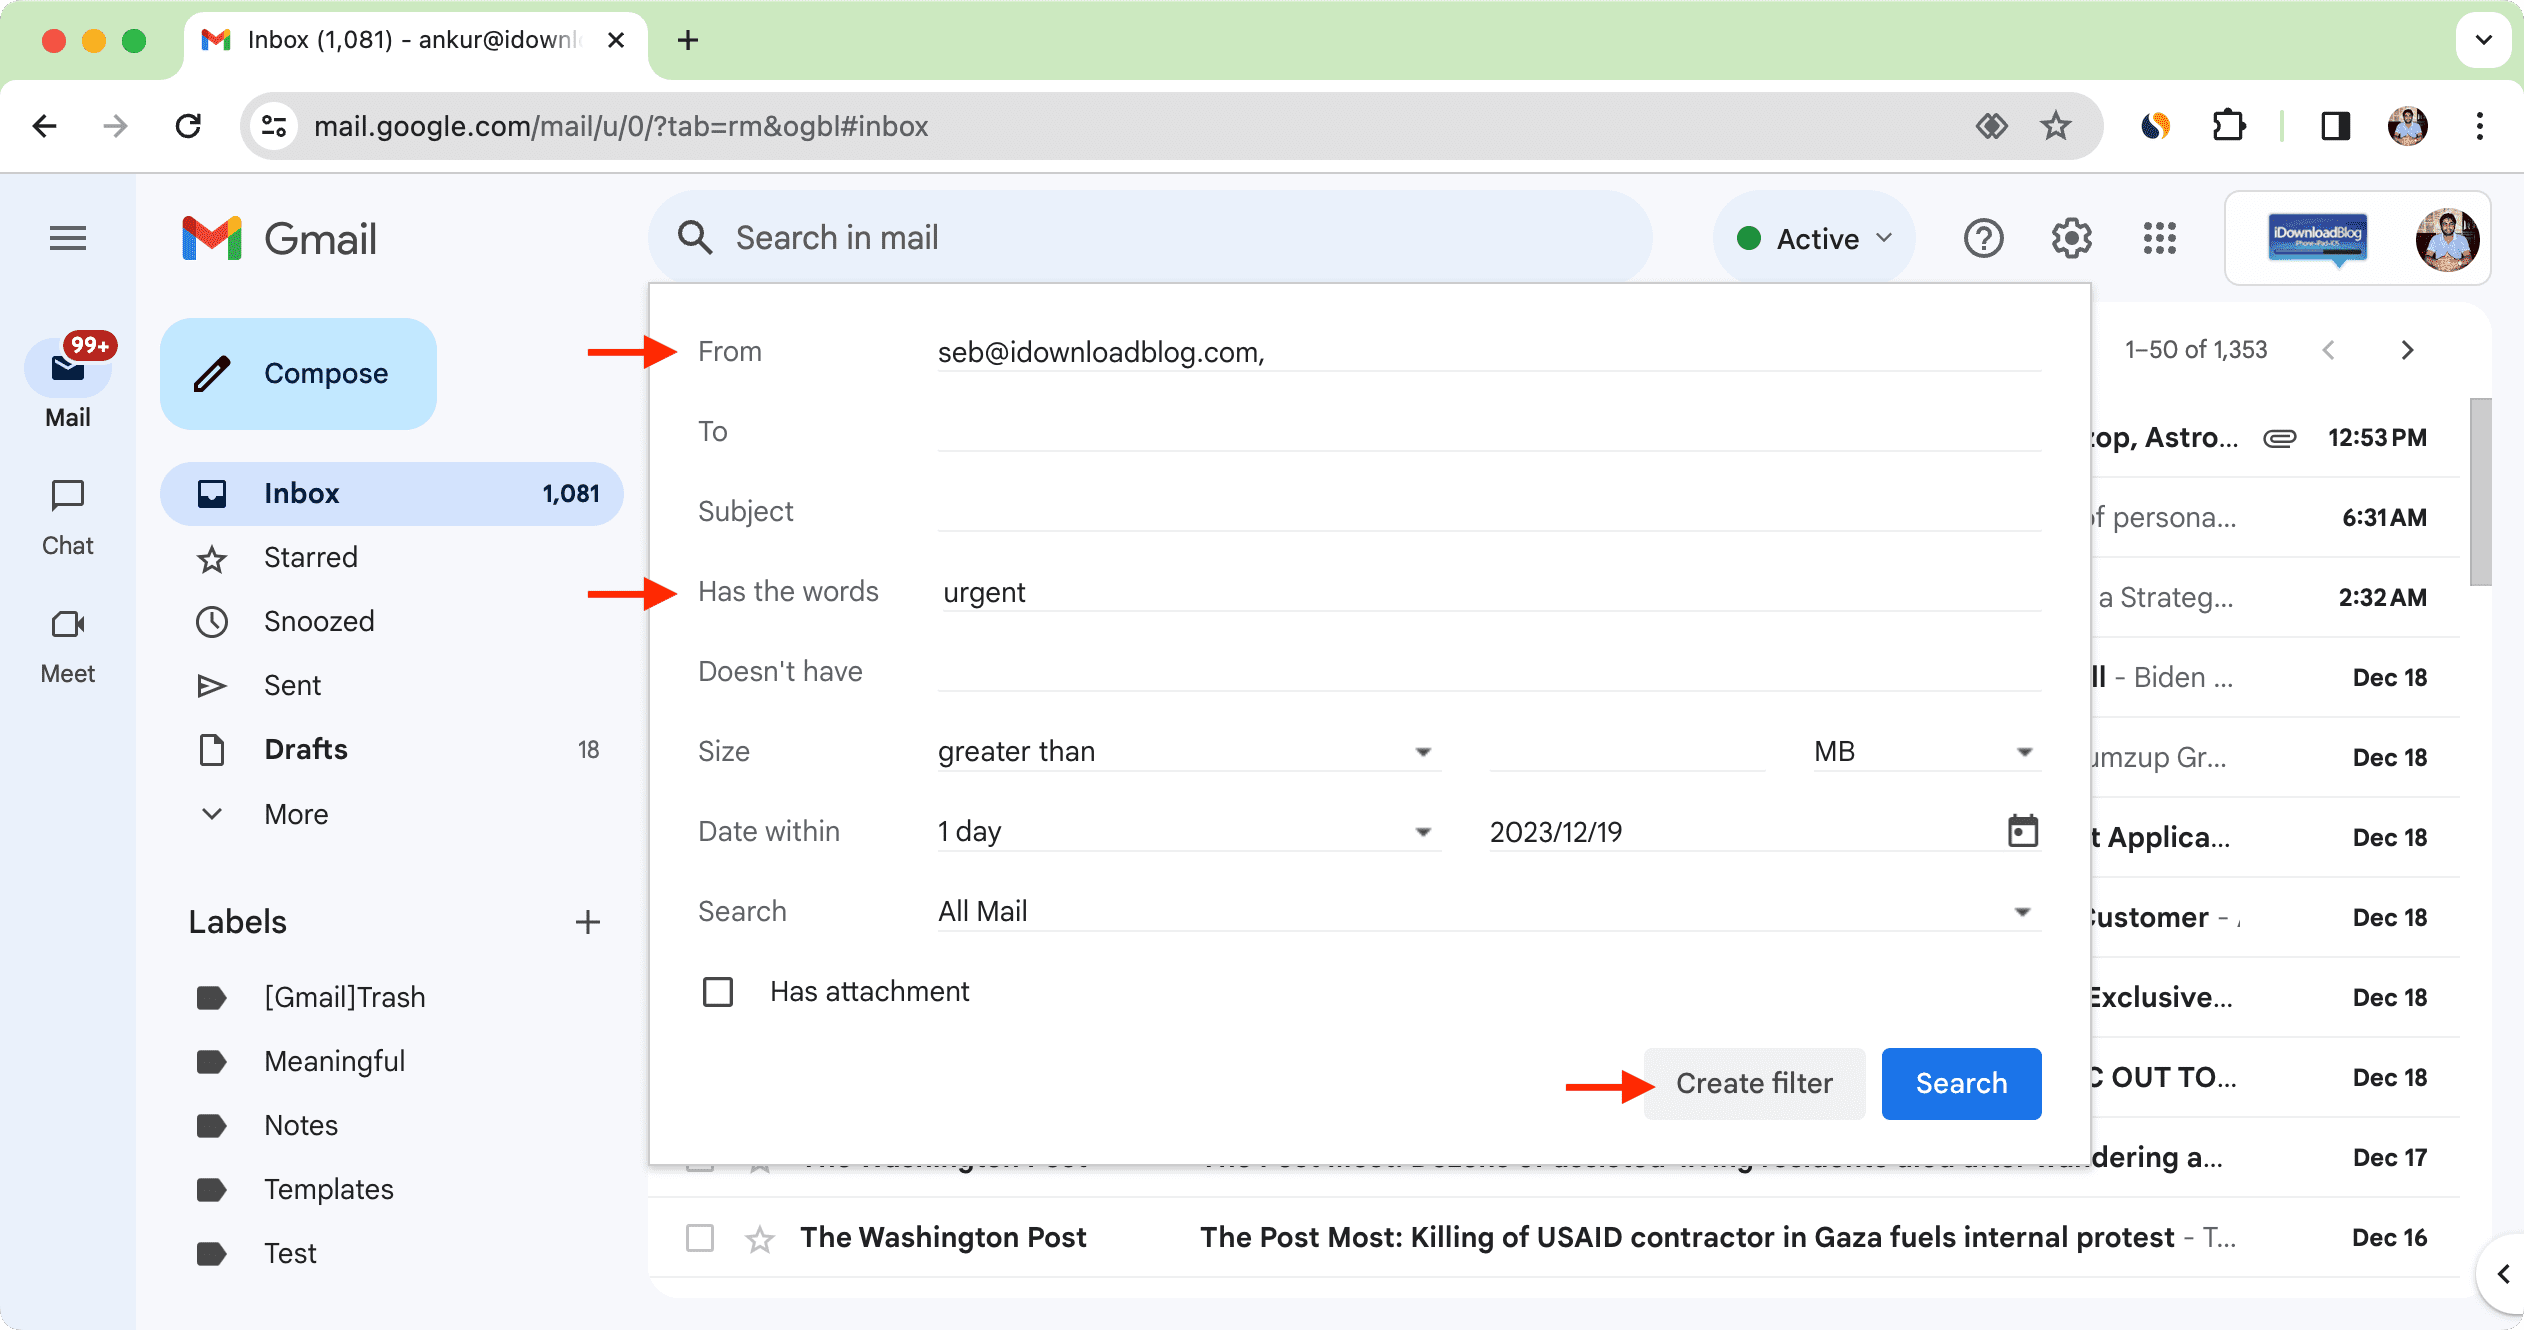
3) Now enter your search criteria to filter by. It’s typically good to filter by a specific email address, but you can also filter by any of the following:
- Who an email is from
- Who an email is to
- The subject of a message
- Contains a certain set of words
- Doesn’t contain a certain set of words
- Contains an attachment
- Excluding chats
- By certain storage size
- Creation date
4) Once satisfied with what you’re filtering by, click Create filter.
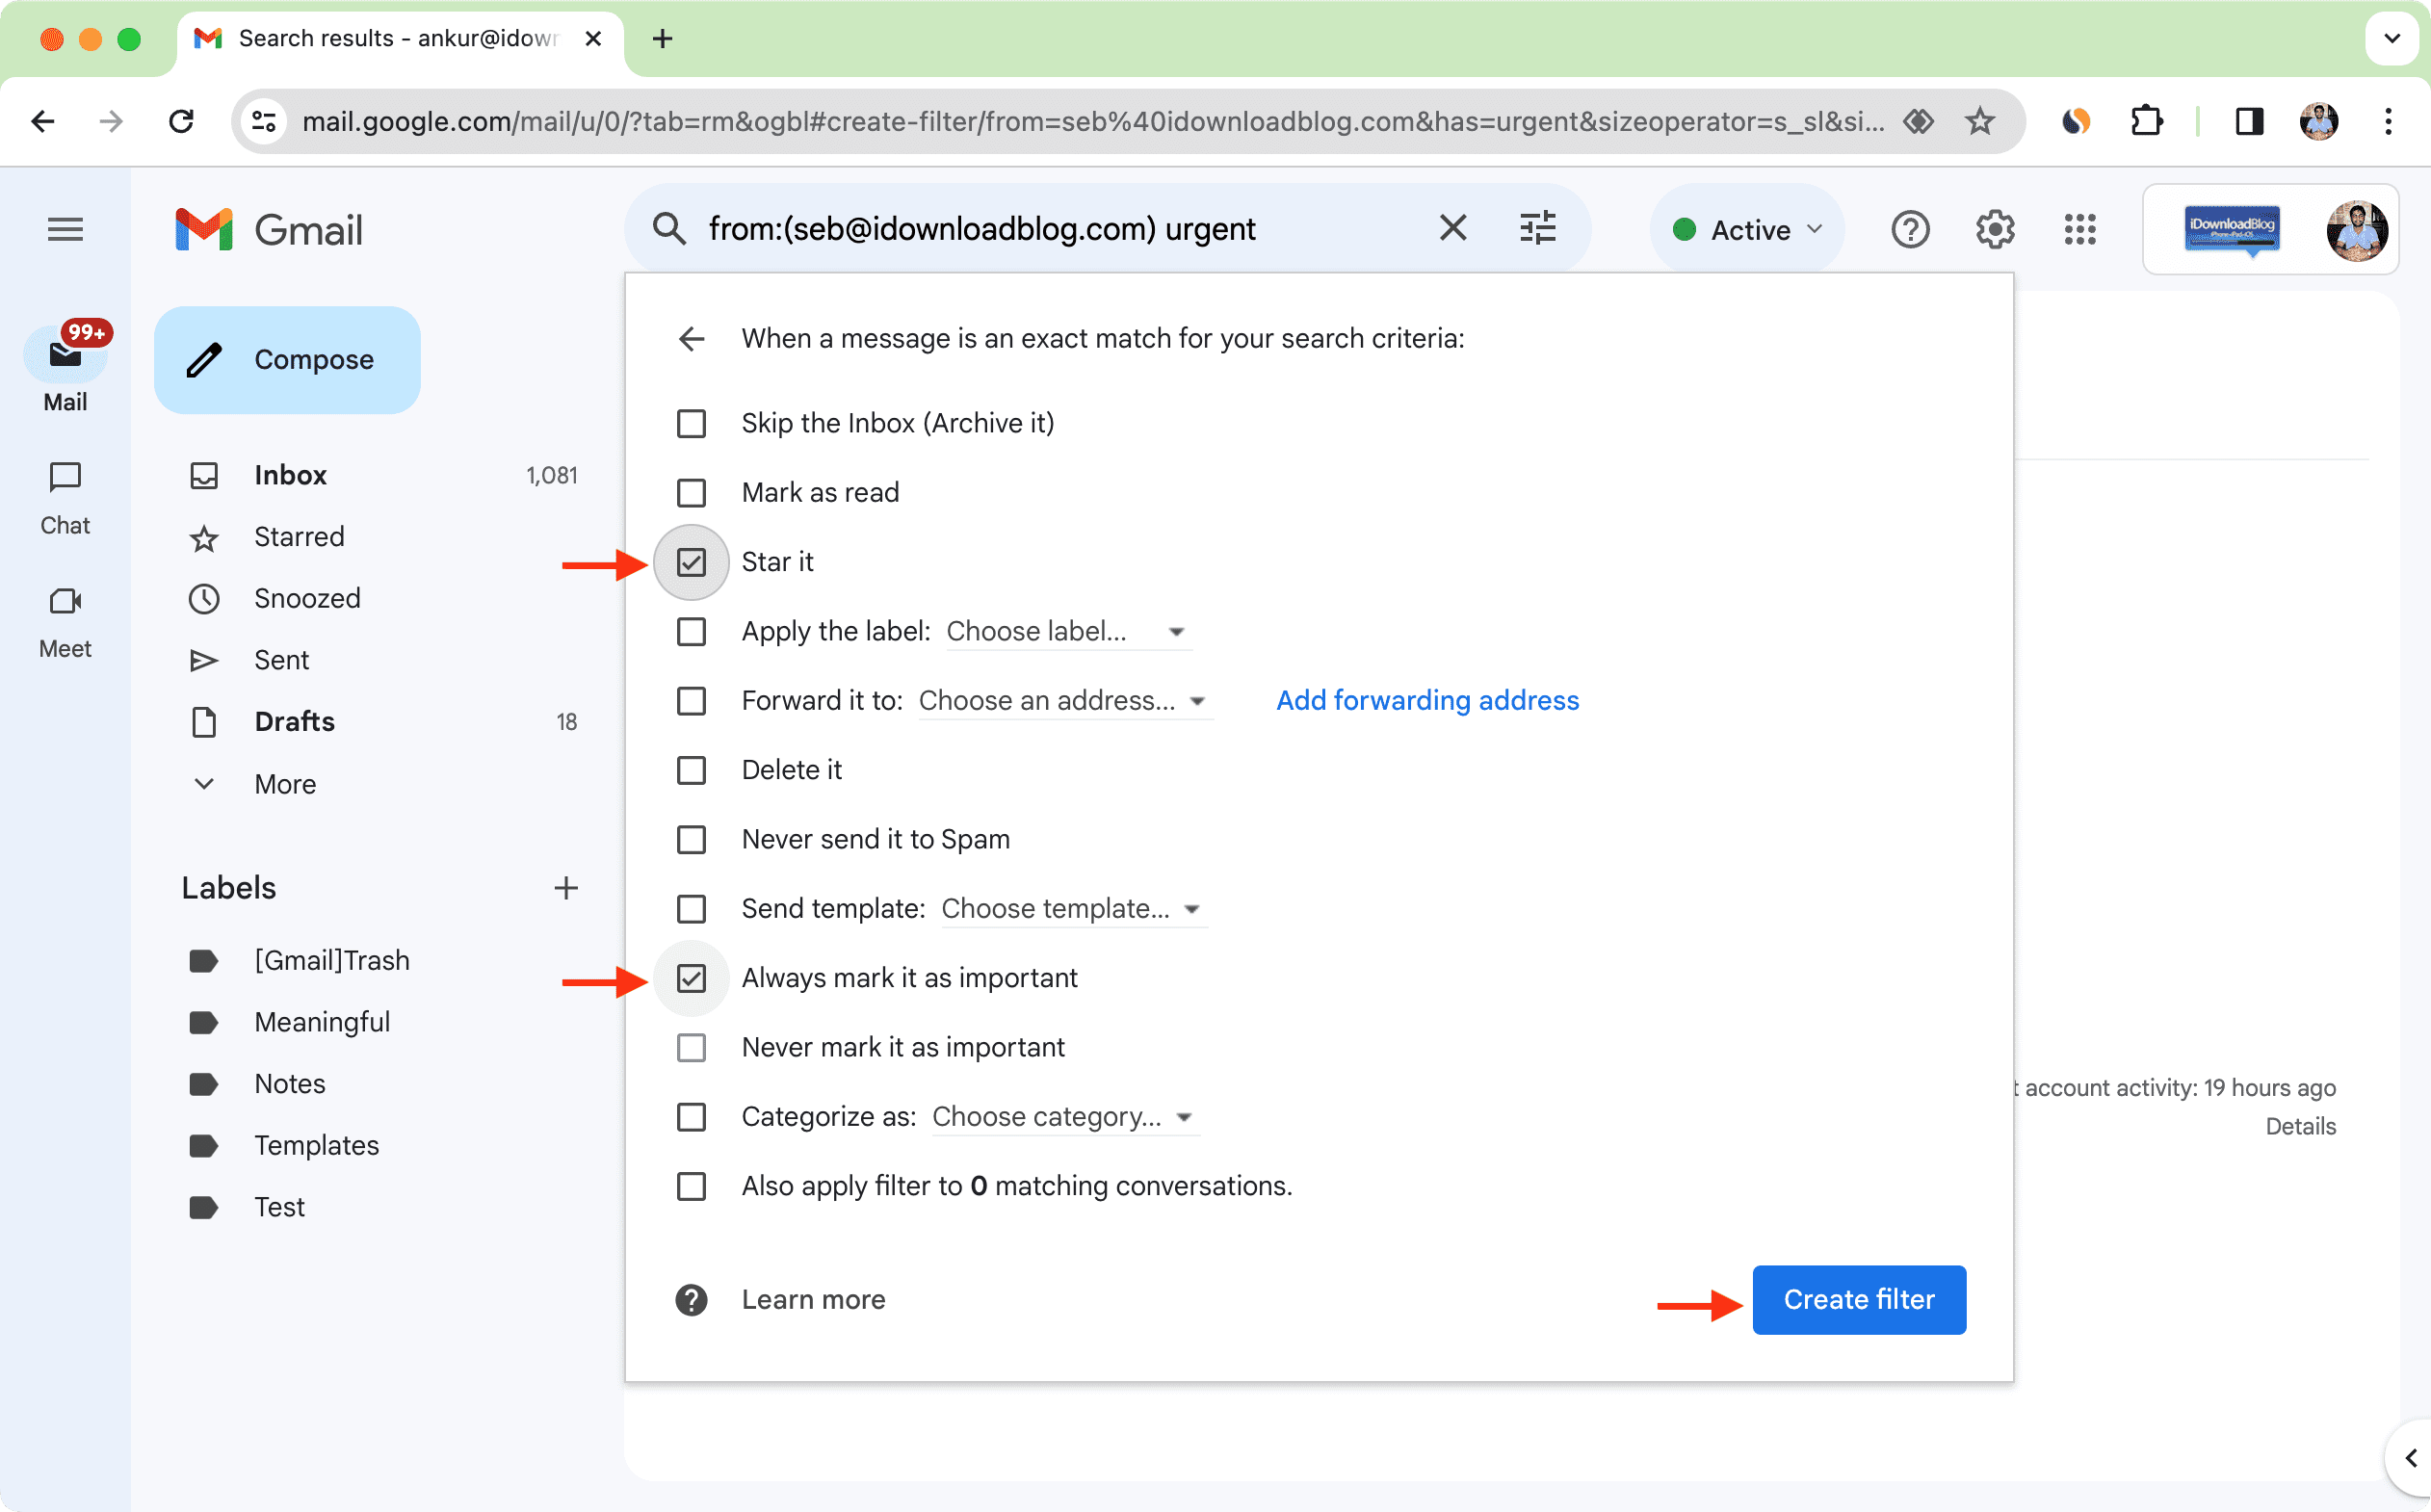
5) Now, you will have to choose what happens to emails that meet your filter criteria. This is known as setting rules.
6) Make your rule selection based on what you want to do, then click on the blue Create Filter button at the bottom left.
Now, any time you send or receive emails that meet your filter criteria, your rules will be applied to those email messages.
Even if you’re using Apple’s Mail app instead of the Gmail app or website on your device, your rules will be applied before they even hit your inbox in the Mail app, so this is an incredibly useful feature to know.
You can go back and create several more filters to suit your usage.
Will you be setting up any rules via filters for your Gmail inbox?
On a related note: