Wondering how to grab a screenshot or do a screen recording of your Mac Lock Screen or user-switching window? In this quick tutorial, we’ll show you the right steps to do so.
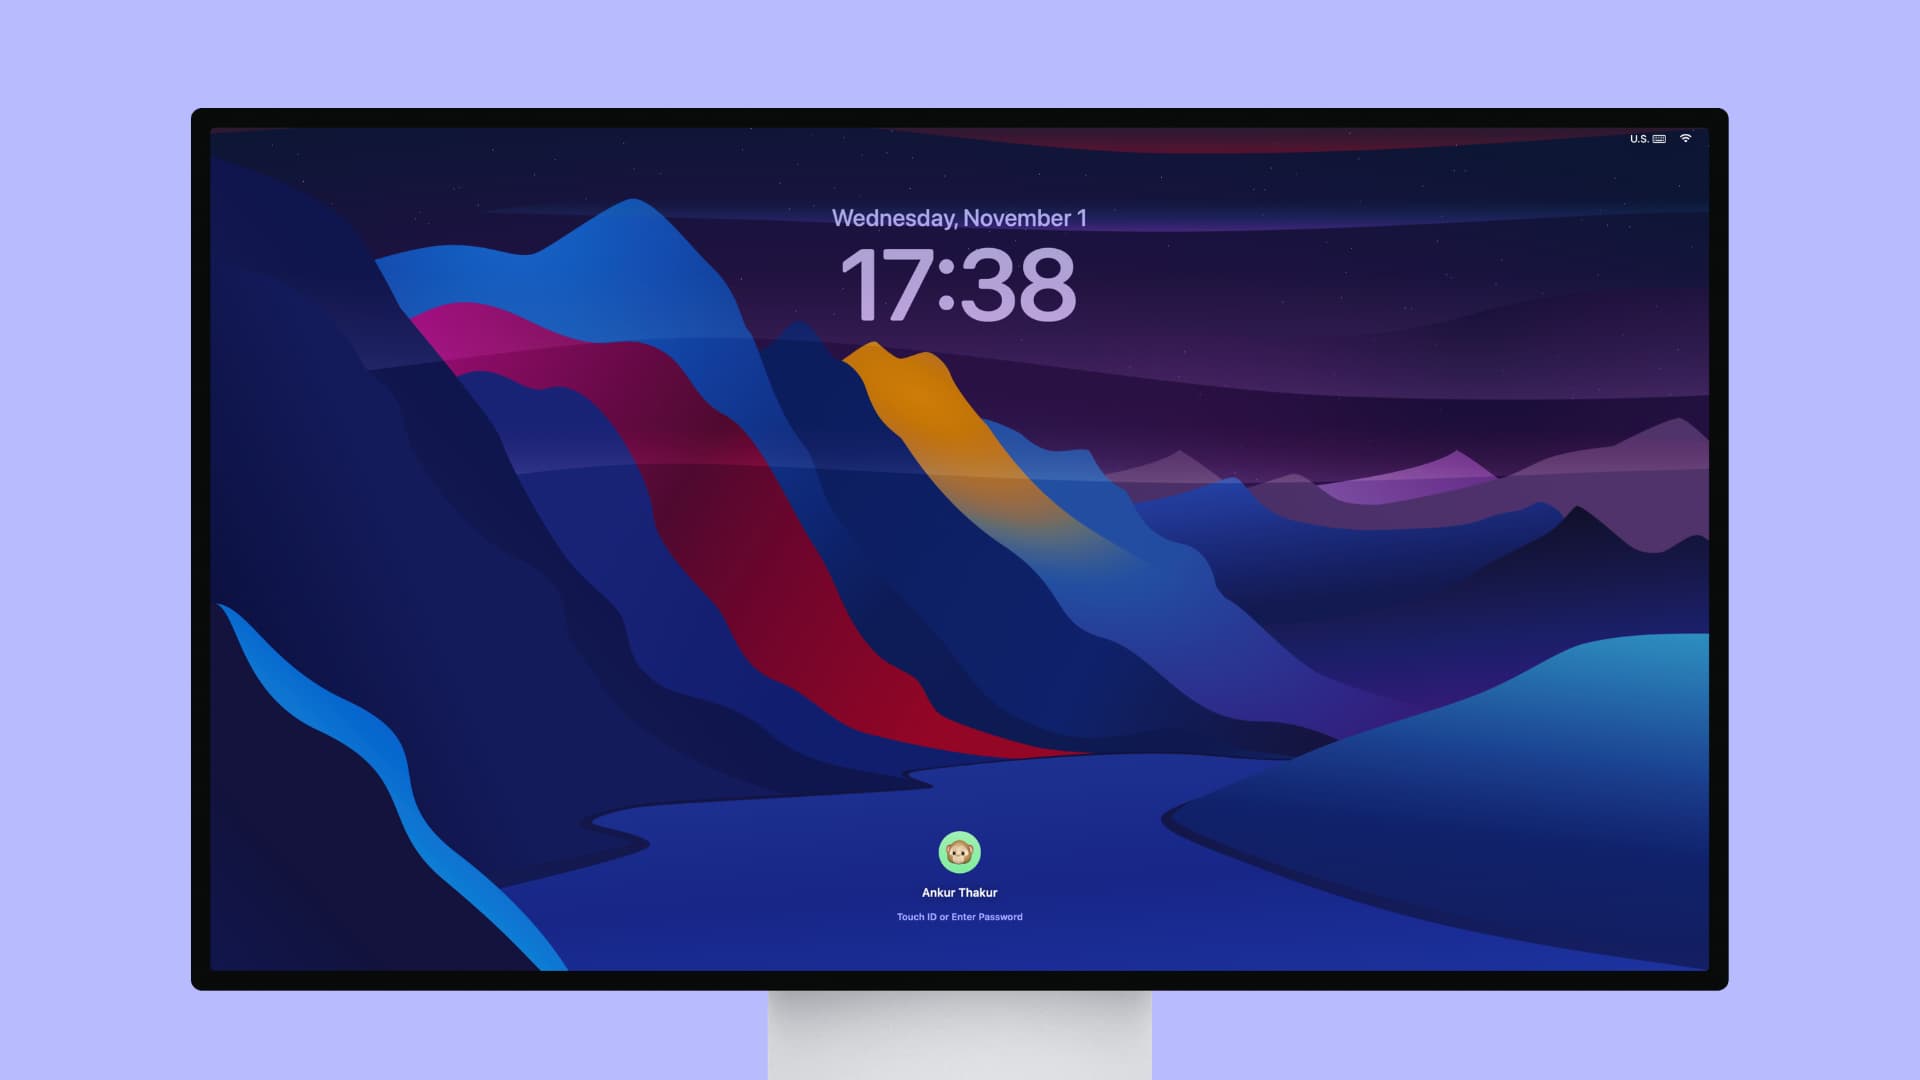
I often need screenshots of the Lock Screen on my Mac, particularly when making tutorials like this one you’re reading.
The only problem is that unless you’re already logged in as a user, there is nowhere to store the screenshot file on your Mac, so you need to employ a slight workaround in order to do that.
Take a screenshot or video recording of your Mac’s Lock Screen
1) Make sure you’re logged in to a user account on your Mac.
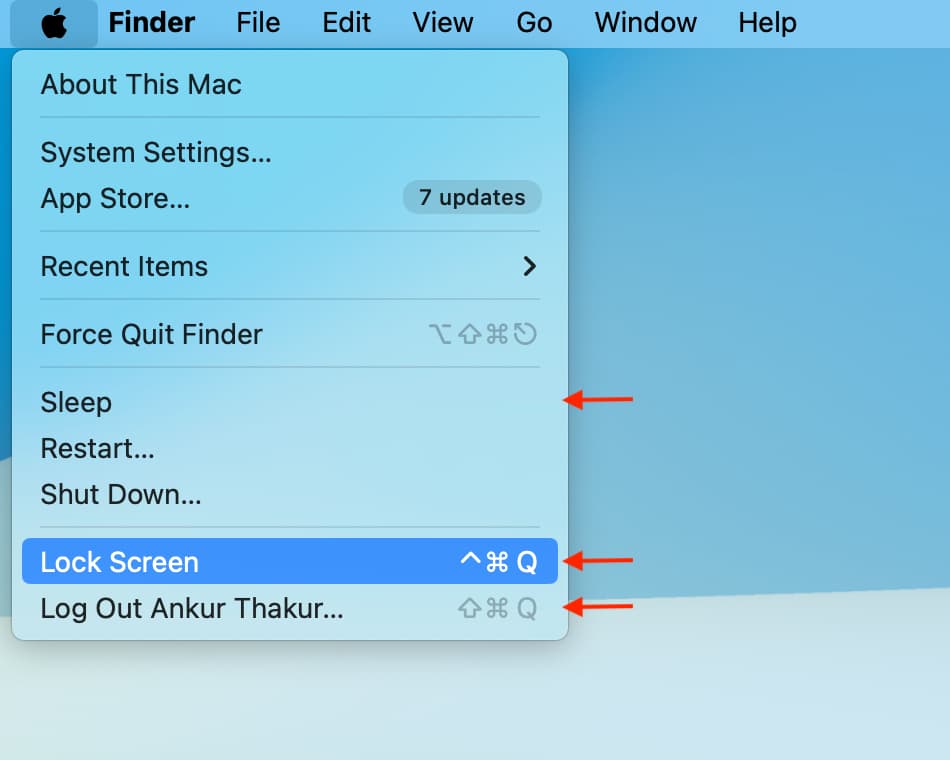
2) Click the Apple logo in the top left corner of the screen and choose Lock Screen, Sleep, or Log Out if you want to grab a screenshot. Or, choose the Lock Screen or Sleep option if you want to do a screen recording of your Mac’s Lock Screen.
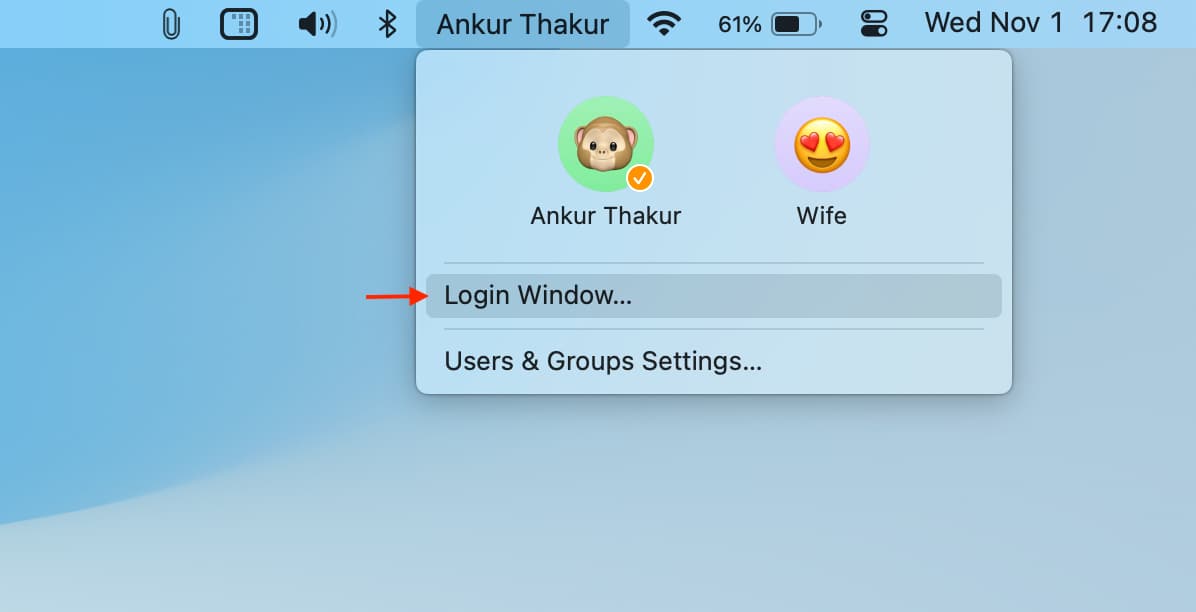
Alternatively, you can also click your name, account username, or fast user-switching icon from the top menu bar and select Login Window to grab a screenshot.
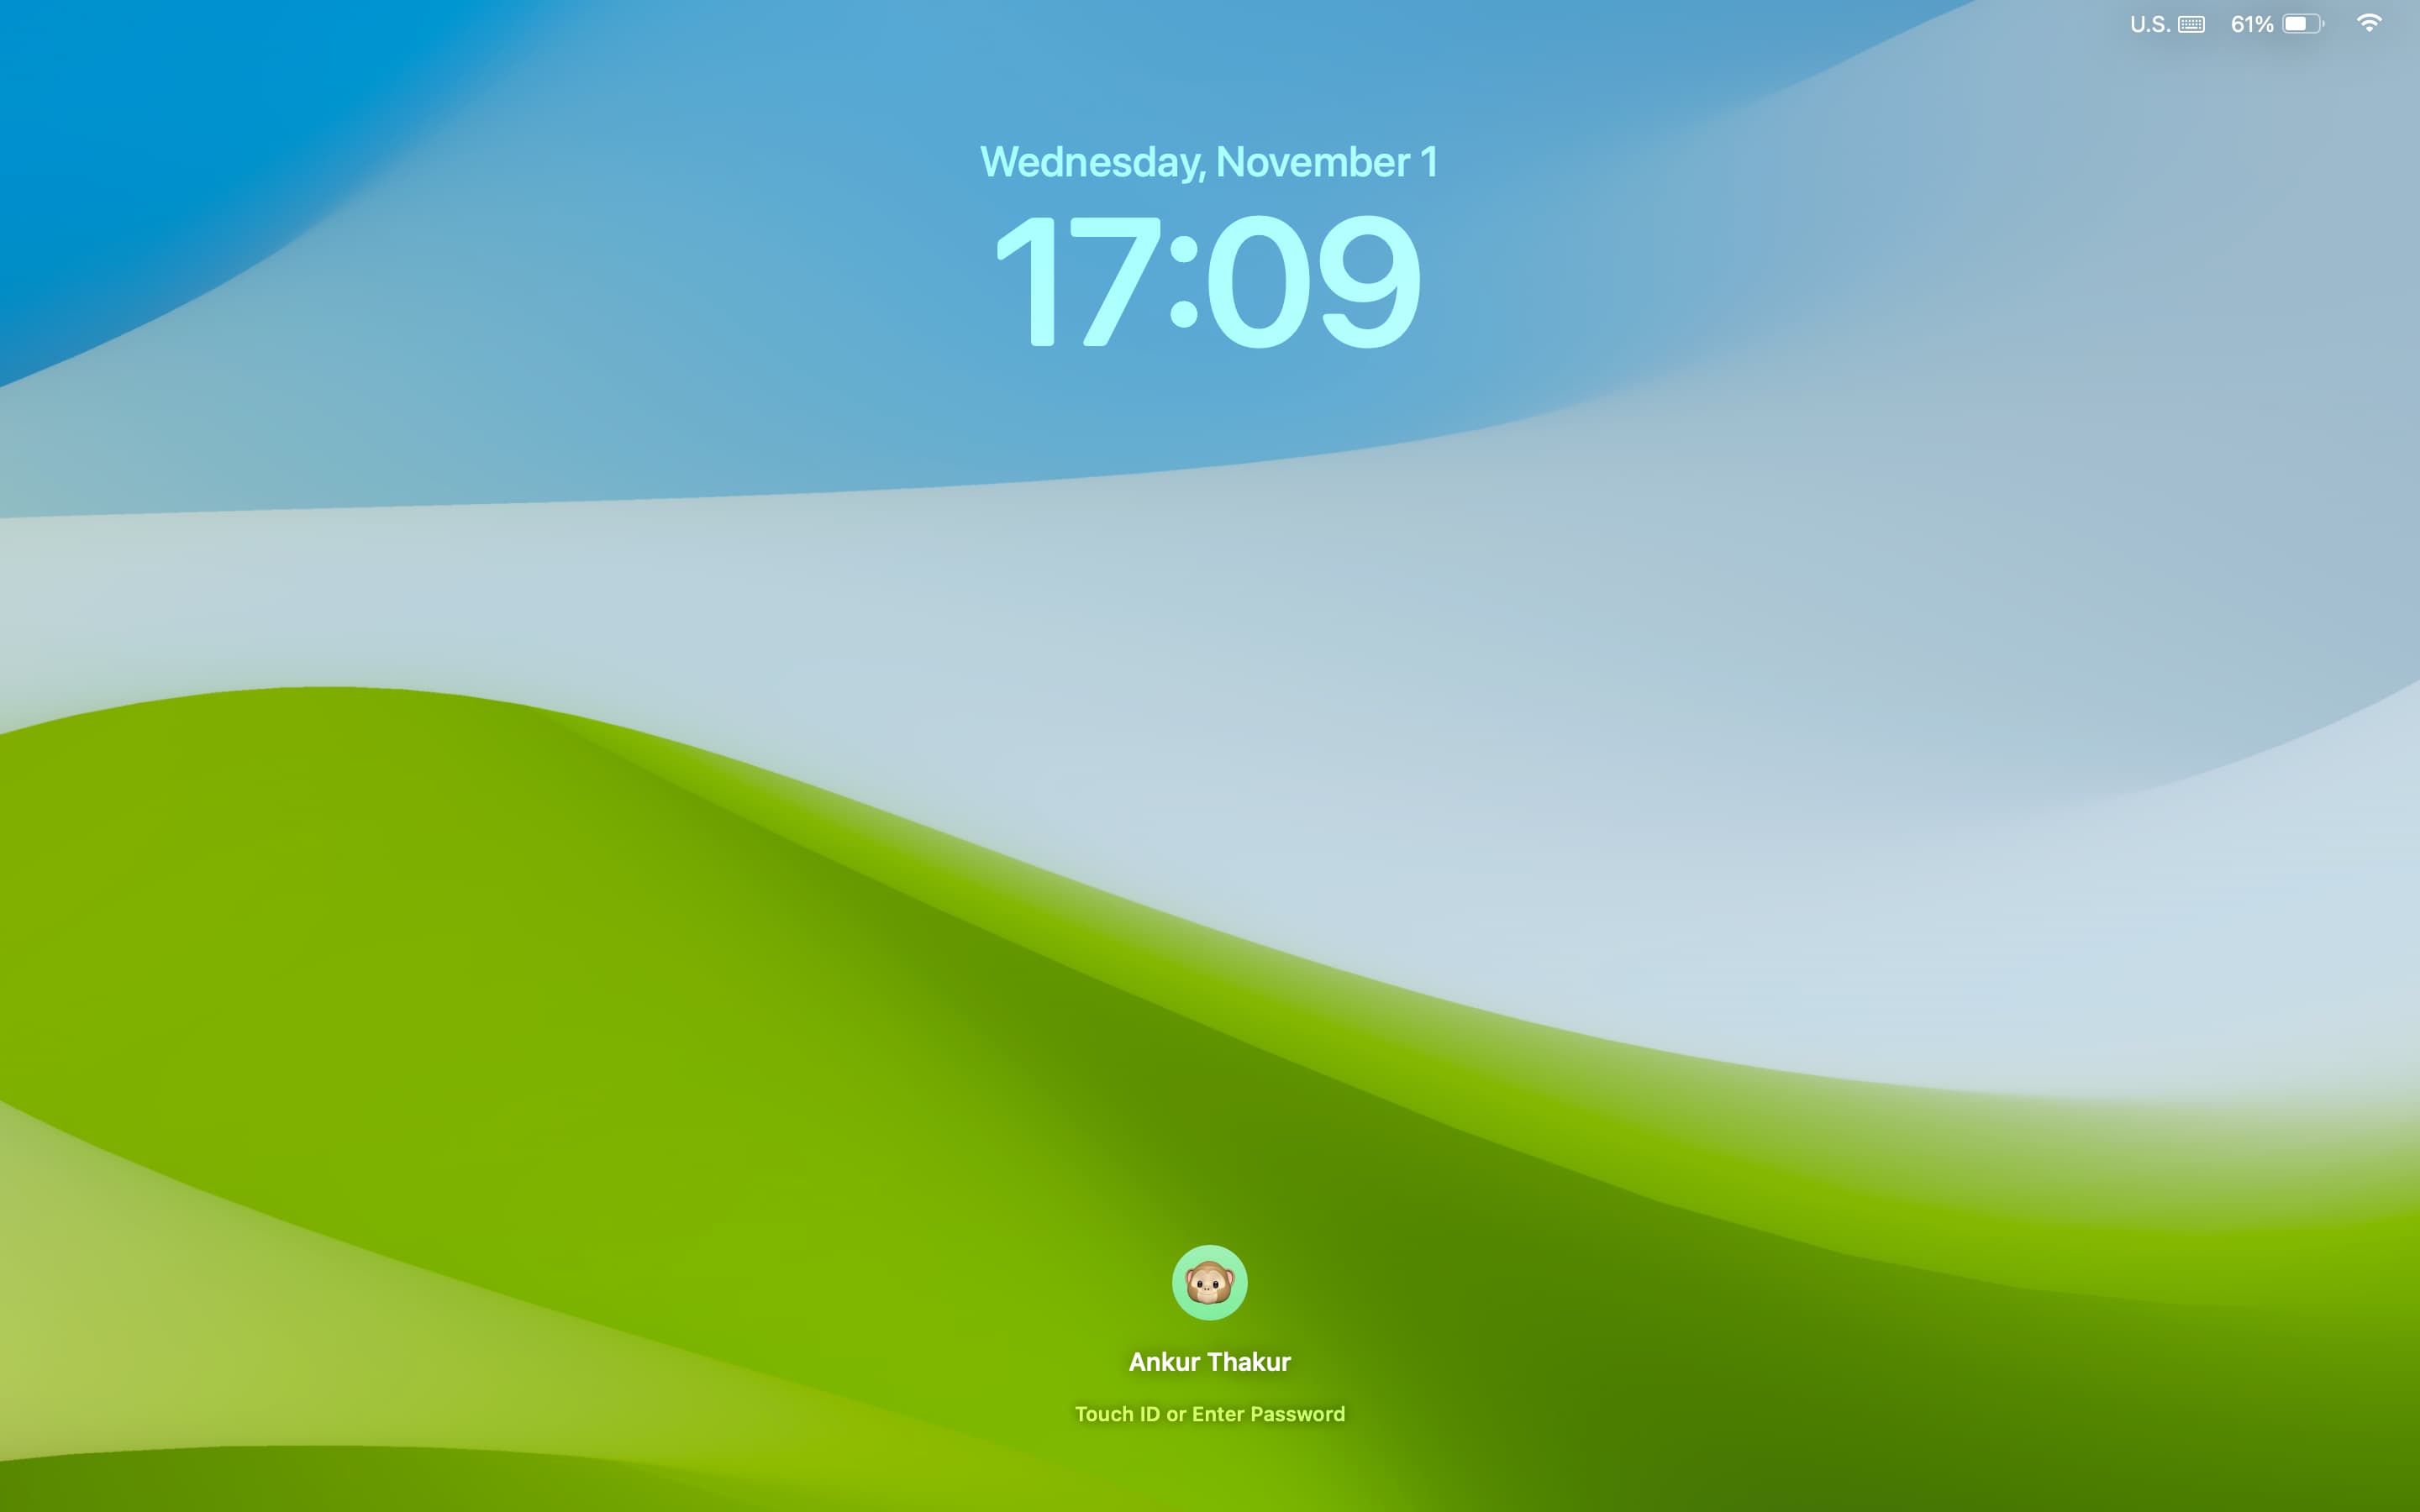
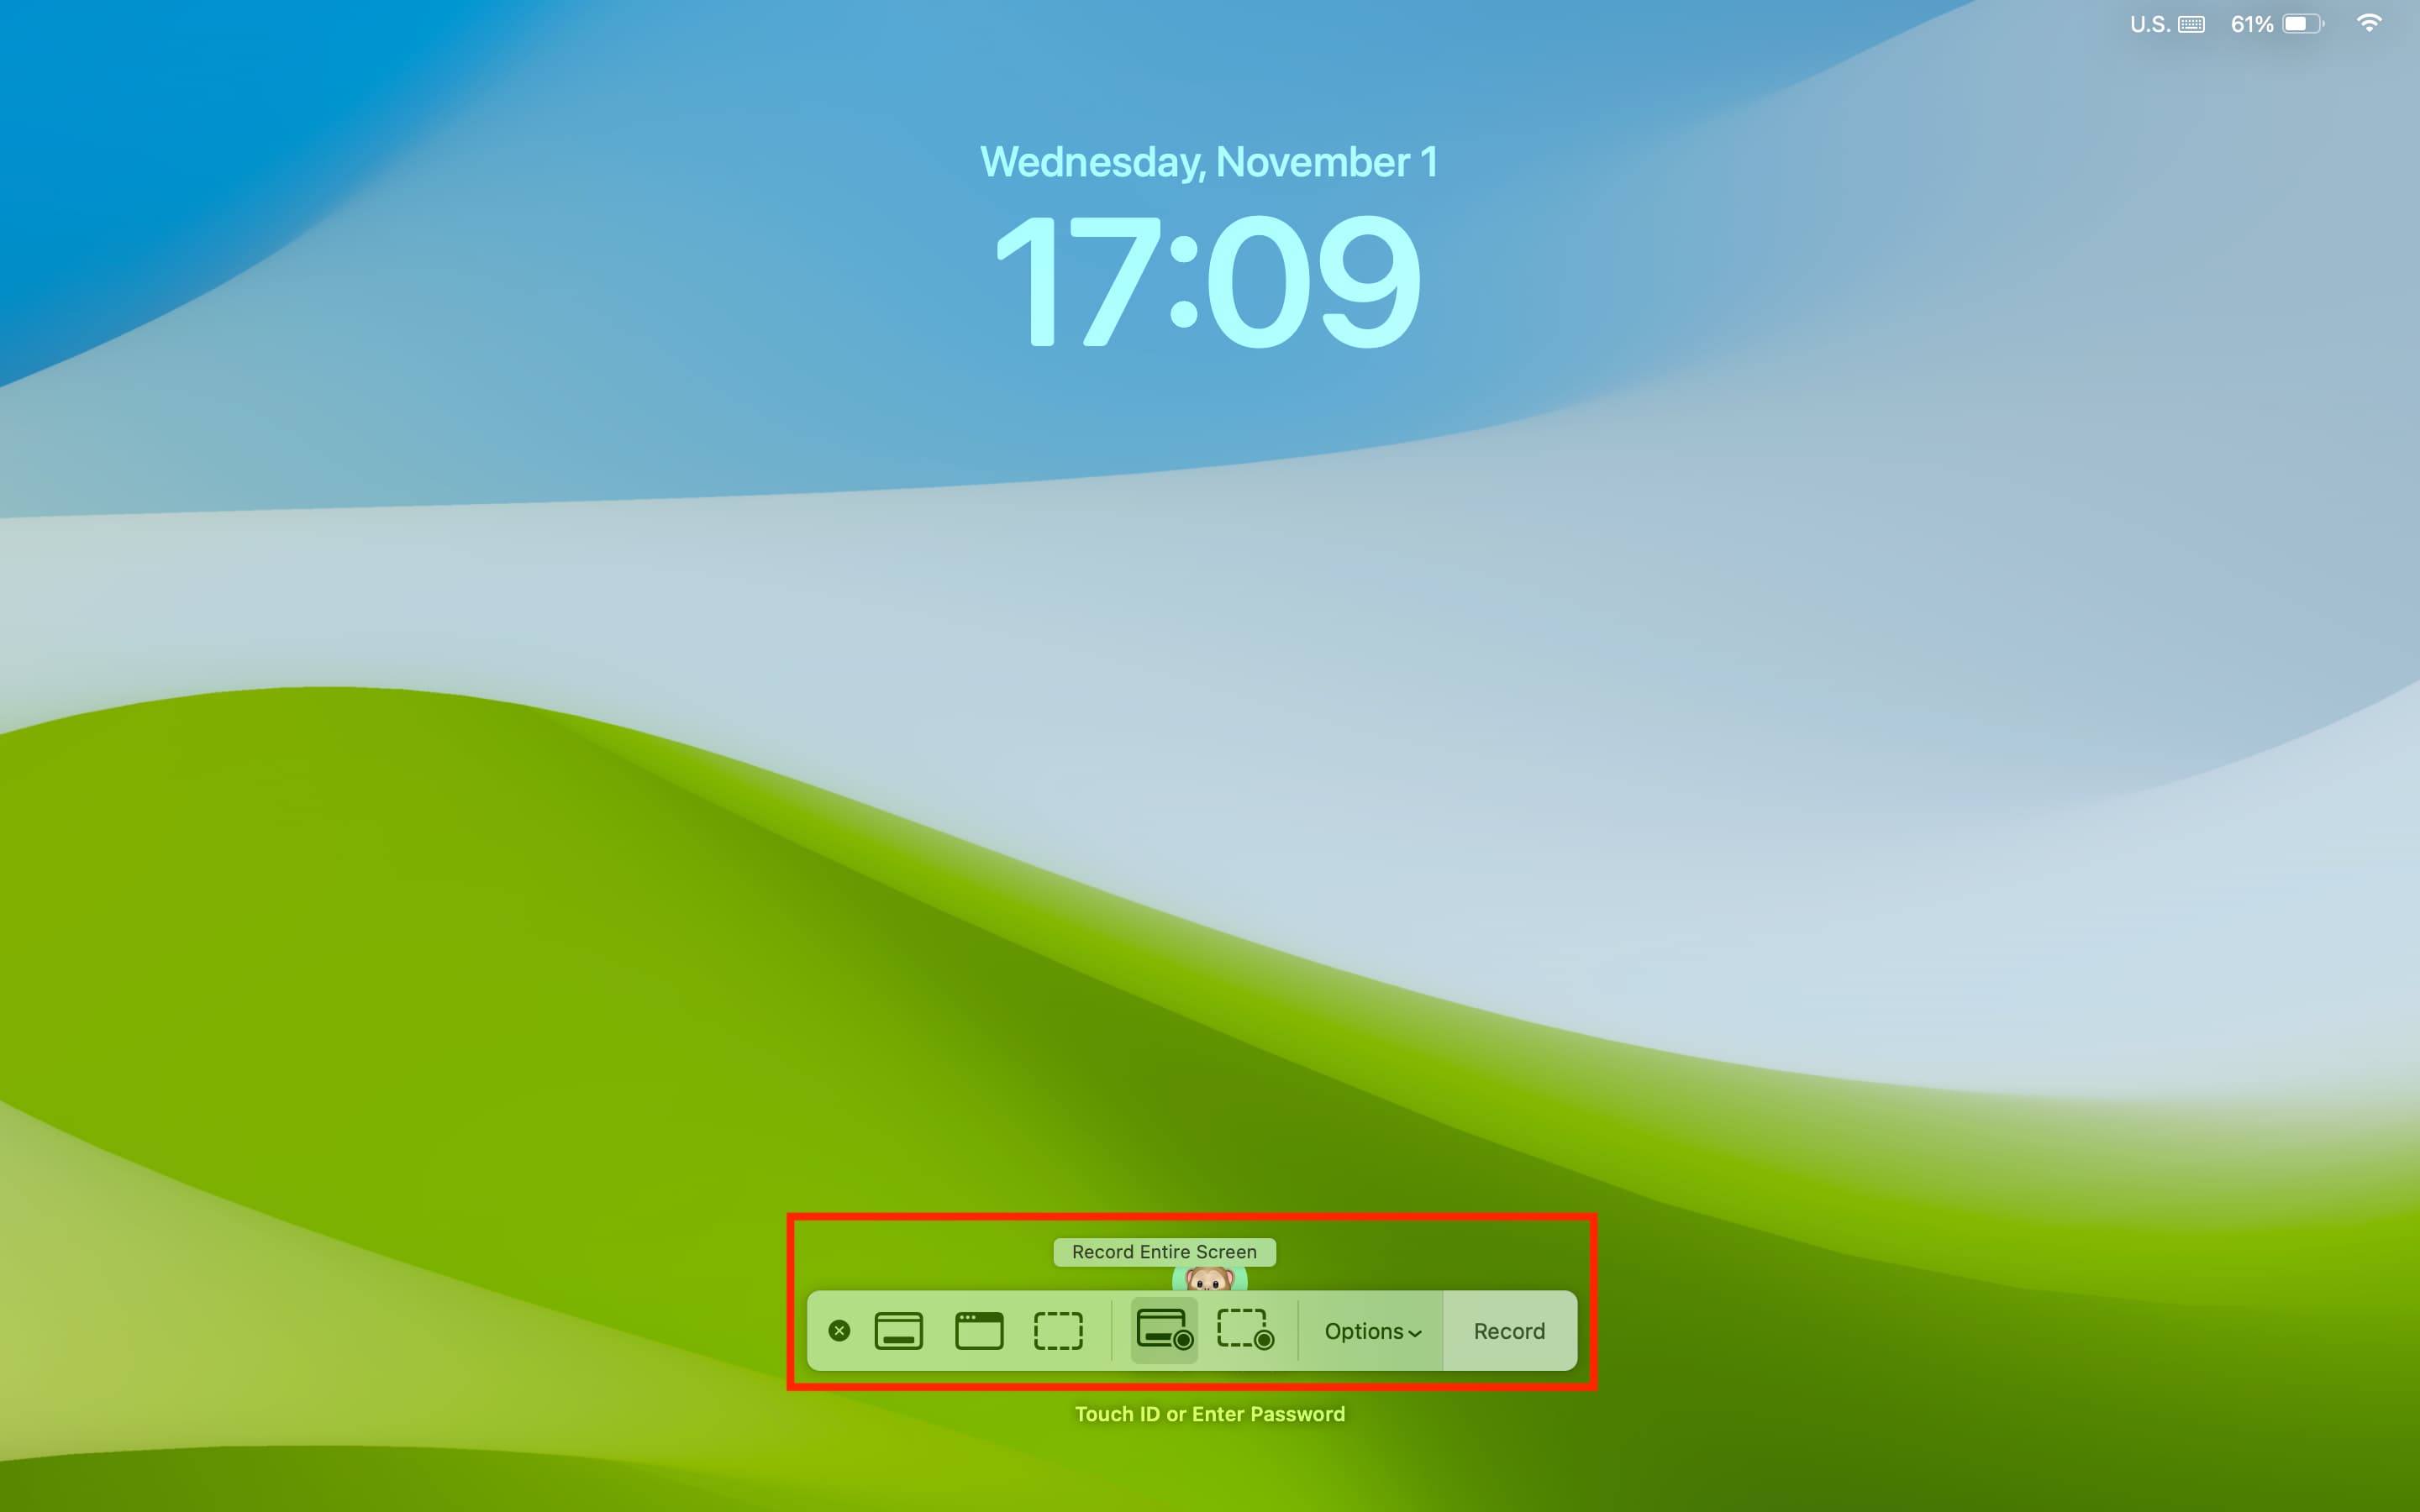
3) Move the trackpad cursor or hit a key if you selected the Sleep option and your Mac’s screen is all black. At this point, you should be on the Lock Screen, but you’re not technically logged out of your account either. You’re just looking at your Lock Screen while you’re still logged in. With that in mind, you’re in a perfect opportunity to snap a screenshot or make a screen recording because the file will be written to your user account.
Press the Command + Shift + 3 keyboard shortcut to take a screenshot. You can also use Command + Shift + 4 to take a screenshot of the selected area.
If you want to make a screen recording, press Command + Shift + 5 and use the screen record option there.
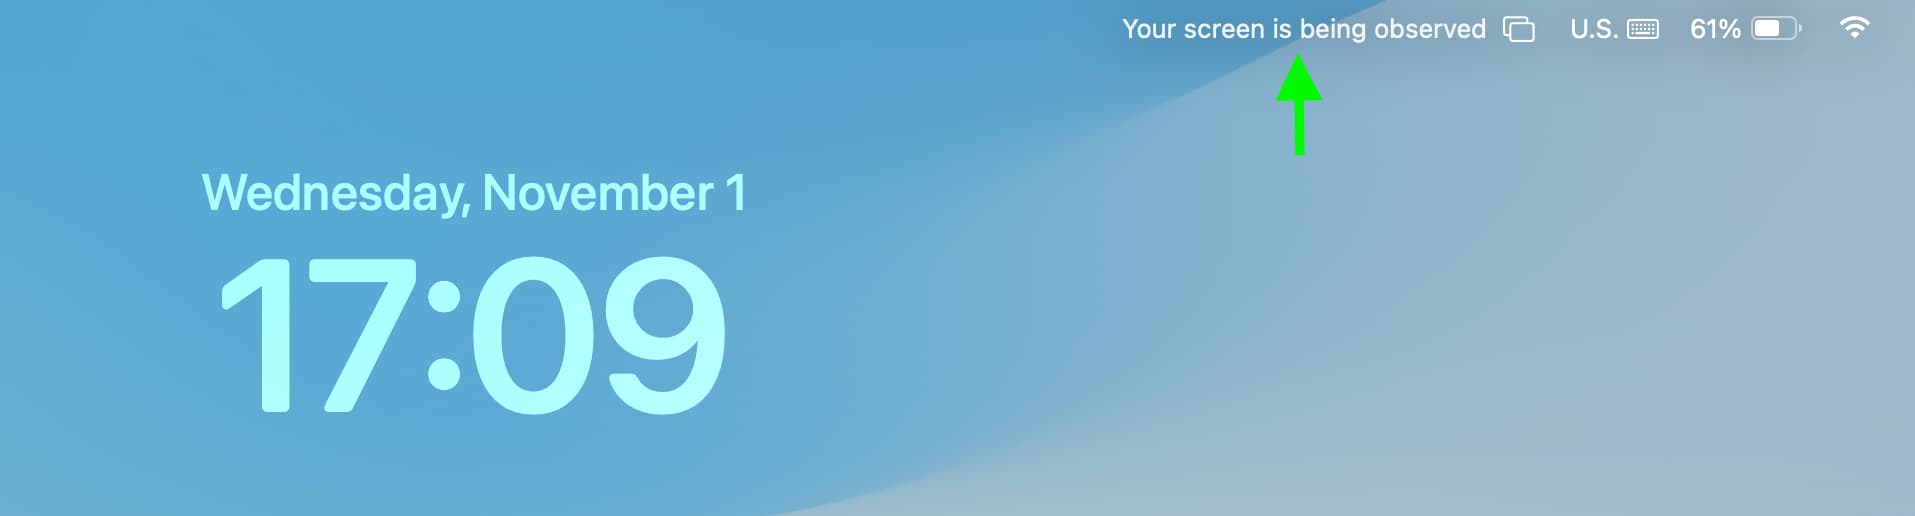
Once it starts, you’ll see the “Your screen is being observed” message in the top menu bar.
4) After you have taken the screenshot or started screen recording, use Touch ID or enter your Mac’s password to log back into your account again.
5) The screenshot should appear on your desktop within seconds if it’s not already there. And if you’re doing a screen recording, it will continue even after you’ve logged in. You can click the stop screen recording button in the top menu bar to end the recording and save the file.

Extra info: If you used the Lock Screen or Sleep option in Step 2, the screenshot file name will begin with Screenshot Date at Time.png. However, if you used the Log Out option, the screenshot file name would be LWScreenShot Date at Time.png.
On a related note: