Downloading and saving files or documents to a computer is something we don’t think about. Click, click, done. It’s saved on the hard drive and ready to be accessed when needed. On iOS, it can get a little more complicated than that.
How do I download a file to my iPhone? Where do I download it to? These are questions I’ve recently been asked, but also problems I have faced myself. In this article, I’ll try to share different options for you to download files to iPhone or iPad.
Where to download files on an iPhone or iPad
Apple has made the lack of an accessible file system a little easier to swallow over the past couple of years, specifically with the expansion of iCloud services but also with the Files app, a front-facing app for most files stored in iCloud and locally on your device.
Apple has also opened things up to third-party applications. Dropbox is probably the most familiar name in the space. Google Drive is also a popular option, and for those users who have limited iCloud storage, these two services might be the best options for downloading files.
Related: How to use Google Drive, Dropbox, etc., in Files app on iPhone and iPad
In this post, we’ll be working with the Files app, also called iCloud Drive, but the principle is the same regardless of the service you’ll use. All the screenshots will be from an iPhone, but again, the basic principles are identical regardless of the iOS device you’re using, be it an iPhone, iPad, or iPod touch. We are using the Files app because this is a stock application that comes with all iPhones and iPads.
How to download files to iPhone and iPad
The basic principle of downloading files to an iPhone or iPad is fairly simple, regardless of the file you’re trying to download. You can for example download PDFs, Word, Excel, PowerPoint, .zip, .txt, .mp3, .M4a, .wav, .mov, and much more. If it’s a file, it can be downloaded.
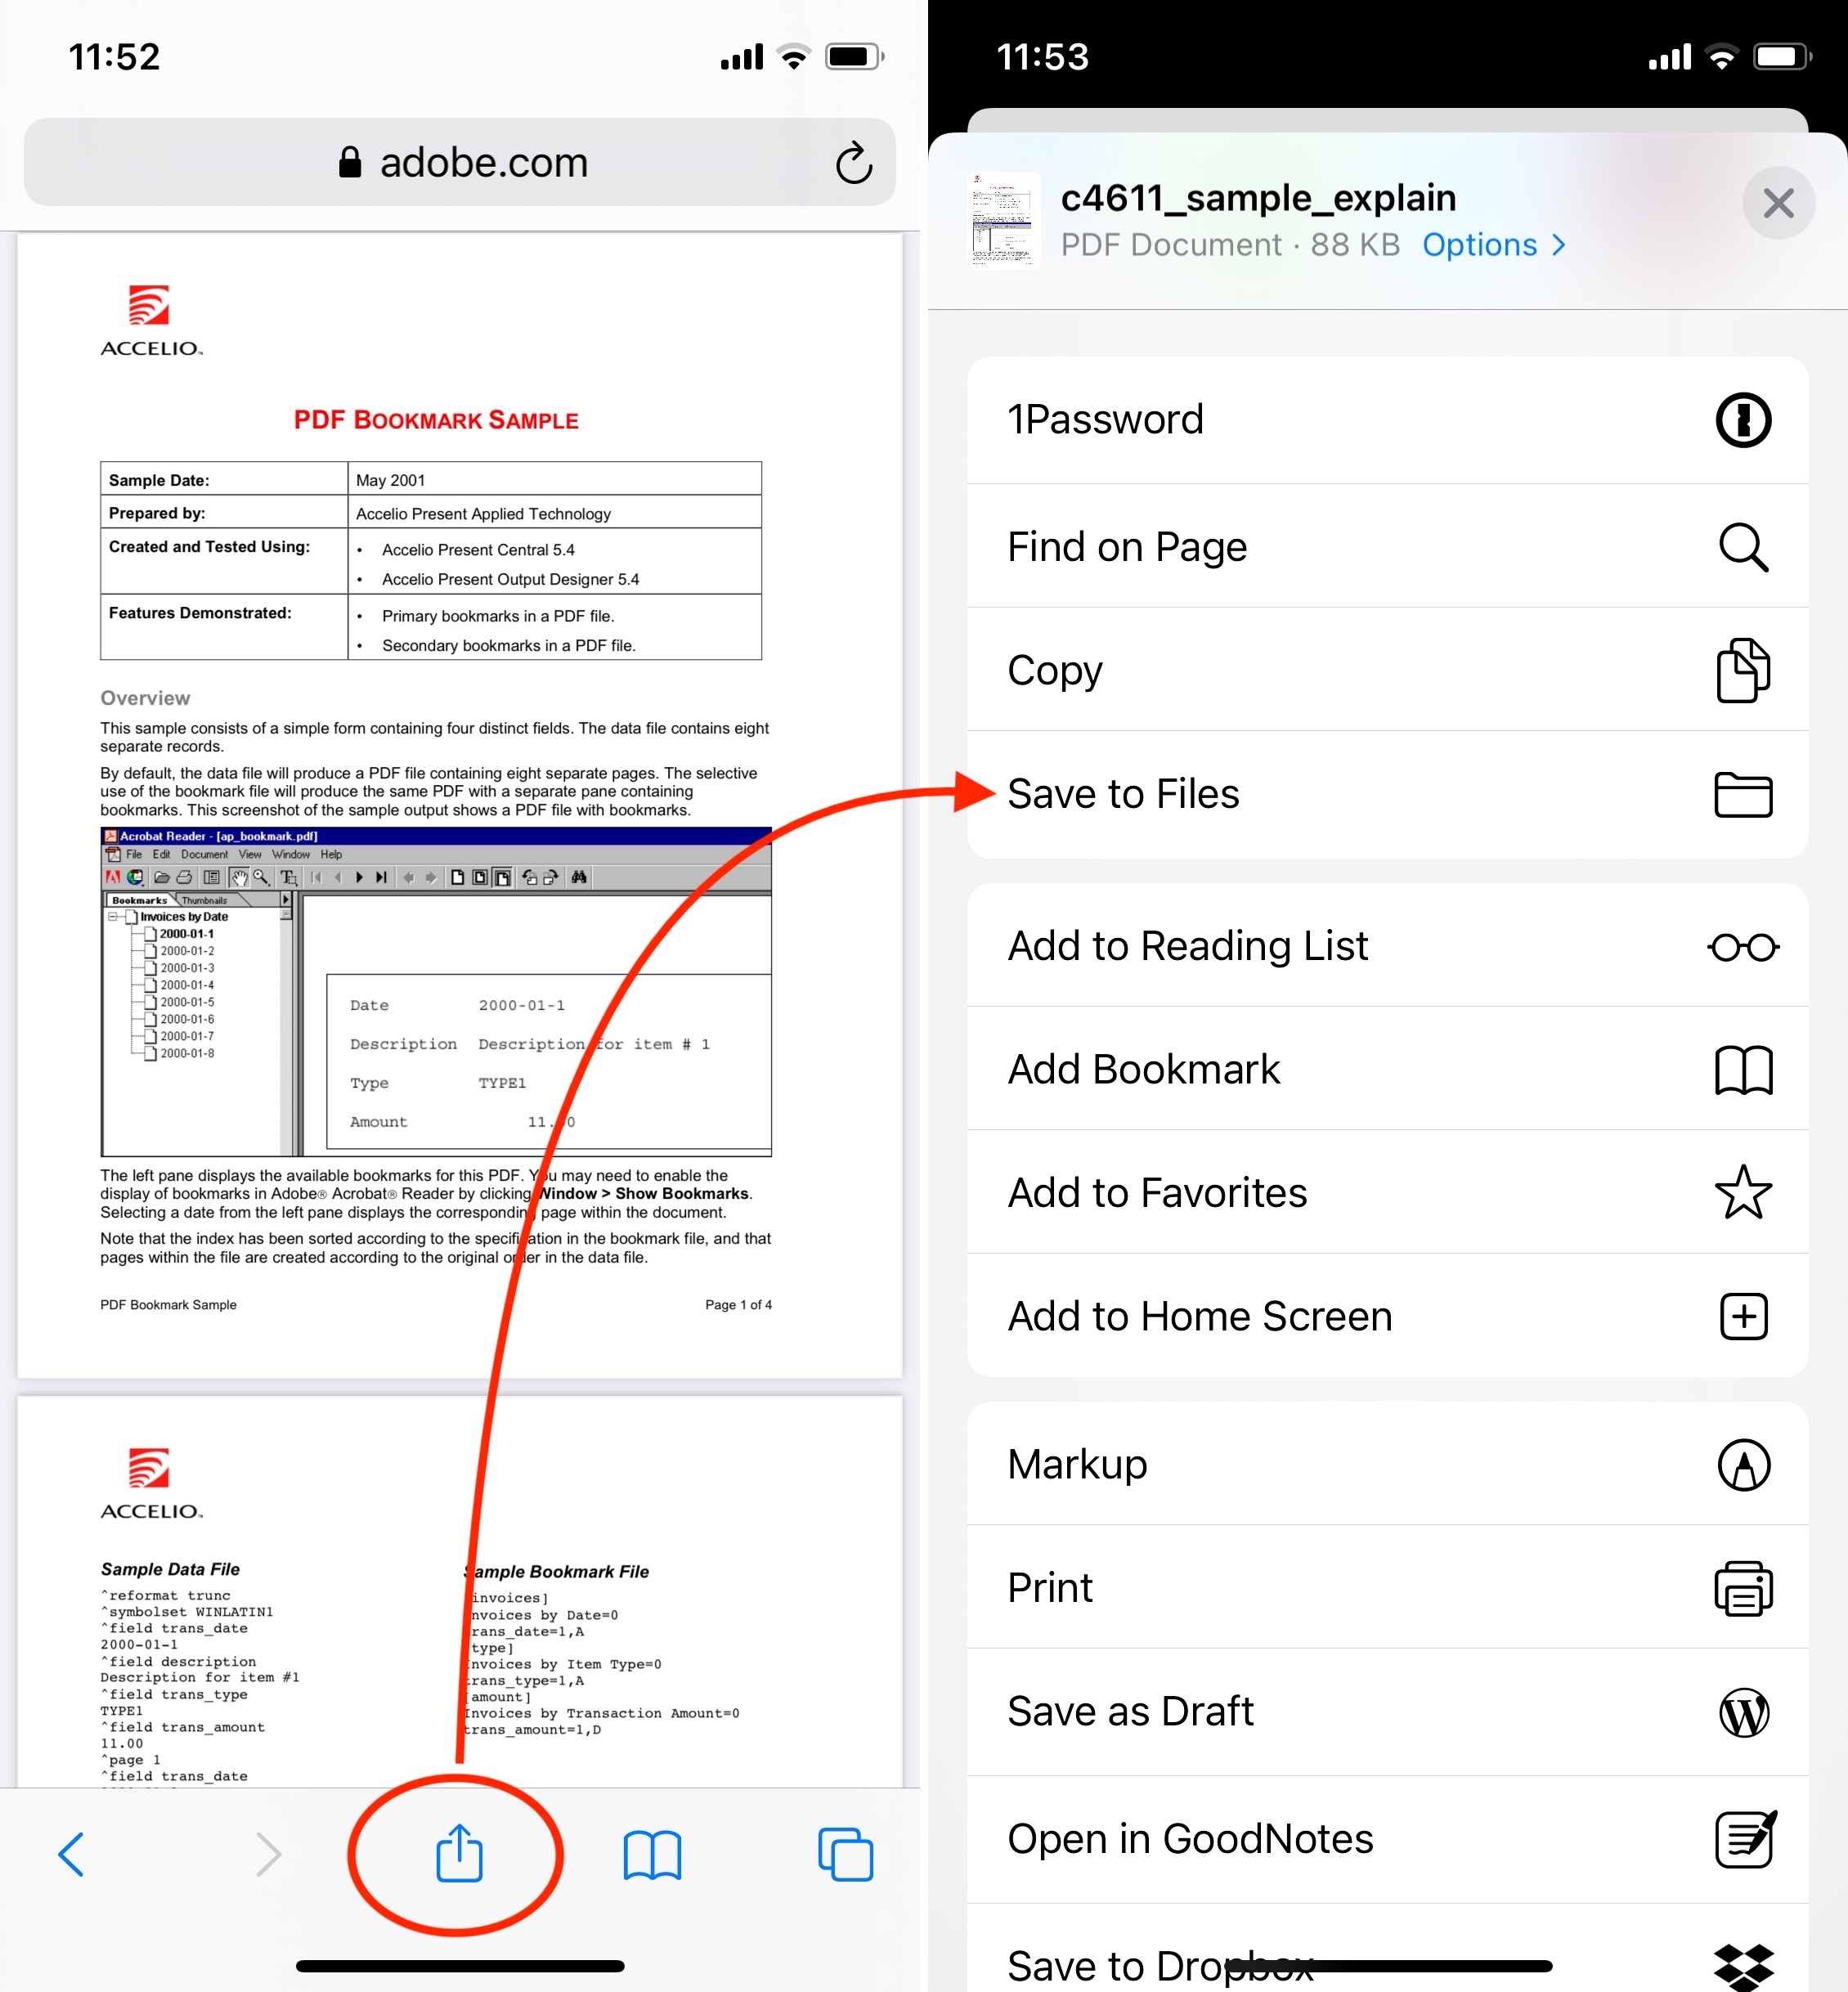
1) On your iPhone or iPad, go to Safari and open the file you are trying to download. In this example, we are trying to download a PDF file.
2) Tap the share button, which will bring up the Share Sheet.
3) Select Save to Files. If you don’t see that option, swipe all the way down and tap on the Edit Actions button. From there, you will be able to enable the Files extension.
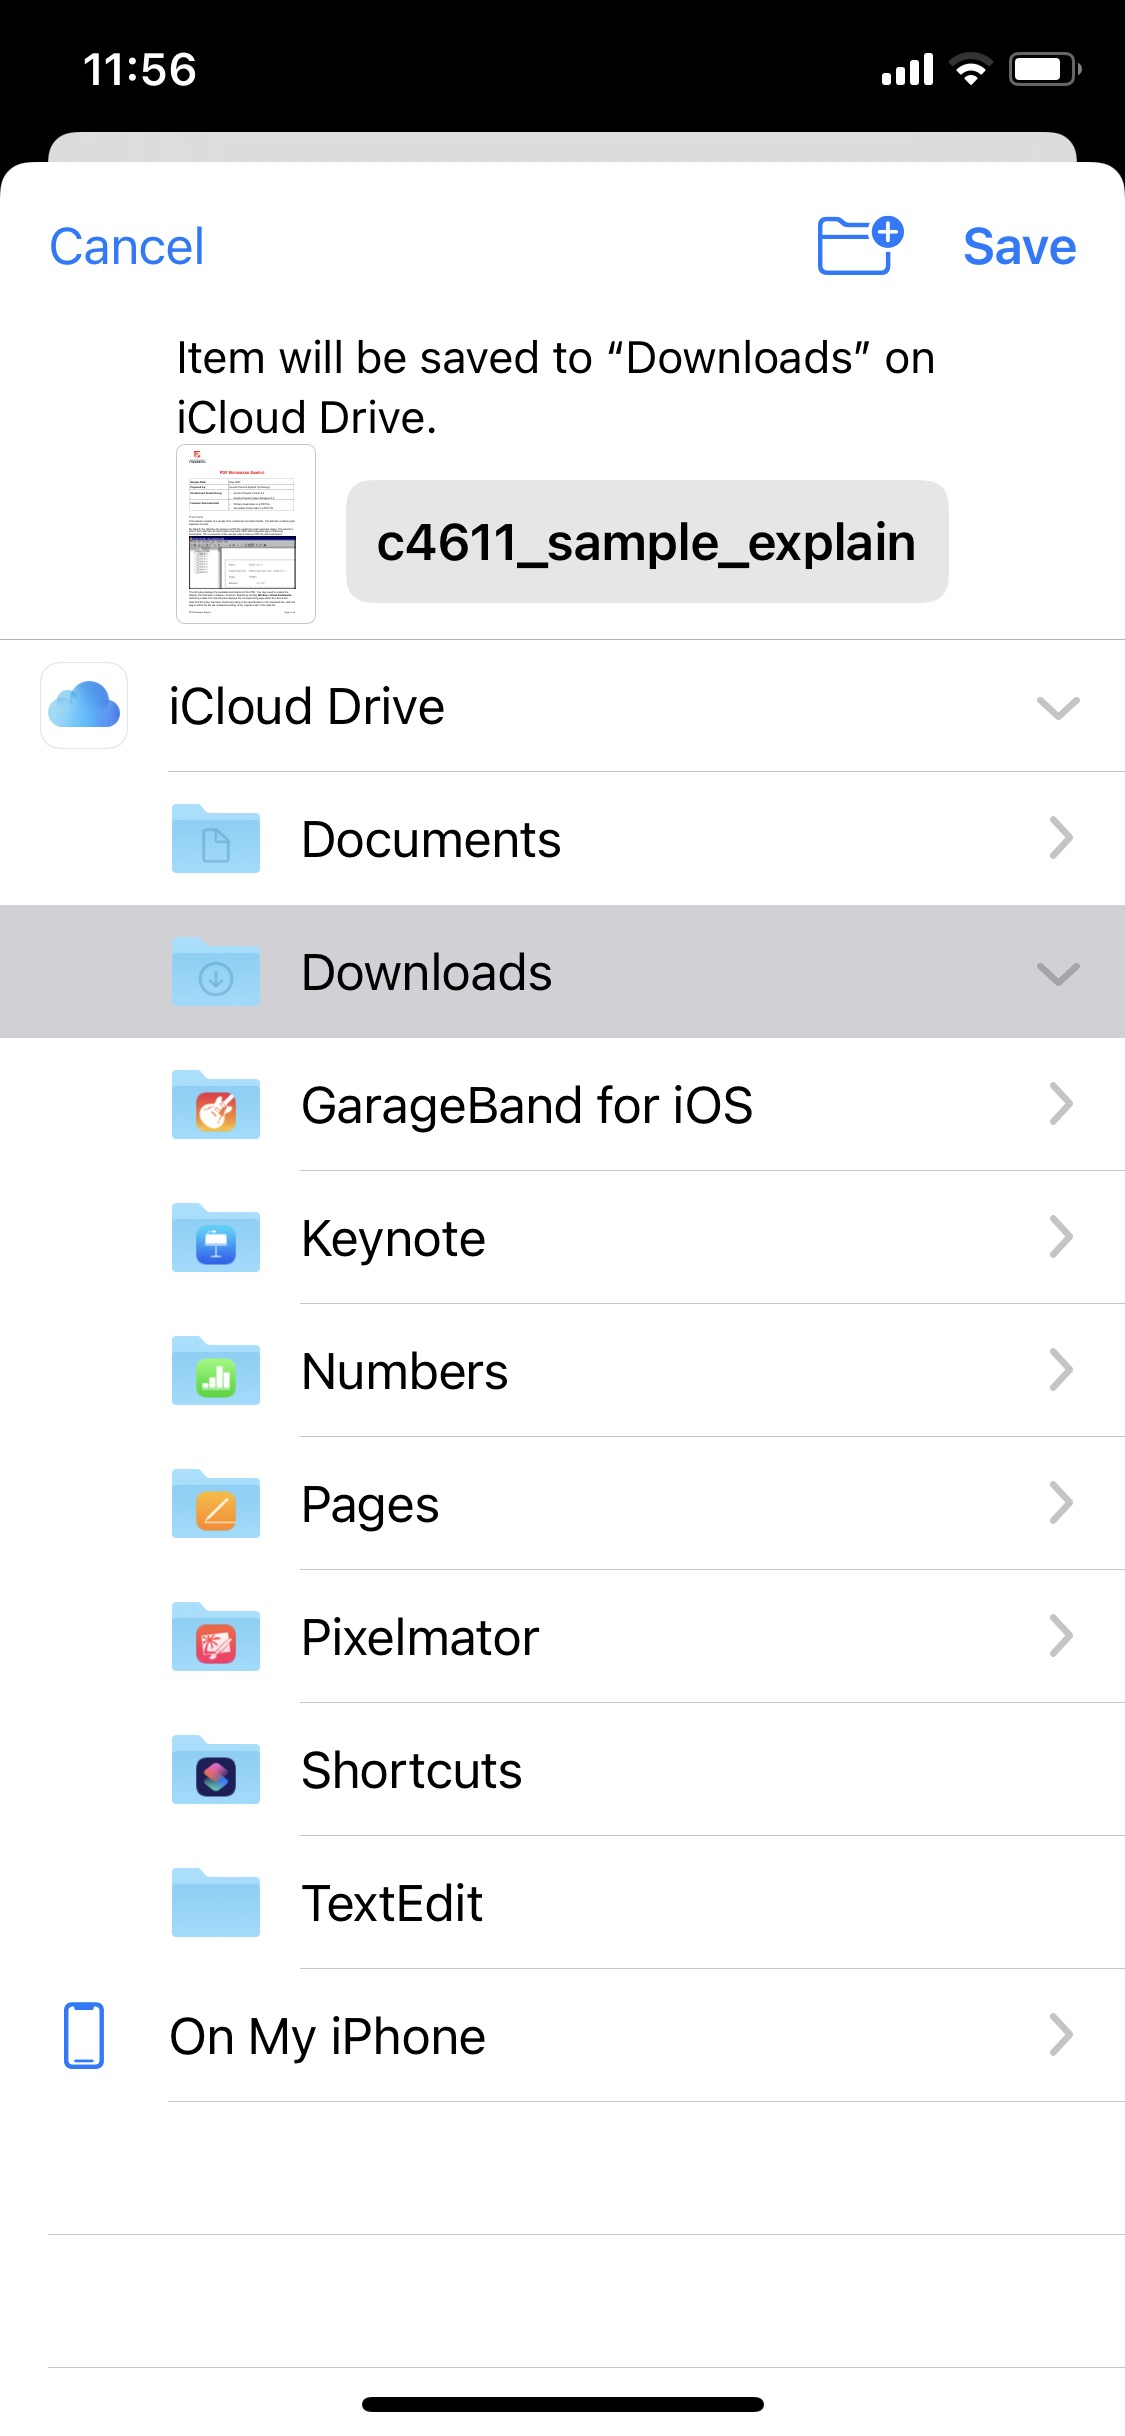
4) At this point, you may rename the file and select a specific location before saving it. Personally, I like to save my downloaded files in the Downloads folder, so this is the folder I will select. Now tap the Save button.
That’s it. The file is now in your iCloud Drive and will be available for easy access across all your devices, such as your computer, your iPhone, iPad, etc.
Once it’s in iCloud Drive (or Dropbox, Google Drive, or whatever other services you may use), you can easily access and share this file from anywhere, assuming you have an Internet connection. If you don’t, you can make specific files available offline.
If your iPhone won’t let you download specific file formats to iCloud Drive, then use Documents 5, as I explain below.
Download files from a password-protected website
The steps mentioned above work great if the file you are trying to download is available publicly from a website. But things can get a little tricky if you are trying to download a file or document that is stored on a password-protected website.
If that’s the case, we’ll need to use another third-party application to do the job. That application is called Documents 5, and it’s free to download from the App Store.
Documents 5 is an amazing application that is primarily a file manager, but it’s more powerful than it sounds. Here is how to use it to download a file from a password-protected site:
1) Launch Documents 5 and open the app’s browser (the button in the lower right corner).
2) Log in to whatever website you need to use to download a file or document.
3) Locate the file you want to download and tap on it to load it.
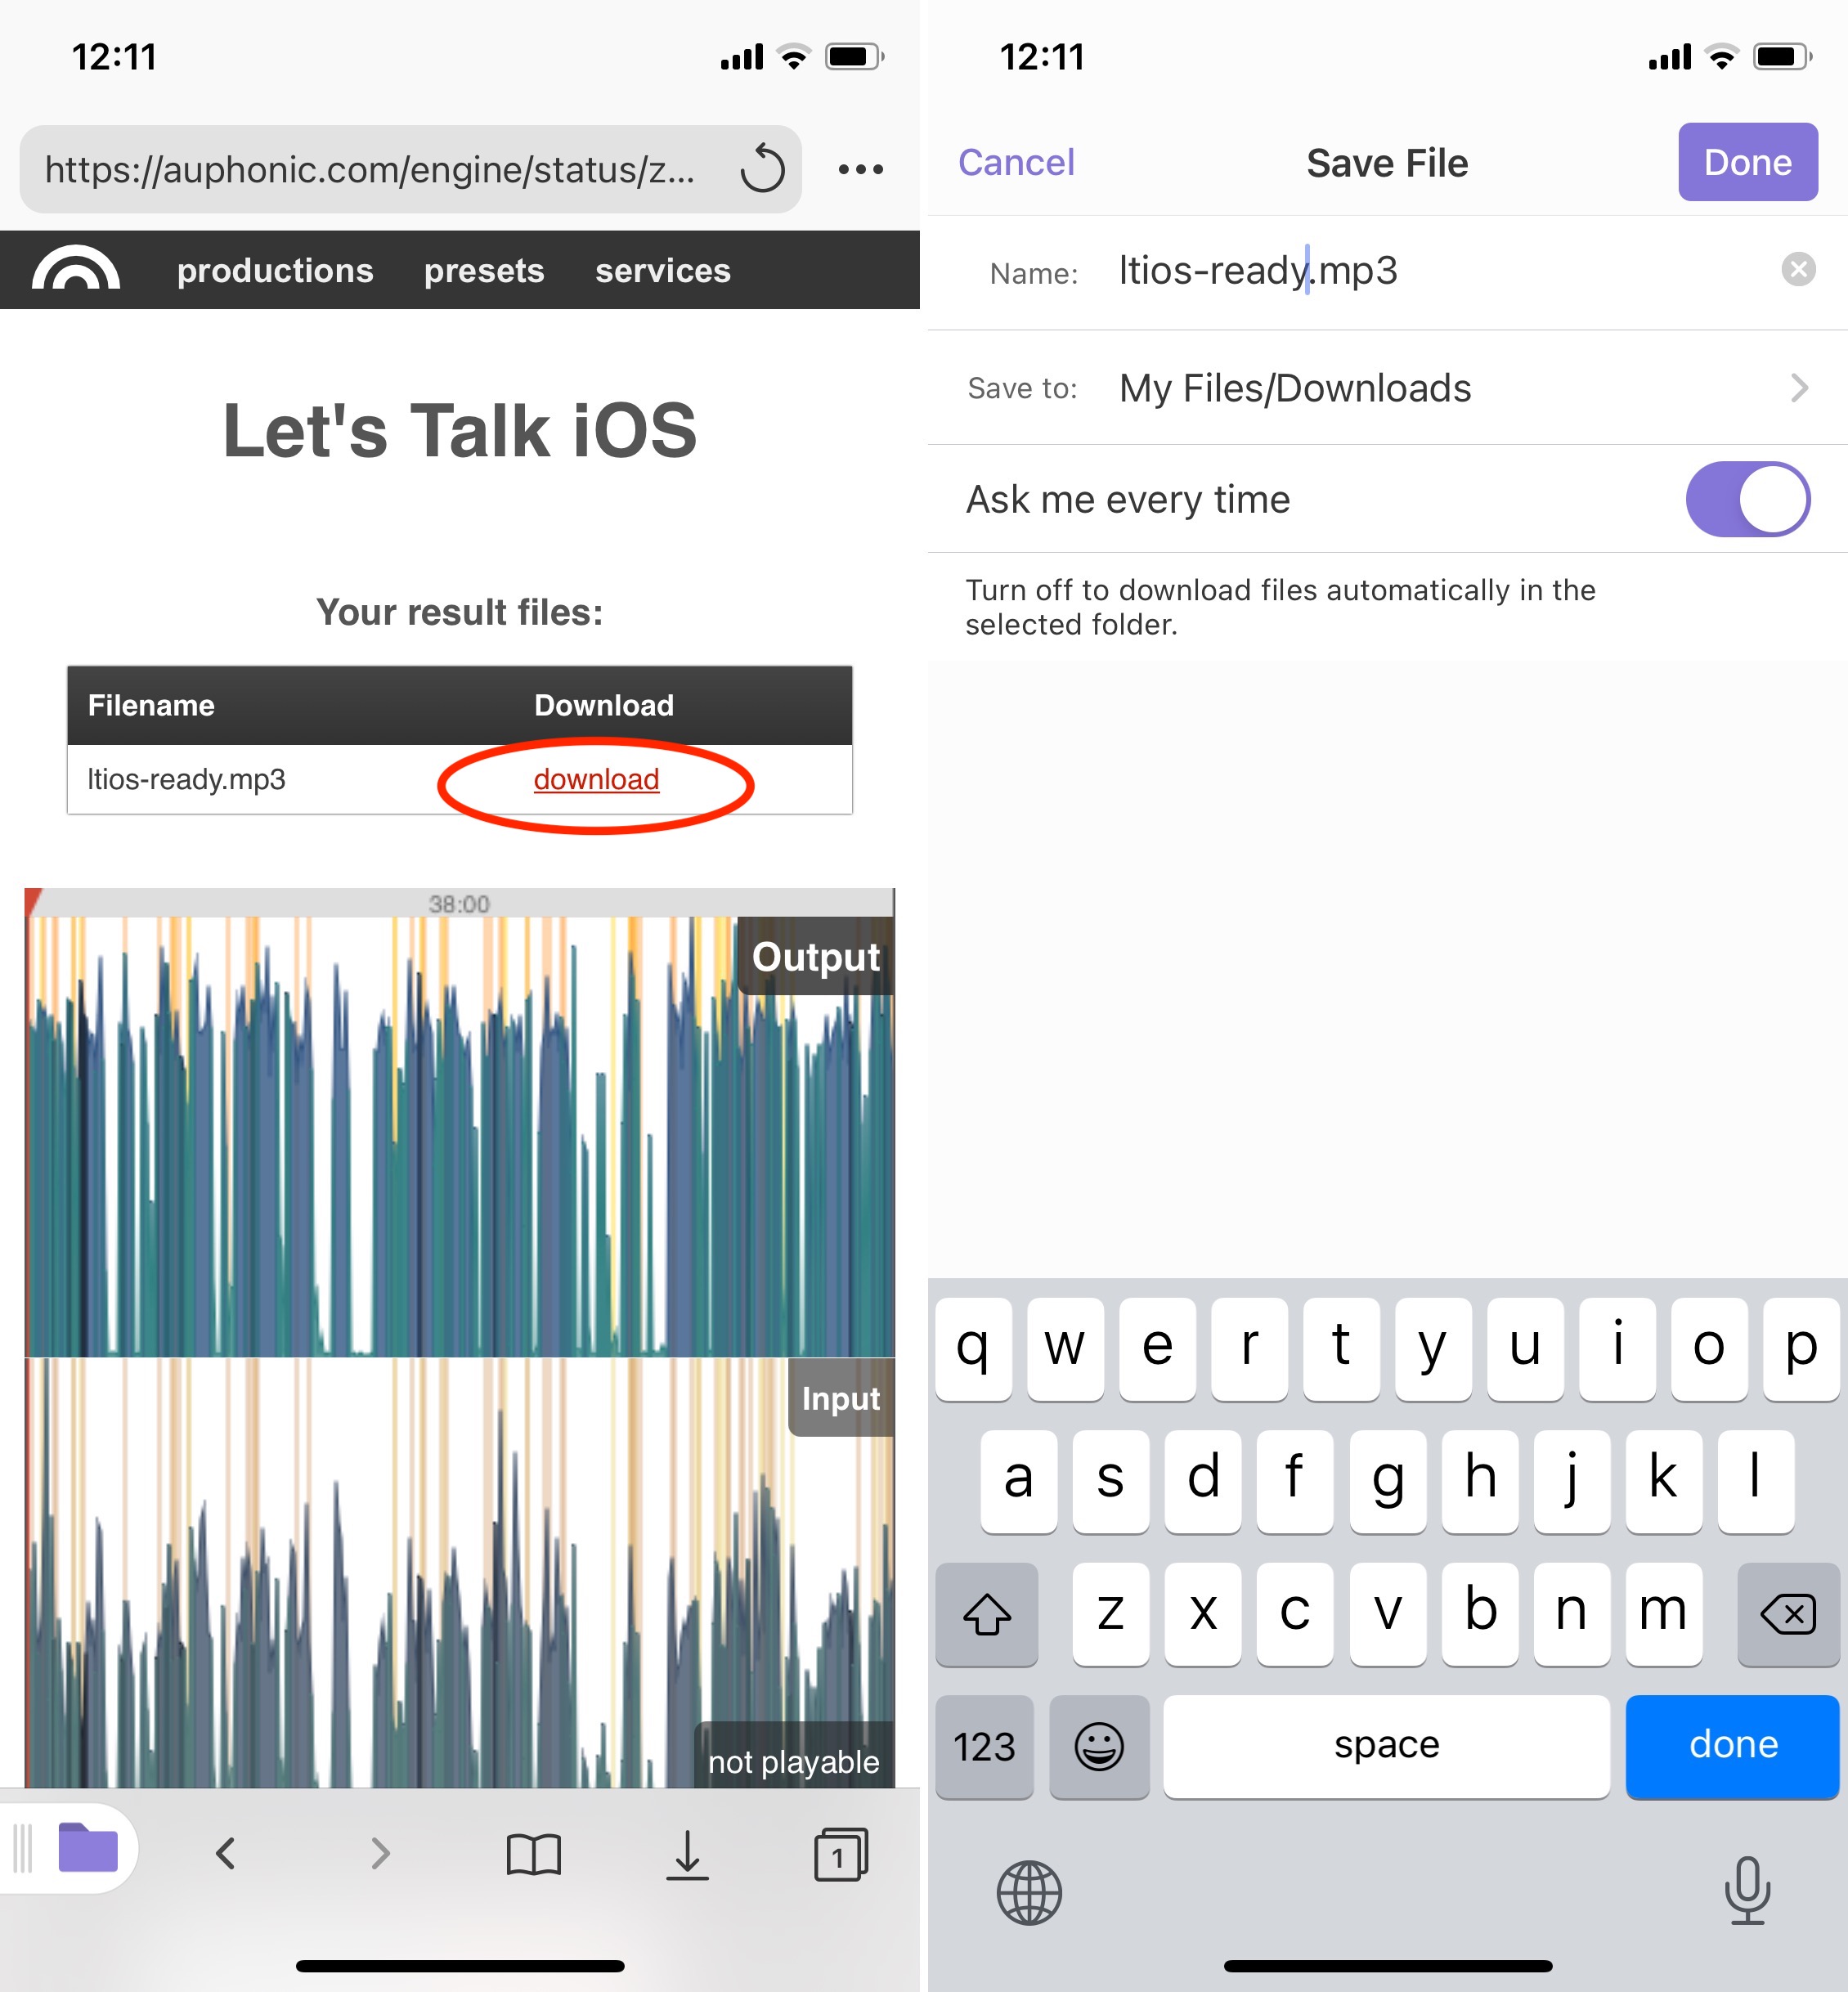
4) The Documents app will automatically prompt you to save that file. From there, you can change the name of the document and select its destination, either locally to the default My Files/Downloads folder of Documents 5 or to iCloud. Tap Done when ready to save the document.
If you choose to download the file to the My Files/Downloads folder, then the file will be stored locally on your device. From Documents 5, you will then be able to move it to iCloud or Dropbox, or Google Drive, for example. You will also be able to share it via email.
Why Documents 5 is a must-have application
Despite the fact that it is completely free, Documents 5 is a great application to have if you’re handling files on your iPhone or iPad. It makes downloading and moving files around a breeze.
Because it can tie into various cloud services and let you access and move files between them, Documents 5 can be the central location for all your file handling needs. Documents 5 can even let you move files around folders and cloud services by using a drag and drop gesture. This makes file handling almost as simple as it would be on a desktop computer. To move a file, simply tap and hold your finger on it, then drag it to your destination of choice. It can be a folder or a cloud service such as iCloud, Dropbox, etc.
Check out next: