
Saurik has officially updated Cydia Eraser this week with support for iOS 9.3.3, which means anyone who jailbroke with the Pangu jailbreak tool now has a way to un-jailbreak their devices without using iTunes to restore and update their device.
In this tutorial, we’ll show you how and why to use Cydia Eraser to un-jailbreak your iOS 9.3.3 device.
Why use Cydia Eraser instead of iTunes?
If you want to remove your iOS 9.3.3 jailbreak, you have two choices: 1) use iTunes, or 2) use Cydia Eraser. Preferably, option 2 is better, and here’s why…
When Apple stops signing iOS 9.3.3, which is going to be soon because iOS 9.3.4 was just released, iTunes is going to force you to install iOS 9.3.4 if you try restoring through iTunes. This means that when you unjailbreak your device with iTunes in the near future, you aren’t going to be able to re-jailbreak it again.
Another factor to keep in mind is that if you’re un-jailbreaking your device so you can sell it, restoring it to factory settings on a jailbreakable firmware may increase the value of the device if sold to the right buyer.
Both Cydia Eraser and iTunes are going to put you on the “Hello” screen where you have to set up your device like you did for the first time when you bought it, but only Cydia Eraser is going to let you restore back to a fresh installation of the jailbreakable firmware that you have without forcing you to update when Apple stops signing the iOS 9.3.3 firmware.
So without further ado, if you want to know how Cydia Eraser works, let’s get right into it!
How to use Cydia Erase to un-jailbreak
If you’re ready to un-jailbreak your iOS 9.3.3 device and put yourself back at an out-of-the-box iOS 9.3.3 feeling once more, you can follow these steps:
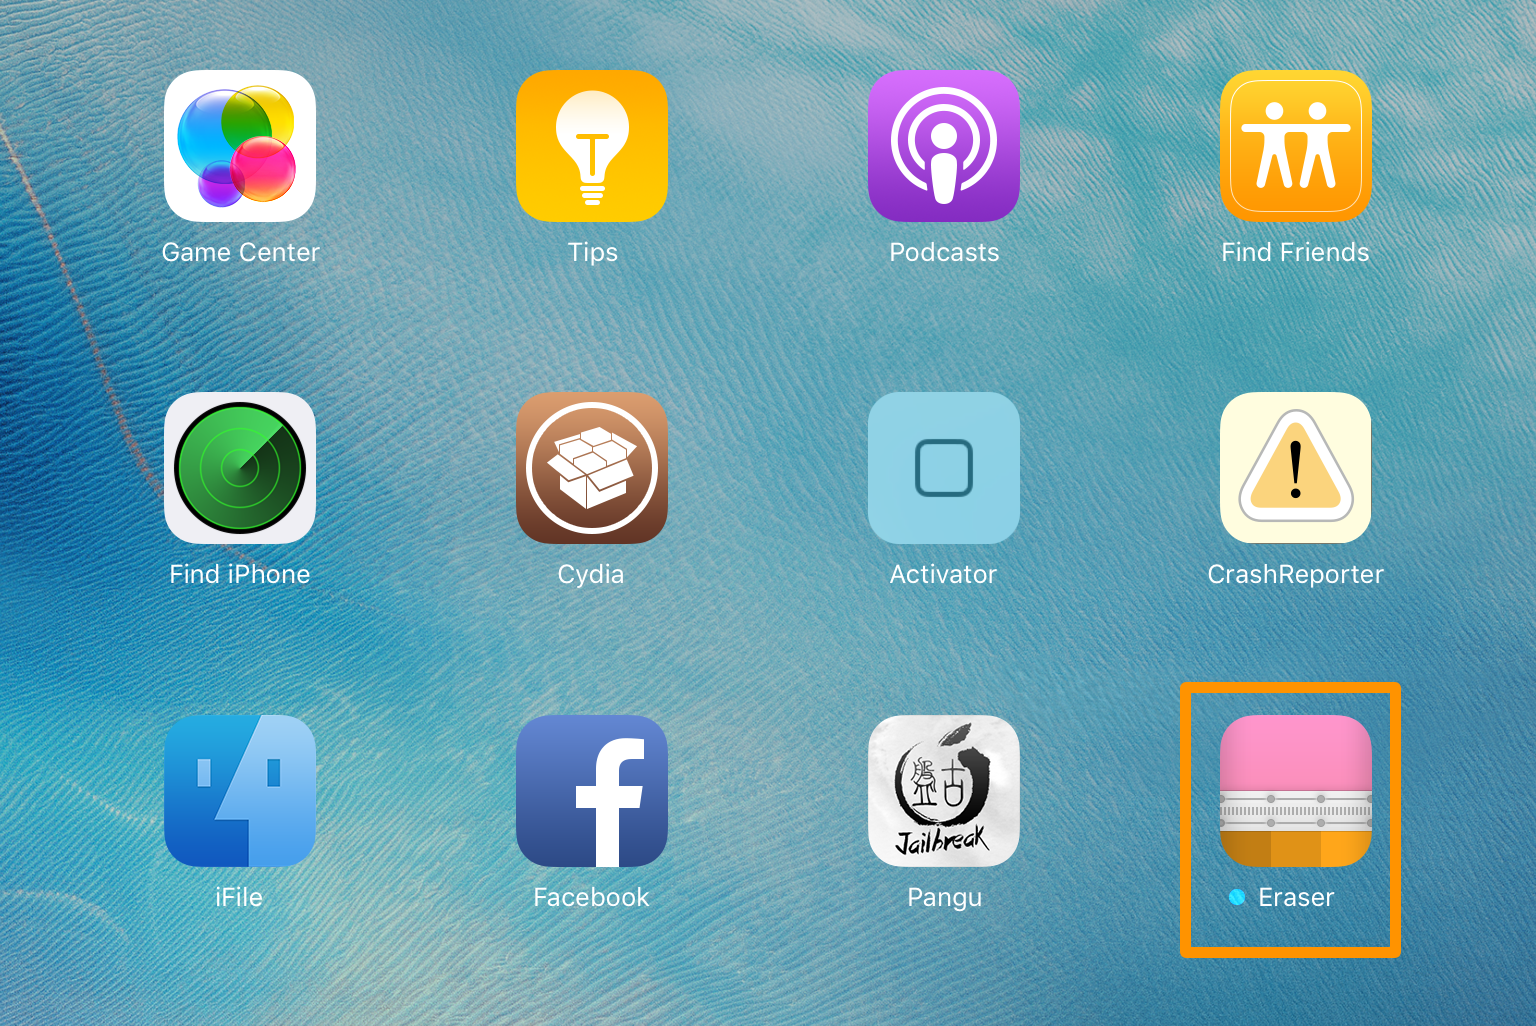
1) Download and install Cydia Eraser from Cydia.
2) Launch Cydia Eraser from the Home screen.
3) Tap on the red erase all data, unjailbreak device button at the bottom of the app.
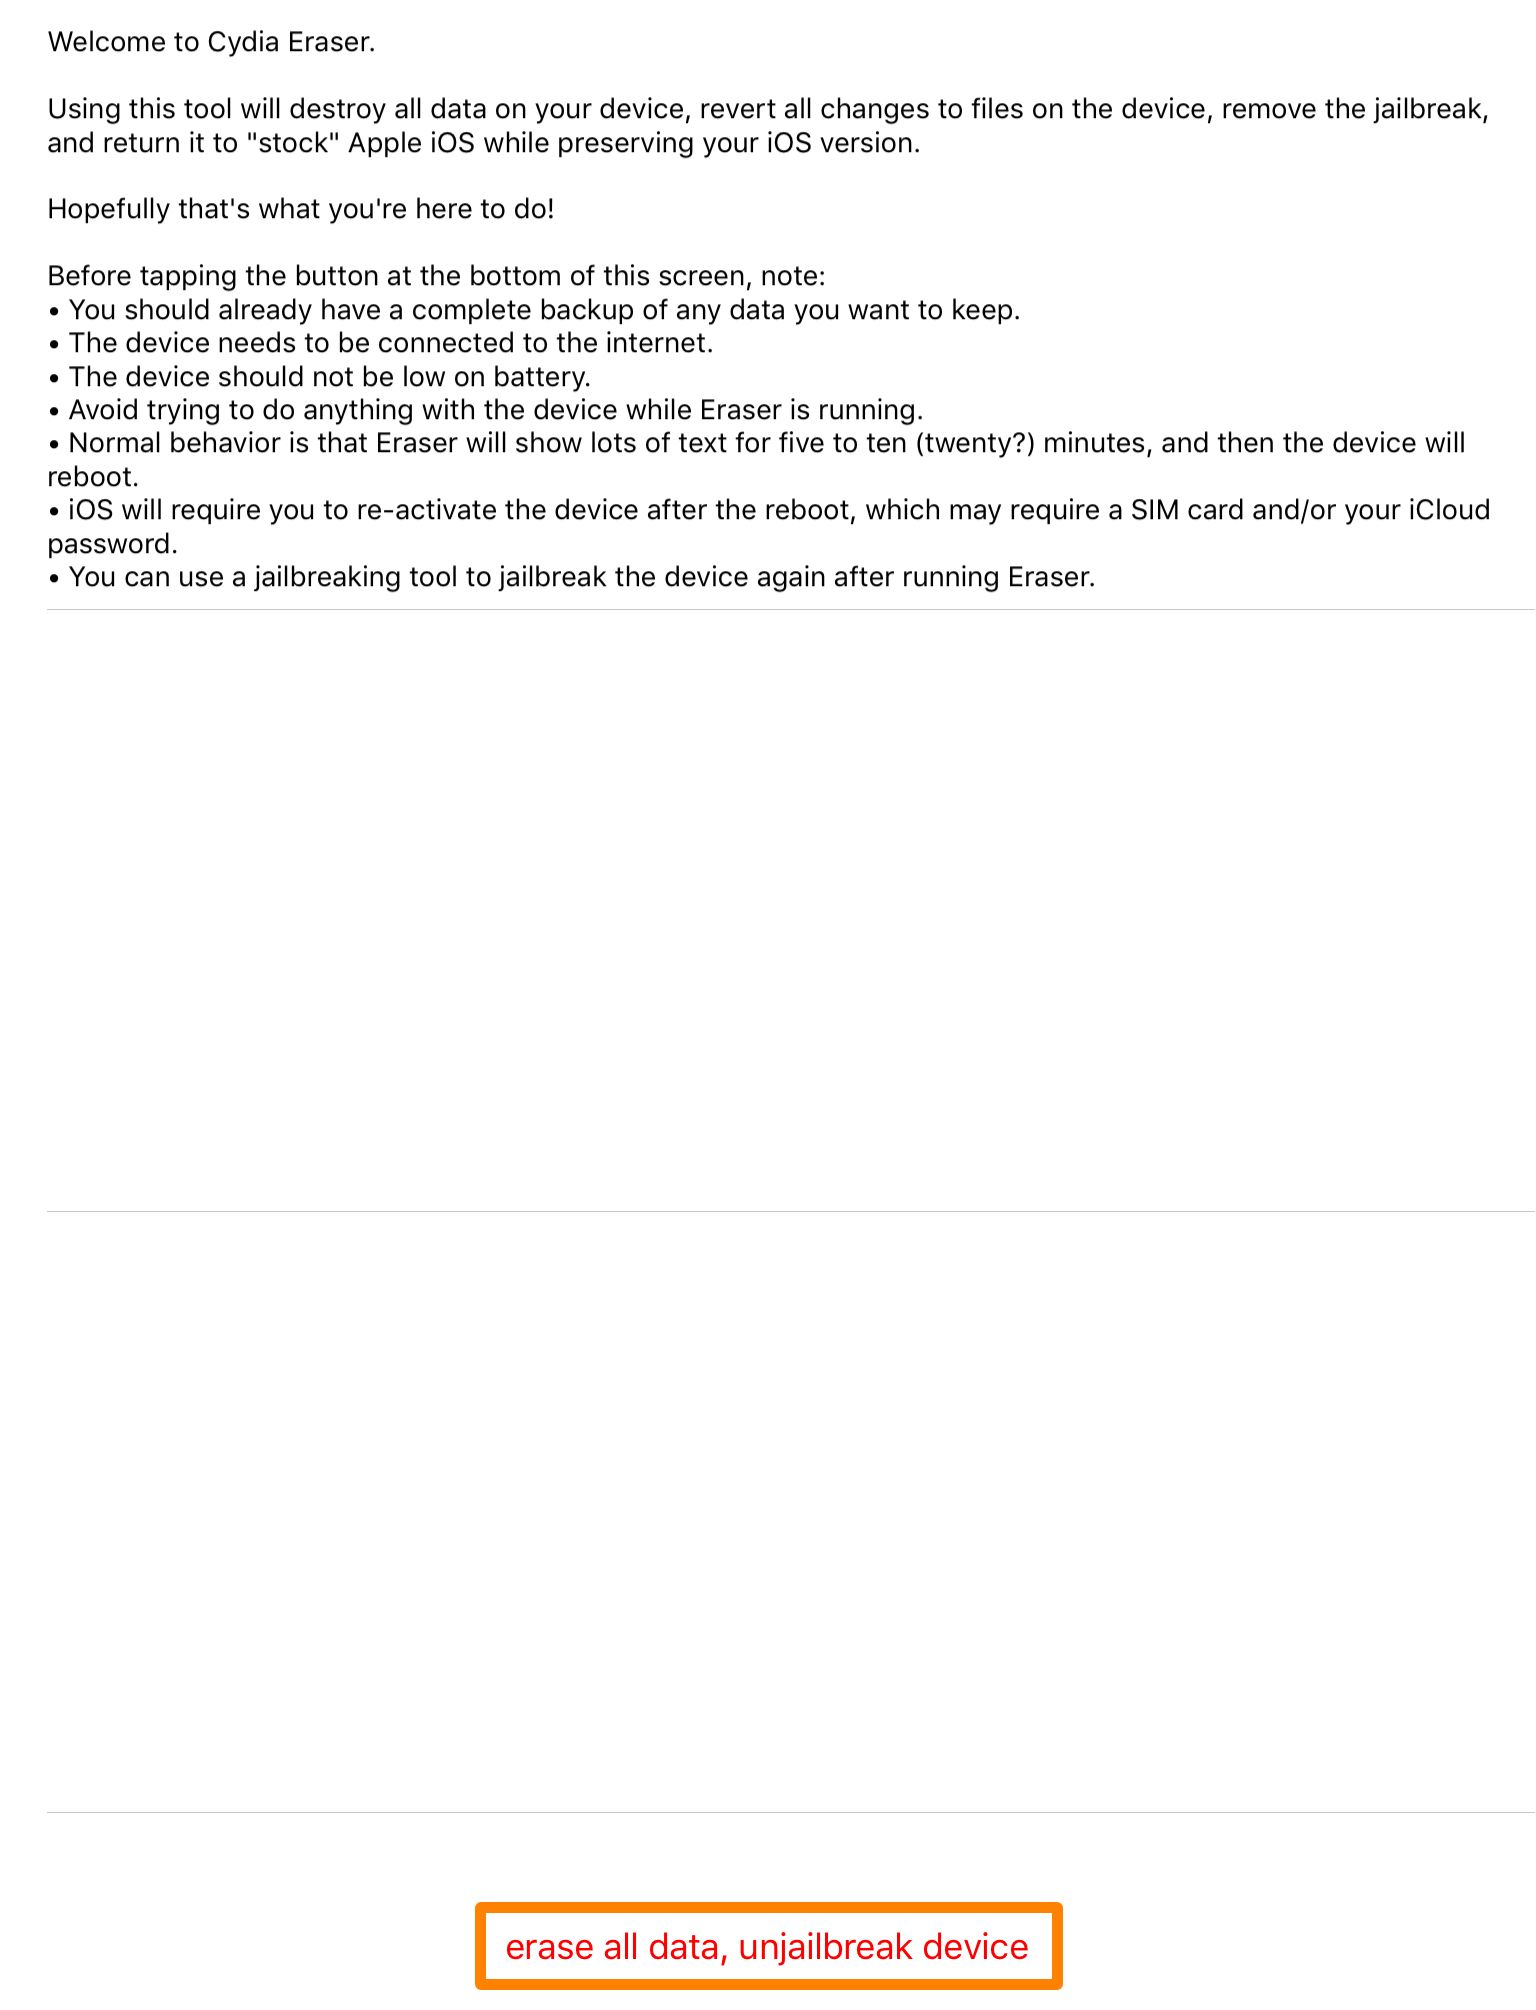
3) When you get the confirmation prompt below, tap on the blue Erase All button.

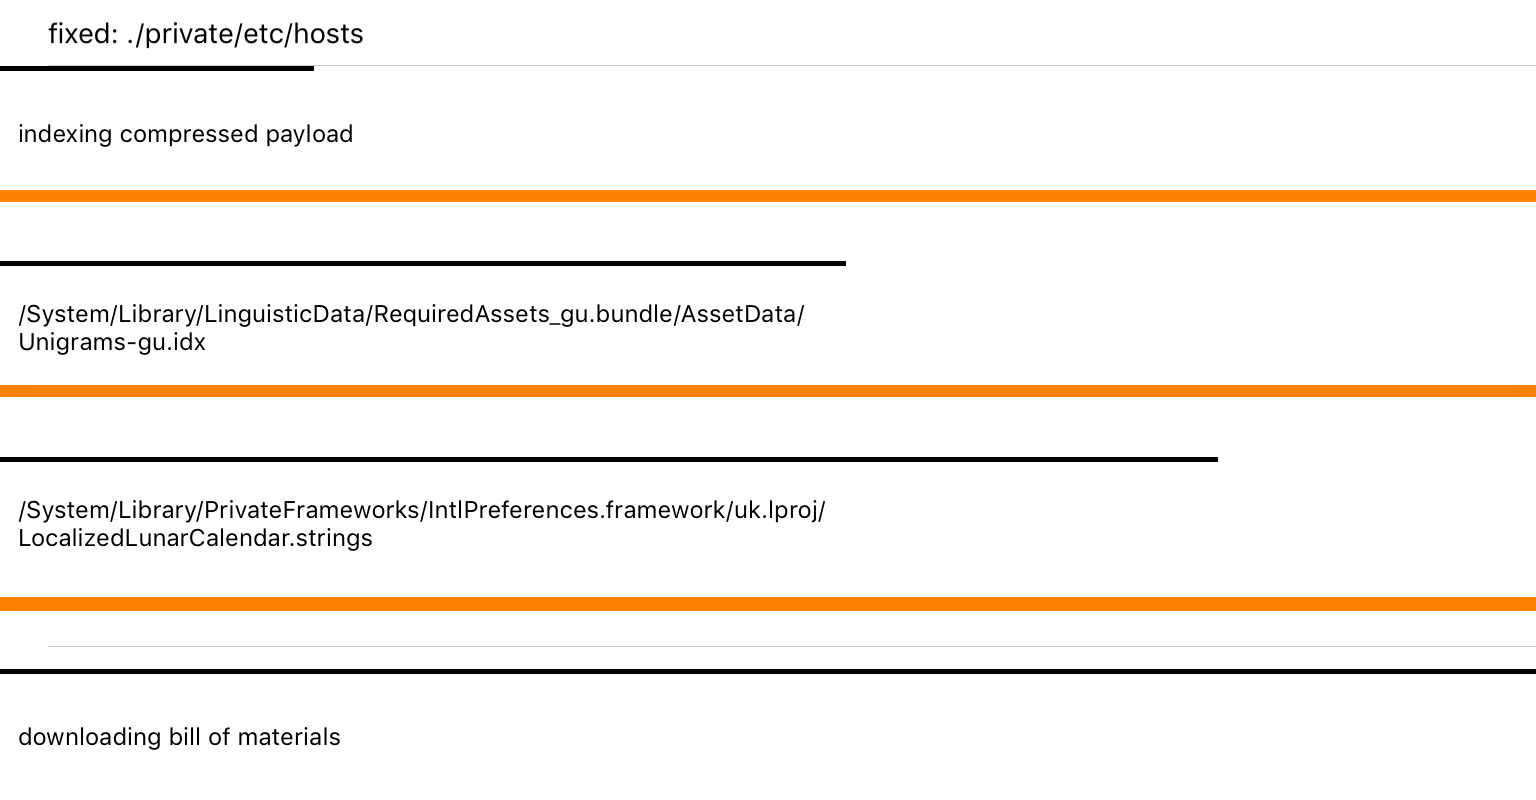
4) Cydia Eraser will begin doing its thing. Depending on how loaded your device is with files and jailbreak add-ons, this could take a bit. For our partially-stock jailbroken device, this process took about 5 minutes.

5) Keep an eye on the progress bar at the bottom of the display, as it will continue to keep you updated on the progress of the process:
6) When Cydia Eraser finishes its thing, you’ll see a black screen with a loading bar, and shortly after, a black screen with an Apple and a loading bar. This is iOS simply setting things up so you can activate your device.
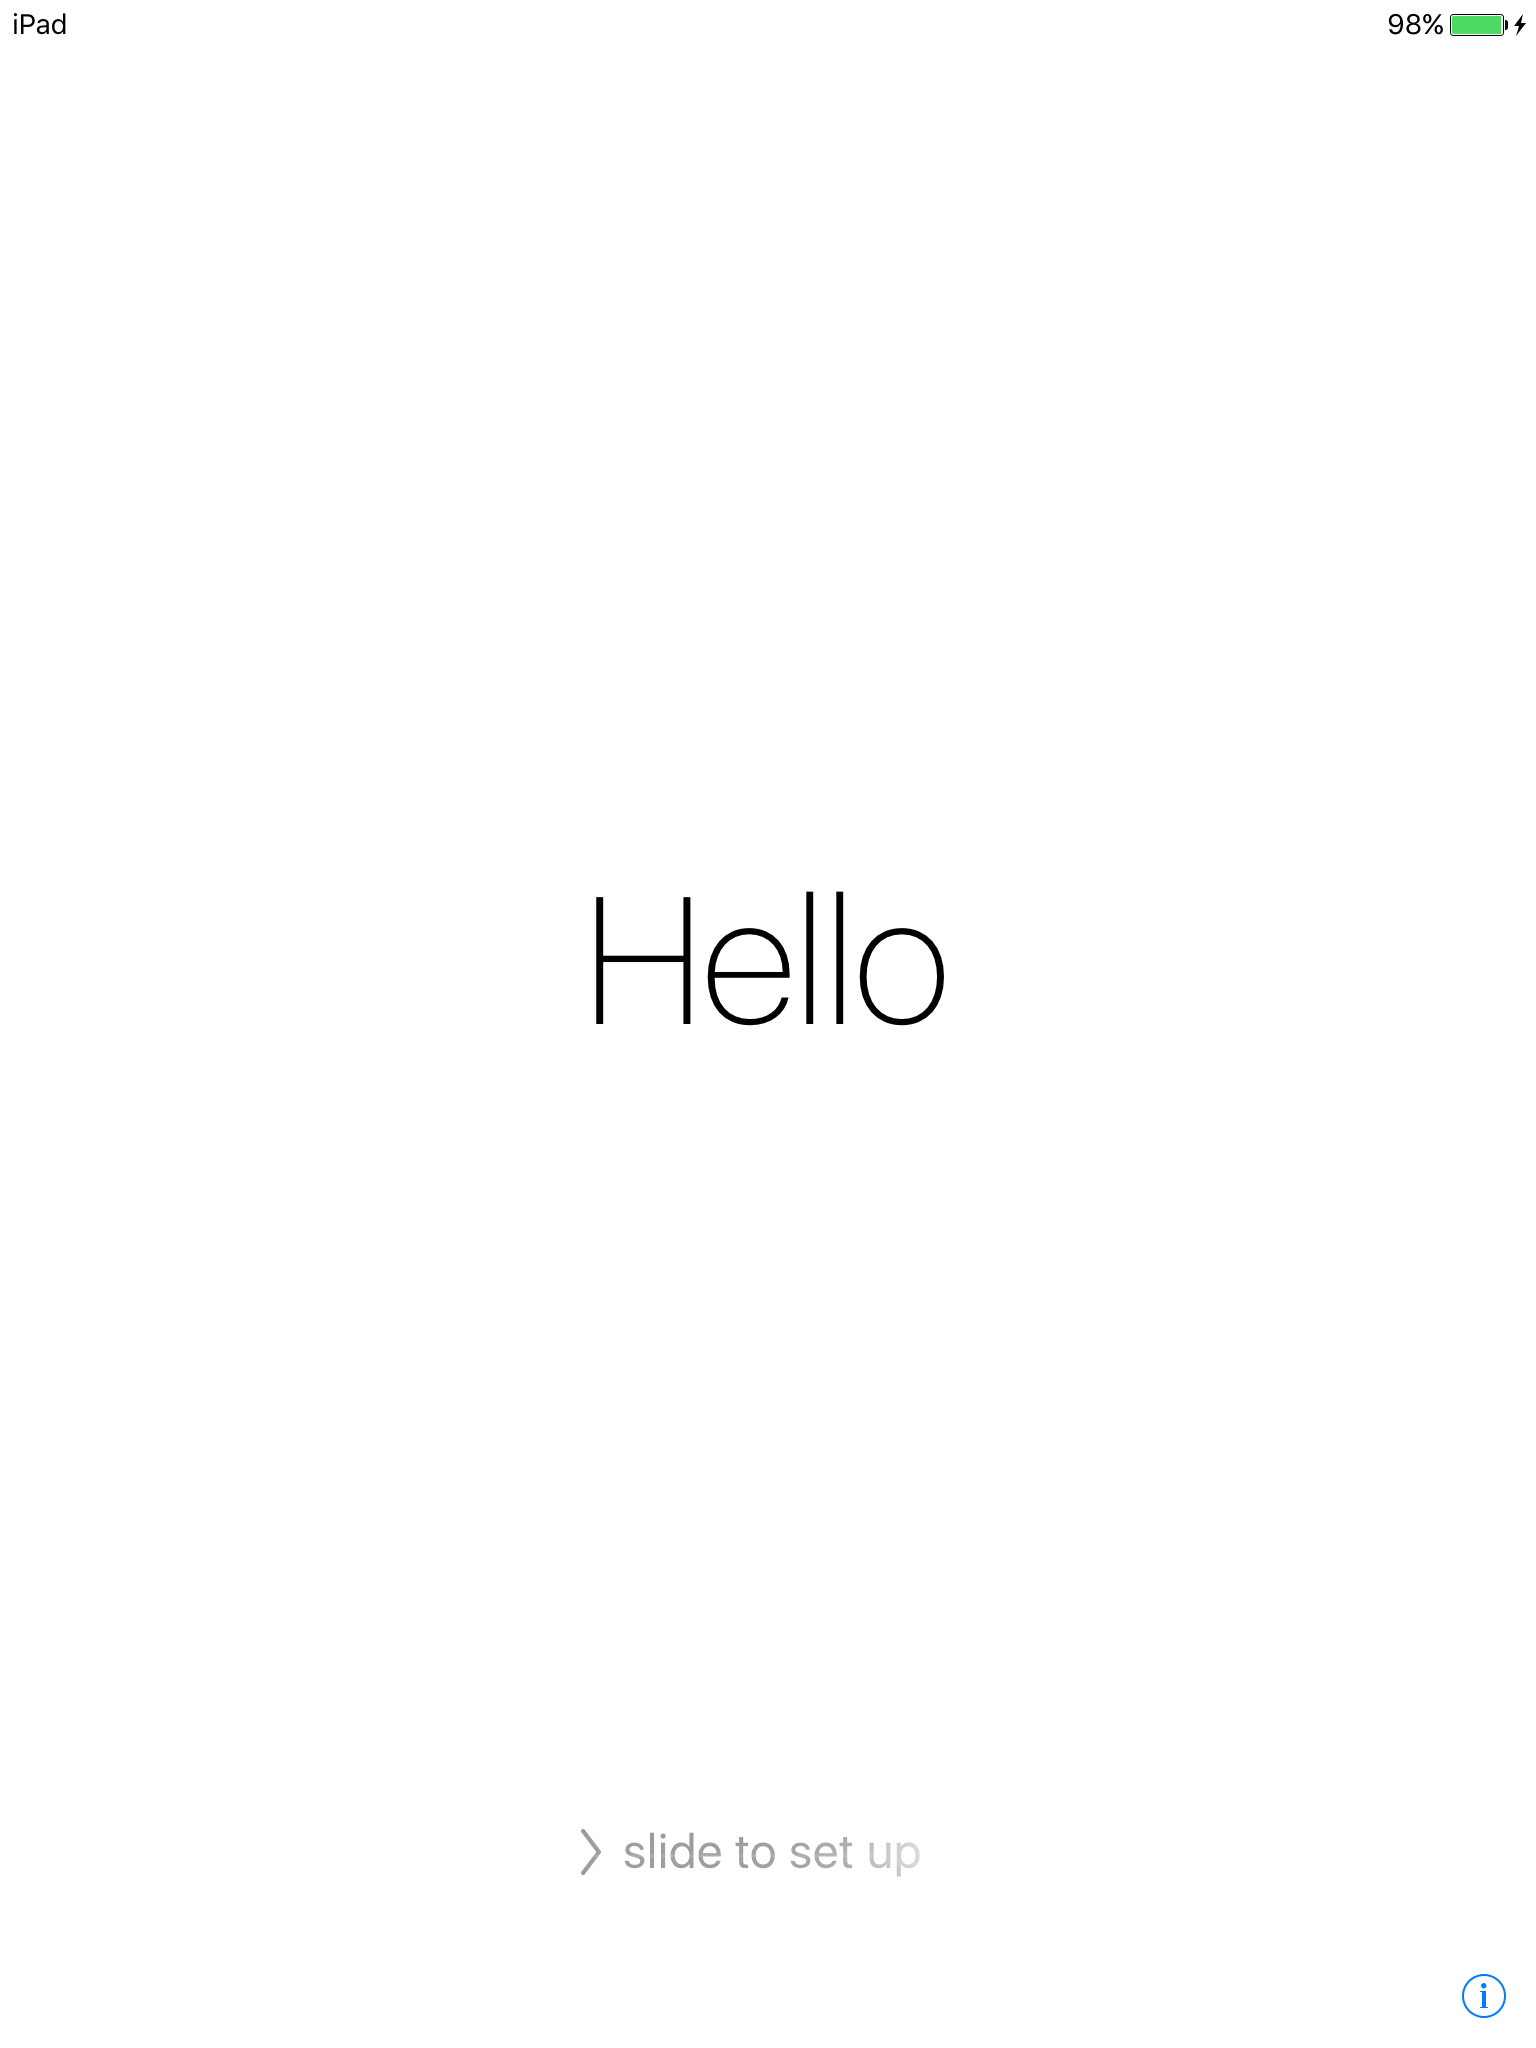
7) When finished, you should see the “Hello” screen. Just follow the steps you see on the screen to set up and activate your device.
8) And just to confirm that you’re on iOS 9.3.3 after using Cydia Eraser, head over to Settings > General > About and you’ll see that your device was restored to iOS 9.3.3:

And that’s all there is to it!
What to do now?
Now that your device has been un-jailbroken and is on a fresh installation of iOS 9.3.3, you don’t have to worry about bugs with your jailbreak anymore.
You’re now free to re-jailbreak, or leave your device as it is. If you were planning on selling it, just turn it off when you see the “Hello” screen in Step 7 and leave it at that.
Wrapping up
With this useful tool now in support of iOS 9.3.3, you can officially un-jailbreak and re-jailbreak on demand without the need to worry about Apple closing iOS signing windows for iOS 9.3.3.
Also read:
If you found this tutorial helpful, or you have any questions, let us know in the comments below!